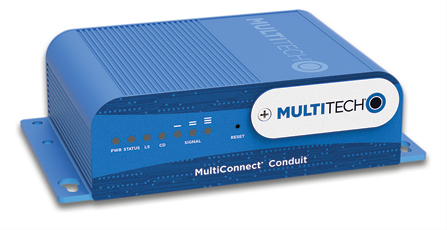
The MultiTech MultiConnect® Conduit™ is a configurable, scalable cellular communications gateway for industrial IoT applications.
This guide will help you set up the Multitech Conduit gateway to communicate over The Things Stack.
The technical specifications of the Conduit can be found in the software guide in the official documentation page.
Prerequisites
- User account on The Things Stack with rights to create Gateways.
- Multitech Conduit AEP Gateway running mPower 5.30 firmware or later.
Registration
Create a gateway by following the instructions for Adding Gateways.
The gateway EUI can be found at the bottom of the gateway under the field "LORA NODE".
Setting Up the Gateway
For the first-time hardware and software setup, you can refer to the appropriate configuration guide on the Multitech documentation page.
We have included a few short steps to help you get started. If your gateway is already configured on your local network, skip ahead to Connecting The Gateway to The Things Stack.
Connecting to the Gateway as a DHCP Server
If you have already connected your gateway to your local network and you can access its configuration page via the gateway’s IP address, skip ahead to Connecting The Gateway to The Things Stack.
Since the gateway initializes as a DHCP server, you can not simply connect it to your local network, and you may have to configure TCP/IP manually. After hard resetting the device, connect it directly to a computer via ethernet and use the following TCP/IP settings:
- IP Address: 192.168.2.2
- Subnet Mask: 255.255.255.0
- Router Address: 192.168.2.1
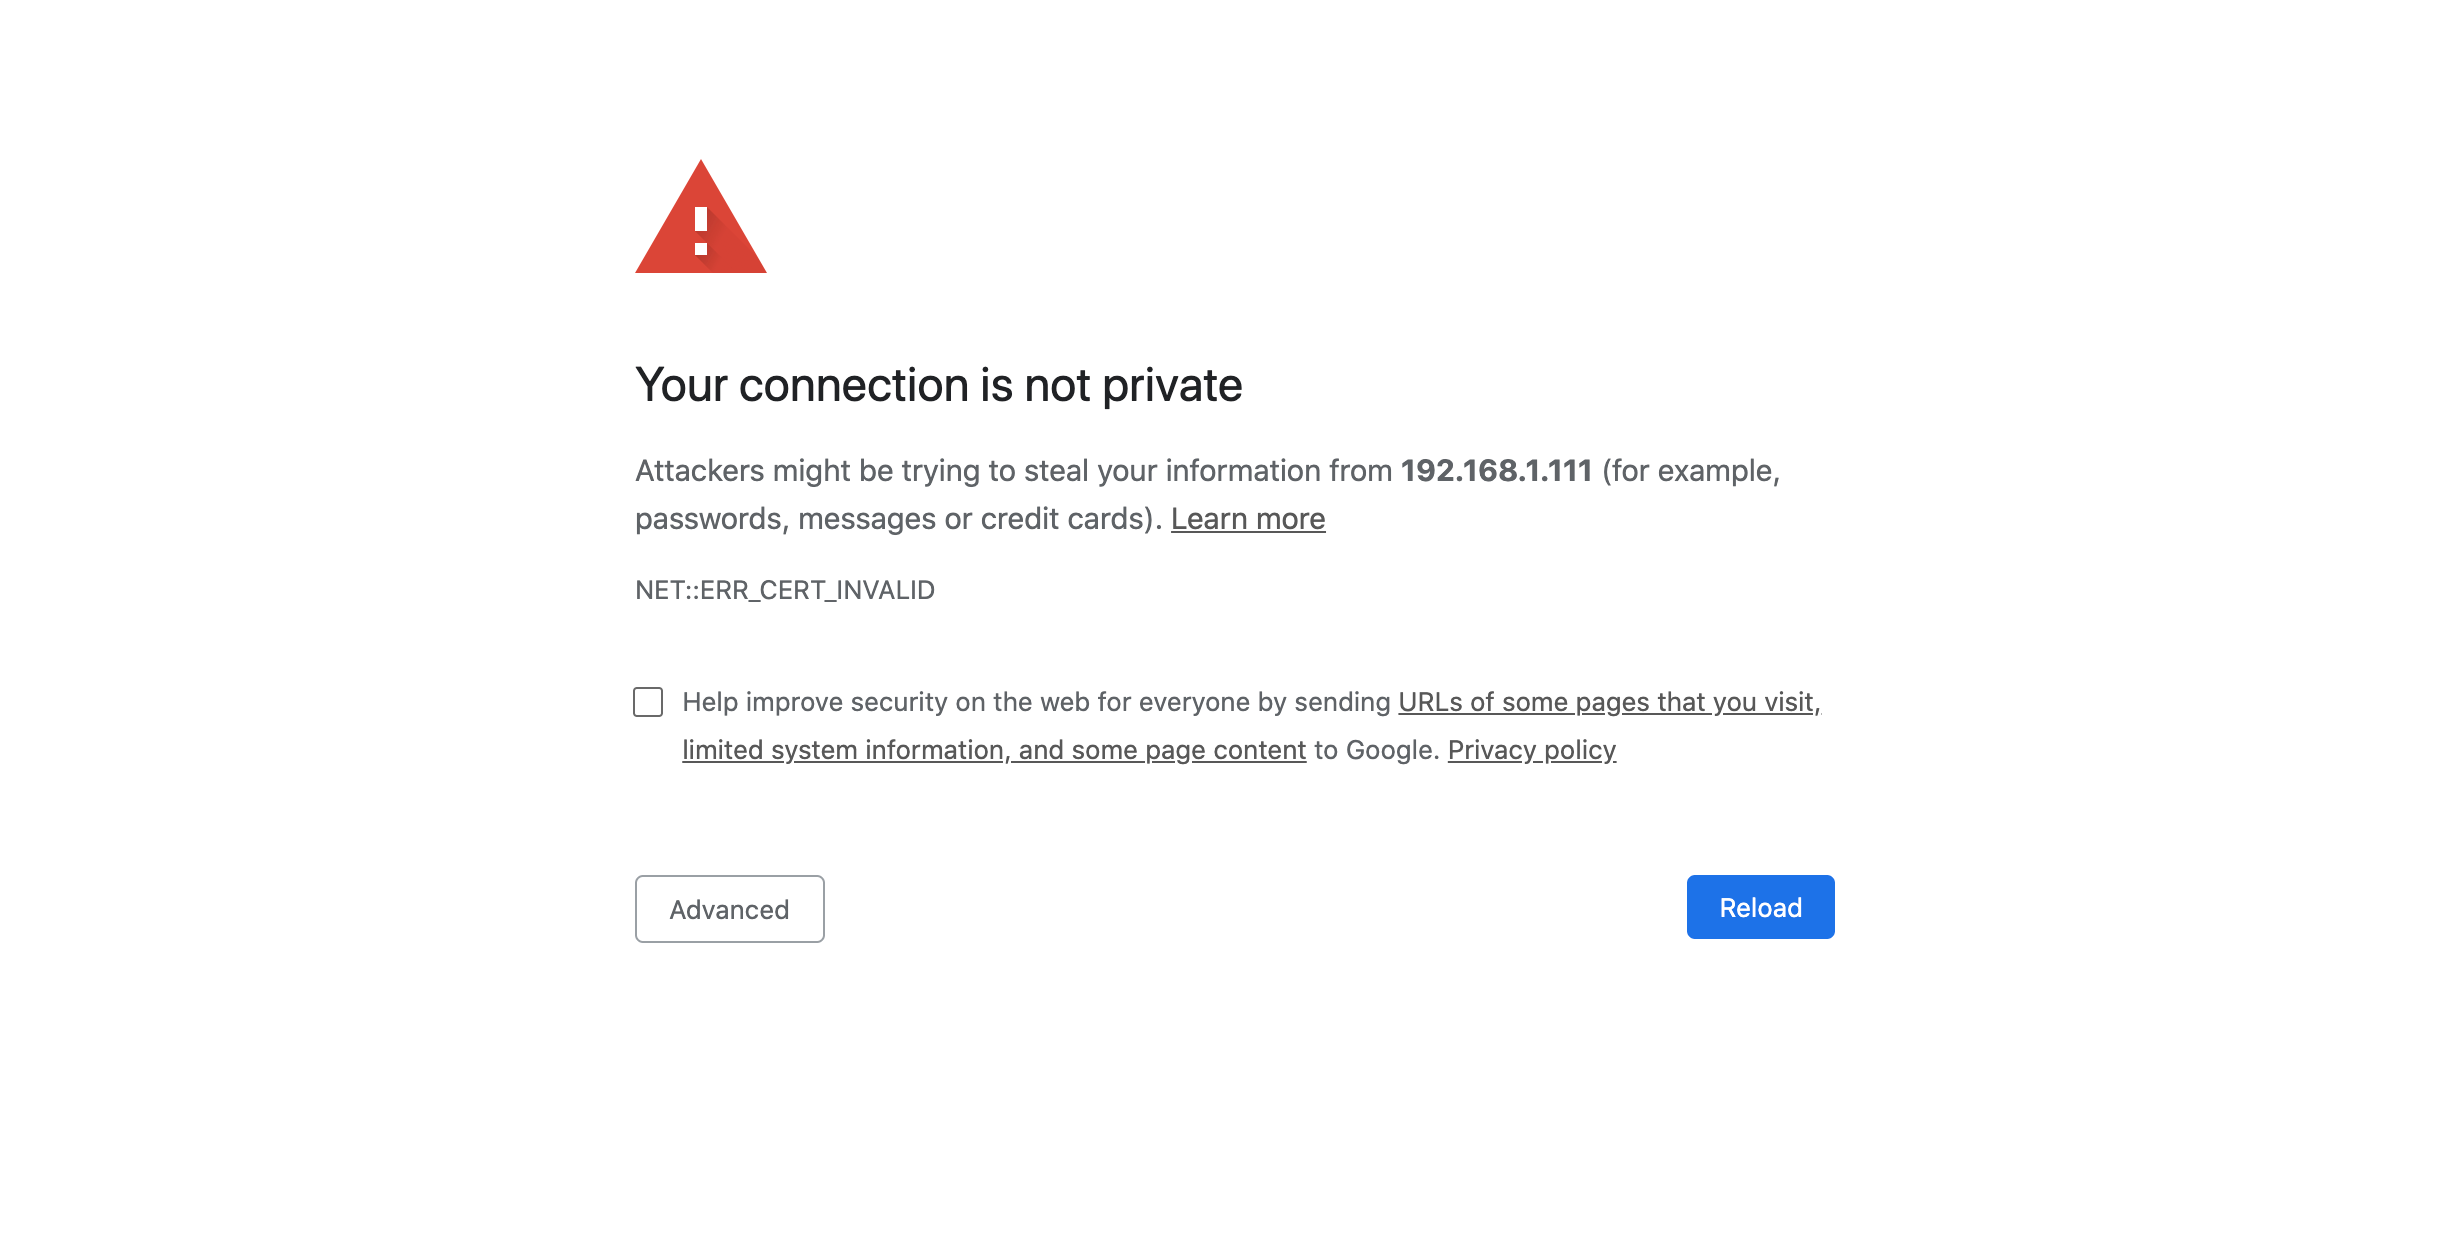
Browse to the IP address of the gateway, 192.168.2.1.
You may be met with the following screen. In newer versions of Chrome, you can type “thisisunsafe” to continue past the certificate error screen. Other browsers have different ways of advancing past certificate error screens.
Once past the certificate screen, create a username and password.
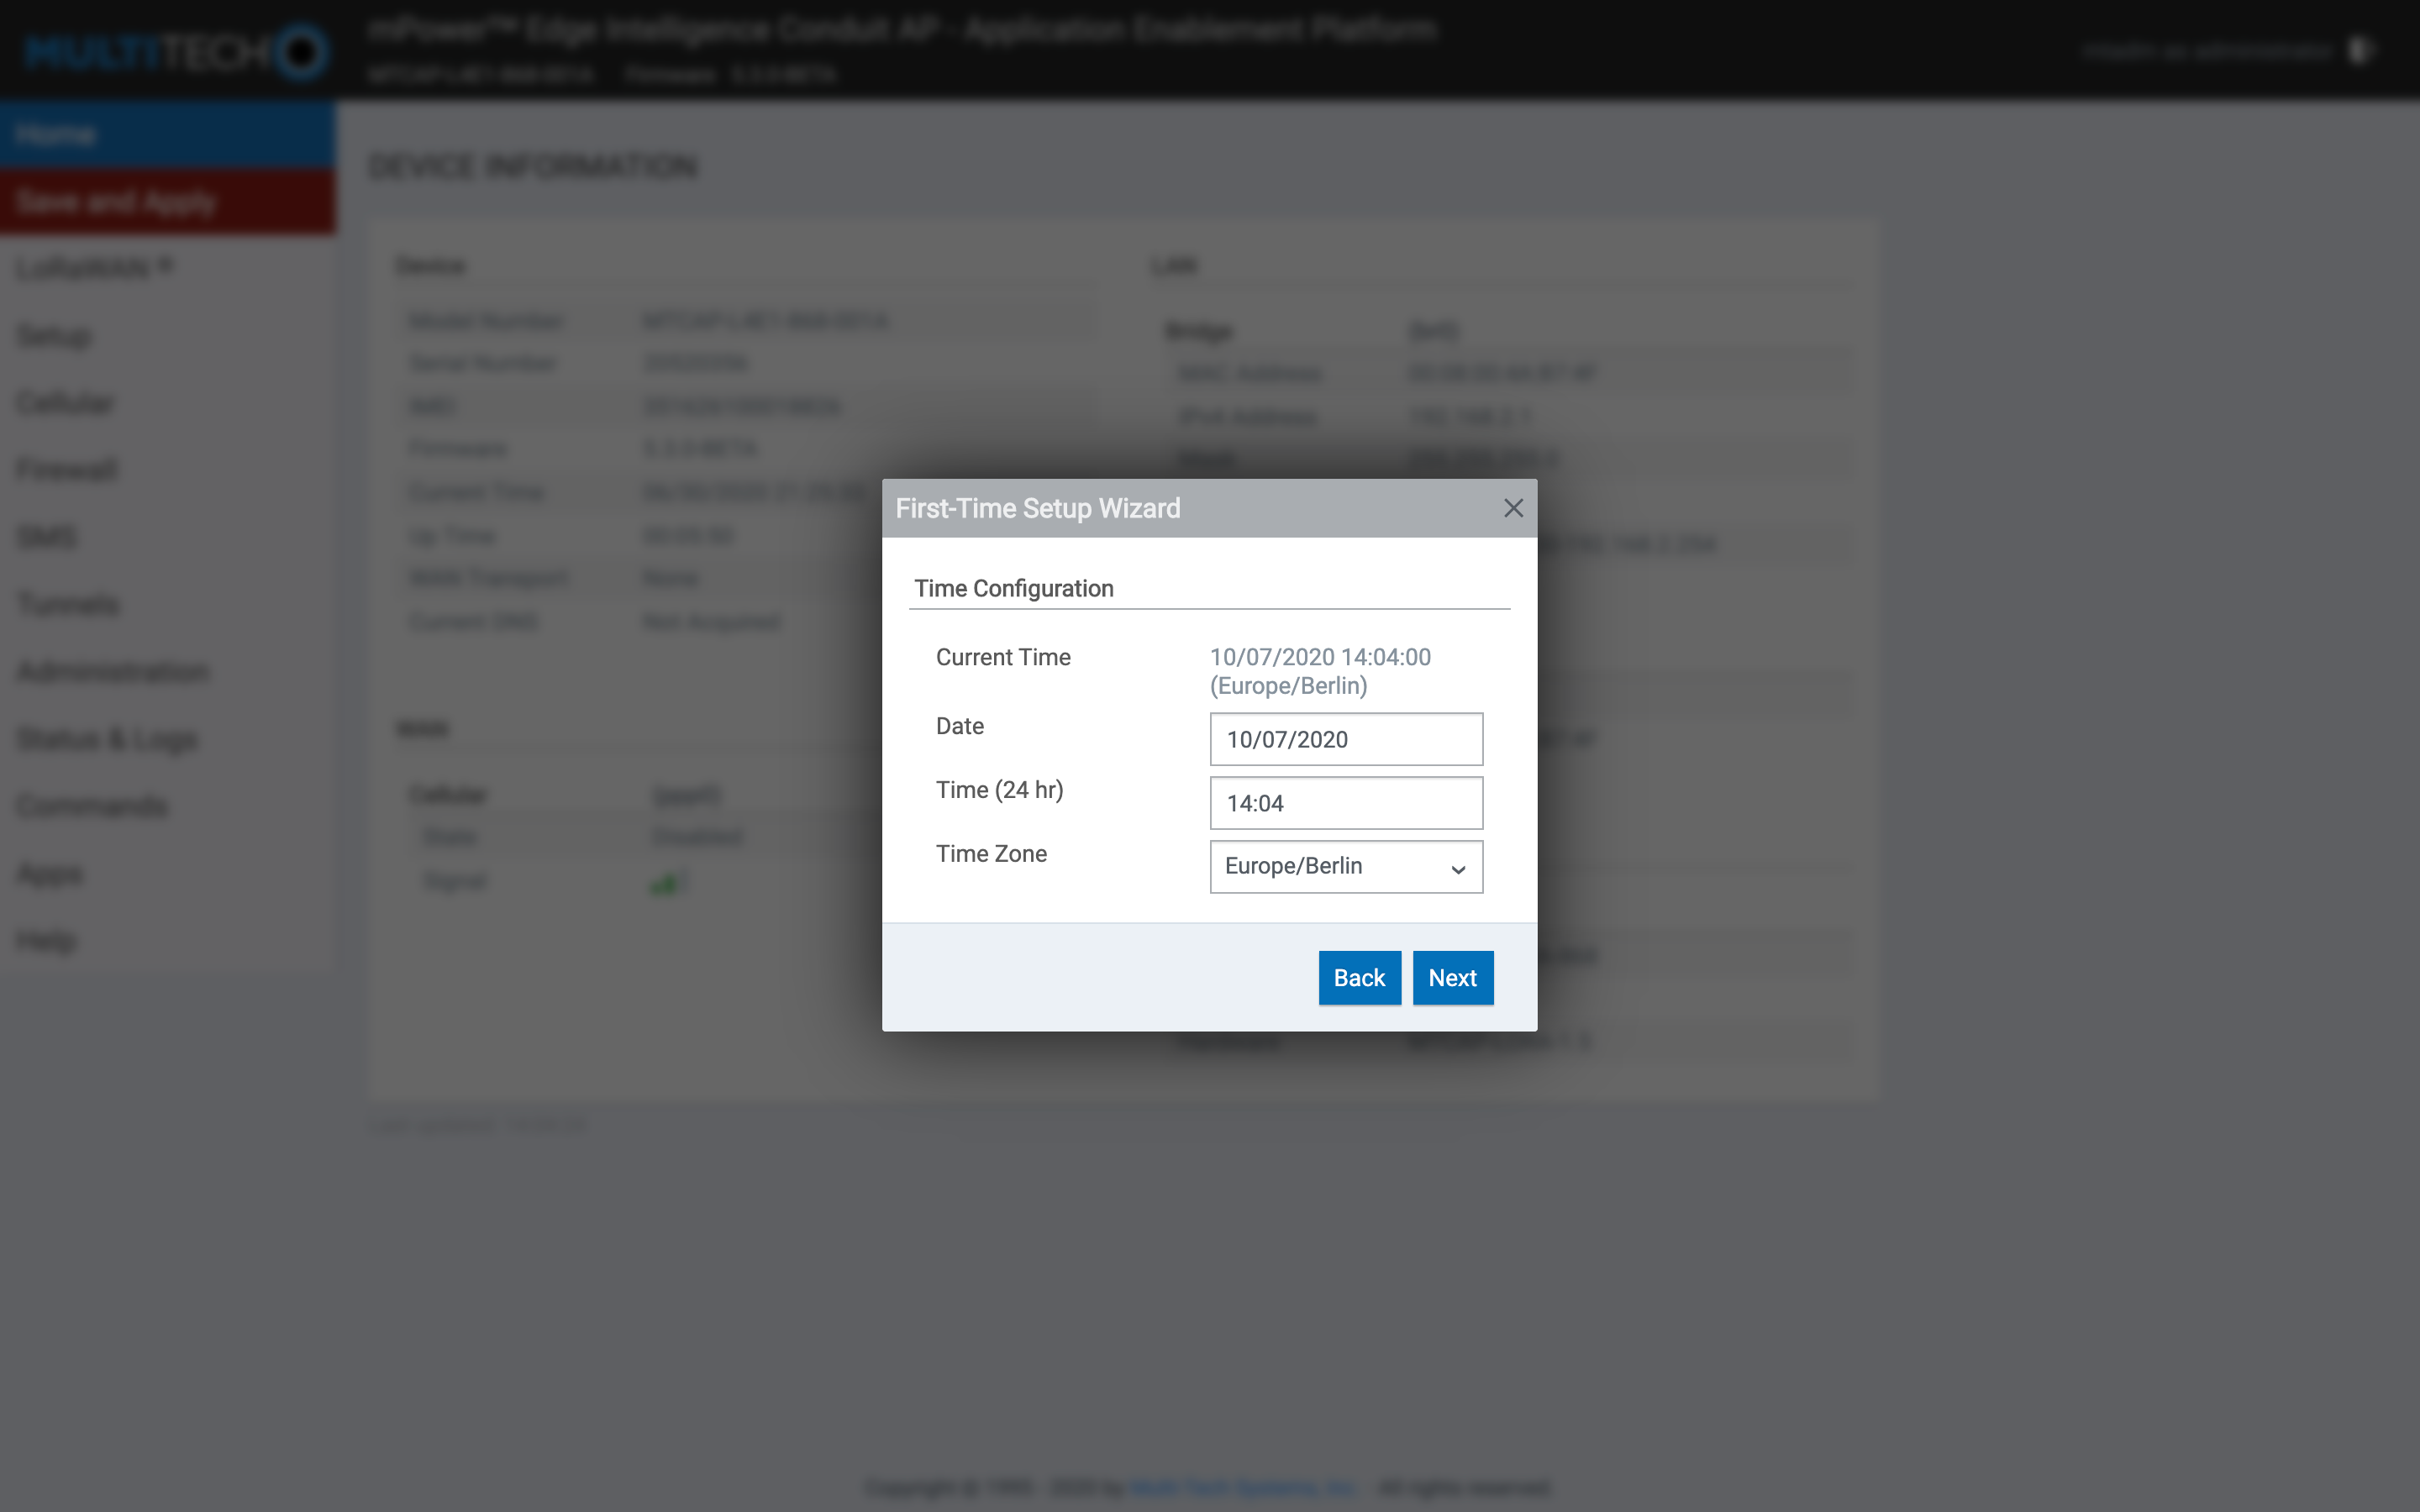
You will then be met with the first time setup screen. Click Next.
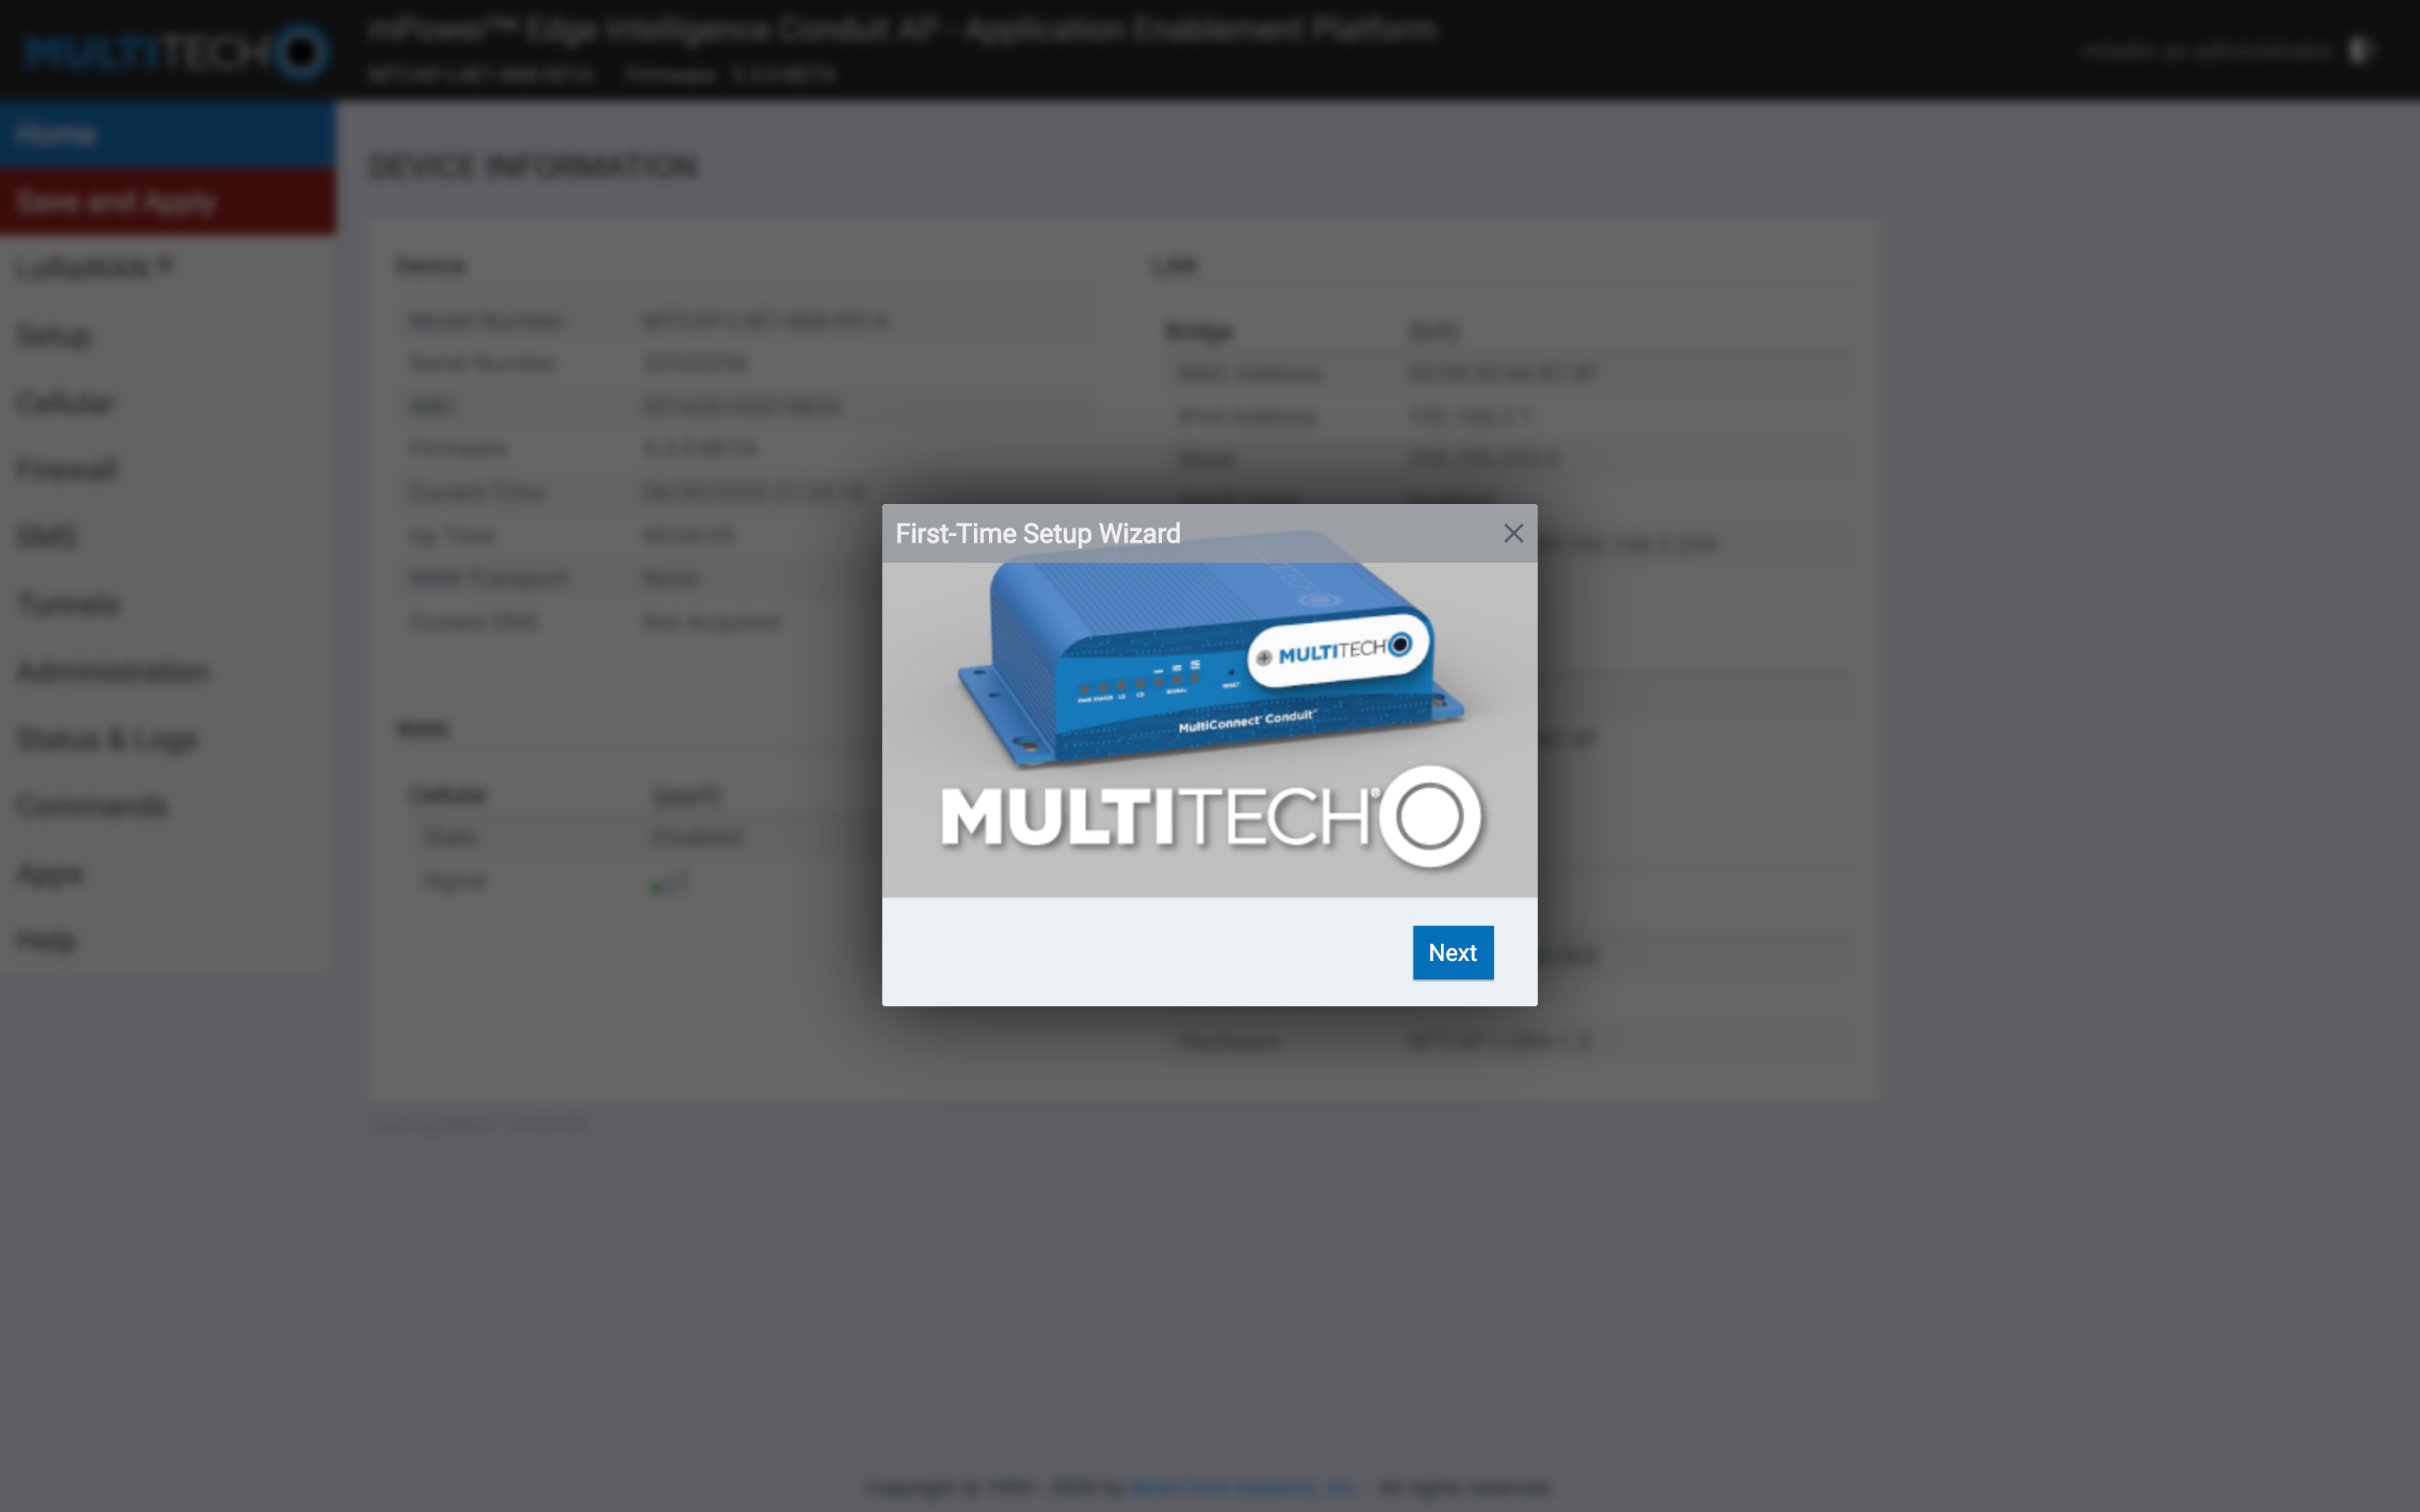
Set a time and date, and skip the rest of the configuration options.
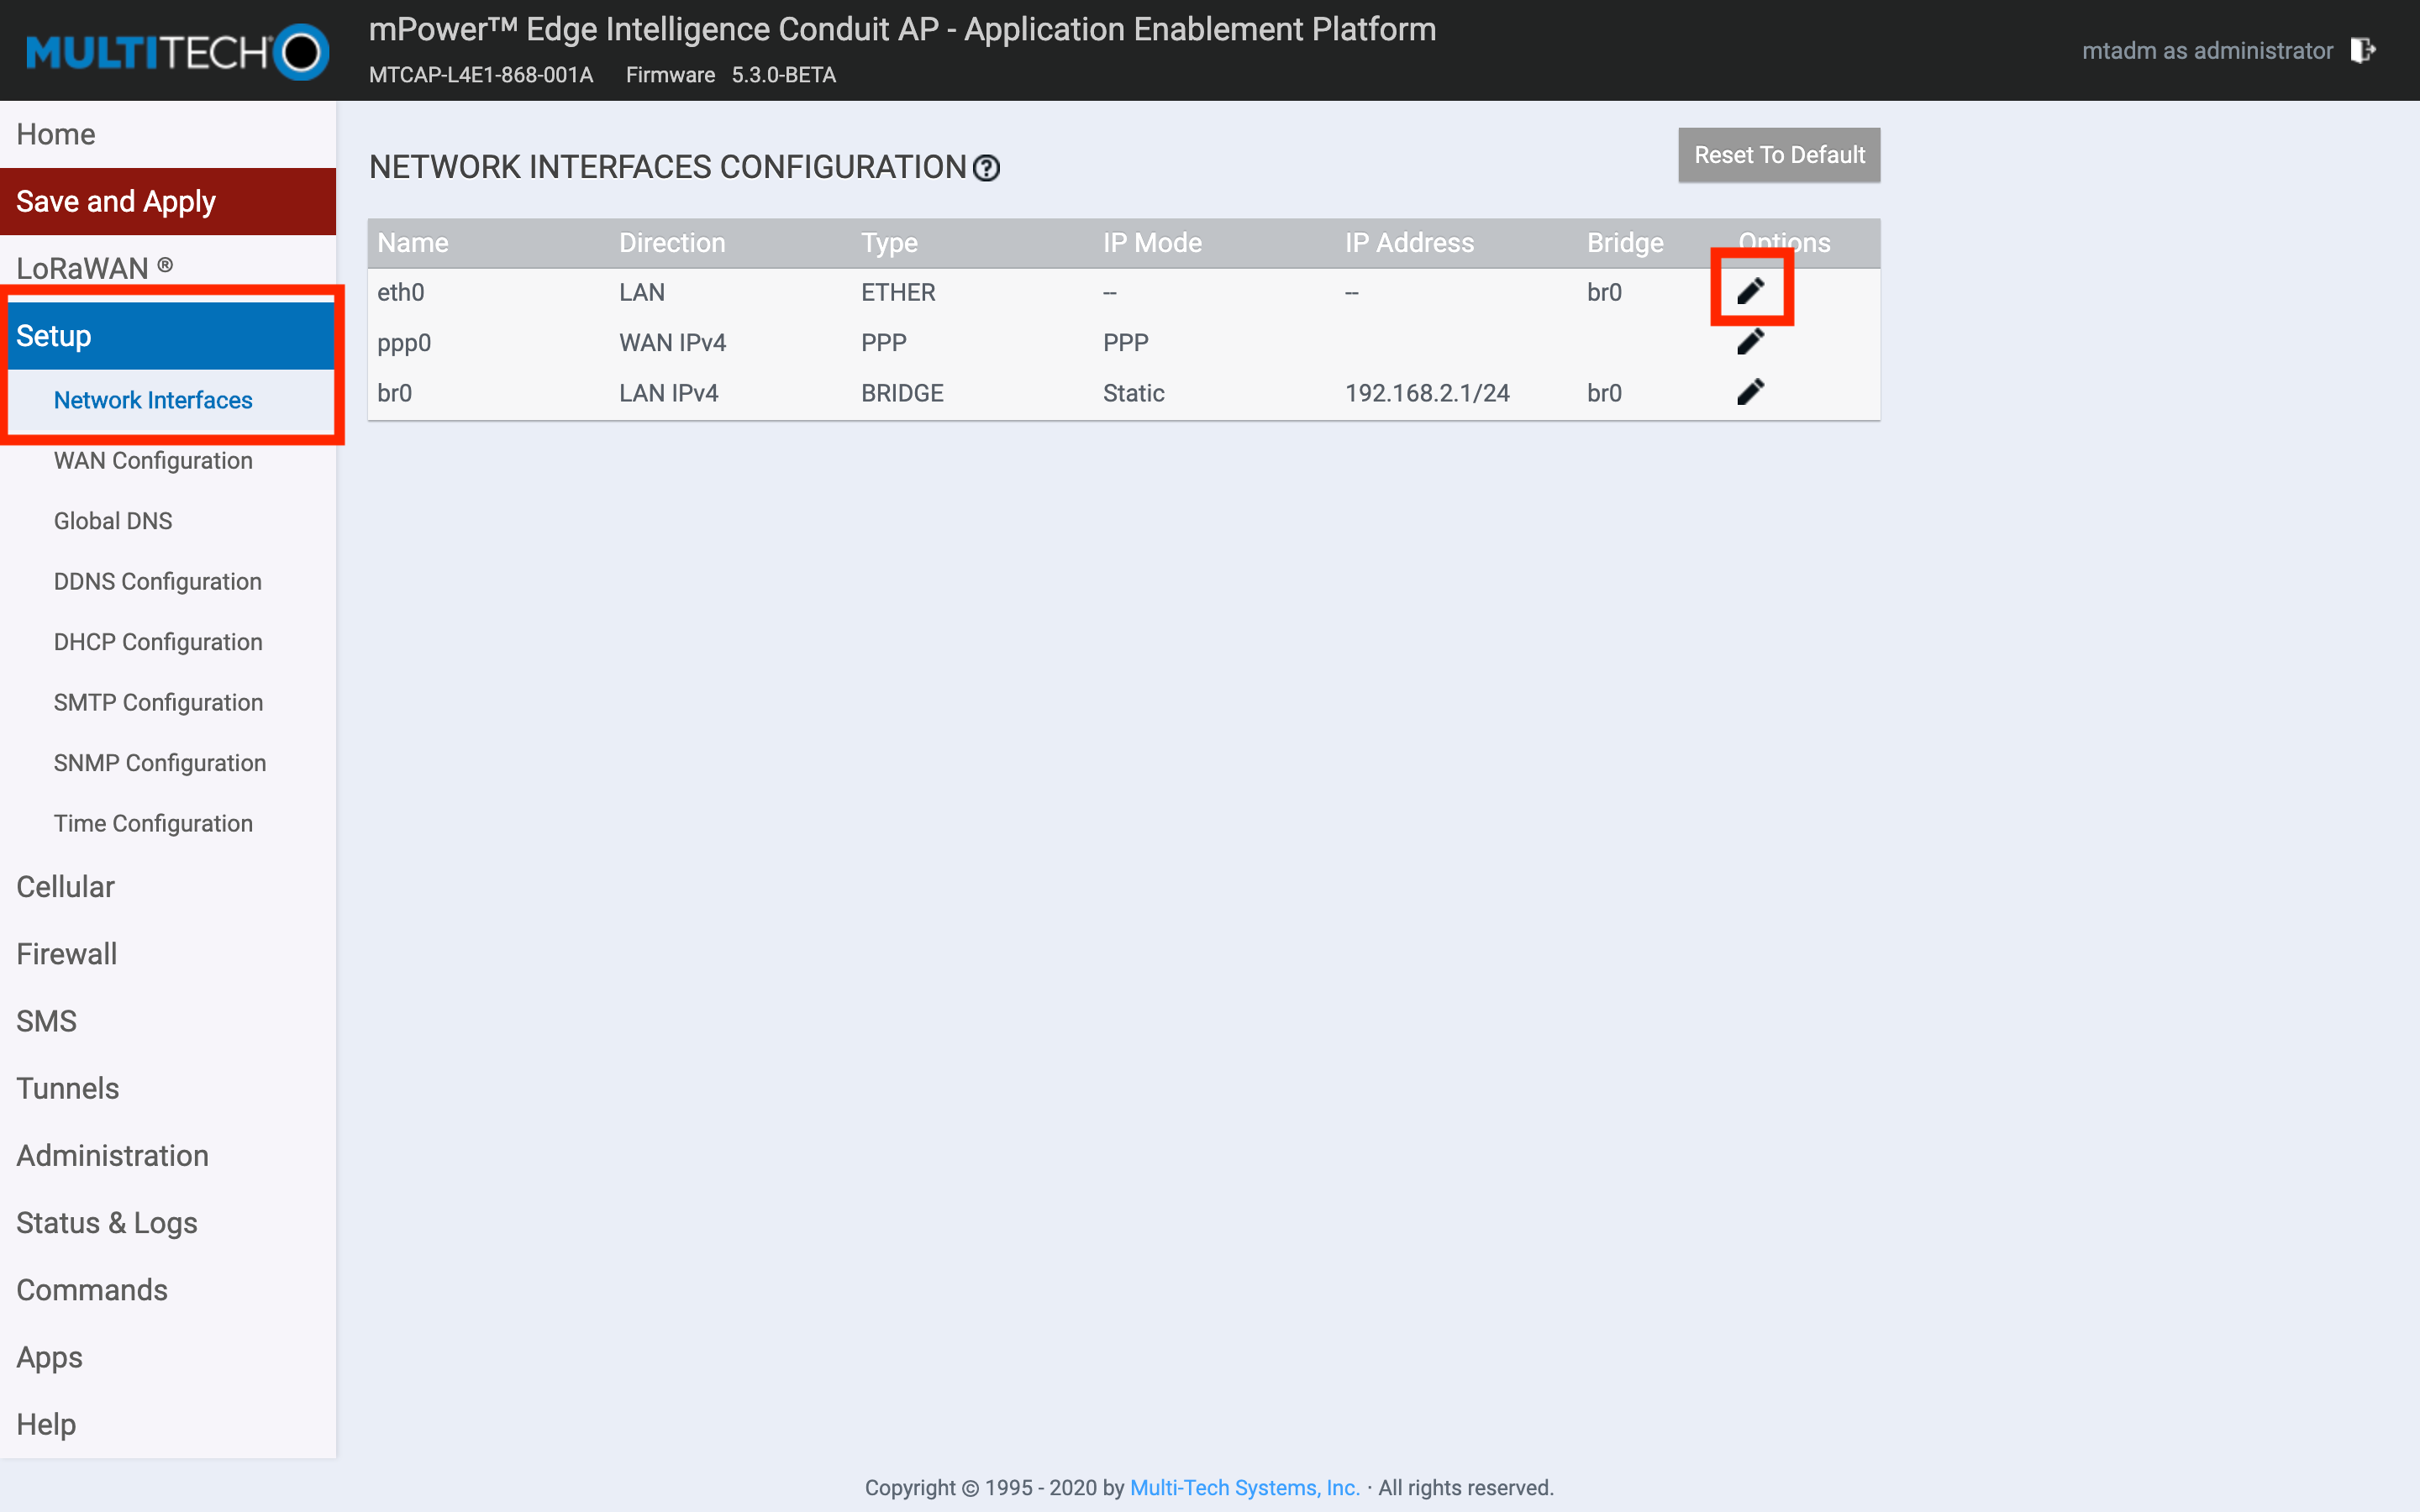
Once you have finished the first time setup, click the Setup button in the left hand menu, and choose Network Interfaces.
Click on the pen icon for the eth0 interface to modify it.
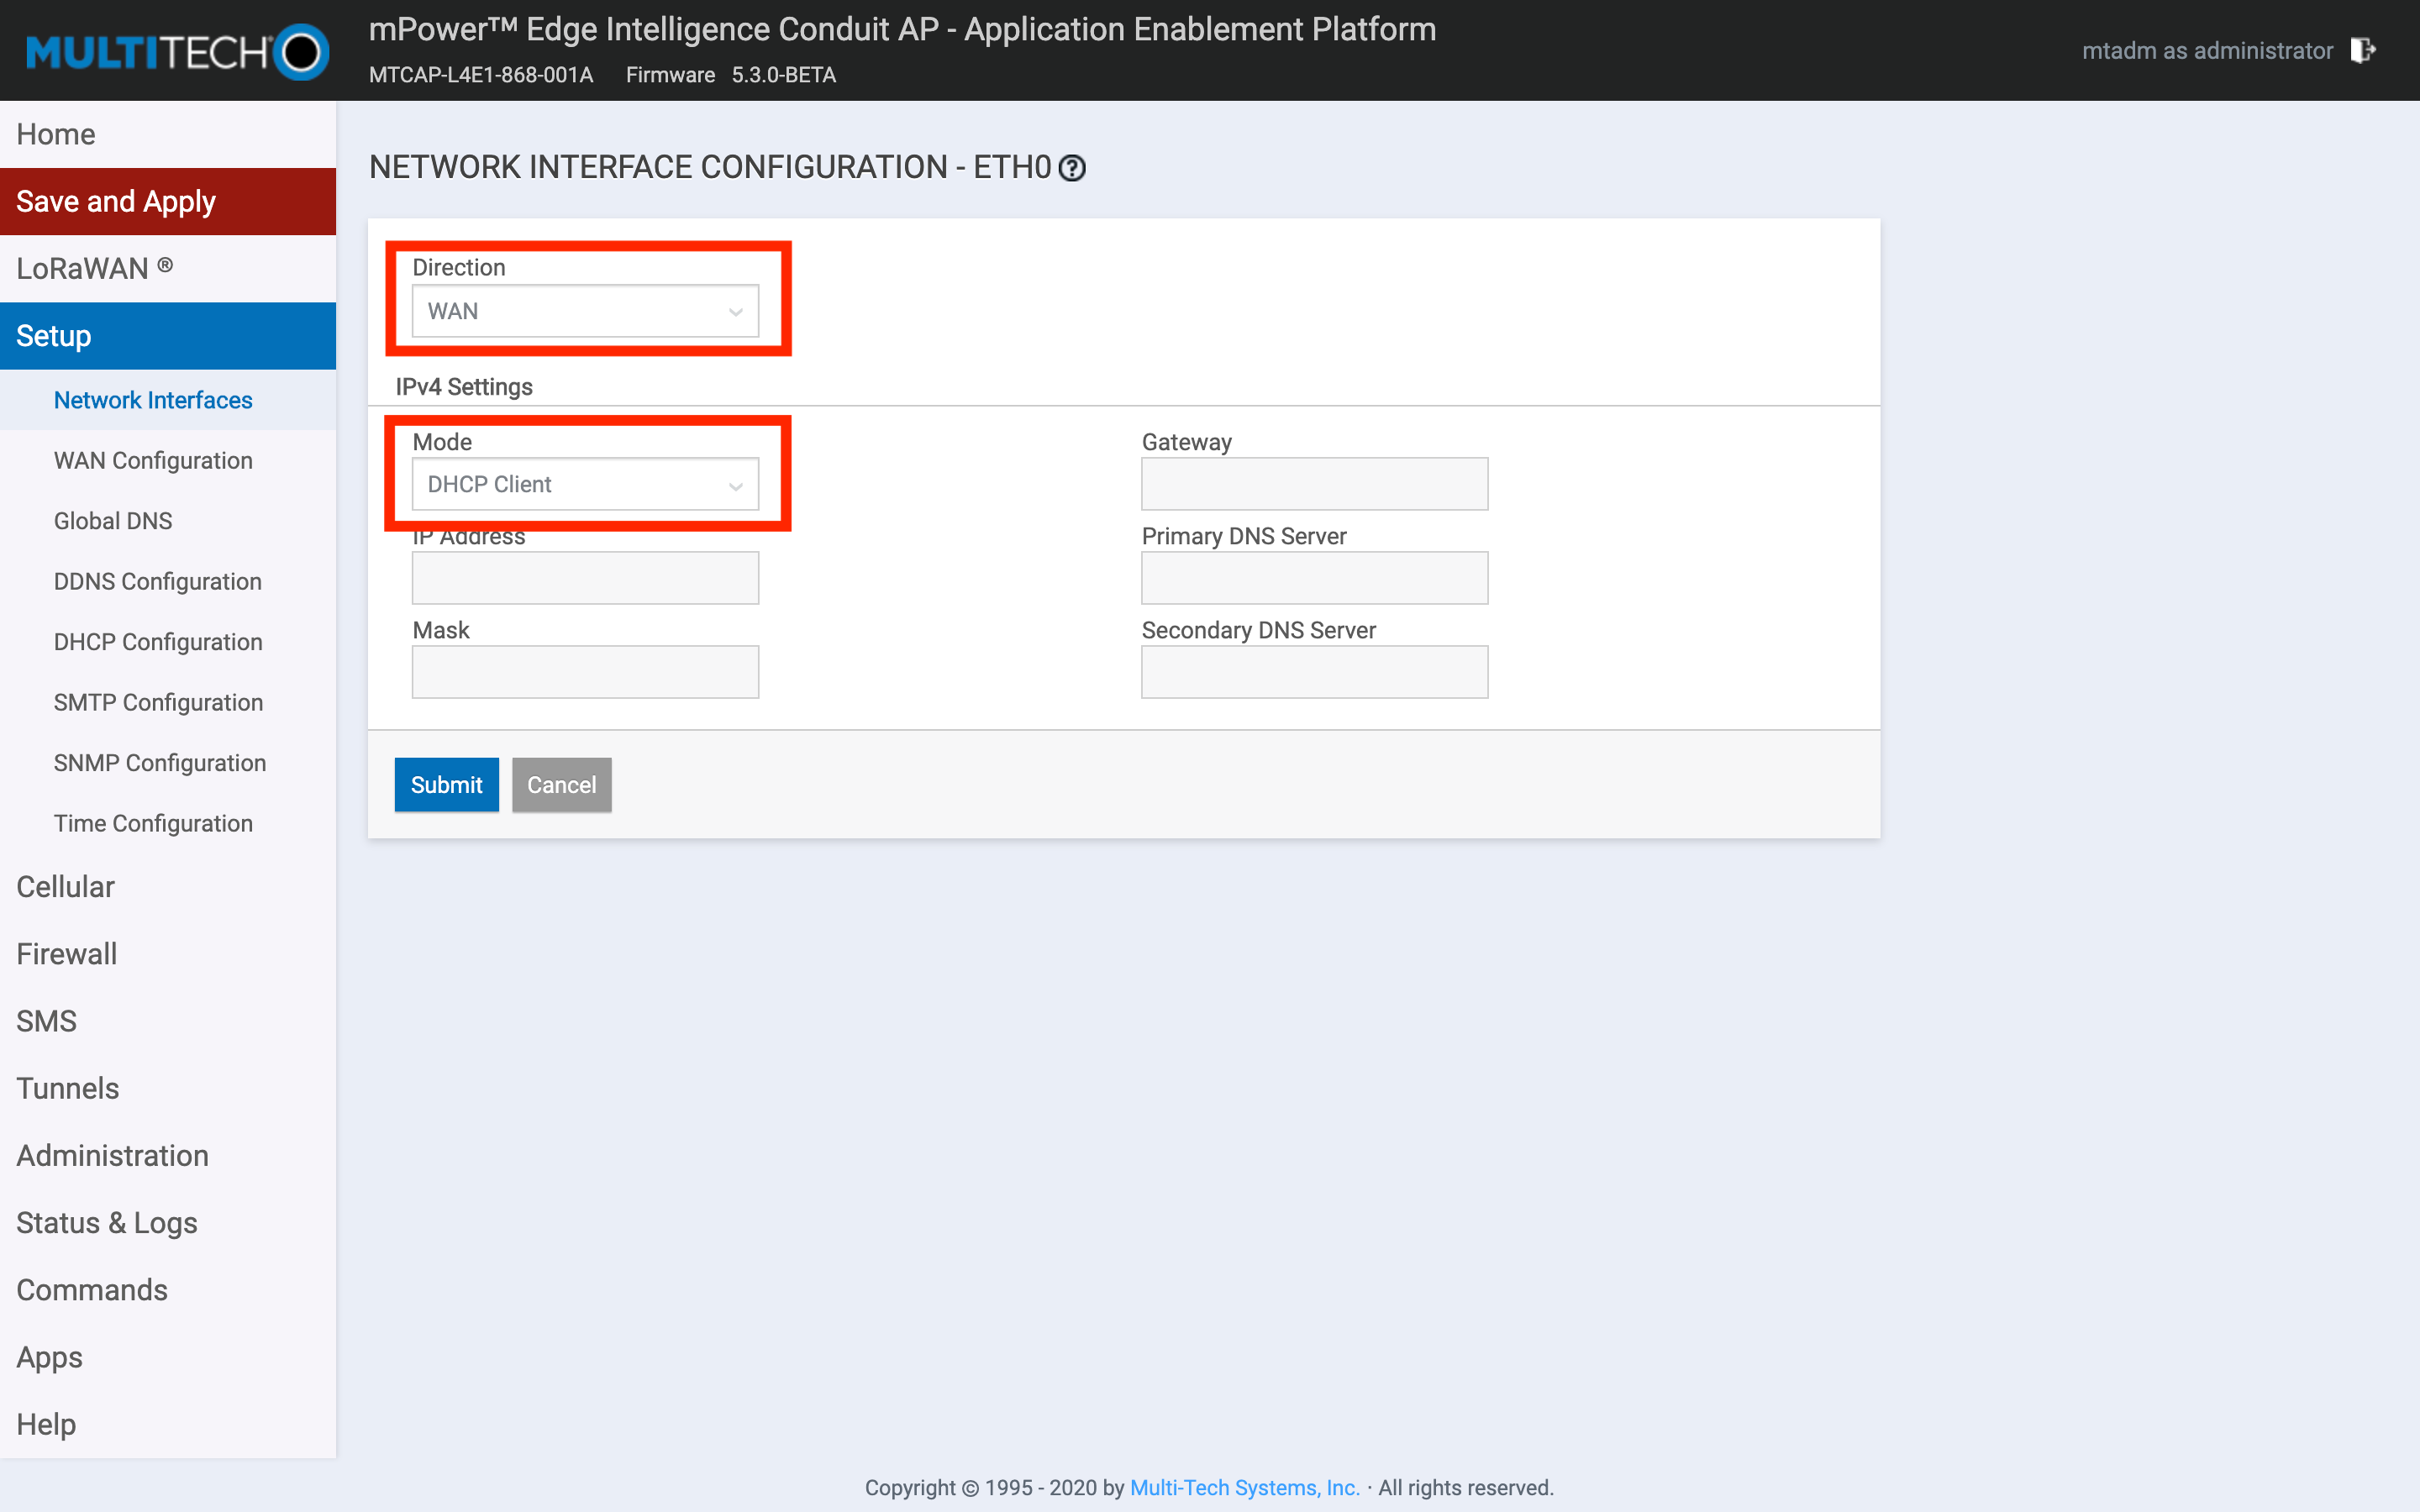
Set the Direction dropdown to WAN, and the Mode dropdown to DHCP Client.
Click Submit to save the settings.
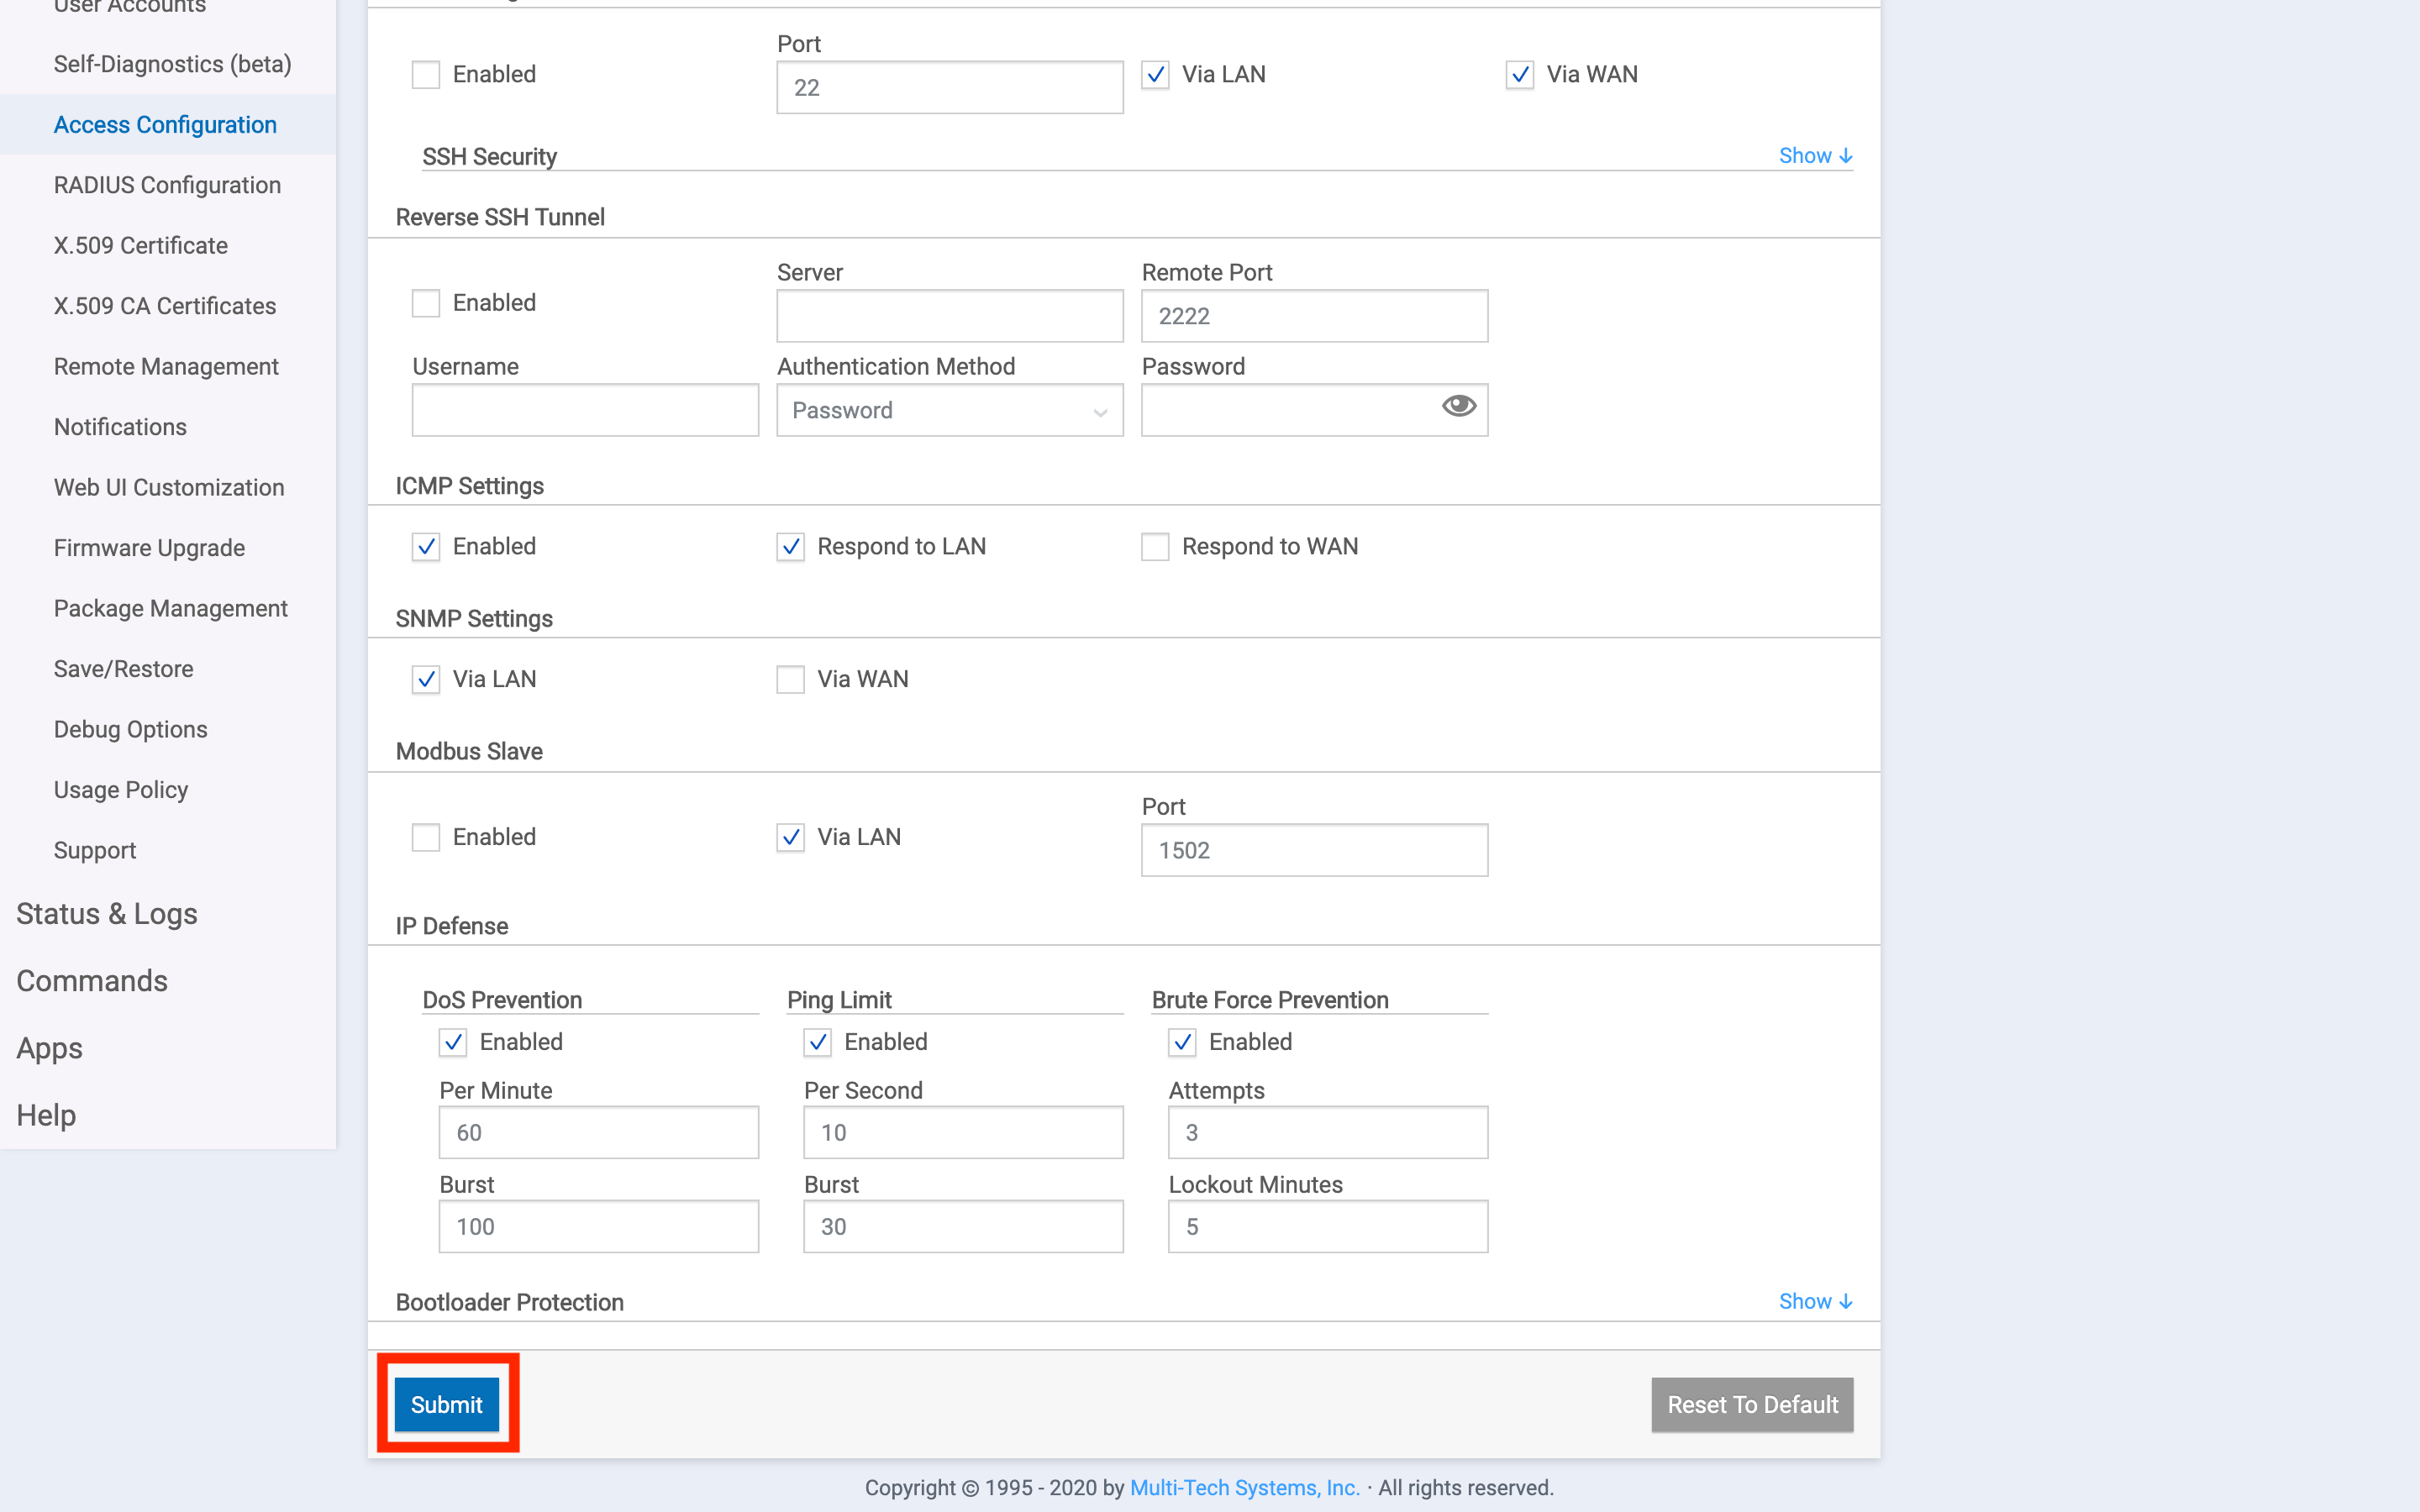
Next, click the Administration button in the left hand menu, and choose the Access Configuration submenu.
Here, enable the Web Server for HTTP via LAN and WAN, and enable HTTPS access via WAN.
Optionally, you can also enable SSH via WAN.
Warning:
If you do not enable Web Server or SSH access via WAN, when you connect the gateway to your local network, you will not be able to access it anymore, and you will have to hard reset and start over.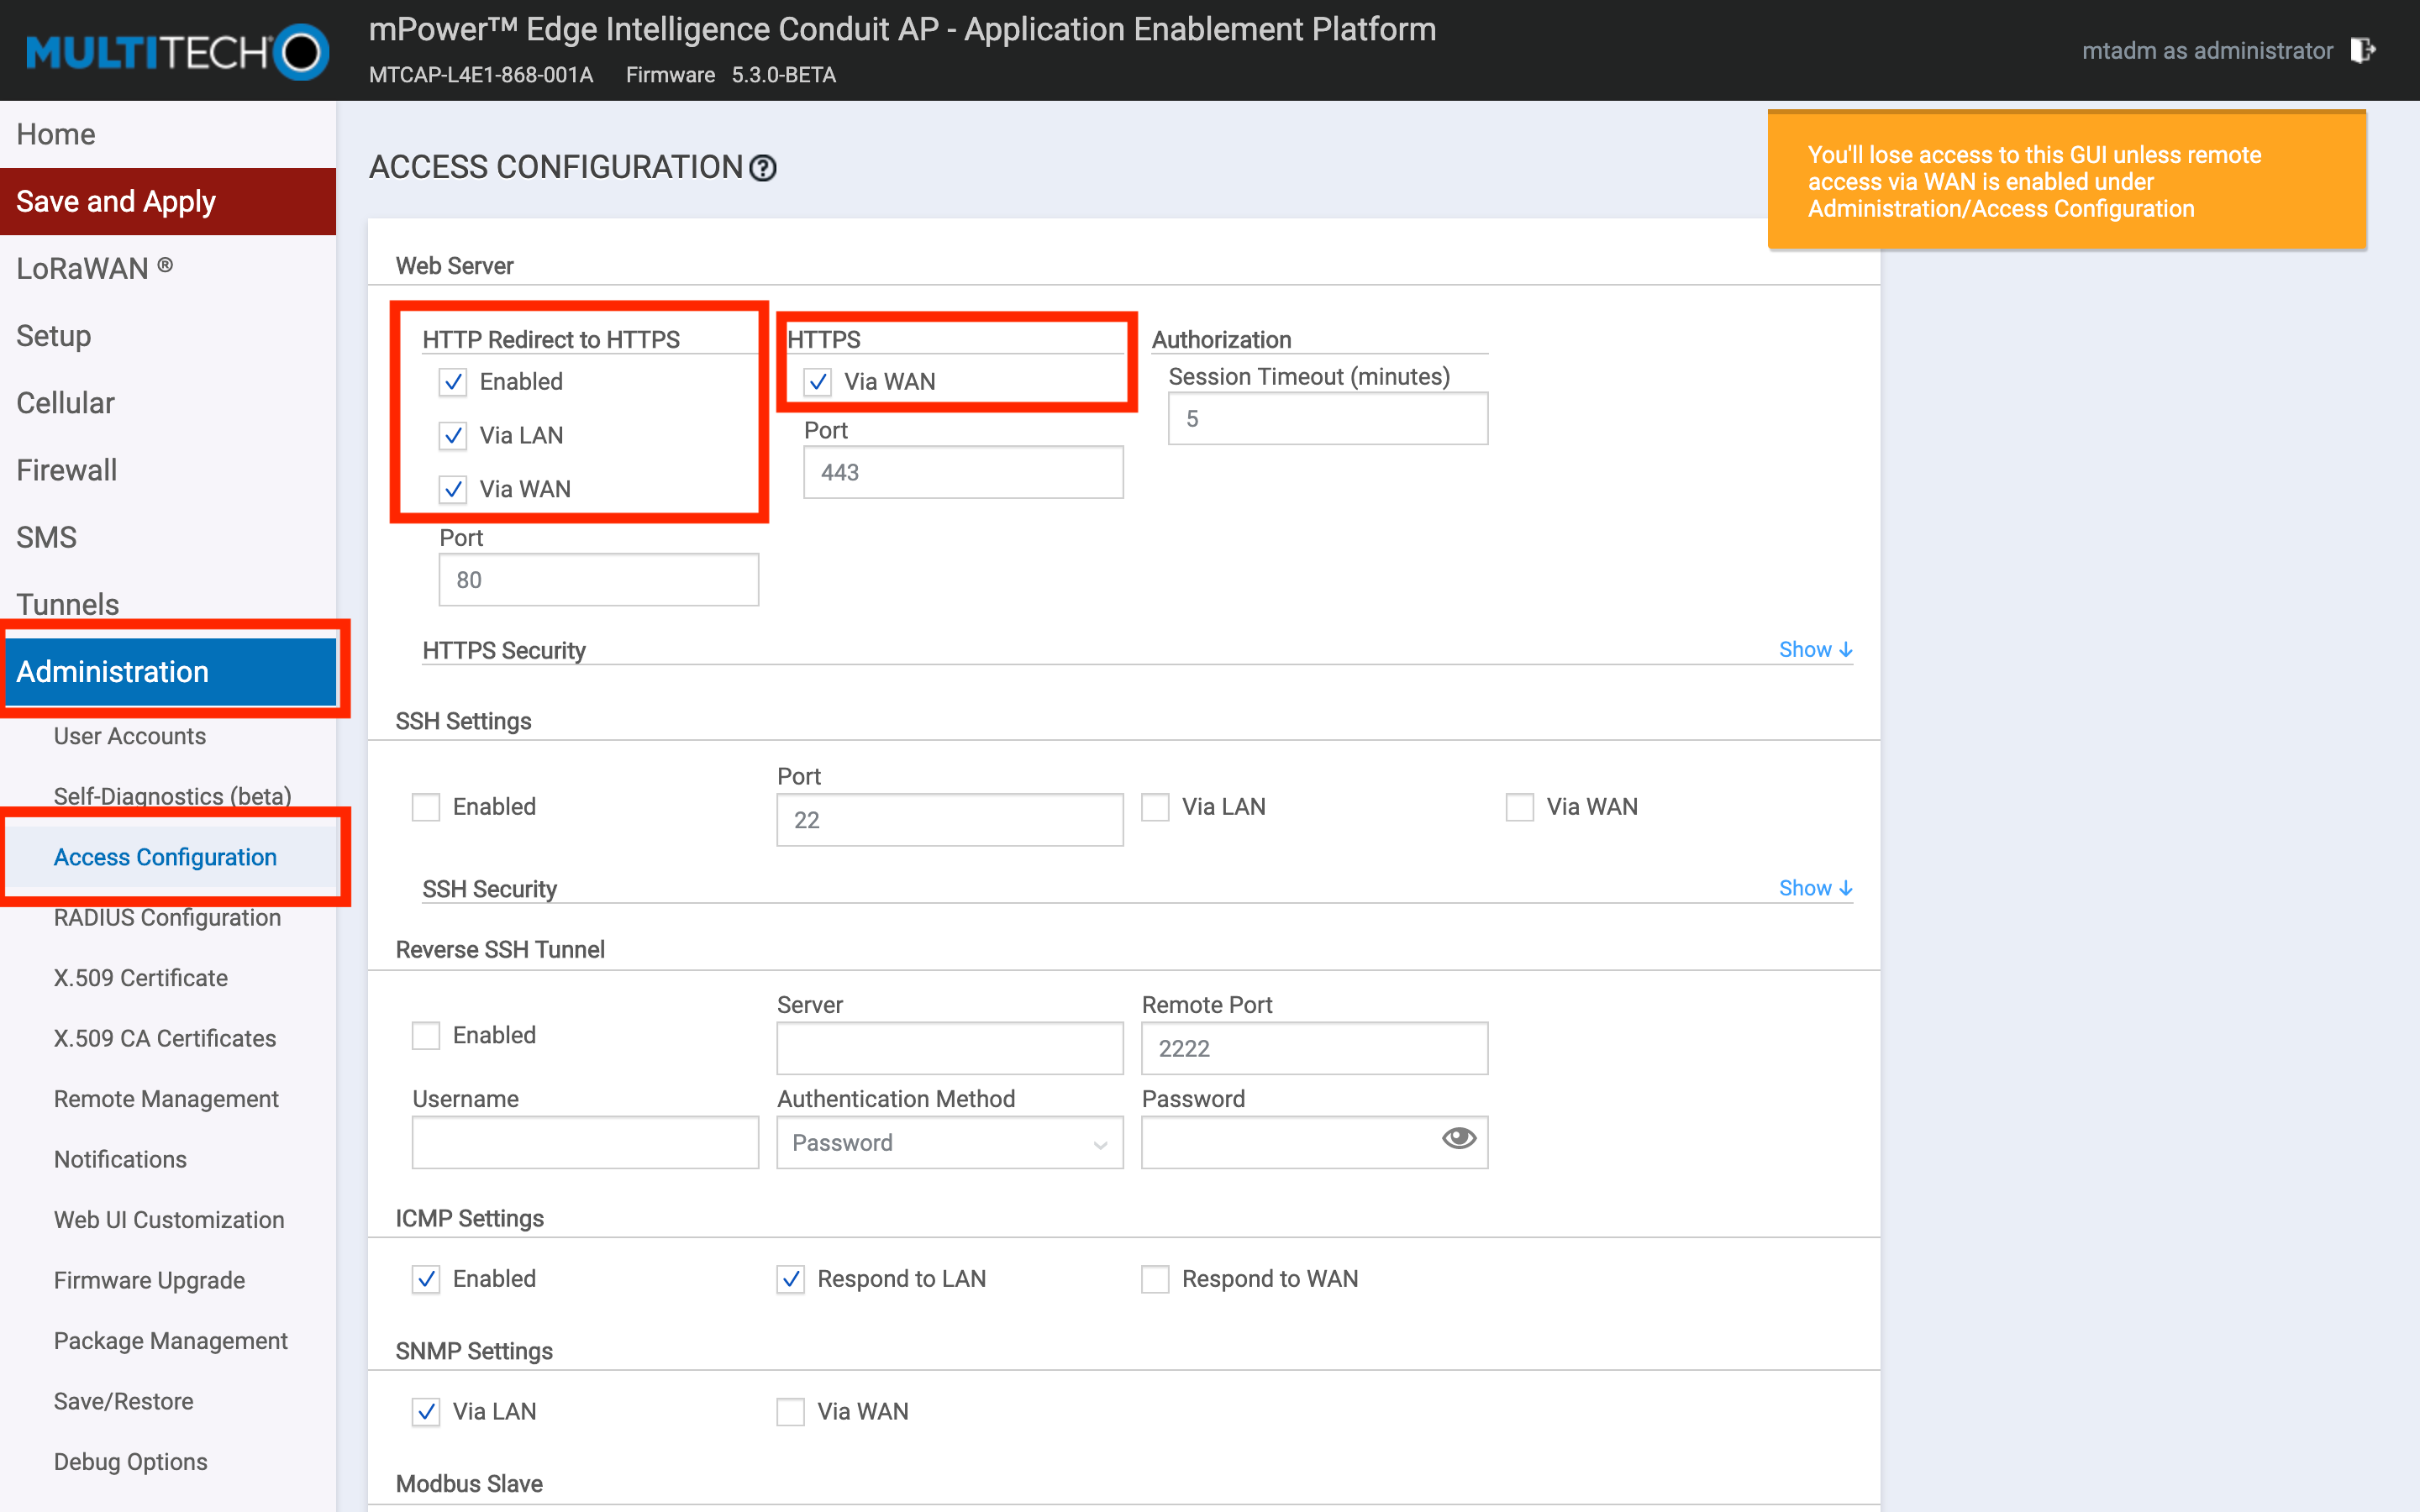
Click Submit to save the Access Configuration Settings.
After you have submitted both the Ethernet Configuration and Access Configuration settings, double check them so you don’t lock yourself out!
Finally, click Save and Apply to apply your configuration.
At this point, the gateway will reboot. It will come back online as a DHCP client, so you can disconnect it from your computer, and connect the gateway directly to your router or local network.
Connecting the Gateway to The Things Stack
The Multitech Conduit supports LoRa Basics™ Station and the legacy UDP packet forwarder. LoRa Basics™ Station is more secure and supports configuration of custom channel plans, amongst other improvements. Please follow instructions to Connect Multitech Conduit with LoRa Basics™ Station.
If for some reason LoRa Basics™ Station is not available to you, instructions for connecting with the legacy packet forwarder are here.
Troubleshooting
Packet Forwarder Logs
Packet forwarder logs contain the messages received from the devices and the network server. You can use the information to debug the issues.
You can find the packet forwarder logs using the gateway's web console. Do the following to download the logs onto your device:
- Login to your gateway's web console and navigate to Administration -> Debug Options.
- Click on the Download Logs button in the Logging section to download the logs.
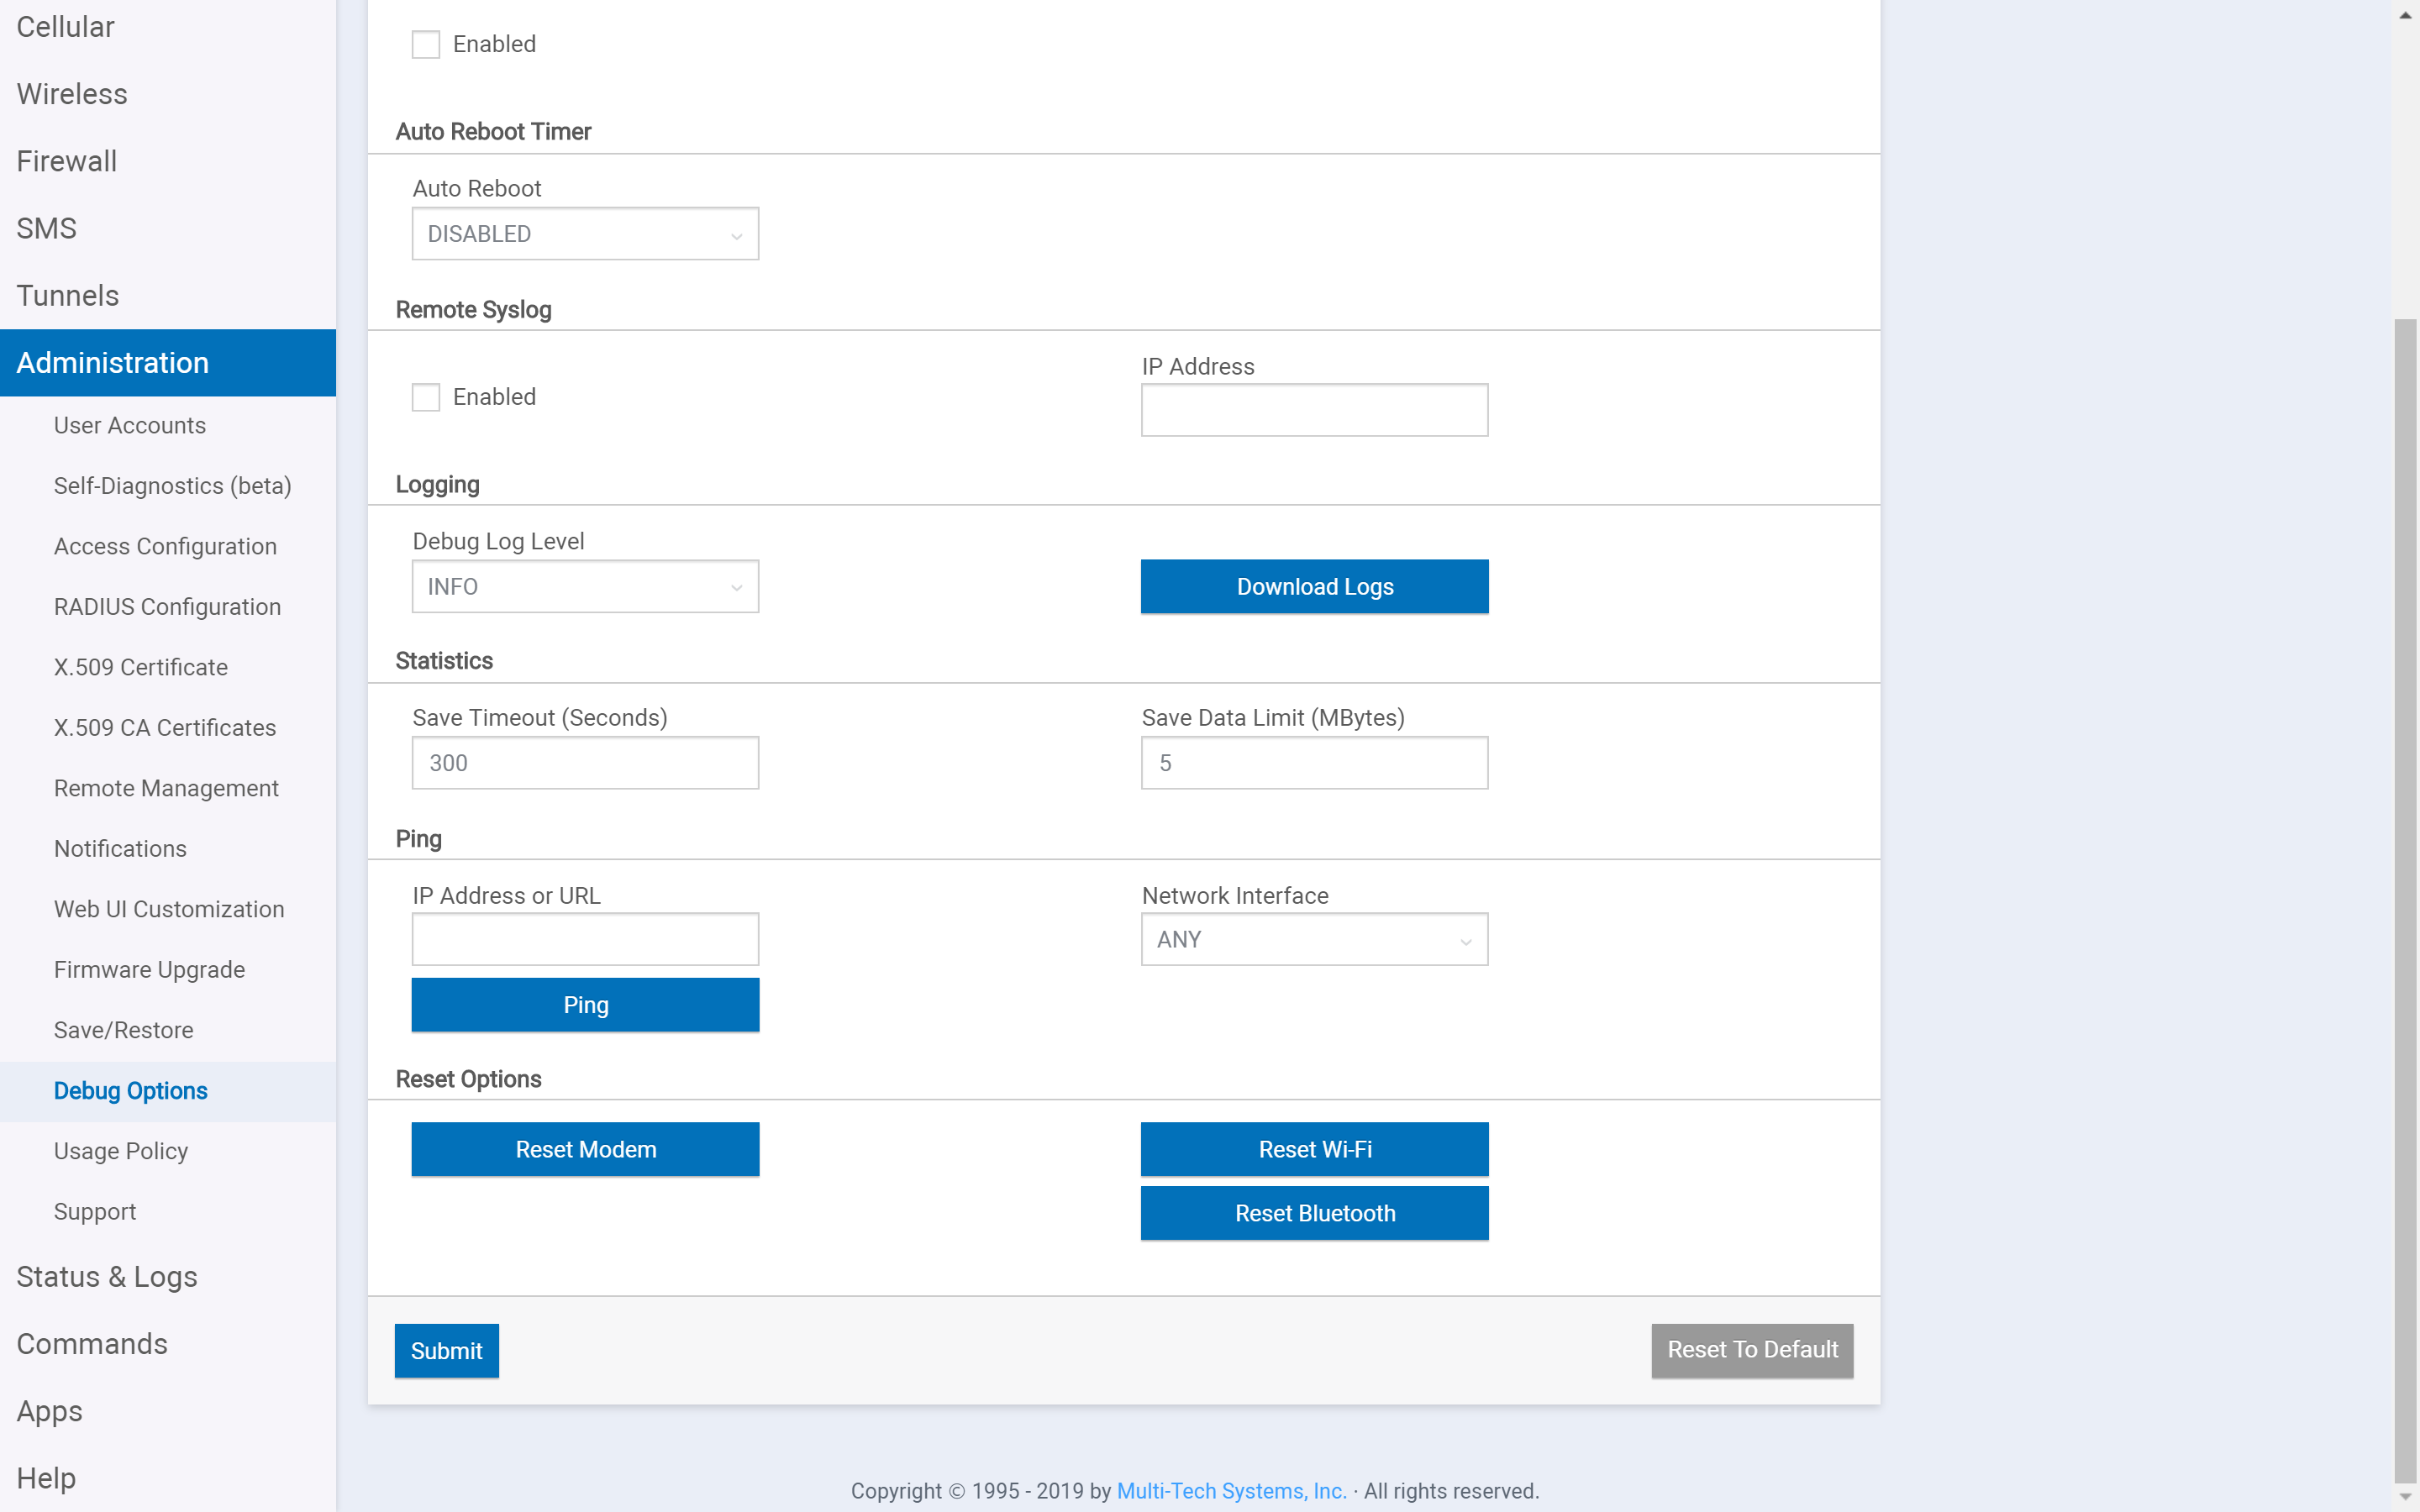
Now, in the downloaded logs, open the lora-pkt-fwd-1.log file to see the packet forwarder logs.
Upgrading the Firmware
If you have an issue with the current firmware version, you can use following steps to upgrade the firmware.
Refer to the top of your configuration software window to check your firmware version. You have to upgrade the device's firmware to the latest version.
You can download the firmware upgrades from the downloads section of the MultiTech website.
Do the following to upgrade the firmware on your device:
- Before you upgrade your firmware, save your present configuration as a backup.
- Go to the MultiTech website, locate the firmware upgrade file you want for your device(MTCDT AEP x.x.x in the current case, where x.x.x is the latest version available on the website), and download this file to a known location.
- Navigate to Administration -> Firmware Upgrade.
- Click on Choose Firmware Upgrade File button, and
- Click on Browse to find where the firmware file resides that you want to apply.
- Select the file and click on Open. The file name appears next to the Choose Firmware Upgrade File button. Make sure you select the correct BIN file; otherwise, your device can become inoperable.
- Click on Start Upgrade.
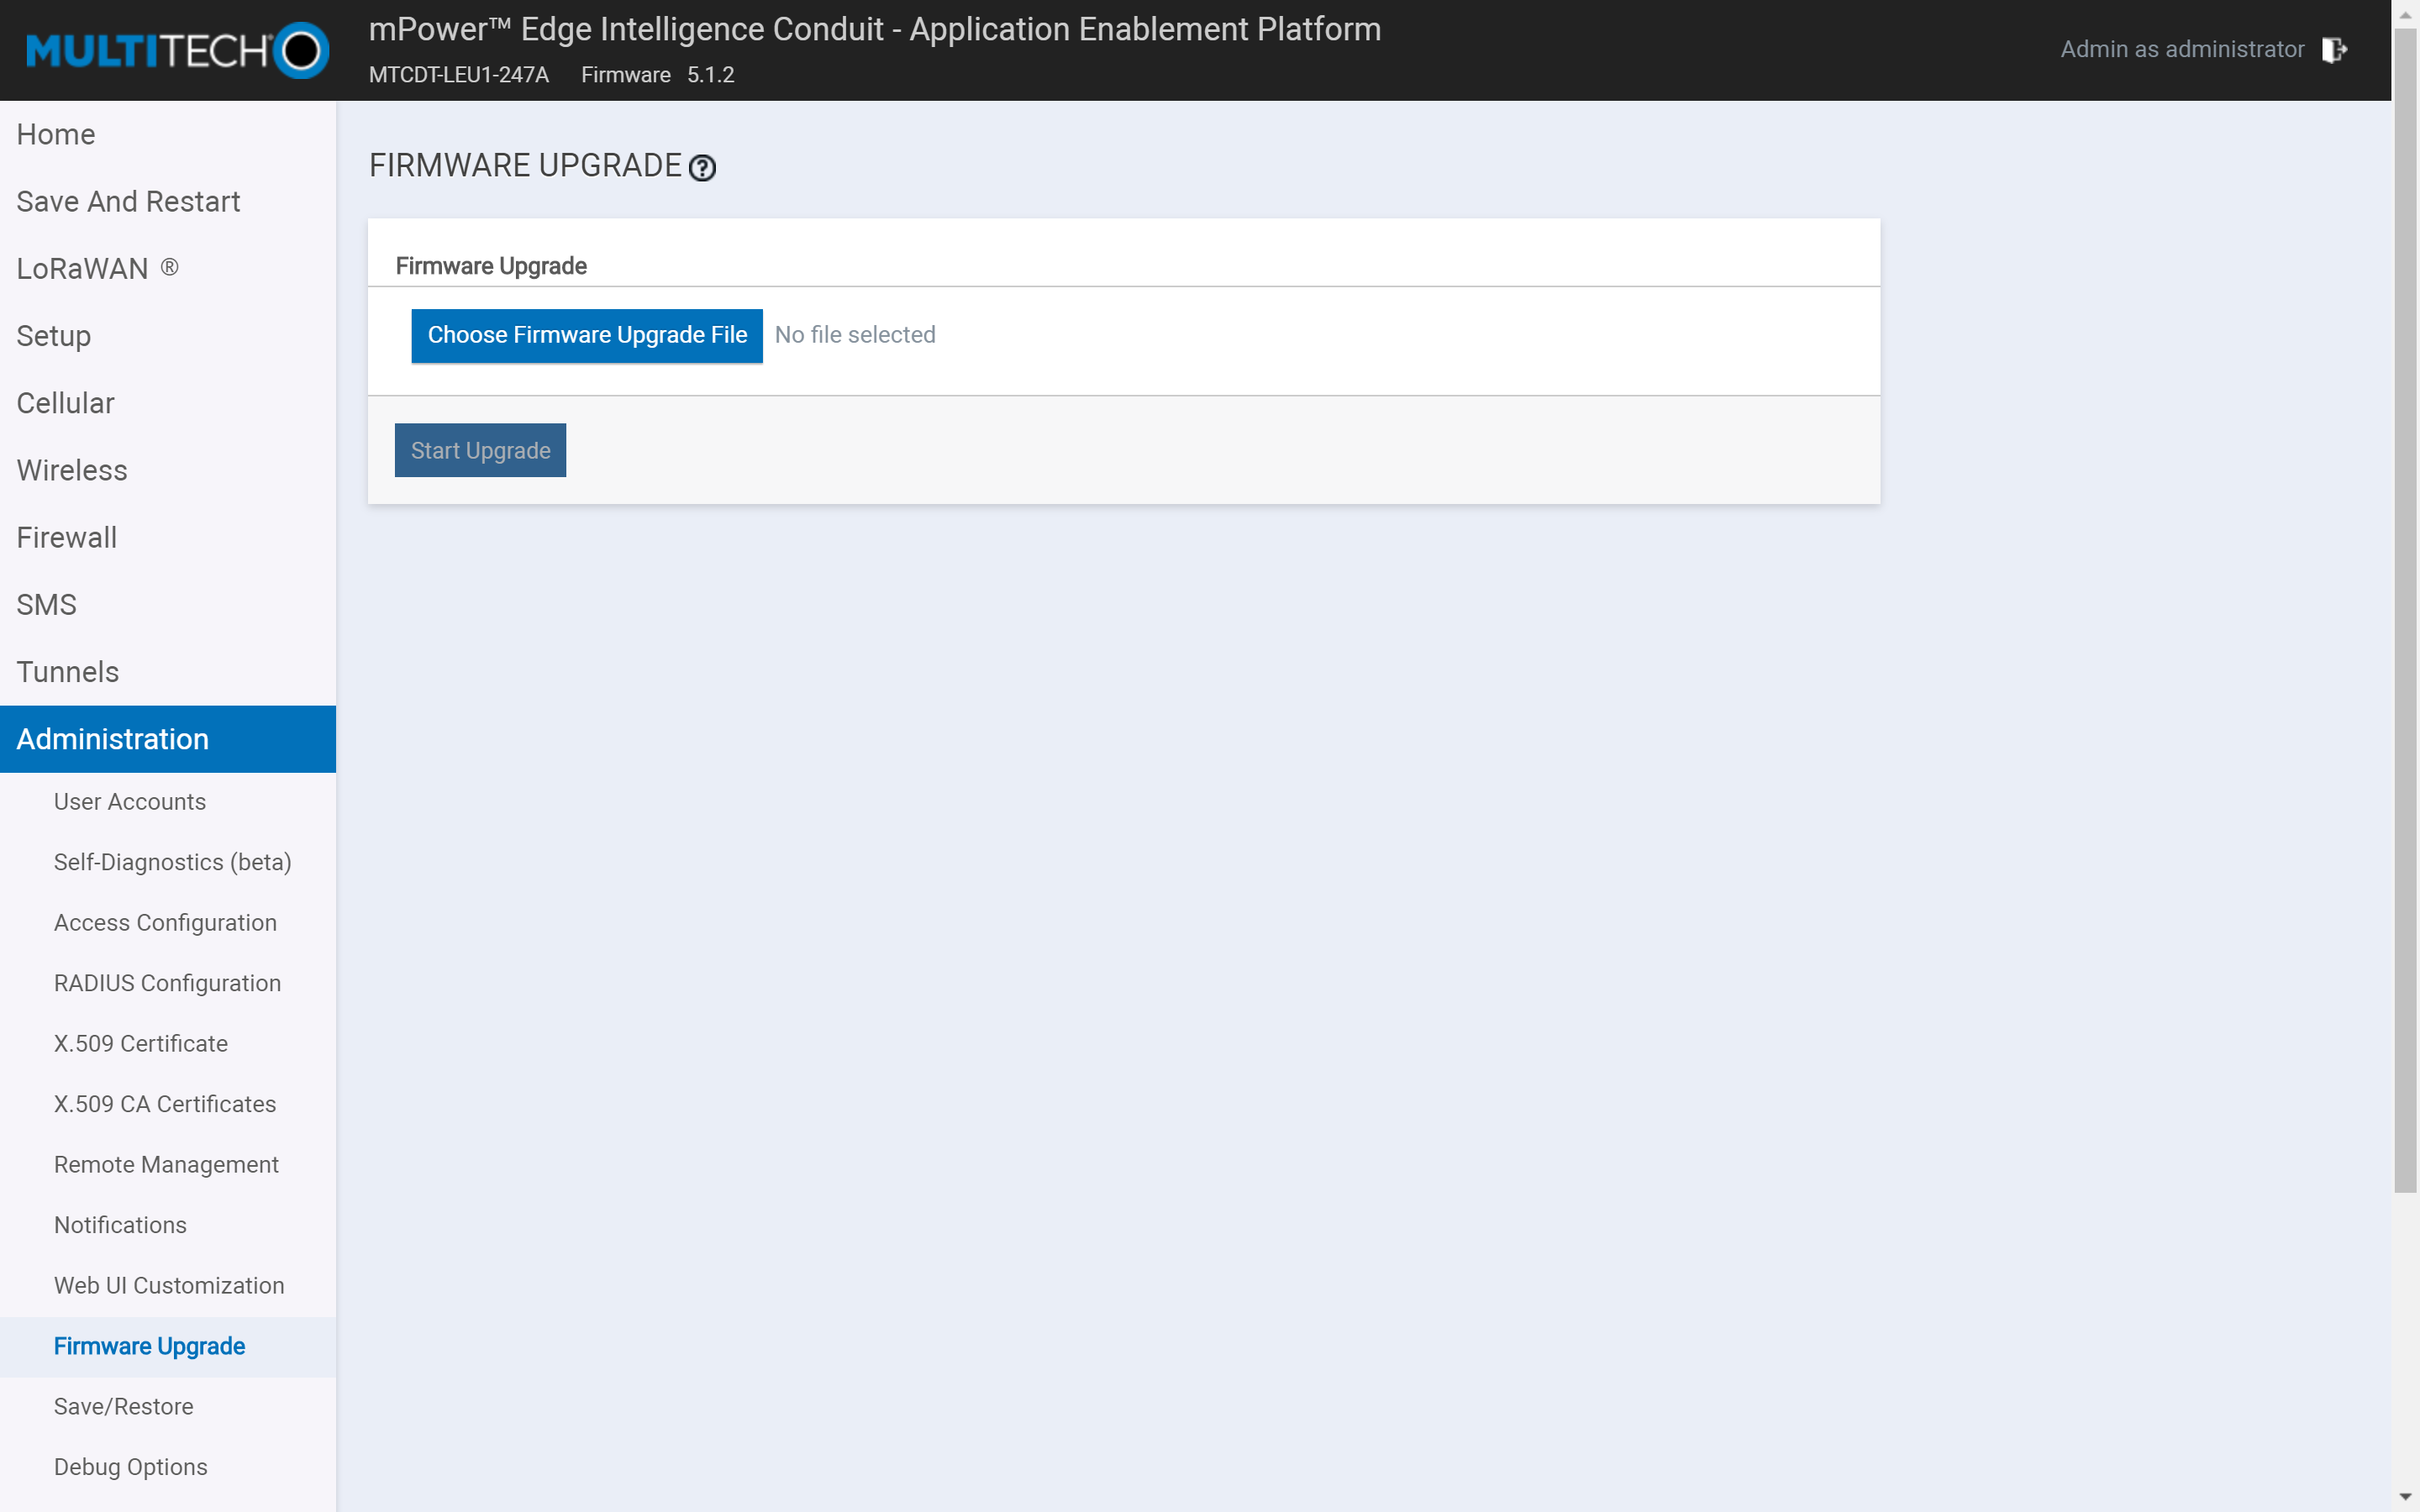
- A message about the time needed to upgrade appears. Click on OK.
- A progress bar appears indicating the status of the upgrade. When the upgrade is completed, your device reboots.
- After the firmware upgrade is completed, verify your configuration to ensure that it is same as what you expected.
The new firmware is written into flash memory. It may take up to 10 minutes to upgrade the firmware. Do not interrupt the devices' power or press the reset button during this time.