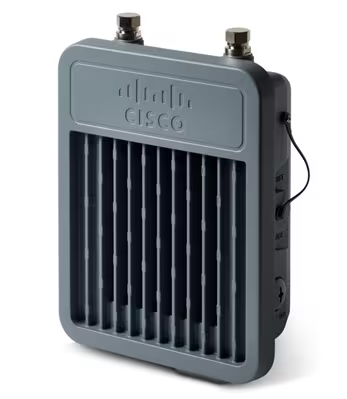
This page guides you to connecting the Cisco Wireless Gateway for LoRaWAN® to The Things Stack.
Technical specifications for this gateway can be found in Cisco’s official documentation.
Prerequisites
- User account on The Things Stack with rights to create gateways.
- Cisco Wireless Gateway for LoRaWAN with latest firmware, connecte to the internet (or your local network) via ethernet. Version
2.3.0is the minimal required for connecting using LoRa Basics™ Station - Console cable from USB to RJ45.
Registration
Create a gateway by following the instructions for the Console or the CLI.
The gateway EUI is derived from the MAC address that can be found on the back panel of the gateway. To get the EUI from the MAC address insert FFFE after the first 6 characters to make it a 64-bit EUI. For example, if the gateway’s MAC address is 5B:A0:CB:80:04:2B then the EUI is 5B A0 CB FF FE 80 04 2B.
The Gateway Server Address is the address of your The Things Stack deployment. See Server Addresses.
Configuration
Plug the RJ45 end of the cable in the Console port at the side of the gateway, and the USB port to your computer.
If you are using MacOS or Linux, connect to the Gateway by opening a terminal and a executing the following commands:
ls /dev/tty.usb*
This will display the list of available USB serial devices. Once you have found the one matching the Cisco console, connect using the following command:
screen /dev/tty.usbserial-AO001X6M 115200
Use PuTTy if you are using Windows.
You are now in the gateway’s shell, called standalone mode.
First you need to enable the privileged mode.
Gateway> enable
Network
To configure your Cisco Gateway to your network, type the following commands:
Gateway# configure terminal
Gateway(config)# interface FastEthernet 0/1
If your local network has a DHCP server attributing IPs:
Gateway(config-if)# ip address dhcp
Otherwise, if you know the static IP address of your gateway:
Gateway(config-if)# ip address <ip-address> <subnet-mask>
Next, type the following to save the network configuration of your gateway:
Gateway(config-if)# description Ethernet
Gateway(config)# exit
Gateway# exit
Gateway# copy running-config startup-config
You can test your Internet configuration with the ping command, for example ping Google’s DNS server:
Gateway# ping ip 8.8.8.8
To see more information about the gateway’s IP and the network, you can use:
show interfaces FastEthernet 0/1show ip interfaces FastEthernet 0/1orshow ip route
Date and Time
To configure your system’s date and time, you can use ntp:
Gateway# configure terminal
Gateway(config)# ntp server address <NTP server address>
Gateway(config)# exit
or
Gateway# configure terminal
Gateway(config)# ntp server ip <NTP server IP>
Gateway(config)# exit
If you do not have production-grade ntp servers available, you can use pool.ntp.org’s servers.
FPGA
If you needed to update your gateway firmware previously, your FPGA will need ~20 minutes to update once the new firmware is installed. The packet forwarder will not work until then, so we recommend at this point waiting until the FPGA is upgraded.To show the status of the FPGA, you can use the following command:
Gateway# show inventory
When the FPGAStatus line indicates Ready, this means you can go forward with this guide.
GPS
If you have a GPS connected to your Cisco gateway, enable it with the following commands:
Gateway# configure terminal
Gateway(config)# gps ubx enable
Gateway(config)# exit
This command may return the message packet-forwarder firmware is not installed, which can be ignored.
Enable Radio
As a final step before setting up the packet forwarder software, we are going to enable the radio. You can see radio information with the show radio command:
Gateway# show radio
ORA_SN: FOC21028R8S
ORA_PN: 95.1602T01
ORA_SKU: 915
ORA_CALC: <NA,NA,NA,50,31,106,97,88,80,71,63,53,44,34,25,16-NA,NA,NA,54,36,109,100,91,83,74,66,57,48,39,30,21>
AL_TEMP_CELSIUS: 31
AL_TEMP_CODE_AD9361: 87
SSI_OFFSET: -204.00,-204.40
ORA_REVISION_NUM: C0
SSI_OFFSET_AUS: -203.00,-204.00

radio status:
on
If the radio is off, enable it with:
Gateway# configure terminal
Gateway(config)# no radio off
Gateway(config)# exit
The show radio command also shows you more information about the LoRa concentrator powering the gateway. For example, LORA_SKU indicates the base frequency of the concentrator.
Enable Authentication
To prevent unauthorized access to the gateway, you’ll want to set up user authentication. The Cisco gateway has a secret system, that requires users to enter a secret to access privileged commands.
To enable this secret system, you can use the following commands:
Gateway# configure terminalto enter global configuration mode.- To set the secret, you can use different commands:
Gateway(config)# enable secret <secret>to enter in plaintext the secret you wish to set, instead of<secret>. Note: Special characters cannot be used in plain secrets.Gateway(config)# enable secret 5 <secret>to enter the md5-encrypted secret.Gateway(config)# enable secret 8 <secret>to enter the SHA512-encrypted secret. Gateway(config)# exitto exit global configuration mode.Gateway#copy running-config startup-configto save the configuration.
Verification
Before we install the packet forwarder, let’s run verification to ensure that the gateway is ready.
- Type
show radioto verify that the radio is enabled. The result should indicate radio status: on. - Type
show inventoryto verify that the FPGAStatus is Ready. - Type
show gps statusto verify that the GPS is correctly connected. You can get additional GPS metadata by typingshow gps info. - Verify that the network connection is working. You can test this by pinging common ping servers with
ping ip <IP>, if your local network does not block ping commands. For example, you can ping Google’s servers withping ip 8.8.8.8.
If some of those checks fail, go back to the appropriate section earlier in order to fix it.
Then save the configuration by executing:
Gateway# copy running-config startup-config
After the initial gateway configuration is done, you can proceed with connecting the gateway to The Things Stack using LoRa Basics™ Station or Semtech UDP Packet Forwarder.
Troubleshooting
Some basic commands that can be used for troublshooting:
Gateway# show common-packet-forwarder status
Gateway# show common-packet-forwarder info
Gateway# show common-packet-forwarder log name config 30
Gateway# debug cpf
Gateway# show common-packet-forwarder log name trace 50
For further information and troubleshooting, have a look at Cisco’s Configuration Guide.