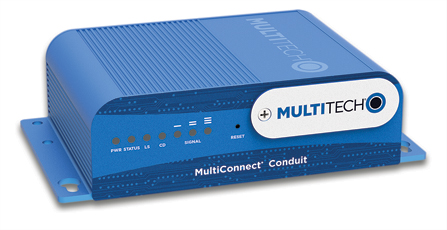
The MultiTech MultiConnect® Conduit™ is a configurable, scalable cellular communications gateway for industrial IoT applications. The technical specifications of this Conduit can be found in the software guide in the official documentation page.
This guide will help you set up the Multitech Conduit mLinux gateway to communicate over The Things Stack.
The MultiTech Conduit has two compatible firmwares - AEP, which is configured via the browser, and mLinux, which is configured via the terminal. This guide is for the mLinux firmware.
Prerequisites
- User account on The Things Stack with rights to create Gateways.
- Multitech Conduit Gateway running mLinux 5.2.7 or later.
Registration
Create a gateway by following the instructions for Adding Gateways.
The gateway EUI can be found at the bottom of the gateway under the field "LORA NODE".
Setting Up the Gateway
For the first-time hardware and software setup, you can refer to the appropriate configuration guide on the Multitech documentation page.
We have included a few short steps to help you get started.
Connecting to the Gateway as a DHCP Server
Since the gateway initializes as a DHCP server, you may have to configure TCP/IP manually. After hard resetting the device, we connected it directly to a computer via ethernet and used the following TCP/IP settings:
- IP Address: 192.168.2.2
- Subnet Mask: 255.255.255.0
- Router Address: 192.168.2.1
Commissioning
After connecting to the gateway, it must be commissioned, or you will not be able to login to the gateway. See instructions here. In short, open a browser to the gateway’s IP, 192.168.2.1, and set a username and password.
Configuring the Gateway as a DHCP Client
To connect the gateway to your network, you must reconfigure it as a DHCP client. After commissioning the device, ssh in using the username and password you set up:
ssh username@192.168.2.1
Modify the network configuration file, /etc/network/interfaces:
sudo nano /etc/network/interfaces
Configure the eth0 peripheral as dhcp, and comment out the static configuration:
# Wired interface
auto eth0
iface eth0 inet dhcp
#iface eth0 inet static
#address 192.168.2.1
#netmask 255.255.255.0
#gateway 192.168.2.254
Reboot your gateway to enable the new network configuration, and now you can connect your gateway to your router and finish the configuration for The Things Stack.
Configuration using a Terminal
Downloading Global_conf.json
To configure the gateway for the correct channel plans, you need a global_conf.json.
The Gateway Configuration Server can be used to retrieve a proper global_conf.json configuration file for your gateway. Follow instructions here.
Configuring the Packet Forwarder
Once the global_conf.json file is generated, you will need to add this to your gateway.
Login to your router at its IP address on your local network, and copy the global_conf.json contents in to a file at /var/config/lora/global_conf.json
ssh username@<GATEWAY_IP_ADDRESS>
sudo mkdir /var/config/lora
sudo touch /var/config/lora/global_conf.json
sudo nano /var/config/lora/global_conf.json
Copy in the contents of the global_conf.json file you downloaded. While the file is open, change the value of clksrc to 0:
"SX1301_conf": {
                "lorawan_public": true,
                "clksrc": 0, # Change this value
                "antenna_gain": 0,
                ...
Multitech devices require a clksrc of 0. Do not skip this step, or your device will not work!
Finally, edit the configuration settings to start the lora-packet-forwarder by default, and disable the lora-network-server:
/etc/init.d/lora-network-server stop
sudo nano /etc/defaults/lora-network-server
#ENABLED=”no”

sudo nano /etc/defaults/lora-packet-forwarder
#ENABLED=”yes”
Start the packet forwarder, and The Things Stack will begin receiving packets from your gateway:
sudo /etc/init.d/lora-packet-forwarder start
Troubleshooting
LORA card not detected
If you receive a LORA card not detected error, make sure you start the lora-packet-forwarder as sudo.