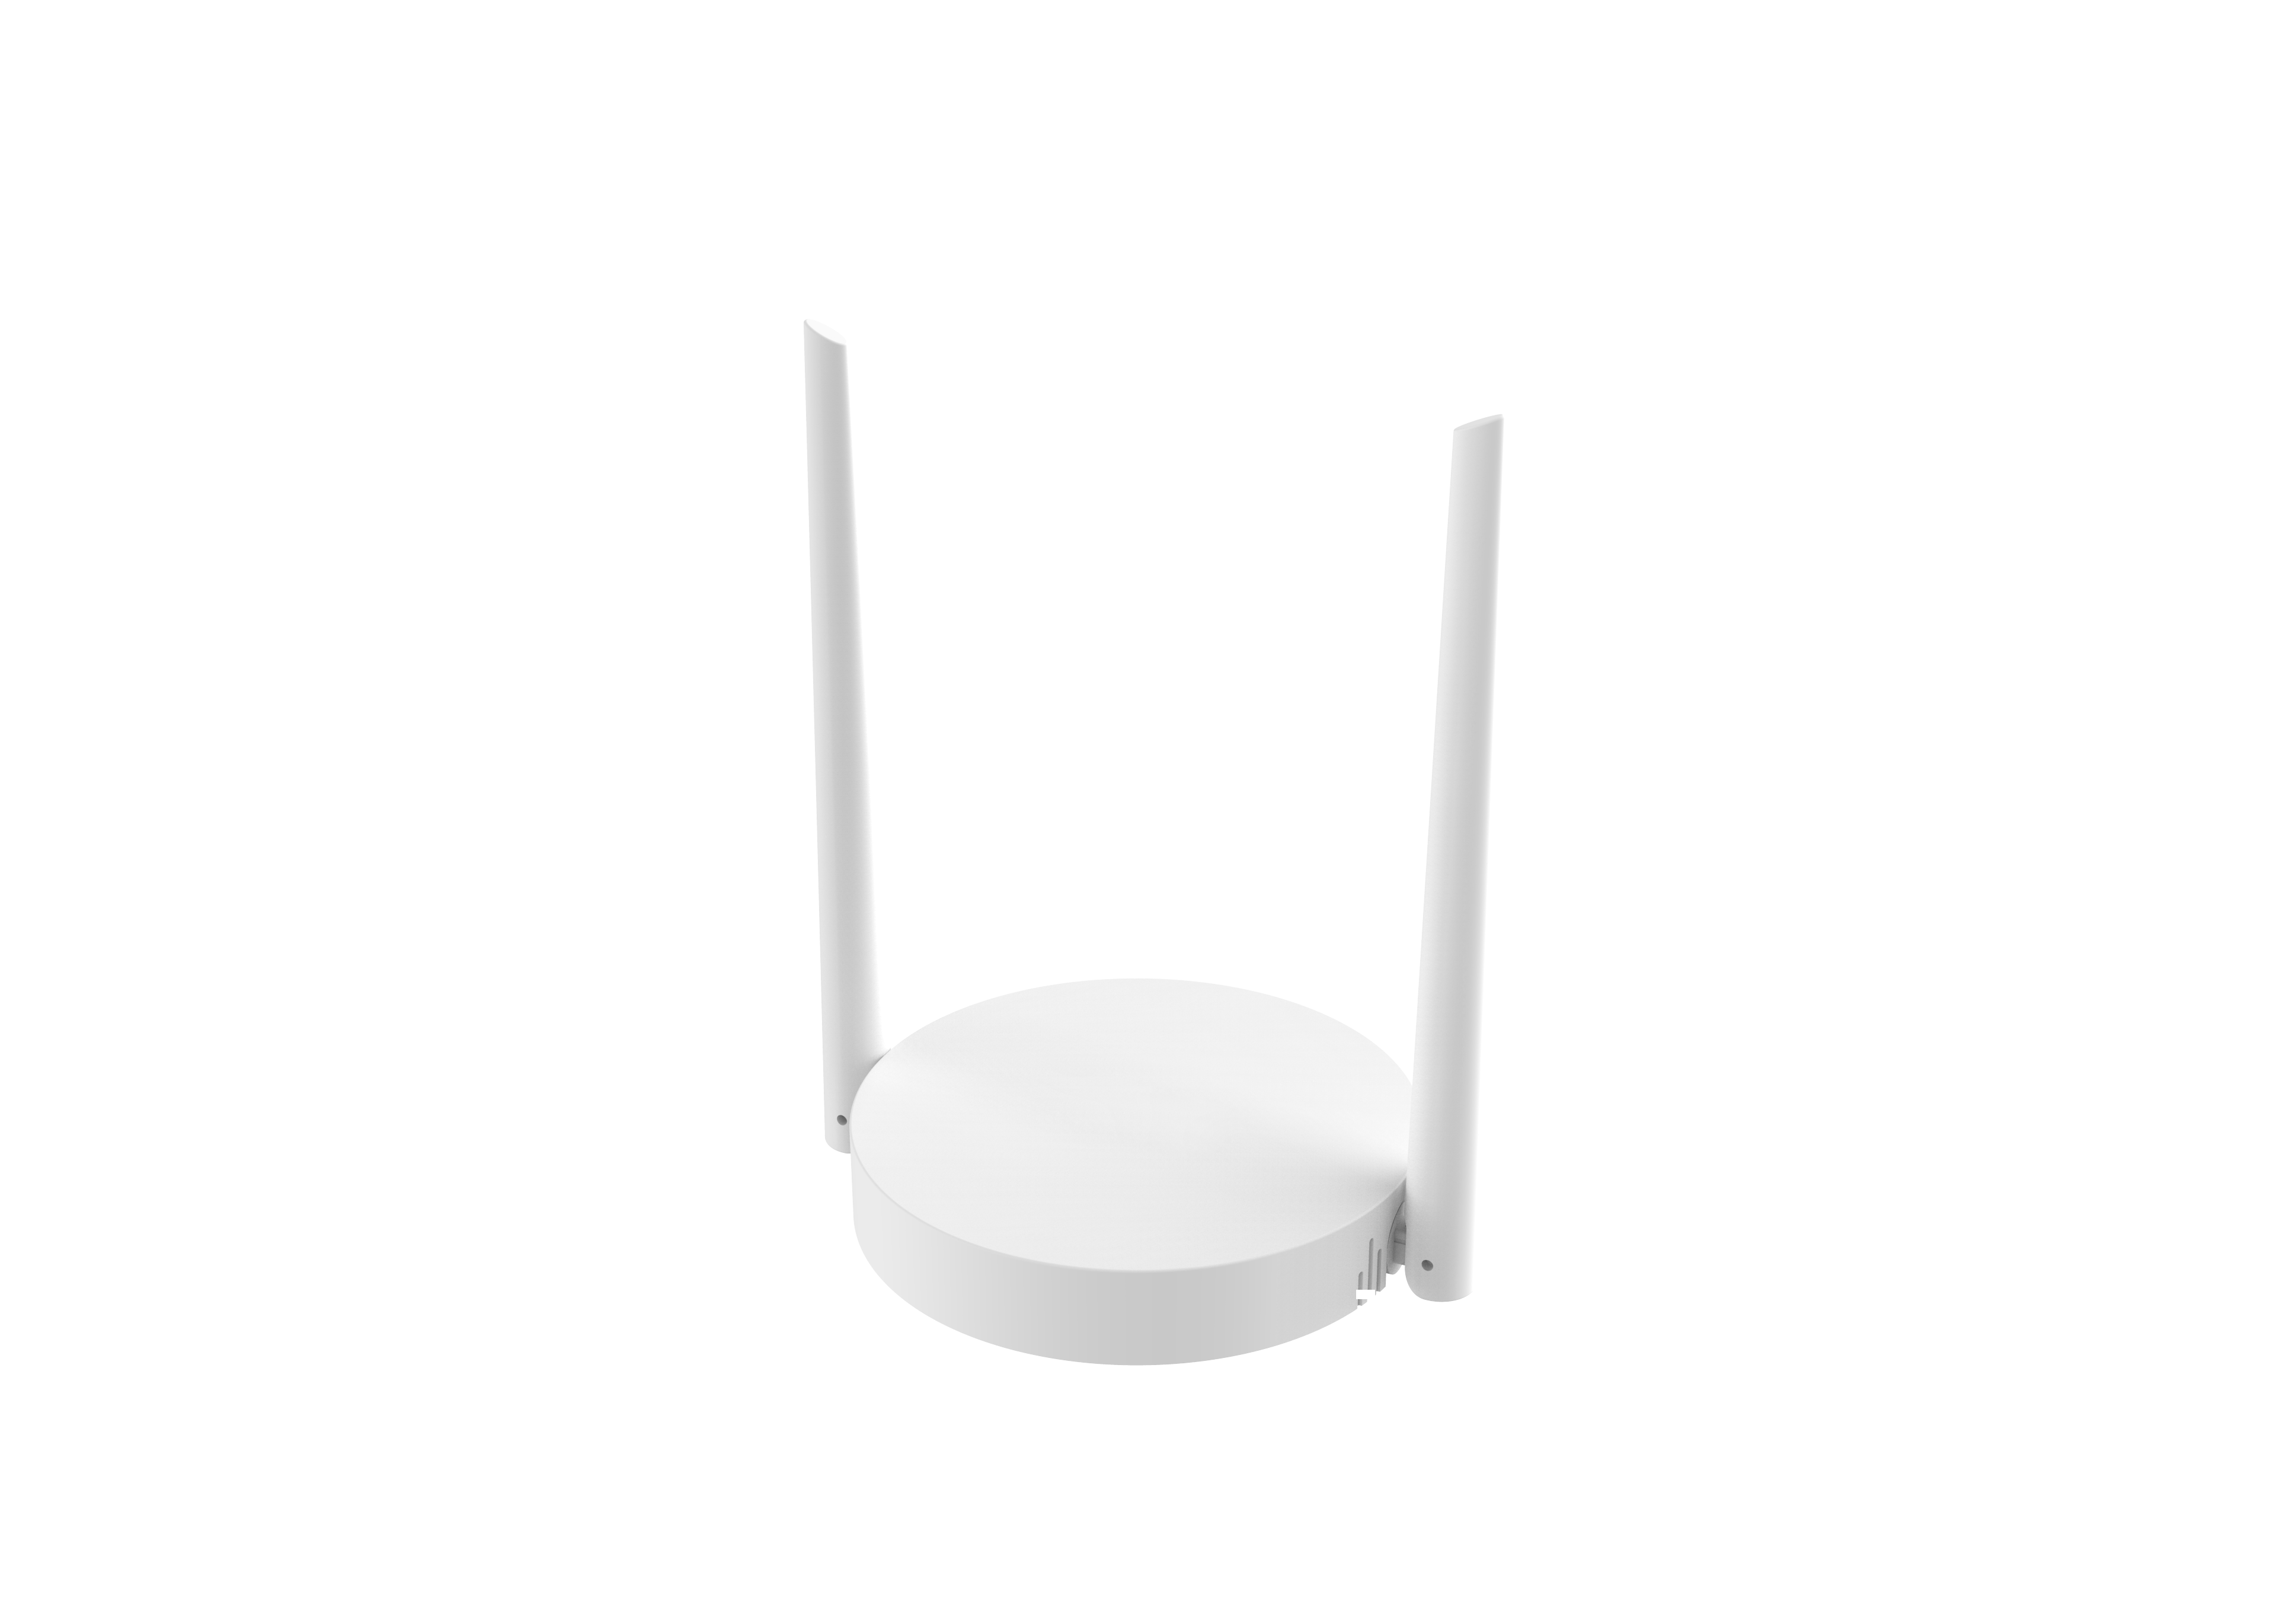
This page will guide you through connecting The Things Indoor Gateway Pro to The Things Stack.
Prerequisites
- Gateway License
- Billing account on The Things Industries Account to manage subscriptions
- User account on The Things Stack with rights to create gateways
- Optional: camera (webcam or phone) for scanning the QR code
Note: The Things Indoor Gateway Pro only works with The Things Stack.
Technical specifications
The Things Indoor Gateway Pro is a fully cloud-managed 8 channel LoRaWAN® gateway.
- Fully cloud-managed, true zero-touch provisioning via The Things Industries Gateway Protocol
- Features Cellular, WiFi and Ethernet backhaul
- Includes Cellular data plan for configuration and connection with The Things Stack
- Remote WiFi configuration
- Supports static IP and custom DNS for WiFi and Ethernet
- Automatic connection failover between Cellular, WiFi and Ethernet
- Positioning via WiFi geolocation
- Power via USB-C or 5-12 V DC
- White label design
- Flexible antenna design for desktop, ceiling and wall mount
- Backplate for easy mounting on walls and ceilings
- Available for EU868 and US915 regions
You can find the brochure here.
Mounting
The Things Indoor Gateway Pro is typically installed either on the desktop, on the ceiling or on the wall.
Desktop Mount
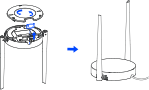
Take off the baffle and mounting plate on the back of the gateway, then you can place the gateway on the desktop.
Ceiling or Wall Mount
Take off the mounting plate on the back of the gateway, drill two holes on the ceiling or wall according to the mounting plate, then fix the included wall plugs into the ceiling or the wall. Fix the mounting plate to the wall plugs with the included screws, then turn the device clockwise to lock it to the mounting plate.
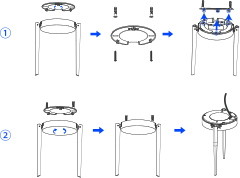
When using wall mount, position the antennas upwards. When using ceiling mount, position the antennas downwards.
Power
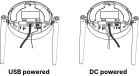
Connect the USB-C cable or a 5-12 V DC power cable. The latter is typically used with building automation systems that provide (backup) power to critical IoT devices and certain Power-over-Ethernet (PoE) splitters.
Gateway License
The Things Indoor Gateway Pro operates with a license, which is purchased together with the hardware and prepaid for 1 year. This license is activated after you have claimed the gateway on The Things Stack. When it’s time to renew, you can do it manually or turn on auto-top-up to keep your connection seamless.
You can manage your gateway license from the Gateway Admin
Claim in The Things Stack
The Things Indoor Gateway Pro can be claimed in The Things Stack deployments that are connected to The Things Gateway Controller. The Things Stack Cloud and Sandbox are supported out-of-the-box.
- In the The Things Stack Console, go to Gateways.
- Click Register Gateway.
- Click Scan gateway QR code and scan the QR code on the bottom of the gateway. Alternatively, enter the Gateway EUI and Owner Token manually:
- If your gateway is part of a Gateway Fleet (prepaid subscription), use the Owner Token from your fleet details in the Subscription Dashboard.
- If your gateway does not use a fleet (no prepaid subscription), use the Owner Token printed on the label under the mounting plate.
- Enter a Gateway ID and select the Frequency plan to use.
- Click Claim gateway.
- Once claimed, your gateway connects automatically and your one-year License is activated.
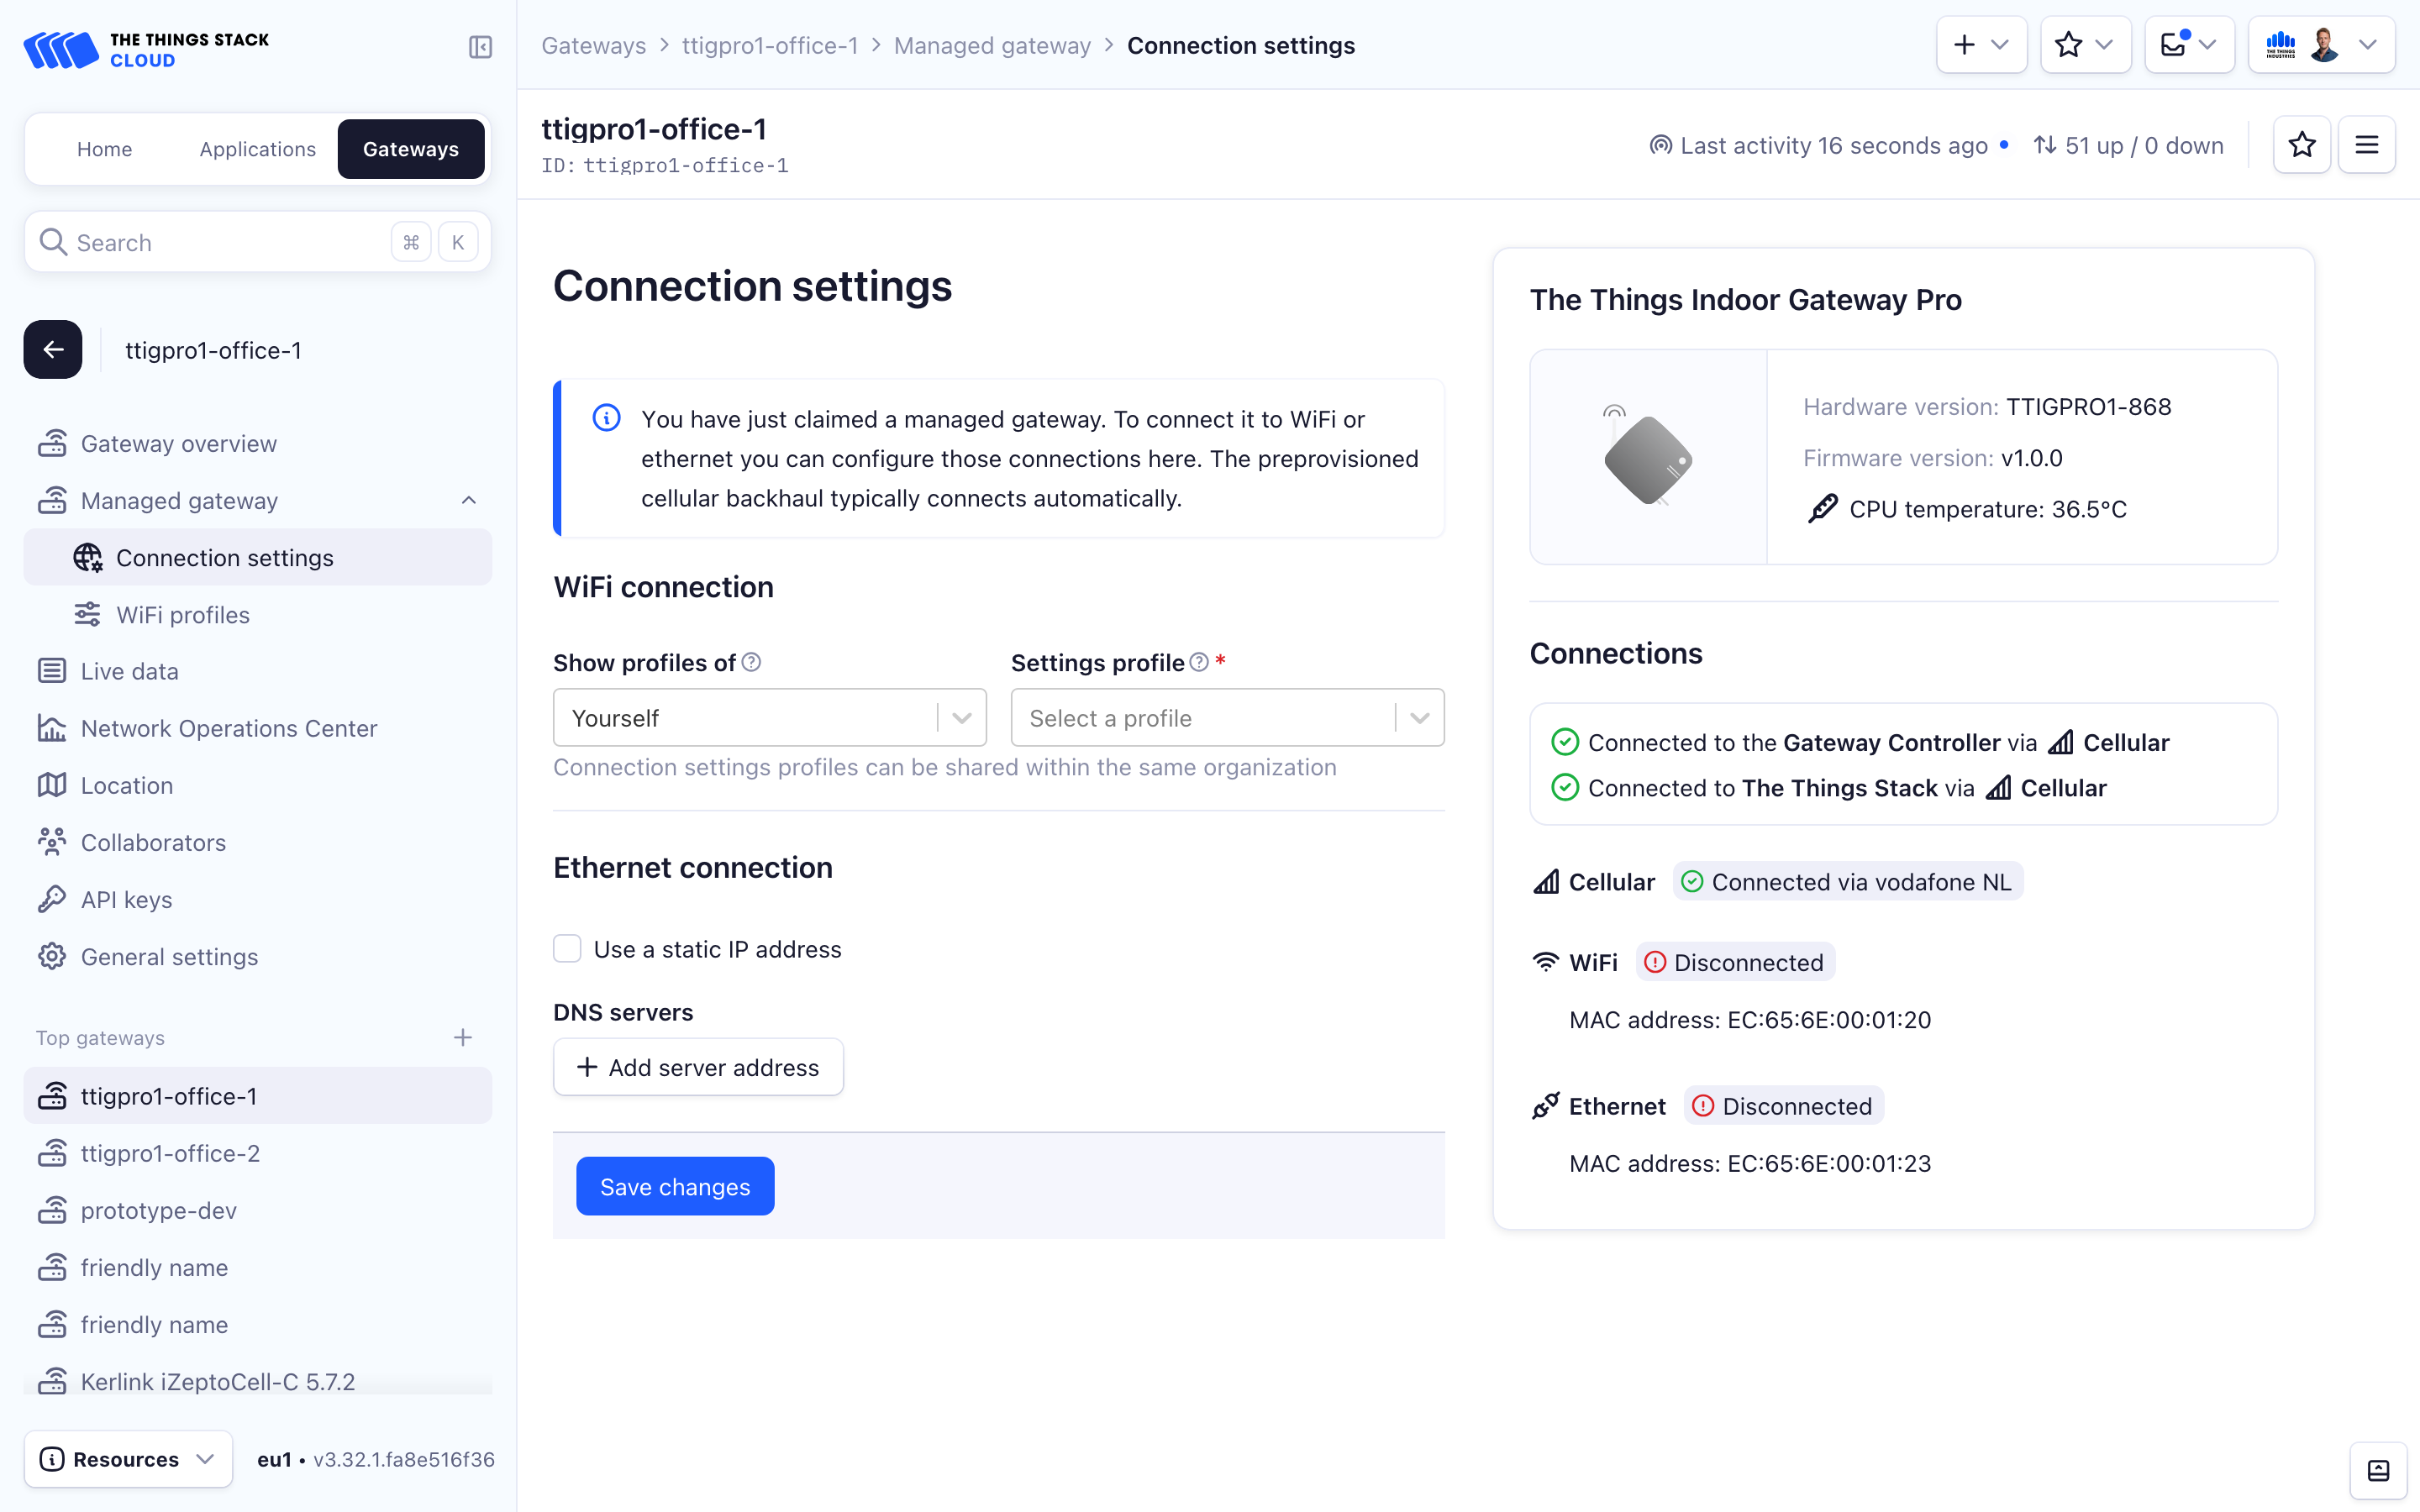
You should now see the Connection settings screen:
Warning:
When powering on your gateway for the first time without Ethernet, it may take several minutes to activate the SIM card and attach to a mobile network.Connection Settings
The Things Indoor Gateway Pro supports Cellular, WiFi and Ethernet. You can configure WiFi and Ethernet in The Things Stack.
First, go to the gateway’s connection settings:
- In The Things Stack Console, go to your The Things Indoor Gateway Pro under Gateways
- In the left menu, expand Managed gateway and click Connection settings
WiFi Configuration
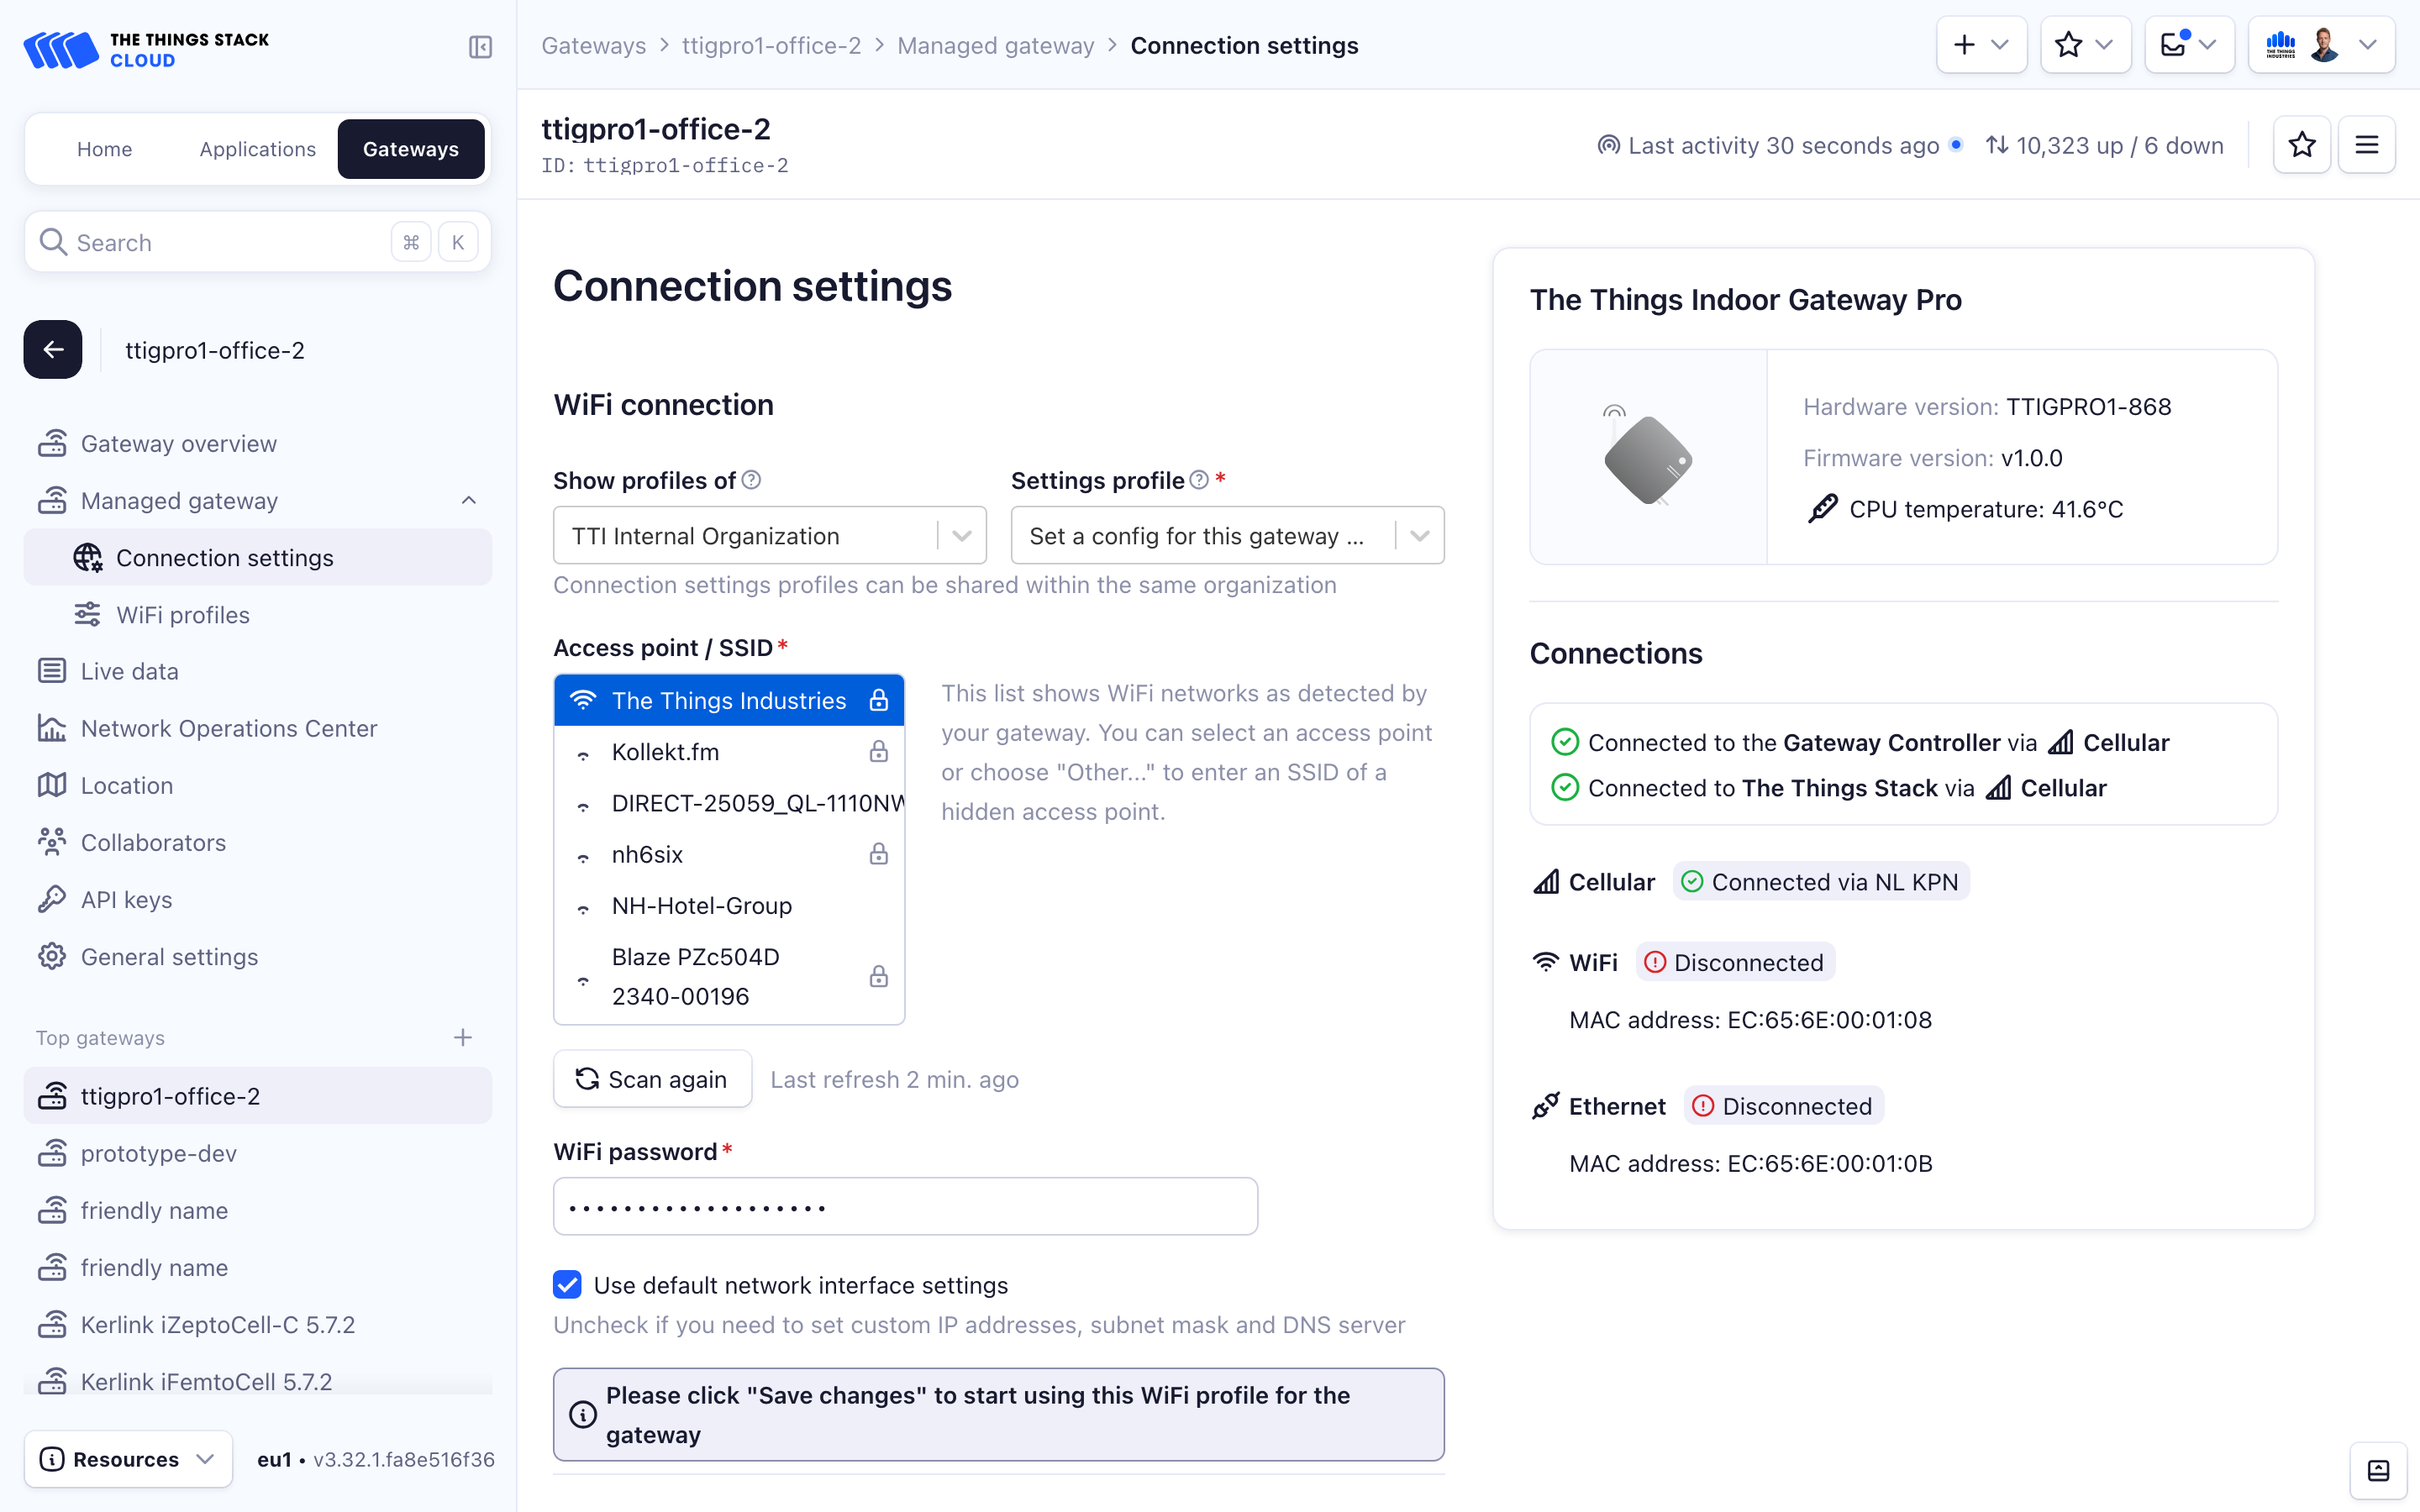
Managed WiFi gateways in The Things Stack support profiles that can be assigned to multiple gateways. This eliminates the need to enter WiFi credentials for multiple gateways that are configured to use the same network.
You can select profiles of Yourself that are linked to your The Things Stack user account. You can also use the dropdown to select an organization that you are a member of. This allows other organization members to reuse the WiFi profile for gateways they configure. Alternatively, you can select Set a config for this gateway only if you don’t need a reusable profile.
Select the WiFi access point name (SSID) to connect with, enter the password and click Save changes.
Note:
WiFi credentials are stored securely in The Things Gateway Controller. This is a service operated by The Things Industries. The WiFi passwords can only be retrieved by gateways for which the WiFi profile is configured. The Things Stack has no access to the passwords once they are saved. If you network security policy disallows entering WiFi credentials on an external platform, please only use Cellular or Ethernet.Static IP and Custom DNS
For both WiFi and Ethernet, you can configure static IP and custom DNS settings.
For WiFi, under WiFi connection, uncheck Use default network interface settings to expand the menu with static IP and custom DNS. For Ethernet, under Ethernet connection, check Use a static IP address to expand the menu.
LED Meaning
The Things Indoor Gateway Pro has two LEDs inside the case directly above to the SIM card slot.
The left LED is for The Things Gateway Controller and system status:
| Color | Pattern | Meaning |
|---|---|---|
| Off | Off | |
| Red | Solid | Power on, not connected to the Gateway Controller |
| Red | Blinking | Firmware upgrading, blink speed is the progress |
| Green | Solid | Connected to the Gateway Controller |
The right LED is for The Things Stack:
| Color | Pattern | Meaning |
|---|---|---|
| Off | Off or not connected to The Things Stack | |
| Green | Solid | Connected to The Things Stack |
(Factory) Reset
You can reset the gateway by pressing the reset button shortly on the back of the gateway with a paperclip or other small object.
The Things Indoor Gateway Pro stores some connection settings for quickly recovering WiFi and Ethernet connectivity after a reboot. This includes WiFi credentials, static IP and custom DNS settings.
If you configured wrong Ethernet settings and you do not have WiFi or Cellular coverage available, the gateway may not be able to reconnect to The Things Gateway Controller or The Things Stack. In that case, you can factory reset the gateway by pressing and holding the reset button for at least 5 seconds (the red LED starts blinking fast). The Things Indoor Gateway Pro will now use DHCP for obtaining an IP address and connect to The Things Gateway Controller.
Advanced: Serial Output
The Things Indoor Gateway Pro writes comprehensive logs via its USB-C port which also functions as serial port. You can connect a serial port client (e.g. PUTTY on Windows, screen on macOS or minicom on Linux) with a baud rate of 115200, 8 data bits, no parity and 1 stop bit. This provides extensive insight in why Cellular, WiFi and/or Ethernet is failing.
Troubleshooting
I get an error “gateway subscription not attached and active” while claiming The Things Industries Gateway Pro
The error occurs if the gateway does not have active subscription. For more information refer subscription.
If the issue persists, please contact support@thethingsindustries.com.
Firmware Changelog
1.3.0
- Update dependencies.
- Use DNS servers from DHCP.
- Log summary of traffic instead of per packet for better diagnostics.
- Convey connect attempt and panic reason to the Gateway Controller for better diagnostics.
- Recover PPP data mode after a failed connection attempt.
- Power cycle the cellular modem after three failed connection attempts.
- Update to ESP-IDF v5.4.3.
1.2.12
- Update to ESP-IDF v5.3.4.
1.2.11
- Update dependencies
- Fix for DNS lookup when a single custom DNS server is configured
- Configure network hostname as
ttigpro-112233(where112233are the last six hex digits of the MAC address) - Reduce connect restart watchdog from 180 to 60 attempts
- Simplify logging
1.2.10
- Adjust task stack sizes to avoid potential memory corruption
- Increase DNS cache
- Switch to ESP-IDF v5.3.3
1.2.9
- Fix LoRa Packet Forwarder deadlock
1.2.8
- Fix DNS lookup issues
- Update to ESP-IDF v5.4.1
1.2.7
- Fix support for WPA-PSK authentication mode
- Upload logs of all log levels after a panic abort
- Panic abort after reaching a maximum number of connection attempts
1.2.6
- Disable configuring DNS servers from DHCP
- Add support for WPA-PSK authentication mode
1.2.5
- Fix memory corruption
- Fix memory leak
1.2.4
- Fix stack overflow
1.2.3
- Update to ESP-IDF v5.4
- Optimize memory usage
- Fix memory leak
- Optimize logging
1.2.2
- Fix firmware update rollback when the update requires a partition table update
1.2.1
- Add core dump functionality to products with bootloader version 1
- Improve resilience against slow networks
1.2.0
- Add bootloader version 2 with flash encryption
- Panic abort when no memory can be allocated for the TLS handshake
- Add remote reboot, diagnostics file and logs upload
- Update to ESP-IDF v5.3.2
1.1.1
- Fix memory leak
- Send reset count and reason to the Gateway Controller
1.1.0
- Optimize memory usage
- Fix memory corruption
- Avoid restarting LoRa packet forwarder when the configuration did not change
- Reconnect via Ethernet or WiFi if that interface comes up
- Reconnect faster
- Reconnect via the network interface that came up last
- Optimize LoRa packet forwarder protocol and ping behavior to reduce bandwidth
- Improve logging
- Save and restore static IP configuration
- First start Ethernet and WiFi as Cellular needs more time
- Fix LoRa RSSI offset
- Implement LoRa downlink queue
- Update to ESP-IDF v5.3.1
0.1.0
First release to manufacturing version.