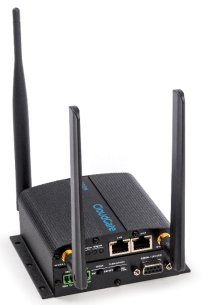
Option Wireless Technology’s CloudGate is the carrier-approved IoT solution platform that delivers device connectivity, security and processing power for global IoT applications.
This guide will help you set up the CloudGate gateway to communicate over The Things Stack using LoRa Basics Station.
For more information, see CloudGate Universe documentation site (free login required to access).
Prerequisites
- User account on The Things Stack with rights to create Gateways.
- CloudGate Gateway with firmware version
2.96.0or newer, connected to Internet via Ethernet or LTE. - CG2132 LoRa expansion card installed in to the CloudGate.
CloudGate Setup
For the first-time hardware and software setup, you can refer to the appropriate configuration guide on the CloudGate Universe documentation page. Here, we have included a few short steps to help you to get started.
Connect the CloudGate to the Internet via Ethernet
Connect an Ethernet cable to the WAN port of the CloudGate gateway. The WAN port supports DHCP and should automatically obtain an IP address from the network.
Connect the CloudGate to the Internet via LTE
Install the LoRa expansion card into the CloudGate gateway.
Attach the appropriate antennas to the antenna connectors on the front of the device. The right SMA connector is for the main antenna, and the left SMA connector is for the GPS/diversity antenna.
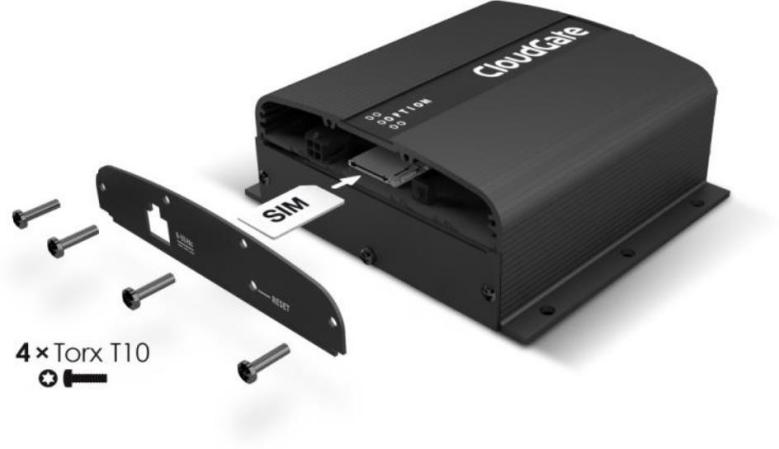
Install the micro-SIM card by removing the plate on the back side of the CloudGate. Insert the micro SIM into the slot as shown in the picture on the right.
Connect your PC to the CloudGate
Power on the CloudGate by plugging in the 12VDC power supply. The boot process takes about 120 seconds.
Connect one side of an Ethernet cable to the LAN port of the CloudGate, and the other side to your PC. The CloudGate runs a built-in DHCP server, so it will provide your PC with an IP address in the 192.168.1.x range.
Now, open a web browser and navigate to to 192.168.1.1.
Log in using admin as both a username and a password. It is highly recommended to change the default username and password. This can be done in the settings under the System tab.
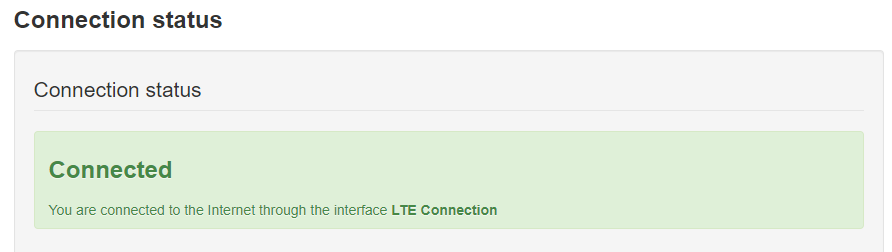
Navigate to the Home tab and check if the CloudGate is connected.
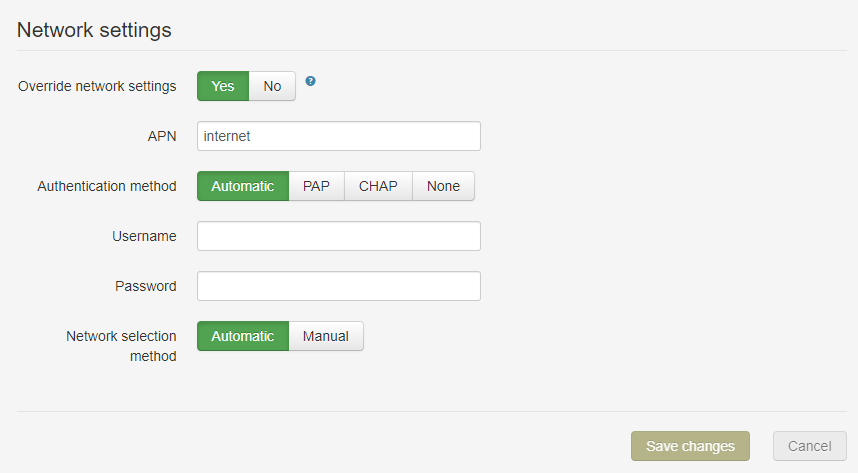
In case the CloudGate is not connected yet and you are connecting it via LTE network, check if the SIM PIN is entered correctly or if the correct APN parameters are used in the Network Settings section (under the Connections → LTE Interface tab).
On the other hand, if you are connecting it via Ethernet, check if the CloudGate has obtained an IP address in the Connections → Main Ethernet Interface tab.
As soon as the CloudGate is connected to the Internet, it will perform a check-in on the CloudGate Universe, and it will start downloading and installing the latest software. You will see the LEDs move in a Knight Rider-like sequence during download and installation.
After the installation is complete, the CloudGate will reboot. This takes approximately 2 minutes to complete.
Go to Home → System Information and make sure that the Basics Station application is installed in the CloudGate.
Note:
The Basics Station application works only for CG2132 and CG8102 LoRa cards.Connect the CloudGate to The Things Stack
Registration
Create a gateway by following the instructions for Adding Gateways.
The Gateway EUI is the MAC address of the CloudGate with FFFE in the middle. For example, if the gateway’s MAC address is 1234567890AB, the Gateway EUI is 123456FFFE7890AB.
Create an API key
LNS establishes a data connection between a LoRa Basics Station and The Things Stack. To connect a gateway using the LNS protocol, it requires an API Key.
Navigate to the API Keys on the left hand menu in your gateway’s settings on The Things Stack and select Add API Key.
Enter a name for your key, select the Link as Gateway to a Gateway Server for traffic exchange, i.e. write uplink and read downlink right and then press Create API Key.
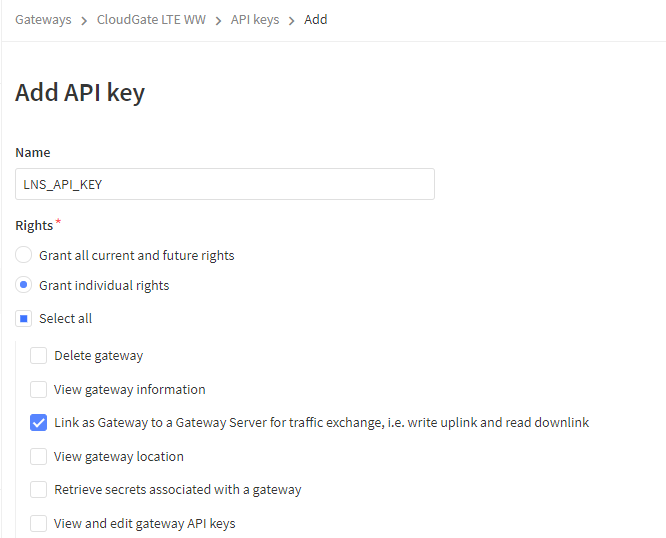
You will see a screen that shows your newly created API Key. You now can copy it in your clipboard by pressing the copy button. After saving the key in a safe place, press I have copied the key.
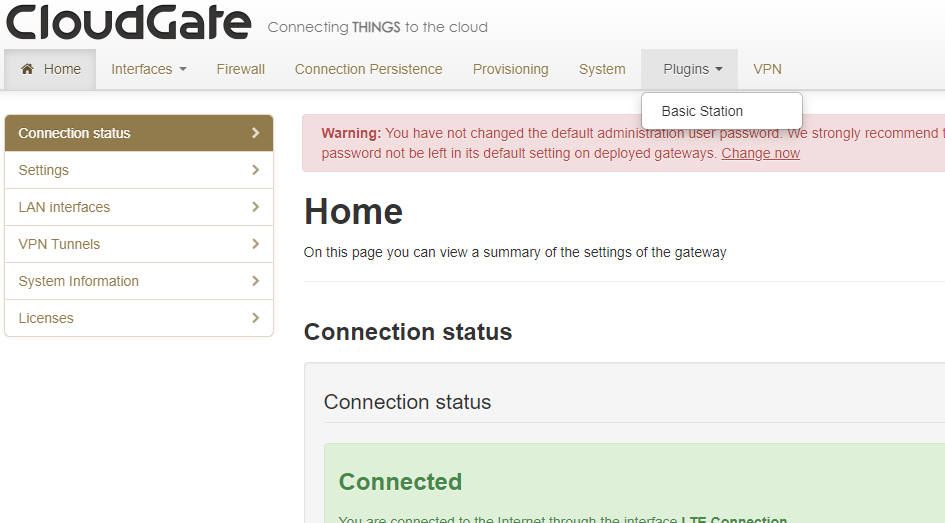
Configure Basics Station
We assume you have made sure that the Basics Station application is installed in your CloudGate as noted in the previous steps.
Now, go to Plugins → Basic Station.
Configure the authentication as LNS, and select the region.
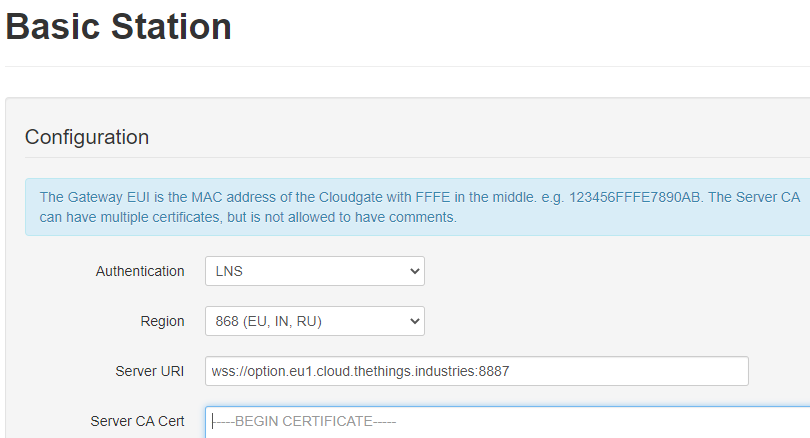
On CloudGate gateways, only CUPS or LNS can be configured. Configuring CUPS will automatically configure LNS, so to use The Things Stack, just follow the instructions for Connecting to CUPS.
The server address is the network endpoint of The Things Stack LNS. It is a combination of the protocol (wss), the server address, and the port. Enter the following in your gateway as the LNS Server Address: wss://<server-address>:8887.
The server CA certificates can be found from Root Certificates page.
You can download the minimal certificates list, and then copy and paste the content into the Server CA Cert field.
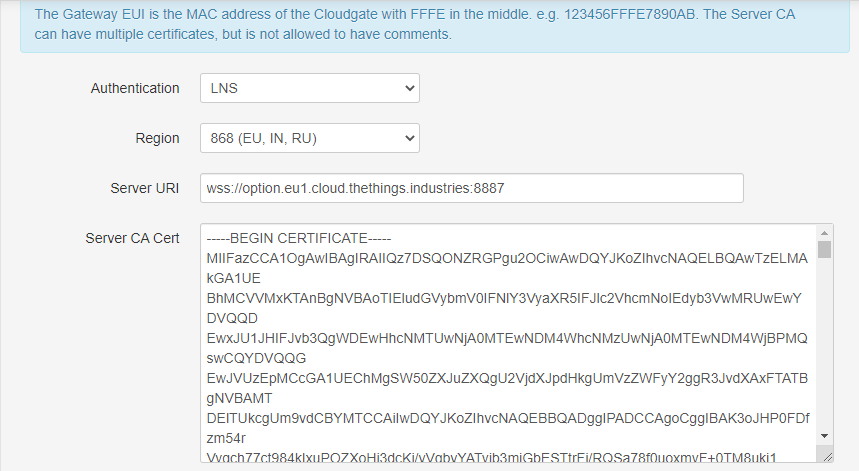
The Gateway Cert field must be left empty.
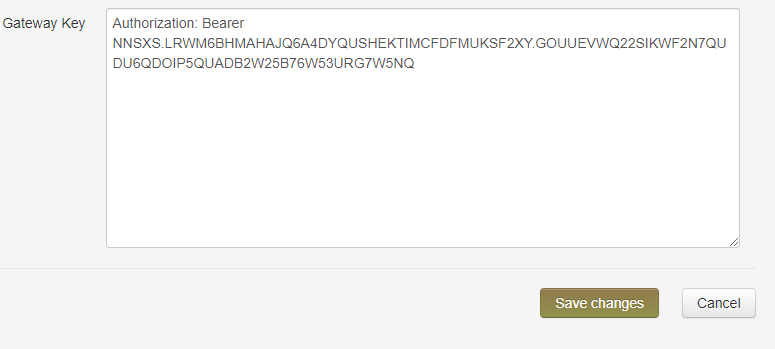
In the Gateway Key field, enter the LNS API key you created during previous steps. The format should be Authorization: Bearer <api-key>. Click on Save Changes to finish.
If your configuration was successful, your gateway will connect to The Things Stack after a couple of seconds!