InfluxDB Cloud 2.0 is a serverless real-time monitoring platform specifically created for working with time series data. It combines data storage, user interface, visualization, processing, monitoring and alerting into one cohesive system.
Besides being able to send data to InfluxDB Cloud 2.0, Telegraf agent can also be configured to subscribe to messages published by The Things Stack MQTT server or to listen to messages sent by The Things Stack Application Server via HTTP Webhooks. This guide contains the instructions for both of these implementations.
For additional info on configuring the Telegraf agent and using its plugins, check out the official documentation.
Prerequisites
-
Telegraf agent (version 1.9.2 or higher) installed on your system.
Setup InfluxDB Cloud 2.0
Log in to your InfluxDB Cloud 2.0 account and select the Data on the left hand menu.
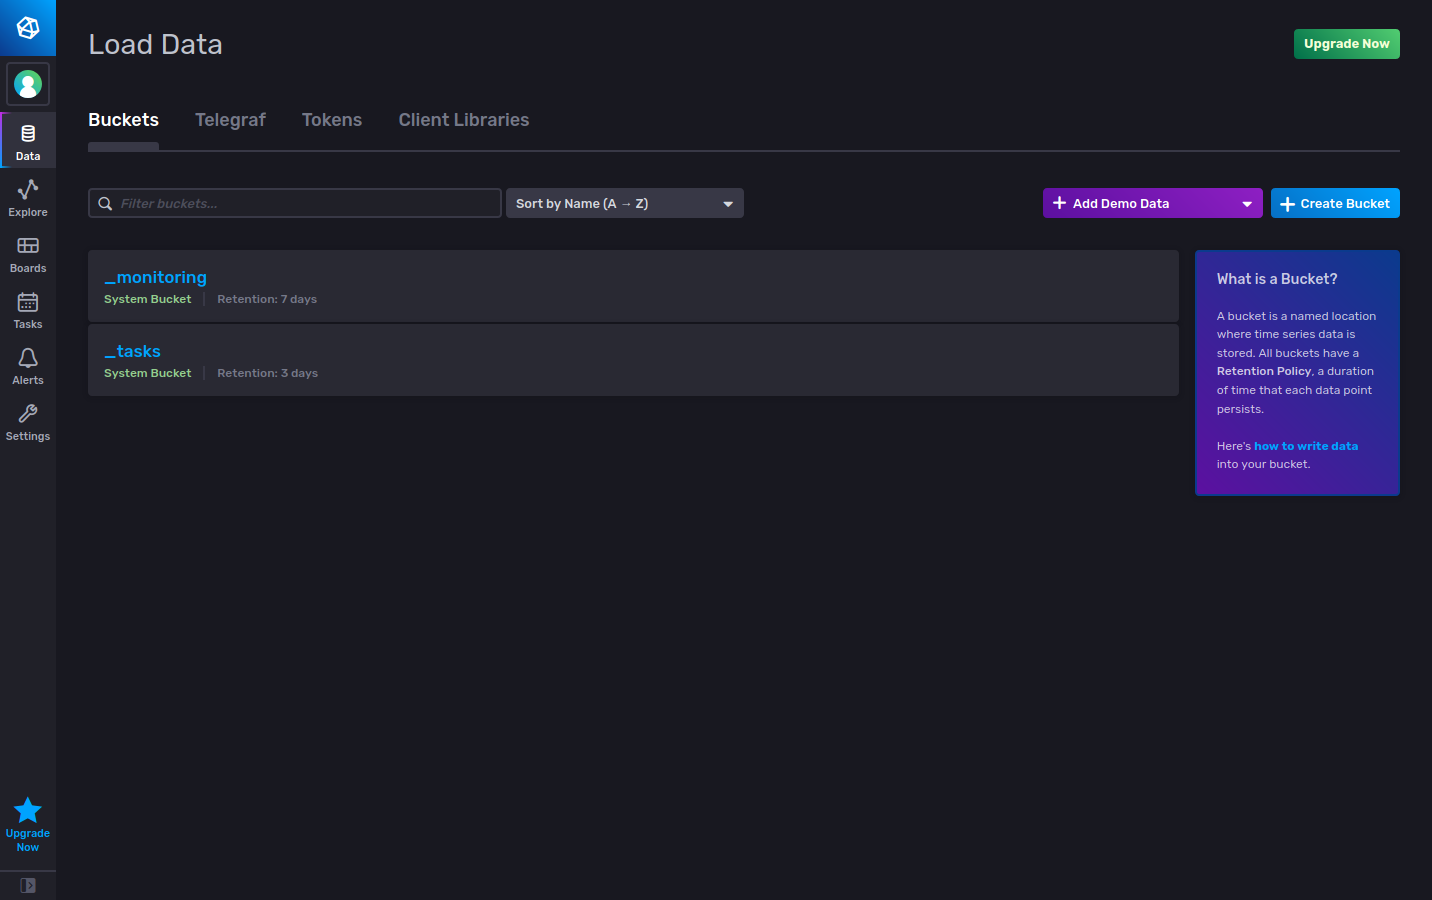
On the Buckets tab, click the Create Bucket button to create a new bucket.
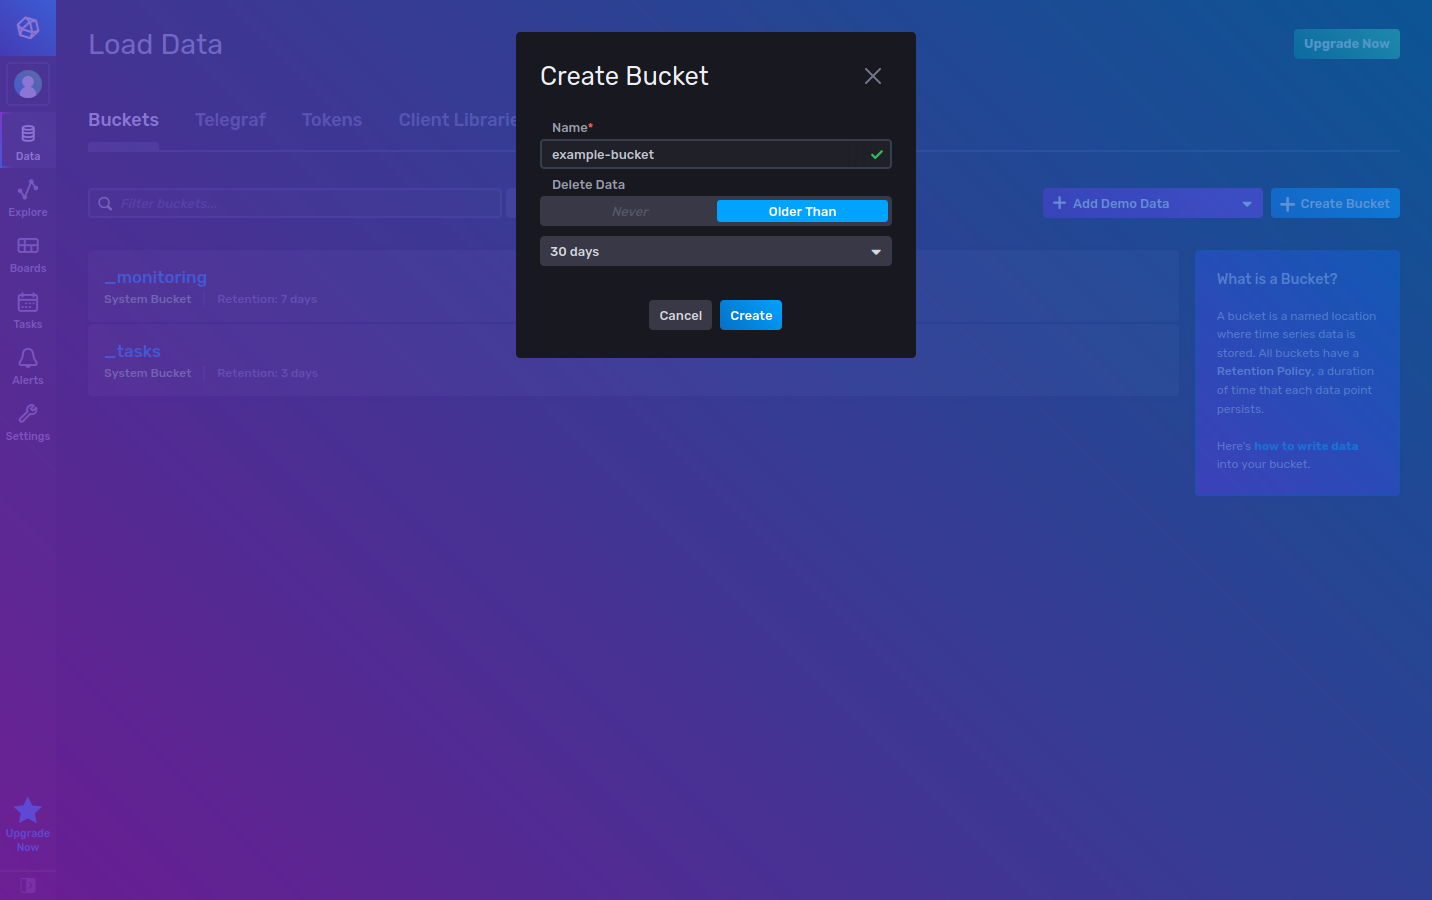
Give your bucket a name, choose how long the data will remain in the database and finish by clicking Create.
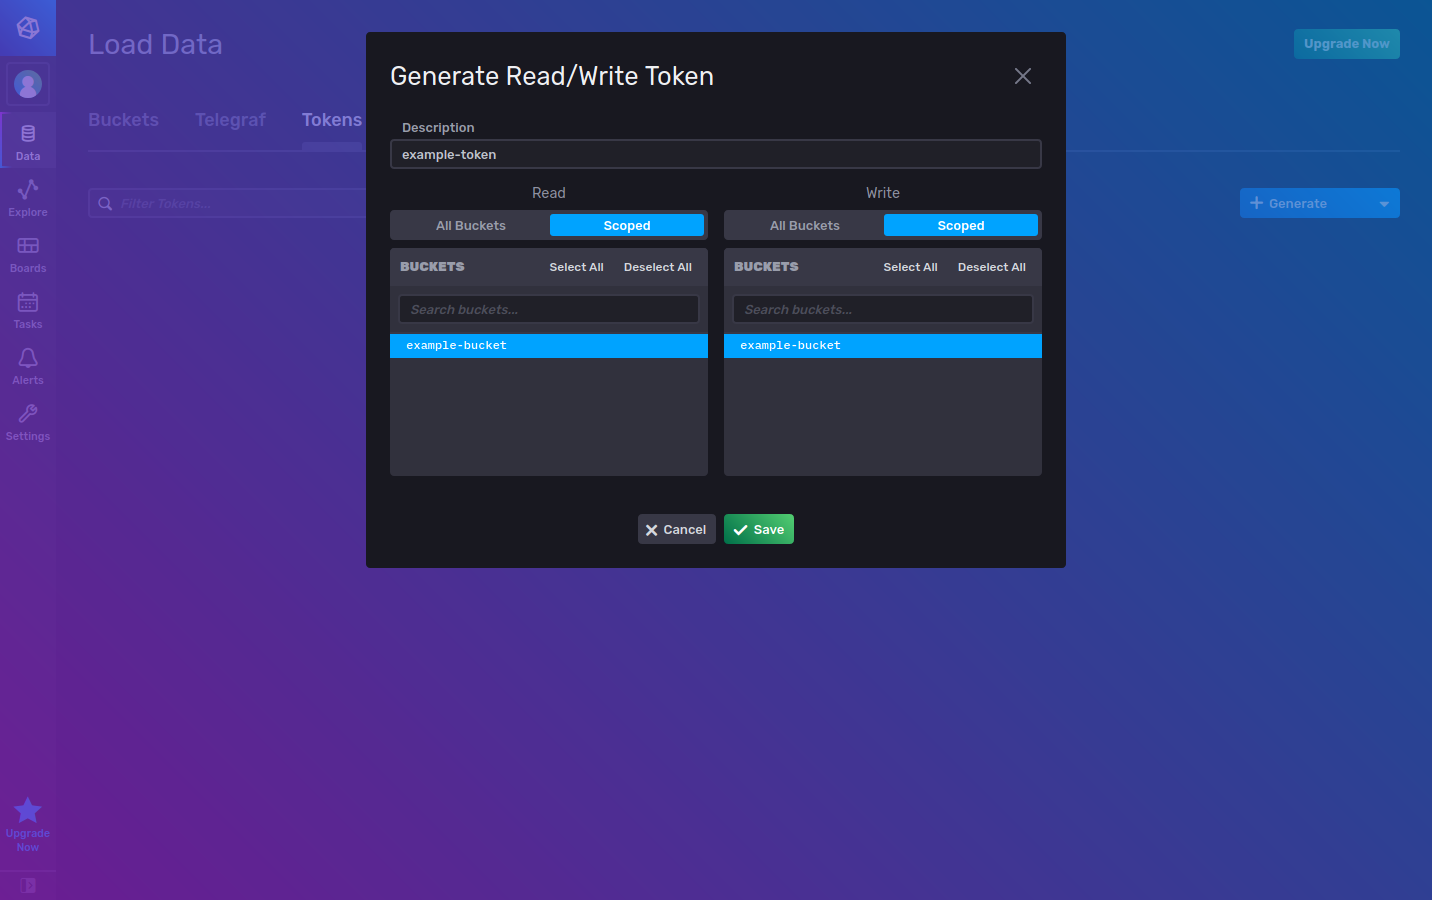
Next, on the Tokens tab, select Generate to generate a new Read/Write Token.
Enter the Description and select the bucket you wish to enable reading and writing for.
Go to the Telegraf tab and select Create Configuration.
When asked What do you want to monitor?, select System.
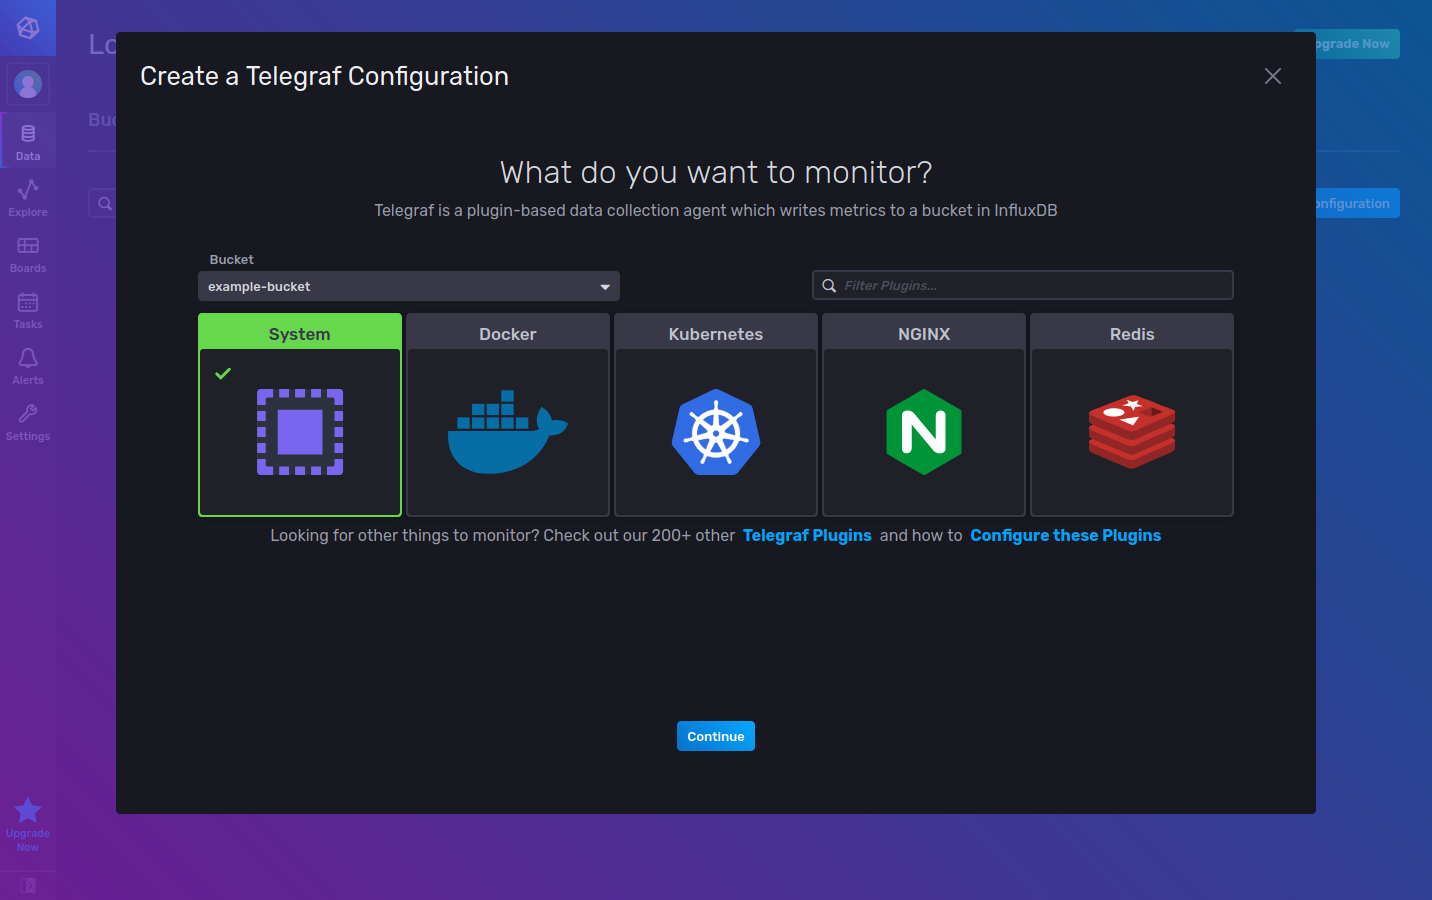
Name your configuration, select Create and Verify and then Finish.
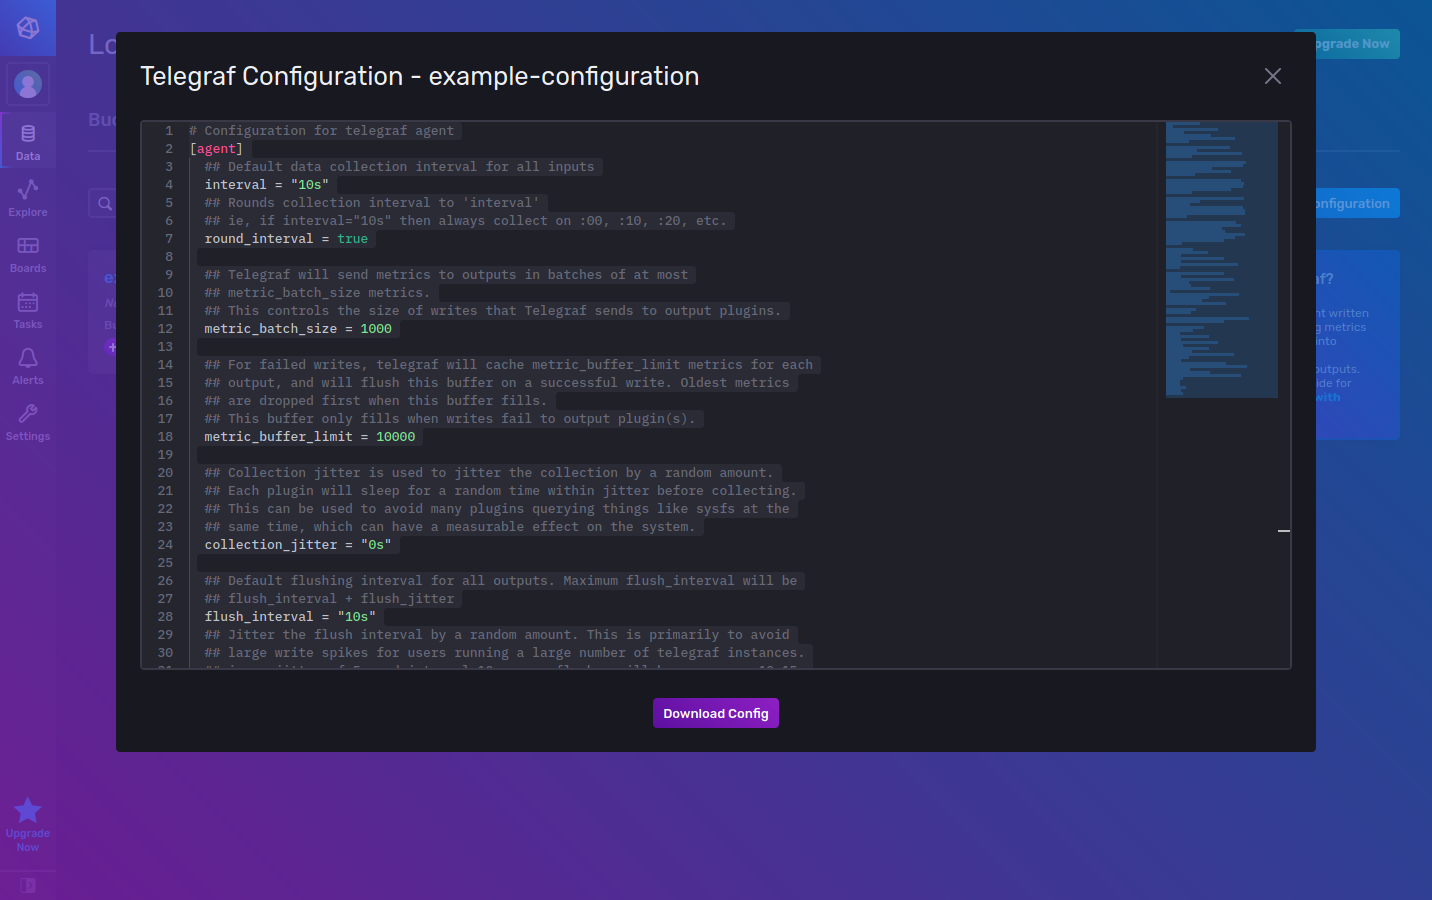
Once the configuration is created, you can simply click on its name in the Telegraf tab and download the configuration file. You can further edit this file for usage with the MQTT or Webhook integration.
Configure Telegraf for MQTT Integration
This section shows you how to configure your Telegraf agent with MQTT Consumer plugin used for connecting to The Things Stack MQTT Server.
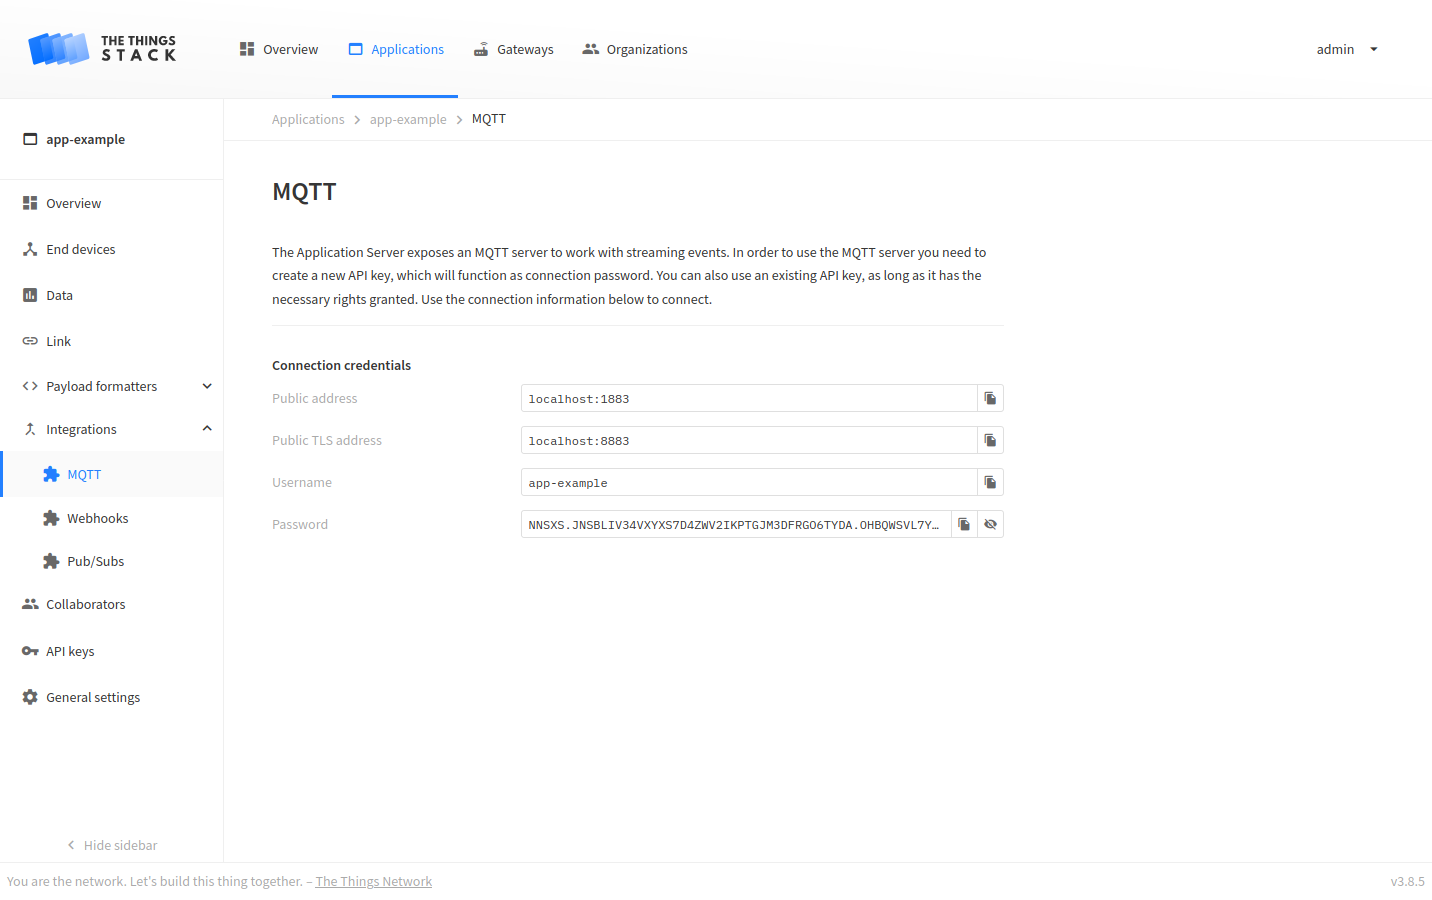
The information needed to configure Telegraf can be found on the MQTT tab in The Things Stack Integrations menu.
Once you have downloaded the Telegraf configuration file as described in InfluxDB Cloud 2.0 Setup, update it by adding the following lines and modifying them according to your MQTT server info:
[[inputs.mqtt_consumer]]
#
# MQTT broker URLs to be used. The format is scheme://host:port, schema can be tcp, ssl, or ws.
  servers = ["tcp://localhost:1883"]
#
# Topics to subscribe to
  topics = ["#"]
#
# Username and password
  username = "app-example"
  password = "NNSXS.JNSBLIV34VXYXS7D4ZWV2IKPTGJM3DFRGO6TYDA.OHBQWSVL7Y.........."
#
# Needed only if your payload type is string, since Telegraf does not forward data of this type by default
  json_string_fields = ["uplink_message_frm_payload"]
#
# Define the message format
  data_format = "json"
Next, you need to copy the previously generated token from the Tokens tab and export it to an environmental variable to be used by the InfluxDB output plugin, or you can simply pass it directly as a token value in the configuration file. You can set the environmental variable by using the following command in your terminal:
INFLUX_TOKEN="paste your token here"
Run the Telegraf agent in your terminal with the following command:
telegraf --config /path/to/custom/telegraf.conf
Configure Telegraf and The Things Stack for Webhook Integration
This section shows you how to configure the Telegraf agent with HTTP Listener v2 plugin and how to create a belonging Webhook integration on The Things Stack.
Update the Telegraf configuration you previously downloaded as described in InfluxDB Cloud 2.0 Setup by adding the following lines and modifying them according to your setup:
[[inputs.http_listener_v2]]
#
# Address and port to host HTTP listener on
  service_address = ":8080"
#
# Path to listen to
  path = "/telegraf"
#
# HTTP methods to accept
  methods = ["POST"]
#
# Needed only if your payload type is string, since Telegraf does not forward data of this type by default
  json_string_fields = ["uplink_message_frm_payload"]
#
# Define the message format
  data_format = "json"
Copy the generated token from the Tokens tab and use it as a token value for the output plugin in your Telegraf configuration file, or export it to an environmental variable with the following command in your terminal:
INFLUX_TOKEN="paste your token here"
Start the Telegraf agent by running the following command in the terminal:
telegraf --config /path/to/custom/telegraf.conf
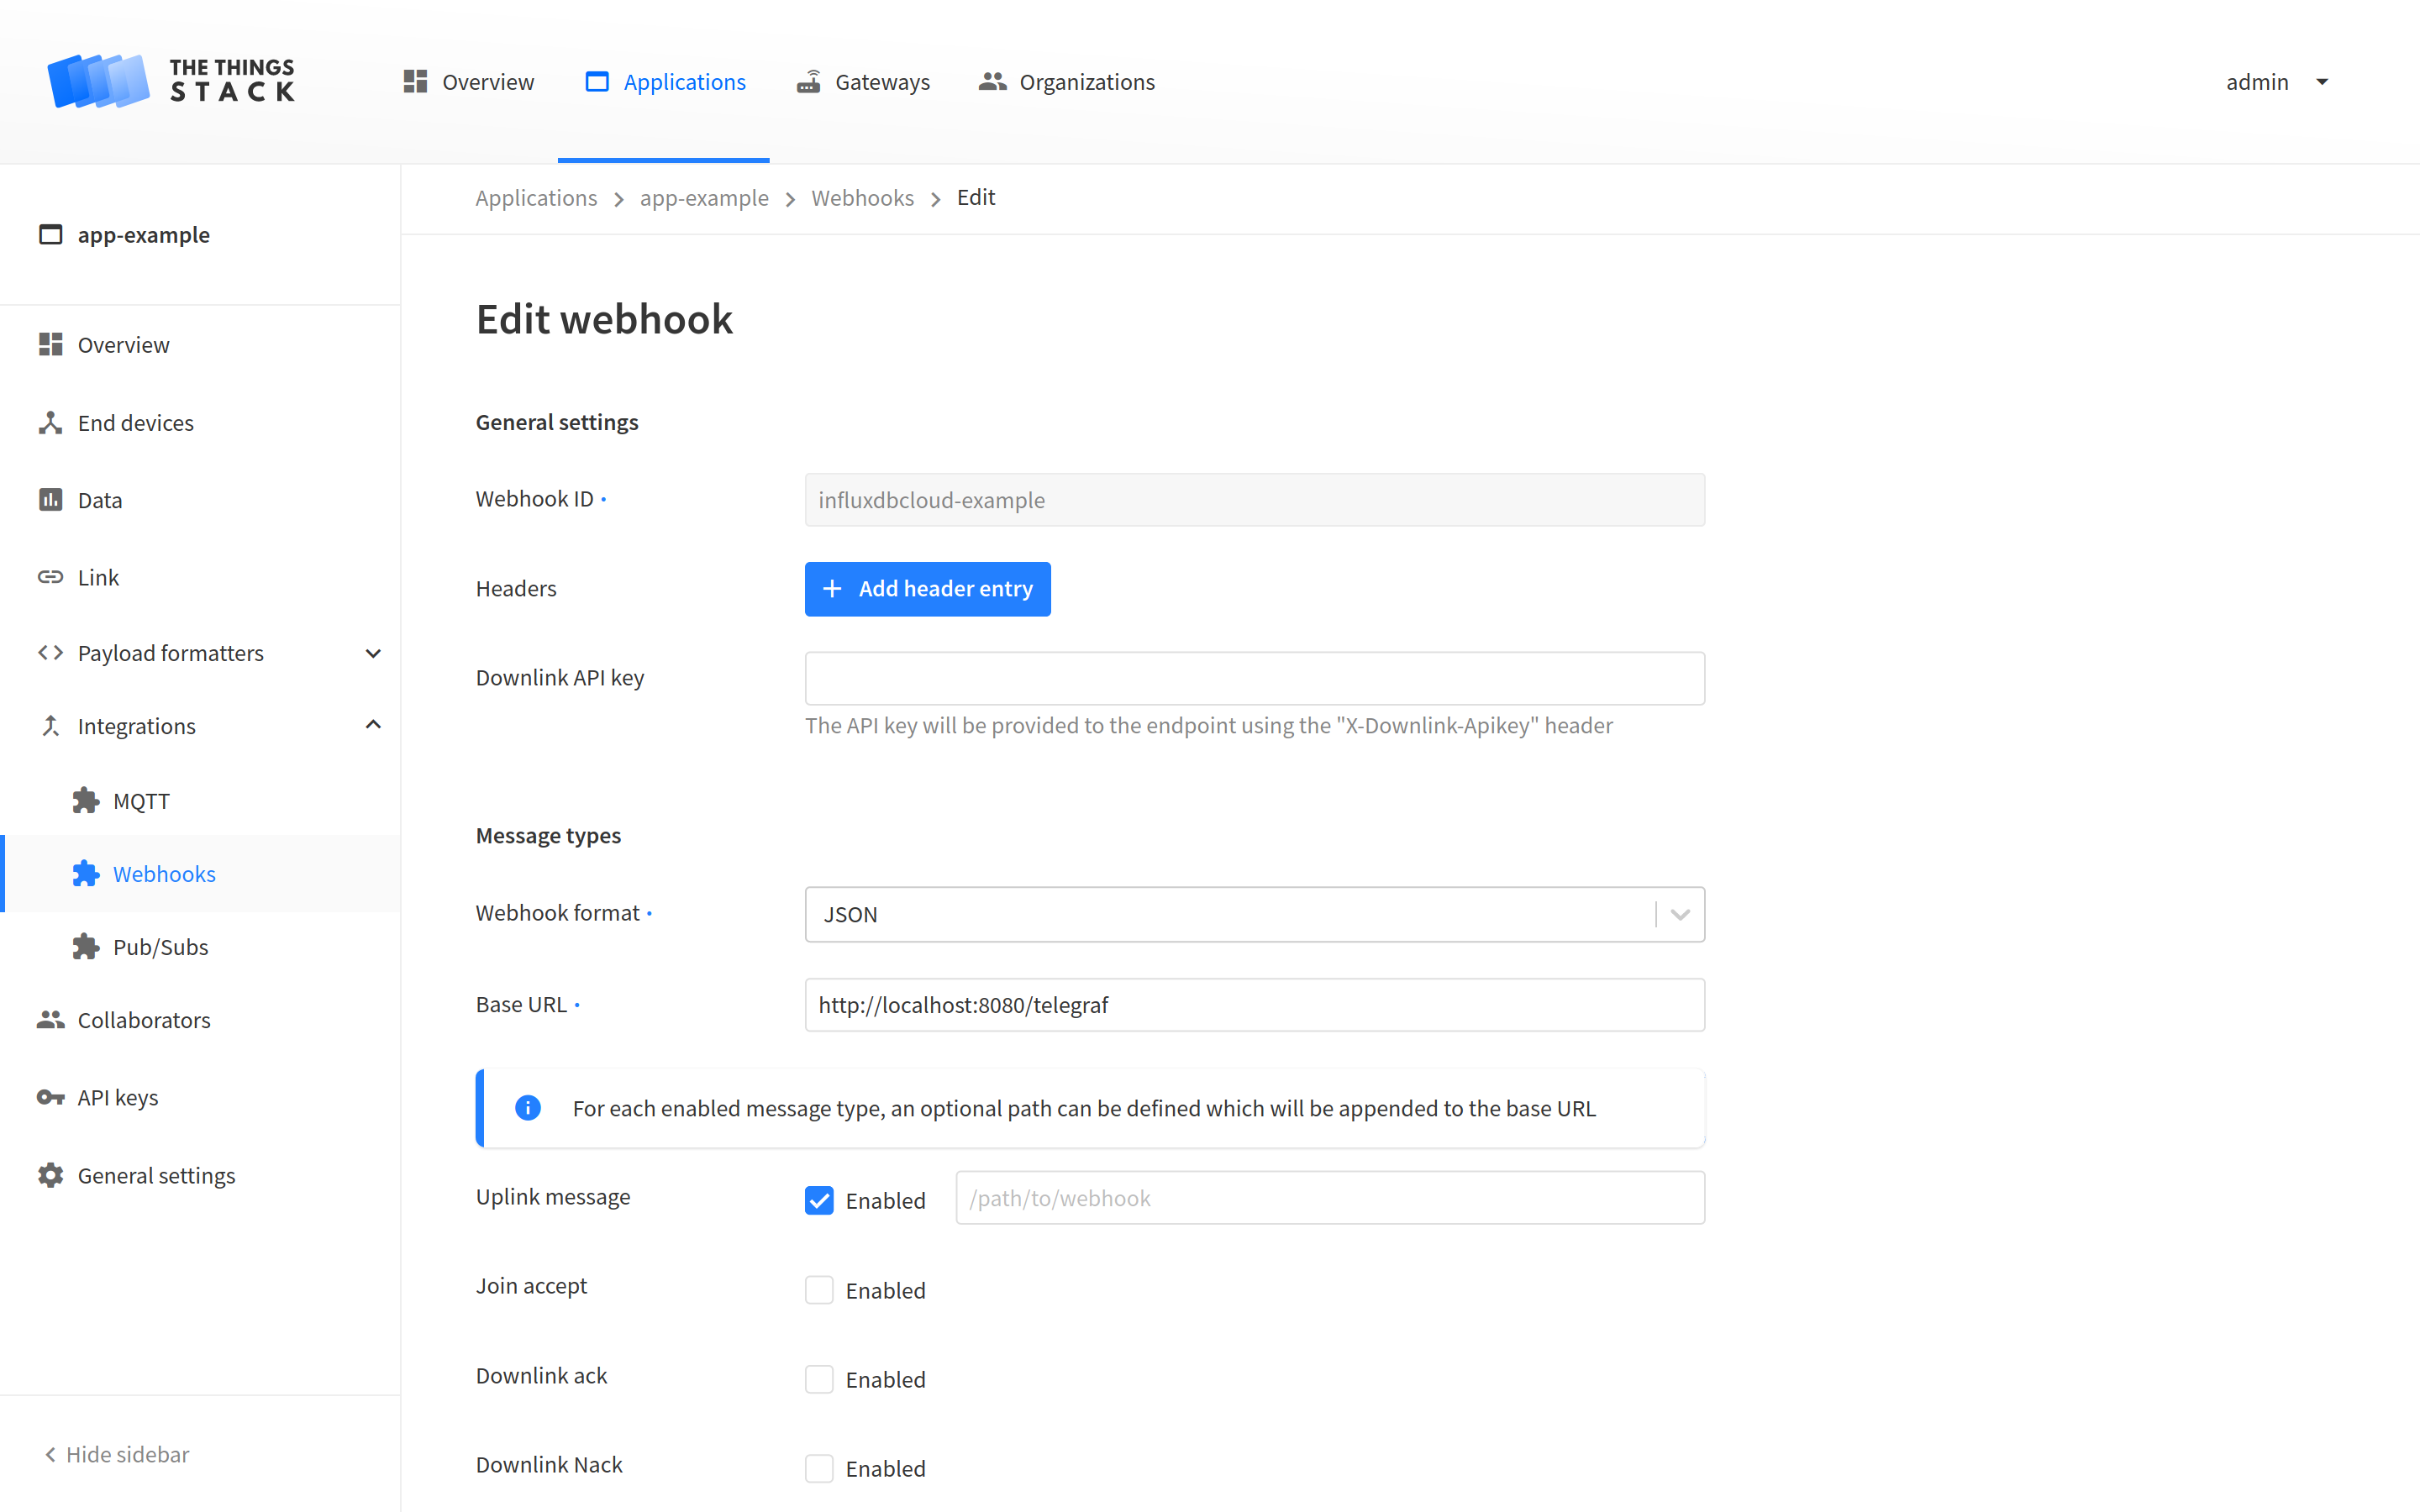
In The Things Stack Console, create a new webhook with JSON Webhook format, set the Base URL to http://localhost:8080/telegraf and tick the box next to the message types you want to enable this webhook for.
Keep in mind that Telegraf agent can be hosted in a remote environment as well. In that case, you need to adjust the Base URL according to your setup.
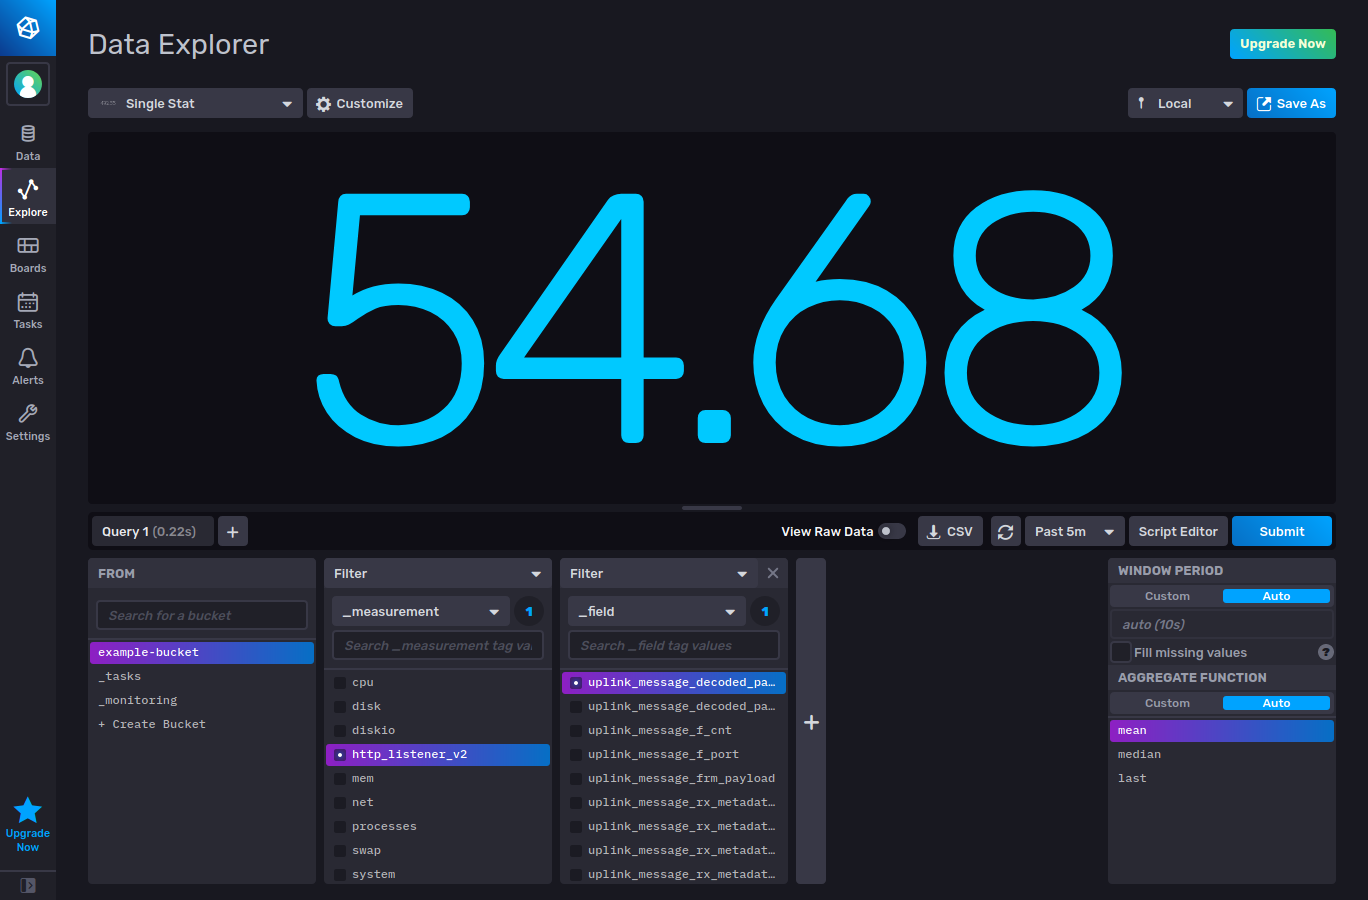
Monitor Your Data
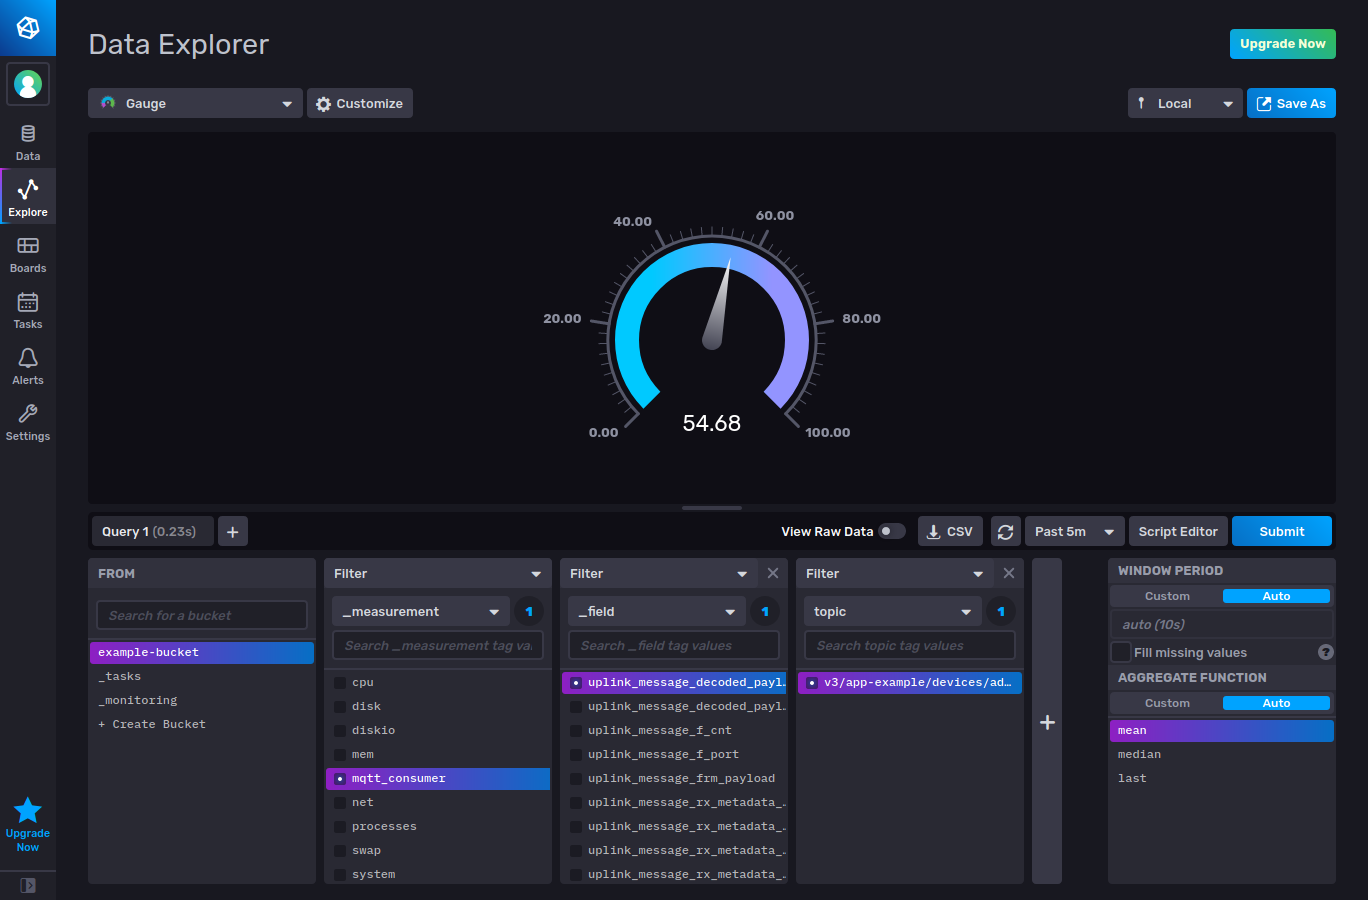
Click the Explore tab on the left in InfluxDB Cloud 2.0. Select your bucket in the FROM window in the bottom. Next, you have to filter your measurements depending on the type of integration.
If you created an MQTT integration, select _measurement on the drop-down menu in the Filter window and tick the mqtt_consumer box. Then you can choose the topic and parameter you wish to monitor.
Otherwise, if you are using Webhook integration, select _measurement on the drop-down menu in the Filter window and tick the http_listener_v2 box. In another Filter window, you can select the uplink_message_decoded_payload and click the Submit field on the right to see the incoming data.