TagoIO combines advanced device management, services, data storage, visualization and analytics to a cloud-based IoT platform, with a wide range of functionalities and easy implementation.
Prerequisites
Setup TagoIO
Log in to your TagoIO user account and click the Devices button on the left hand menu.
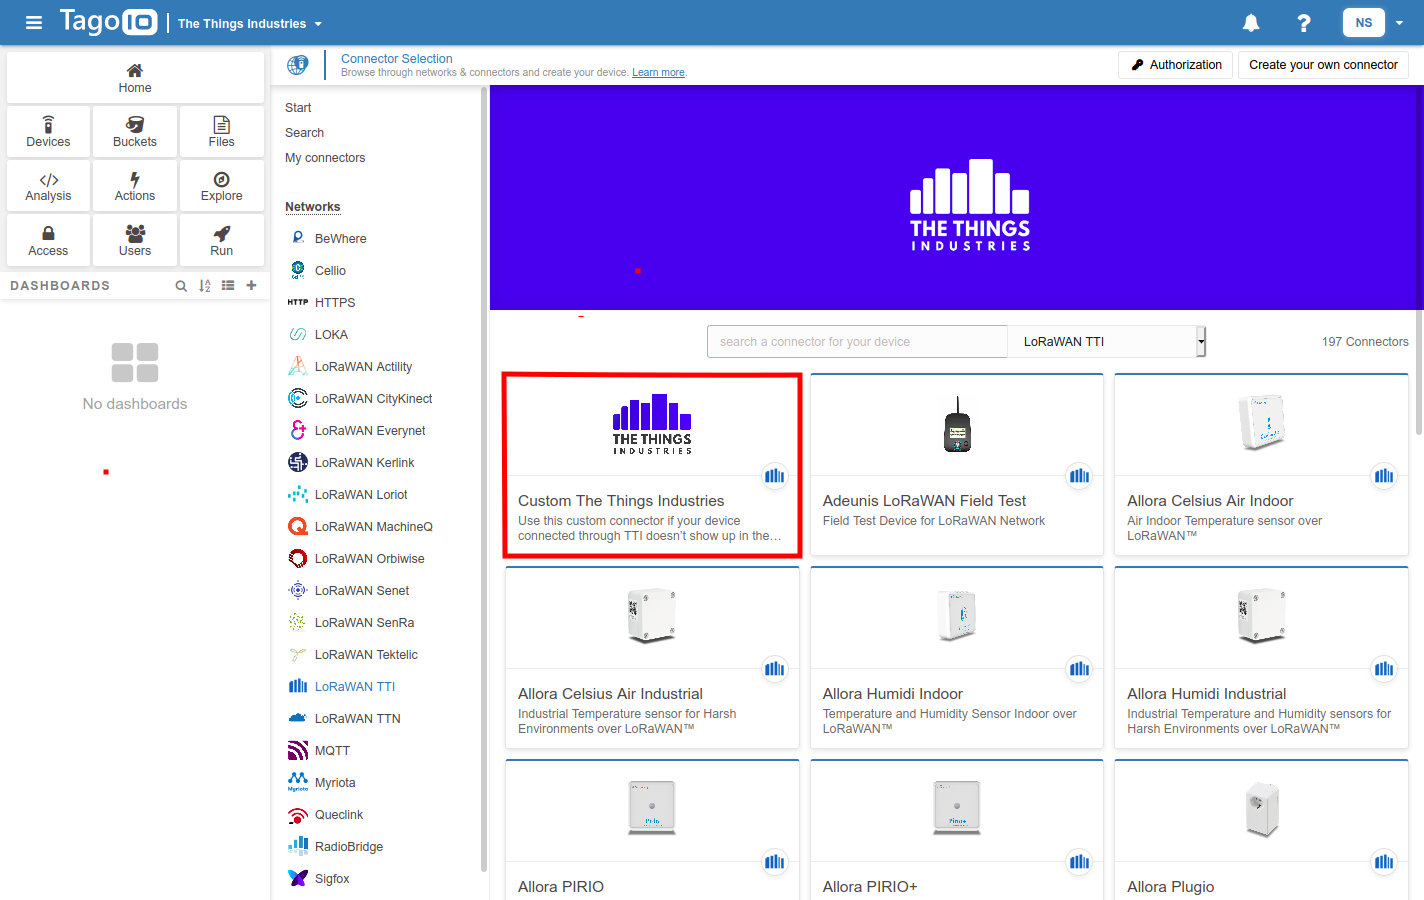
The list of available connectors will pop out immediately if you do not own any devices. If you already own some devices on TagoIO, select Add Device in the upper right to add a new device.
Choose LoRaWAN TTI connector and then select Custom The Things Industries.
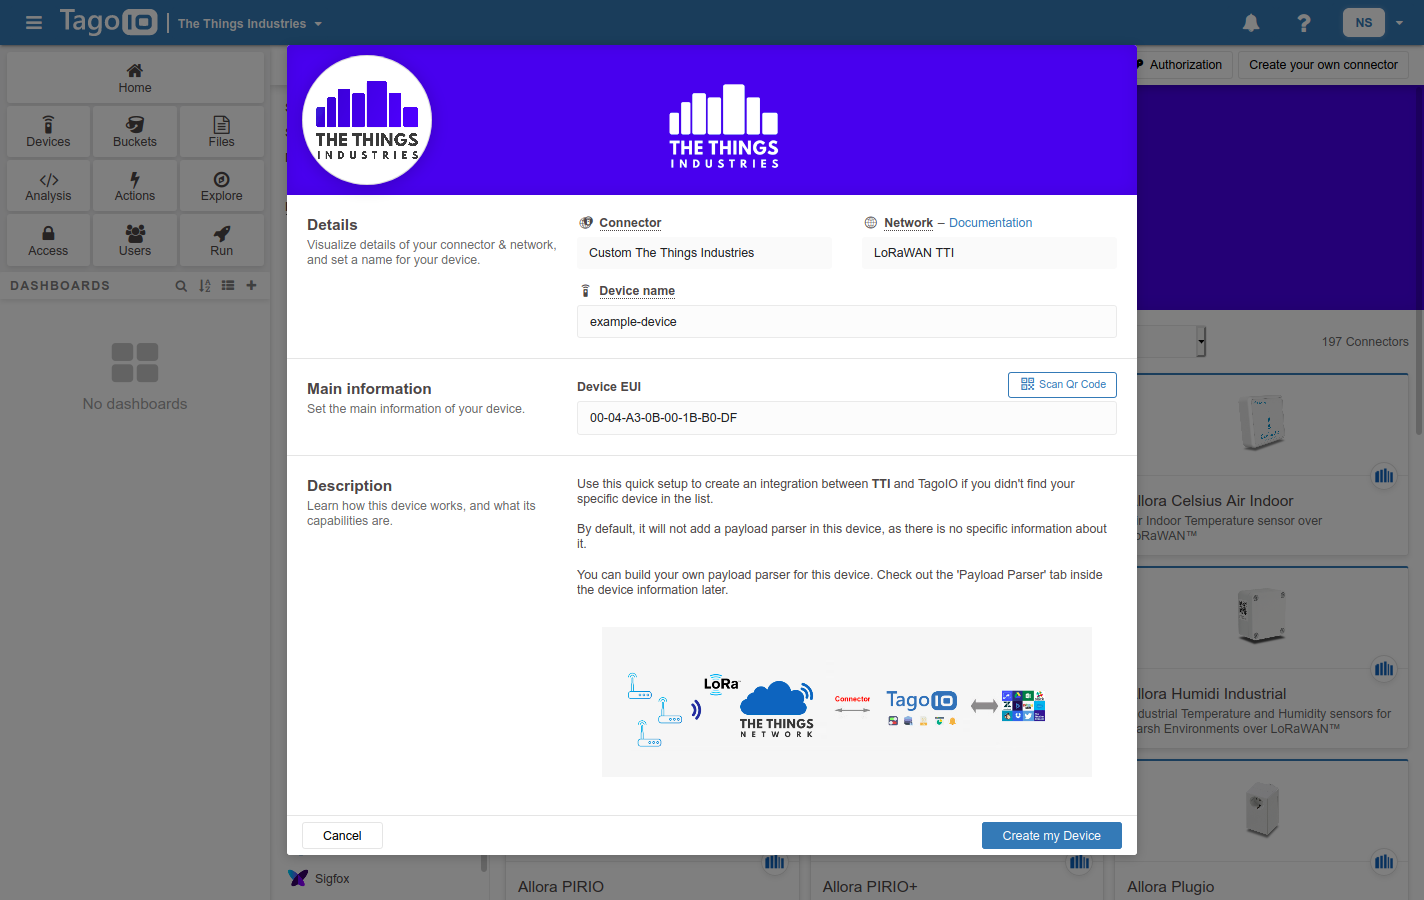
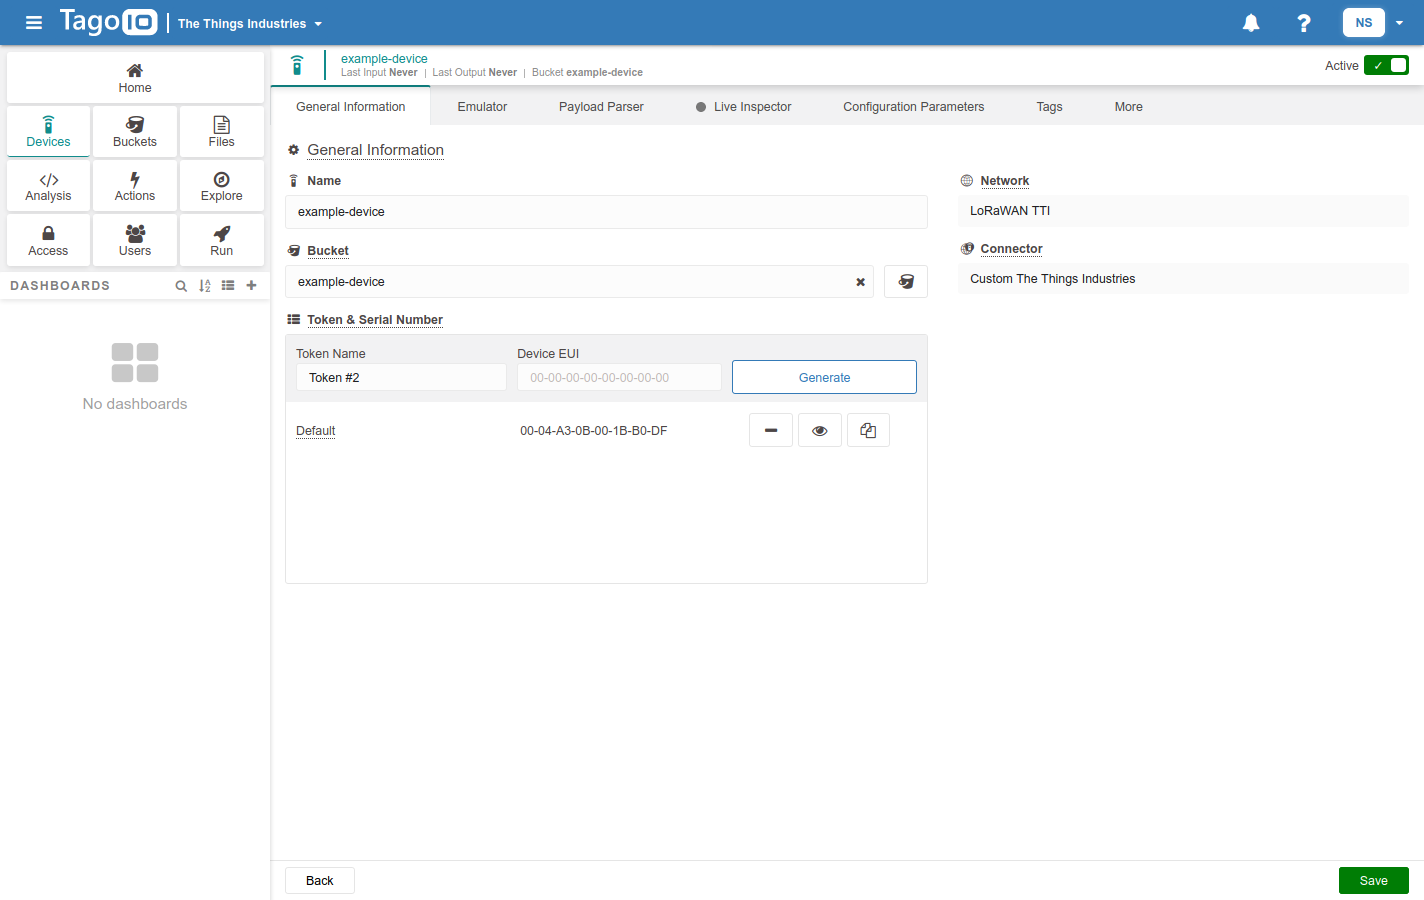
Give a name to your device by filling the Device name field, enter the Device EUI and click the Create my device button to finish.
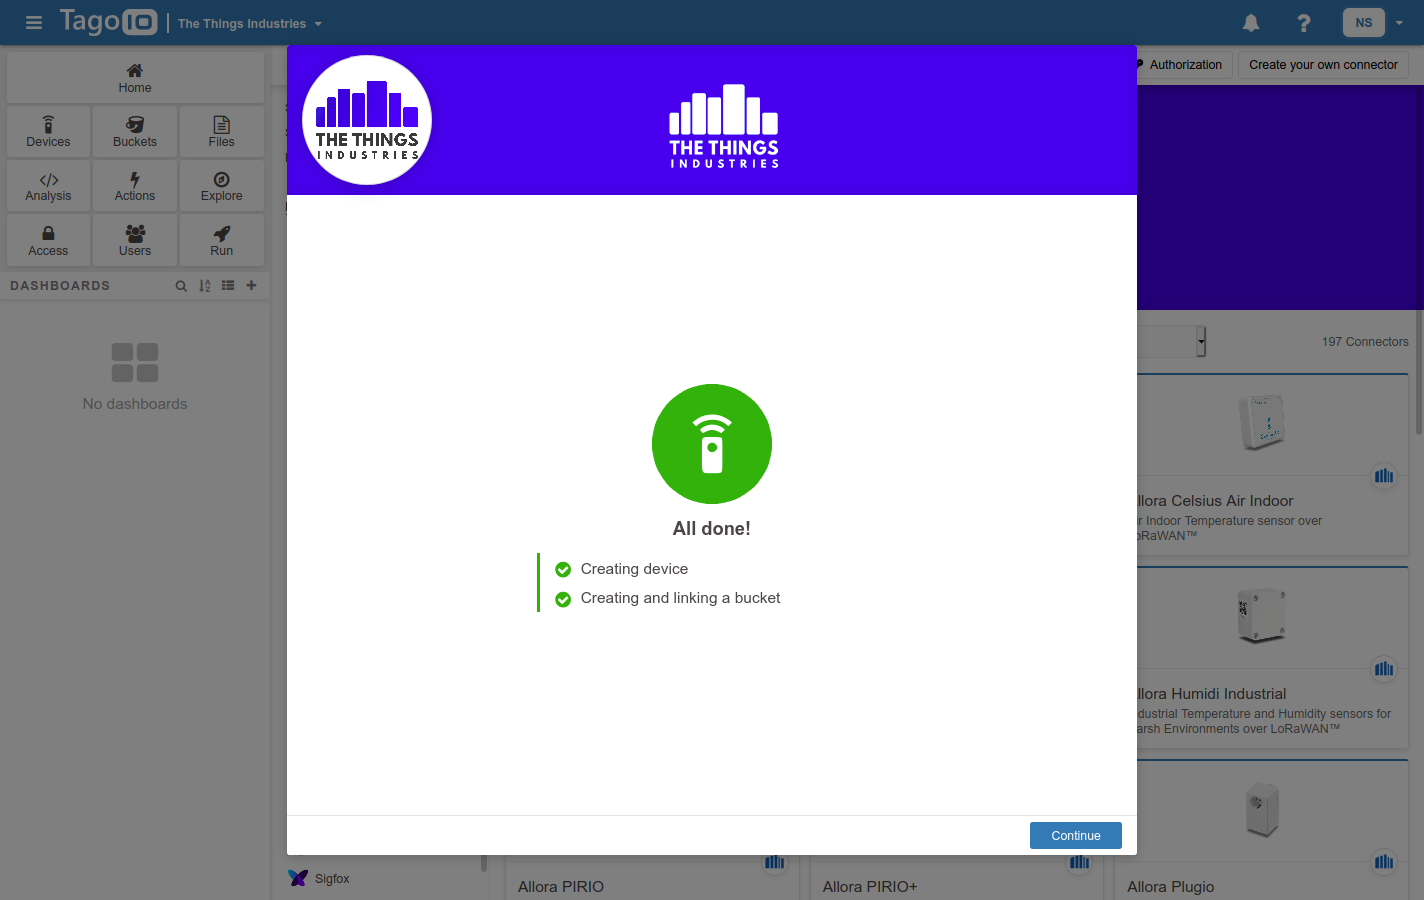
When the device has been succesfully created, you will be presented with a confirmation window, so you can just click Continue.
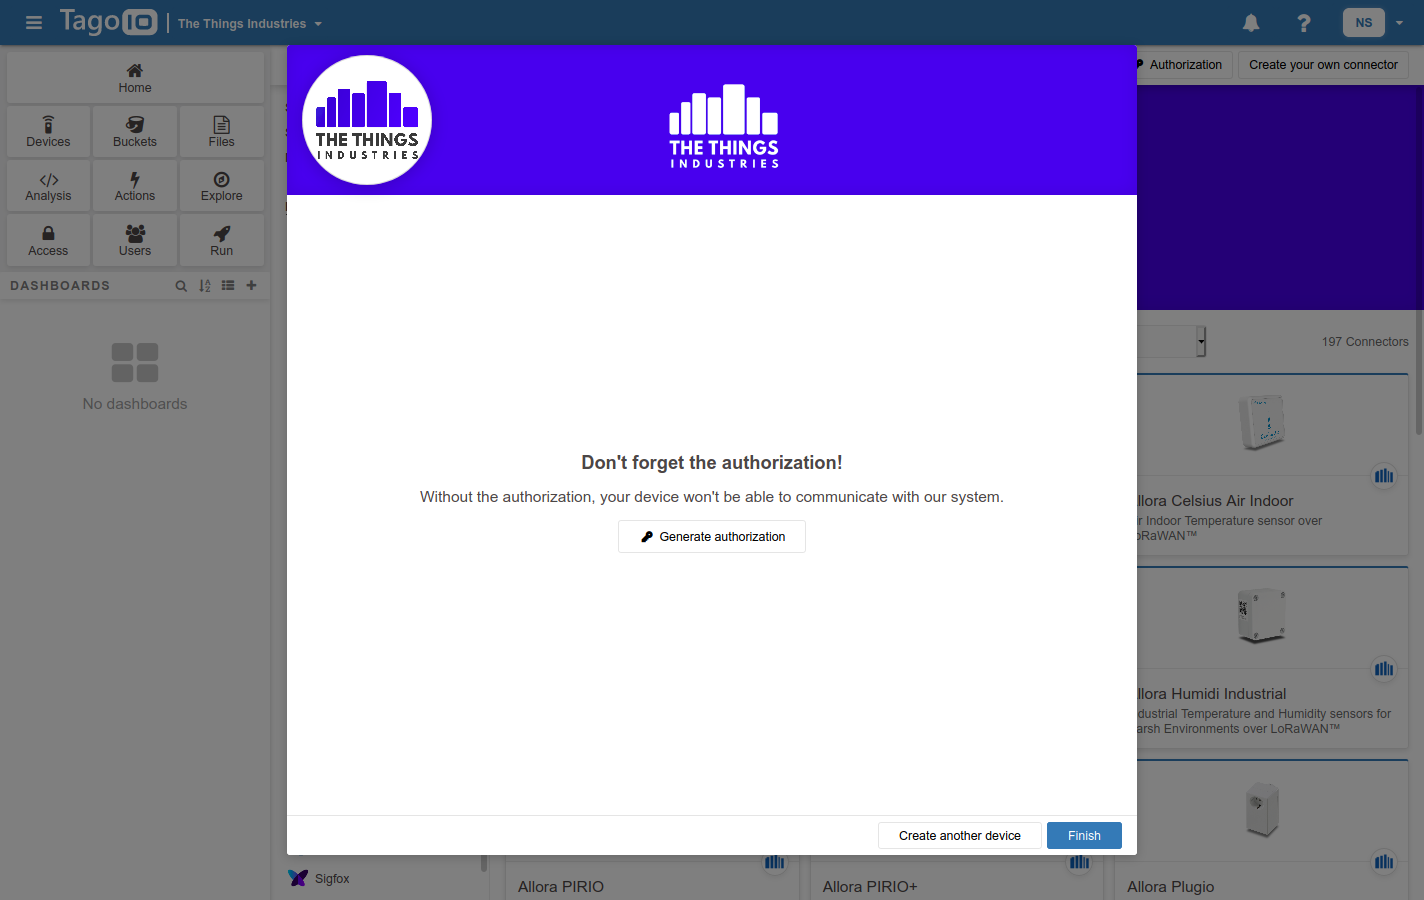
Now, Don’t forget the authorization! Click the Generate authorization button.
When redirected to the Service Authorization page, just fill in the Name field and select Generate. Copy this value for further steps.
Click Finish and select the device you just created in Devices to access its features.
Navigate to the Live Inspector tab and press the Start button to prepare the integration for the incoming messages from The Things Stack.
Configure The Things Stack
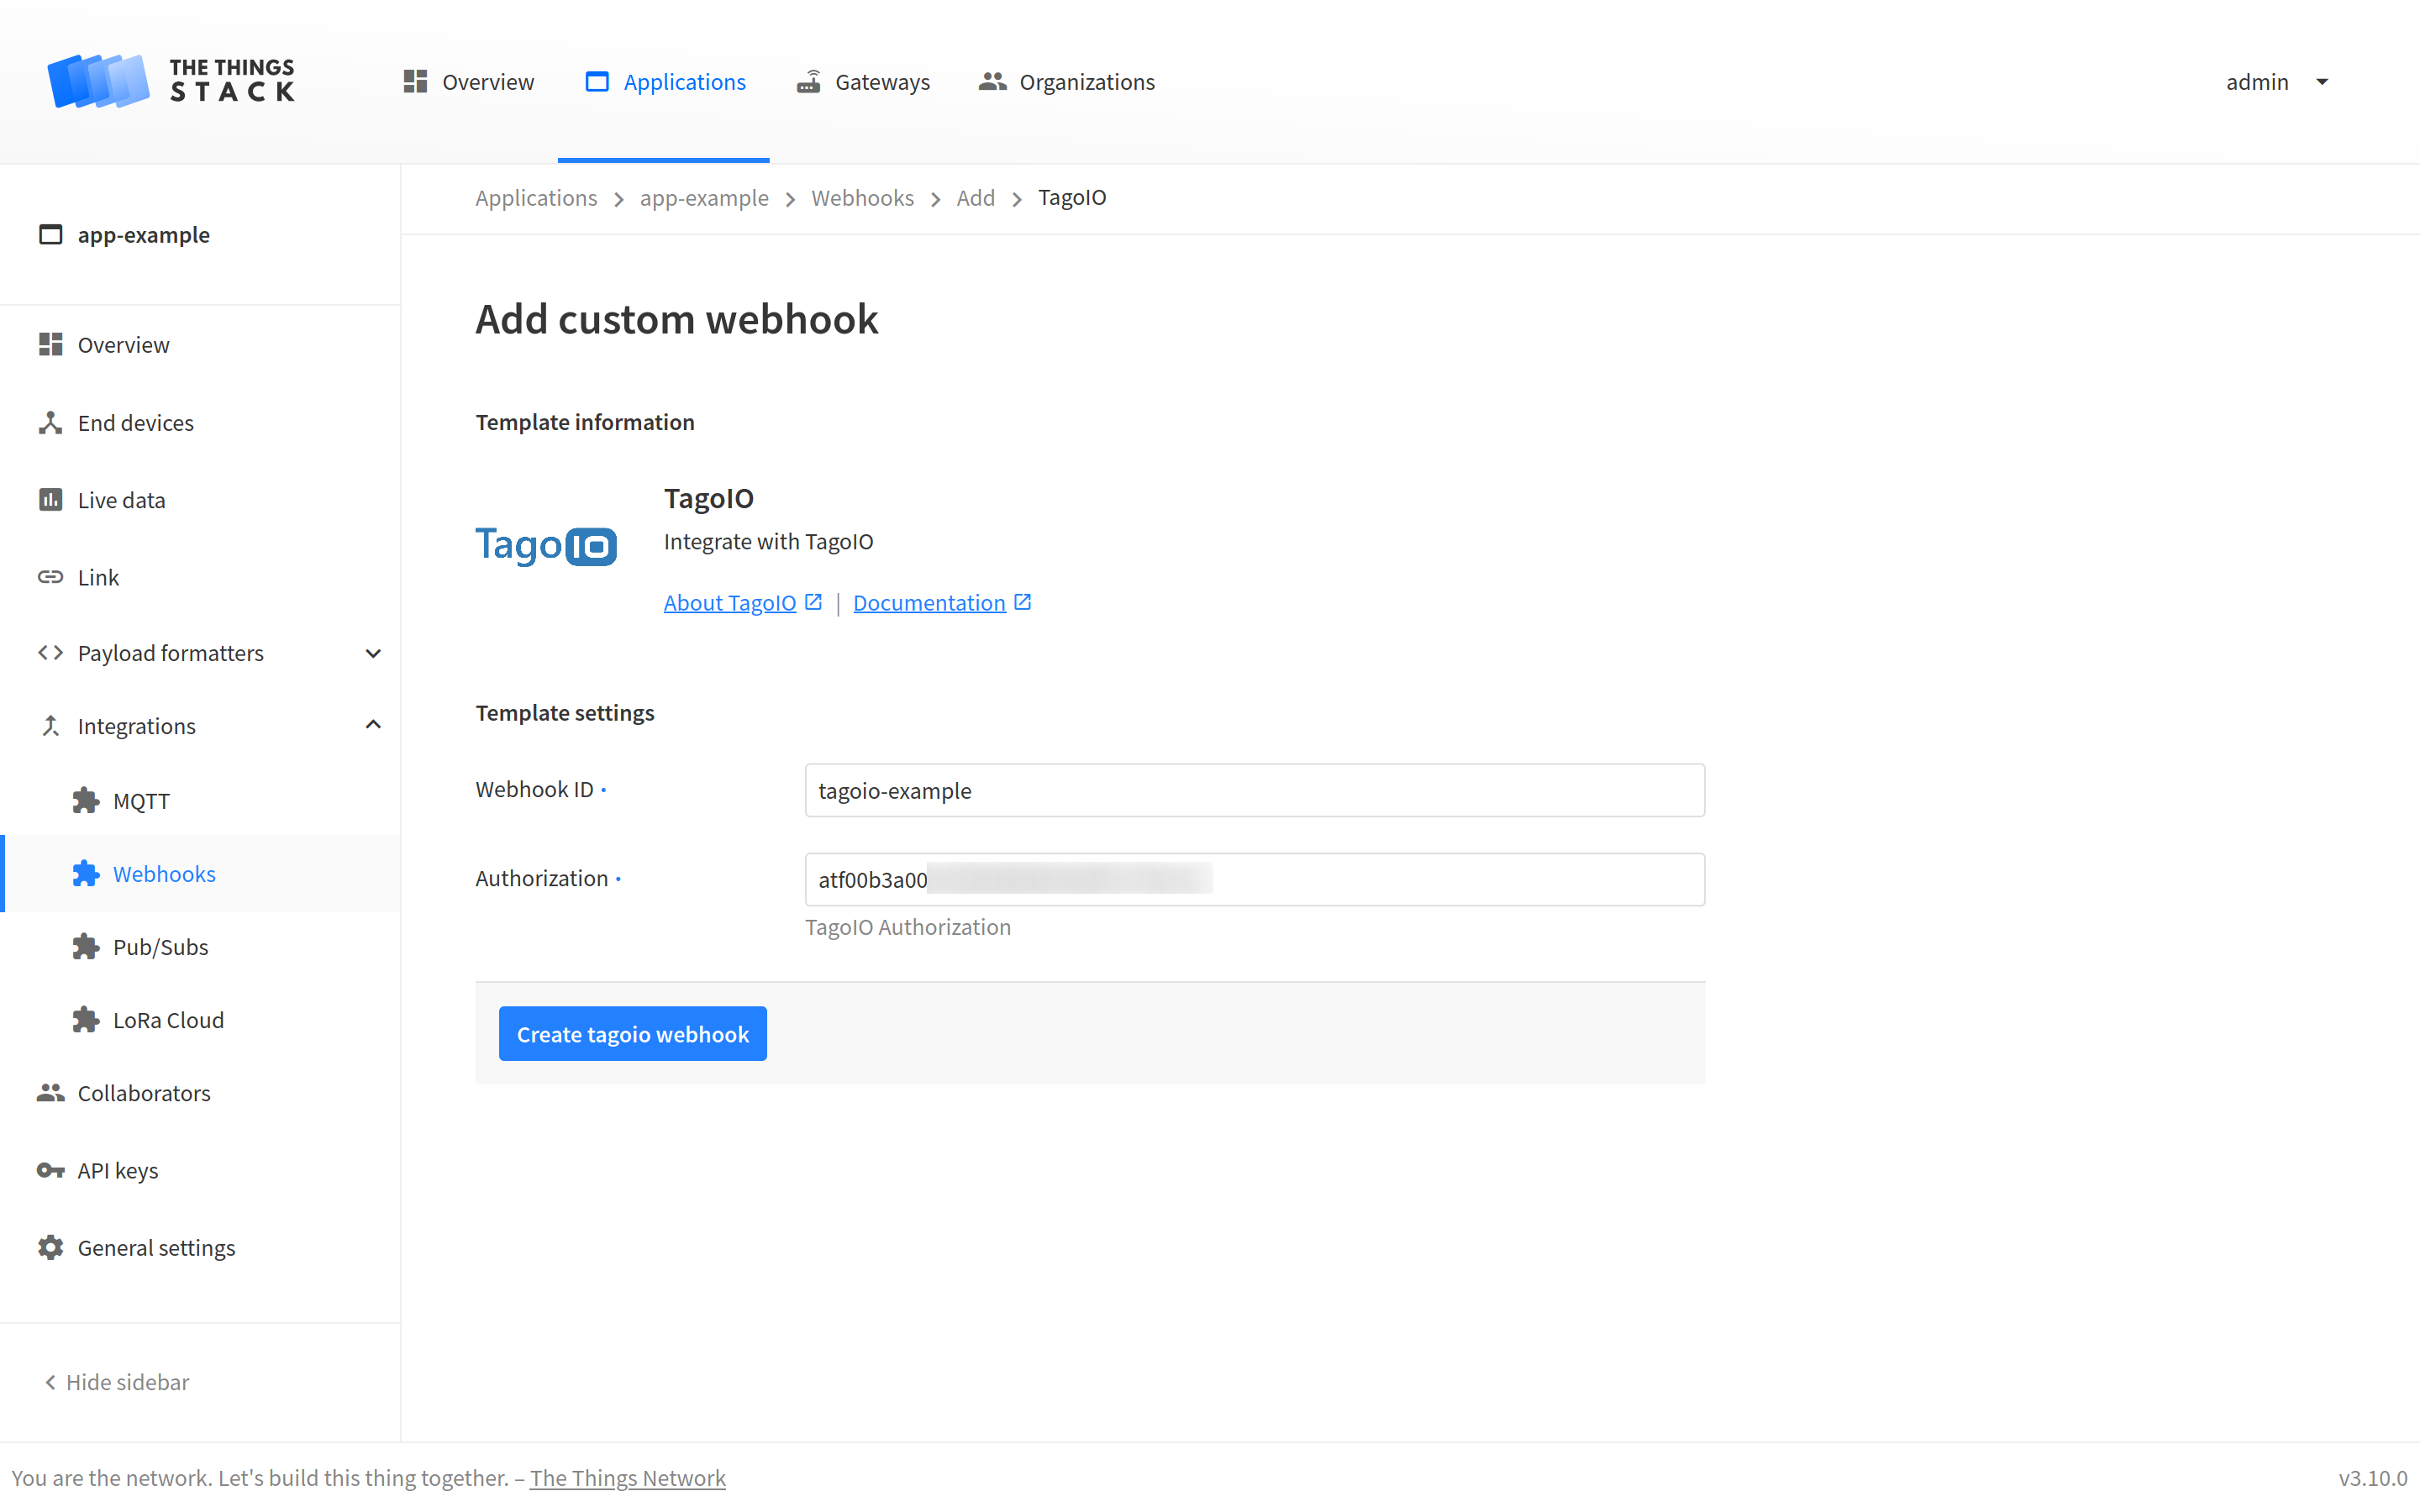
Next step is to create a Webhook integration on The Things Stack by using the TagoIO Webhook template.
Fill in the Webhook ID field, and then paste the TagoIO service authorization in the Authorization field.
To see the values of all parameters of the TagoIO integration, click on the integration after you created it with the Webhook template.
After following these steps, you will see messages arriving in the Live Inspector tab in TagoIO.