my IoT open Tech is an IoT platform, developed on top of ThingsBoard Community Edition (an open-source project), with a user-centered design.
Users can store and chart the telemetries from their devices, configure their features, and manage alarms.
my IoT open Tech development is a non-profit community effort open to everybody willing to contribute to an open, free and neutral IoT platform focused on social, educational and community use cases.
Visit my IoT open Tech Documentation for detailed documentation.
Prerequisites
- A compatible device already configured in The Things Stack. If you want to use a different device type, please consider contributing to our Github repository.
- A user account on my IoT open Tech.
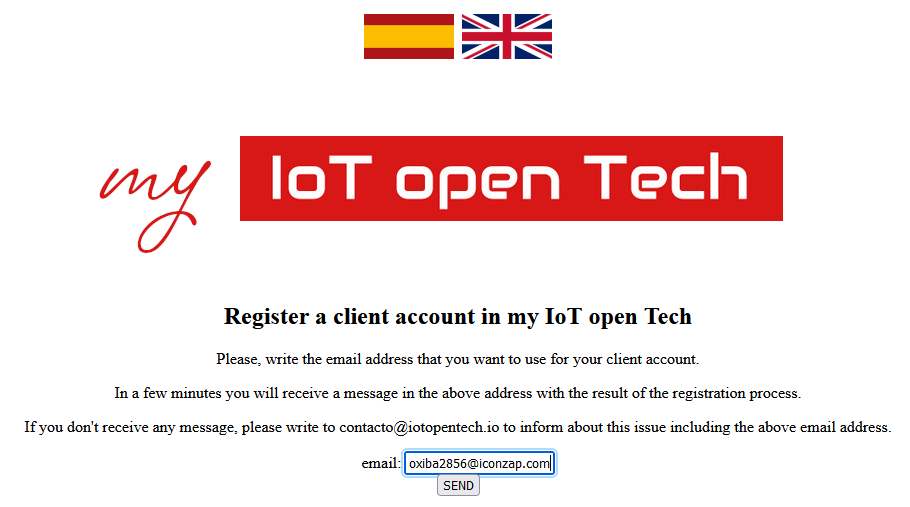
Register a Client Account in my IoT open Tech
Use your web browser to open my IoT open Tech registration page.
Write you email address and press the SEND button.
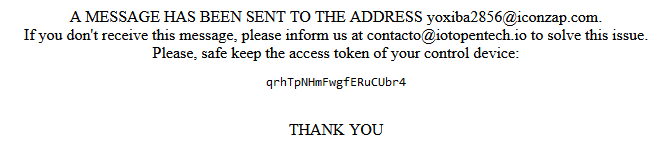
After a few seconds, a new page will appear showing the access token of your Control Device in my IoT open Tech. Please keep this token safe. You will need it later.
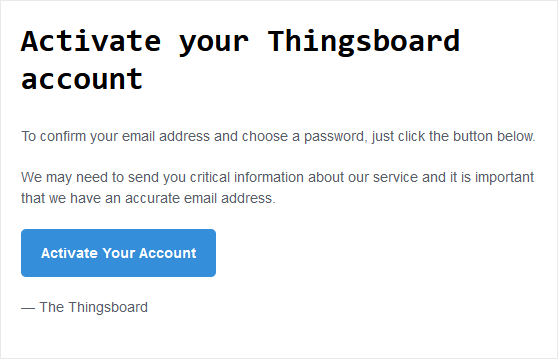
Check your email inbox for a ThingsBoard account activation message, and click on the Activate Your Account button.
Next, you will be asked to choose a password and write it twice.
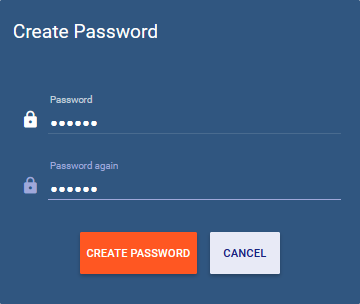
Finally press the CREATE PASSWORD button.
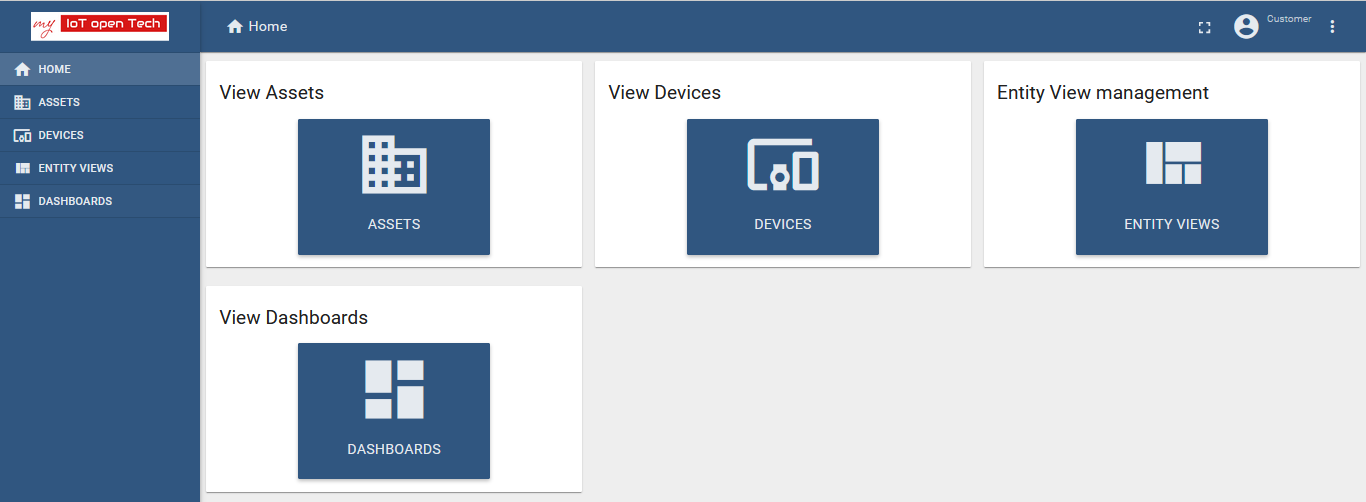
You will be redirected to the my IoT open Tech HOME page.
Create and Configure Your Device in my IoT open Tech
Click on the DASHBOARDS option on the left hand menu, and then on the Configuración panel to open the Configuración dashboard.
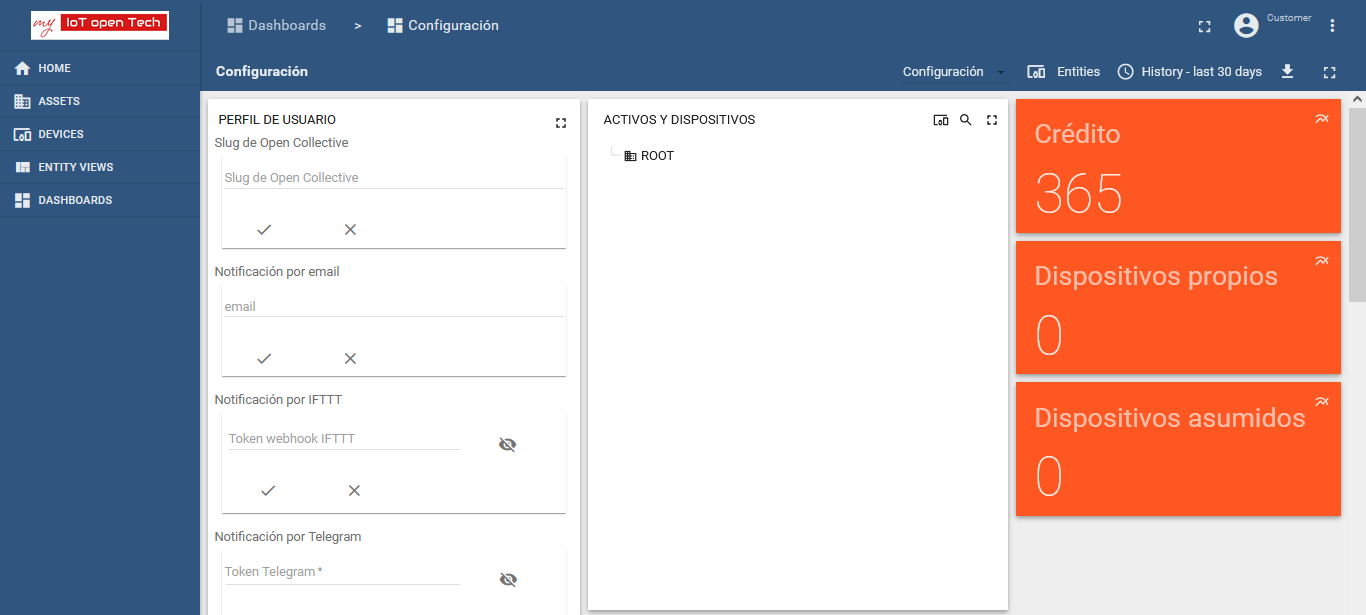
In the central panel ACTIVOS Y DISPOSITIVOS, click on ROOT to open the configuration dialog box of your root asset.
Navigate to the CREAR tab, write a name for your device, choose the Device type, choose the model of your device (in our example LHT65), and press the CREAR button.

The new created device will appear in the central panel nested below the ROOT asset.
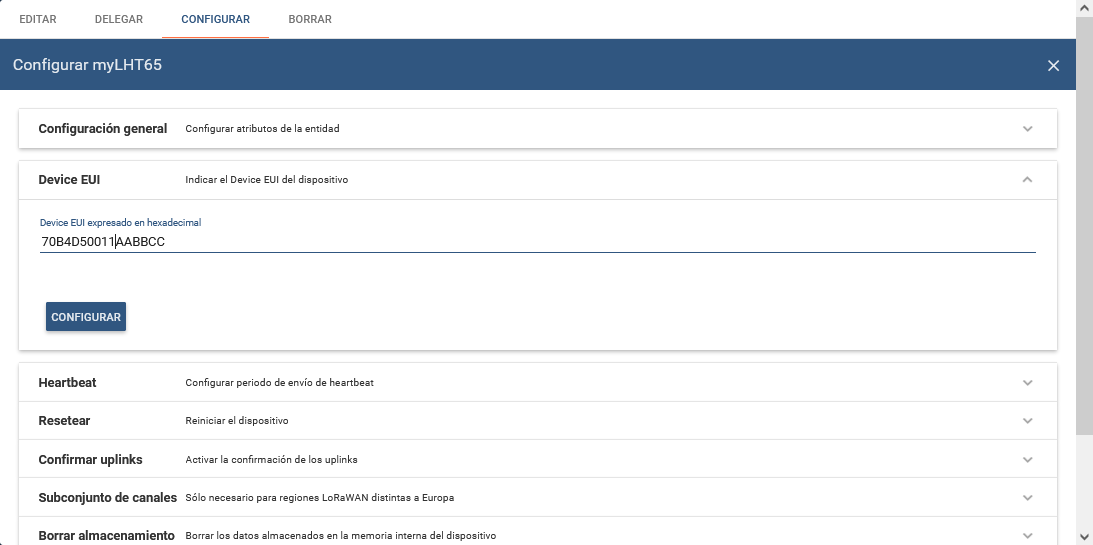
Click on your new device to open its configuration dialog box.
Navigate to the CONFIGURAR tab, unfold the Device EUI section, write the Device EUI of your device (this value is available in your end device’s overview page in The Things Stack Console under DevEUI), and press the CONFIGURAR button.
Configure The Things Stack
After finishing my IoT open Tech setup, use the my IoT open Tech Webhook template to create a Webhook integration on The Things Stack.
To integrate, you only need to fill out the Webhook ID field with a desired value, and provide the access token of your my IoT open Tech Control Device.
Note:
You got your Control Device’s access token after registering your my IoT open Tech client account. If you haven’t copied it upon registration, navigate to HOME panel on the left hand menu in my IoT open Tech, then to DEVICES, select your Control Device and press the COPY ACCESS TOKEN button.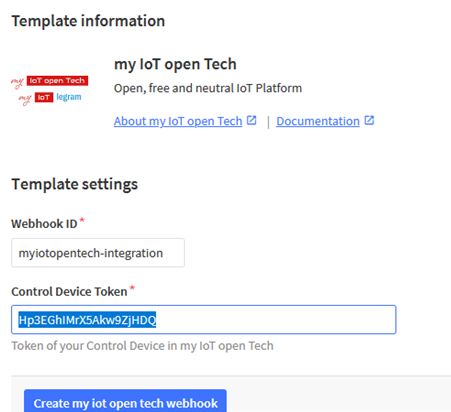
Monitoring Your Data
In the HOME page of my IoT open Tech, click on DASHBOARDS and then on the Panel de control dashboard.
In the ACTIVOS Y DISPOSITIVOS panel, click on your device.
As soon as new uplink message is sent from your end device and received by The Things Stack, the dashboard will automatically update to reflect the incoming data.
