Qubitro is a device data platform (DDP) built for a hyper-connected world and used by companies of all sizes — from visionary startups to large enterprises across 40+ countries.
Qubitro has no-code source integration support for The Things Stack.
Prerequisites
Creating the integration
Fetch credentials from Qubitro
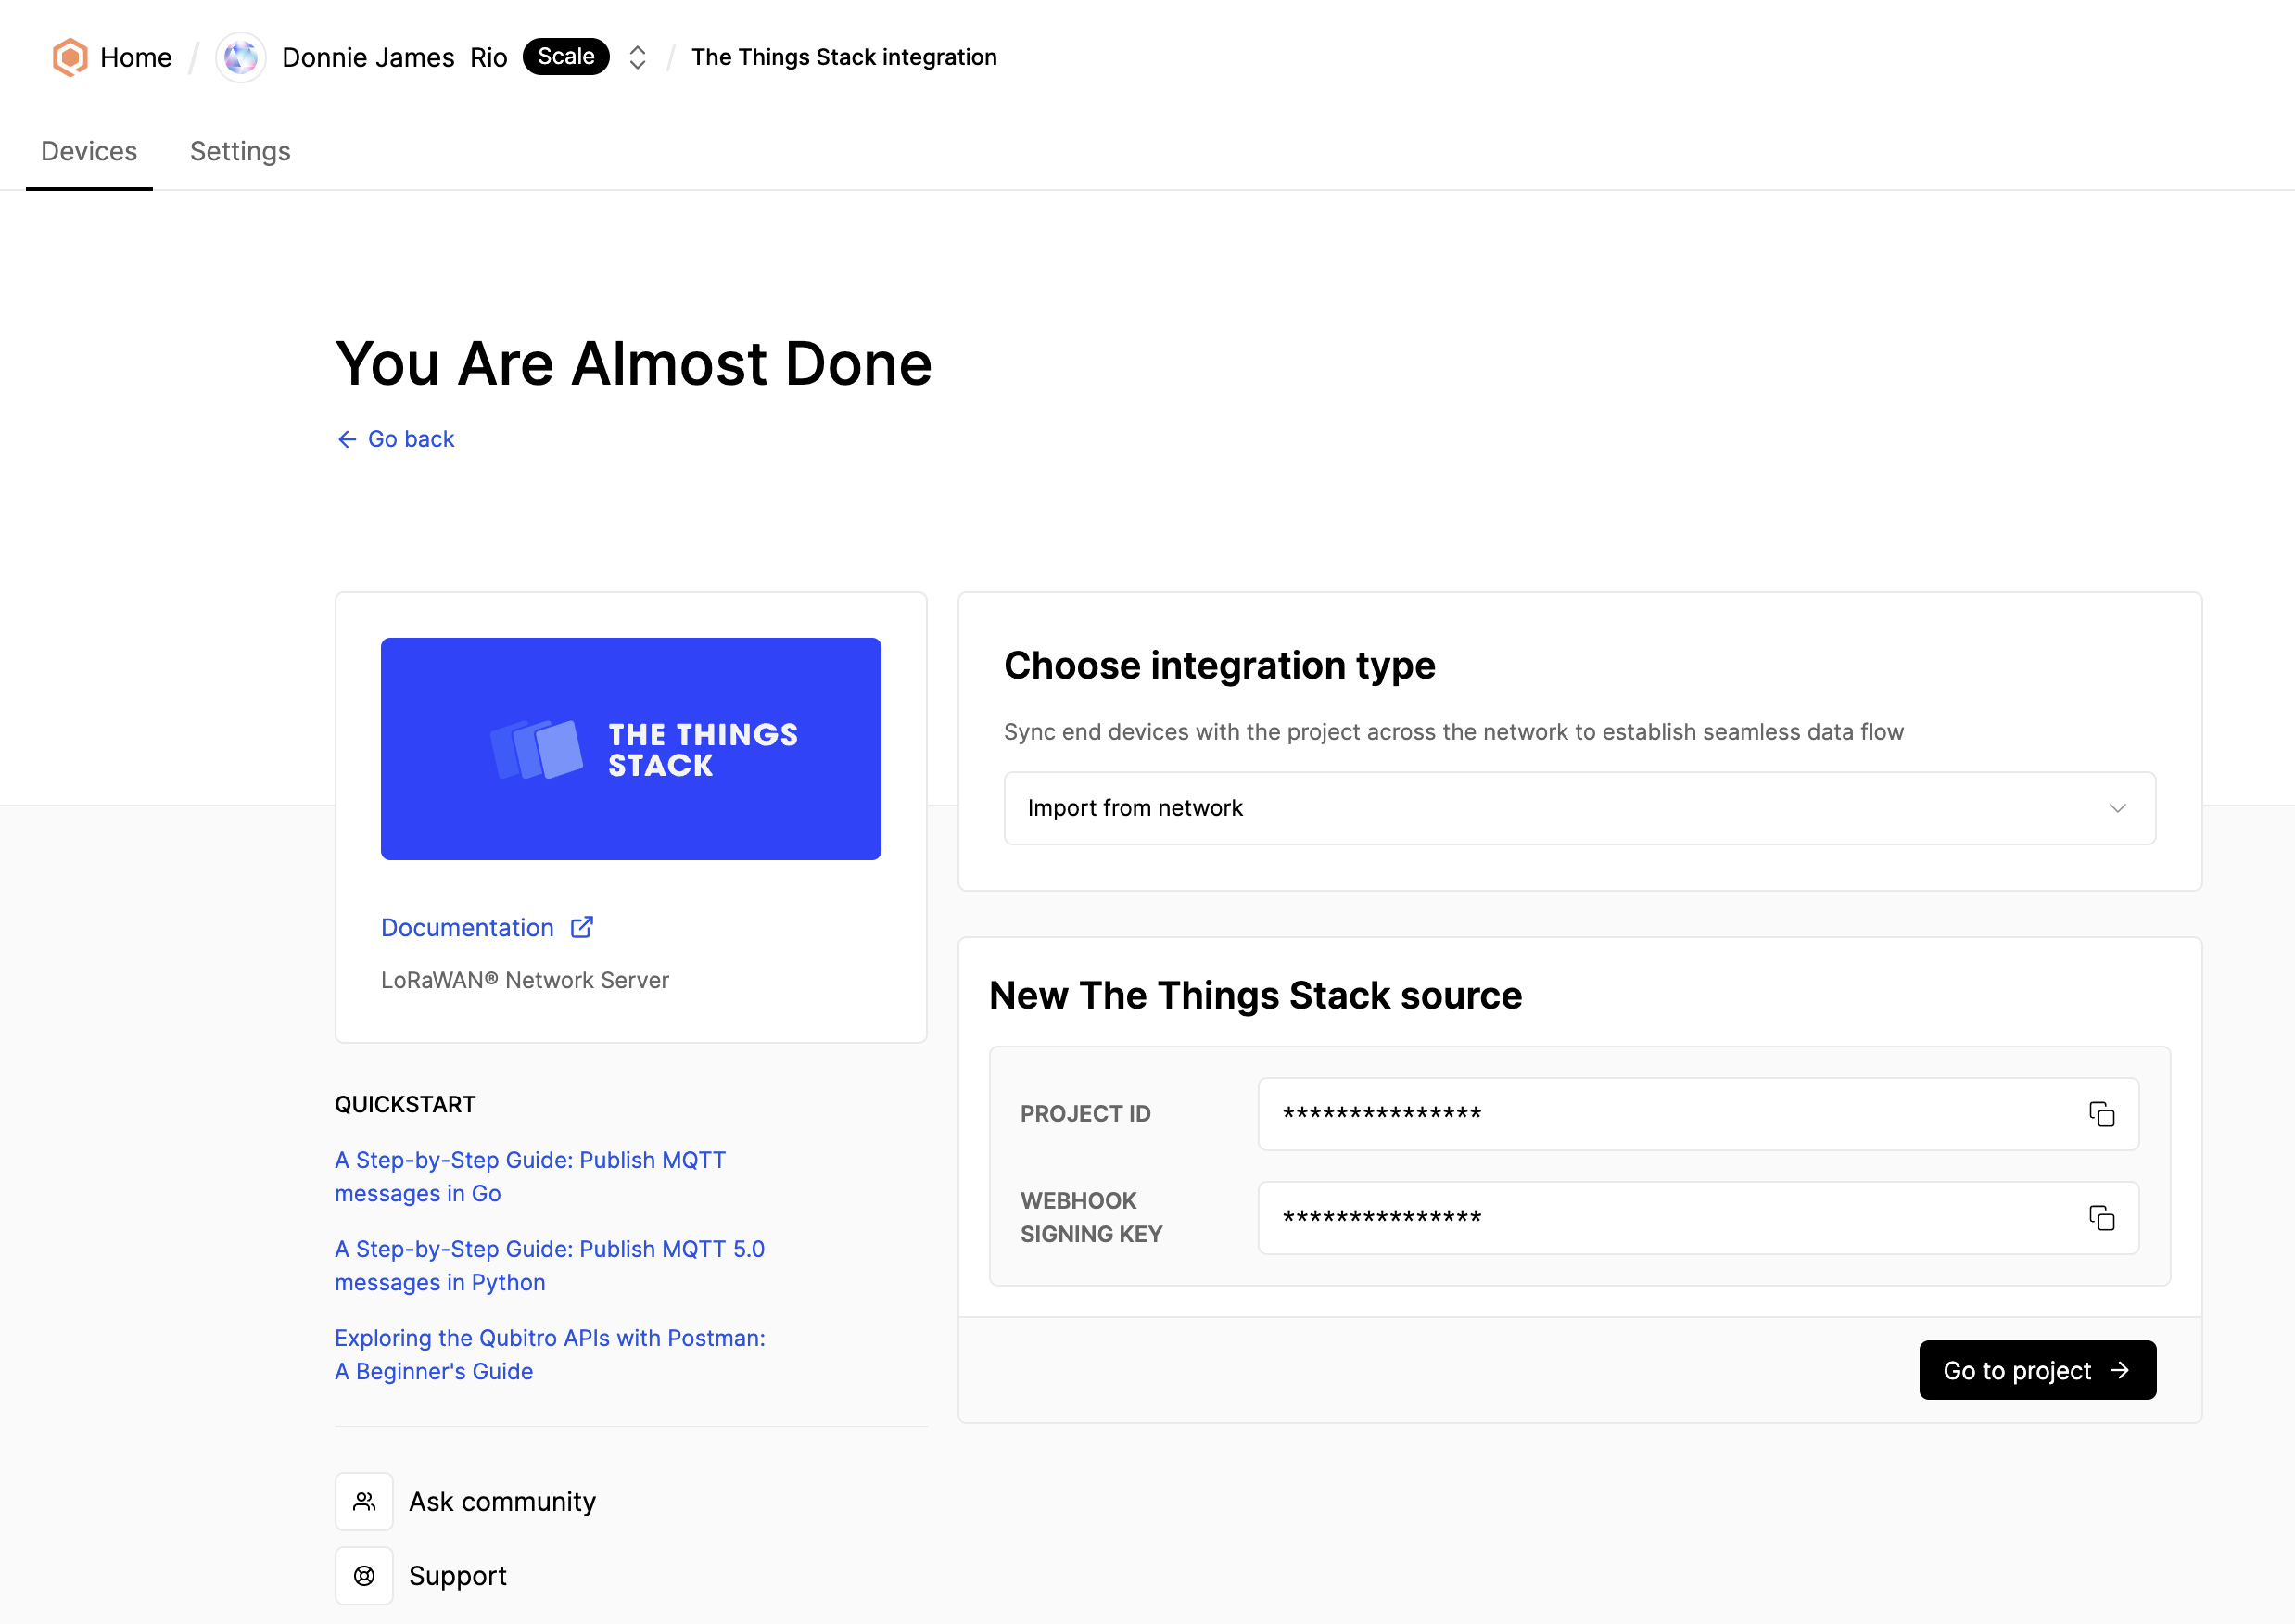
To get the required credentials, choose a project from the list, then, click on the New source button and click on The Things Stack in the list.
Keep this page open and navigate to The Things Stack Console to configure the webhook integration.
Setup The Things Stack
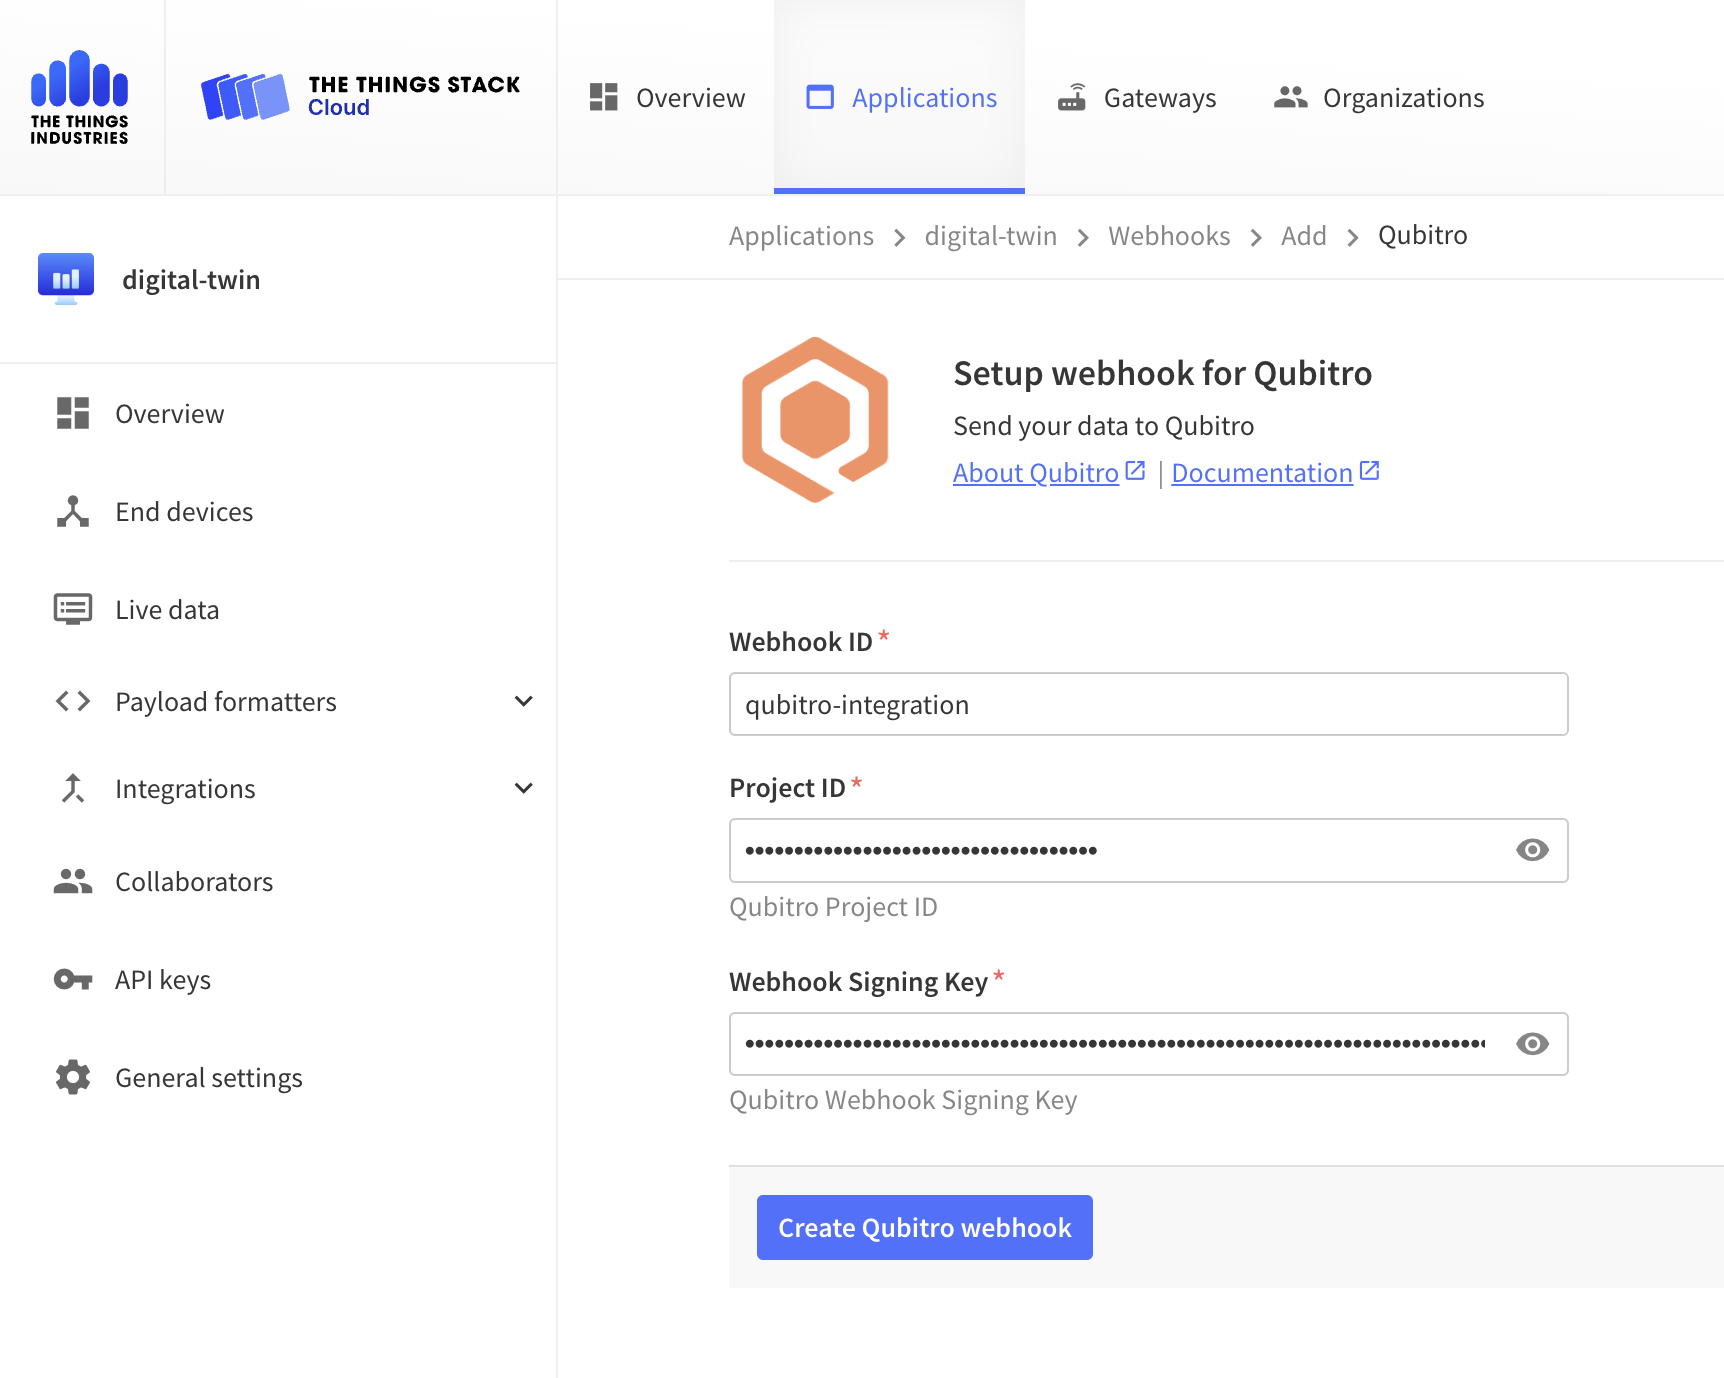
Choose the application on The Things Stack Console then click on Webhooks from the left navigation menu. Next, click the Add webhook button located at the top right of the page, and choose Qubitro from the list.
Copy and paste the values of credentials from the first step on Qubitro Portal. You can also copy values individually from the Projects Settings and Credentials tab.
Click on the Create Qubitro webhook button and go back to the Qubitro Portal.
An example configuration is shown on the image below.
Verify integration
Click on the Go to project button and then the Refresh button to verify that devices are listed successfully.
Note: Once the integration is configured, all devices connected to the same project on The Things Stack will be synchronized with Qubitro automatically.

Configure the decoder and verify the data
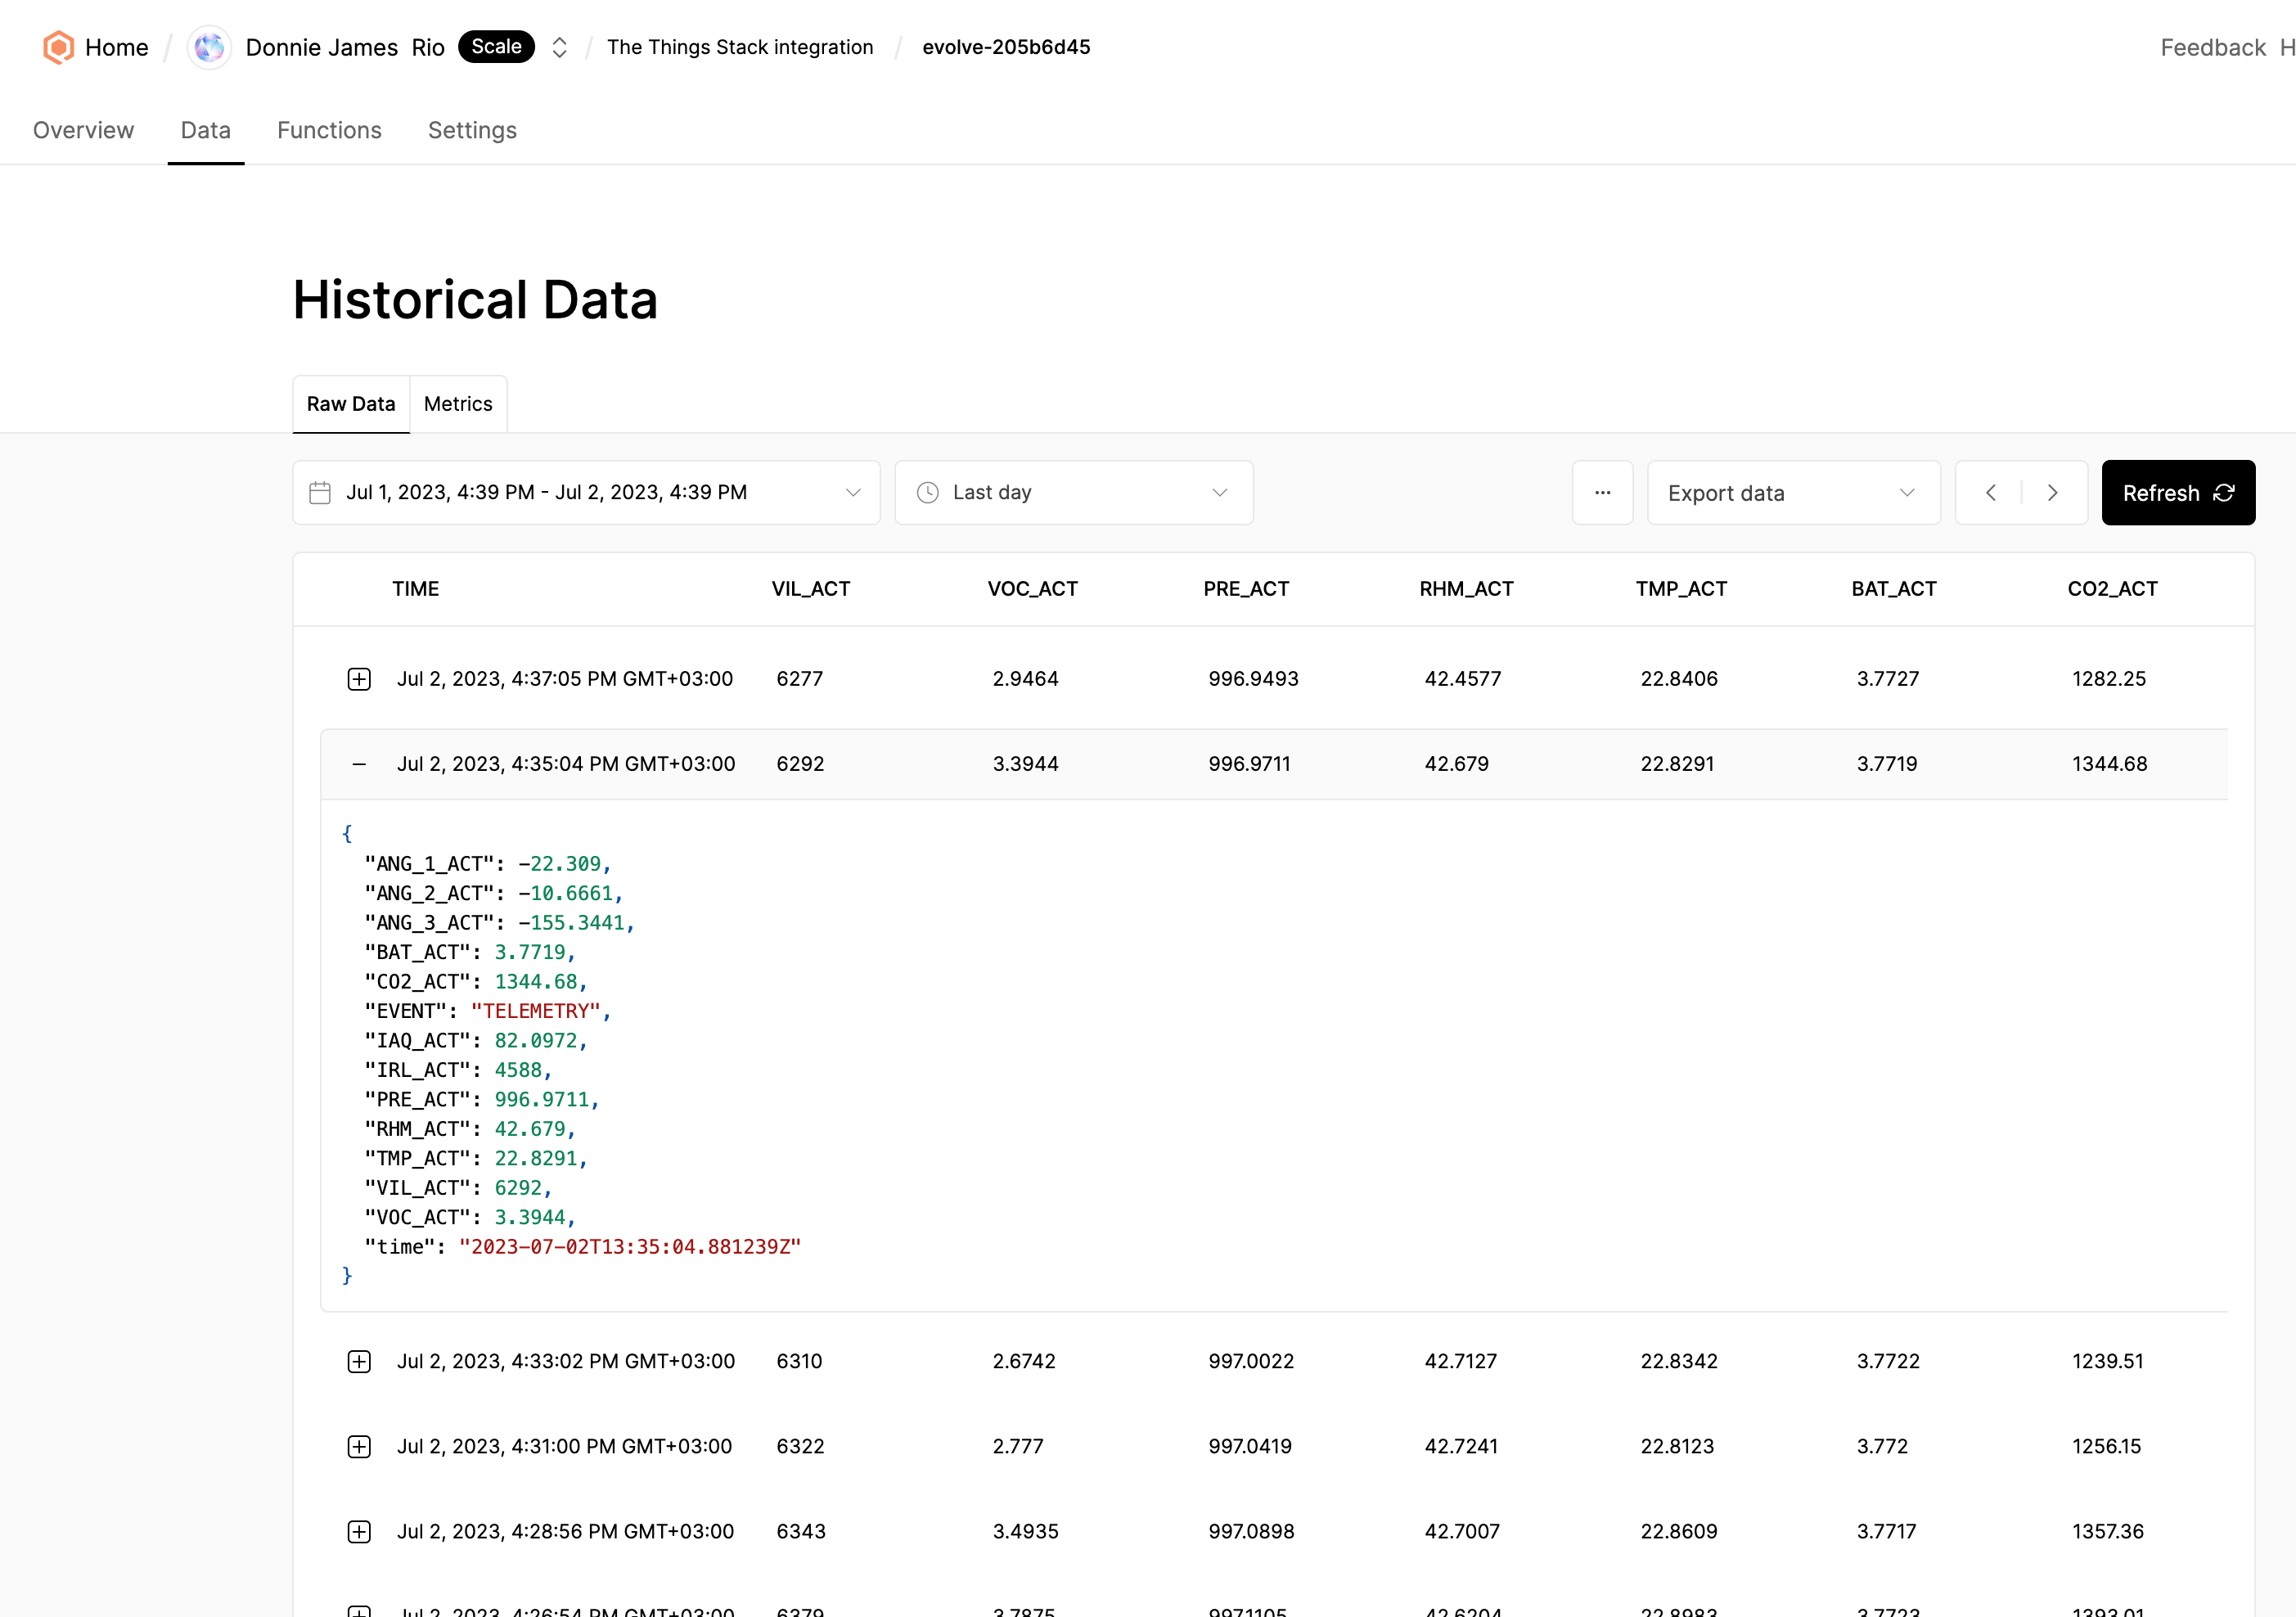
If you want to process incoming data, you need to configure decoder functions. You can create custom decoder function or choose from available device templates on Qubitro Portal.
Note: If the decoder is enabled on The Things Stack, Qubitro will automatically store incoming JSON data.
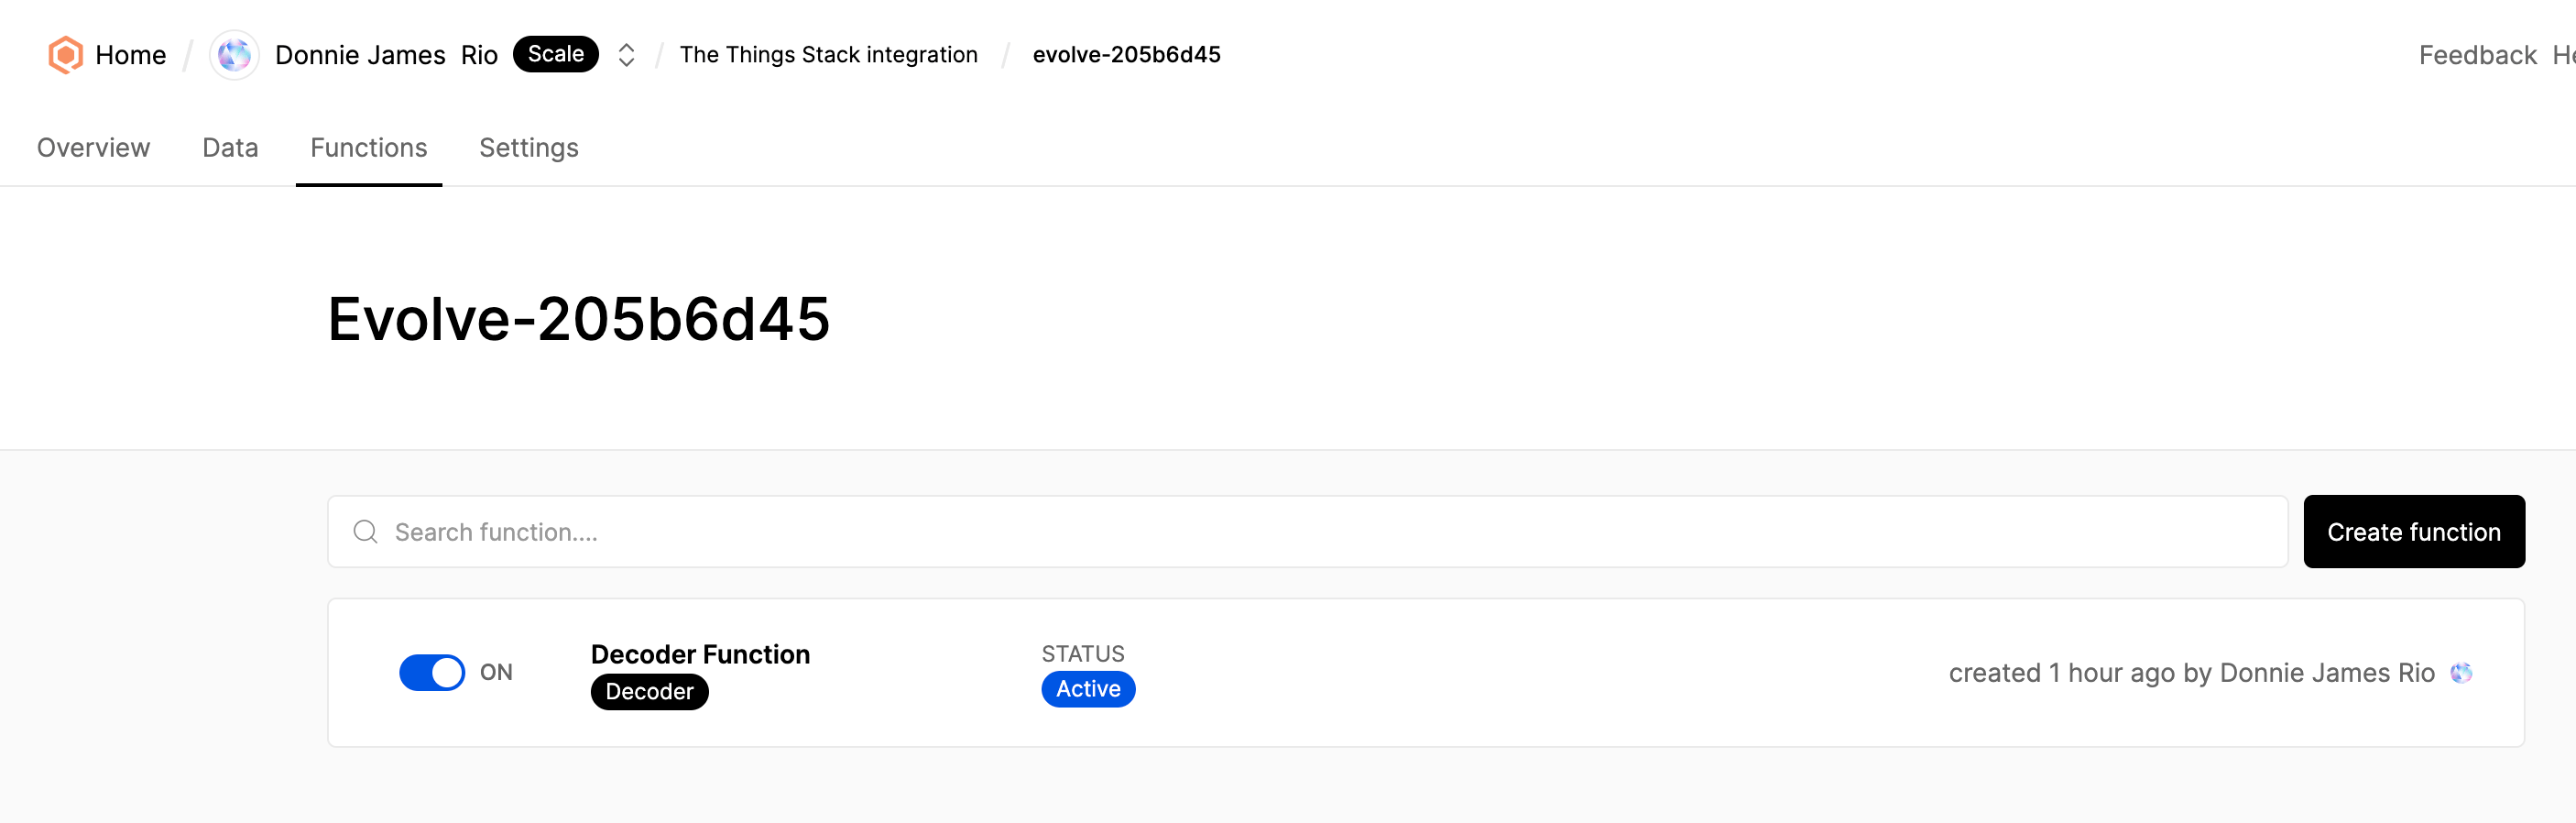
You can create a decoder function by navigating to the Functions tab located on the device page.
Then, navigate to the device and click on the Data tab to verify the incoming data.
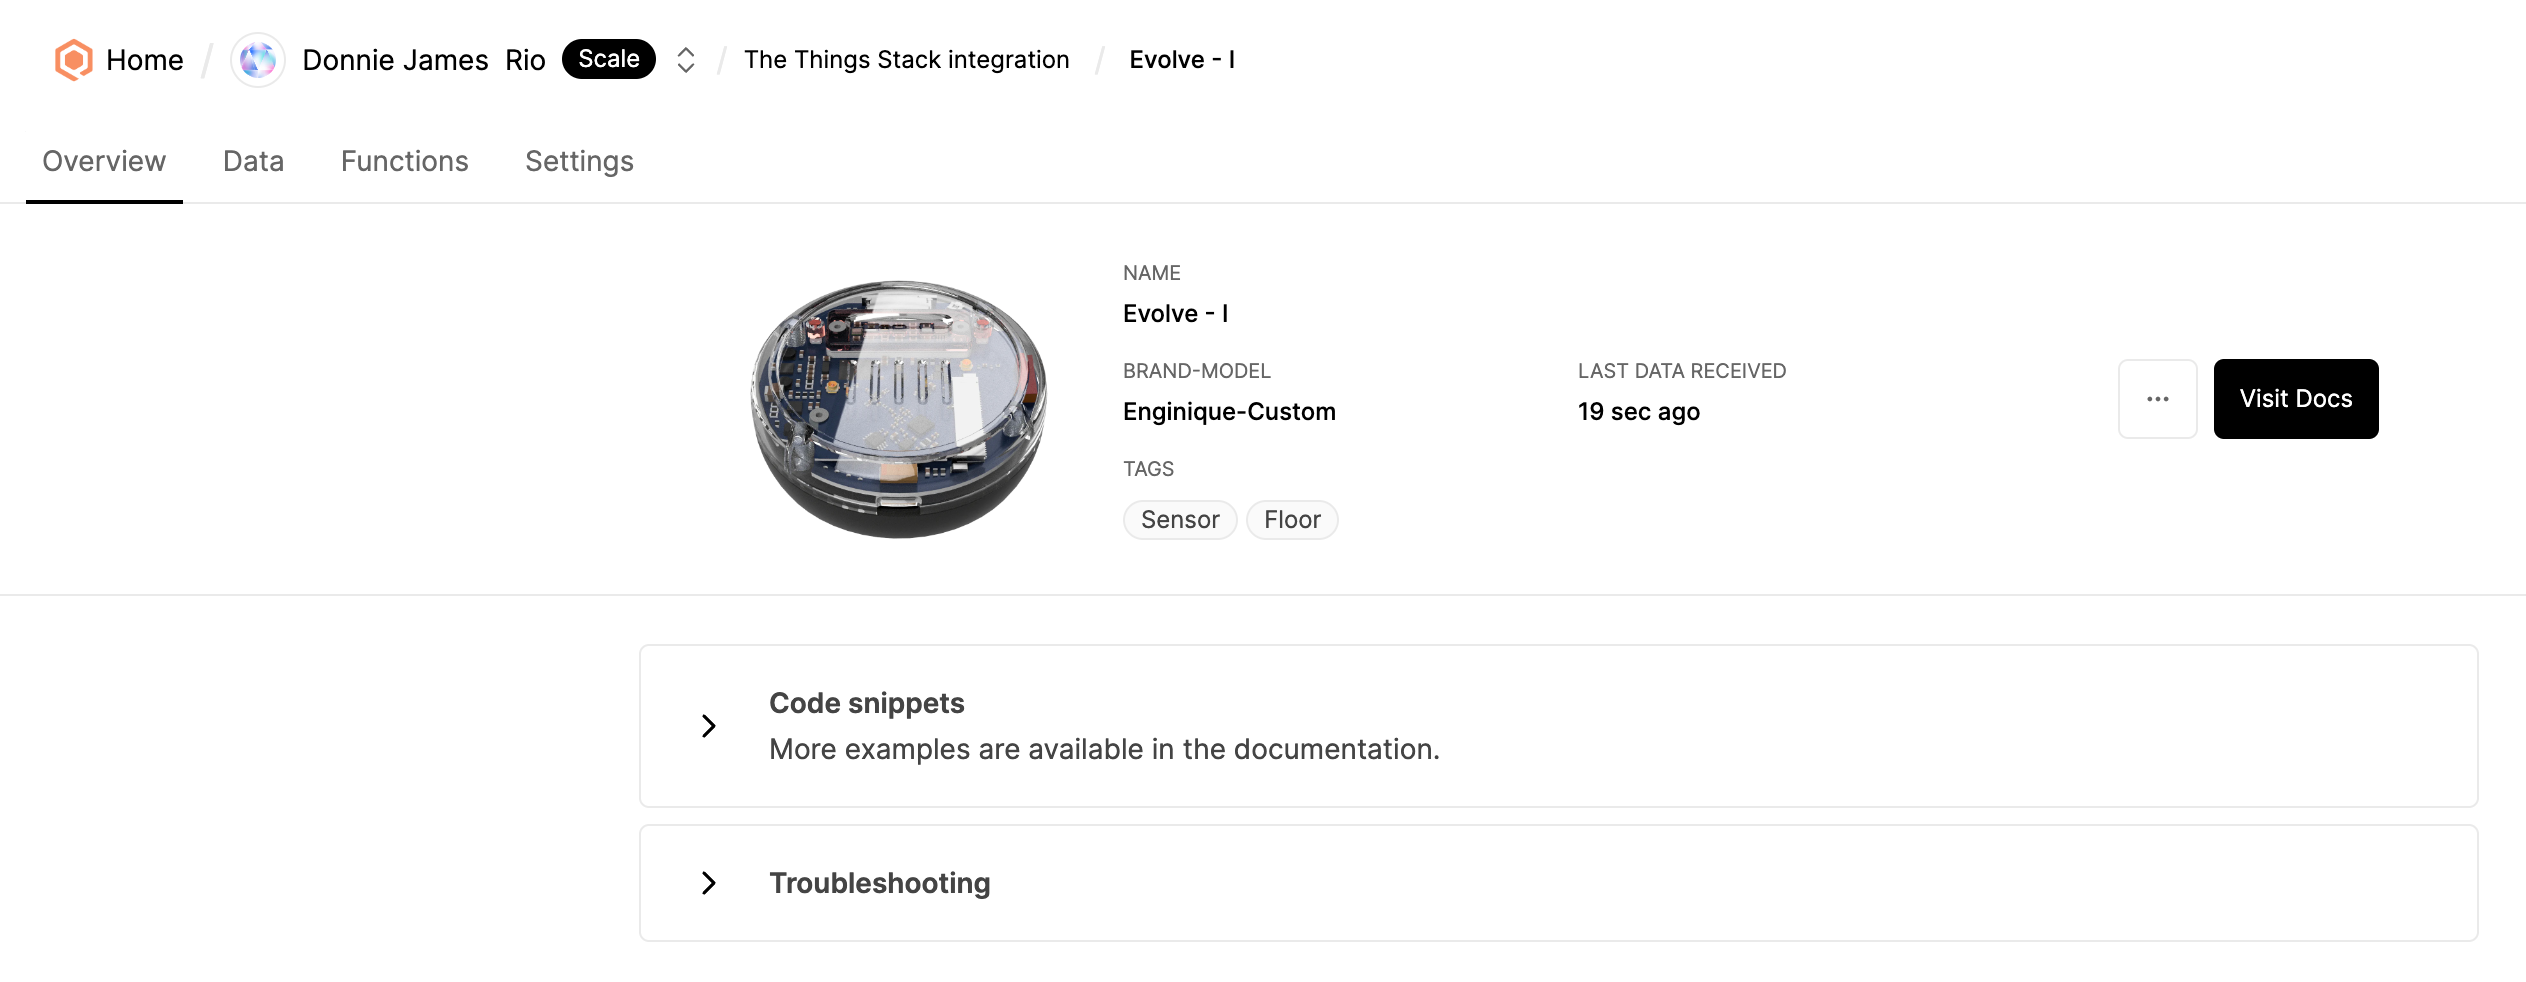
Customize device information (optional)
You can customize device information, such as avatar, name, brand, and model, by navigating to the device settings.

An example device overview is shown below.
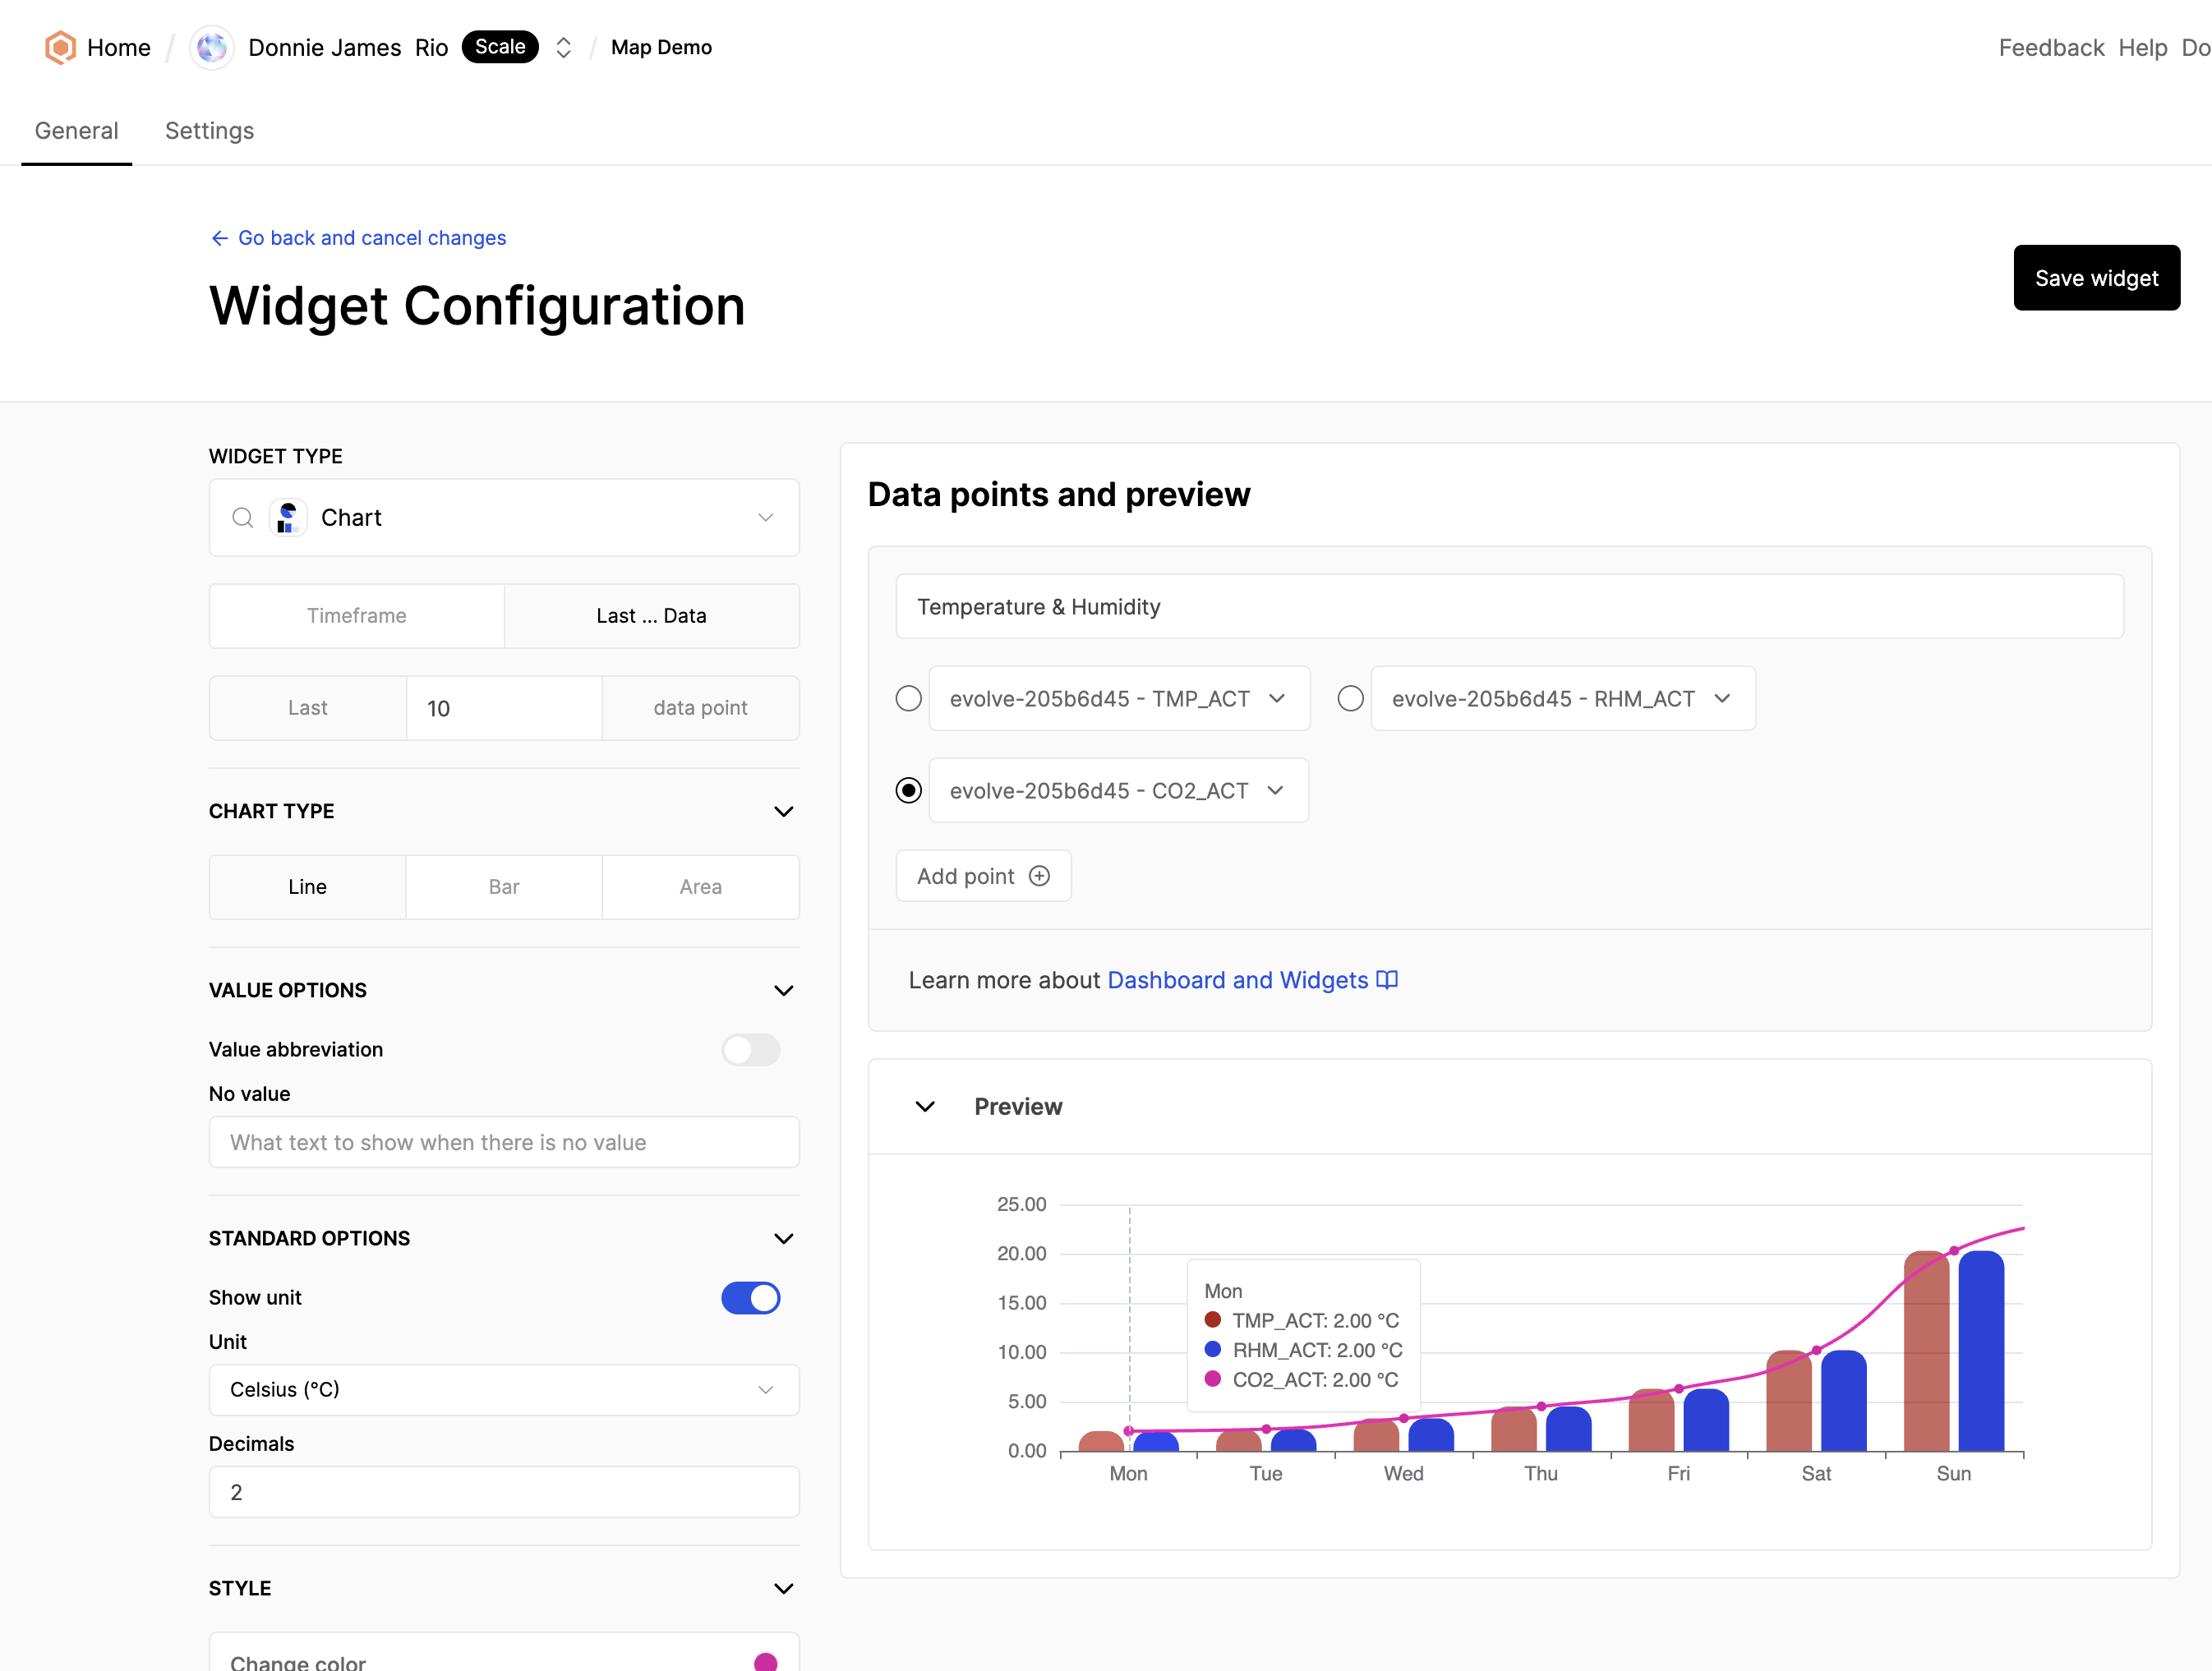
Work with Device Data
Click on the Dashboads tab to create dashboards.
You can also discover other features such as Rule Functions on Qubitro Portal.

For more cool features, see the official Qubitro documentation.