AllThingsTalk Maker is a highly accessible IoT platform for a rapid IoT prototype development. It lets you connect a wide range of devices to the network of your choice, then to extract, visualize and process the collected sensor data in a user friendly way.
Prerequisites
- A user account on AllThingsTalk Maker.
- Message payload in Concise Binary Object Representation (CBOR) format.
Setup AllThingsTalk Maker
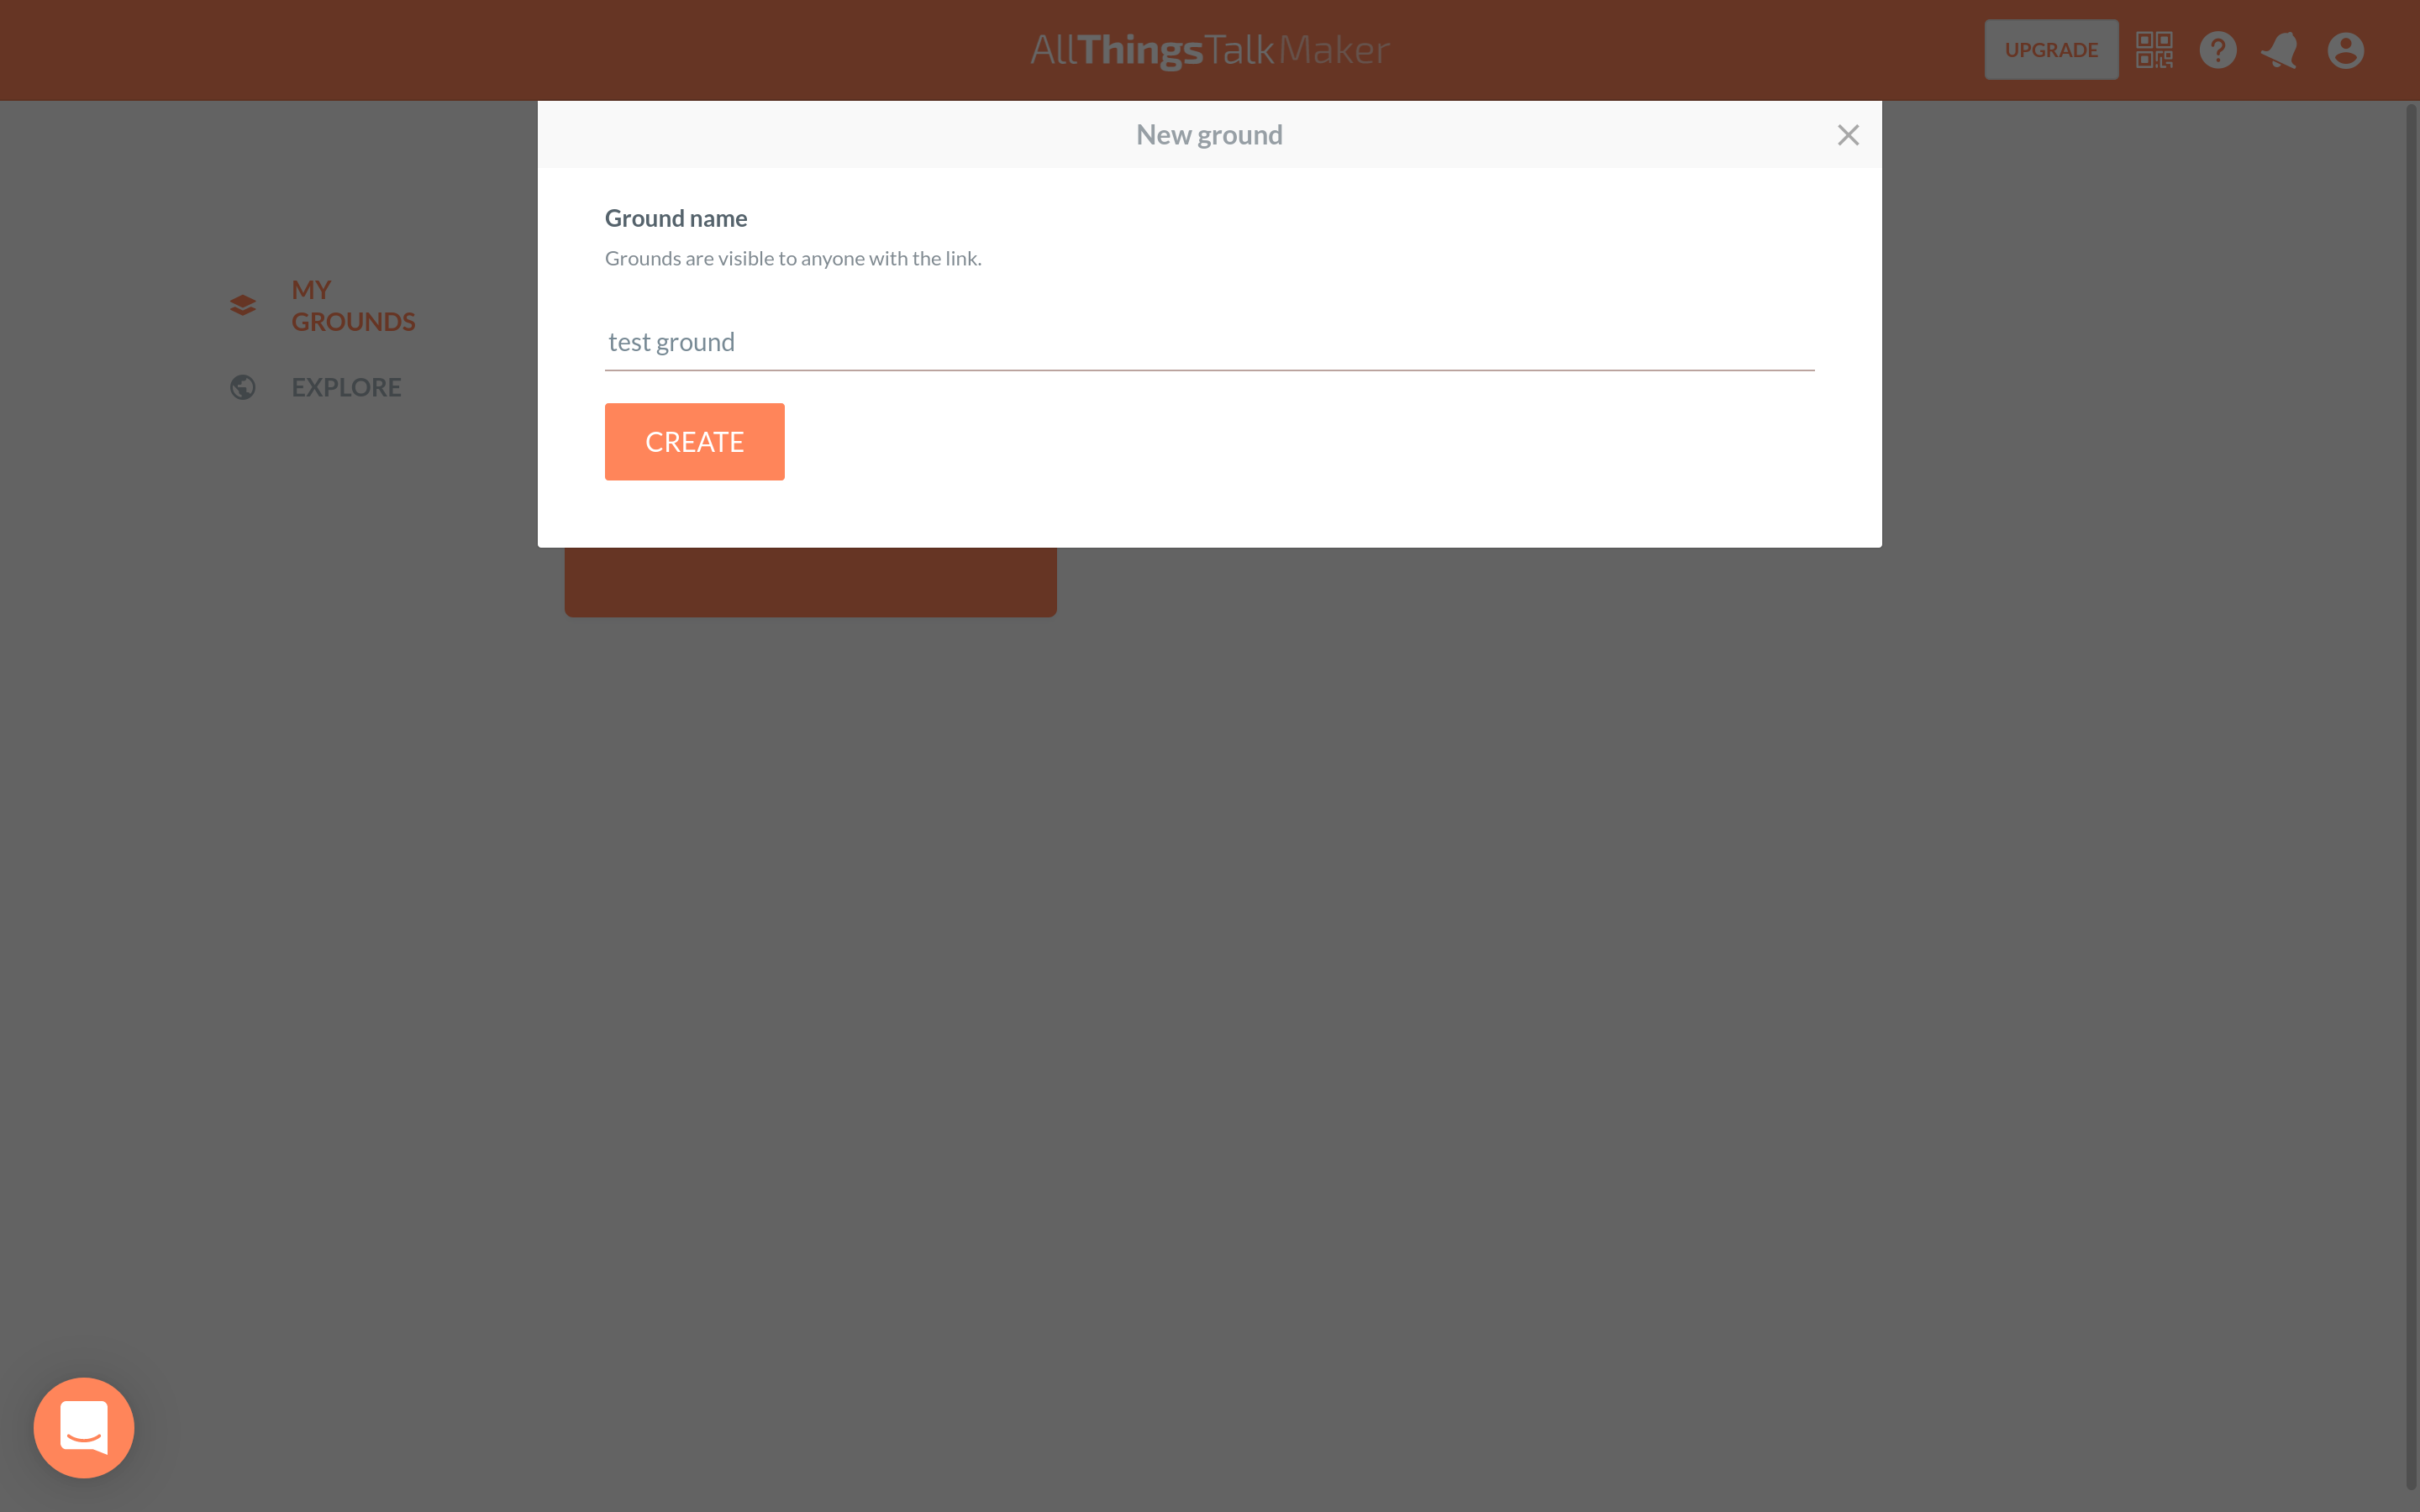
When you first log into the AllThingsTalk Maker, you have to create a new ground. To do so, click the + New ground button, enter a ground name and finish with Create.
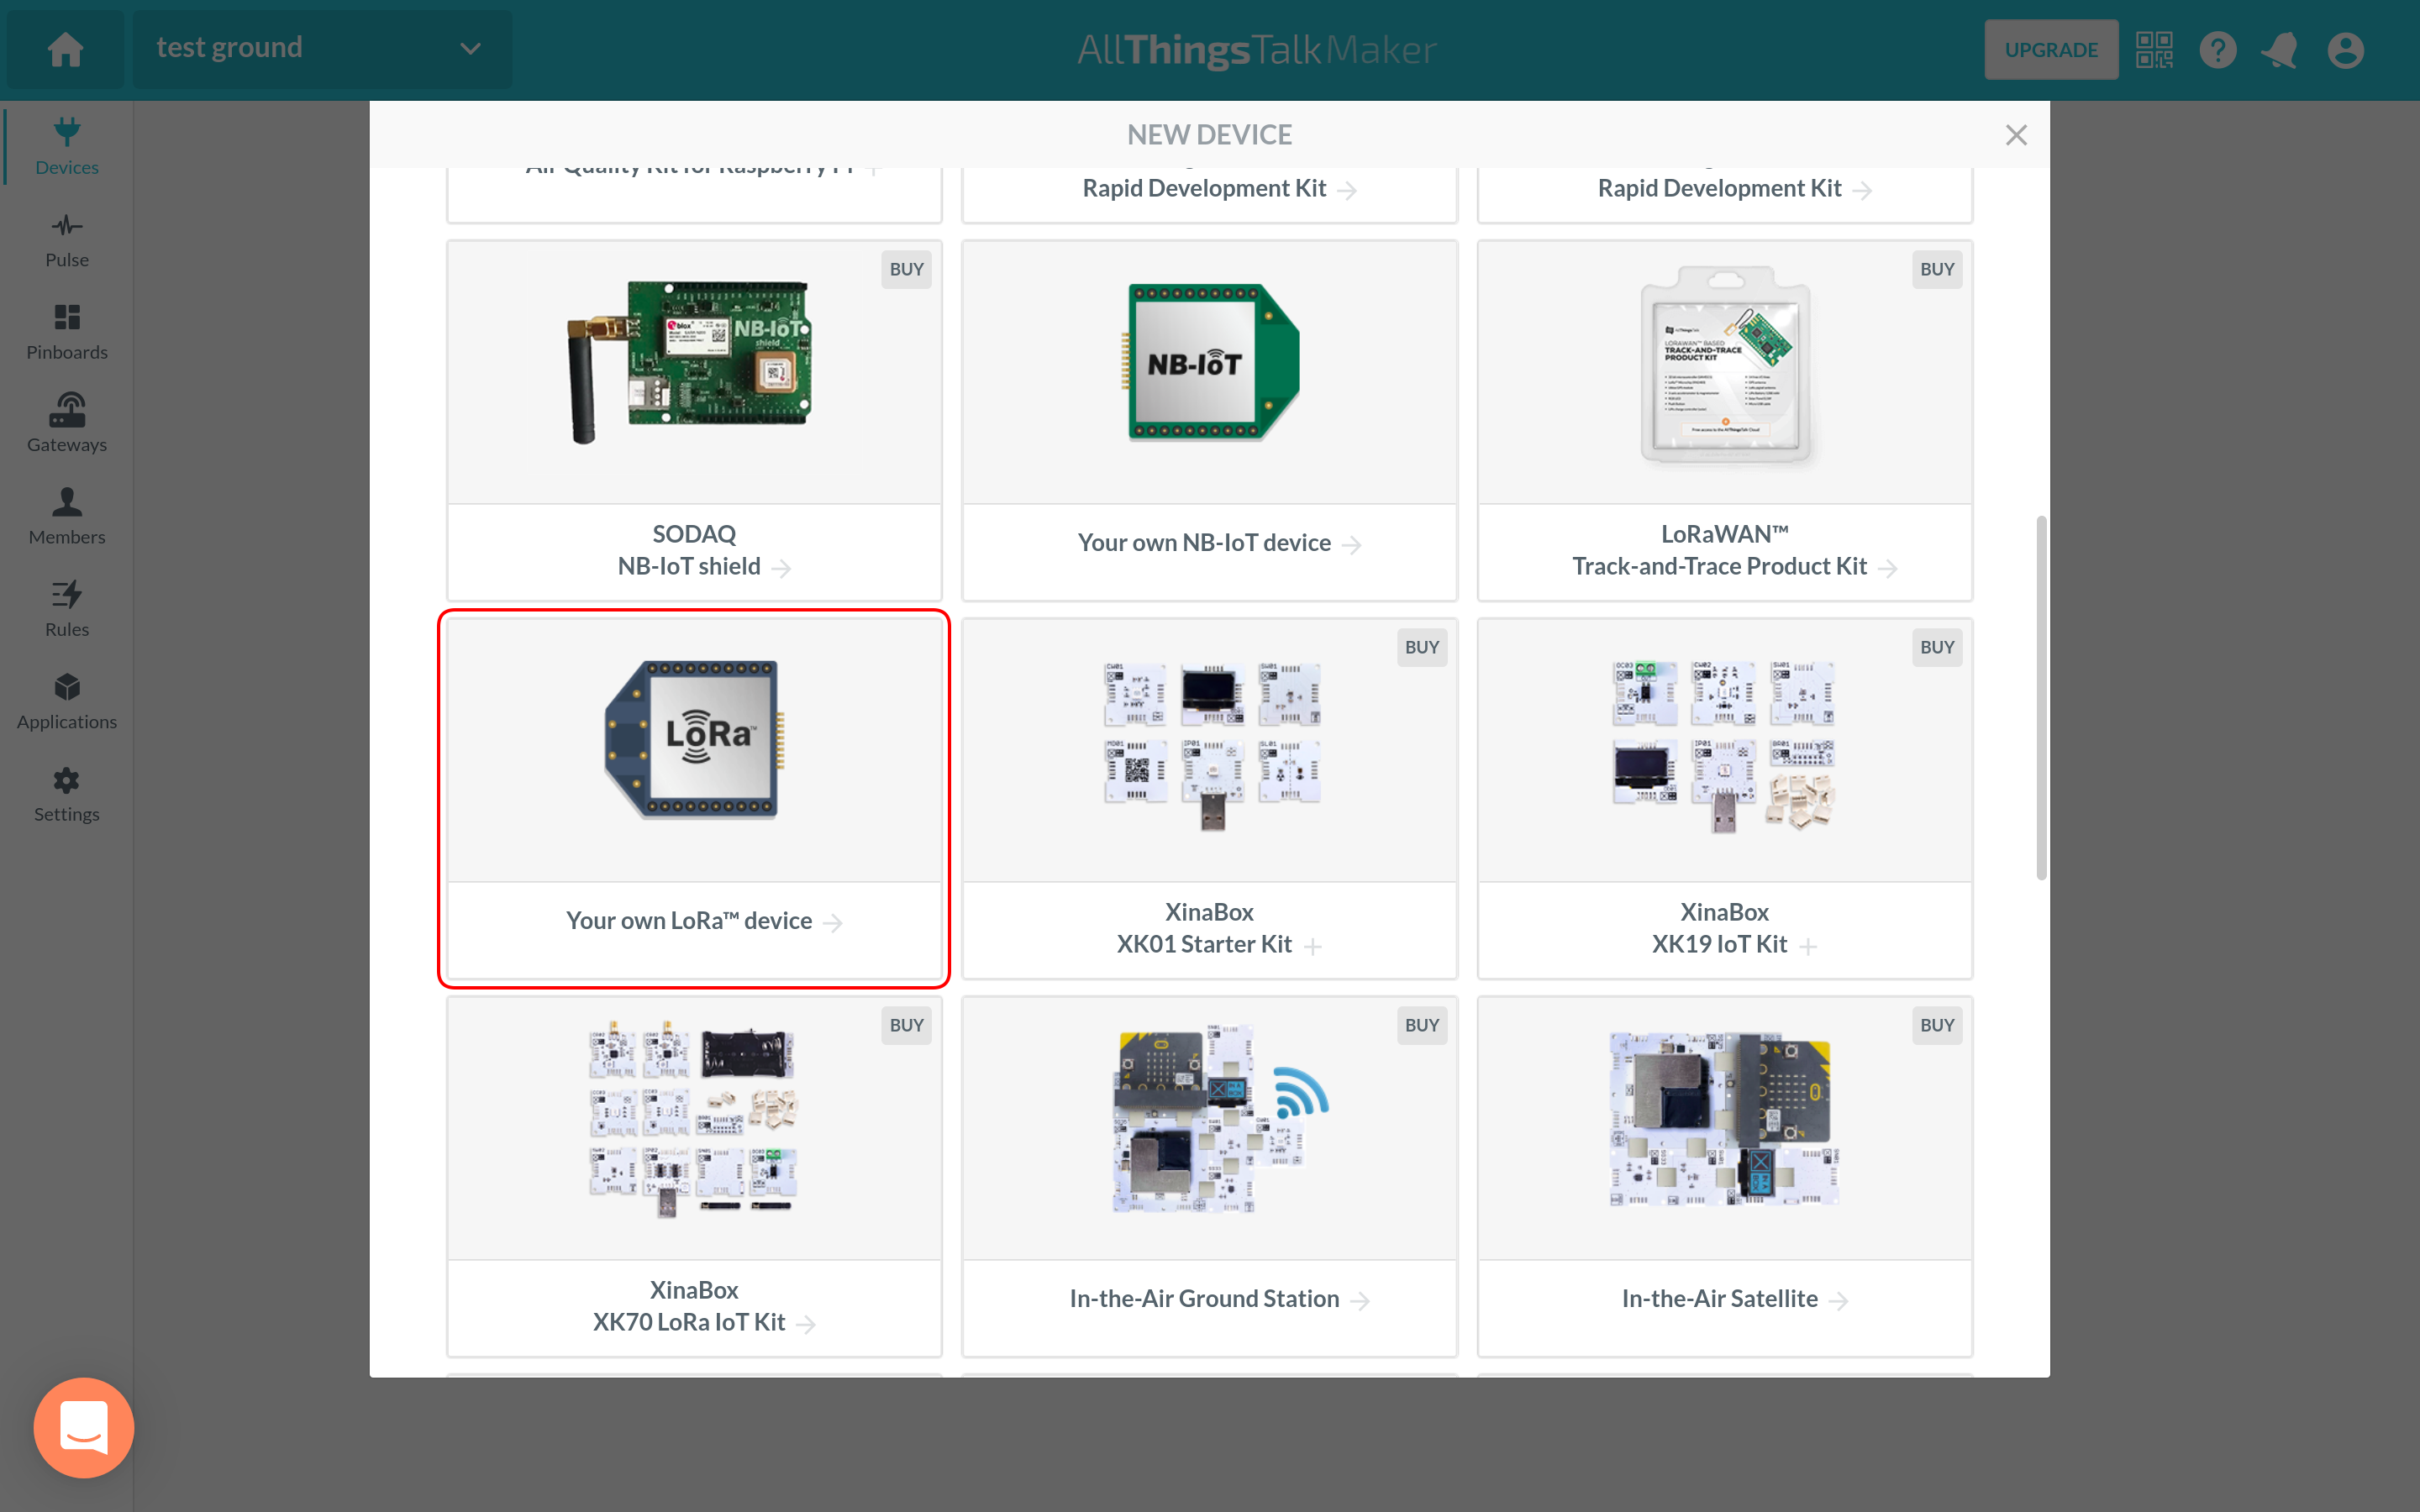
Navigate to Devices on the left hand menu in your newly created ground and click the + Connect a device to add a new device.
You will be presented with a list of supported devices; choose Your own LoRa device.
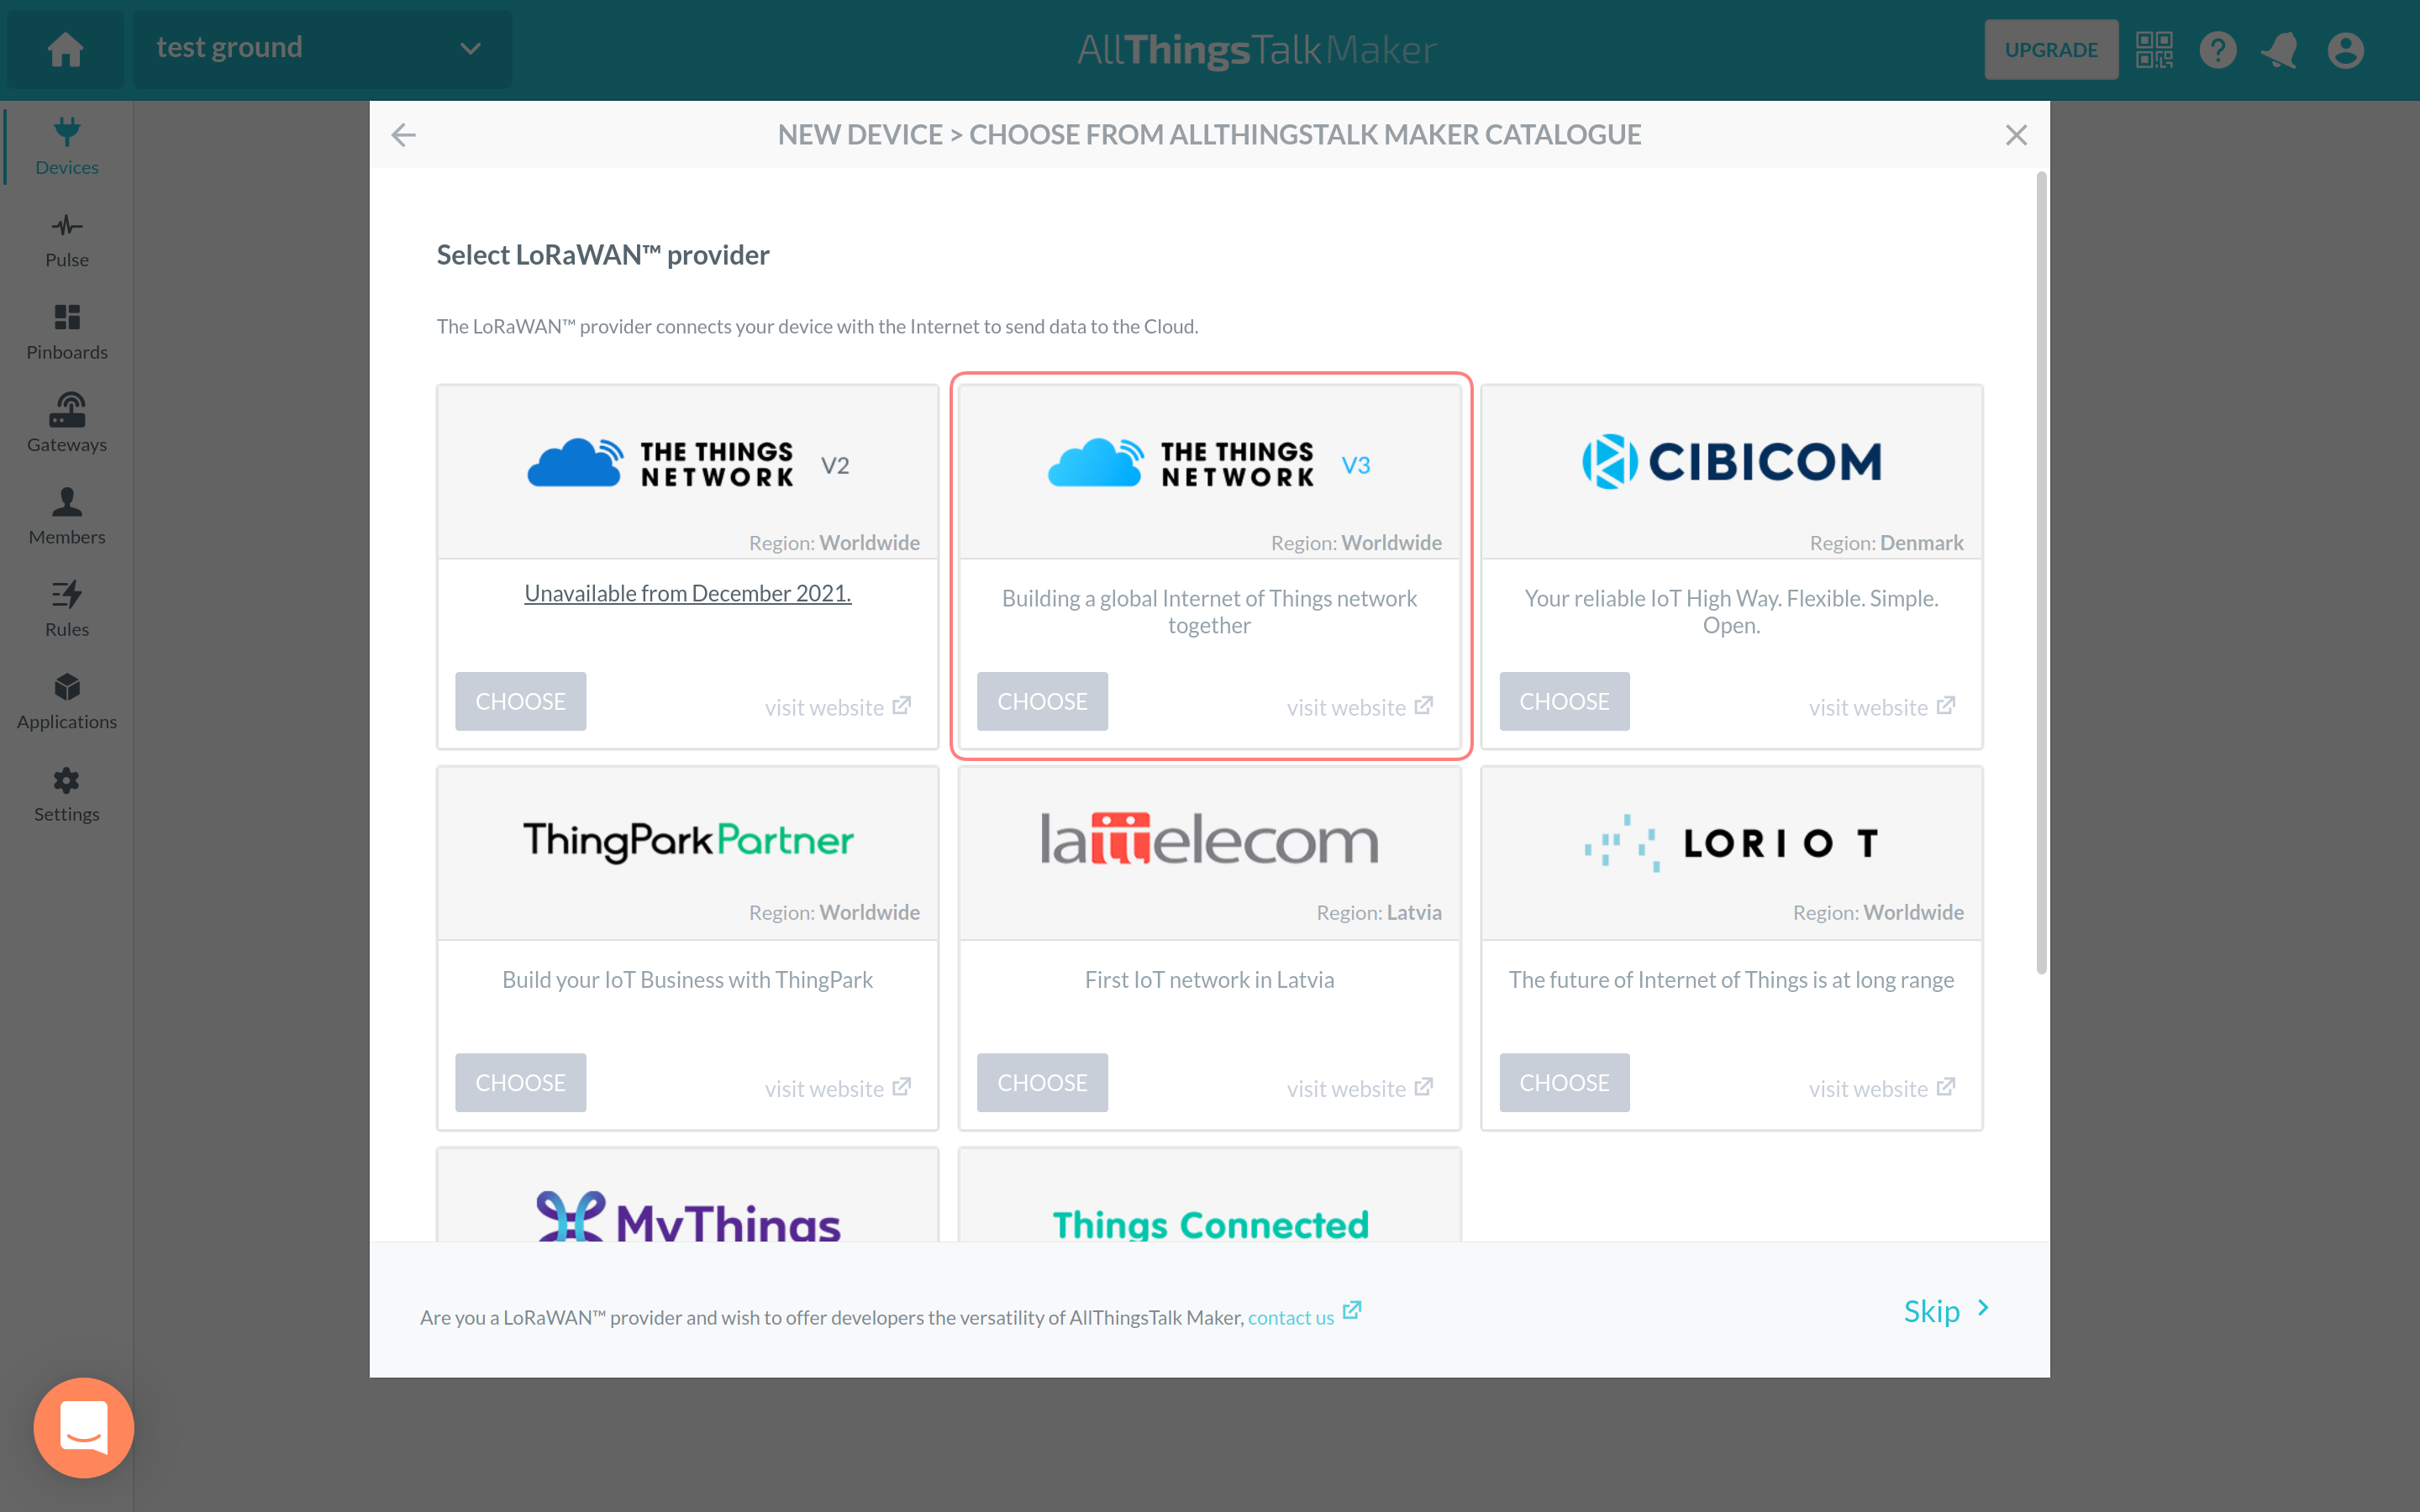
Next, choose The Things Network V3 as a LoRaWAN® provider.
Last, you need to fill in the Device name with a desired value and provide your device’s EUI in the Device EUI field.
In this step, you can also note down the Network Token value as you will need it in further integration process.
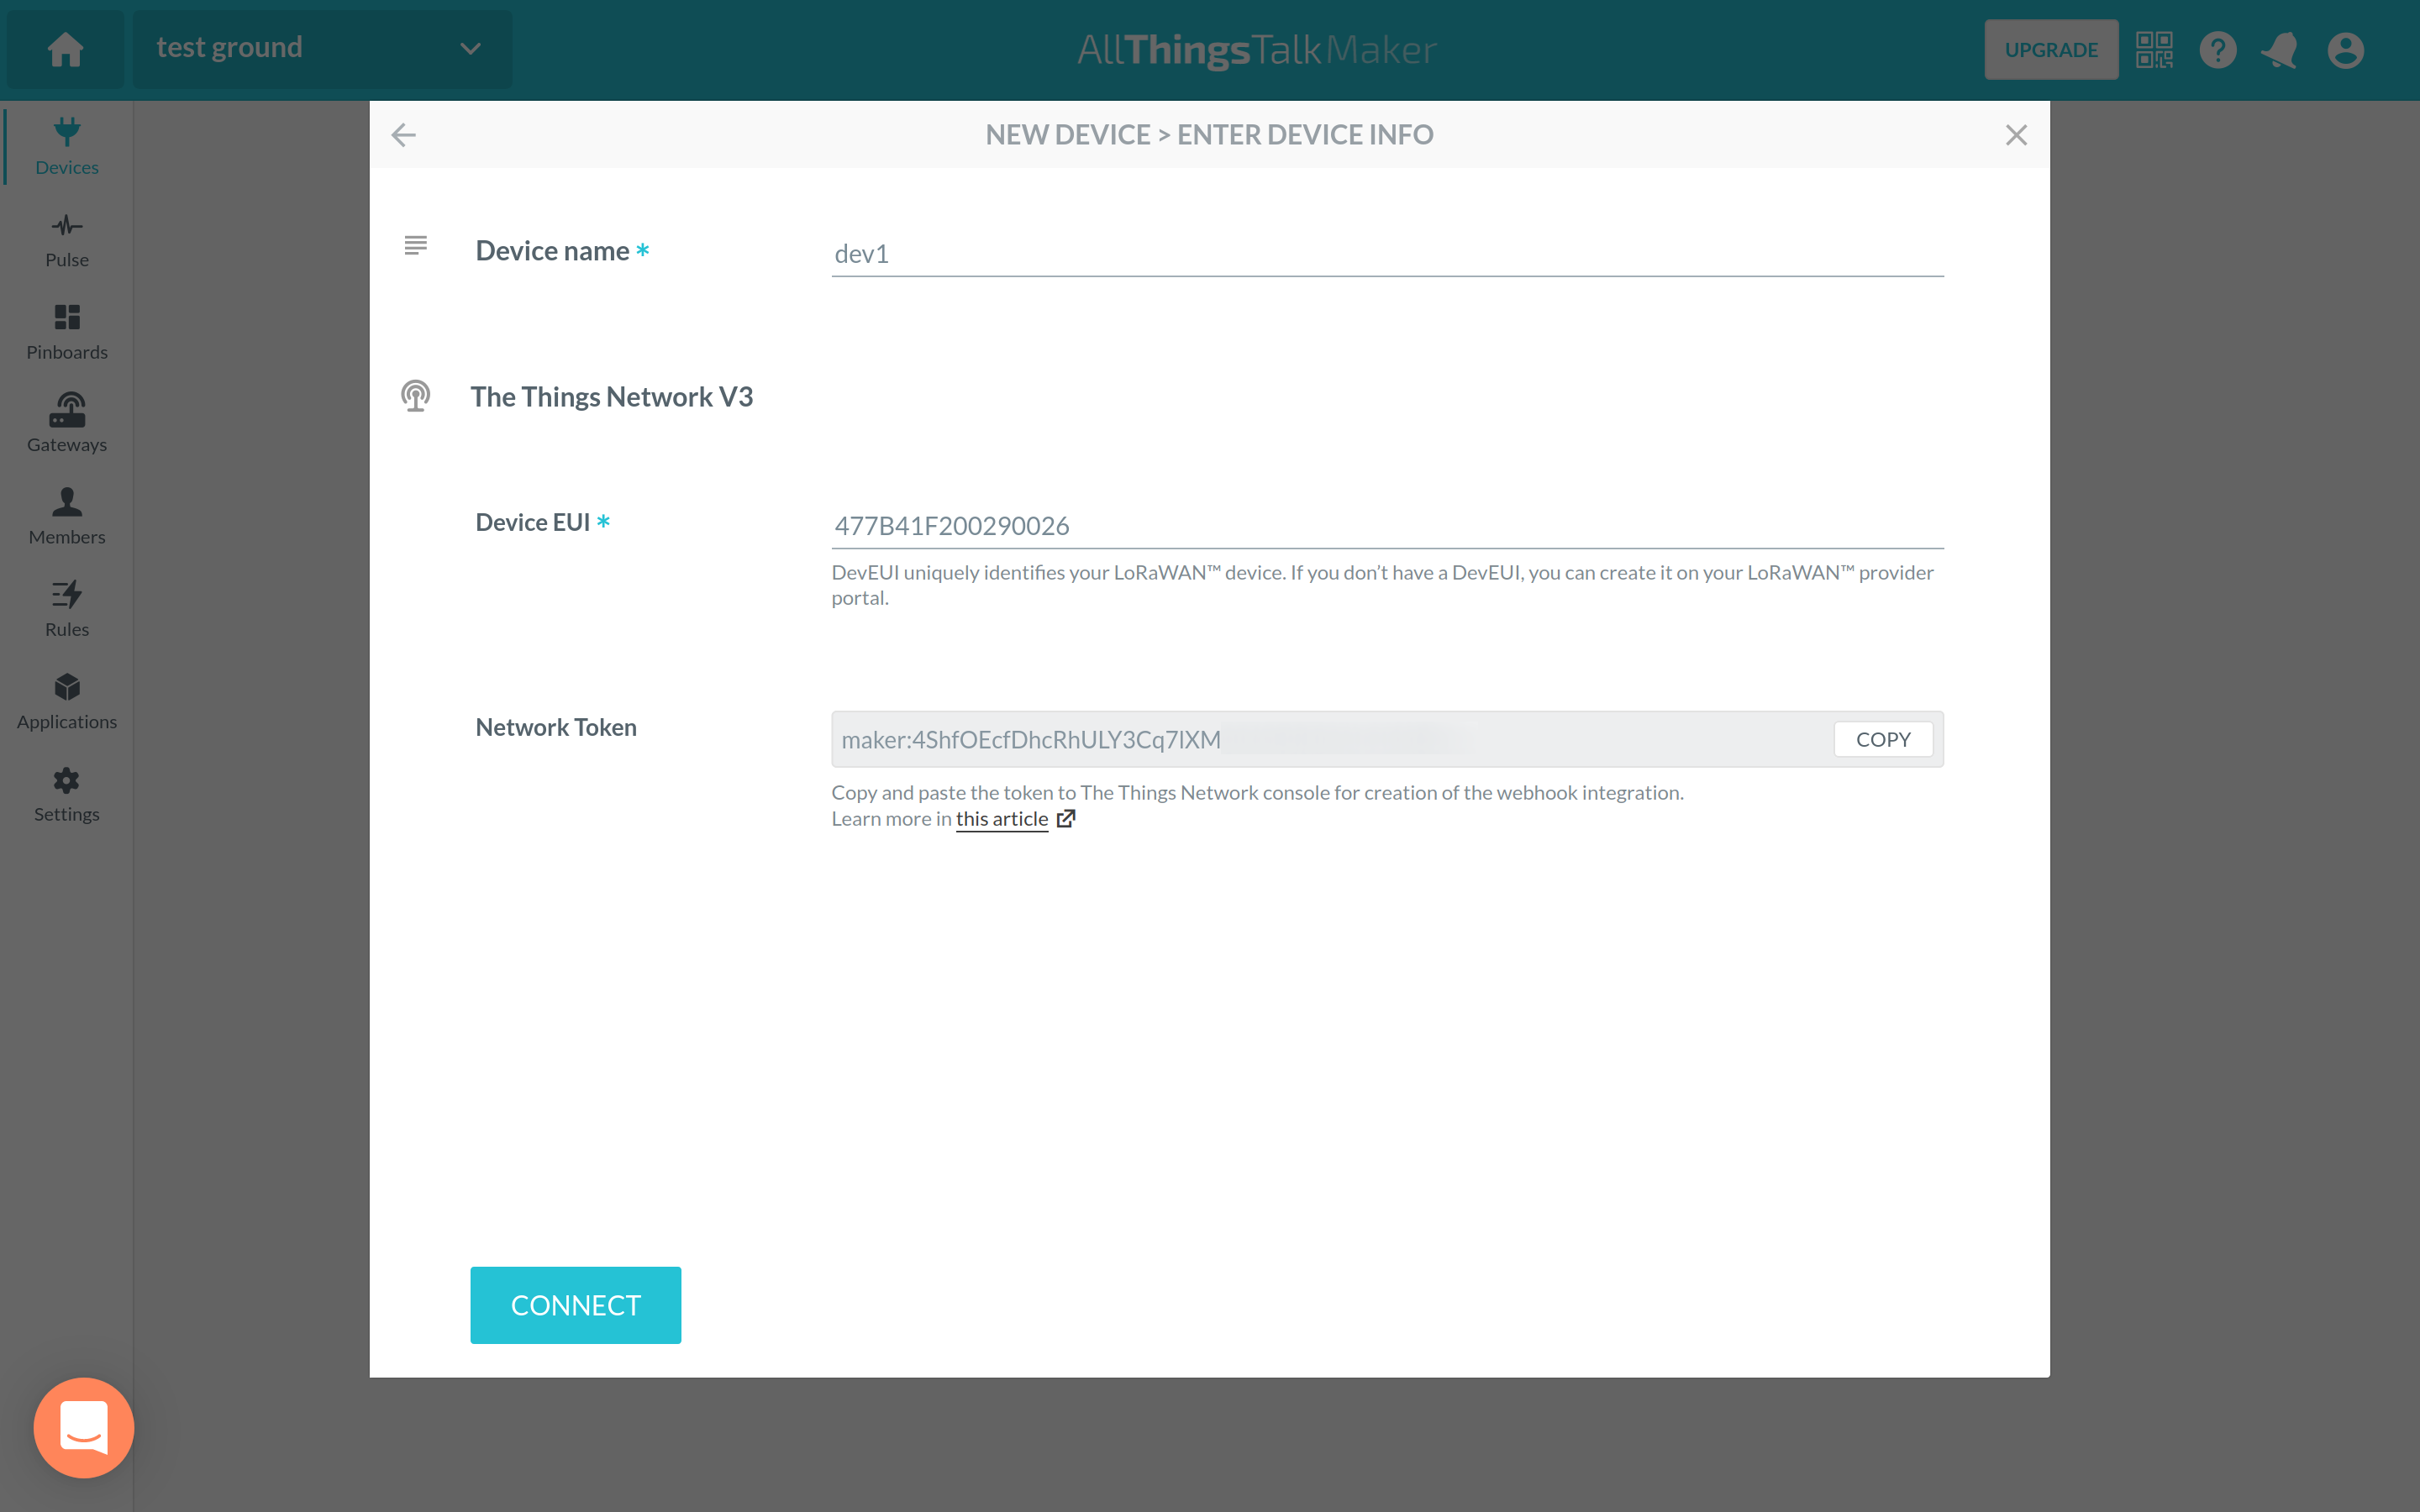
Finish adding the device by clicking Connect.
Configure The Things Stack
After finishing AllThingsTalk Maker setup, use the AllThingsTalk Maker Webhook template to create a Webhook integration on The Things Stack.
To integrate, you only need to fill out the Webhook ID field and provide the Network Token you copied from AllThingsTalk in the previous step.
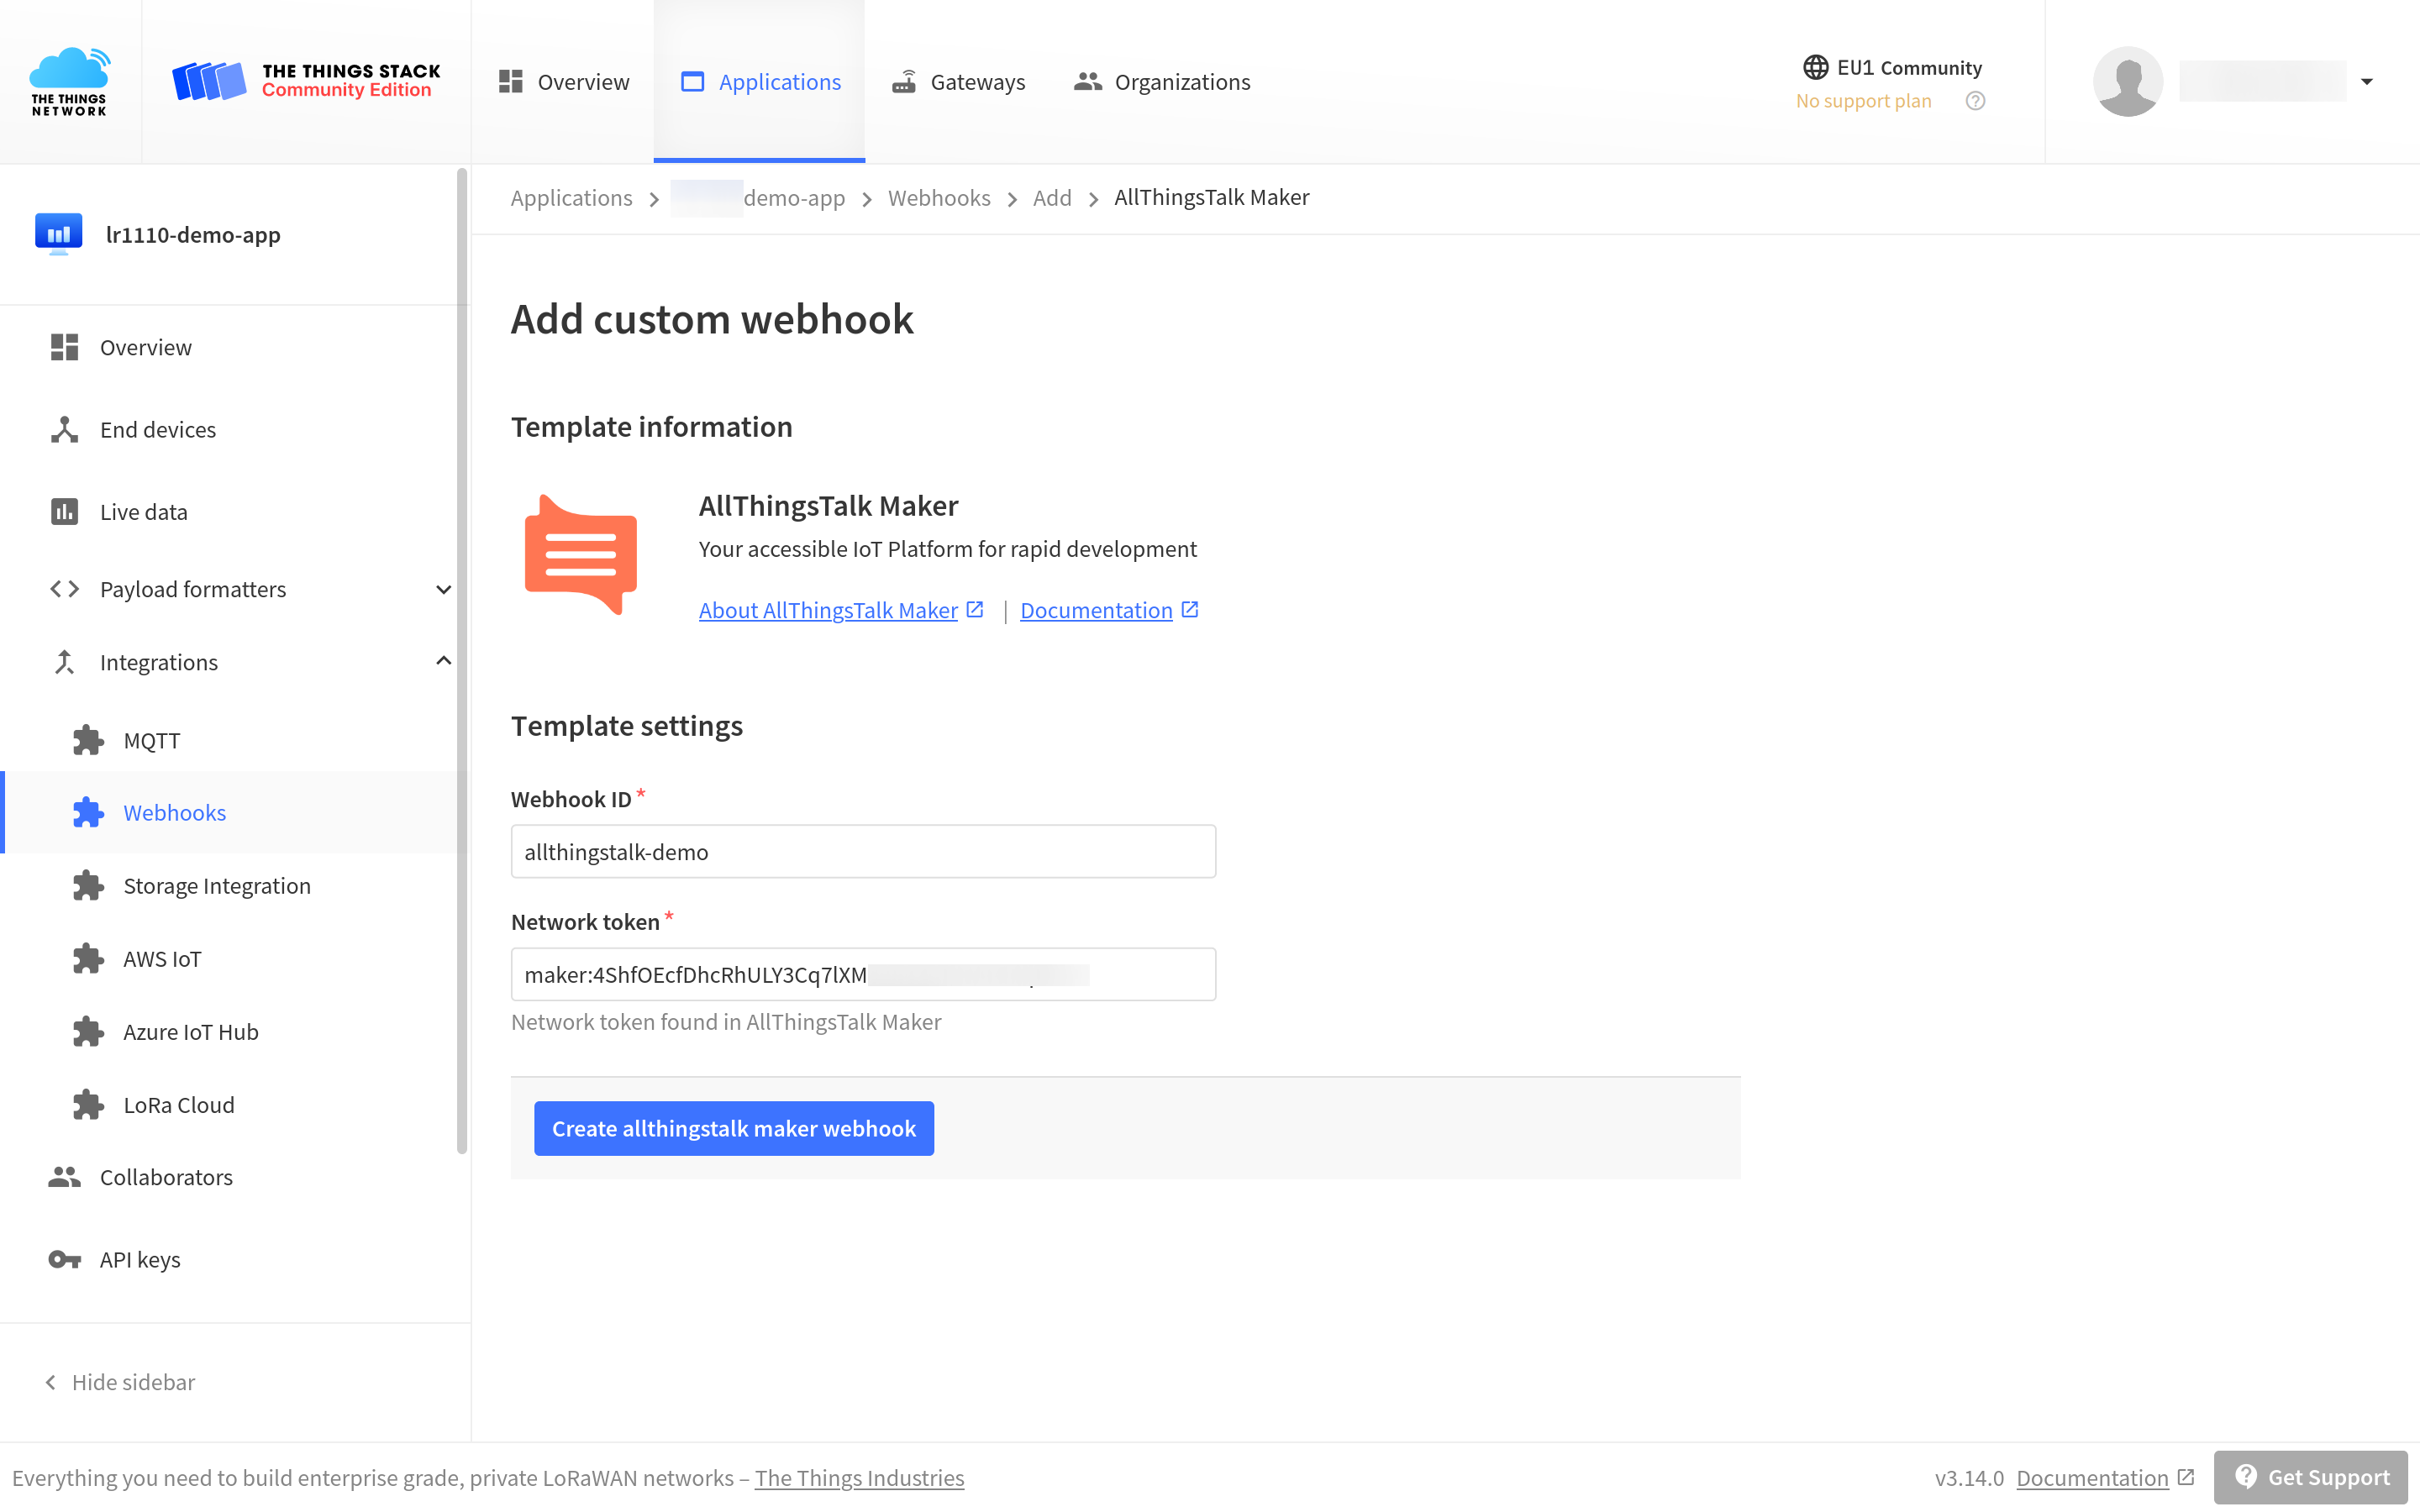
To see the values of all parameters of the AllThingsTalk Maker integration, click on the integration after you created it with the Webhook template.
Monitoring Sensor Data
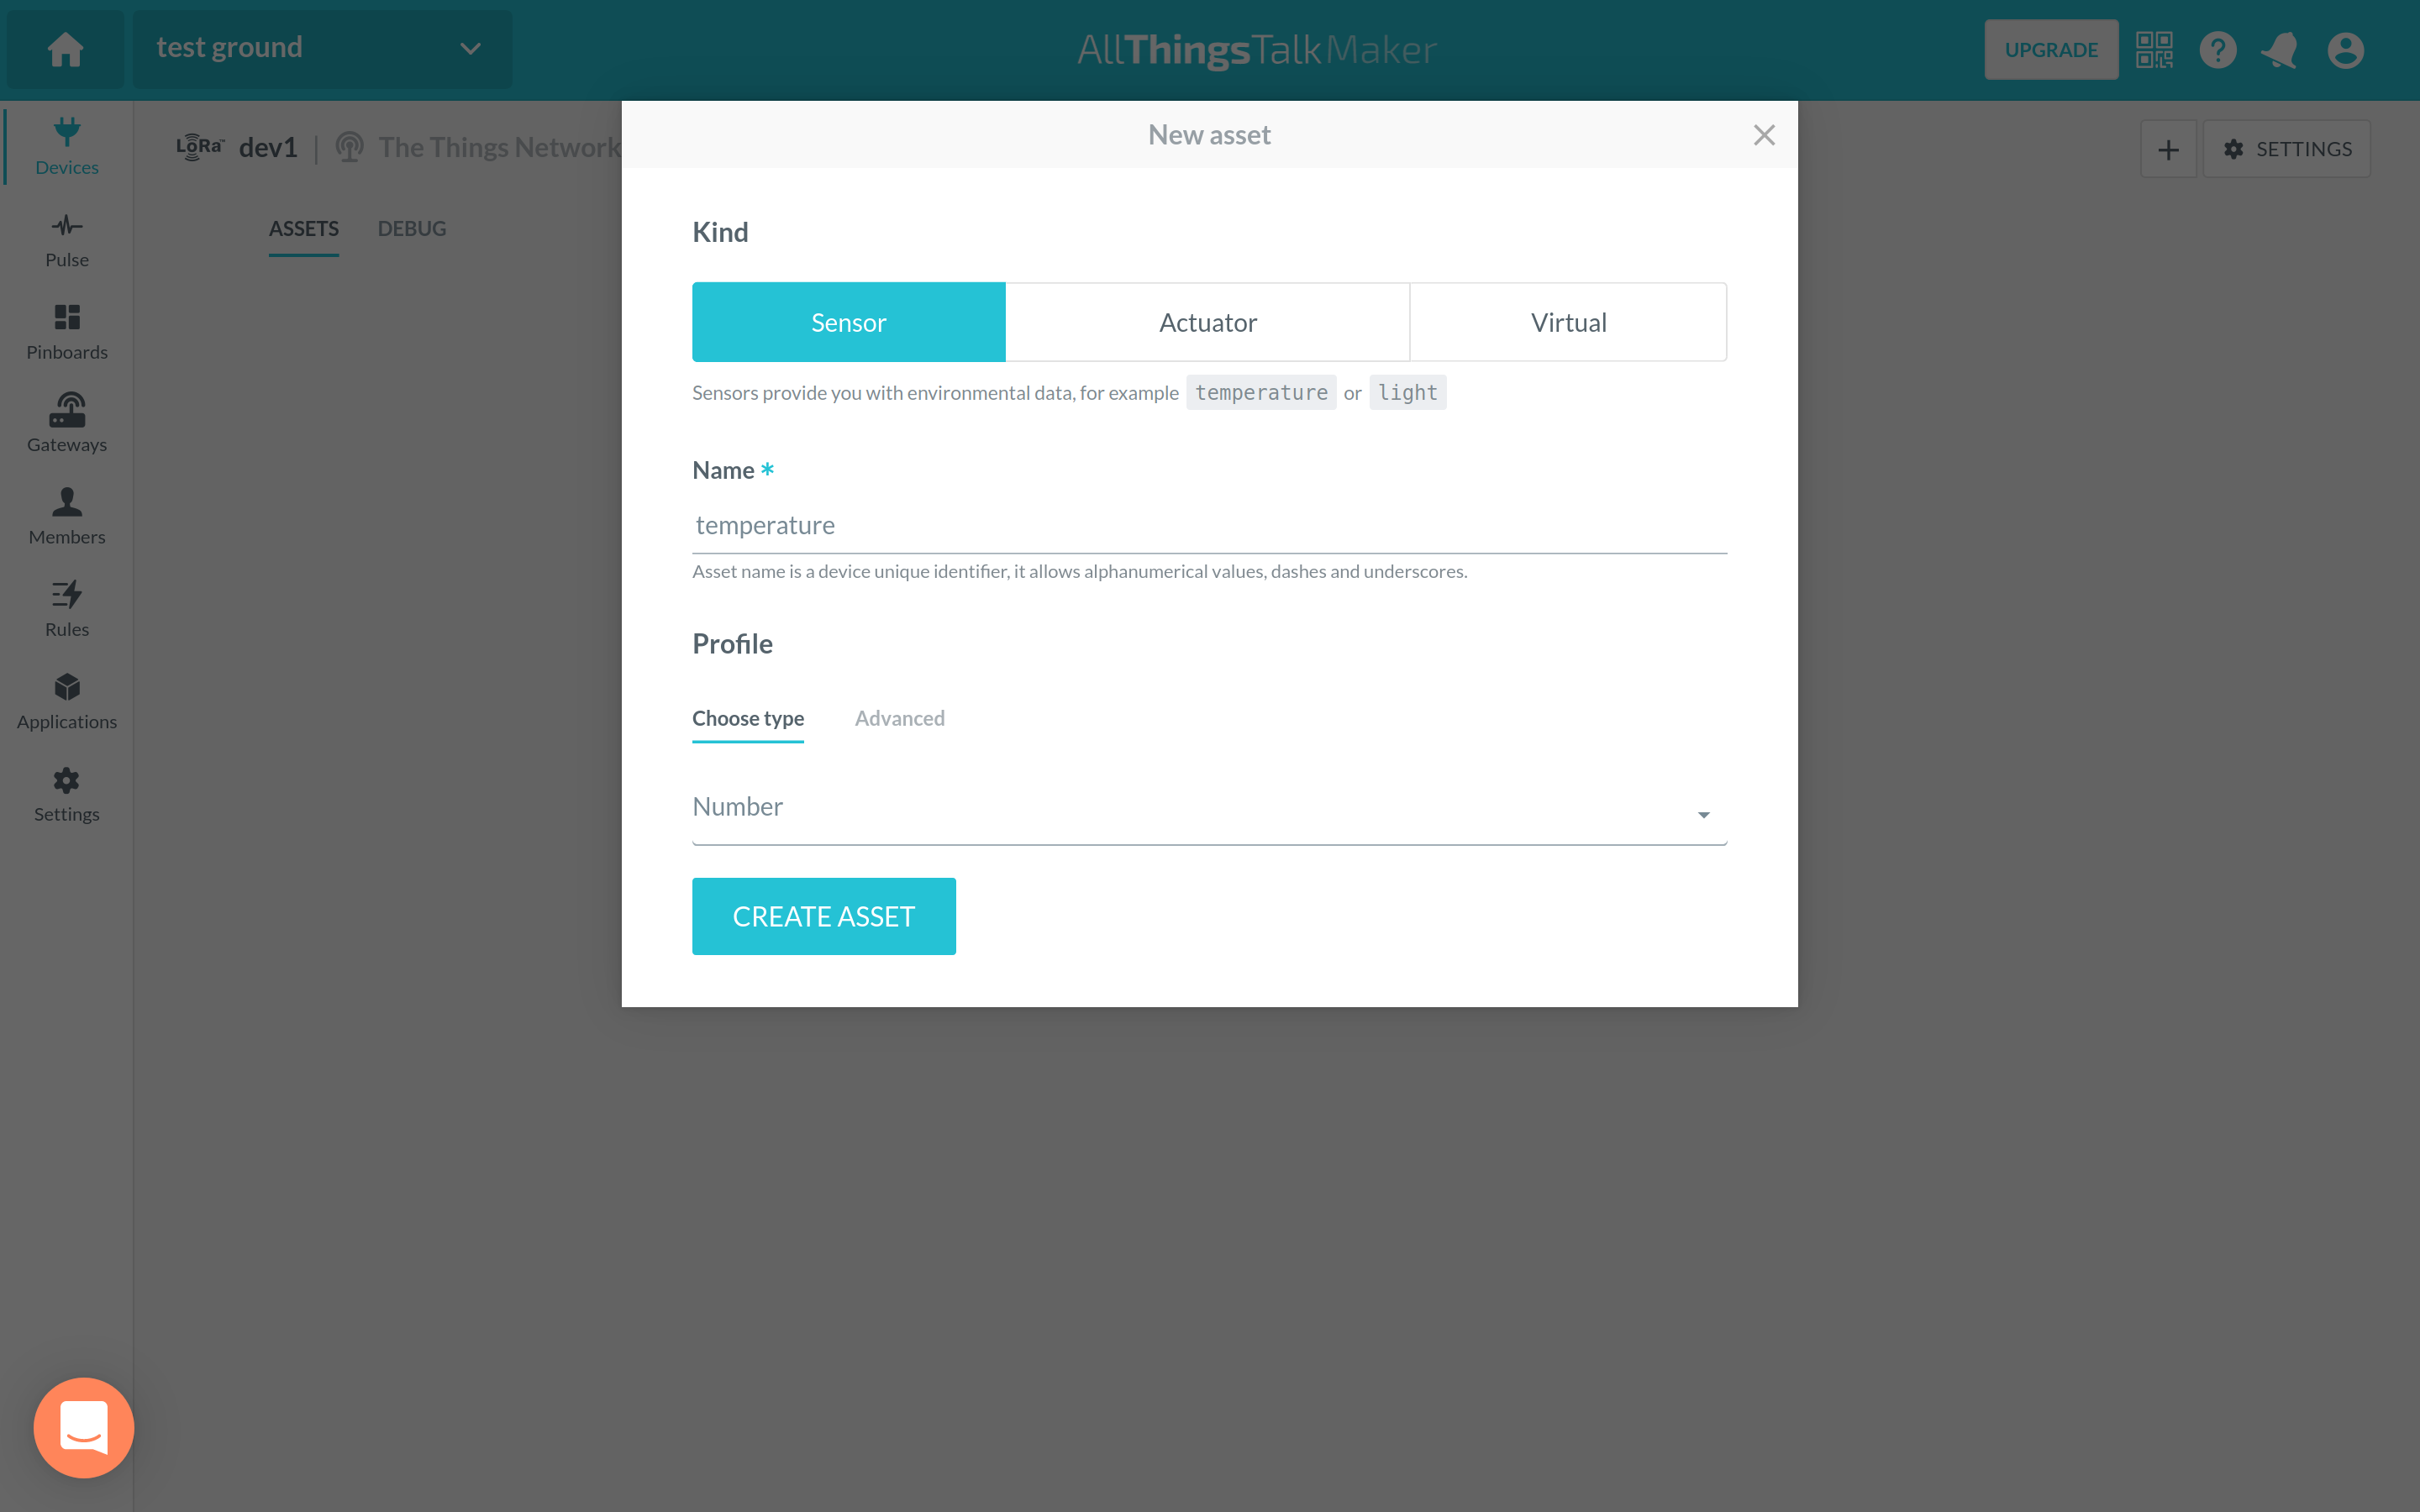
Enter your newly created device’s dashboard, navigate to Assets and select Create asset to create a new device asset.
Choose Sensor, add a Name depending on the type of your sensor data and choose the type of data. In this guide, we demonstrate sending numerical data from a temperature sensor.
In order for your sensor data to be properly decoded on the AllThingsTalk Maker end, it needs to be converted to CBOR format, as mentioned in the Prerequisites. According to the AllThingsTalk data formats documentation, the payload should be constructed using {"<asset-name>": <value>} structures, which after need to be converted to CBOR.
Remember that the <asset-name> is the name you provided when you created a sensor asset.
In this guide, we demonstrate sending {"temperature": <value>} records converted to CBOR format. For example, if the temperature sensor measurement results in {"temperature": 36}, after a conversion to CBOR the uplink message payload will be A1 6B 74 65 6D 70 65 72 61 74 75 72 65 18 24.
You can use free online tools such as cbor.me to easily convert data to CBOR.
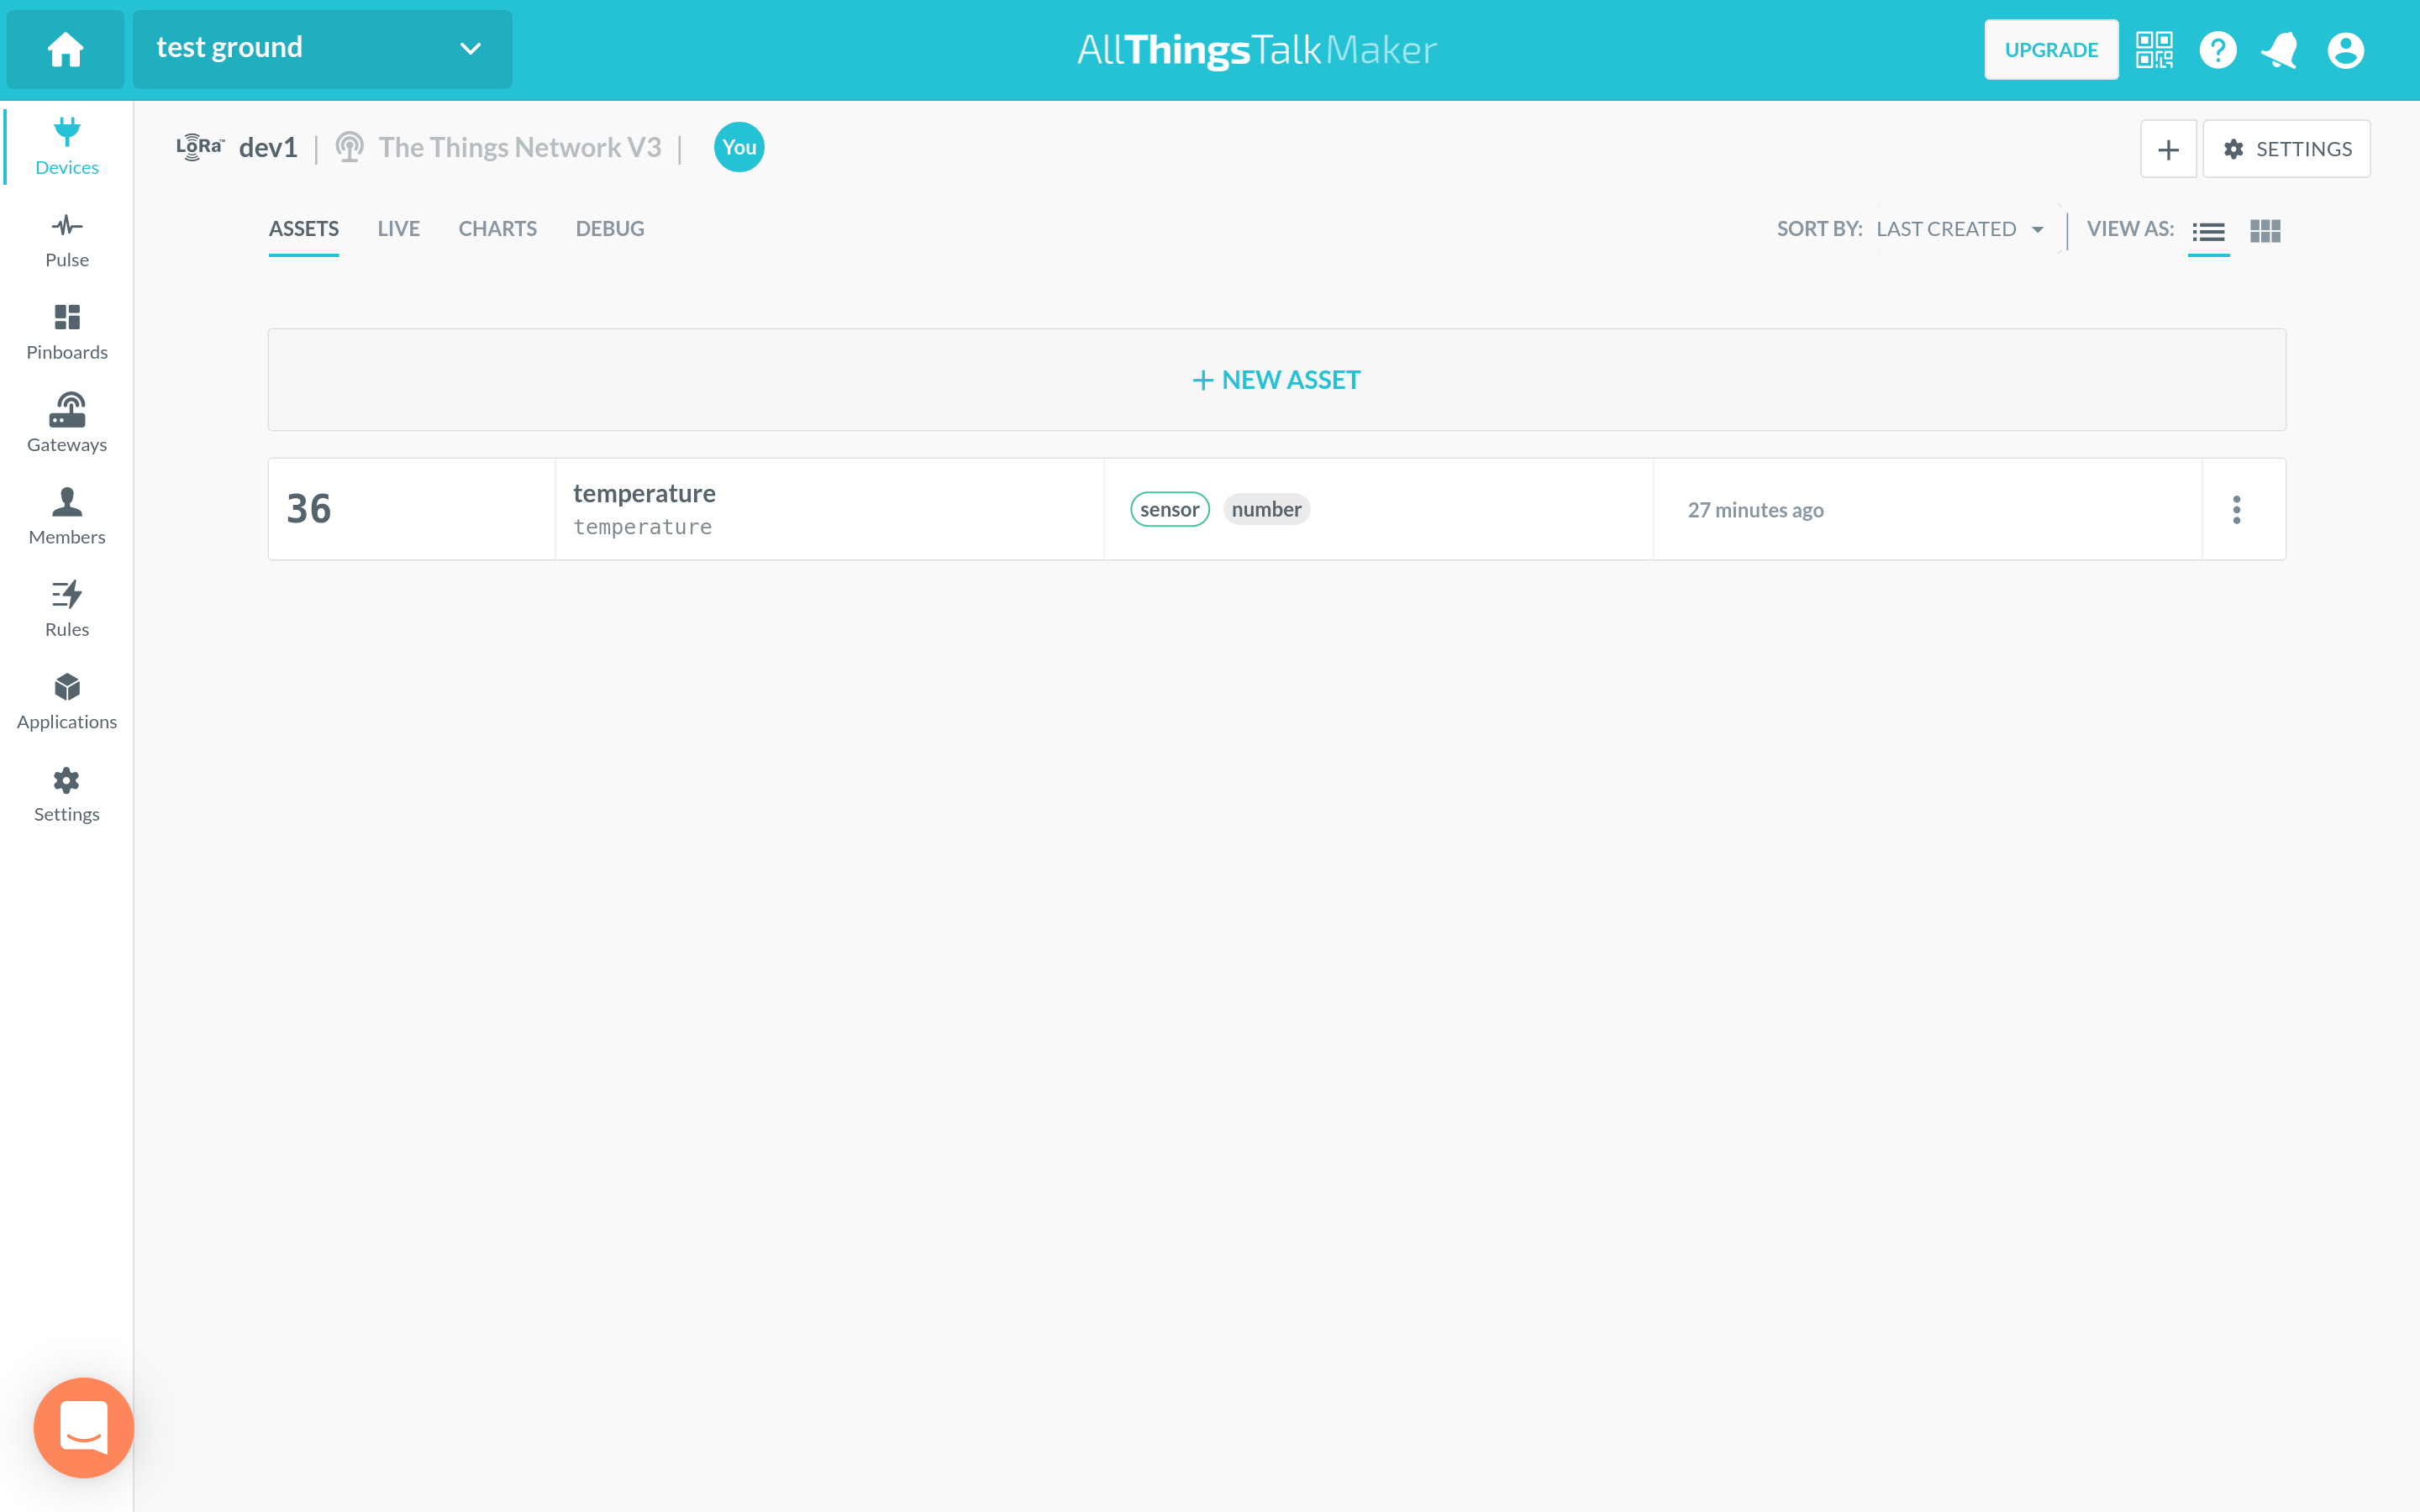
After this data reaches AllThingsTalk Maker, the asset sensor value will automatically be updated, as shown on the image below. You can now continue monitoring this data, creating visual charts, etc.
Actuating Your Device
If your device is an actuator, you can actuate it by scheduling a downlink message to be sent to it from AllThingsTalk Maker.
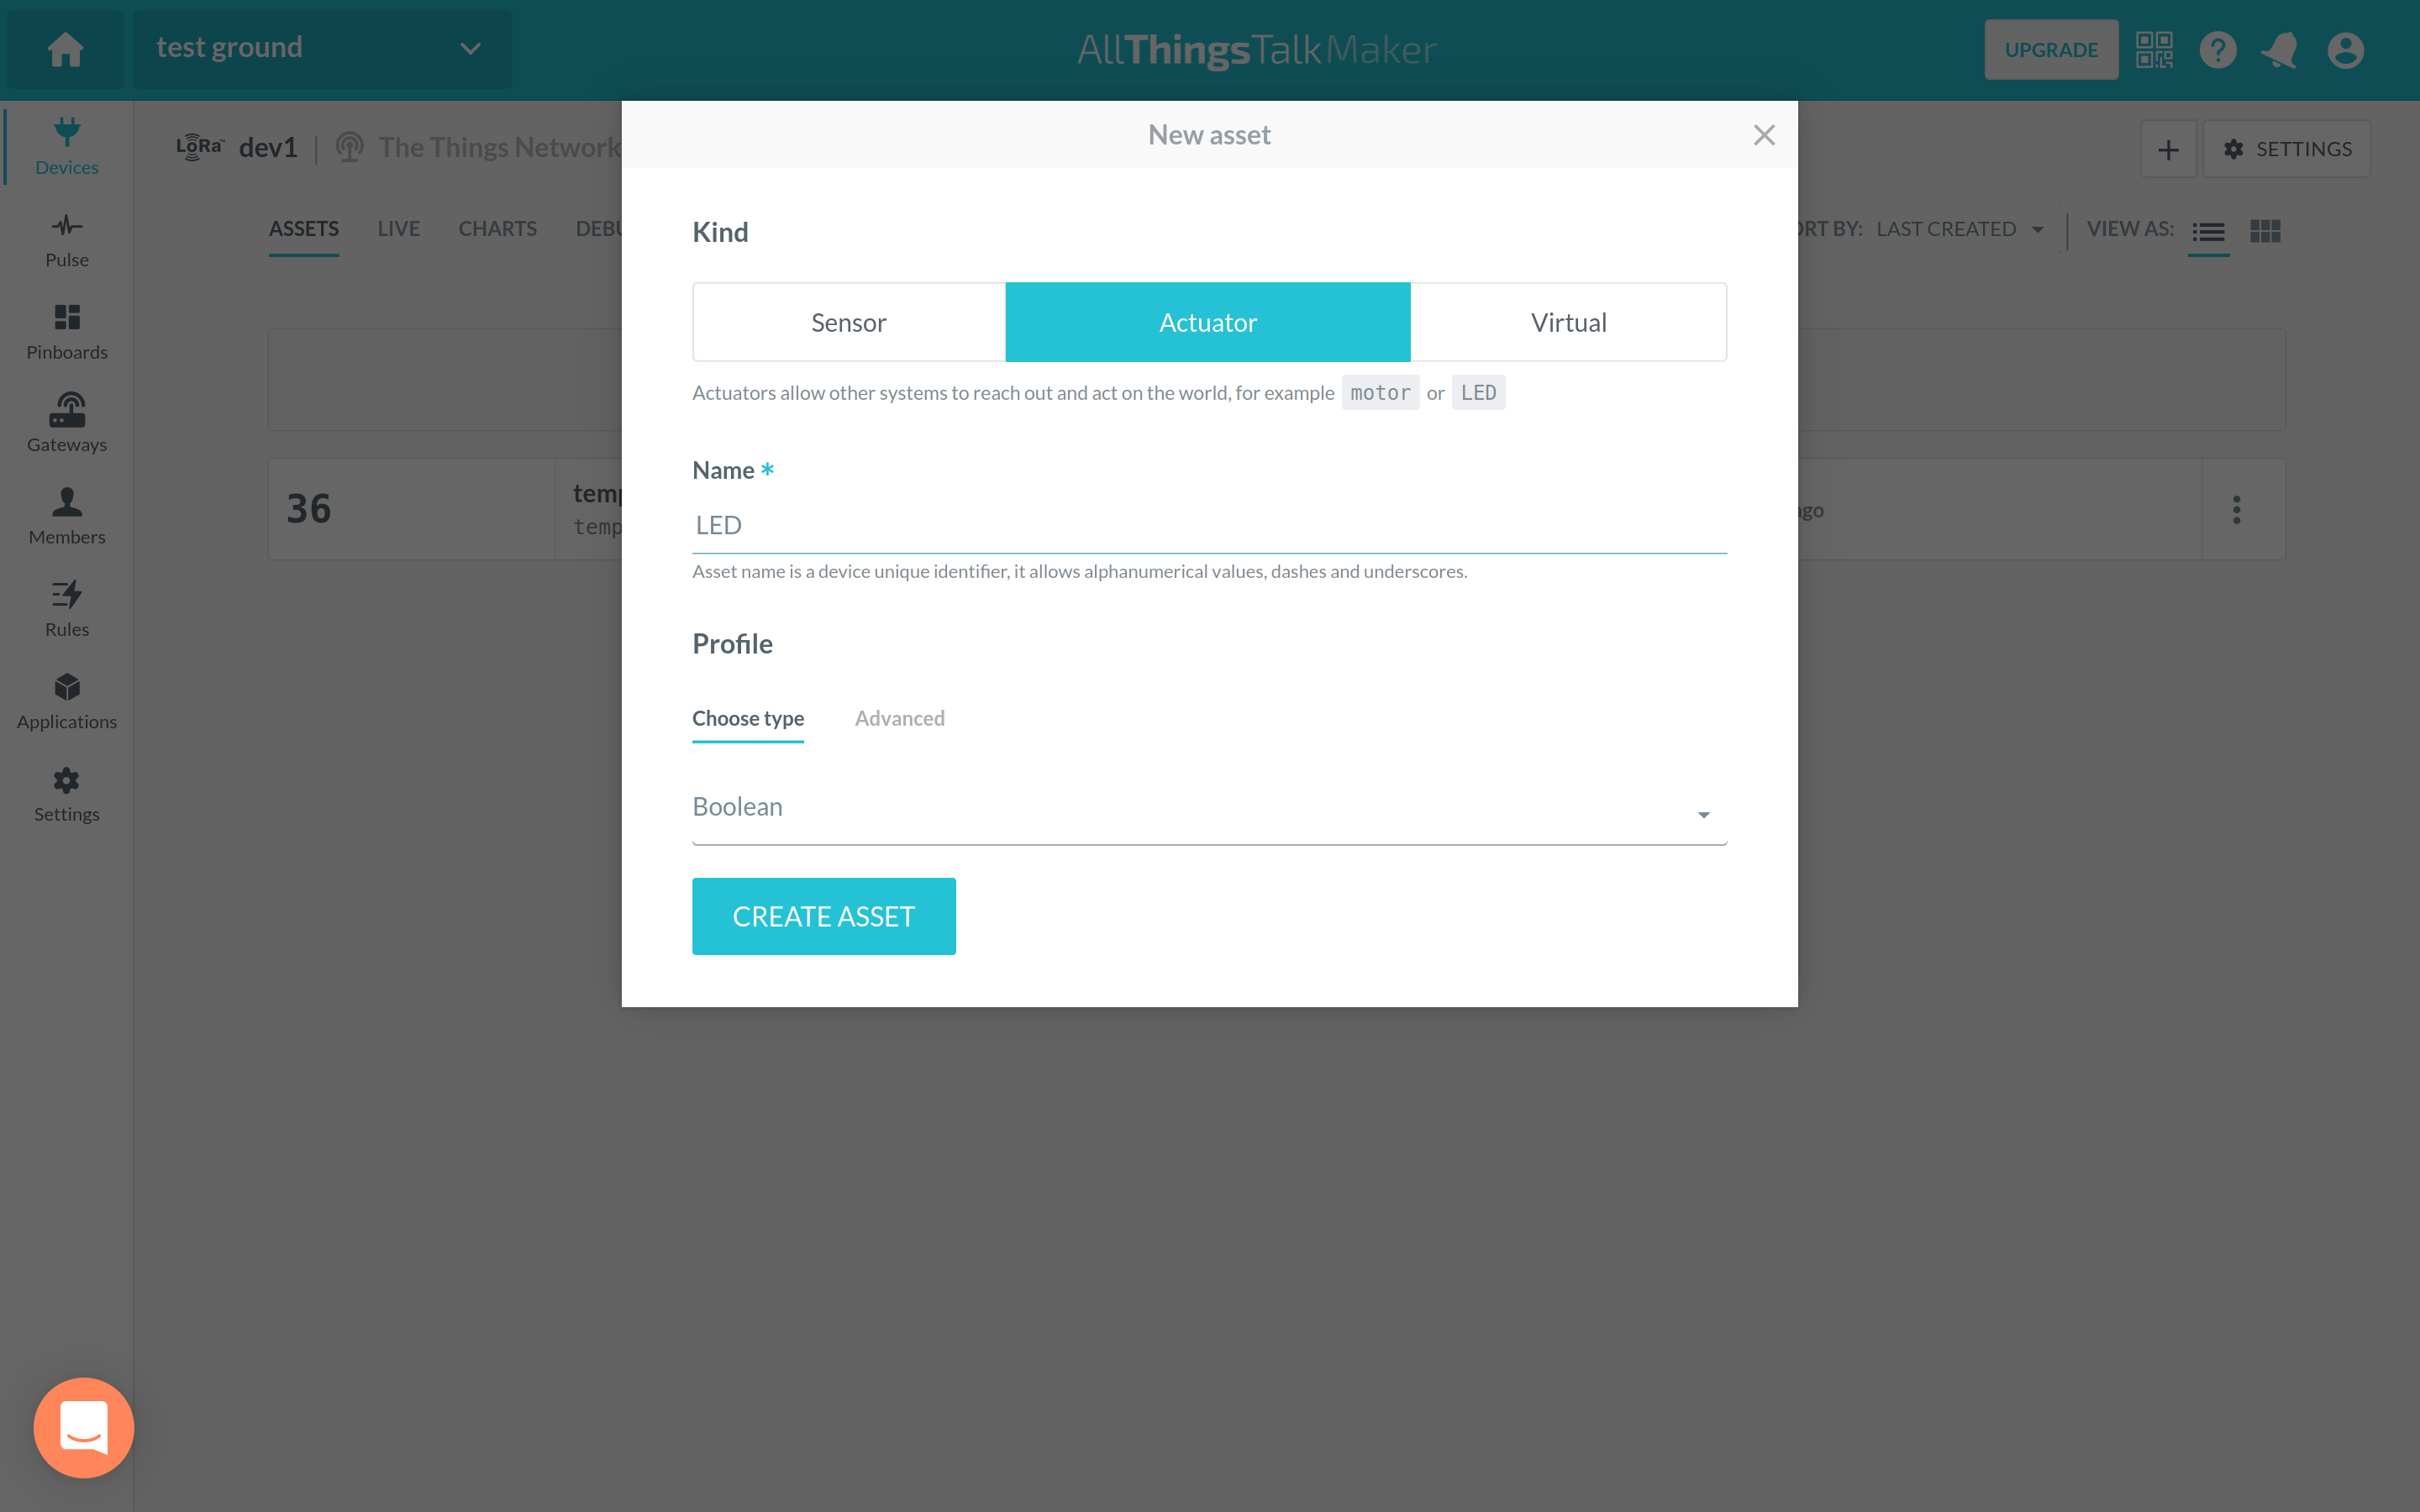
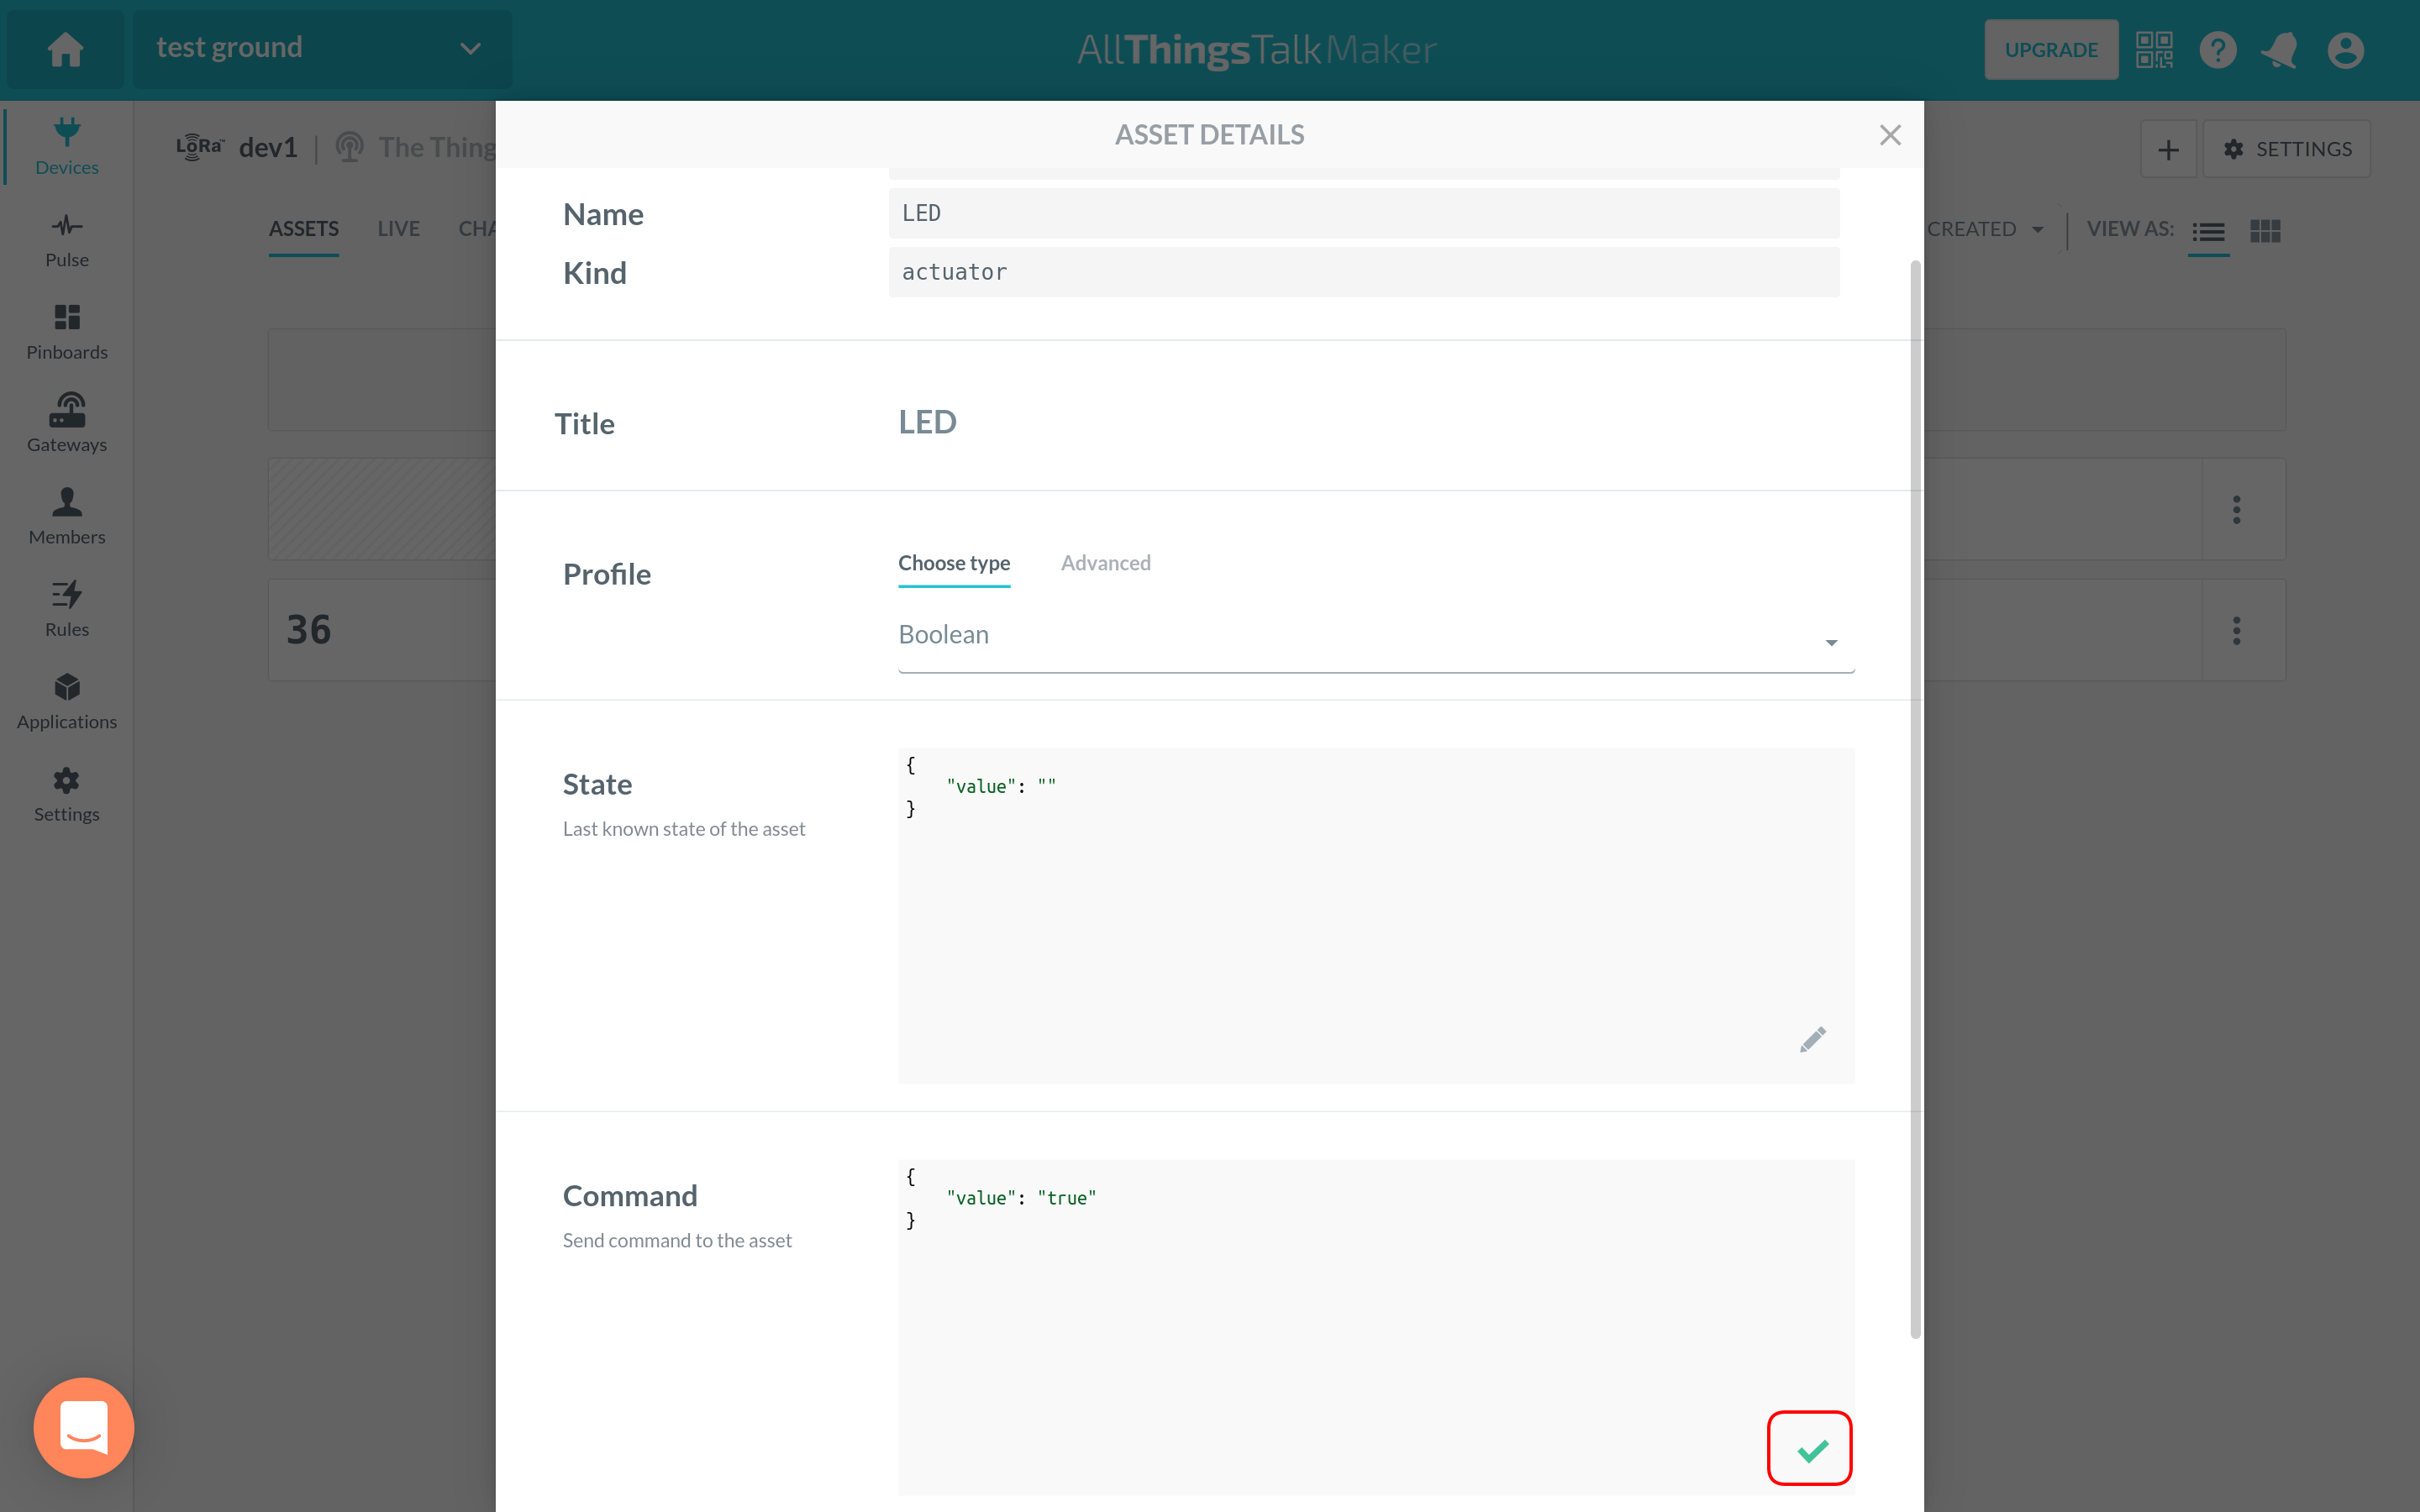
First, enter your device’s dashboard on AllThingsTalk Maker, navigate to Assets and select Create asset to create a new device asset. Choose Actuator, add a Name depending on the variable name you are actuating your device from, and choose the type of data.
In this guide, we demonstrate turning on a LED on an end device by setting the LED asset value to true and sending it through a downlink message.
Select the newly created asset, scroll down to the Command section, set the value to true and click on the green checkmark on the right.
If you check The Things Stack Live data tab, you will see downlink messages being scheduled to be sent to your end device.
You will notice that payloads of the scheduled downlink messages are in CBOR format. You will need to decode this data and implement the logic that actuates your device using the decoded data.
You can also actuate your device using AllThingsTalk Binary Conversion Language (ABCL). For more information on using this format, as well as the integration in general, visit the Use The Things Network V3 with AllThingsTalk guide on the official AllThingsTalk Maker documentation site.