This section provides instructions for creating a webhook in the console.
In addition to the written instructions linked below, a video with instructions for creating webhooks is available on The Things Industries youtube channel.
Show video
Creating a webhook requires you to have an HTTP(S) endpoint available. If you don’t have an endpoint available for testing, you can test with a free service like Webhook.site.
In your application select the Webhooks submenu from the Integrations side menu. Clicking on the + Add Webhook button will open the list of Webhook templates.
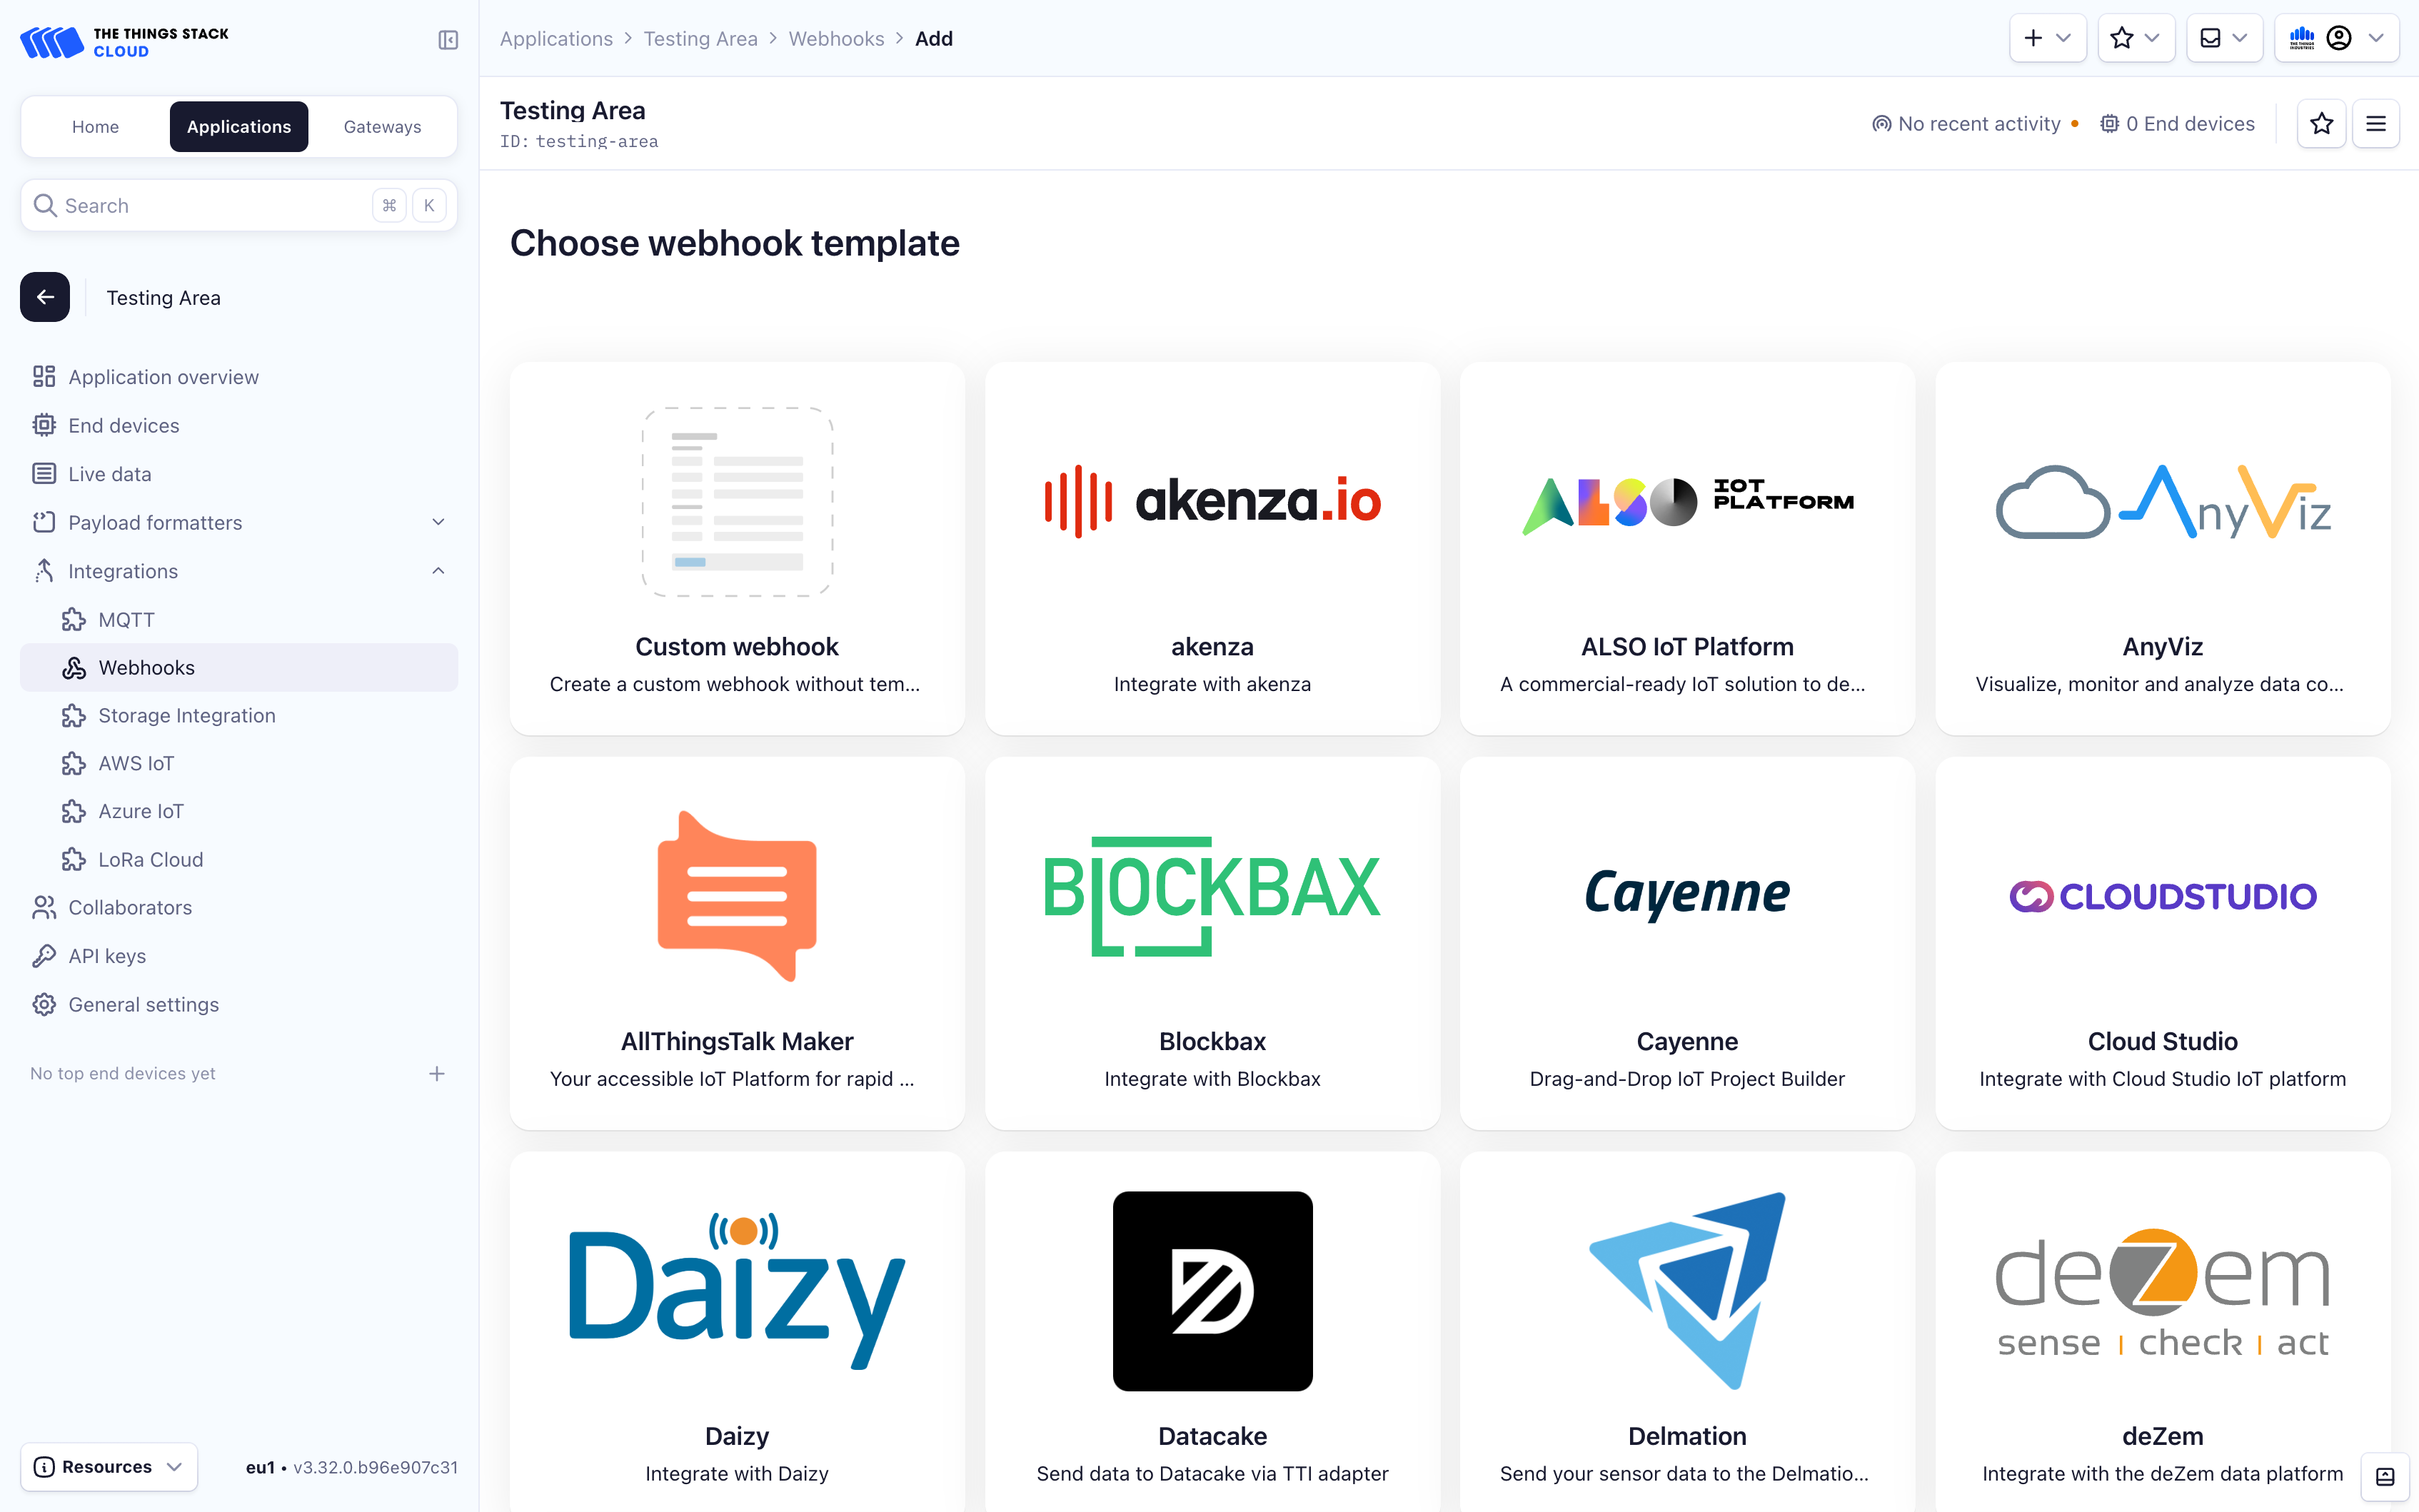
To use a predefined webhook template, choose it. Otherwise, to create your own custom webhook, choose Custom webhook and follow the instructions below.
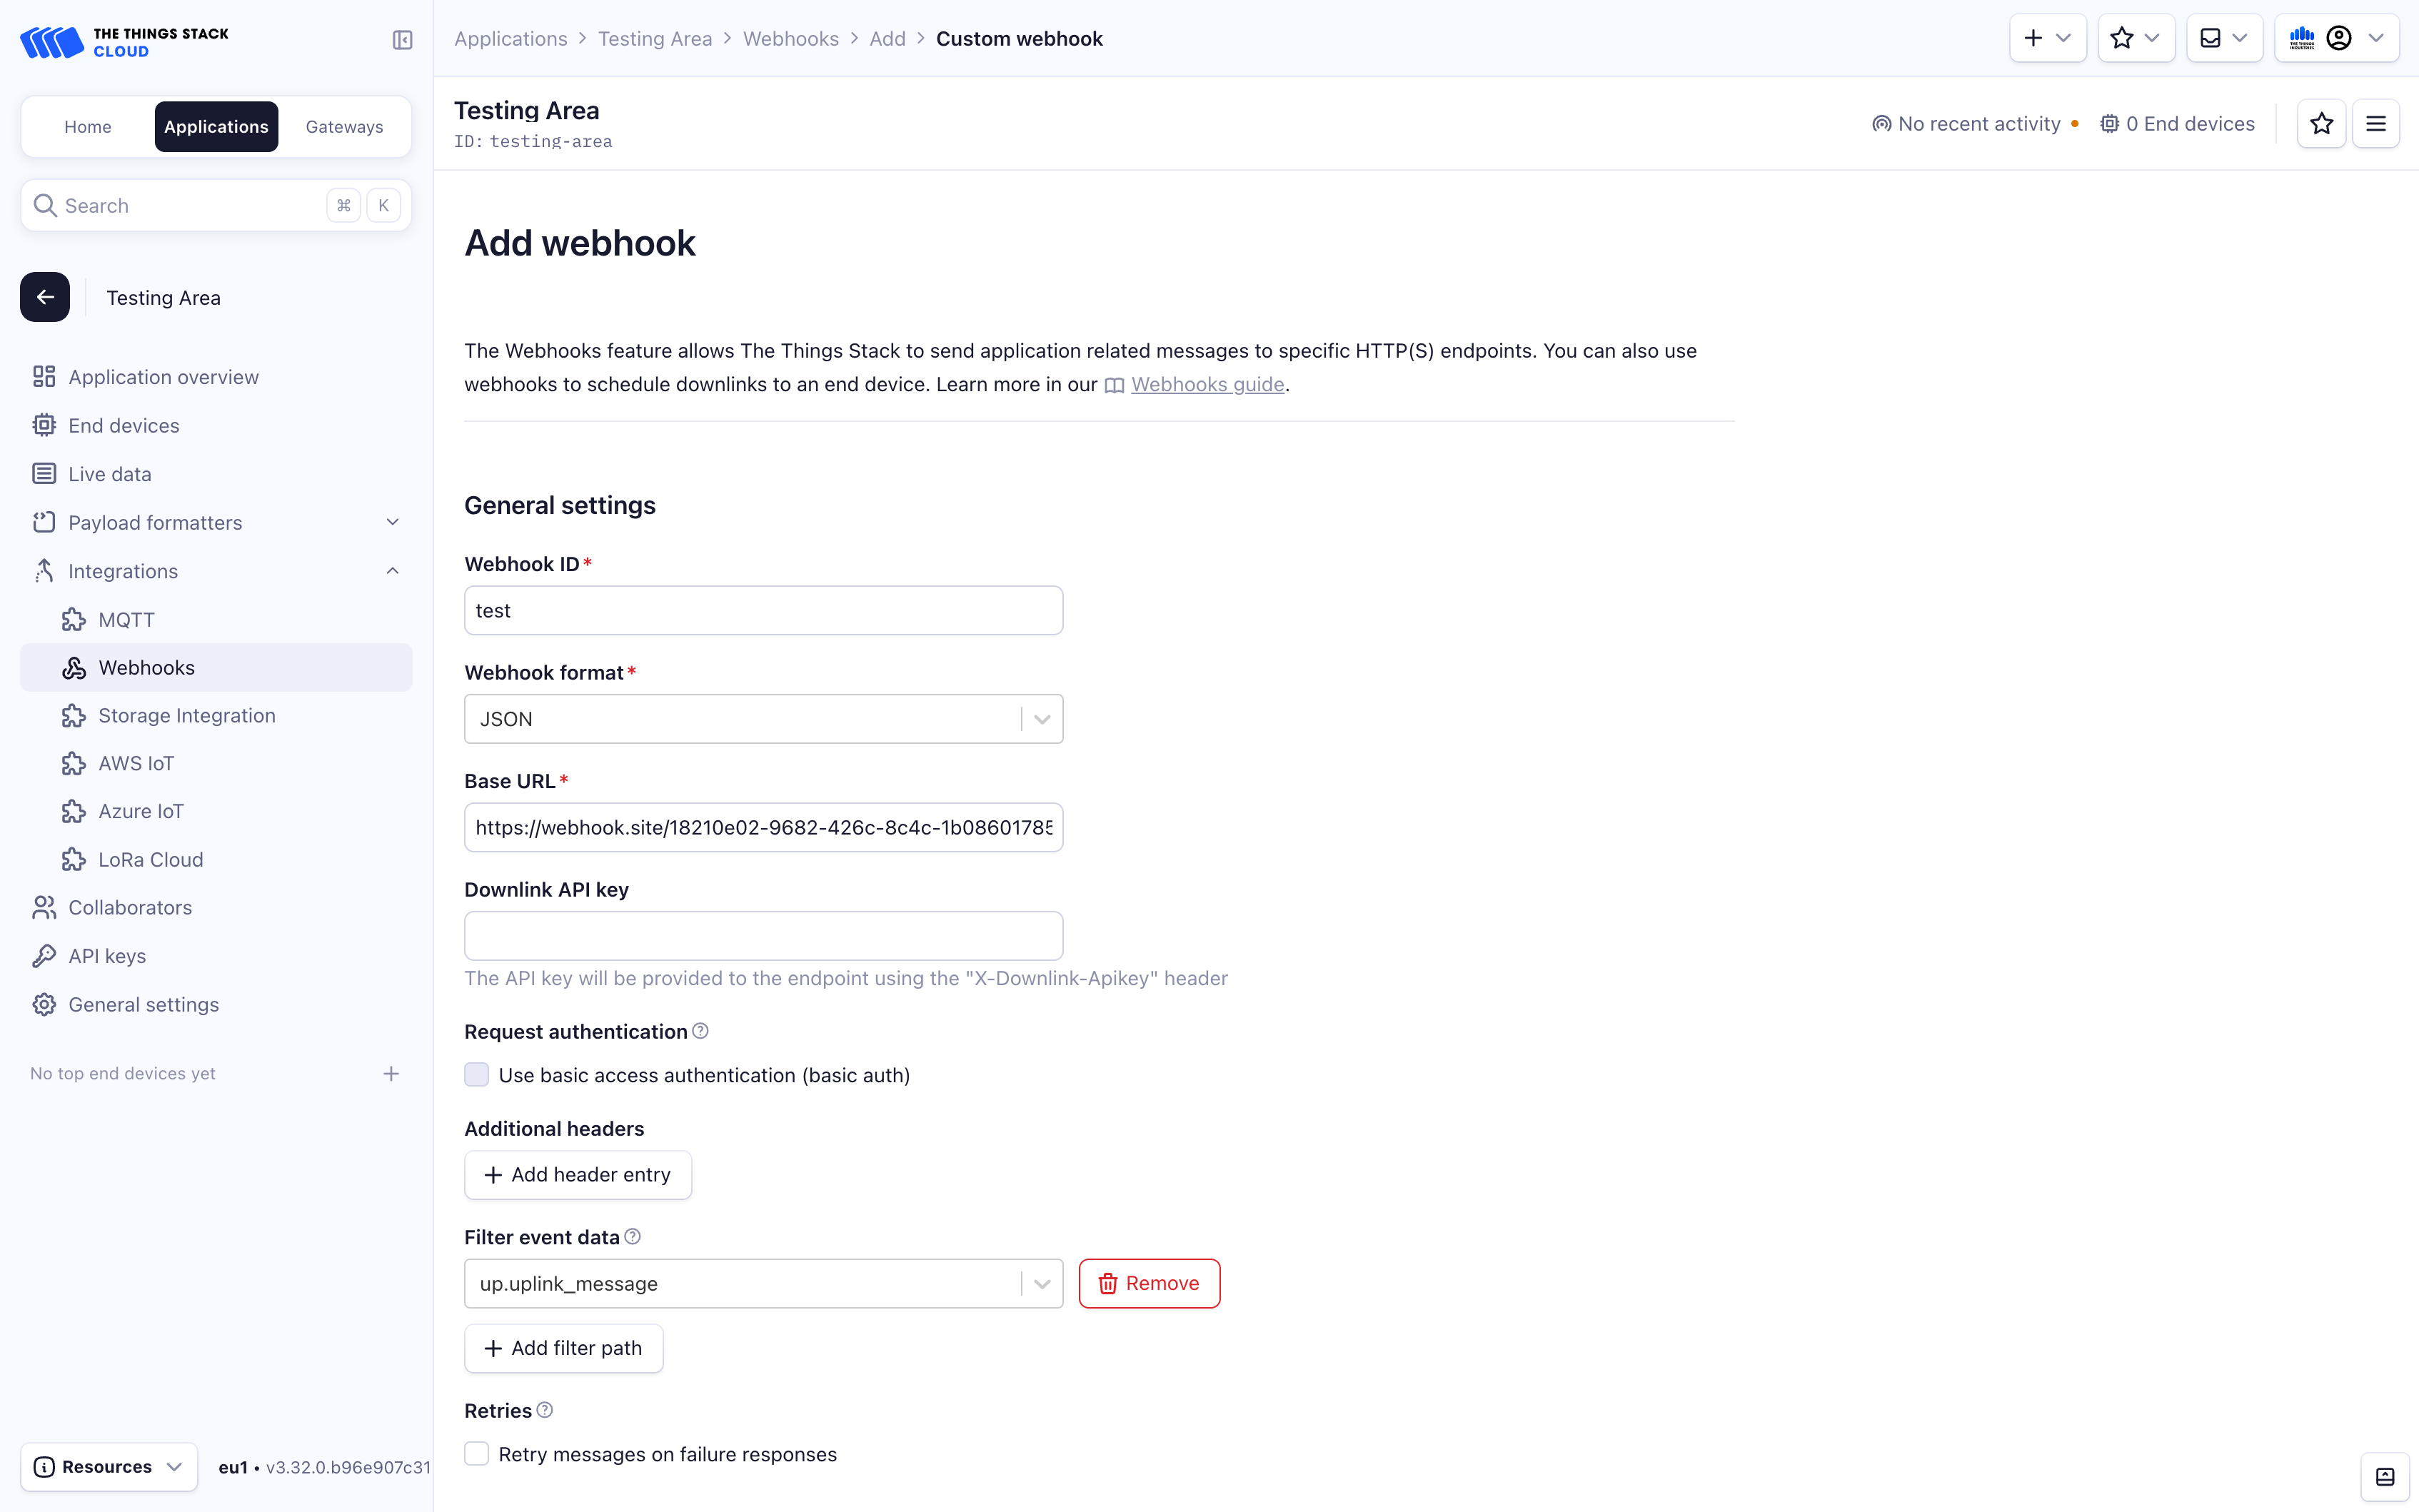
Give your webhook a Webhook ID to identify it. Choose JSON as the Webhook format.
For Base URL, provide the upstream endpoint URL that the webhook should call. Make sure to always check if the endpoint is accessible beforehand, using tools like cURL or Postman. The 200 OK status code response must be received from the endpoint URL for a Webhook integration to be successful.
The Downlink API key field allows you to provide an API key which will be sent with all messages to the webhook endpoint. This can be useful to allow your integration to schedule downlinks without requiring you to hardcode an API key in the endpoint.
Note:
Your integration may also schedule downlinks using an API key with appropriate rights, regardless of the value in the Downlink API key field.If you want to increase security, you can also check the Request authentication checkbox and provide credentials that will be used to generate basic authentication header (Authentication: Basic <credentials> format). This header will then be attached to all webhook requests.
It is also possible to Filter event data, i.e. to choose which data you want to push to your webhook. This feature is convenient in case you want to avoid pushing details you don’t need and want to save bandwidth. To filter data, just click on the Add filter path button and choose paths for data that you need. For example, if you choose only up.uplink_message filter, you will only push the following object:
{
  "uplink_message": {
    "f_port": 1,
    "frm_payload": "ICw=",
    "rx_metadata": [
      {
        "gateway_ids": {
          "gateway_id": "test"
        },
        "rssi": 42,
        "channel_rssi": 42,
        "snr": 4.2
      }
    ],
    "settings": {
      "data_rate": {
        "lora": {
          "bandwidth": 125000,
          "spreading_factor": 7
        }
      },
      "frequency": "868000000"
    }
  }
}
Check out all available filter paths.
To enable messages for different types of events, use the checkboxes in the Enabled event types section.
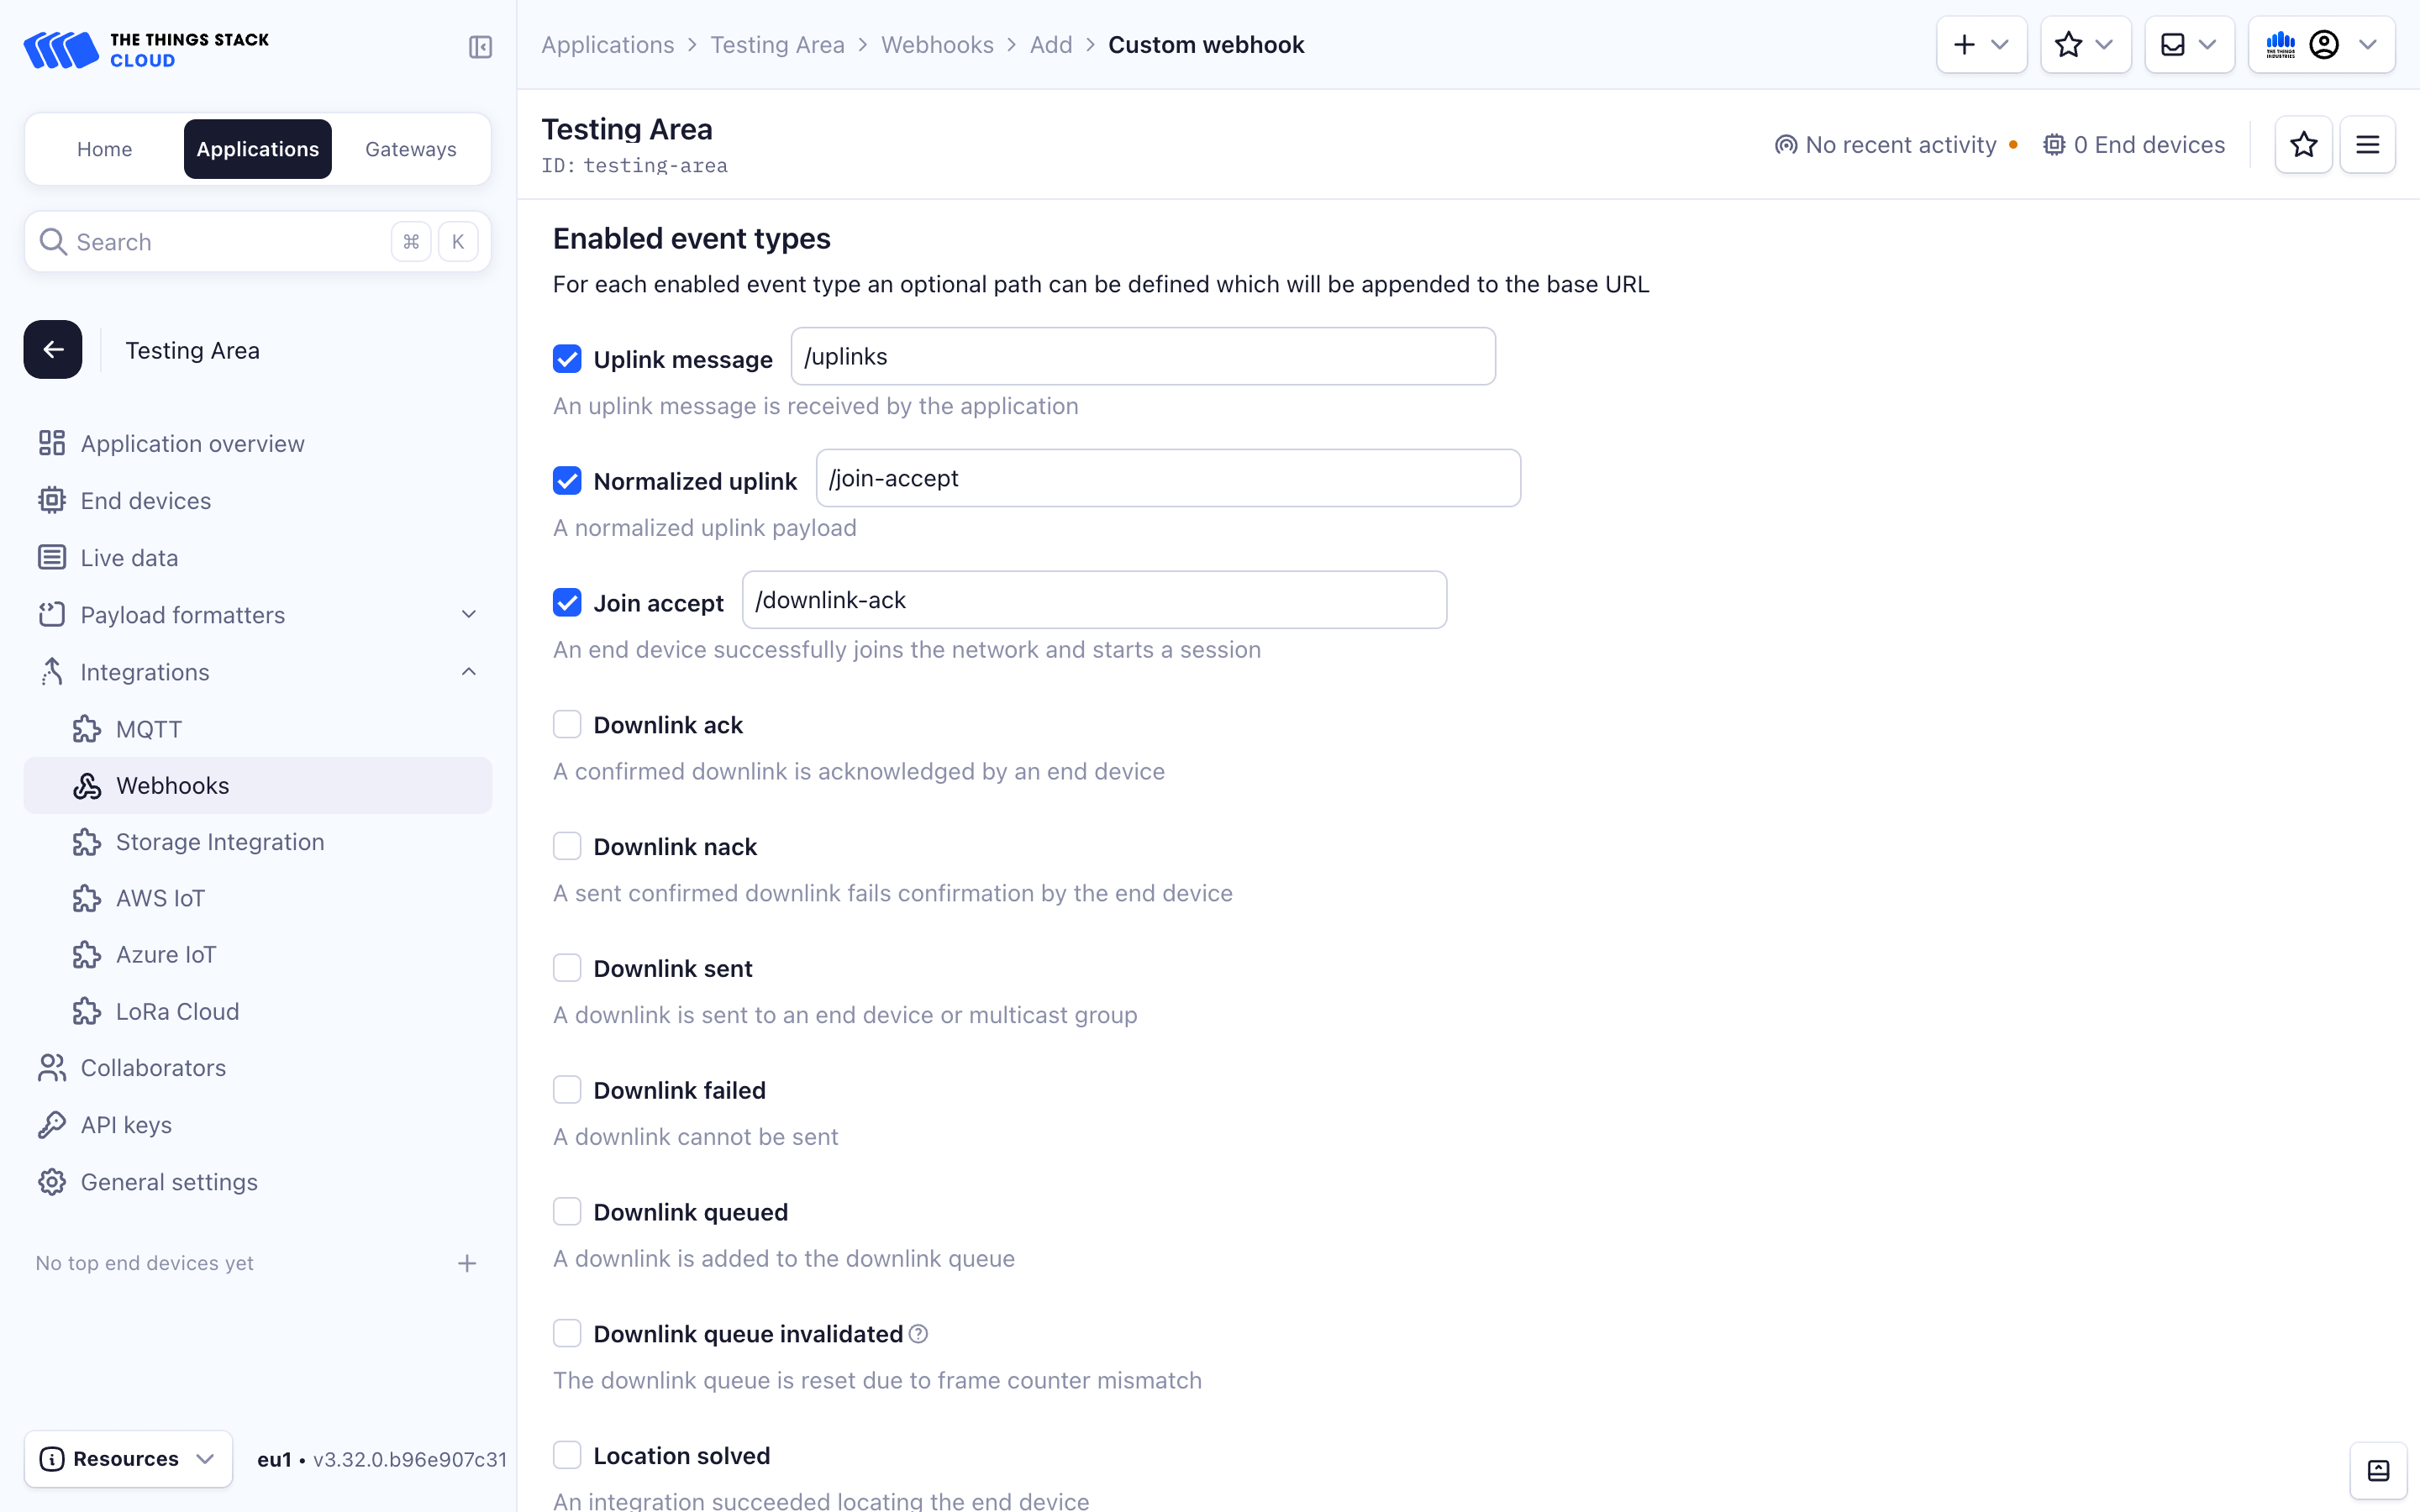
The paths are appended to the Base URL. In the example from the images above, the Application Server will perform POST requests on the endpoint https://webhook.site/uplinks for uplinks, https://webhook.site/join-accept for join-accept messages, and https://webhook.site/downlink-ack for downlink acknowledgement messages.
If no path is specified, messages of that type will be sent to the Base URL.
See Data Formats for examples of uplink and downlink JSON messages.
Clicking the Add Webhook button will create the Webhook.