evrlast is a cloud platform for the automatic collection, monitoring, and analysis of sensor data. evrlast devices continuously measure environmental and operational parameters, transmit the data wirelessly to the evrlast cloud, and notify users whenever configured thresholds are exceeded. The evrlast web application provides a centralized dashboard for monitoring and managing all sensor data.
In addition to native evrlast devices, The Things Stack can be integrated as an additional data provider. Sensor data from The Things Stack is forwarded to the evrlast platform using webhooks, allowing you to monitor and analyze LoRaWAN devices from The Things Stack alongside your evrlast devices in a single platform.
Note:
The screenshots in this guide show the German user interface of the evrlast web application. The English labels used in the text correspond to the German labels in the screenshots.Create an Account
If you do not already have an evrlast account, you first need to register:
- Open evrlast in your web browser.
- Click Just use this link to register! and enter your email address and a password.
- You will receive a confirmation email. Click the link in the email to activate your account.
- Sign in using your email address and password.
See also the evrlast documentation.
Create an API Key
Open your User Profile and navigate to the API Keys tab.
-
Click Add.
-
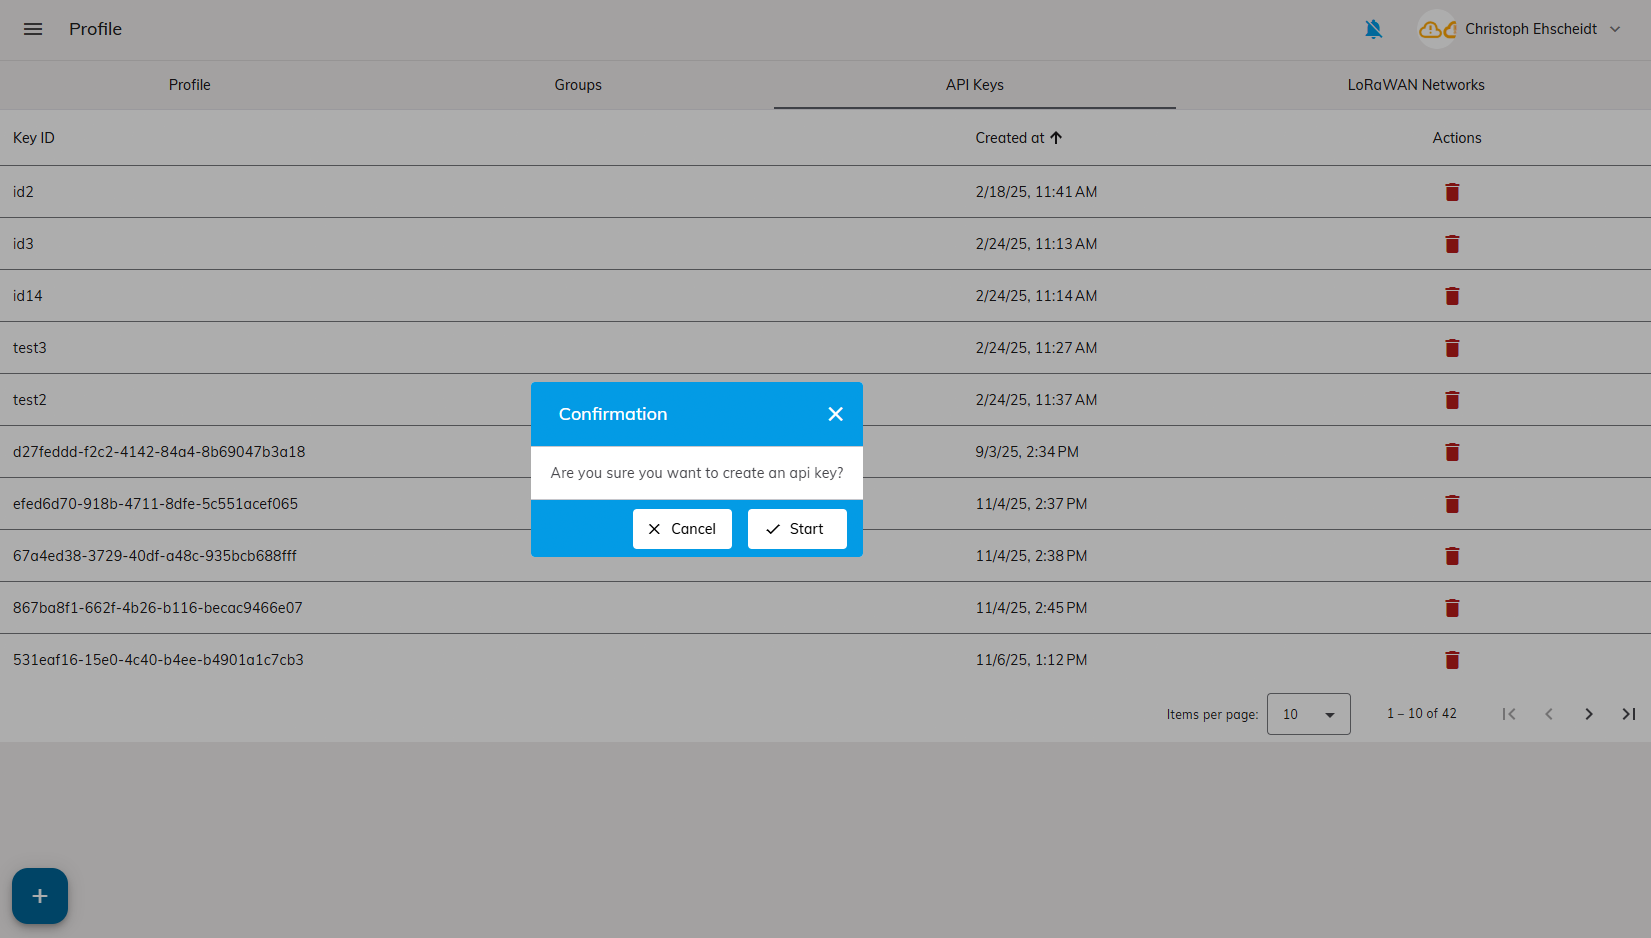
Confirm the creation of the new API key in the dialog.
-
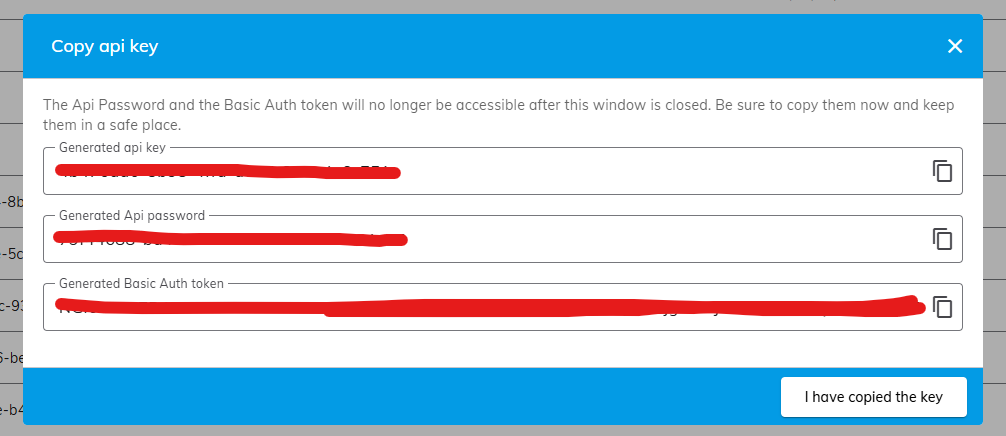
The following dialog shows the generated Api Key, the generated Api Passwort (API password) and the Basic Auth Token. The Basic Auth Token is the Base64 encoded combination of the API key and the API password, and it is required to configure the webhook. Copy the Basic Auth Token and store it securely.
Warning:
The API password and the Basic Auth Token are shown only once. After you close the dialog, they cannot be displayed again.To connect your LoRaWAN network server directly with the evrlast cloud, manage the credentials in the LoRaWAN Networks tab, as described below.
See also the evrlast documentation.
Create a LoRaWAN Network in evrlast
A LoRaWAN Network is only required if you want to connect an evrlast LoRaWAN device: it allows the evrlast cloud to communicate directly with your network server, so that the platform can manage the device and its configuration without manual interaction with the LNS. You can skip this section for LoRaWAN devices from other manufacturers.
In the LoRaWAN Networks tab of your user profile, you can manage the connections to your LoRaWAN network servers (LNS).
Gather the Connection Details
To connect the evrlast cloud with The Things Stack, you need the following information:
- Server URL
- Application ID
- Access Token
Server URL
The server URL is the address of your The Things Stack instance.
- For The Things Stack Community Edition (The Things Network), use the base URL of your cluster, for example
https://eu1.cloud.thethings.network. - For The Things Stack Cloud, use the base URL of your tenant, for example
https://<tenant>.eu1.cloud.thethings.industries. - If you are using a private installation of The Things Stack, use the URL of your own server.
Application ID
The Application ID uniquely identifies your application in The Things Stack.
To find it:
- Log in to the Console.
- Open Applications.
- Select the application you want to connect.
- Copy the Application ID displayed on the General Information page.
Note:
The Application ID is also visible in the page URL after opening the application.Access Token
The evrlast cloud authenticates with The Things Stack using an API key (access token).
To create one:
-
Open your application in the Console.
-
Navigate to API keys.
-
Click + Add API key.
-
Enter a descriptive name, for example
evrlast cloud. -
Grant the required permissions. At minimum, the API key needs the following right:
- Link as Application to a Network Server for traffic exchange, i.e. read uplink and write downlink
Depending on the functionality used by the evrlast cloud, additional permissions may be required.
-
Click Create API key.
-
Copy the generated API key immediately.
Warning:
The Things Stack only displays the API key once. Store it securely before leaving the page.Add the Connection
Open your User Profile and navigate to the LoRaWAN Networks tab.
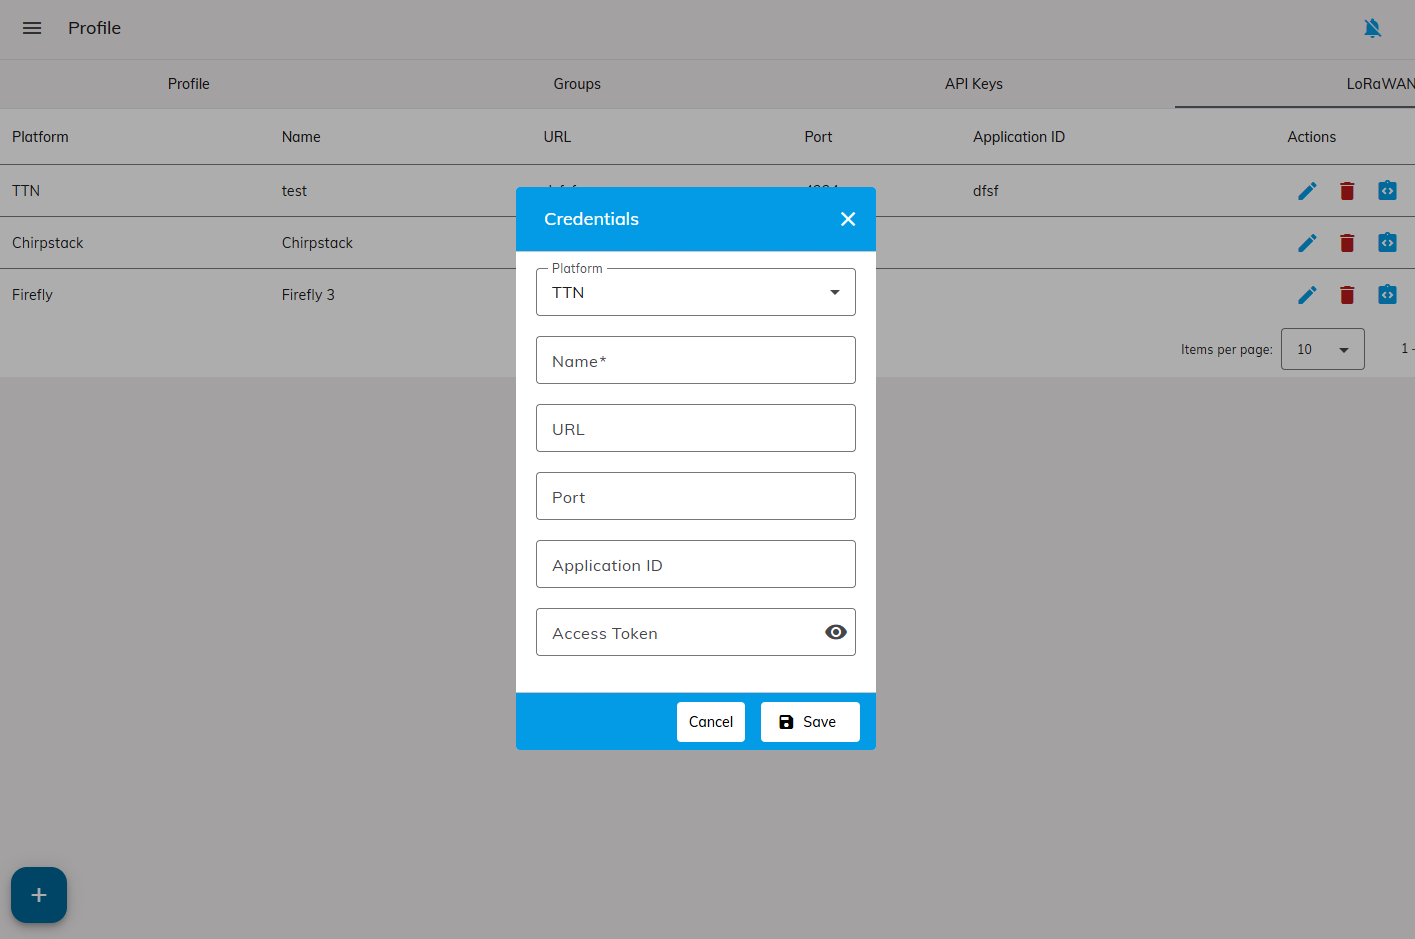
- Click the + Add button in the lower-left corner.
- In the Connection Details dialog, select the Platform matching your network server (TTN).
- Fill in the required fields, as described in the table below.
- Click Save to create the connection. Click Cancel to discard your changes without saving.
| Field | Description |
|---|---|
| Name | A descriptive name for the connection. This name is displayed in the overview. |
| URL | The address of the network server. |
| Port | The network server port, if required. |
| Application ID | Identifier of the application on the network server. |
| Access Token | Authentication token or API key used to authenticate with the network server. Click the eye icon to reveal the entered value. |
See also the evrlast documentation.
Create the Webhook
Use the evrlast Webhook template to create a Webhook integration on The Things Stack.
Enter the Basic Auth Token you copied above in the API credentials field.
Register a New Device
In the evrlast web application, click + neues Gerät registrieren (register new device) and select LoRaWAN. See also the evrlast documentation.
After your device has sent data to the evrlast platform, a device request is created. Confirm it to add the device to your evrlast device pool.
Open the Device Requests section in the evrlast web application. This page lists all devices that have recently connected but have not yet been assigned to your evrlast account.
- Click Confirm next to the device you want to register.
- If you register an evrlast device, select the LoRaWAN Network you created earlier in the dialog that appears. For devices from other manufacturers, you only need to confirm the assignment.
- Confirm the assignment.
- The device is automatically added to your Device List and is ready for use.
See also the evrlast documentation.