Azure IoT Central allows users to model the telemetry and device properties using the Digital Twin Definition Language (DTDL) in order to manipulate the data and build powerful views and dashboards of your device fleet. These templates can be automatically be associated with the end devices in your Azure IoT Central Application.
As part of this tutorial we will build a small DTDL model for The Things Uno which allows us to control the built in LED of the device.
Prerequisites
- A The Things Uno registered in your end device, with the end device version identifiers set, and using the
quickstartsketch.
You can check if the end device version identifiers are set by checking the Console end device overview, under the Hardware section.
Digital Twin Modeling Identifier
When the Azure IoT Central integration provisions an end device using the underlying Azure Device Provisioning Service, it will provide a DTDL model ID to the provisioning service in order to allow Azure IoT Central to automatically assign the DTDL model to the end device.
A DTDL model ID is a Digital Twin Modeling Identifier. The Things Stack generates this model ID using the following rules:
- The base model ID template is
dtmi:ttnlwstack:brand:{brandID}:model:{modelID}:hwversion:{hwVersion}:fwversion:{fwVersion}:band:{bandID};{generation} {brandID}is replaced by the normalized form of the end device version identifiersbrand_idfield.{modelID}is replaced by the normalized form of the end device version identifiersmodel_idfield.{hwVersion}is replaced by the normalized form of the end device version identifiershardware_versionfield, prepended byhw(as versions may start with numeric values, but DTMI segments cannot start with a numeric value).{fwVersion}is replaced by the normalized form of the end device version identifiersfirmware_versionfield, prepended byfw(using the same reasoning as above).{bandID}is replaced by the normalized form of the end device version identifiers{band_id}field.{generation}is currently always replaced by1.
Normalization in this context refers to the process of replacing any non-alphanumeric character with a
_character. The normalized form ofThe Things IndustriesisThe_Things_Industries.
Following the end device version identifiers associated with the quickstart sketch mentioned above, we obtain the following values:
{brand_id}is replaced bythe_things_products.{model_id}is replaced bythe_things_uno.{hwVersion}is replaced byhw1.0.{fwVersion}is replaced byfwquickstart.{bandID}is replaced byEU_863_870.{generation}is replaced by1.
Following this, the resulting DTMI is:
dtmi:ttnlwstack:brand:the_things_products:model:the_things_uno:hwversion:hw1_0:fwversion:fwquickstart:band:EU_863_870;1
Base Model
Note:
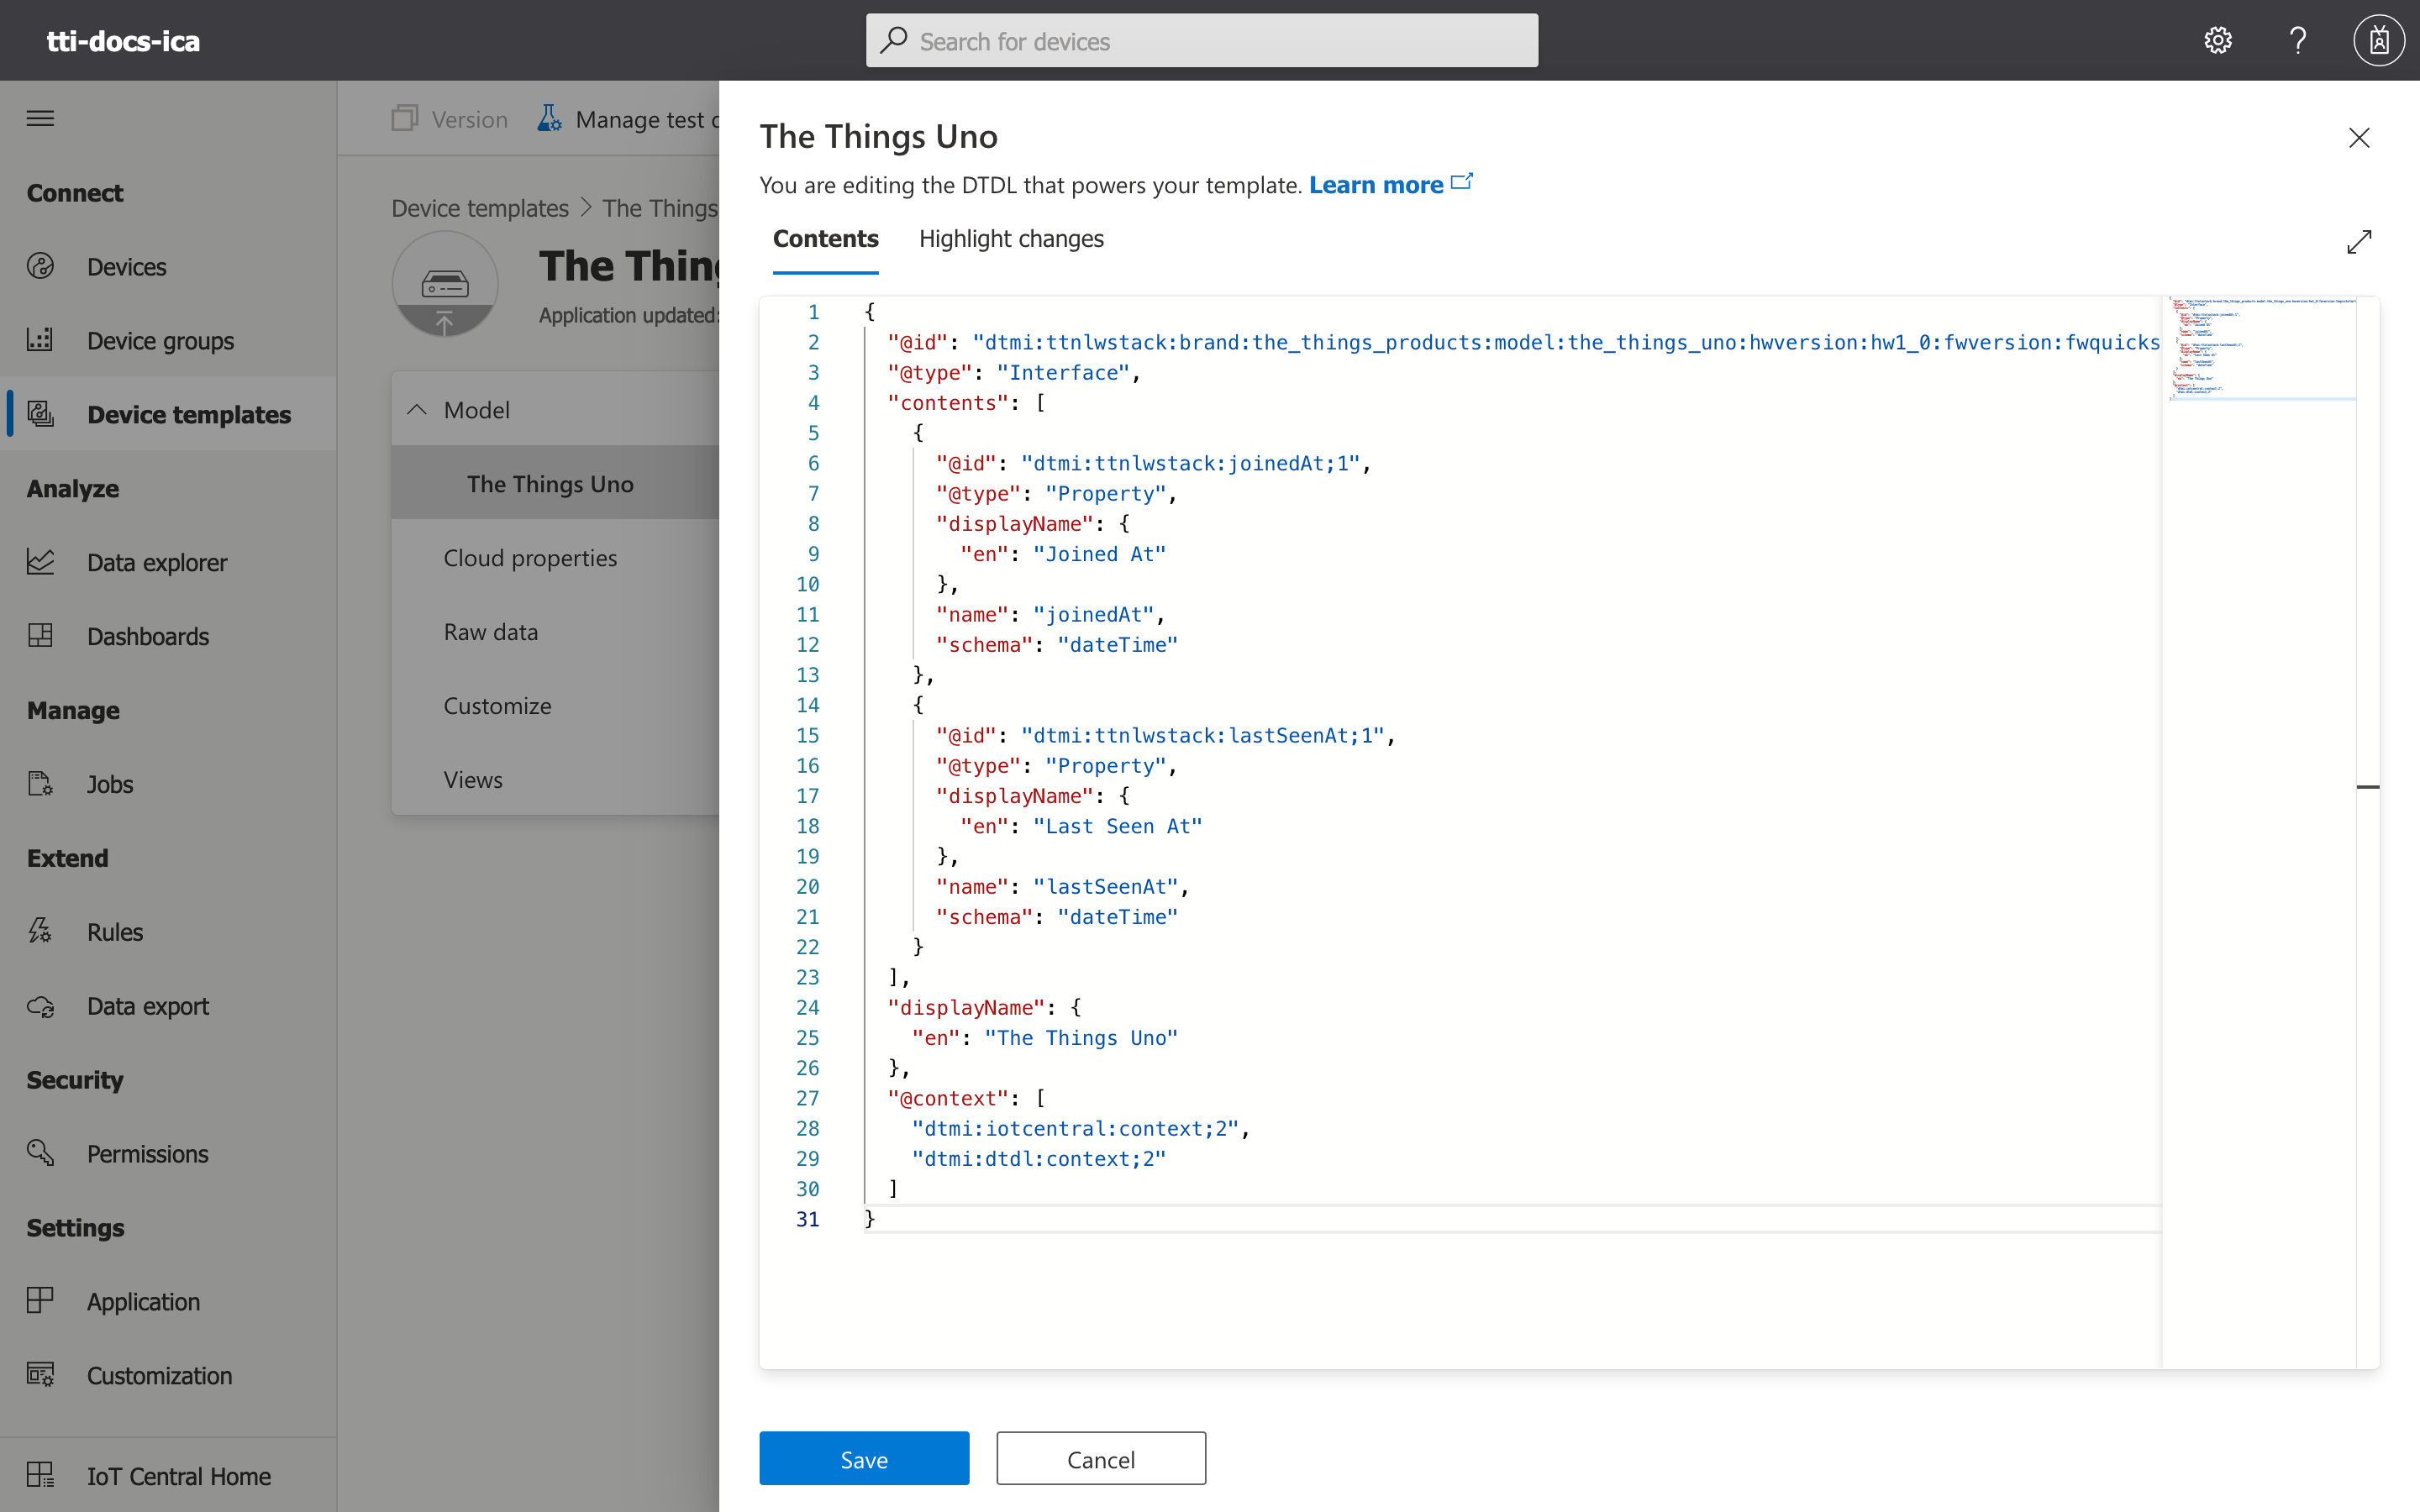
Please consult the official Digital Twin Definition Language Version 2 specification if you have any questions about DTDL semantics.The top level object of a DTDL model is an Interface. We will define the top level Interface for our The Things Uno device, before adding properties and telemetry, as follows:
{
  "@id": "dtmi:ttnlwstack:brand:the_things_products:model:the_things_uno:hwversion:hw1_0:fwversion:fwquickstart:band:EU_863_870;1",
  "@type": "Interface",
  "contents": [],
  "displayName": {
    "en": "The Things Uno"
  },
  "@context": ["dtmi:iotcentral:context;2", "dtmi:dtdl:context;2"]
}
Modeling Properties
As described in the Device Twin section, The Things Stack will automatically publish certain properties on behalf of the device. A generic property which is applicable to any device is lastSeenAt. Let us model this property as follows:
{
  "@id": "dtmi:ttnlwstack:lastSeenAt;1",
  "@type": "Property",
  "displayName": {
    "en": "Last Seen At"
  },
  "name": "lastSeenAt",
  "schema": "dateTime"
}
We can see that the @type is set to Property, and that the schema is dateTime, as the field represents a timestamp. The @id is a DTMI, and by convention we have prepended the name of the field by ttnlwstack for the purpose of this example. Similarly, one may define the joinedAt property of the end device as follows:
{
  "@id": "dtmi:ttnlwstack:joinedAt;1",
  "@type": "Property",
  "displayName": {
    "en": "Joined At"
  },
  "name": "joinedAt",
  "schema": "dateTime"
}
We can now put together our intermediate model, by providing the two properties to the base model contents field, resulting in the following model:
{
  "@id": "dtmi:ttnlwstack:brand:the_things_products:model:the_things_uno:hwversion:hw1_0:fwversion:fwquickstart:band:EU_863_870;1",
  "@type": "Interface",
  "contents": [
    {
      "@id": "dtmi:ttnlwstack:joinedAt;1",
      "@type": "Property",
      "displayName": {
        "en": "Joined At"
      },
      "name": "joinedAt",
      "schema": "dateTime"
    },
    {
      "@id": "dtmi:ttnlwstack:lastSeenAt;1",
      "@type": "Property",
      "displayName": {
        "en": "Last Seen At"
      },
      "name": "lastSeenAt",
      "schema": "dateTime"
    }
  ],
  "displayName": {
    "en": "The Things Uno"
  },
  "@context": ["dtmi:iotcentral:context;2", "dtmi:dtdl:context;2"]
}
Model Registration
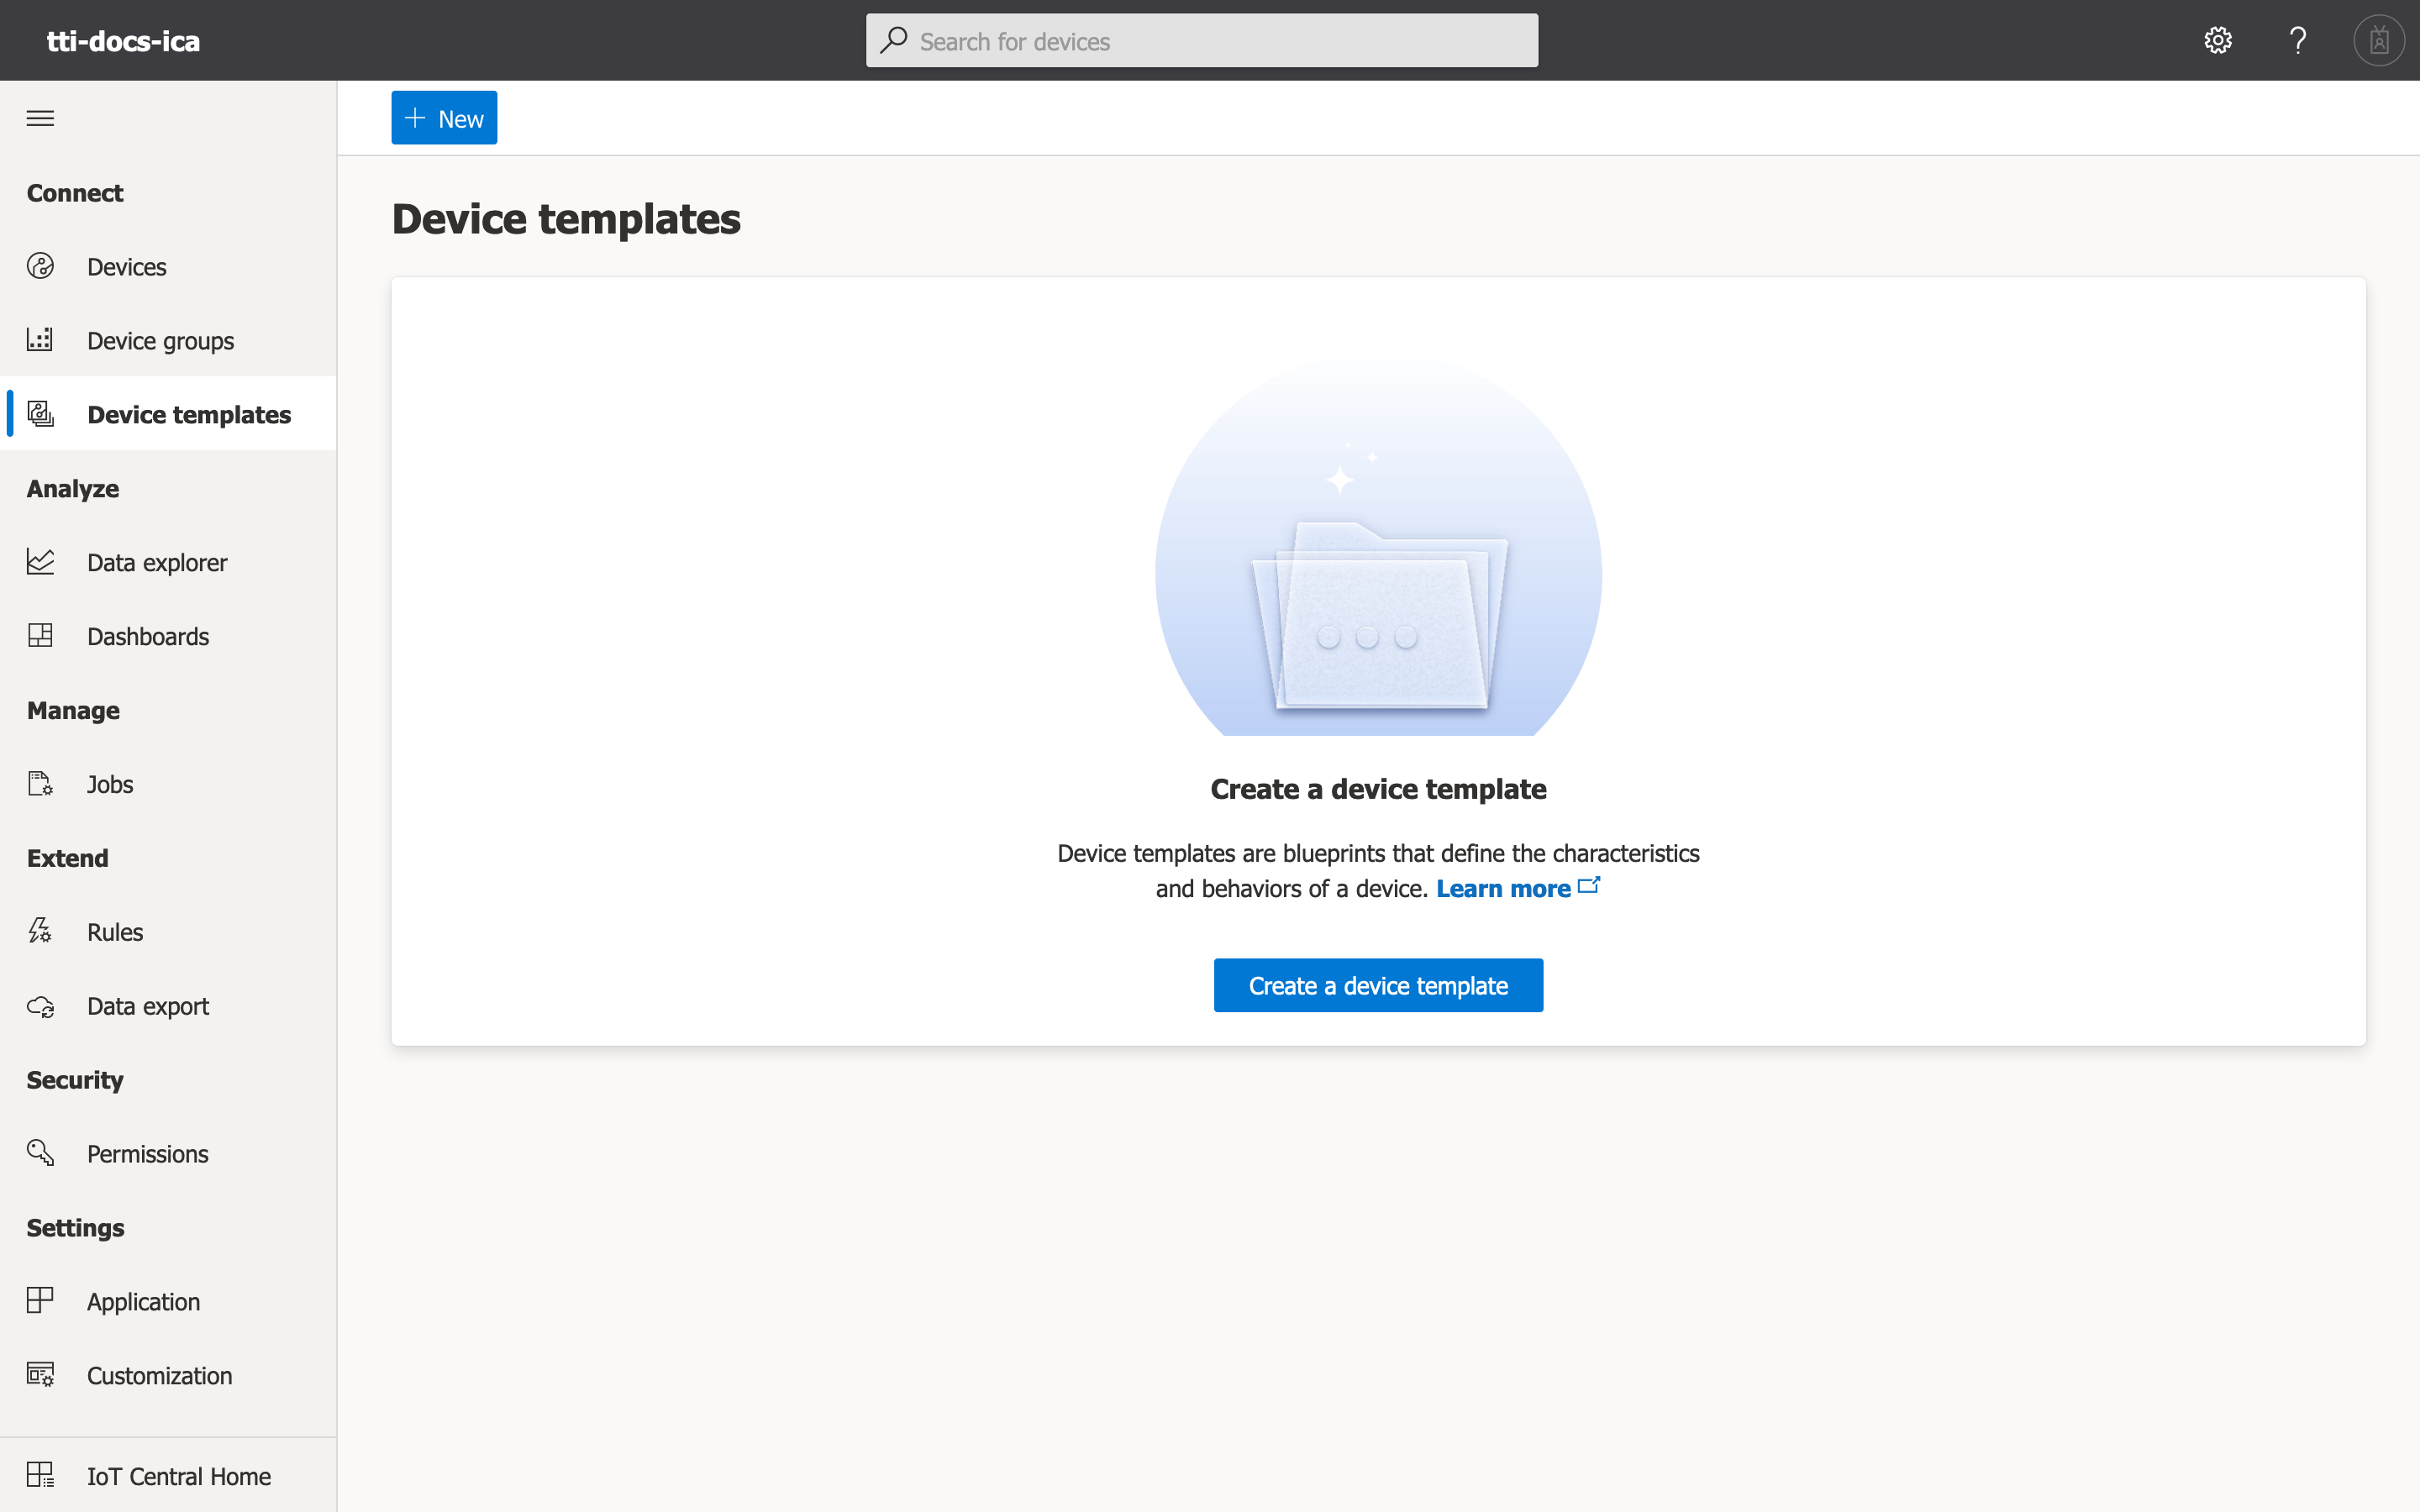
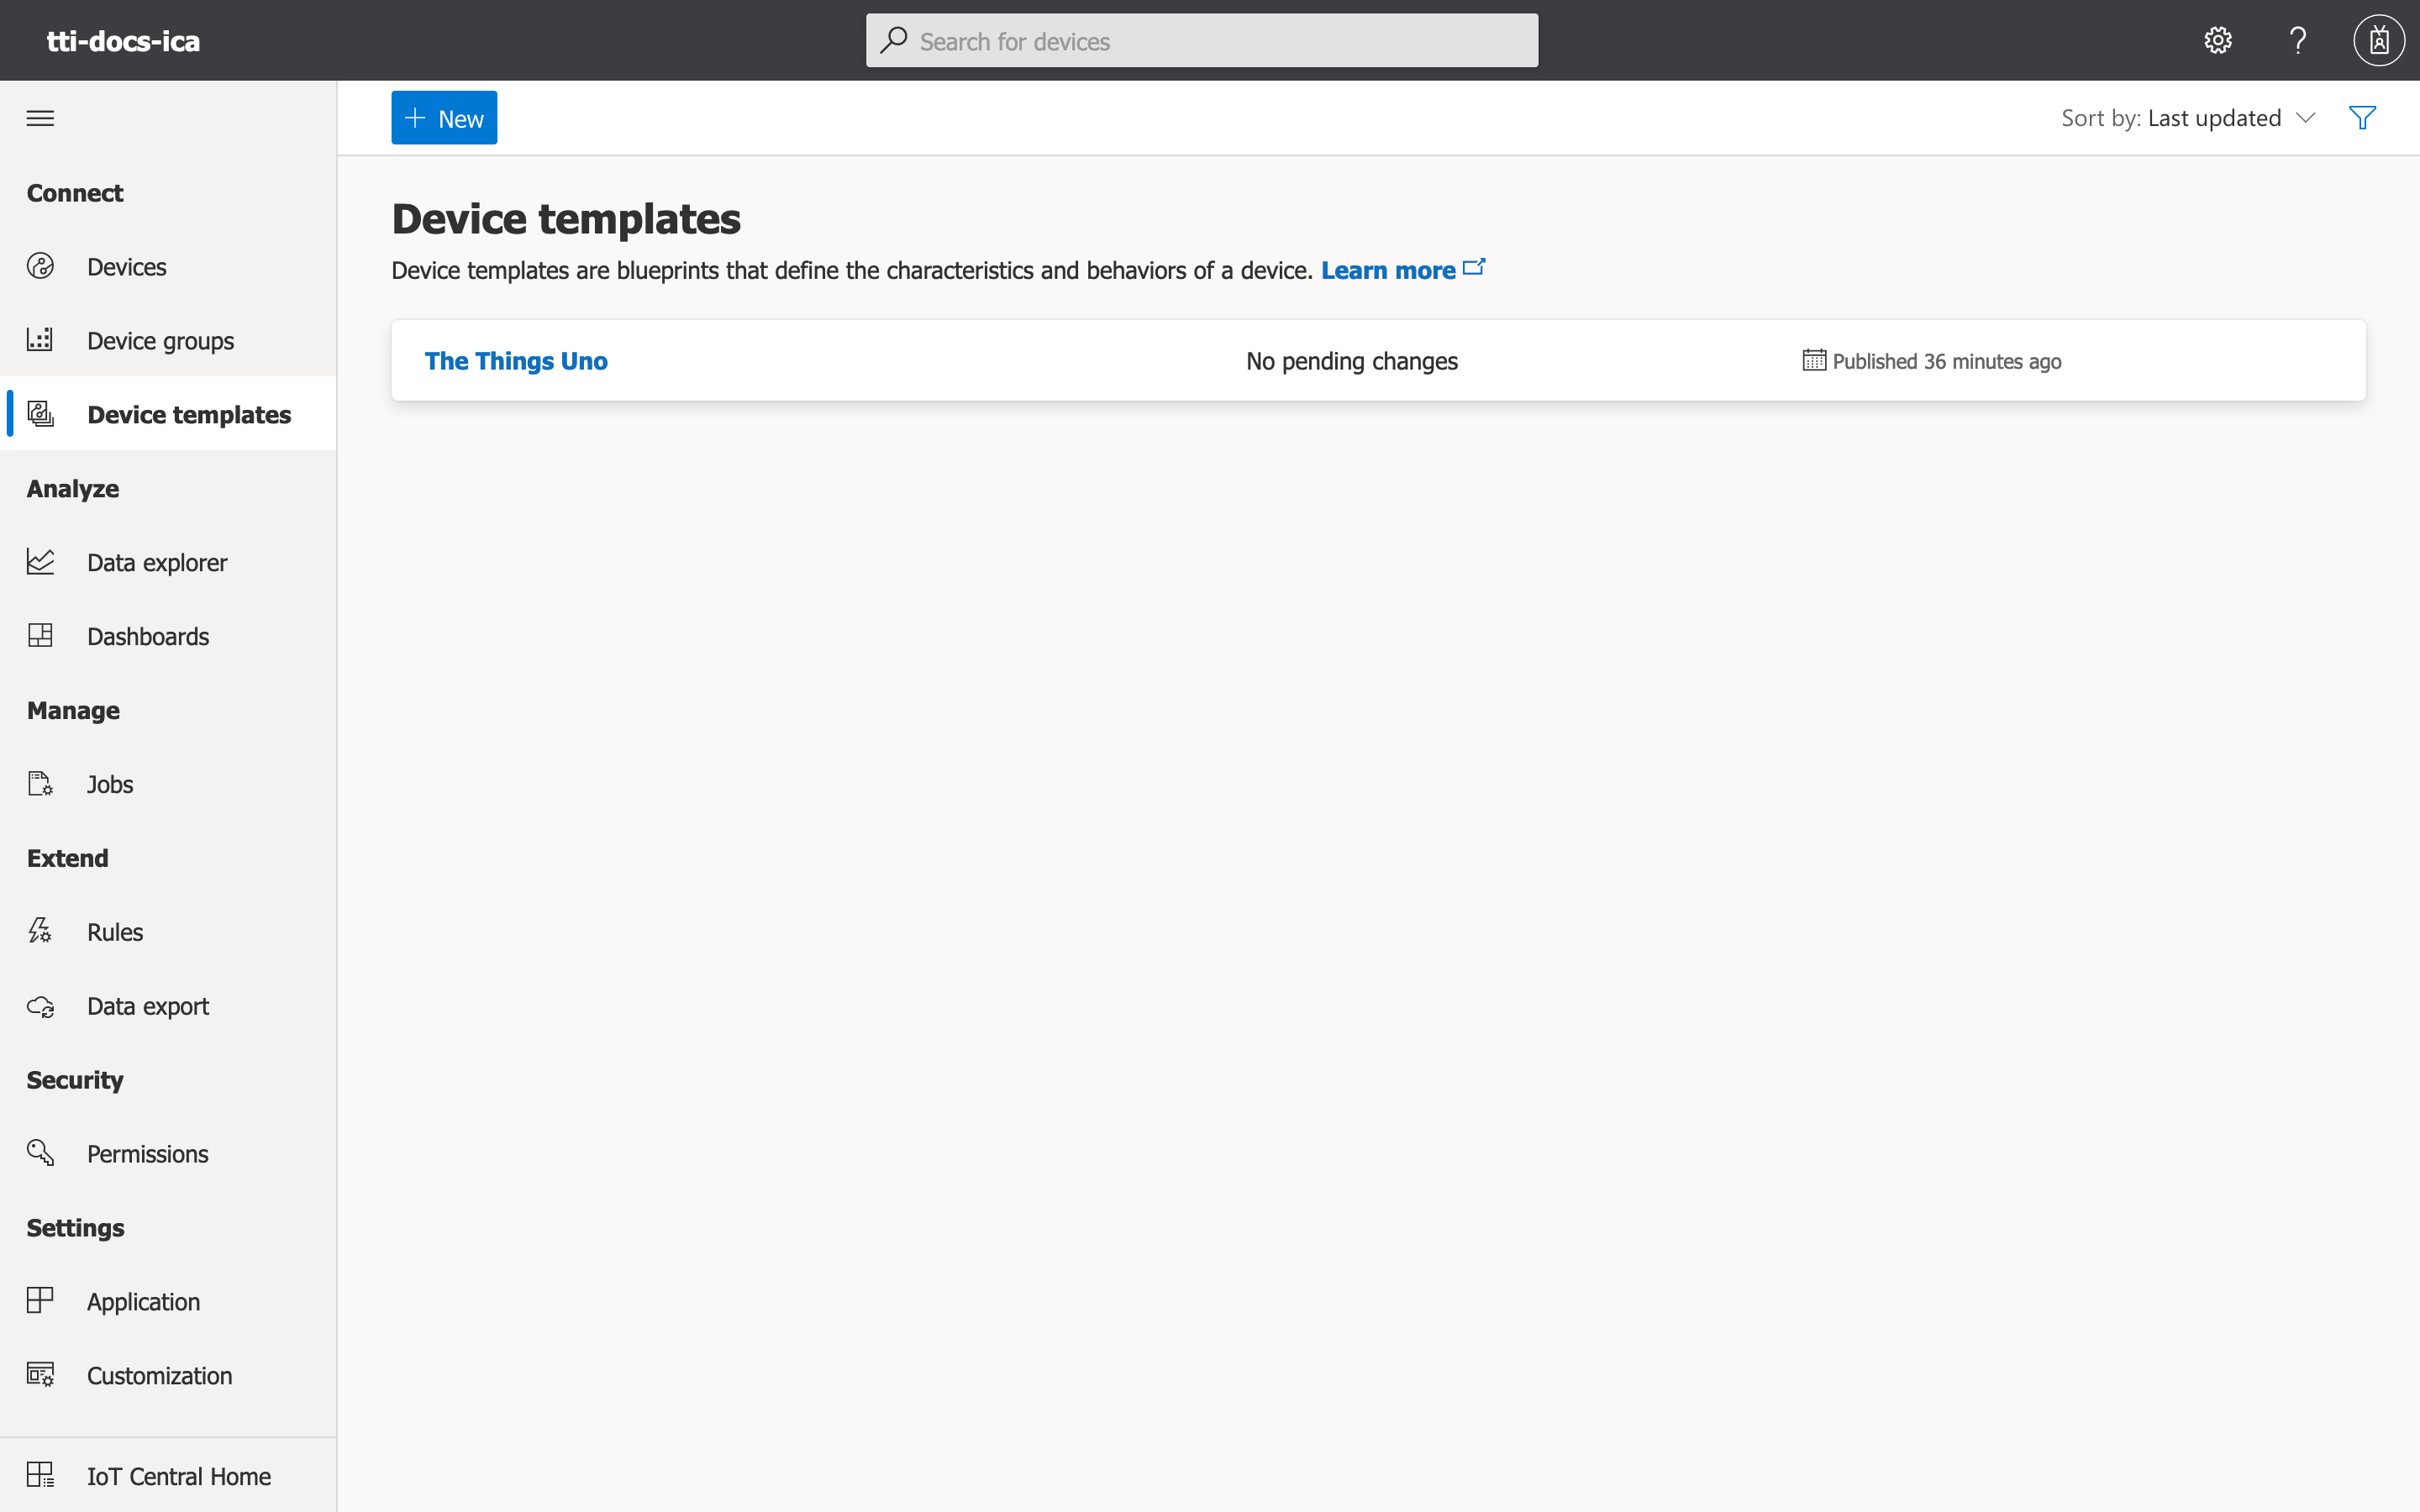
Go to your Azure IoT Central Application, navigate to Device templates on the left hand menu and click on + New.
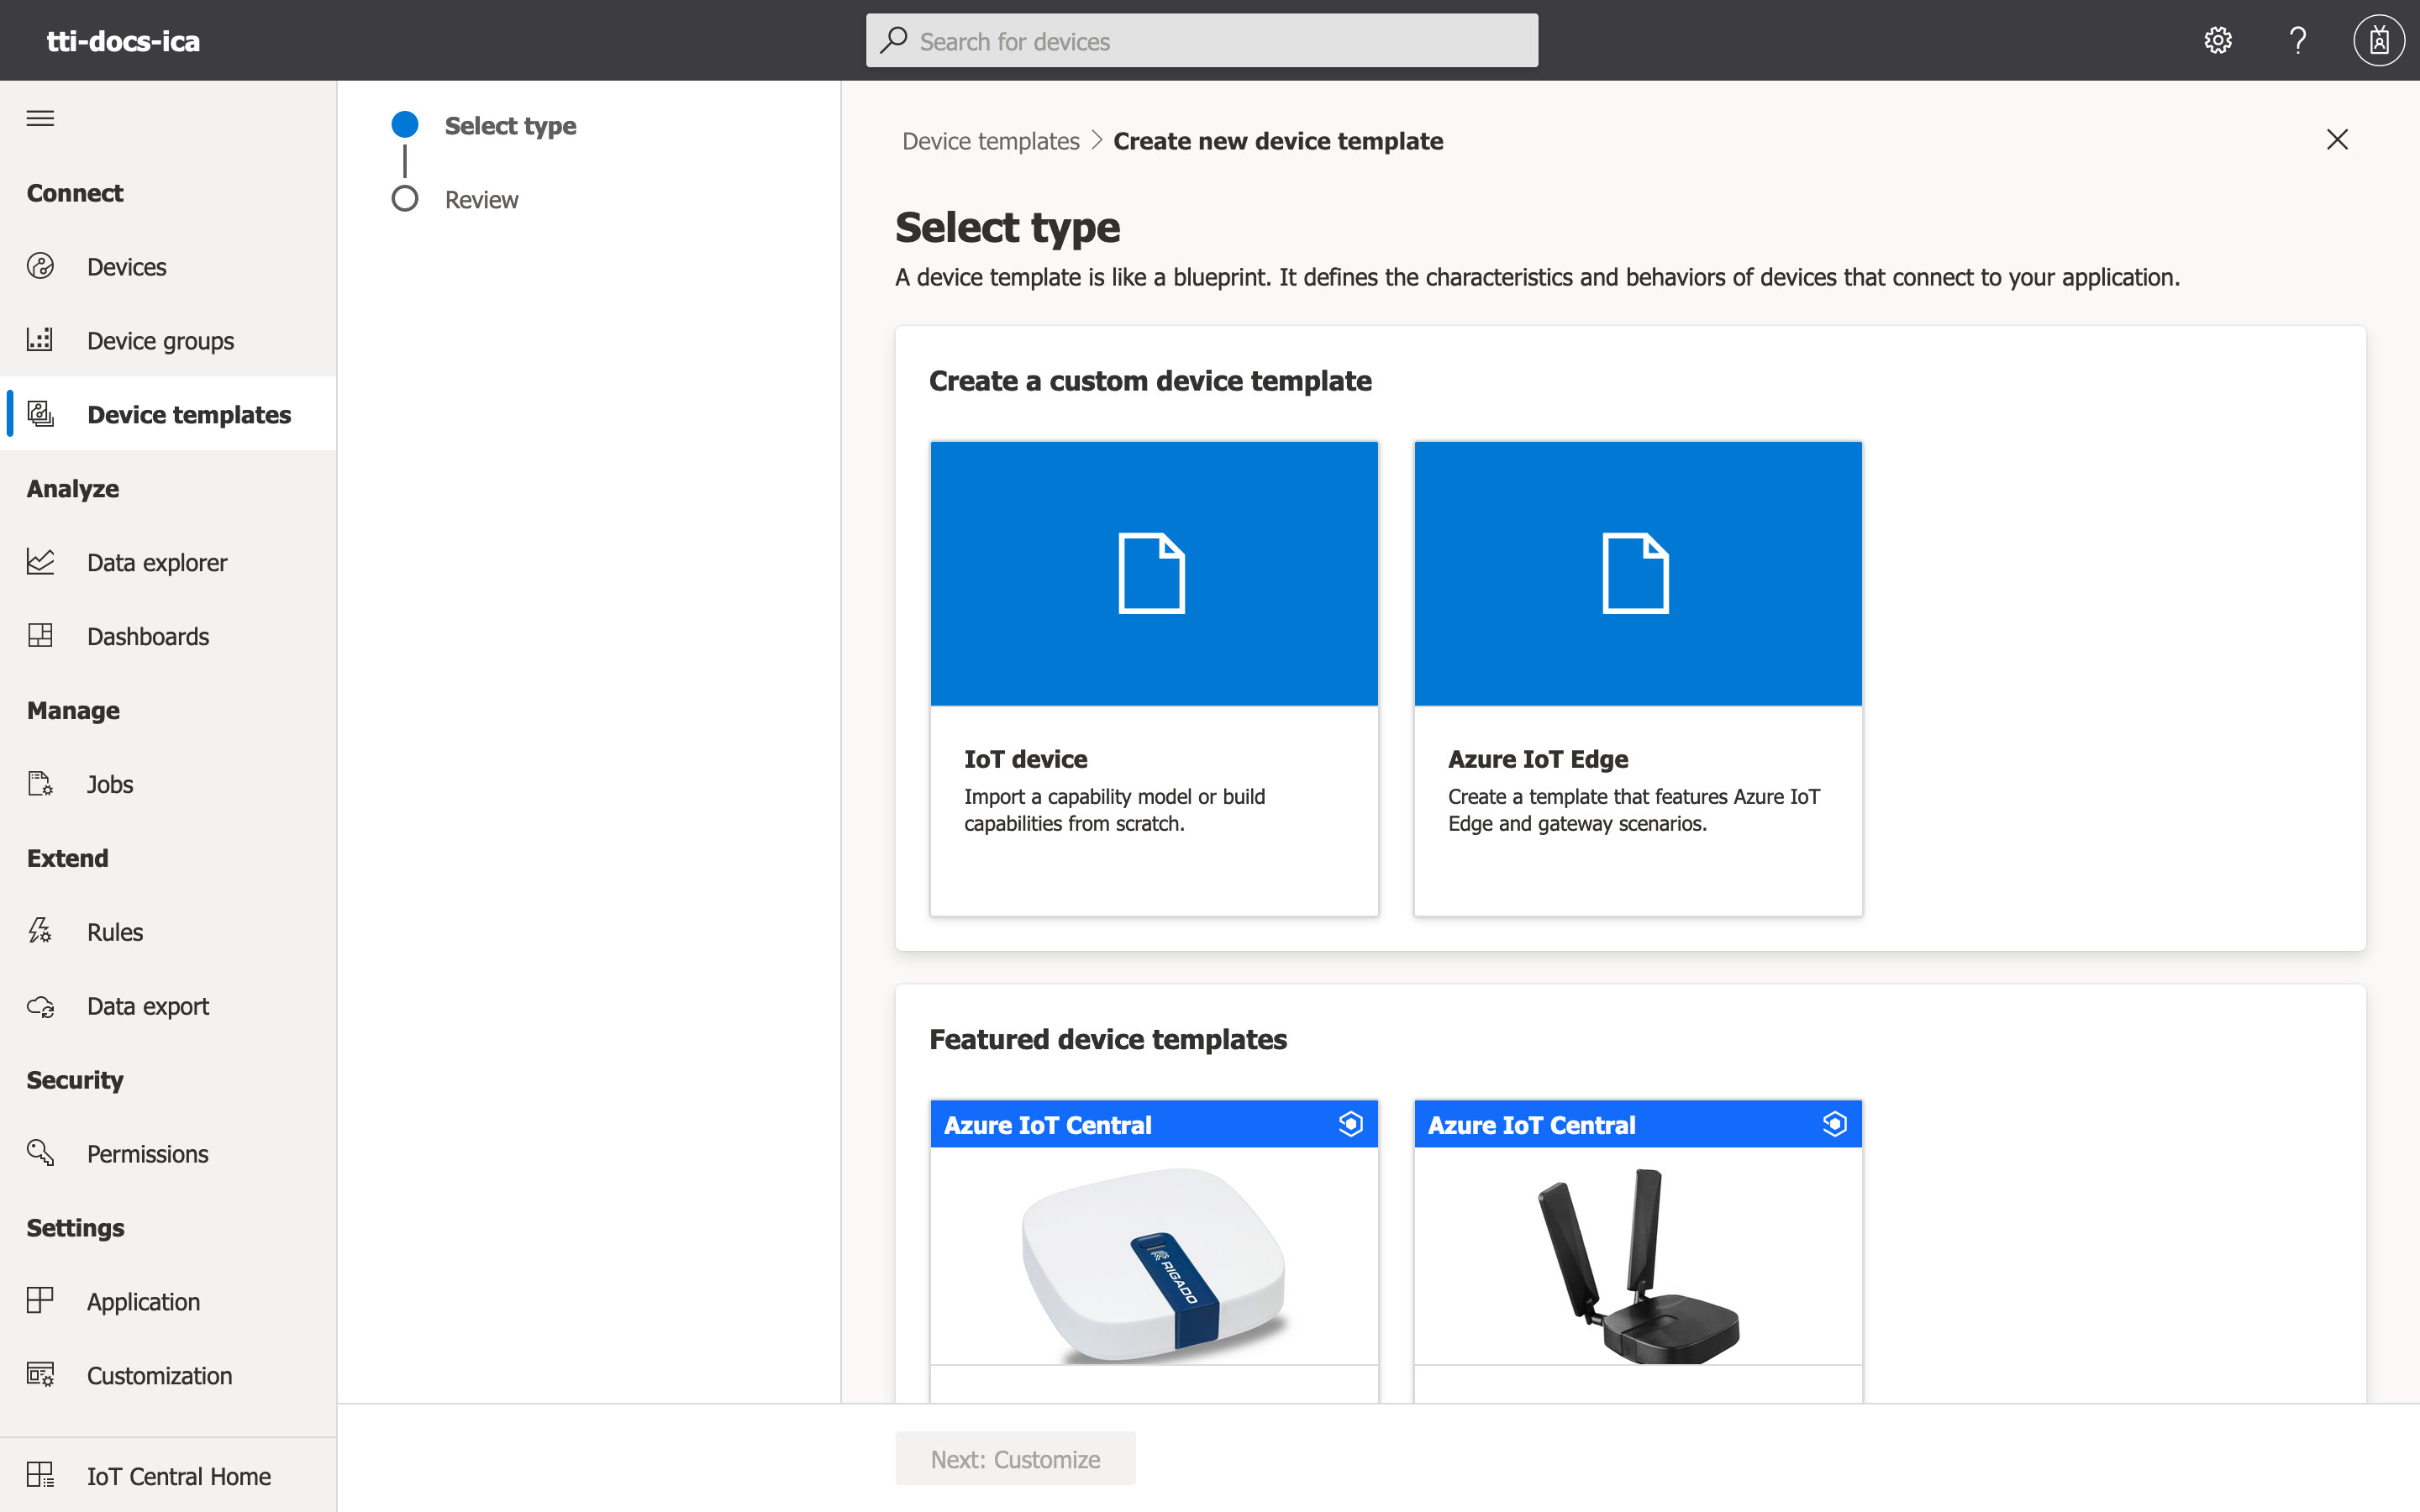
You can now select the IoT Device custom device template, then click on Next: Customize.
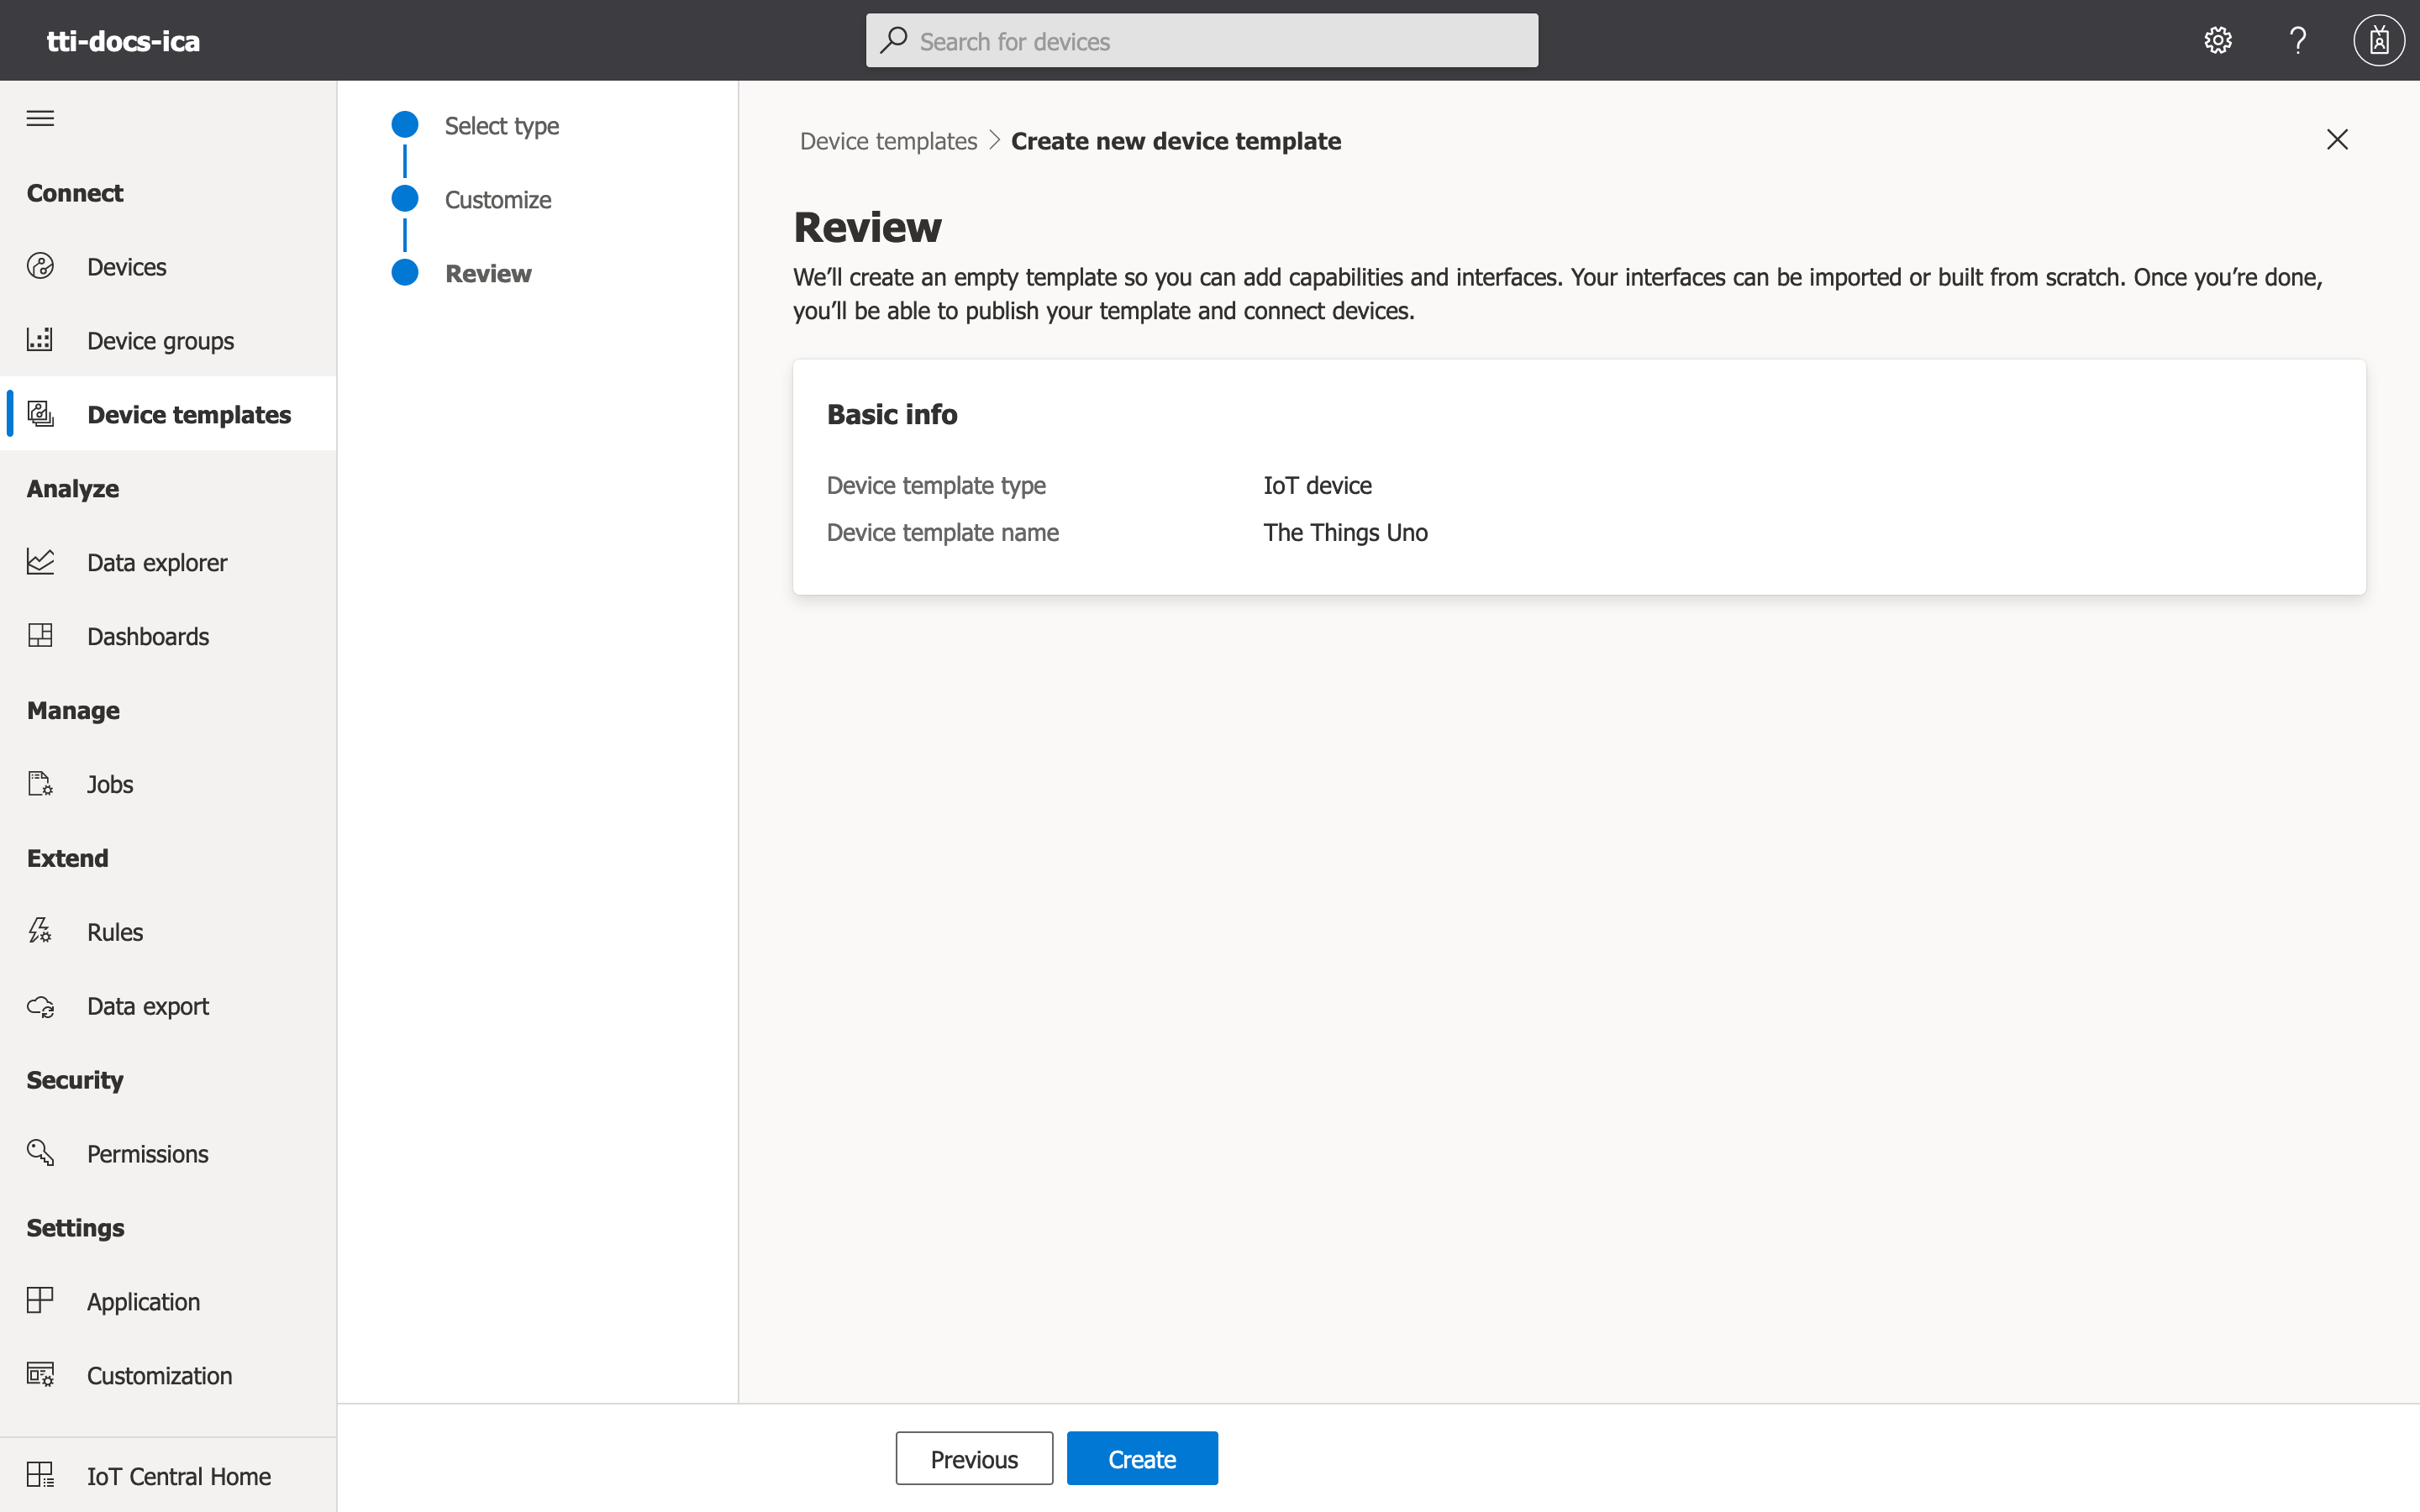
You can now enter the template name and then click on Next: Review at the bottom of the page. You will be presented with the device review screen. Check the details one last time and click on Create.
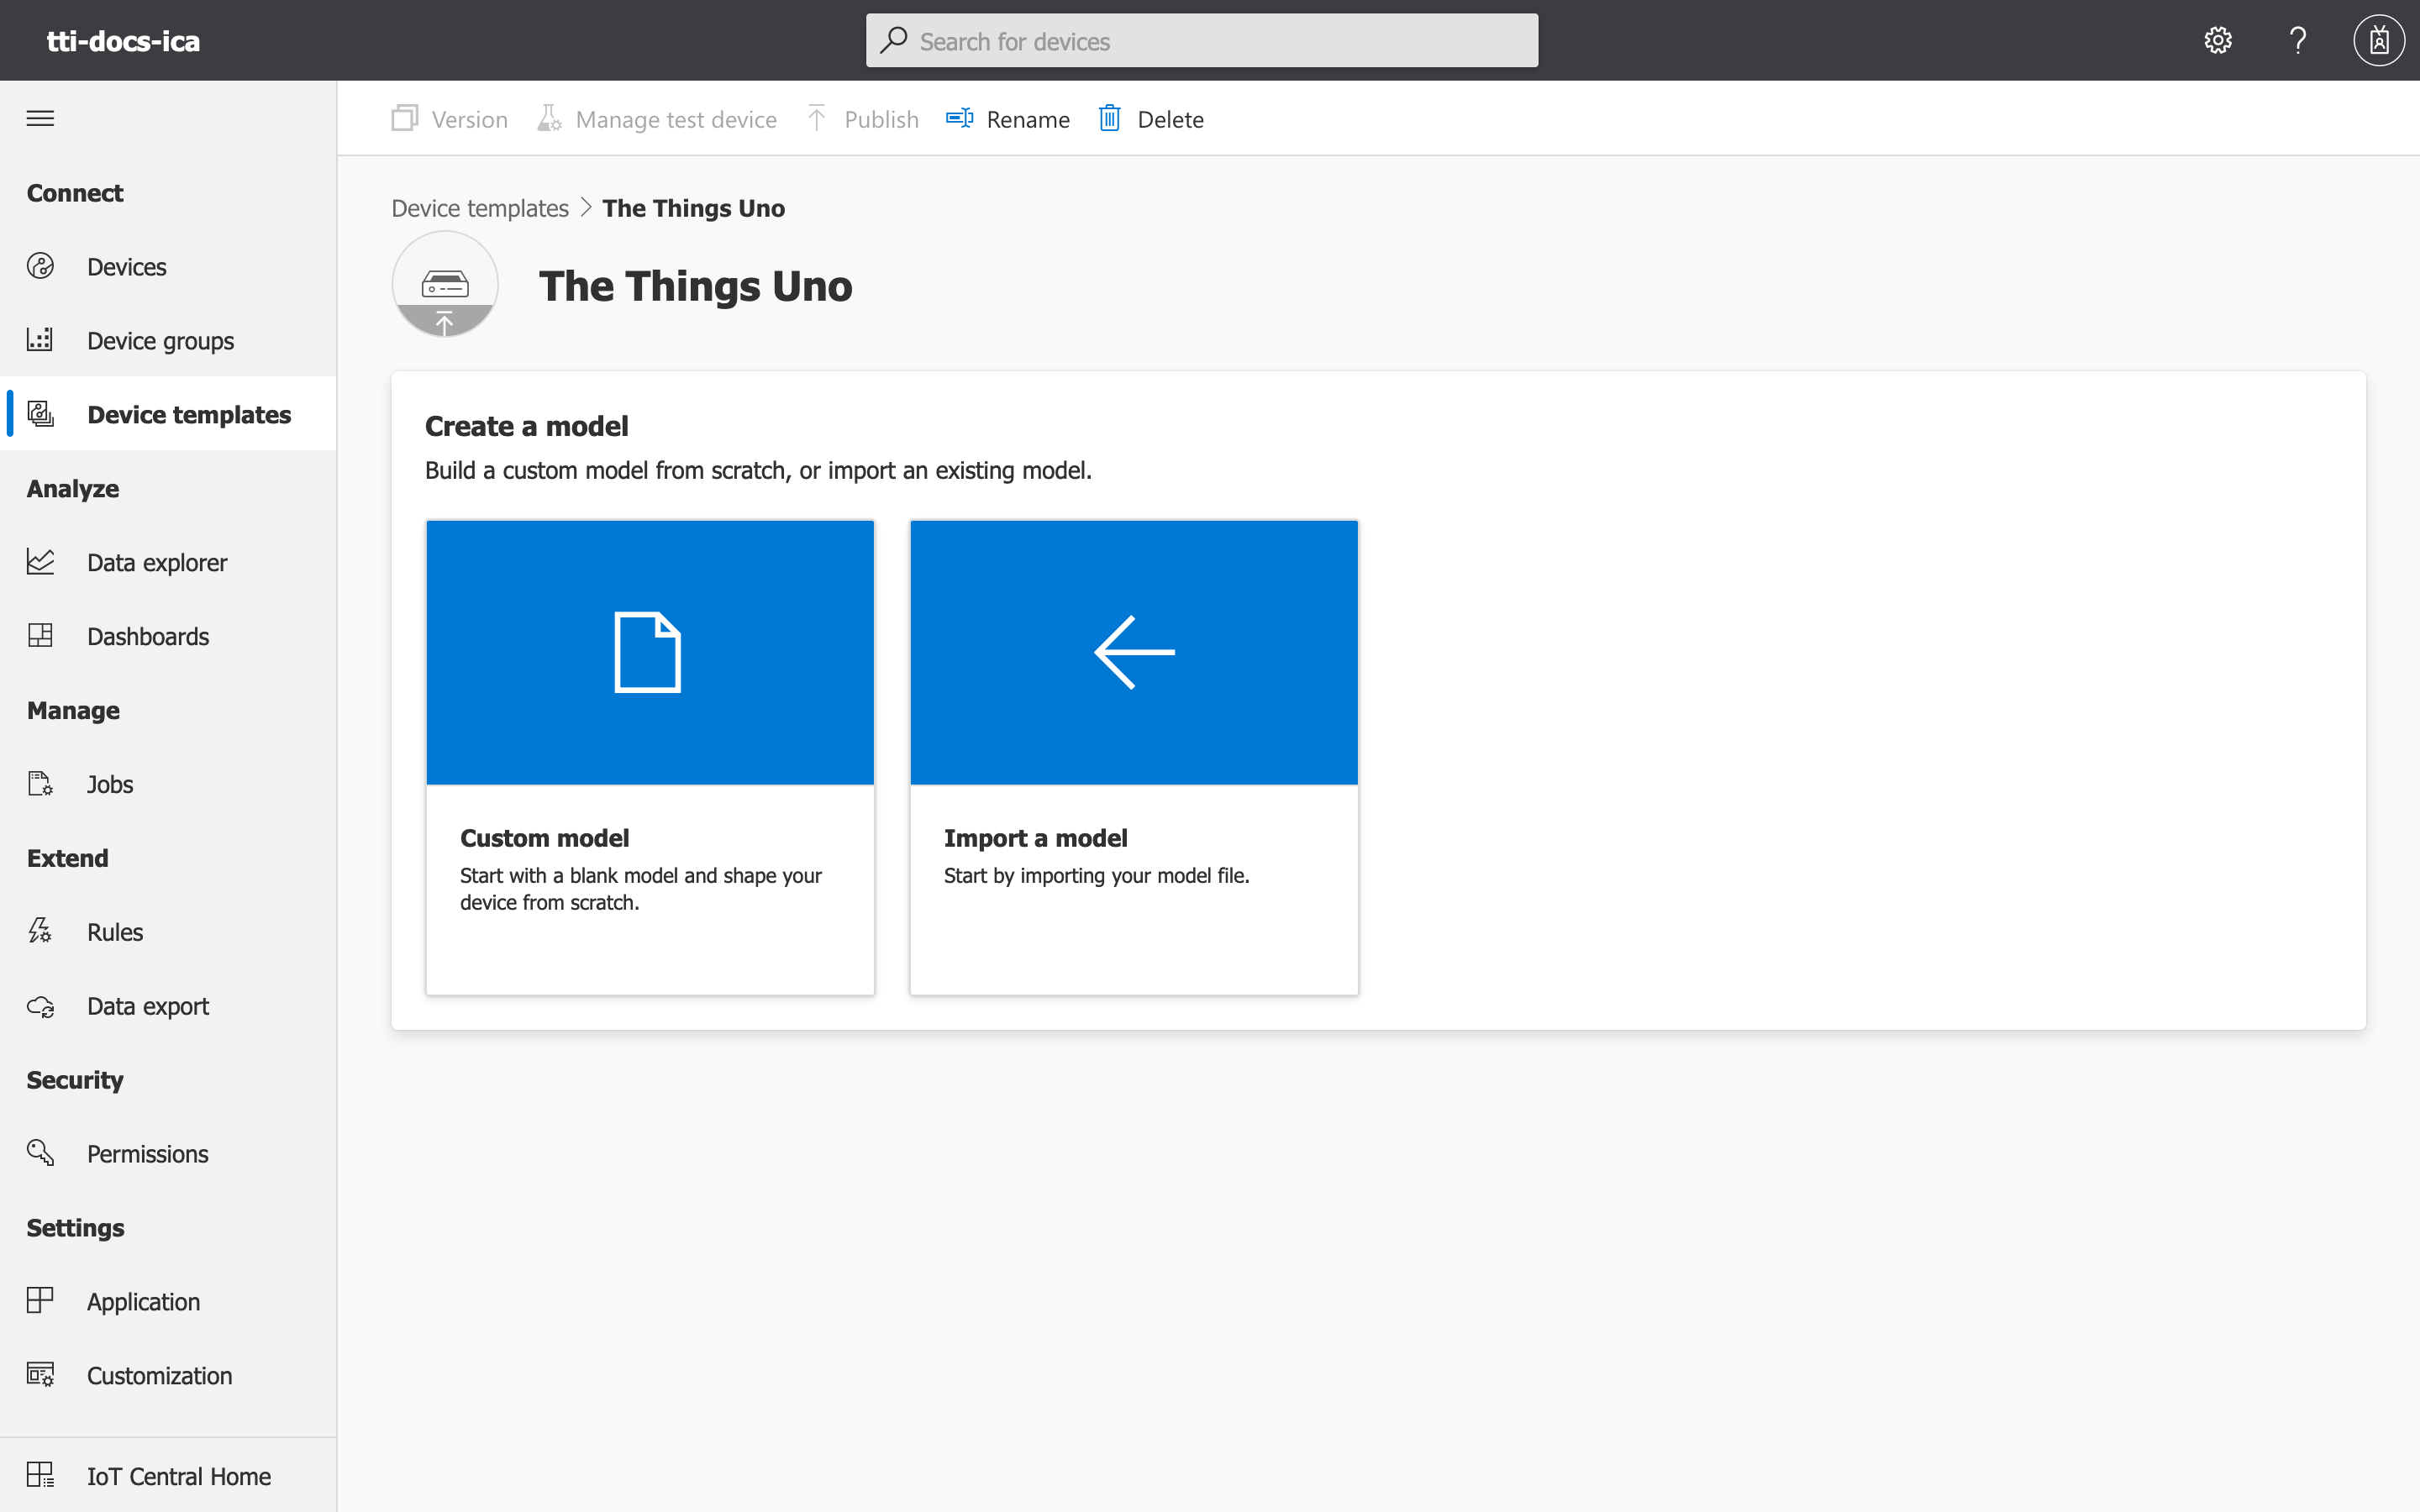
We can now input our DTDL model into the device template that we have just created. Select Custom model in the Create a model screen.
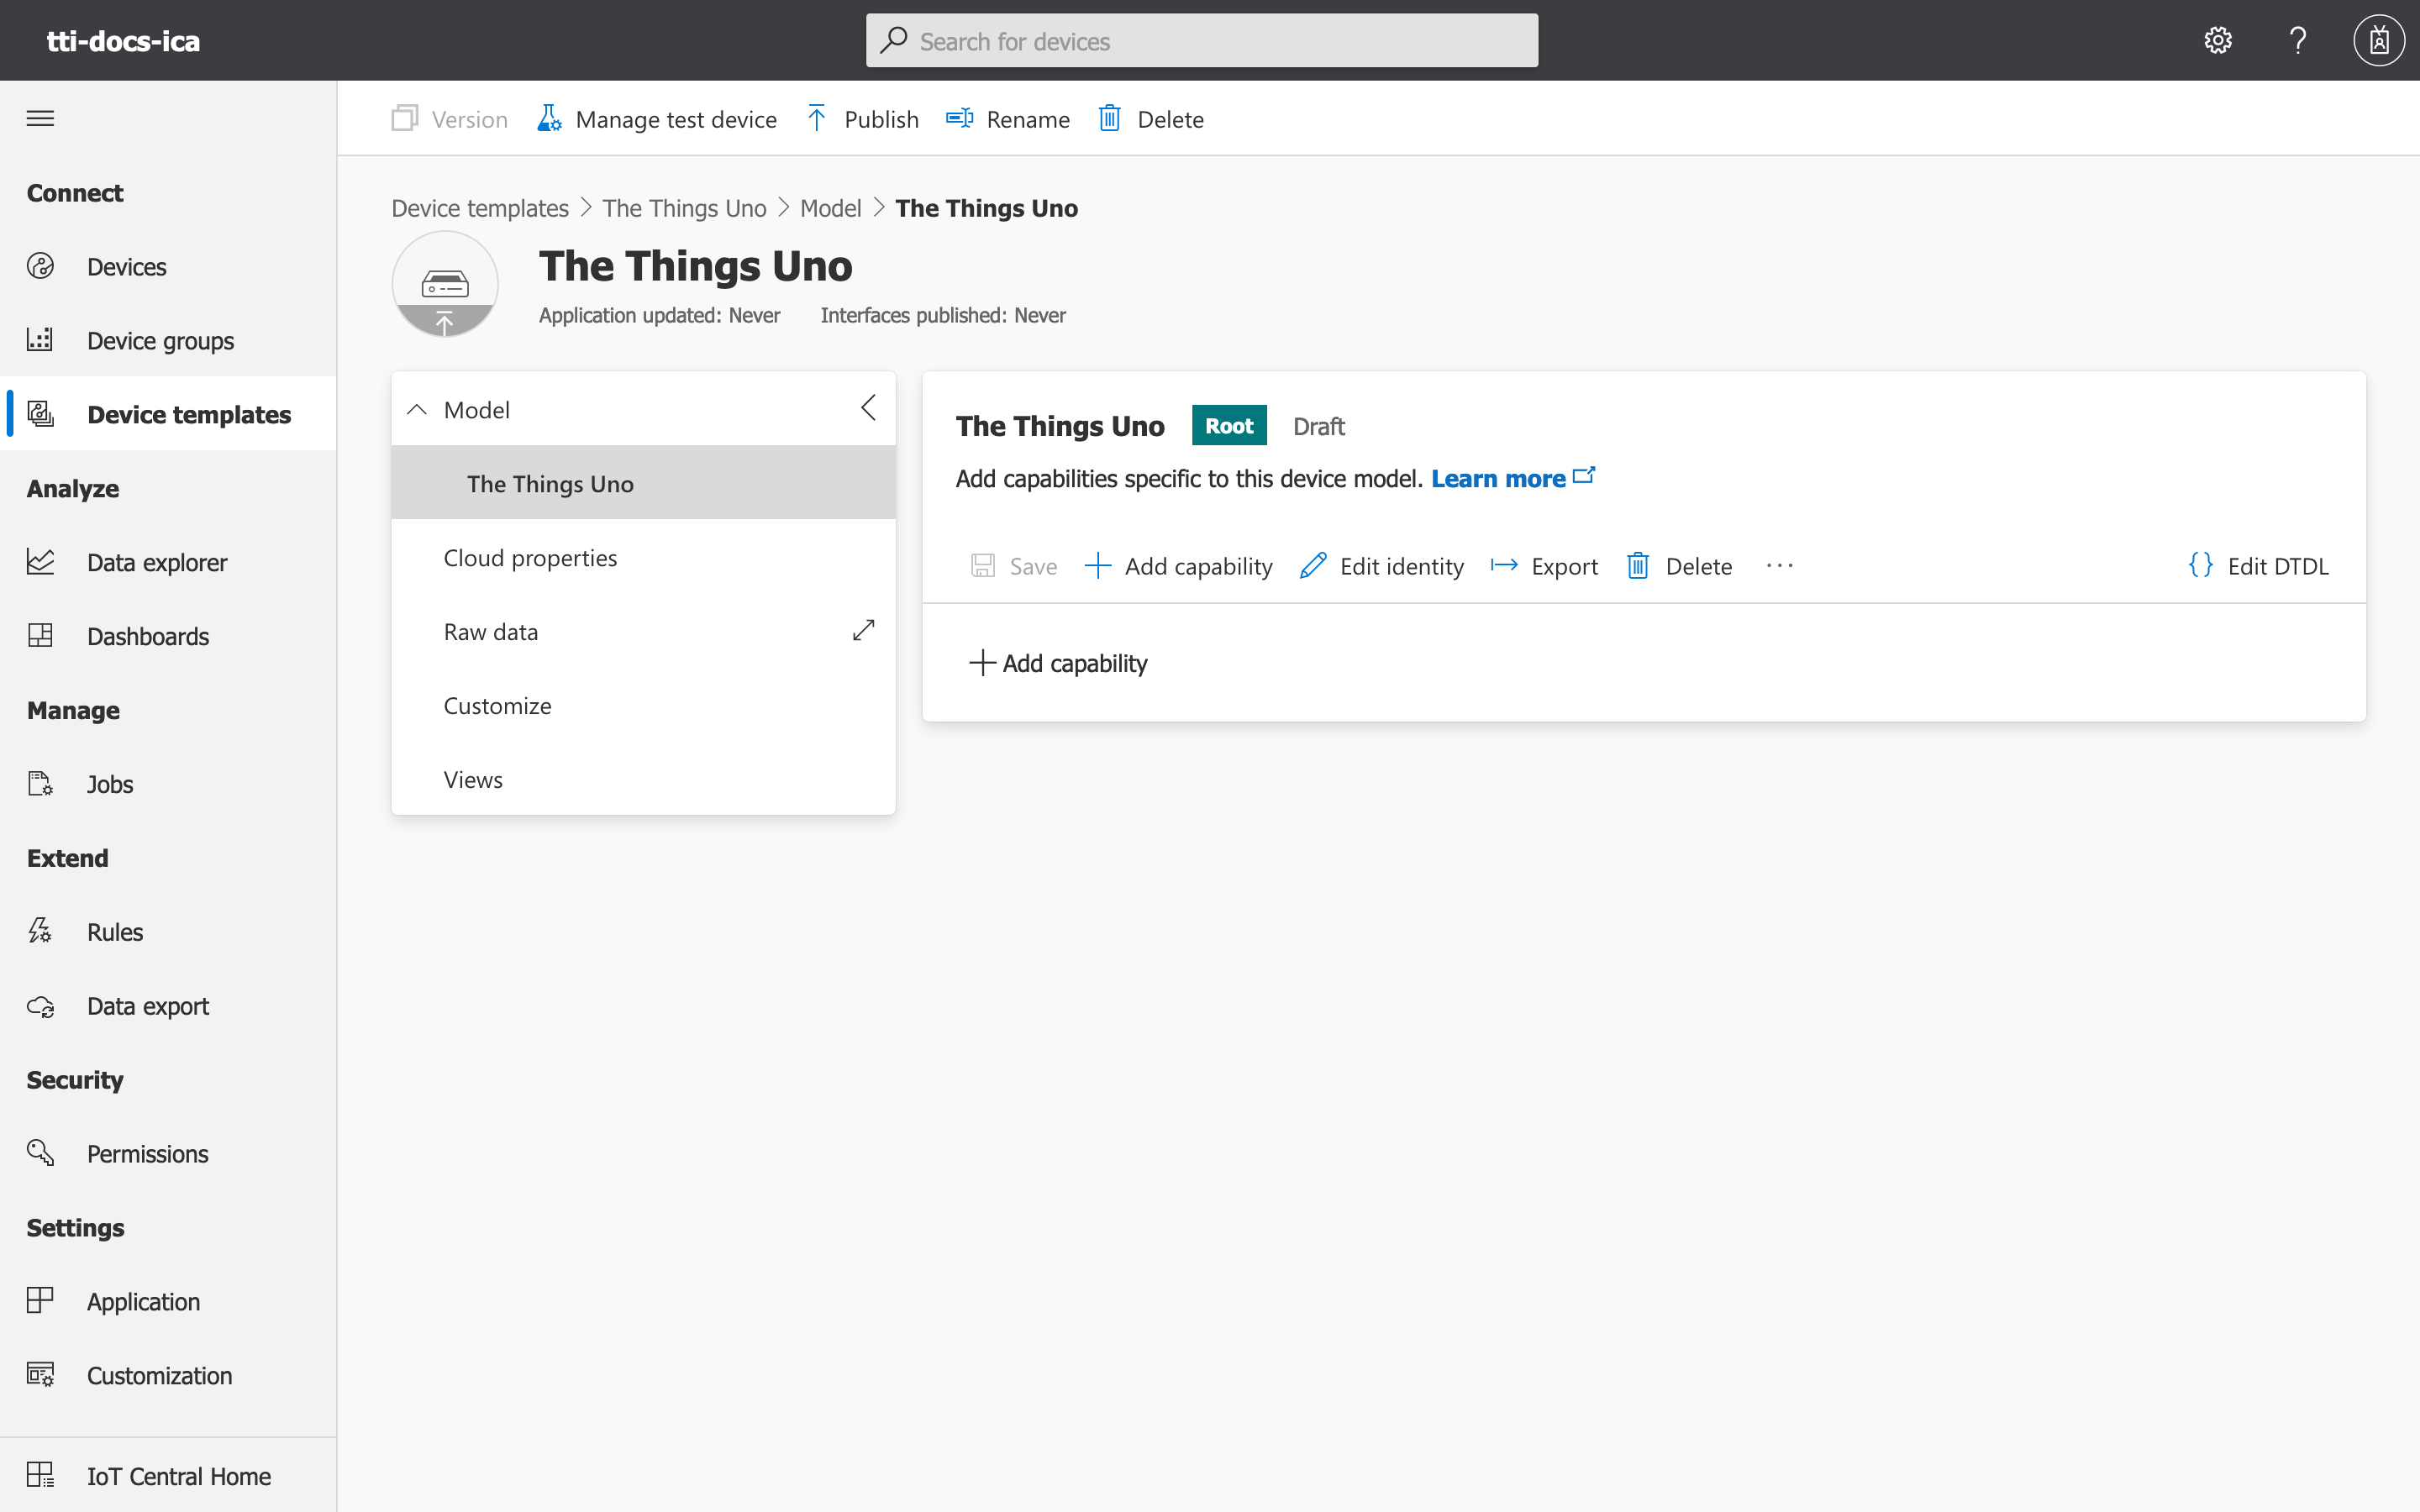
Click on the Edit DTDL button.
You can now input the DTDL model that we have defined in the previous step, then click on Save.
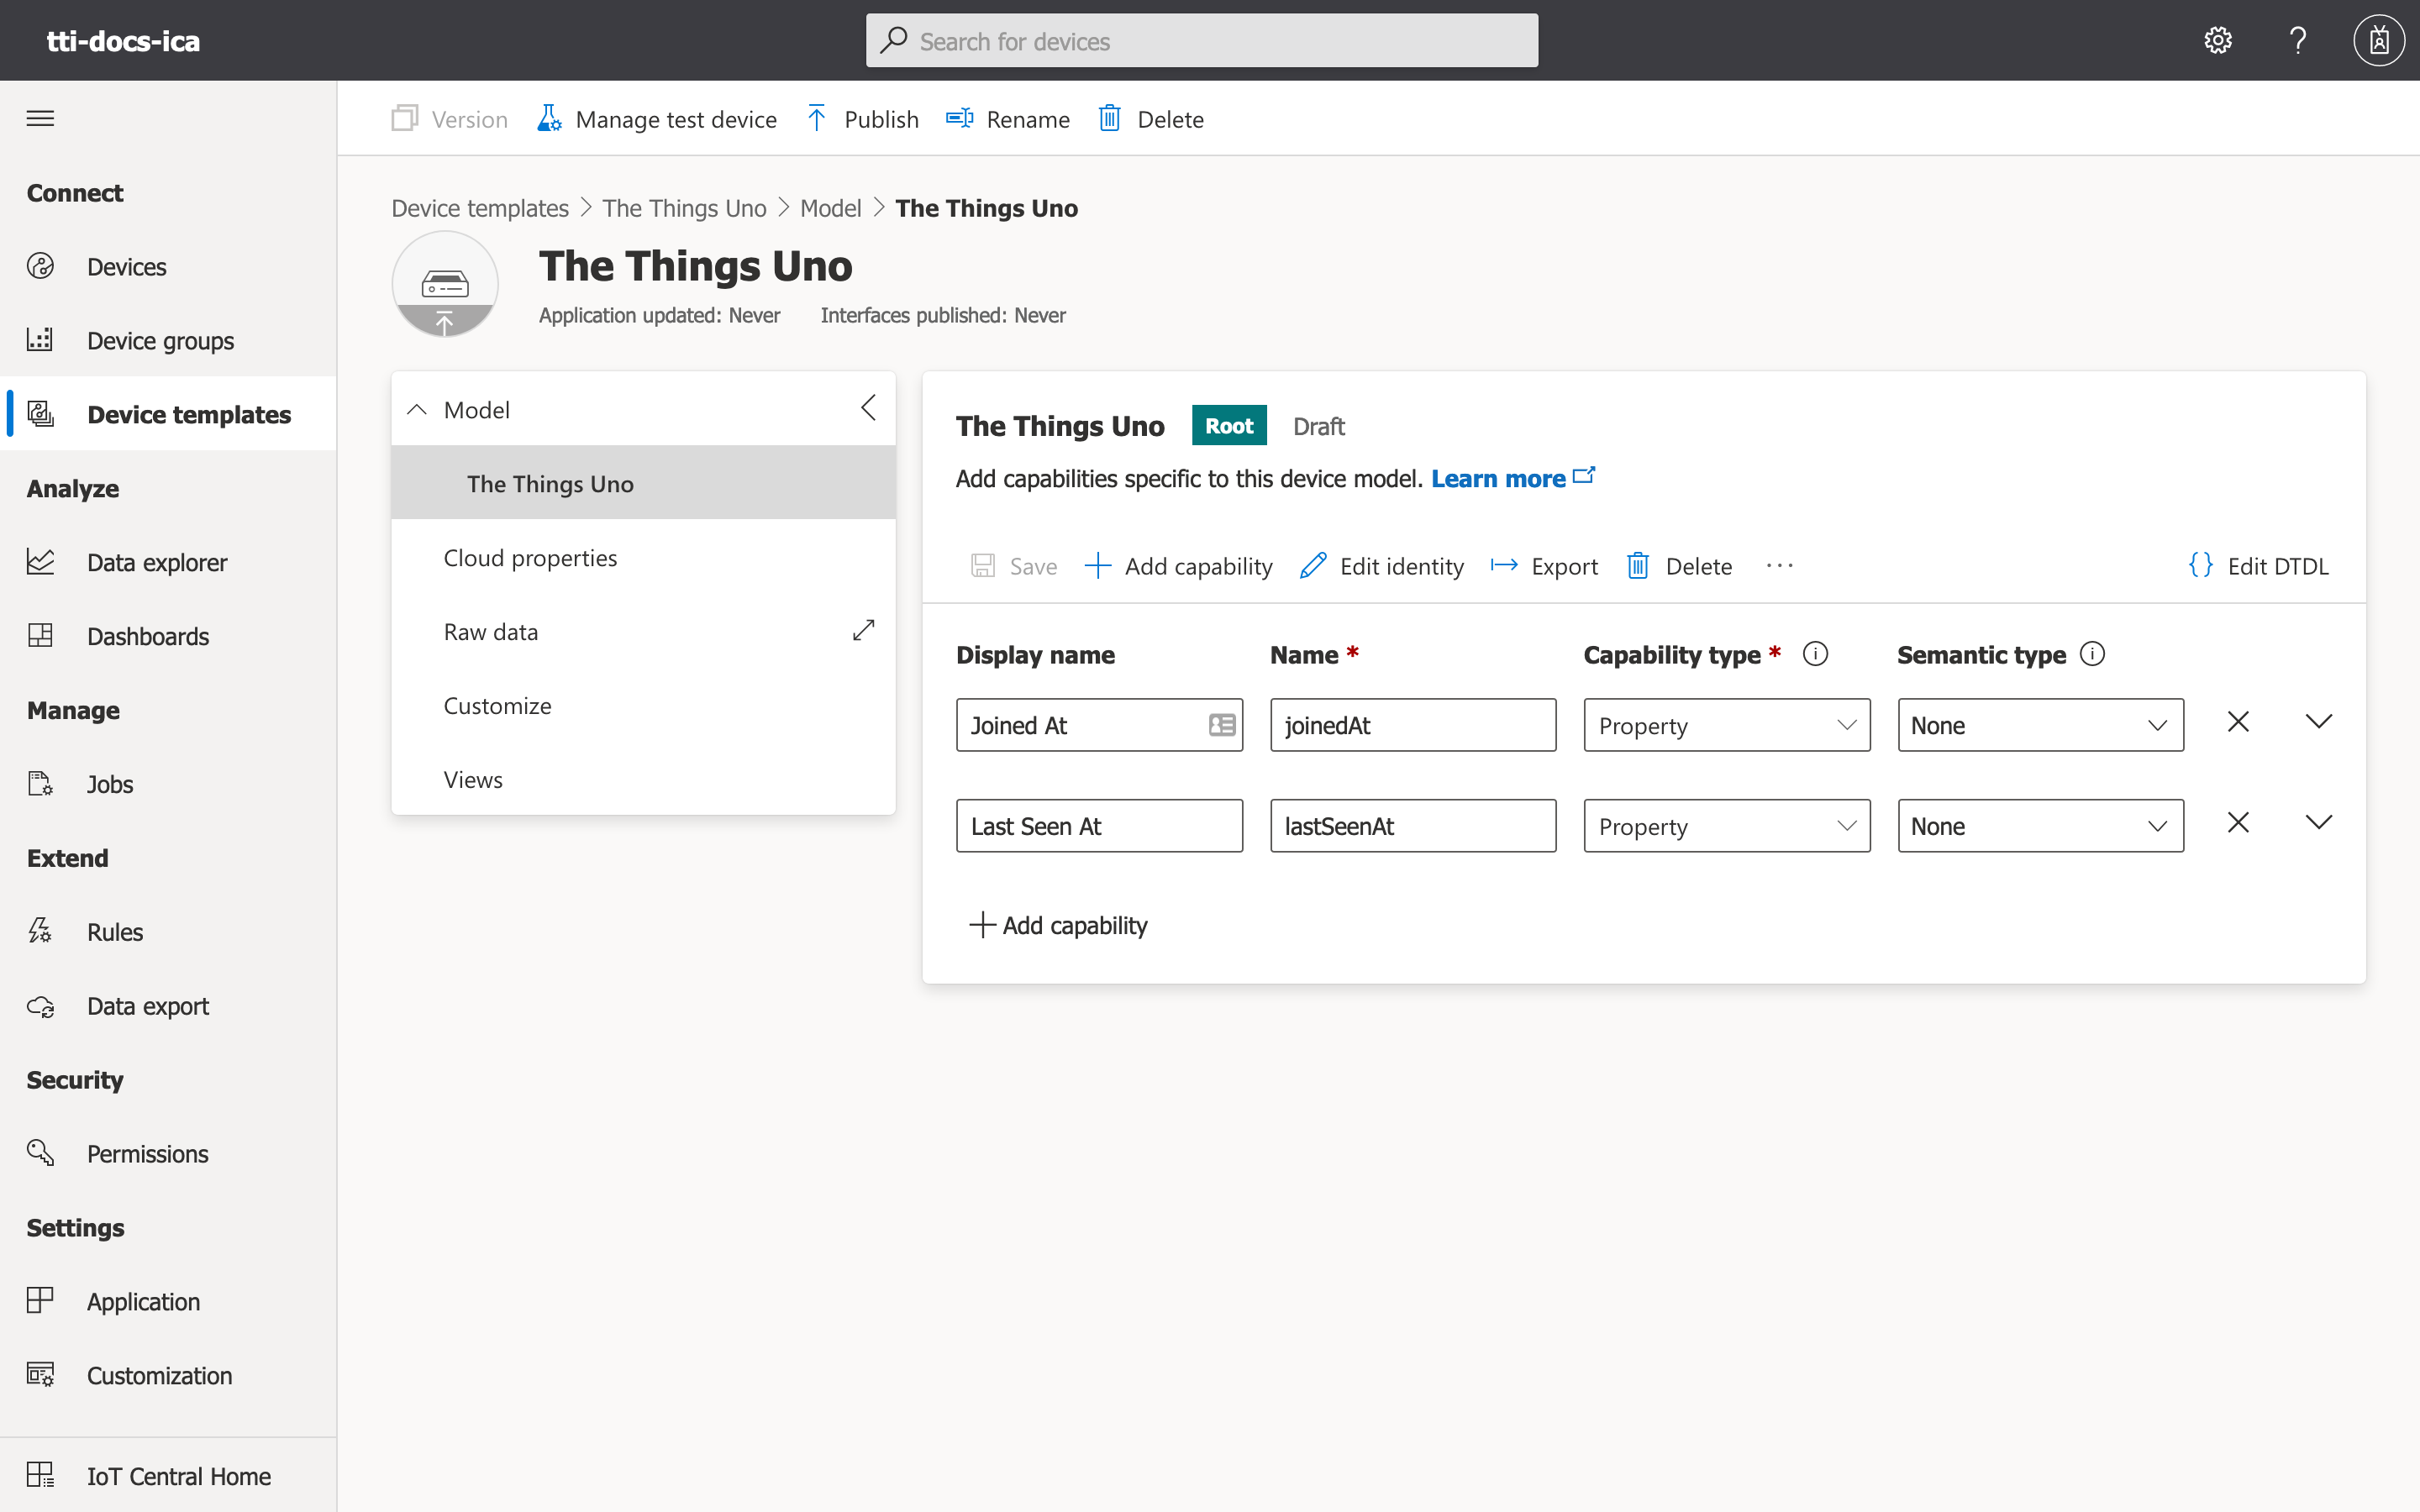
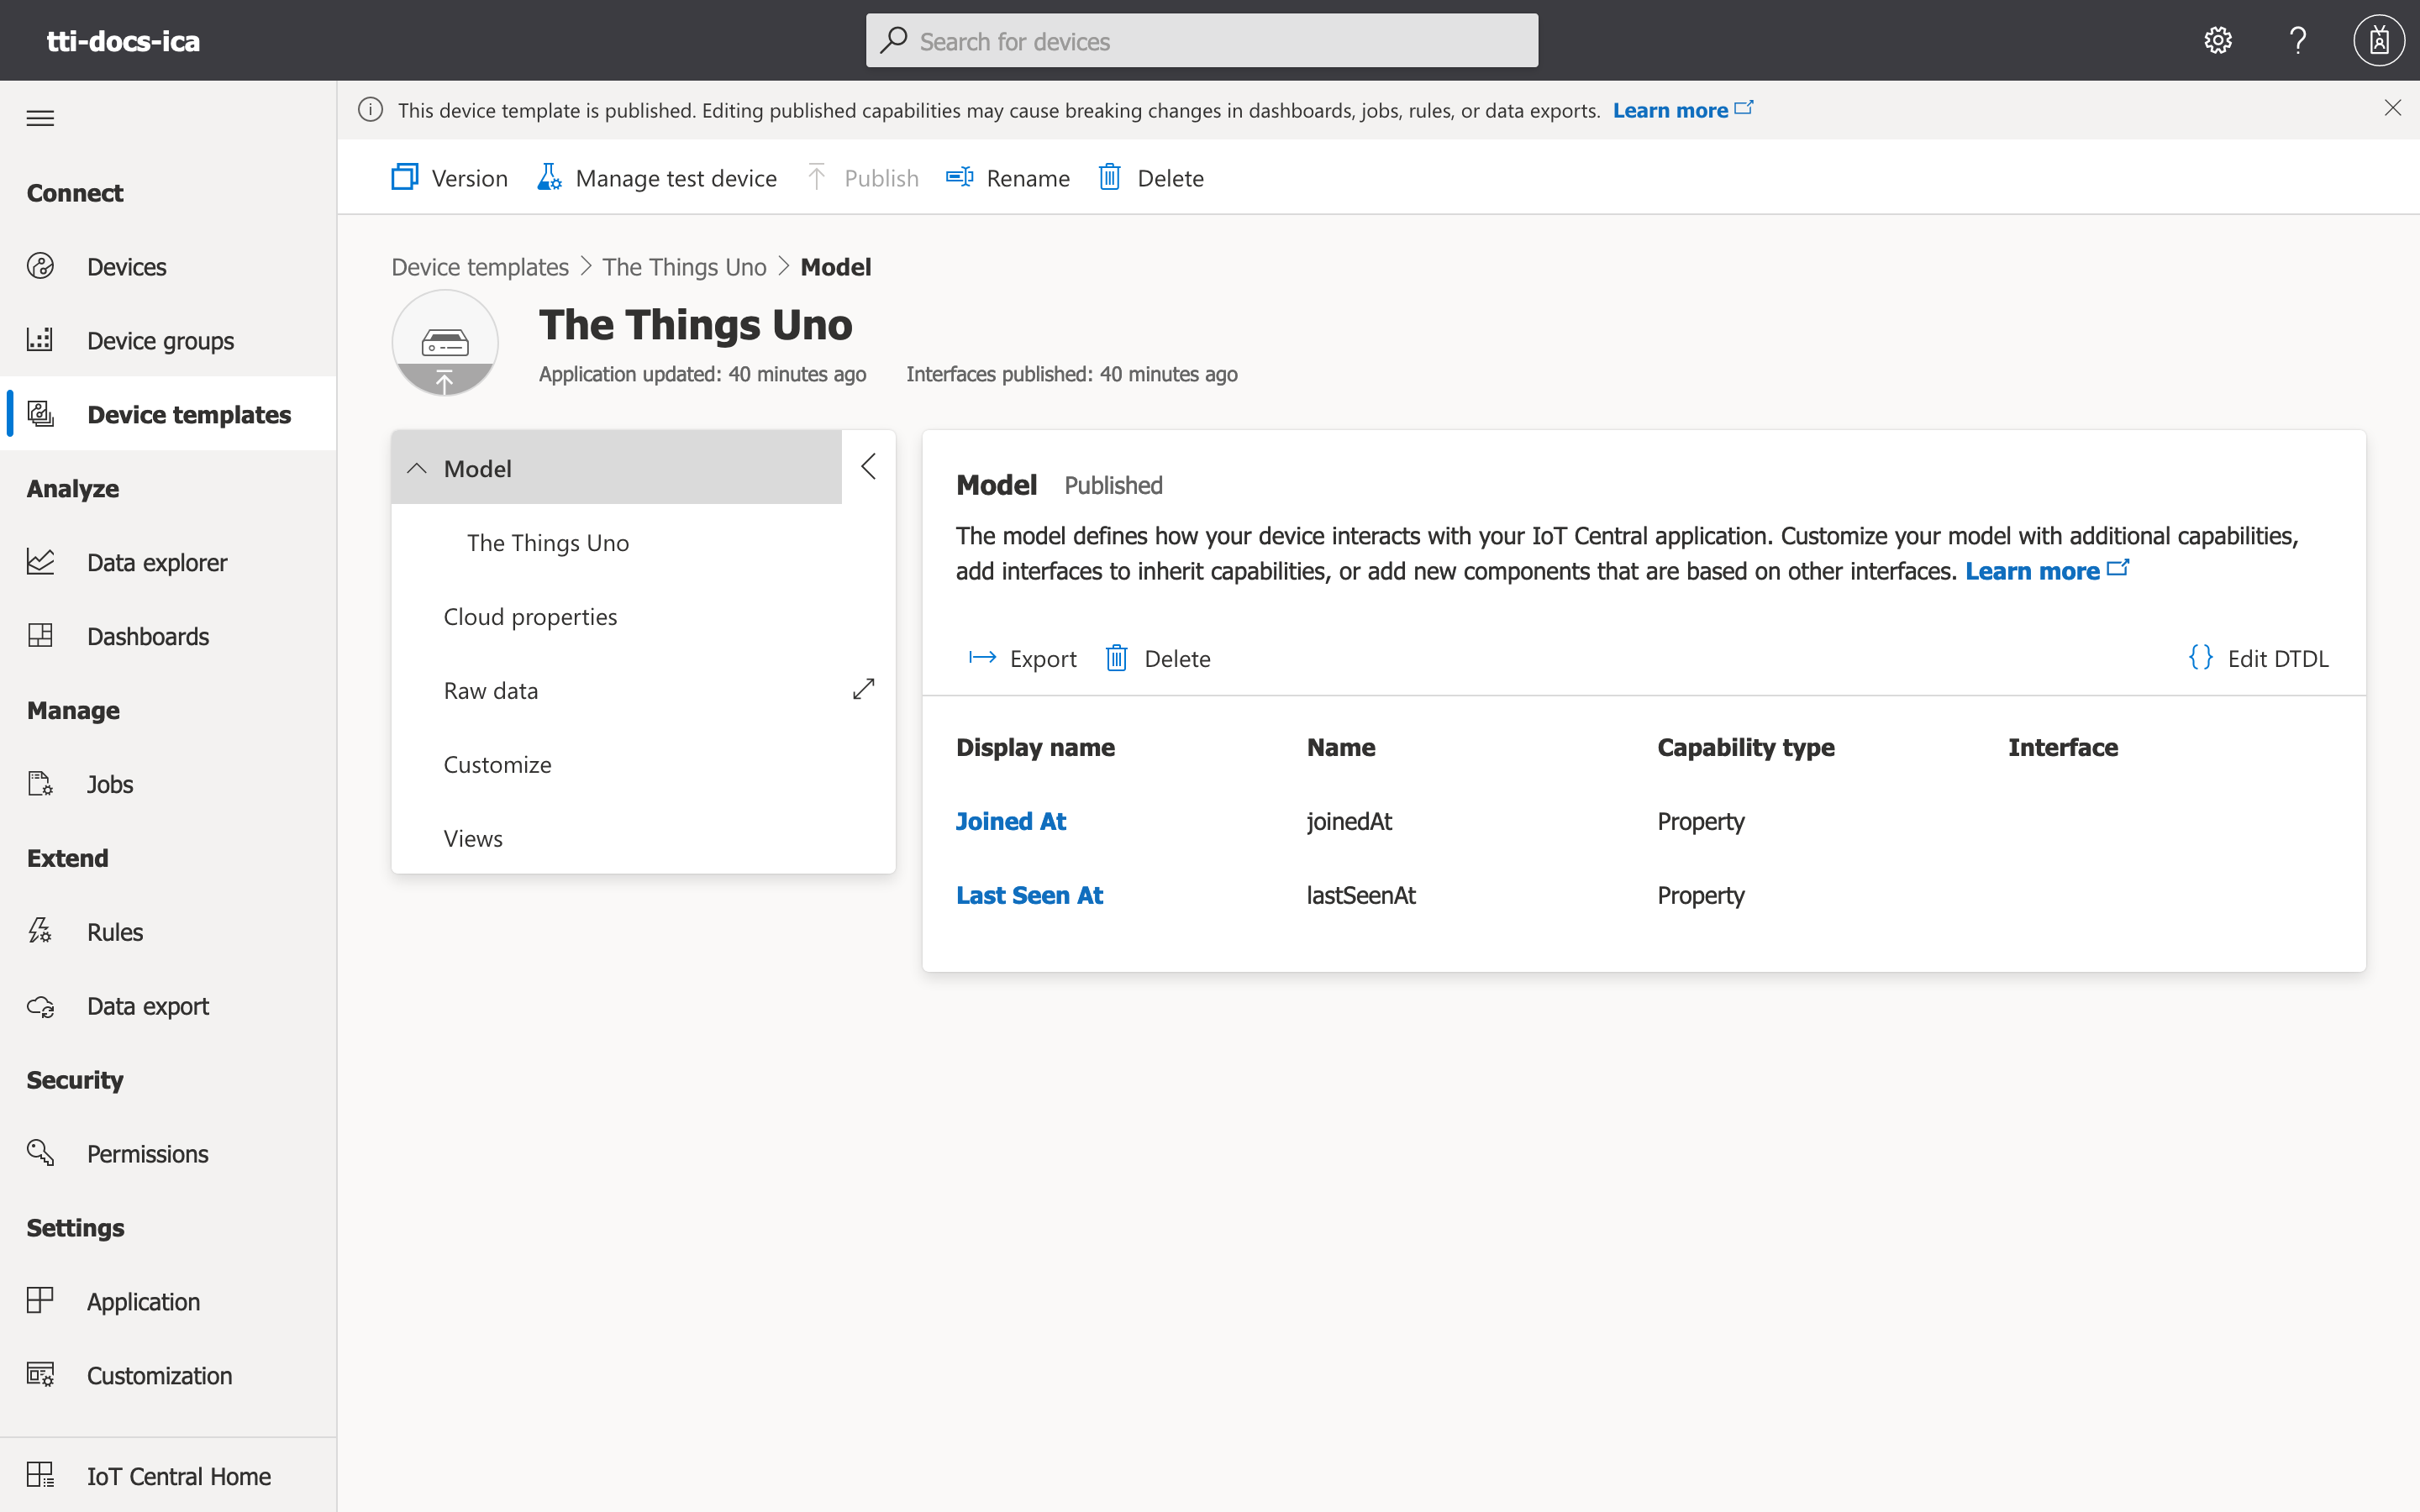
Click on the X in the corner of the model editing dialogue. You will now see the two properties in the model overview.
Click Publish on the top level menu, then click Publish again in the publish device template dialogue.
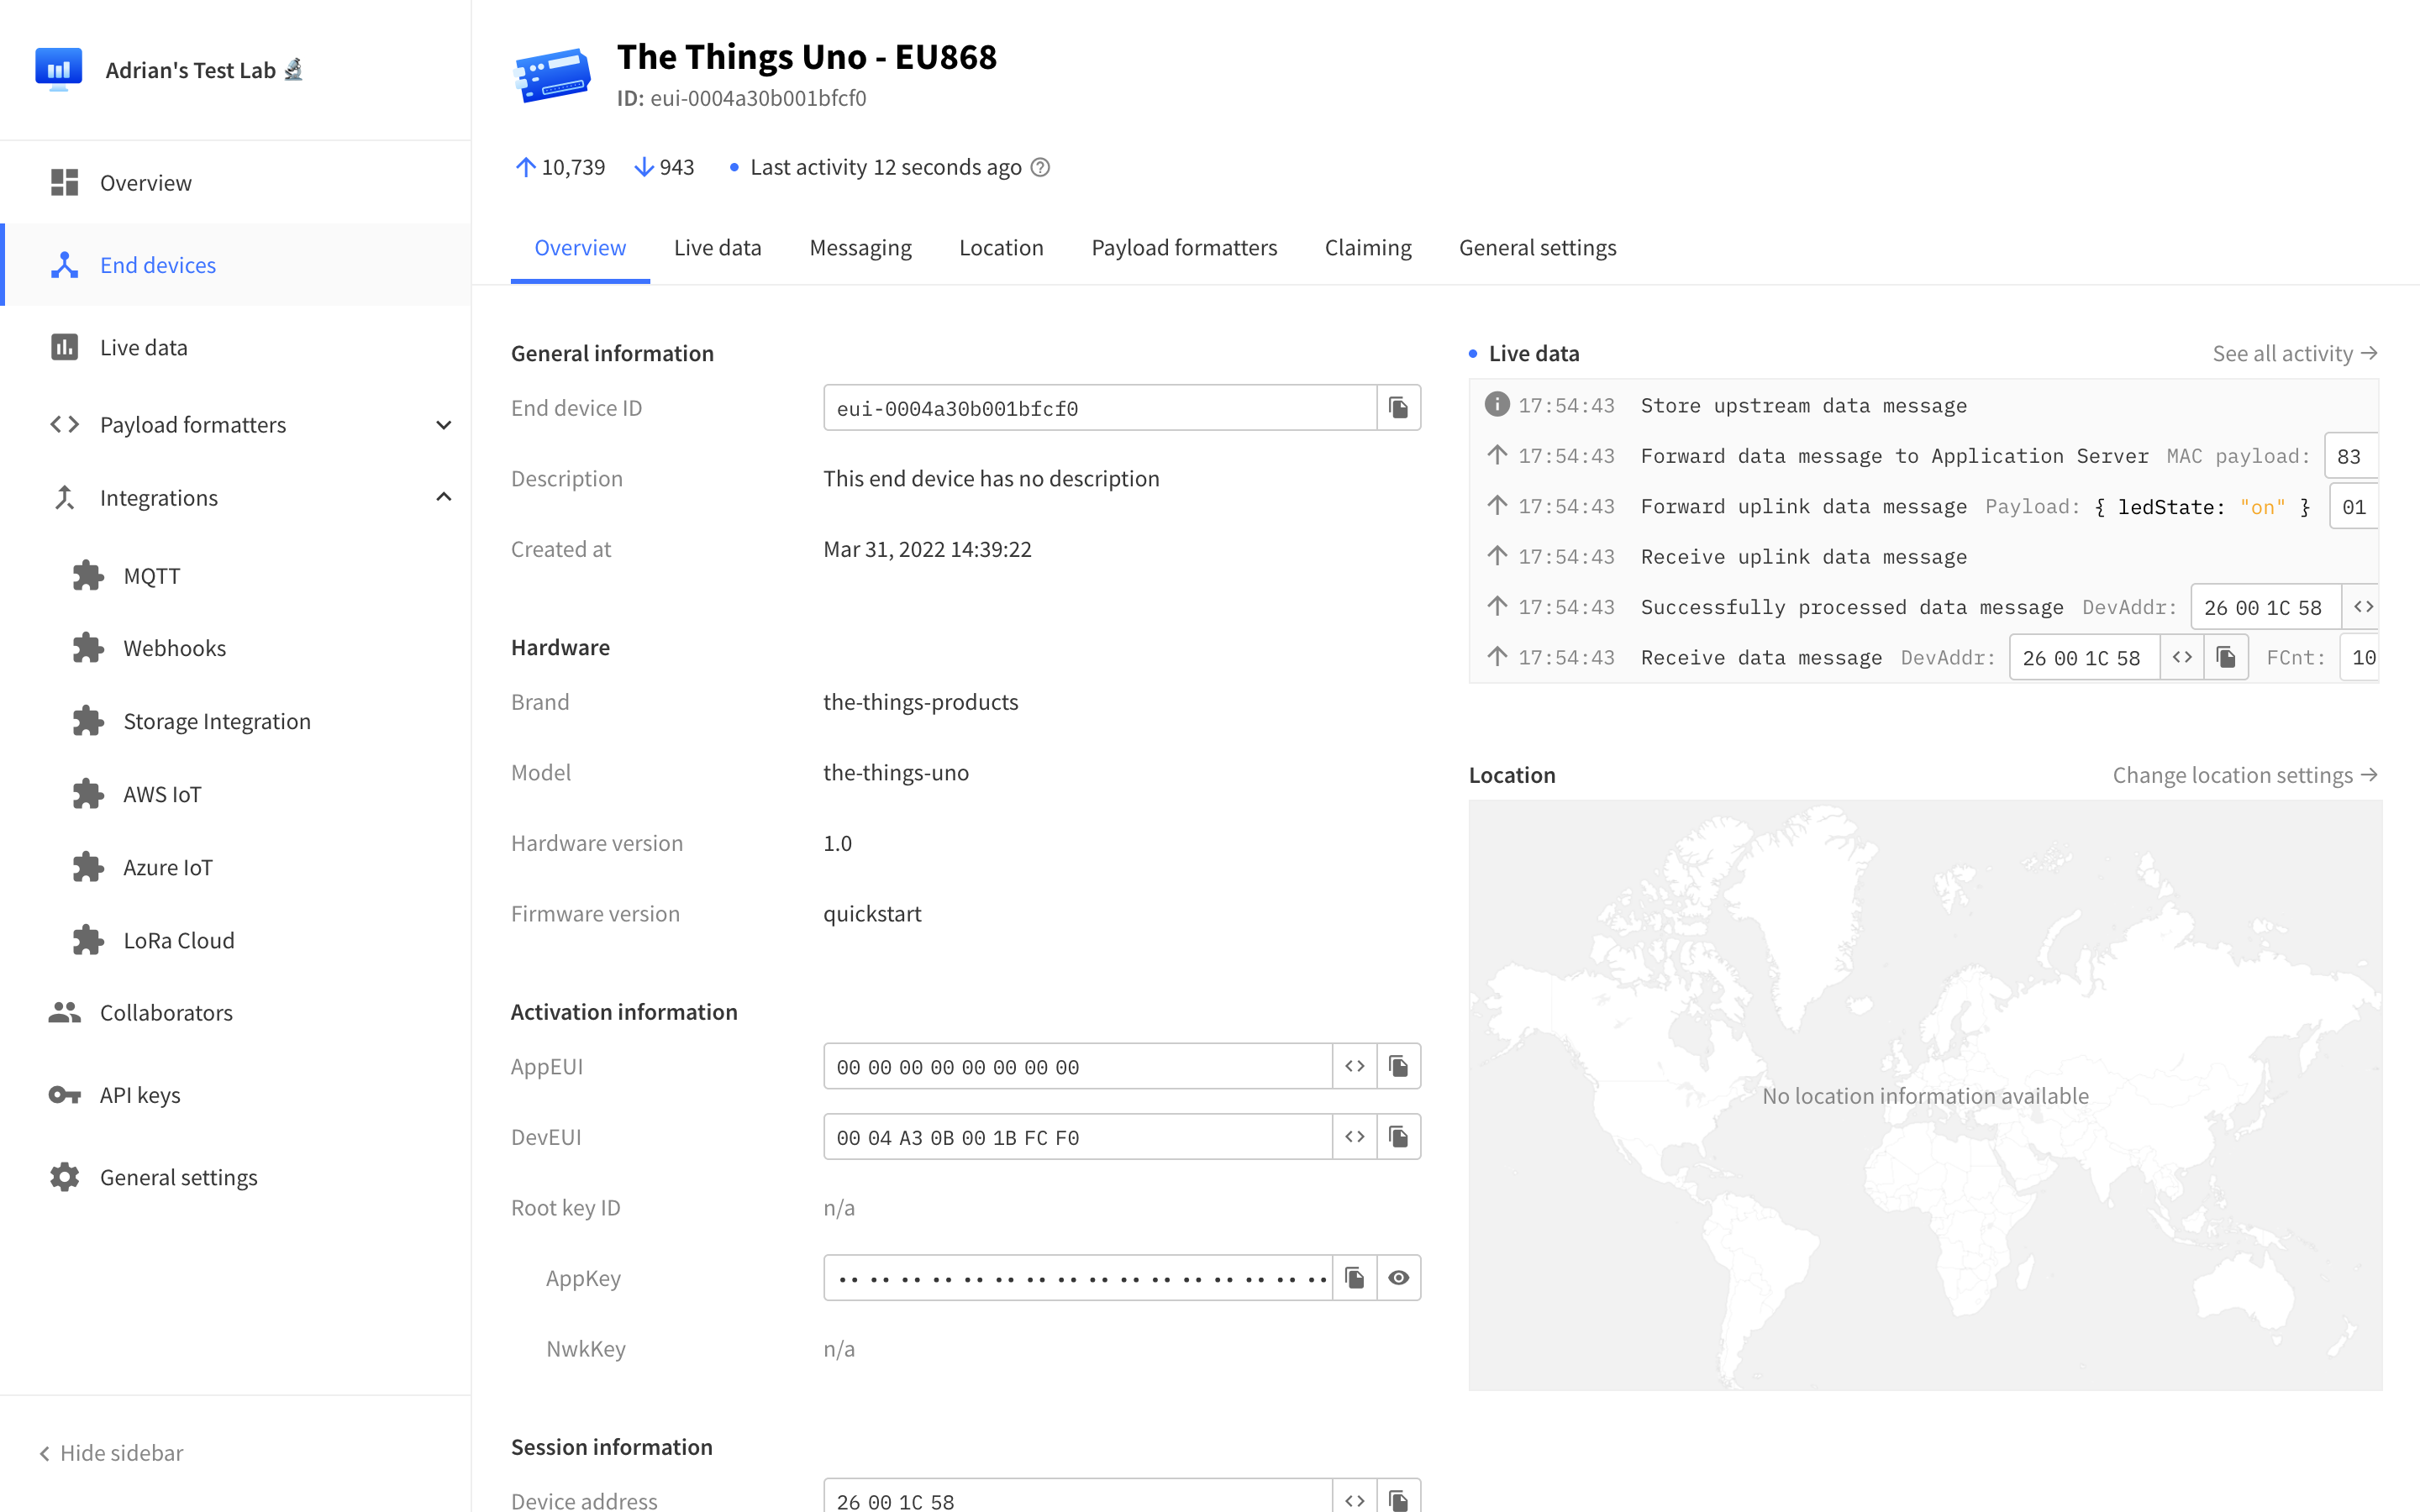
The model is now published and can be automatically assigned on device provisioning. We can now plug in our The Things Uno and allow it to send its first uplink. This will cause the integration to provision the end device using our newly registered template.
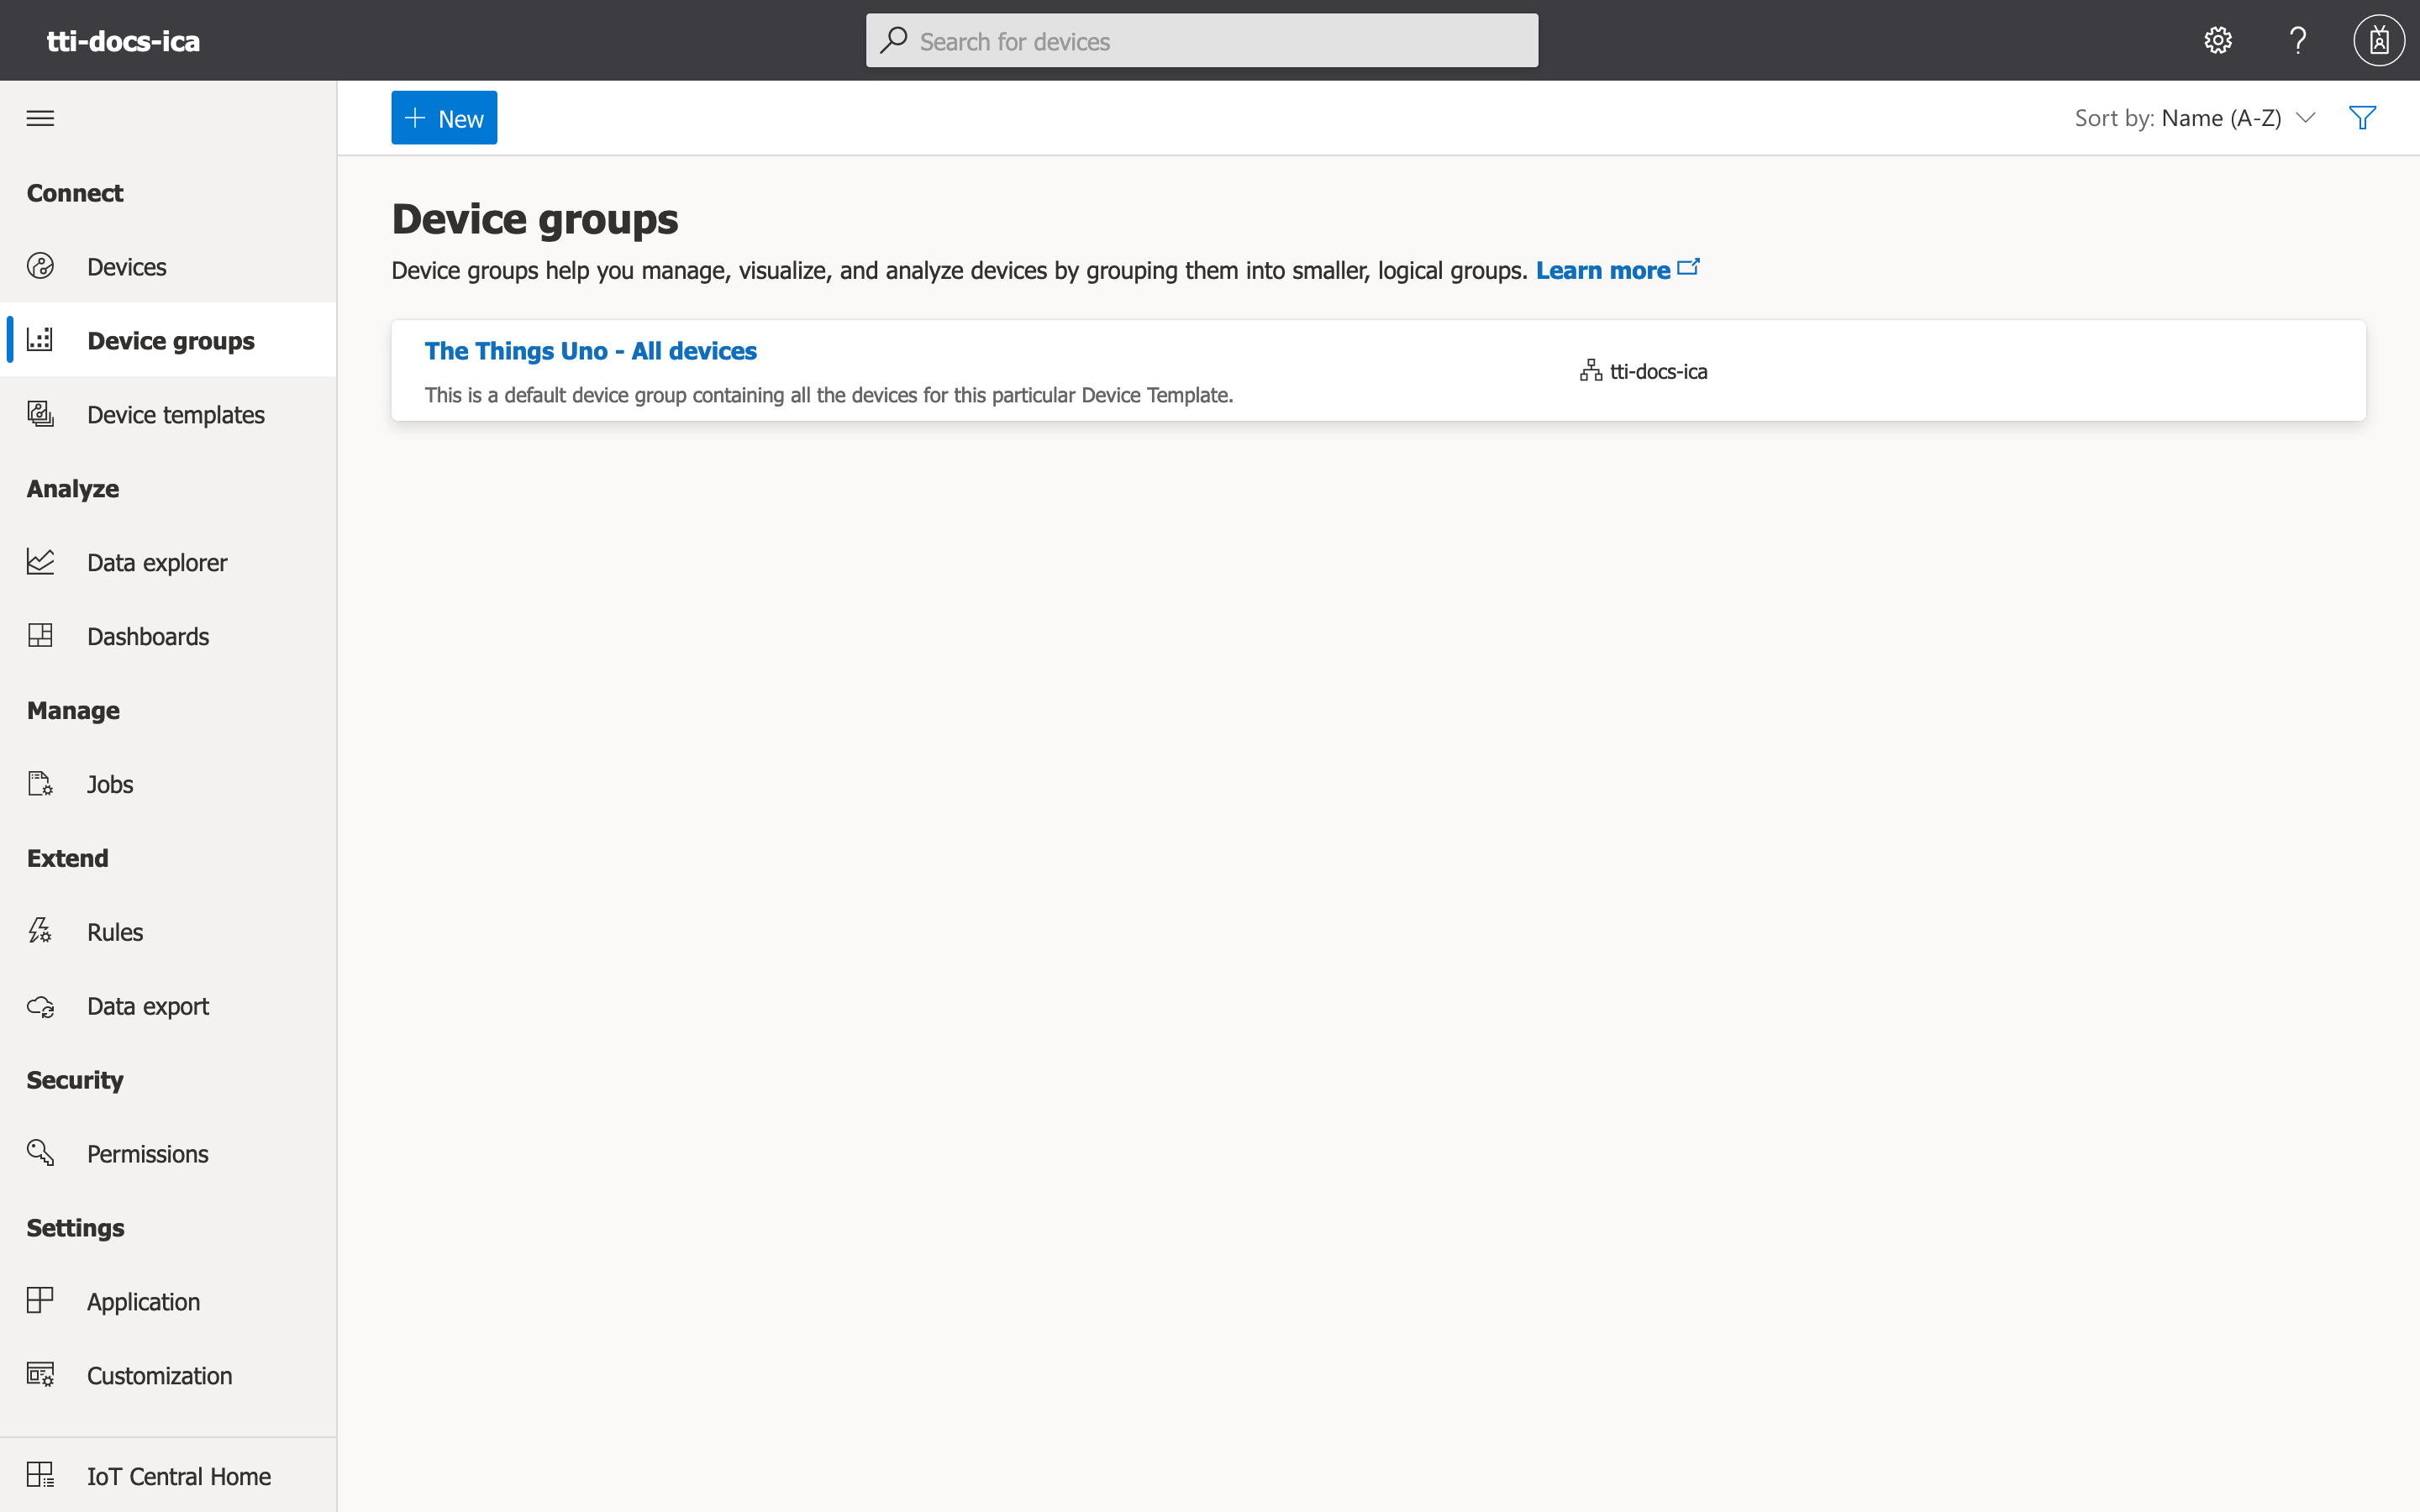
We can navigate to Device groups on the left hand side menu. A group for all of the The Things Uno devices will appear.
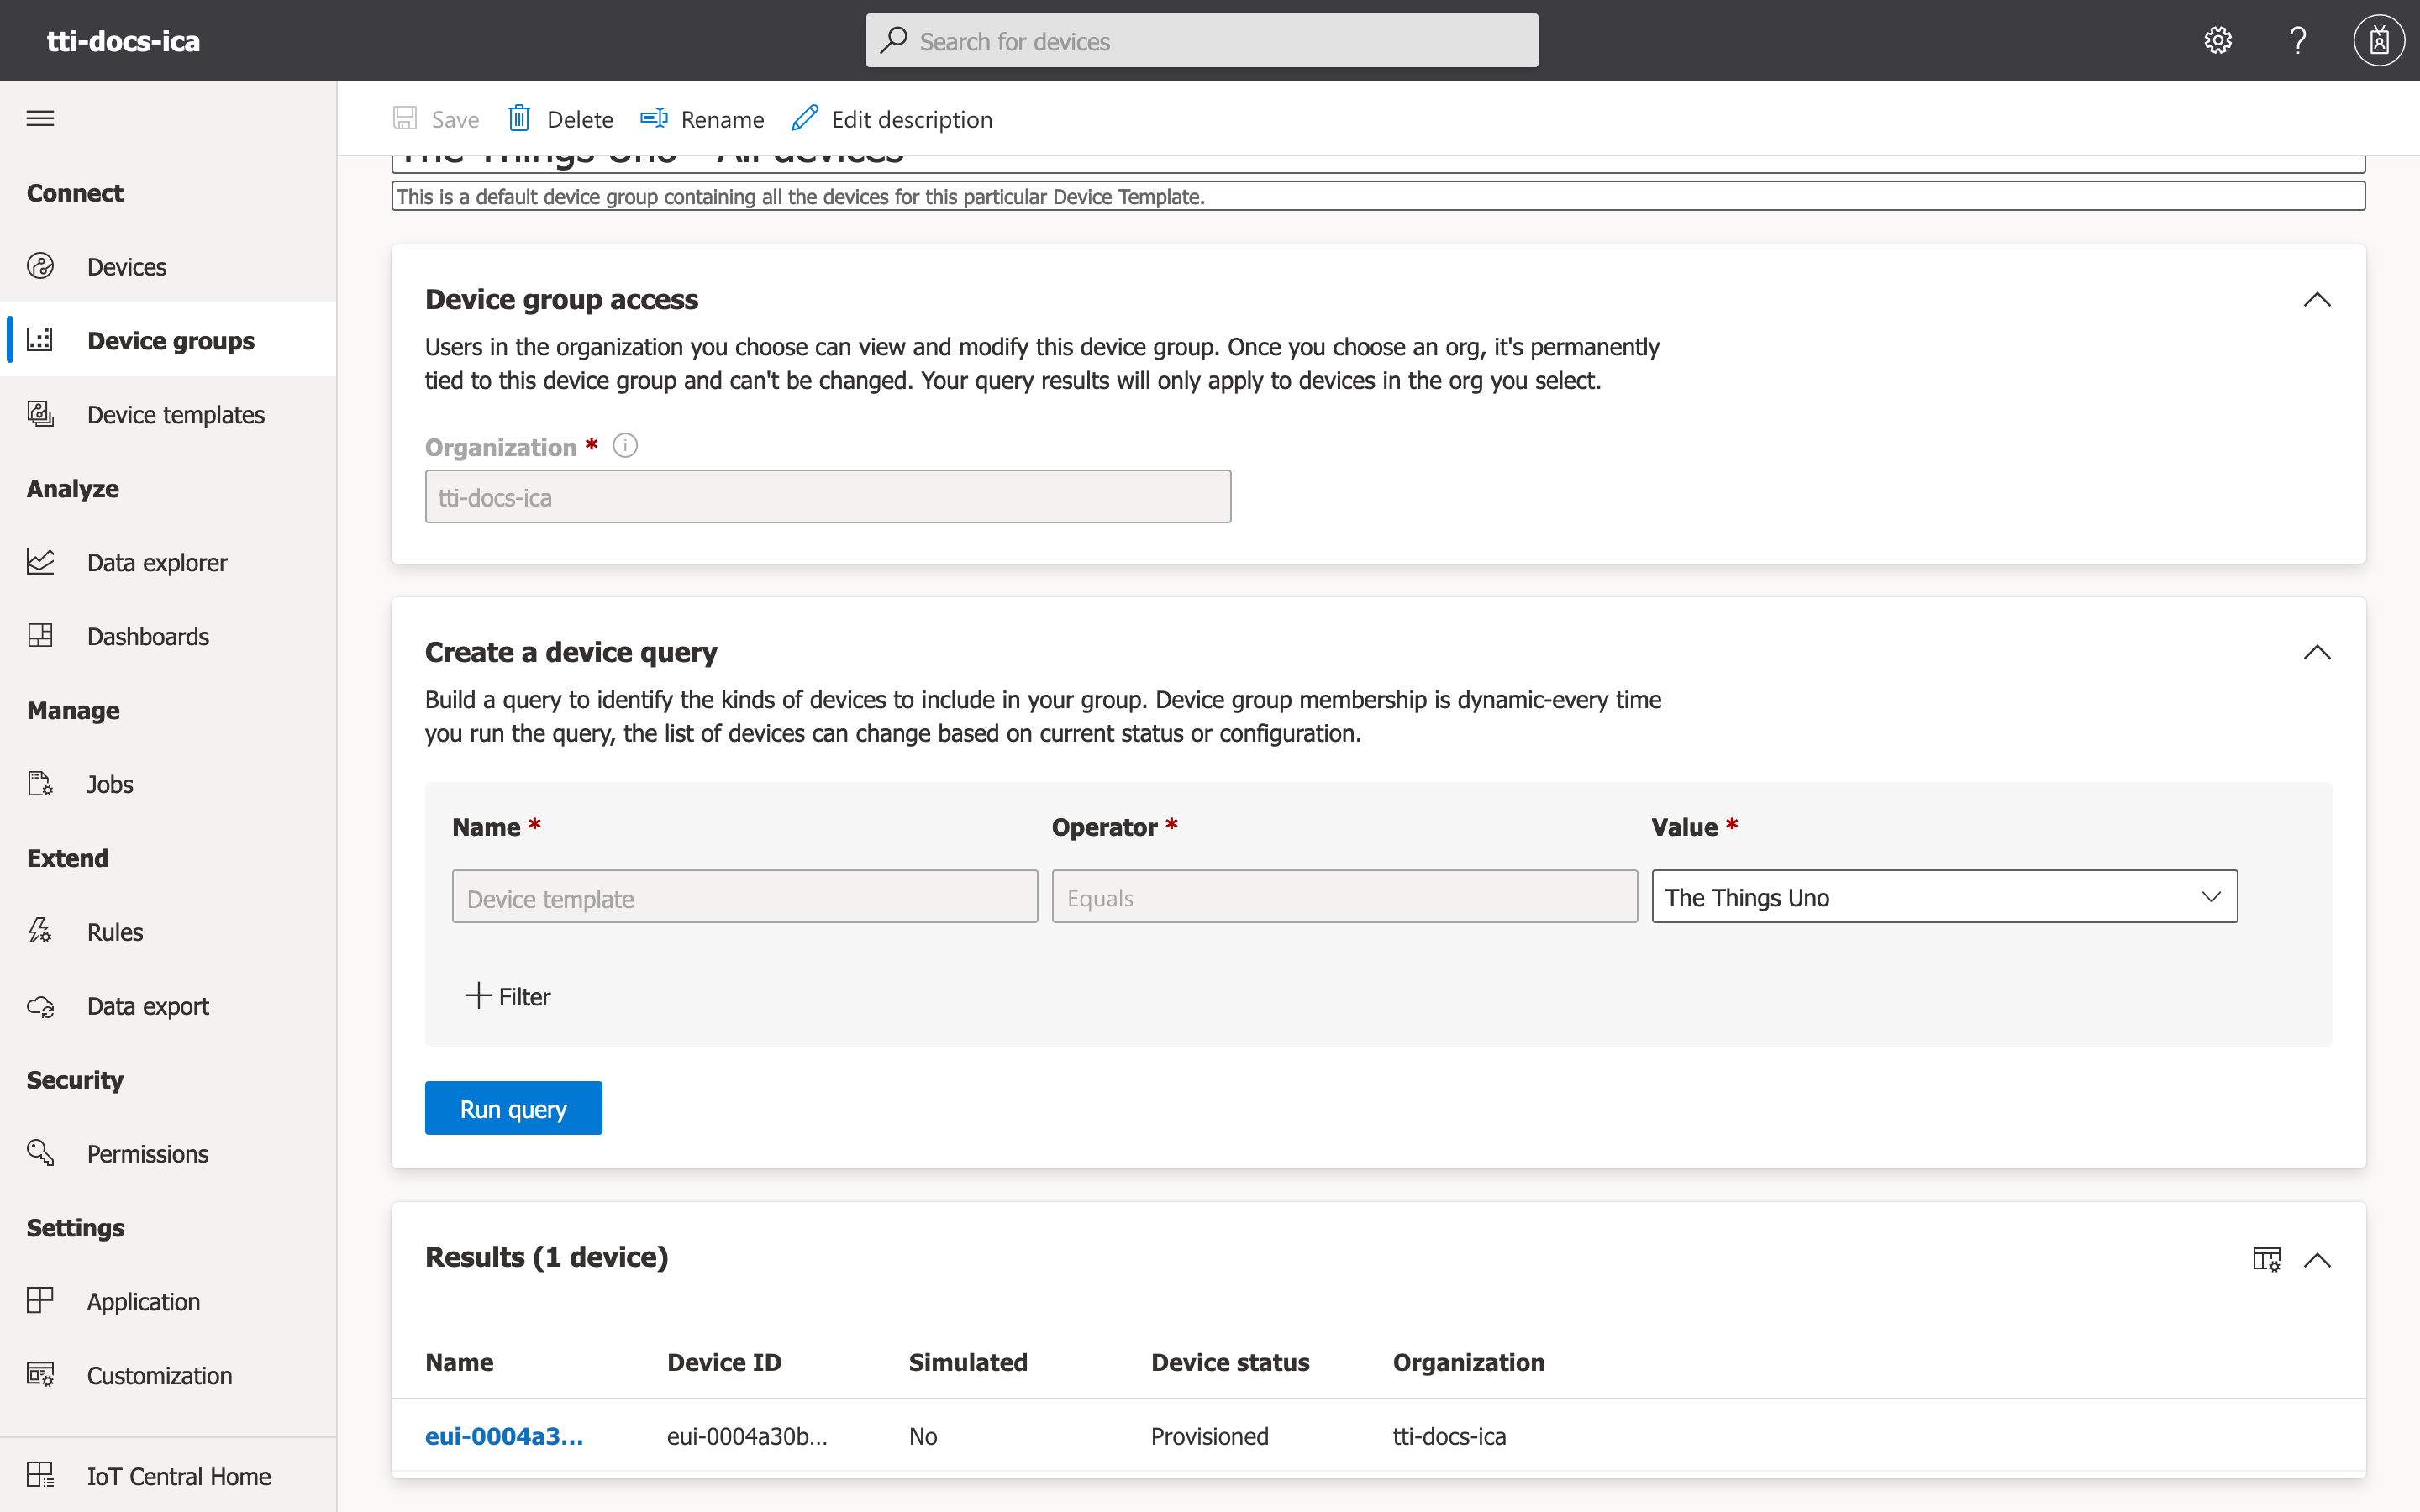
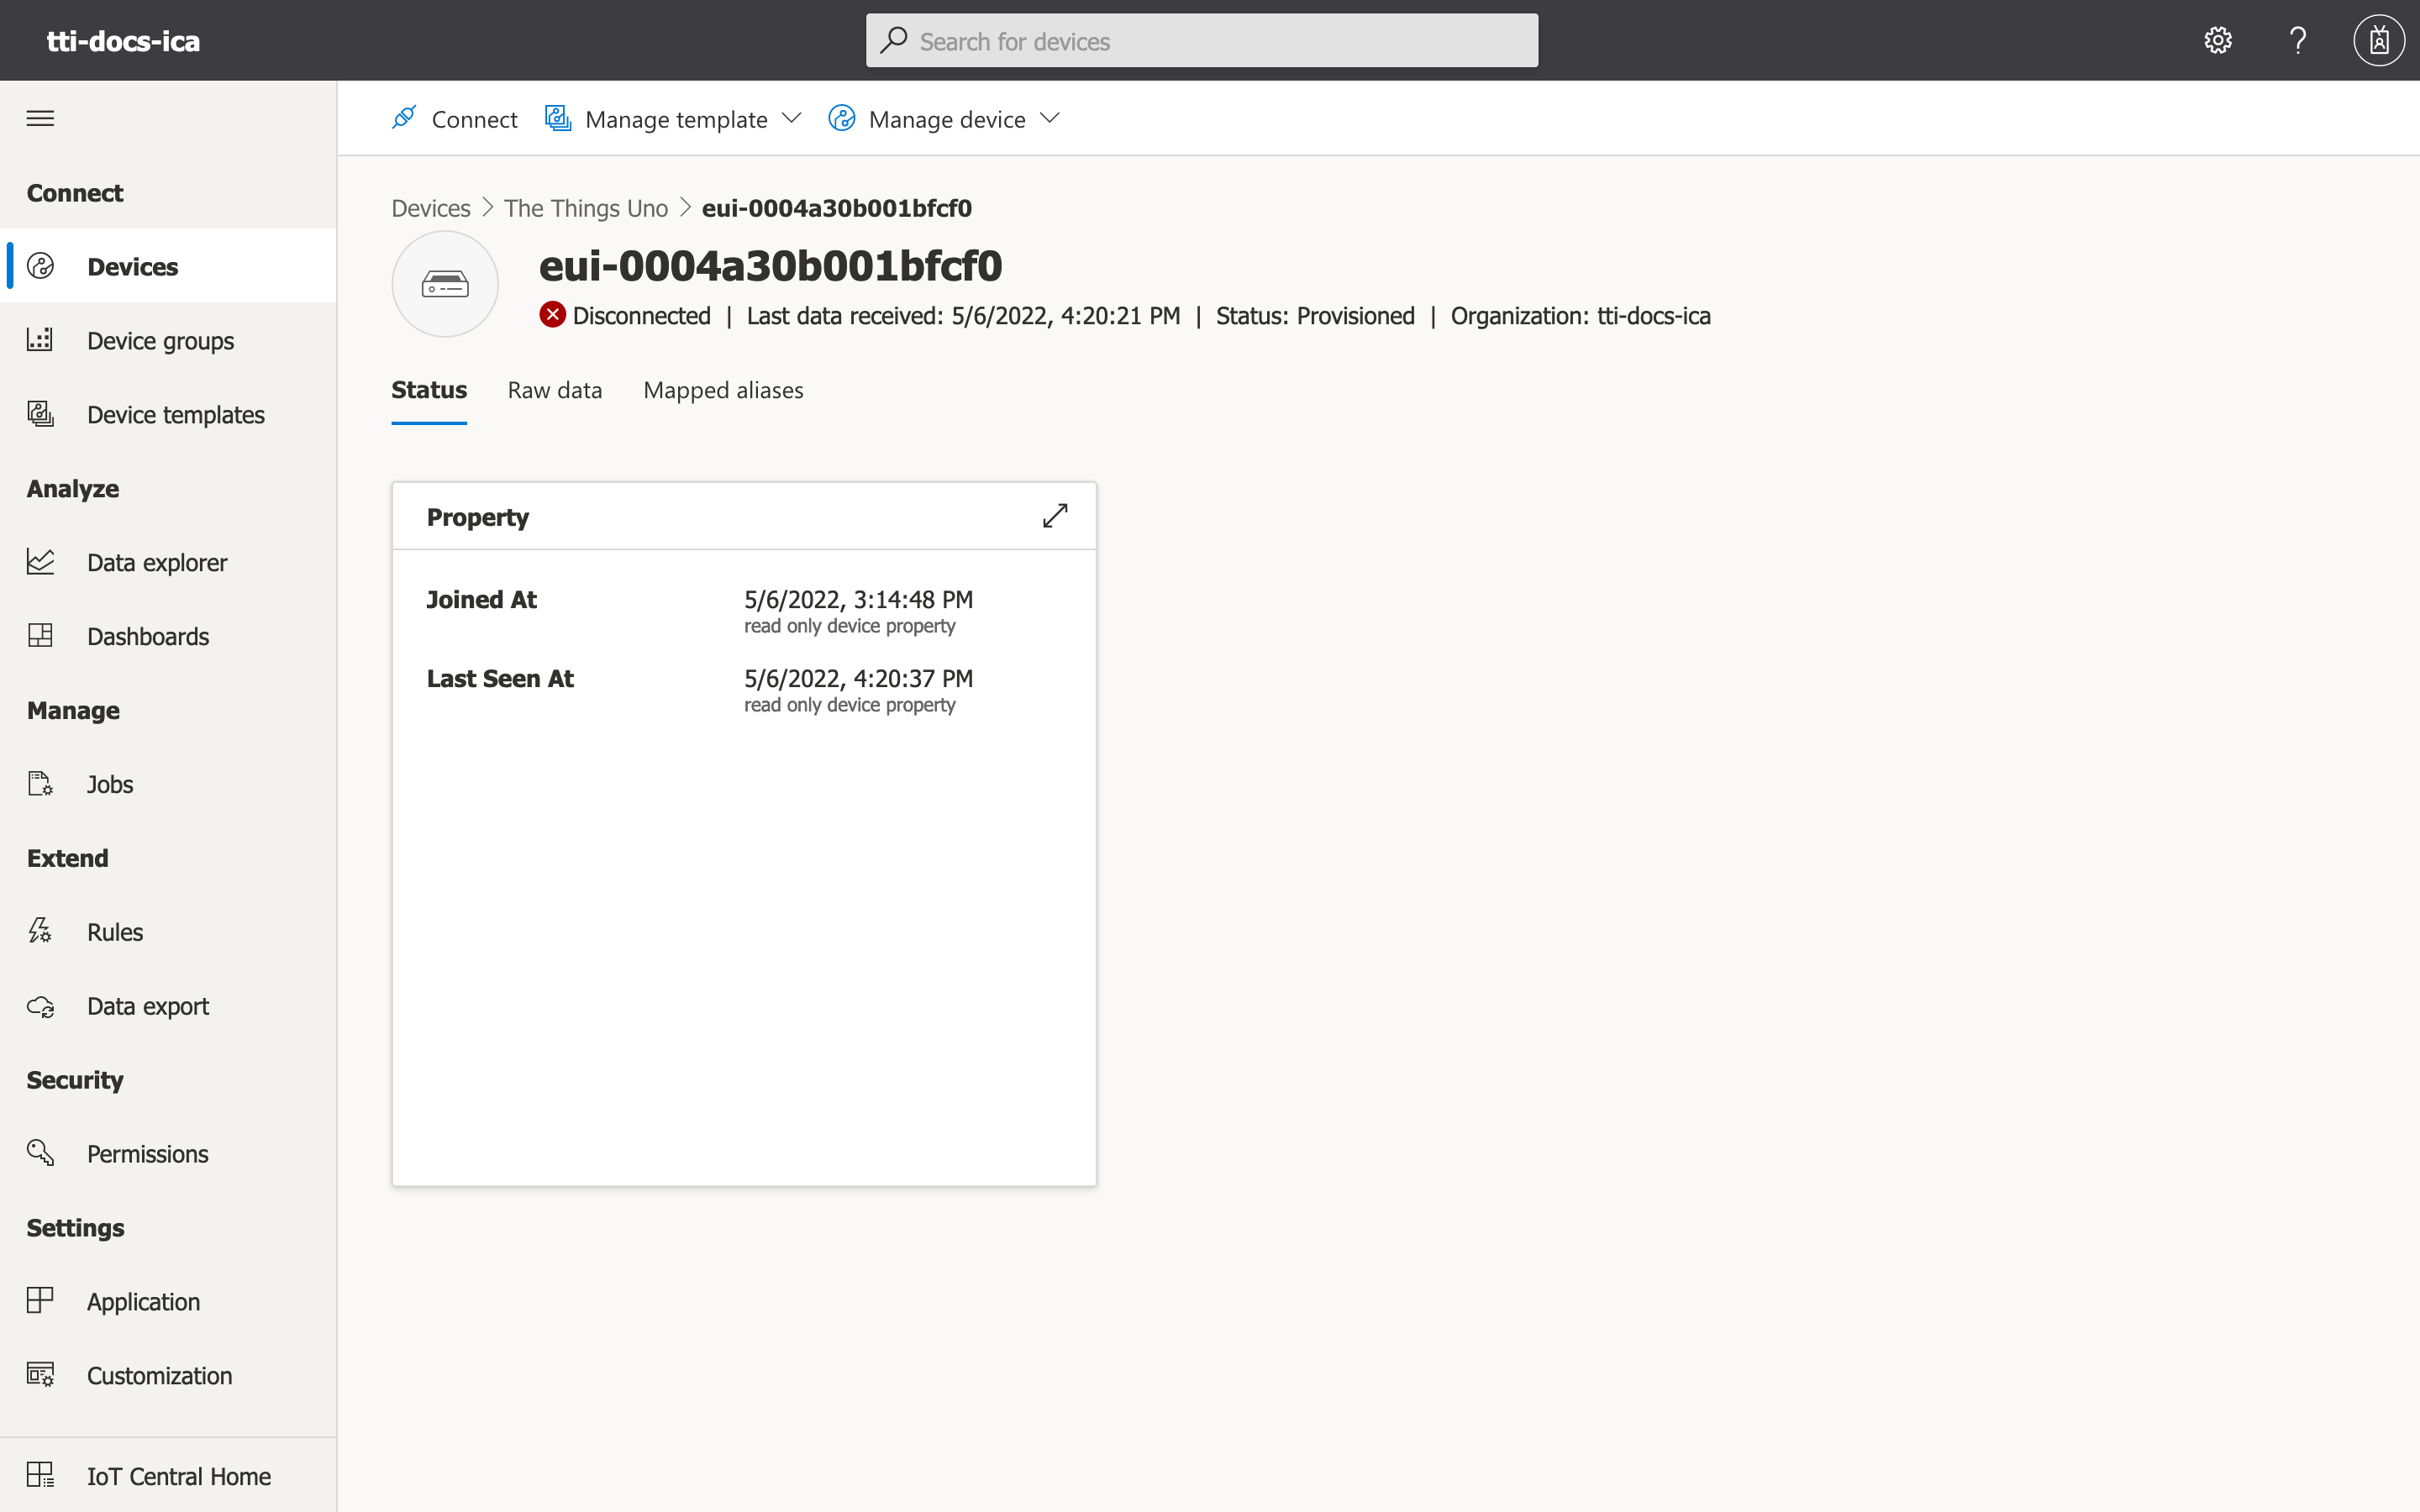
We can now open the group and see the newly provisioned end device in the device list.
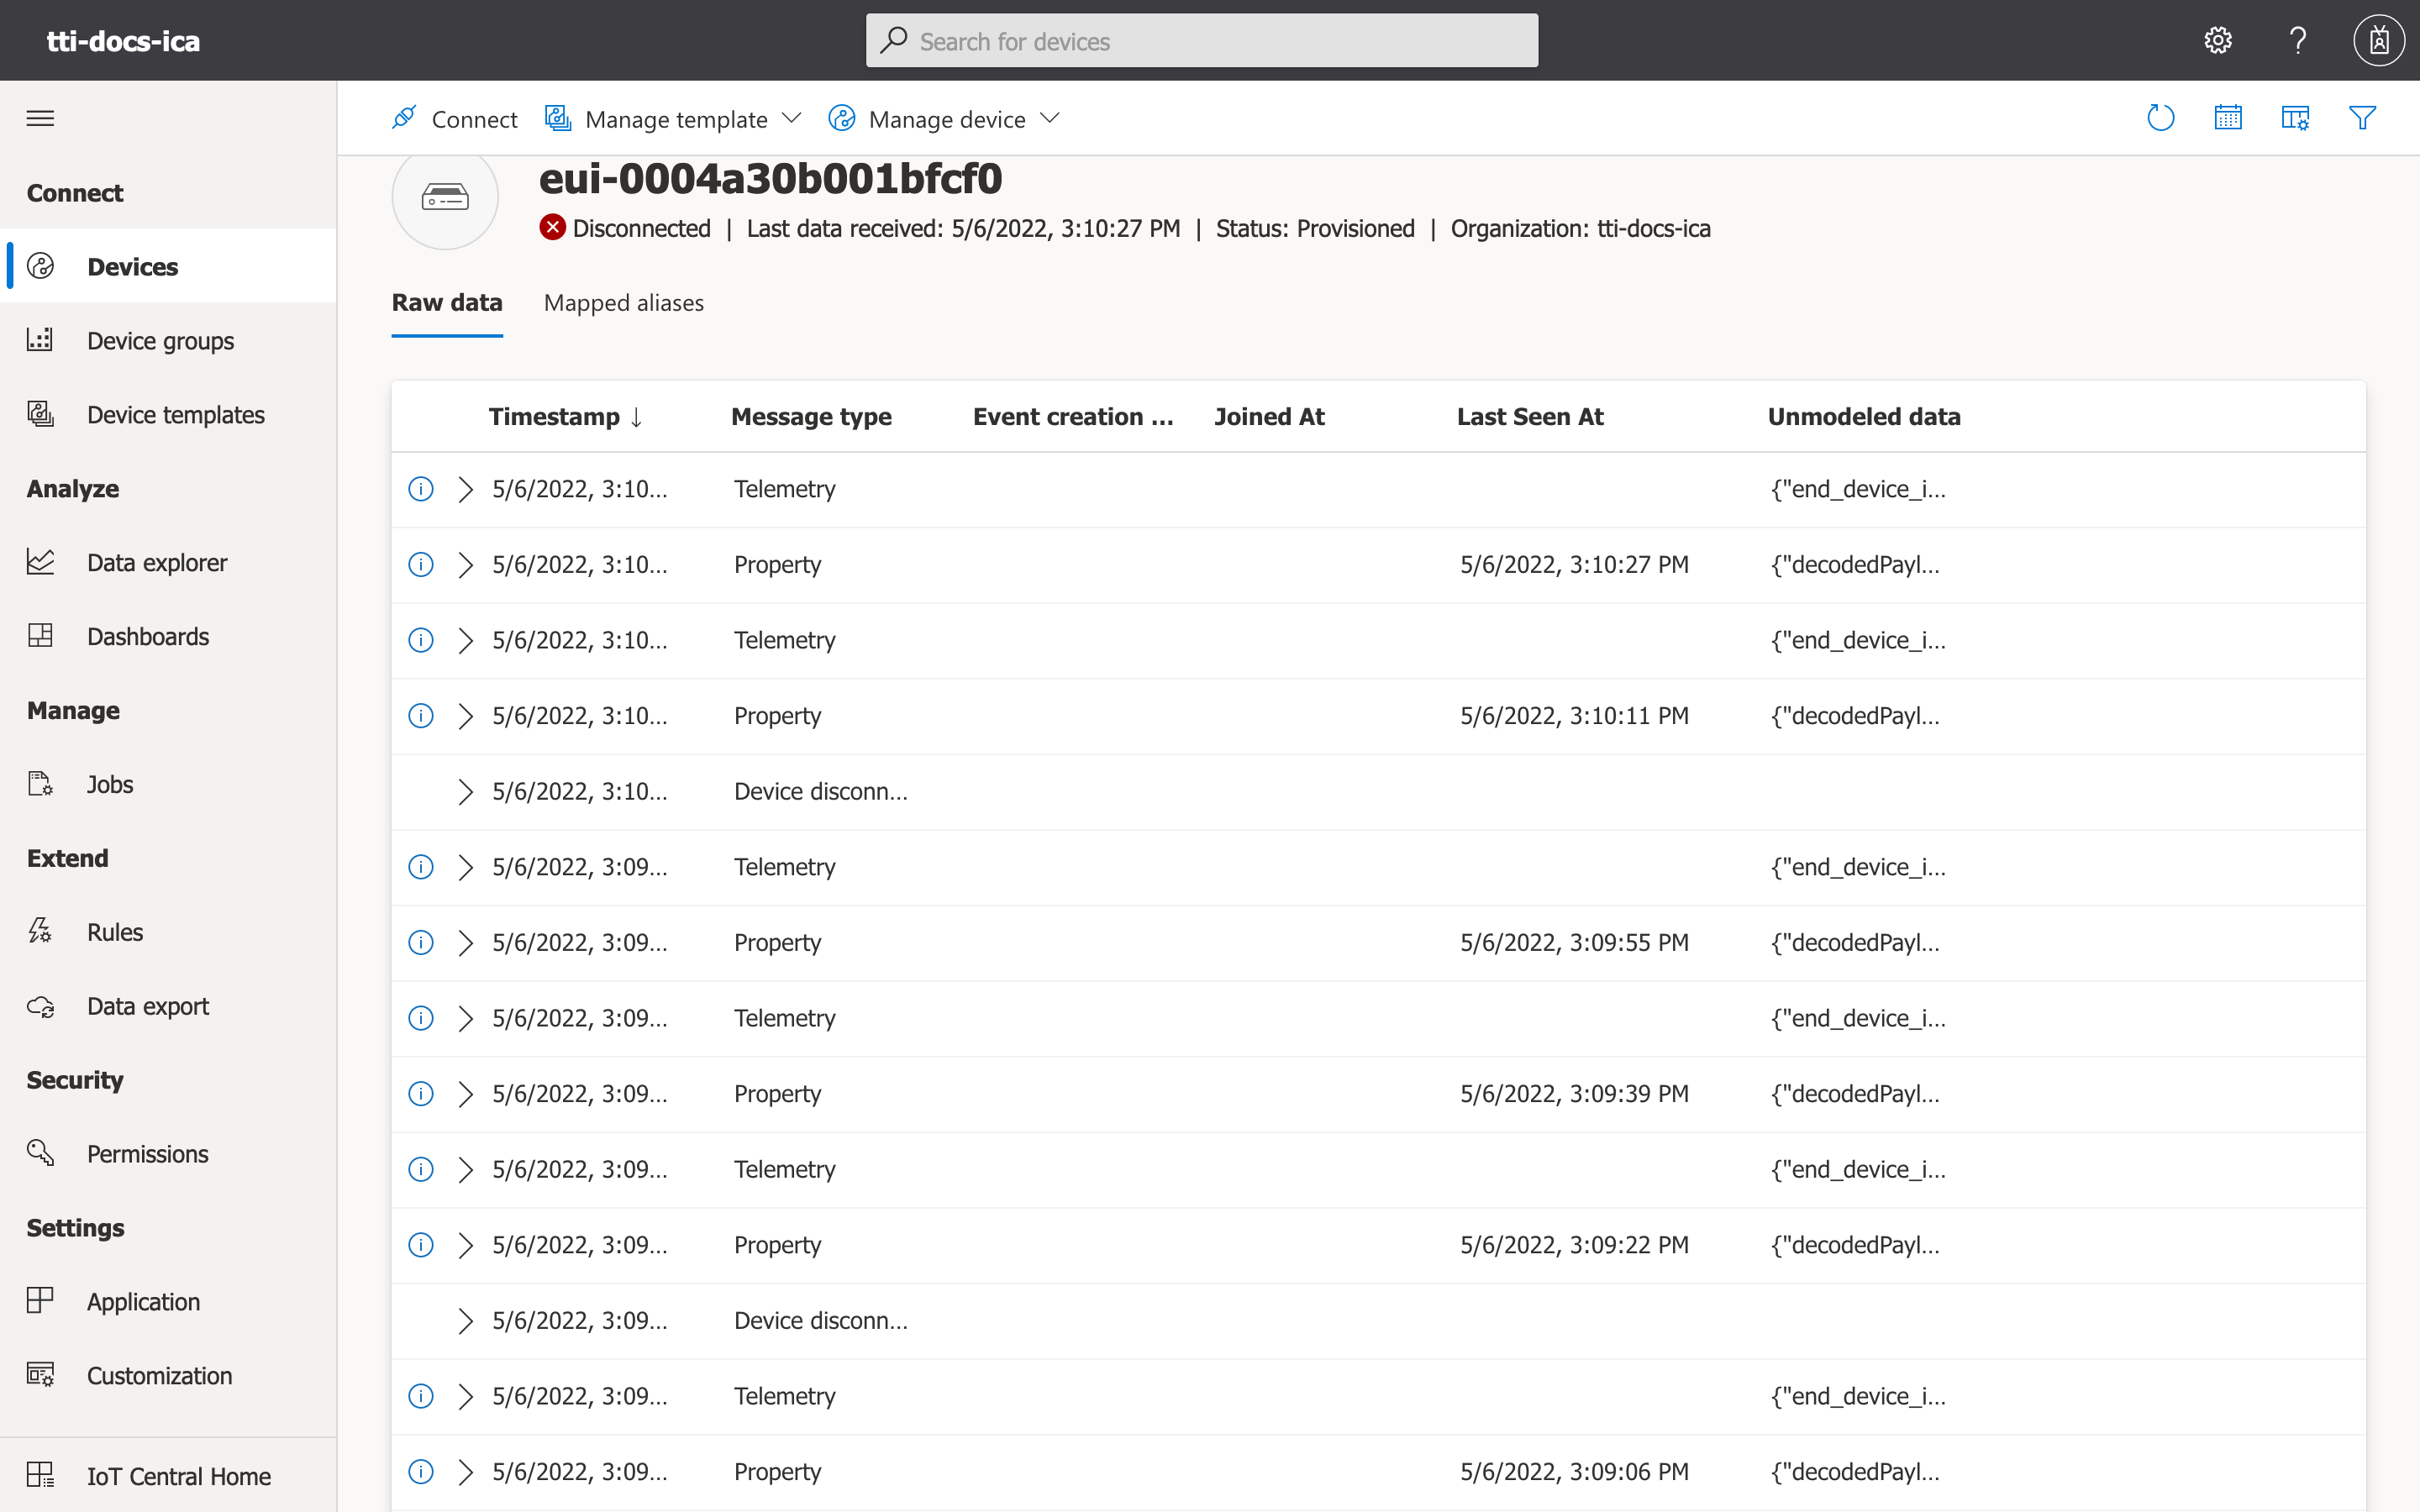
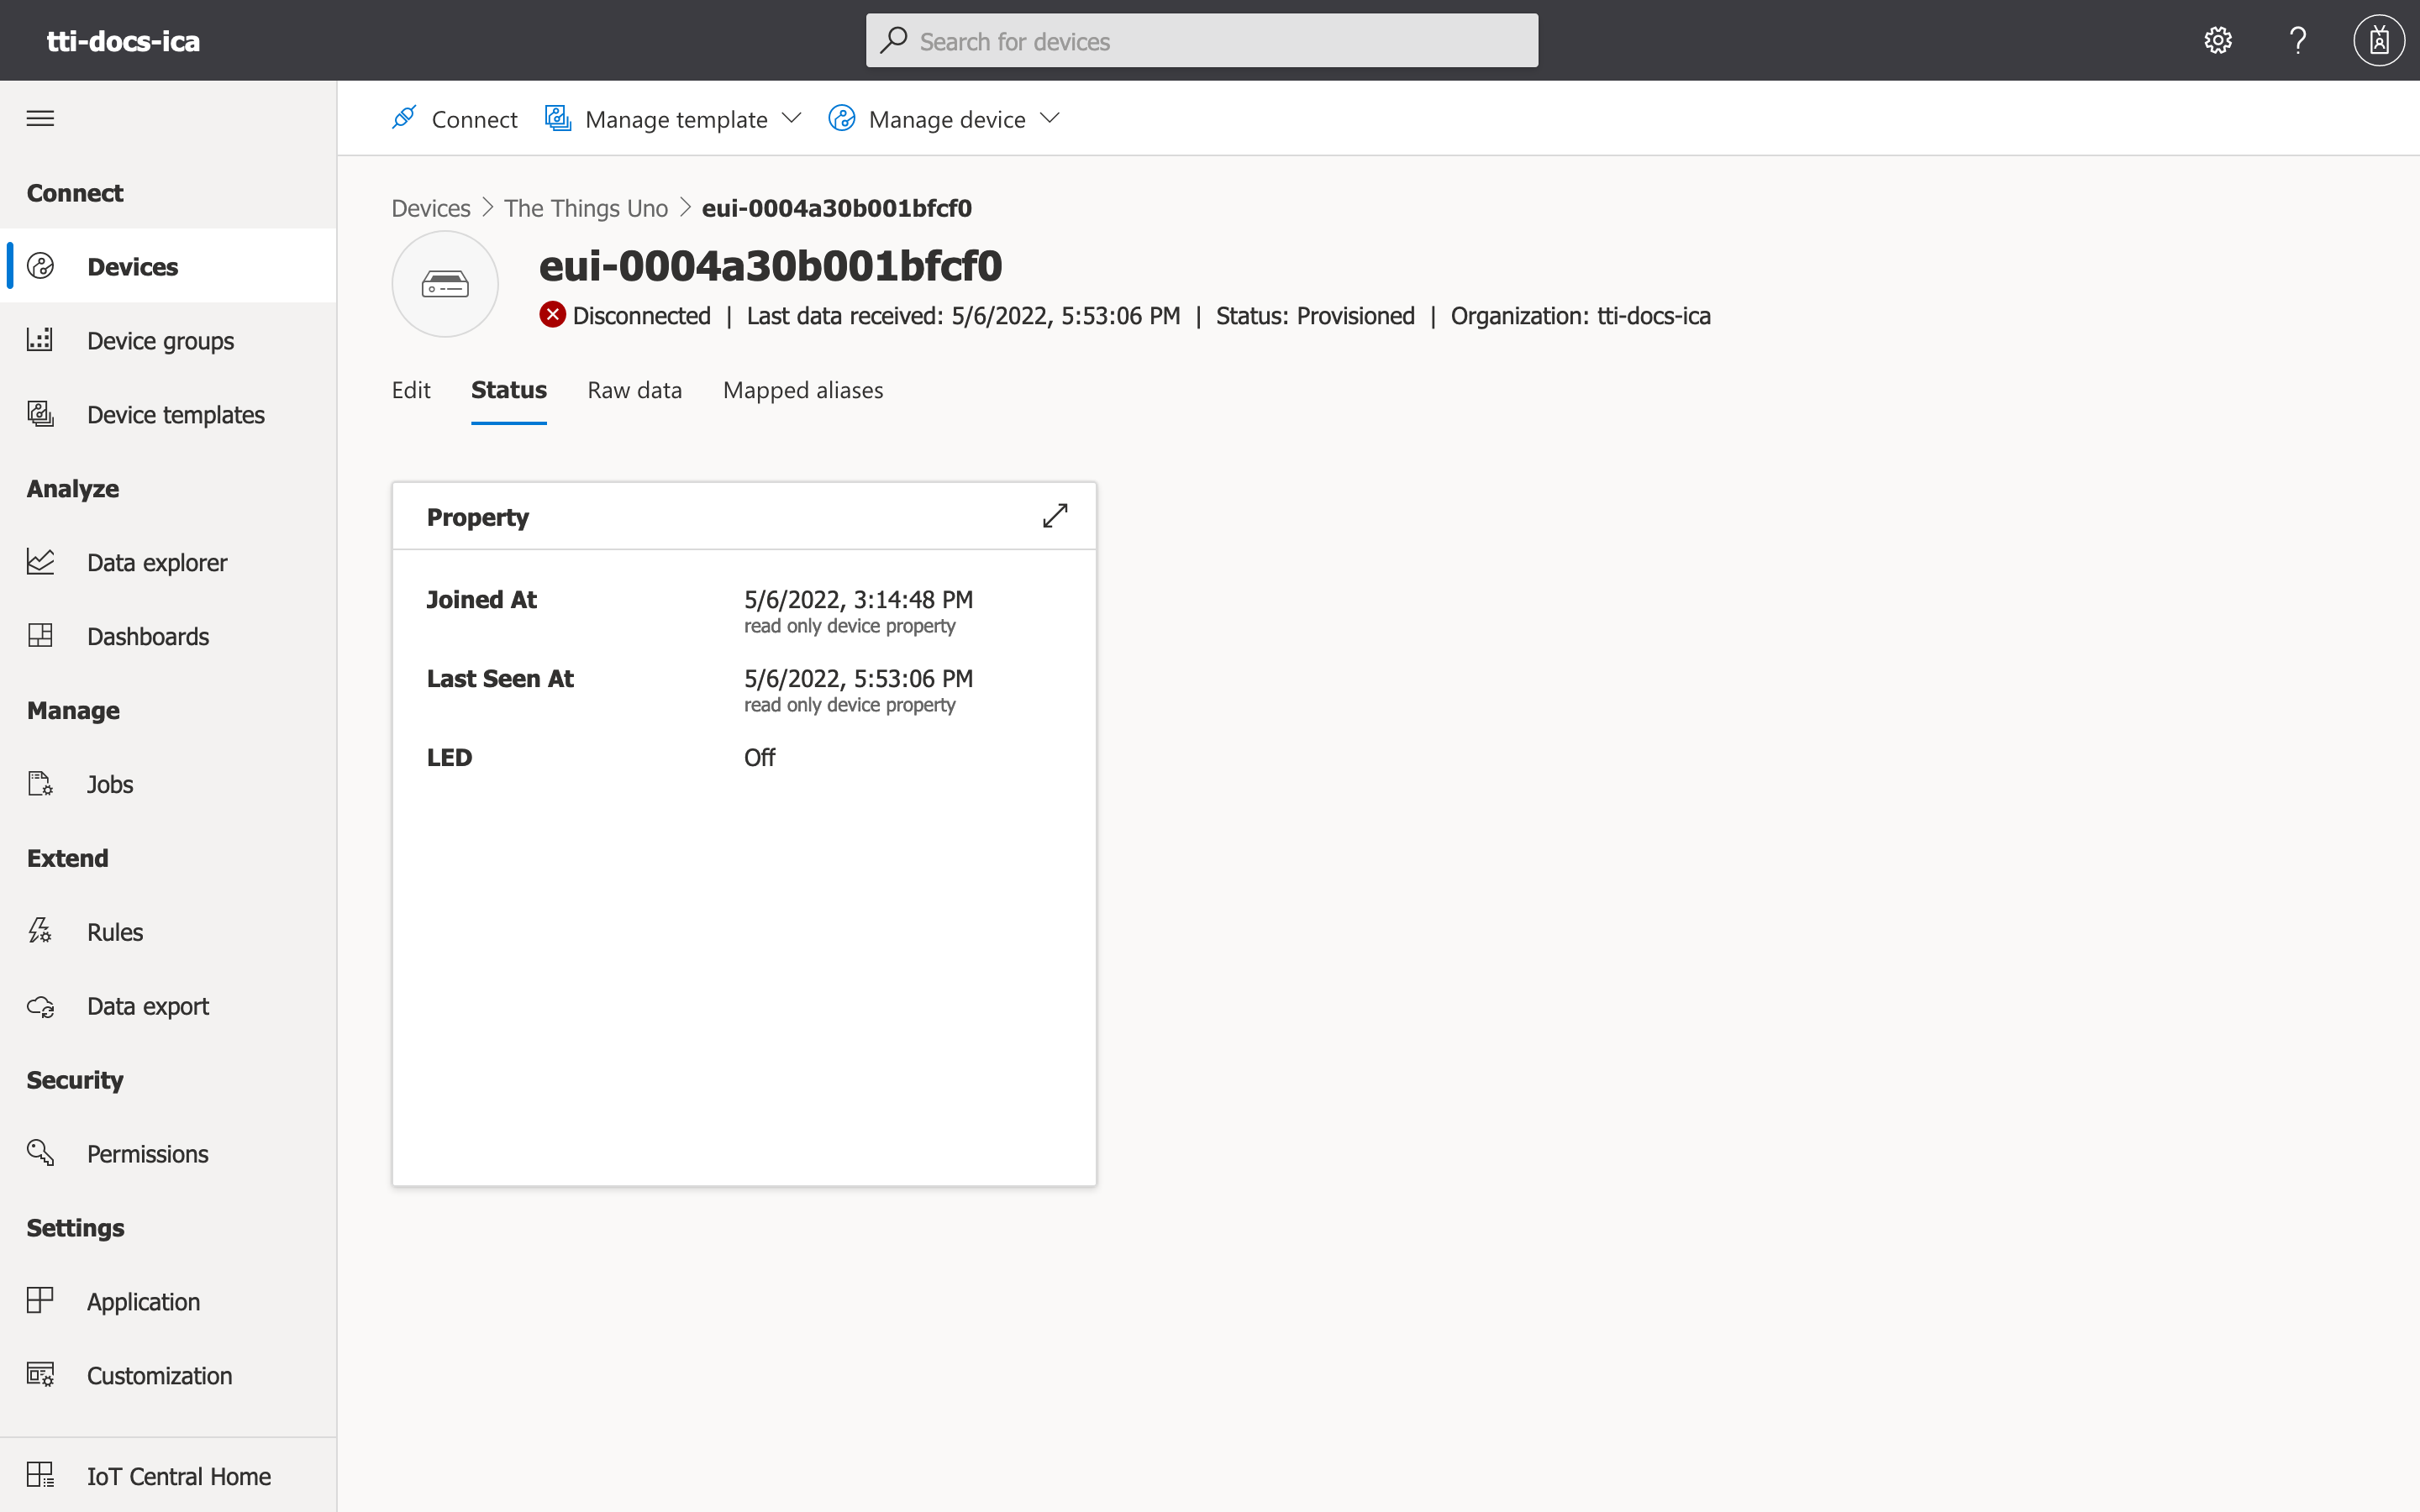
Click on the end device. The raw data screen will now contain the modeled properties.
Note:
Note that thejoinedAt property is not set in any of the recent messages as the join accept message has triggered the device provisioning process. Messages that occur while the end device is provisioning are not sent to IoT Central, as we cannot act on behalf of the end device yet. One can simply reset The Things Uno in order to force the end device to join again, thus populating the property.
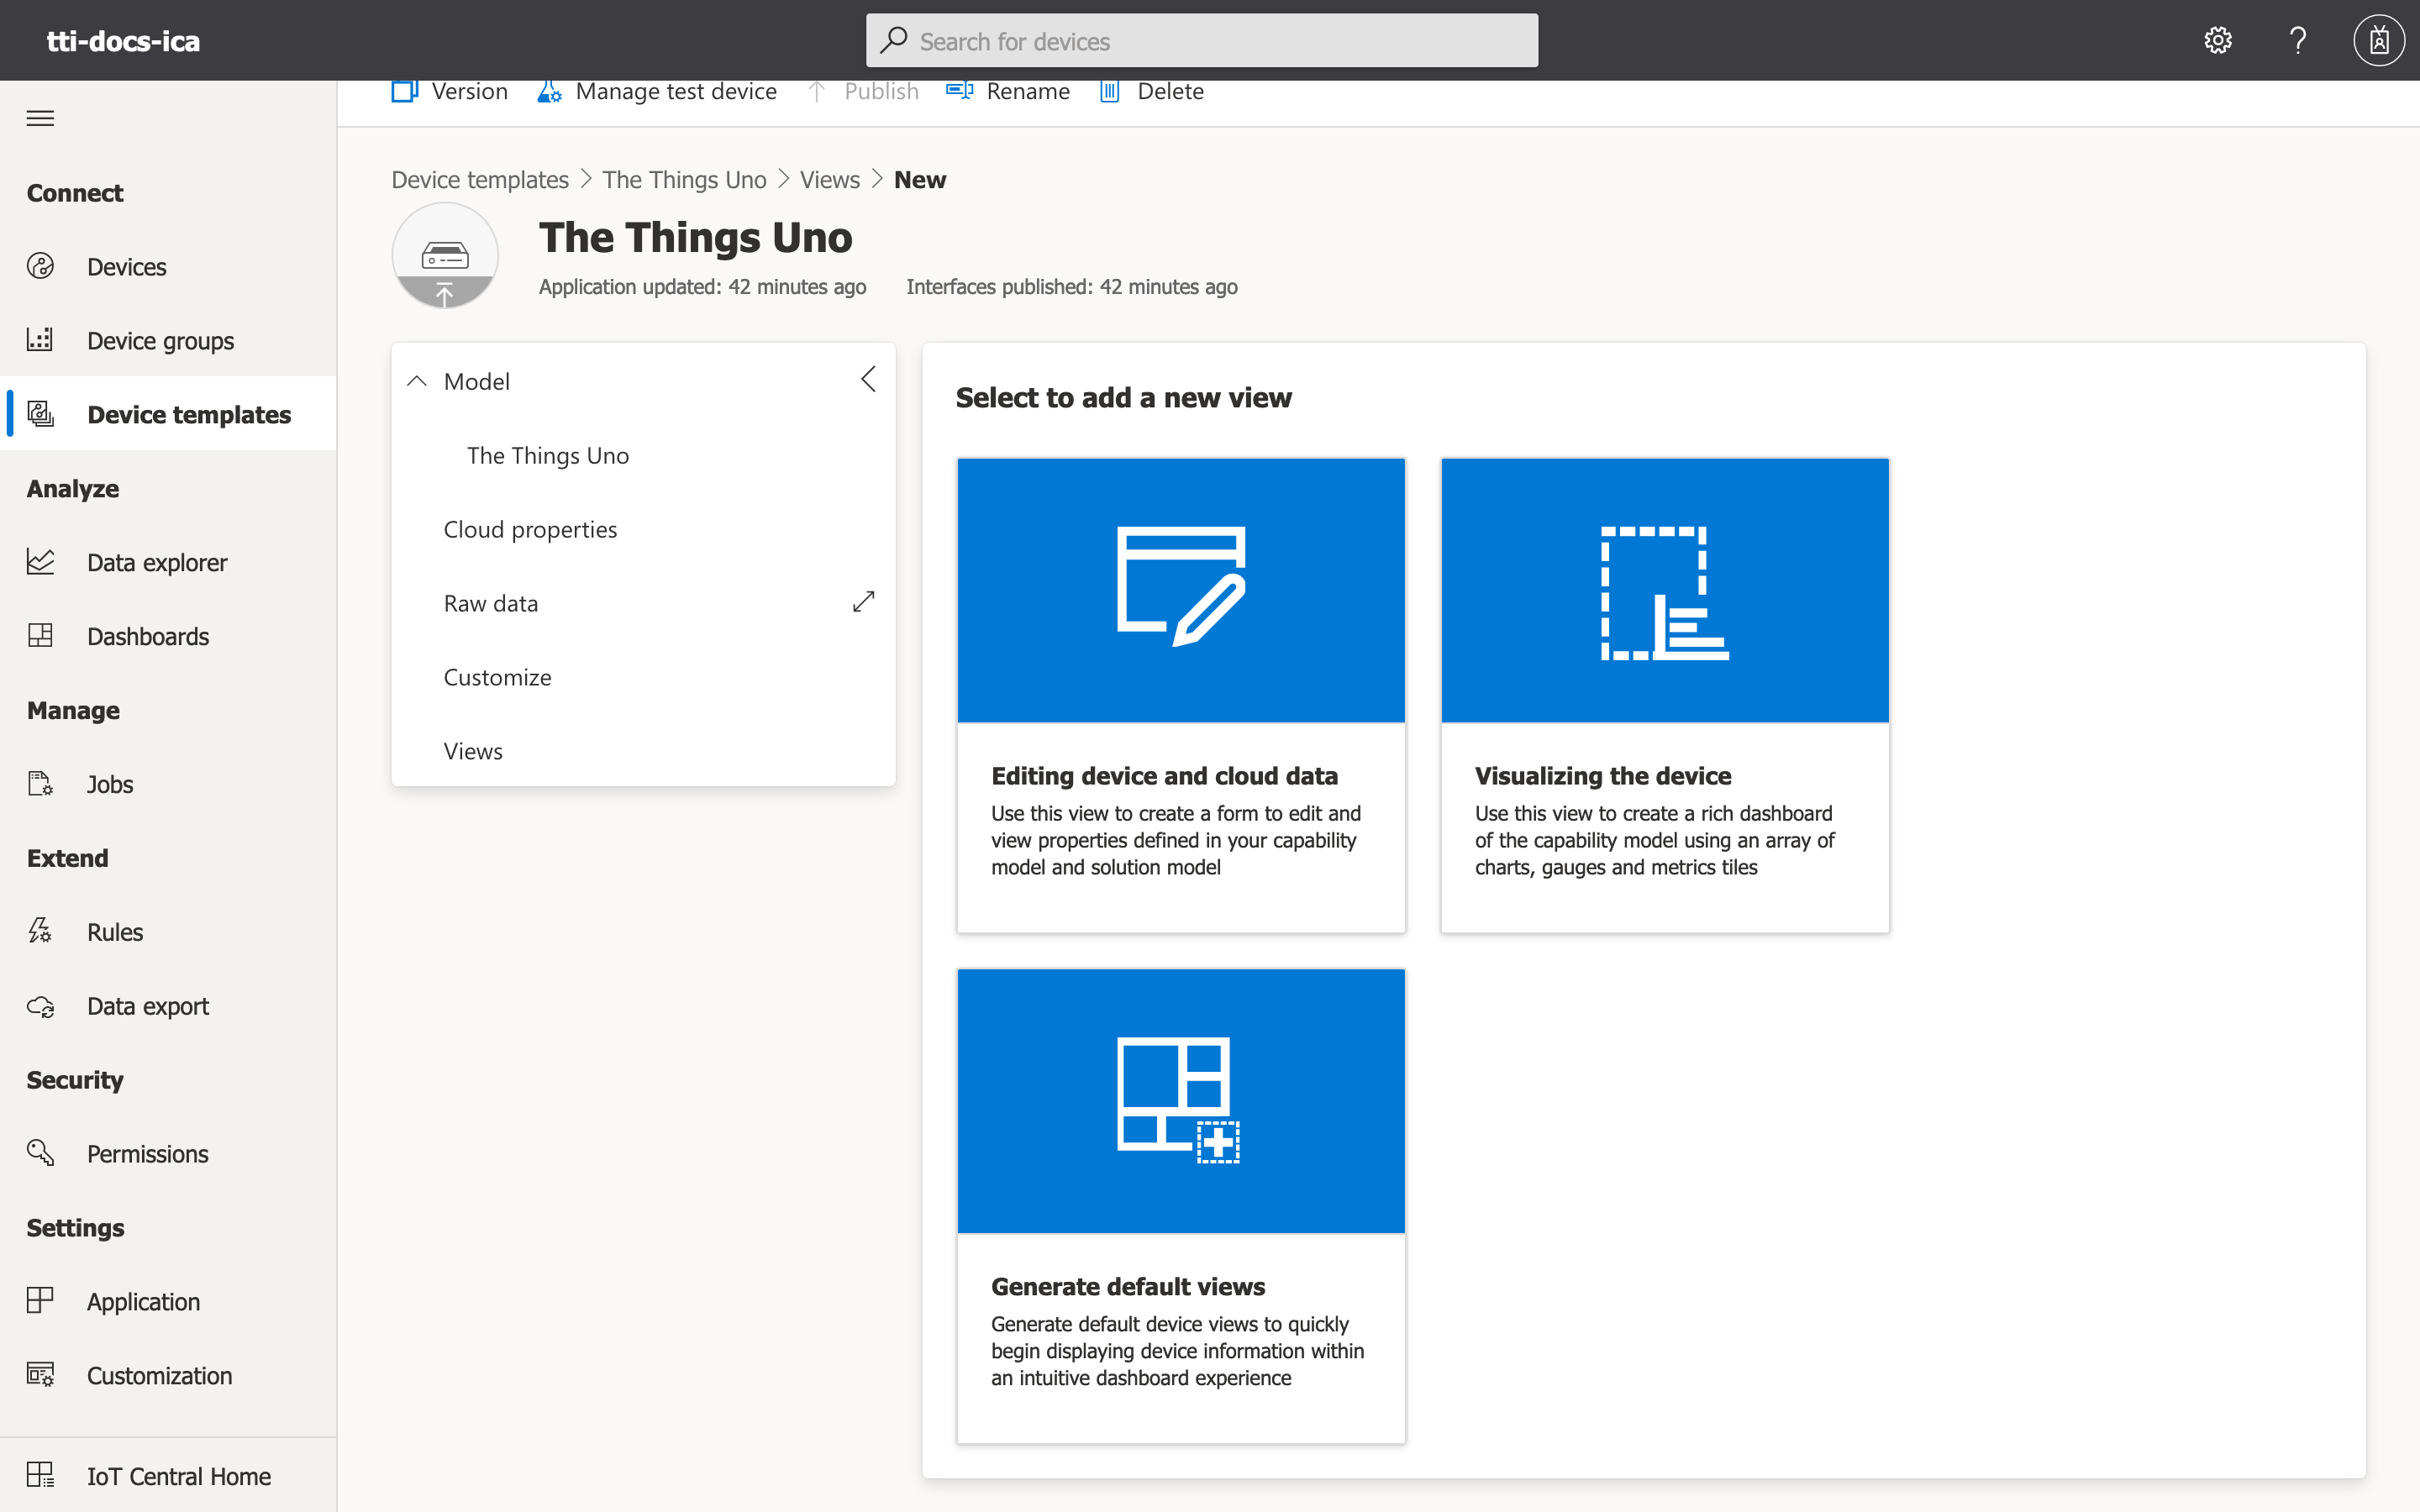
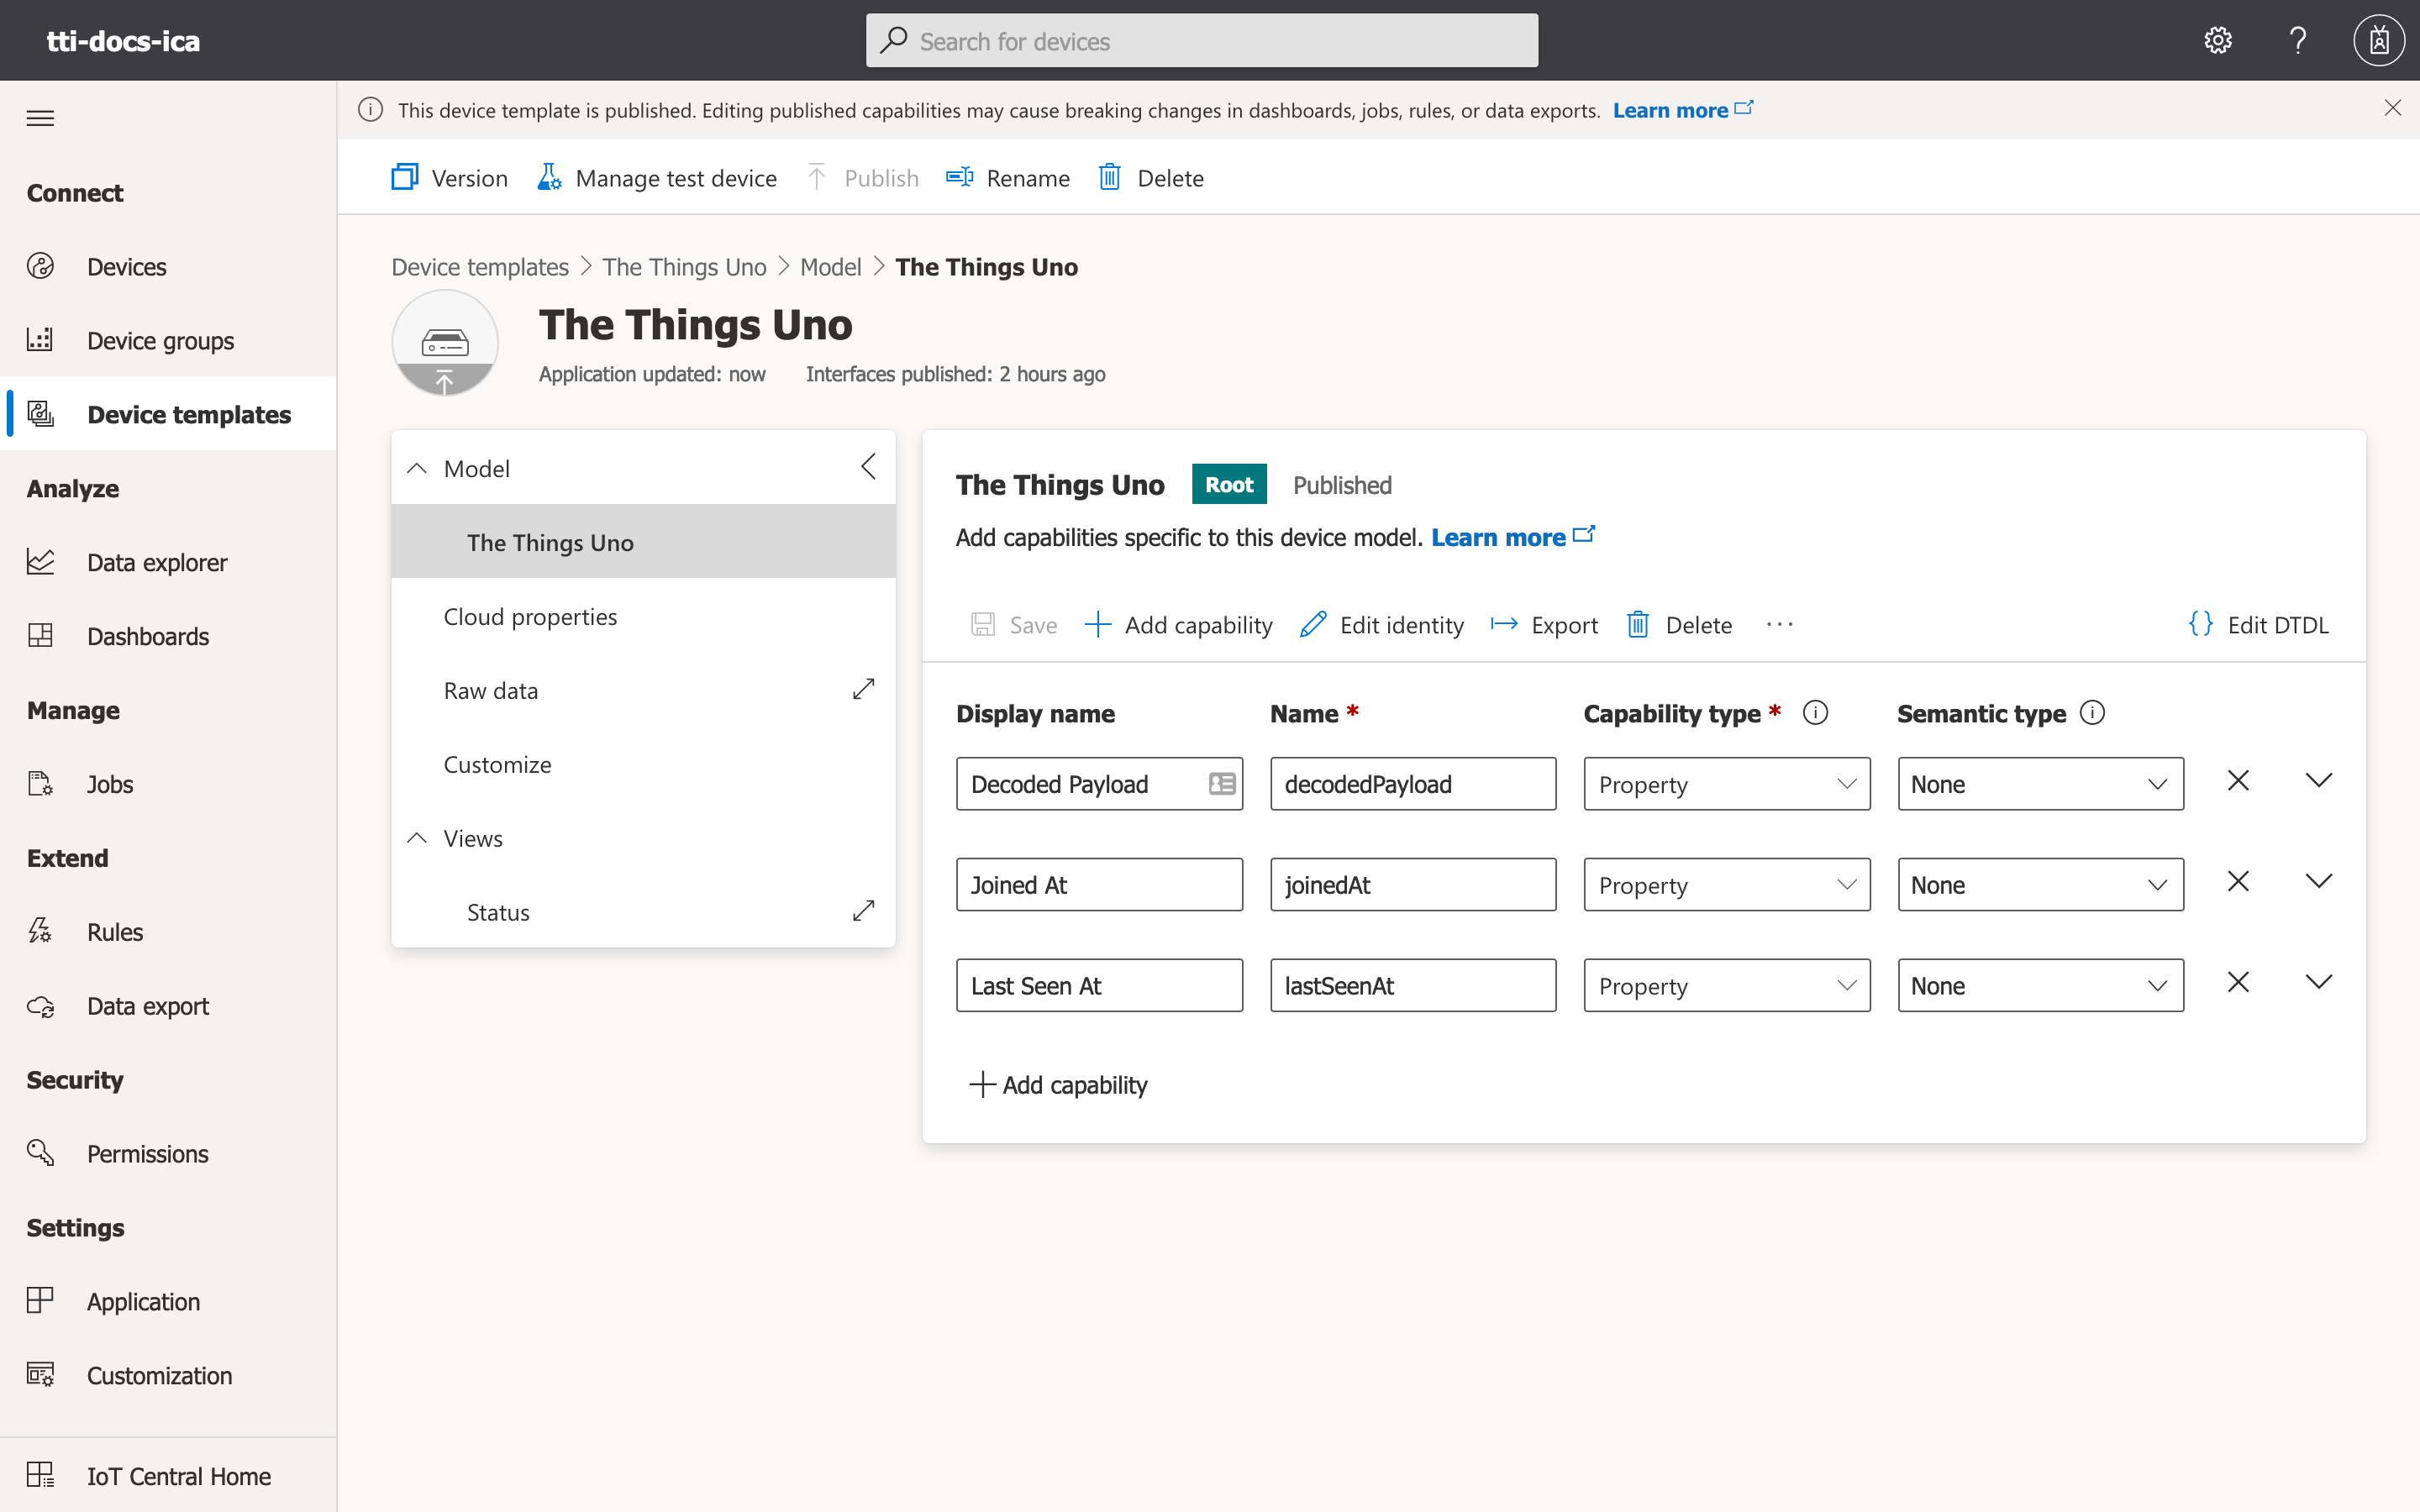
As the data is now modeled, we may build a short view in order to visualize the properties themselves. Click on Device templates → The Things Uno.
You may now click on View, under the Model menu.
You may now select the Visualizing the device view type.
Under the View name enter the name of your view, such as Status.
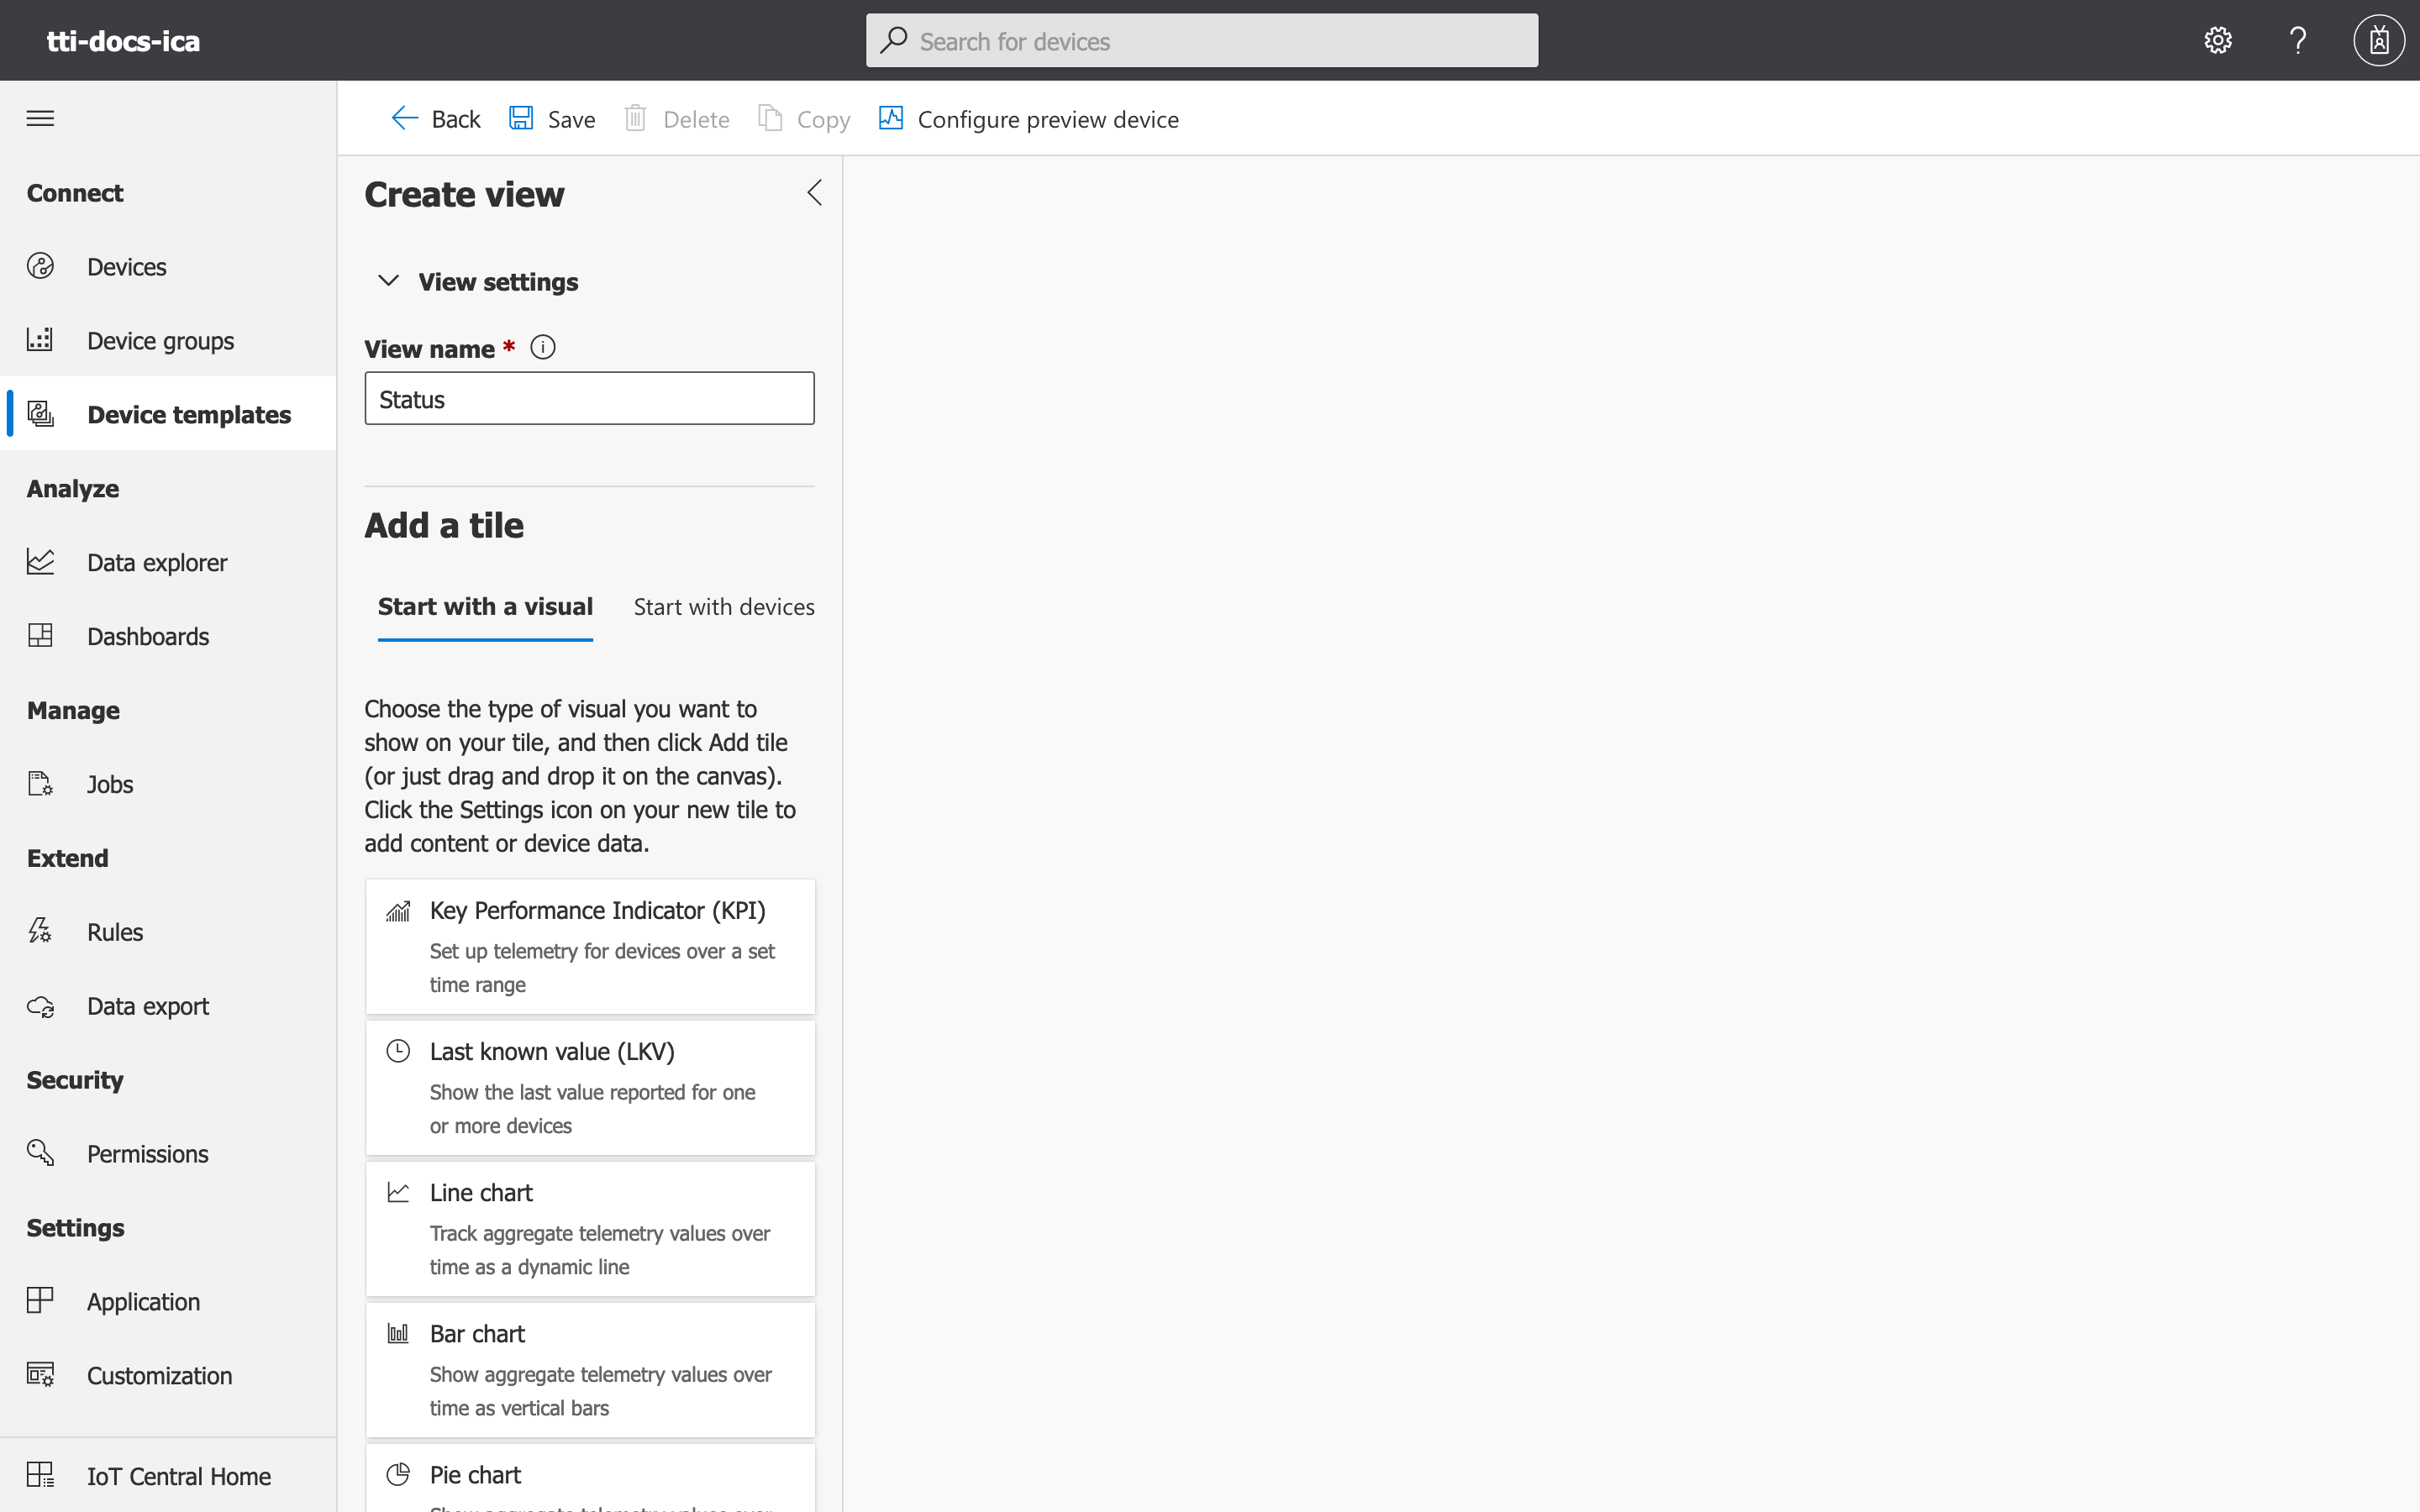
You can now drag-and-drop a Property tile from the left hand side menu. The property will appear in the right hand side canvas.
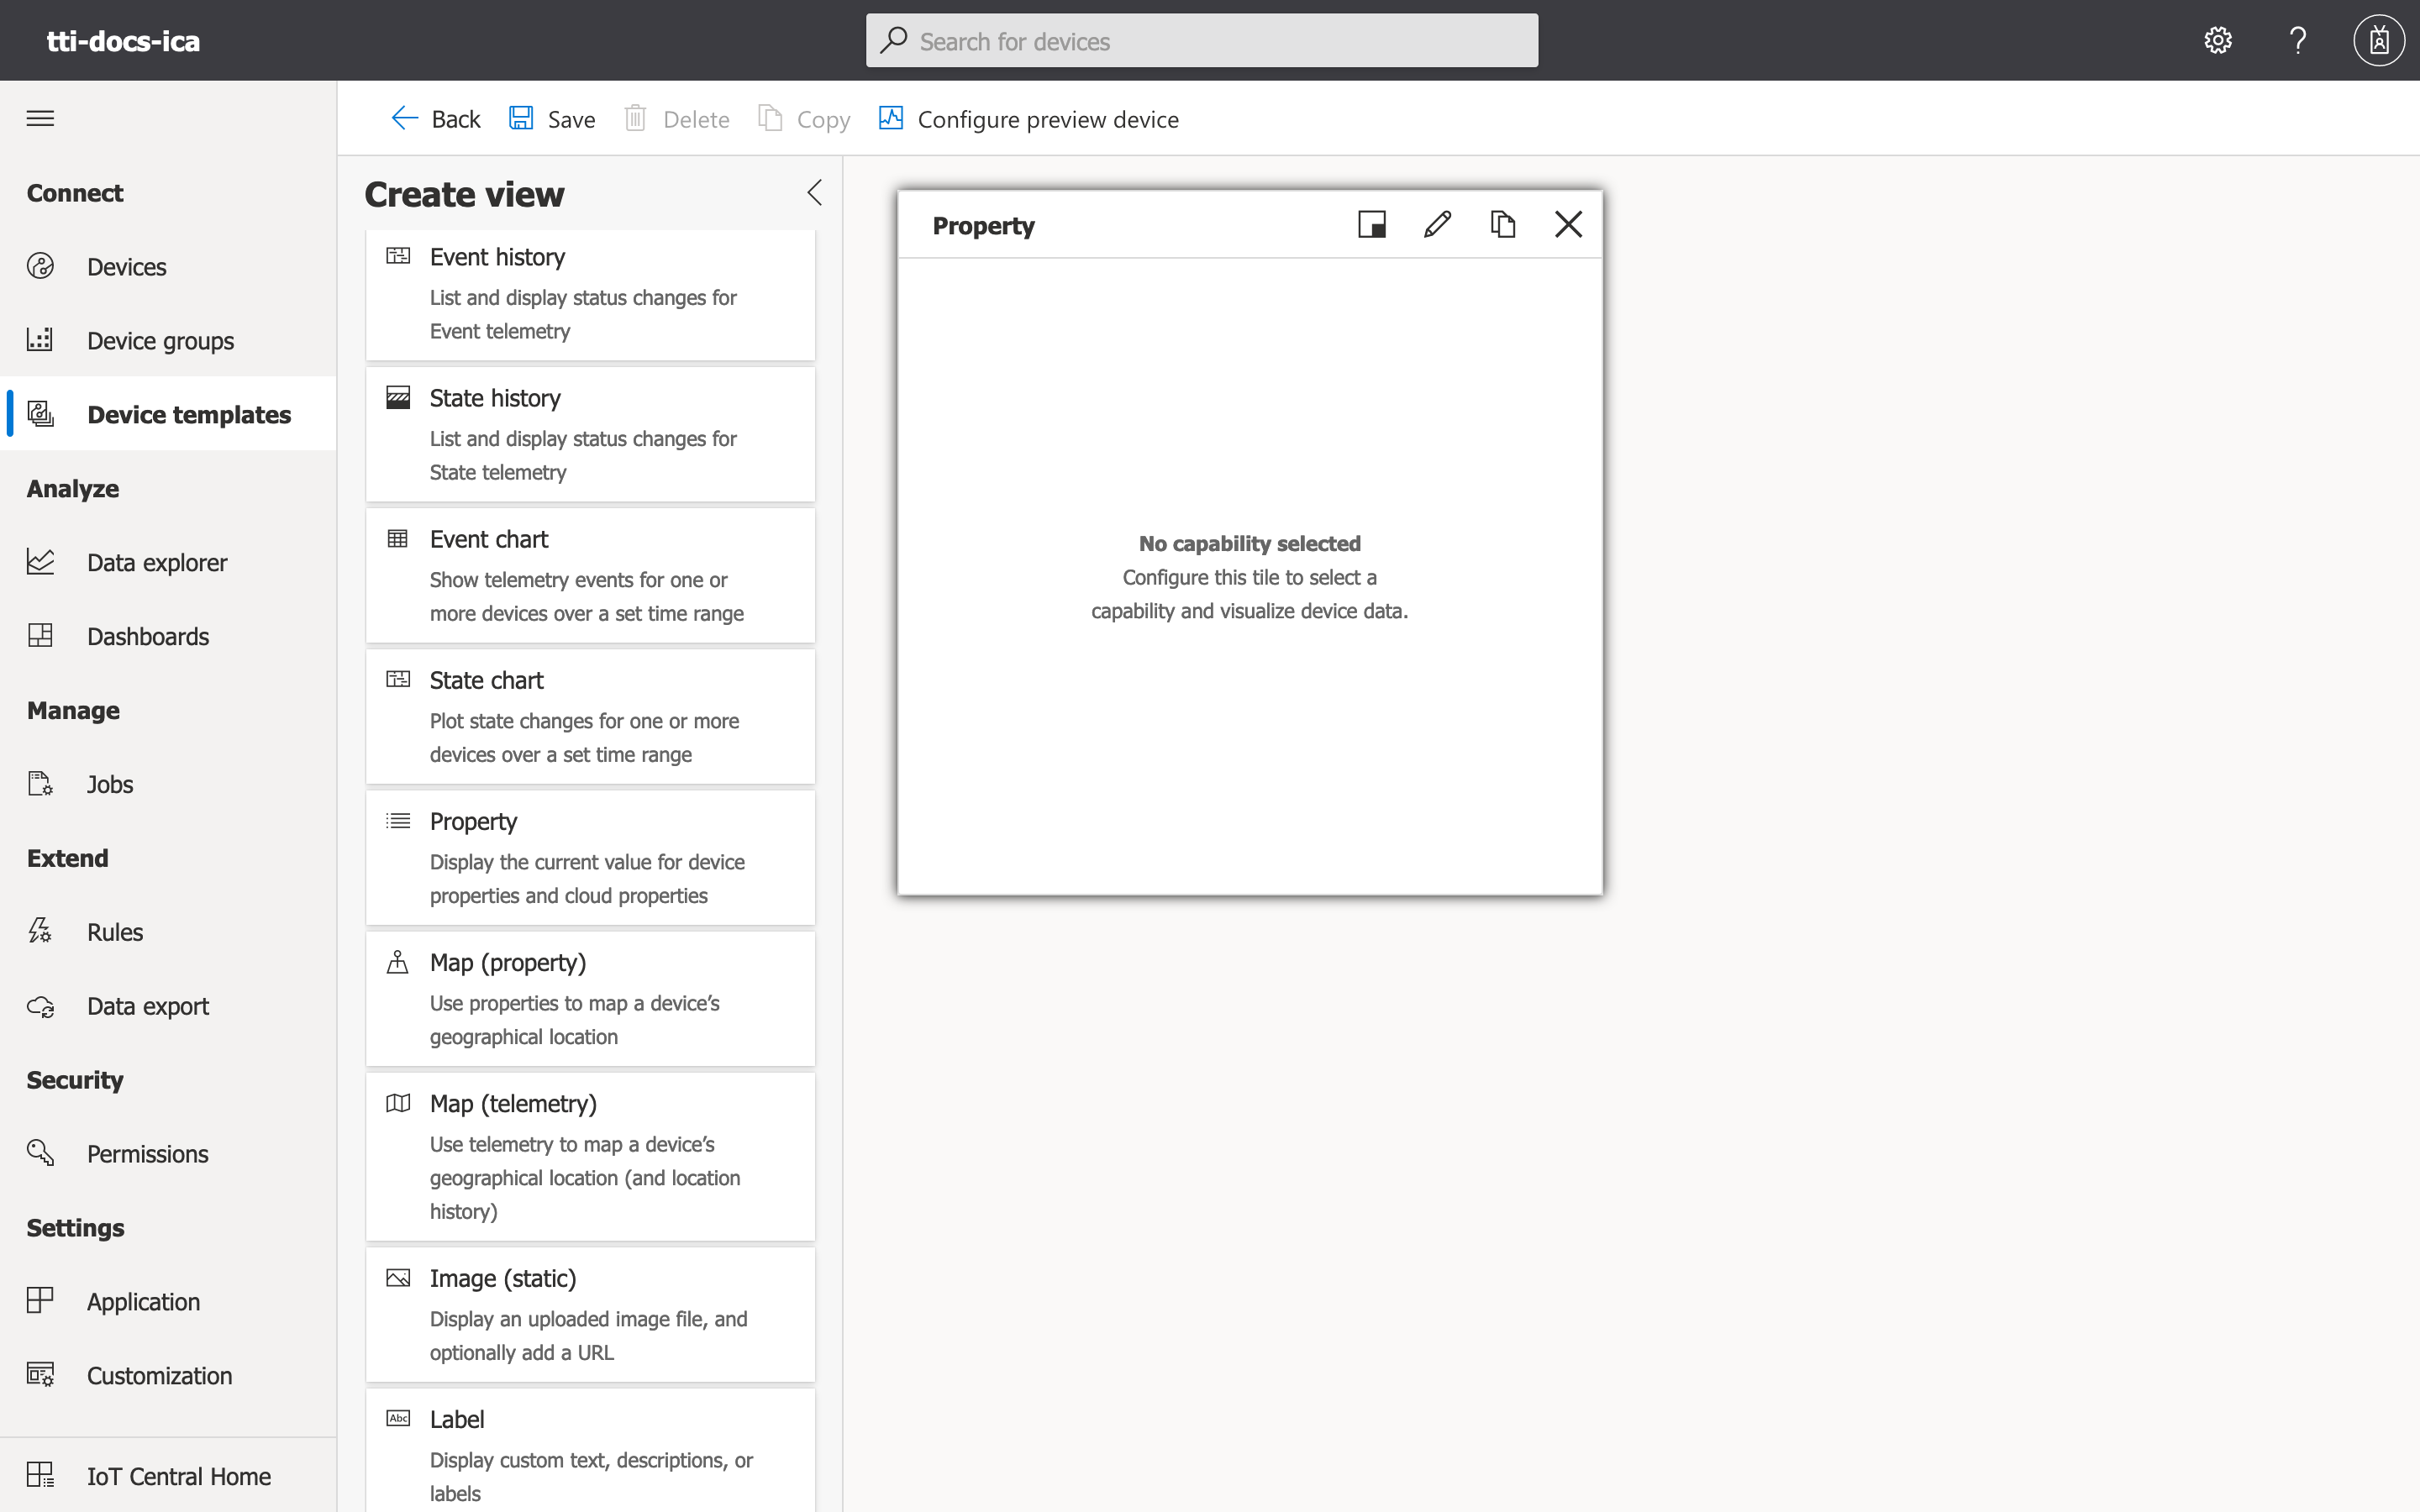
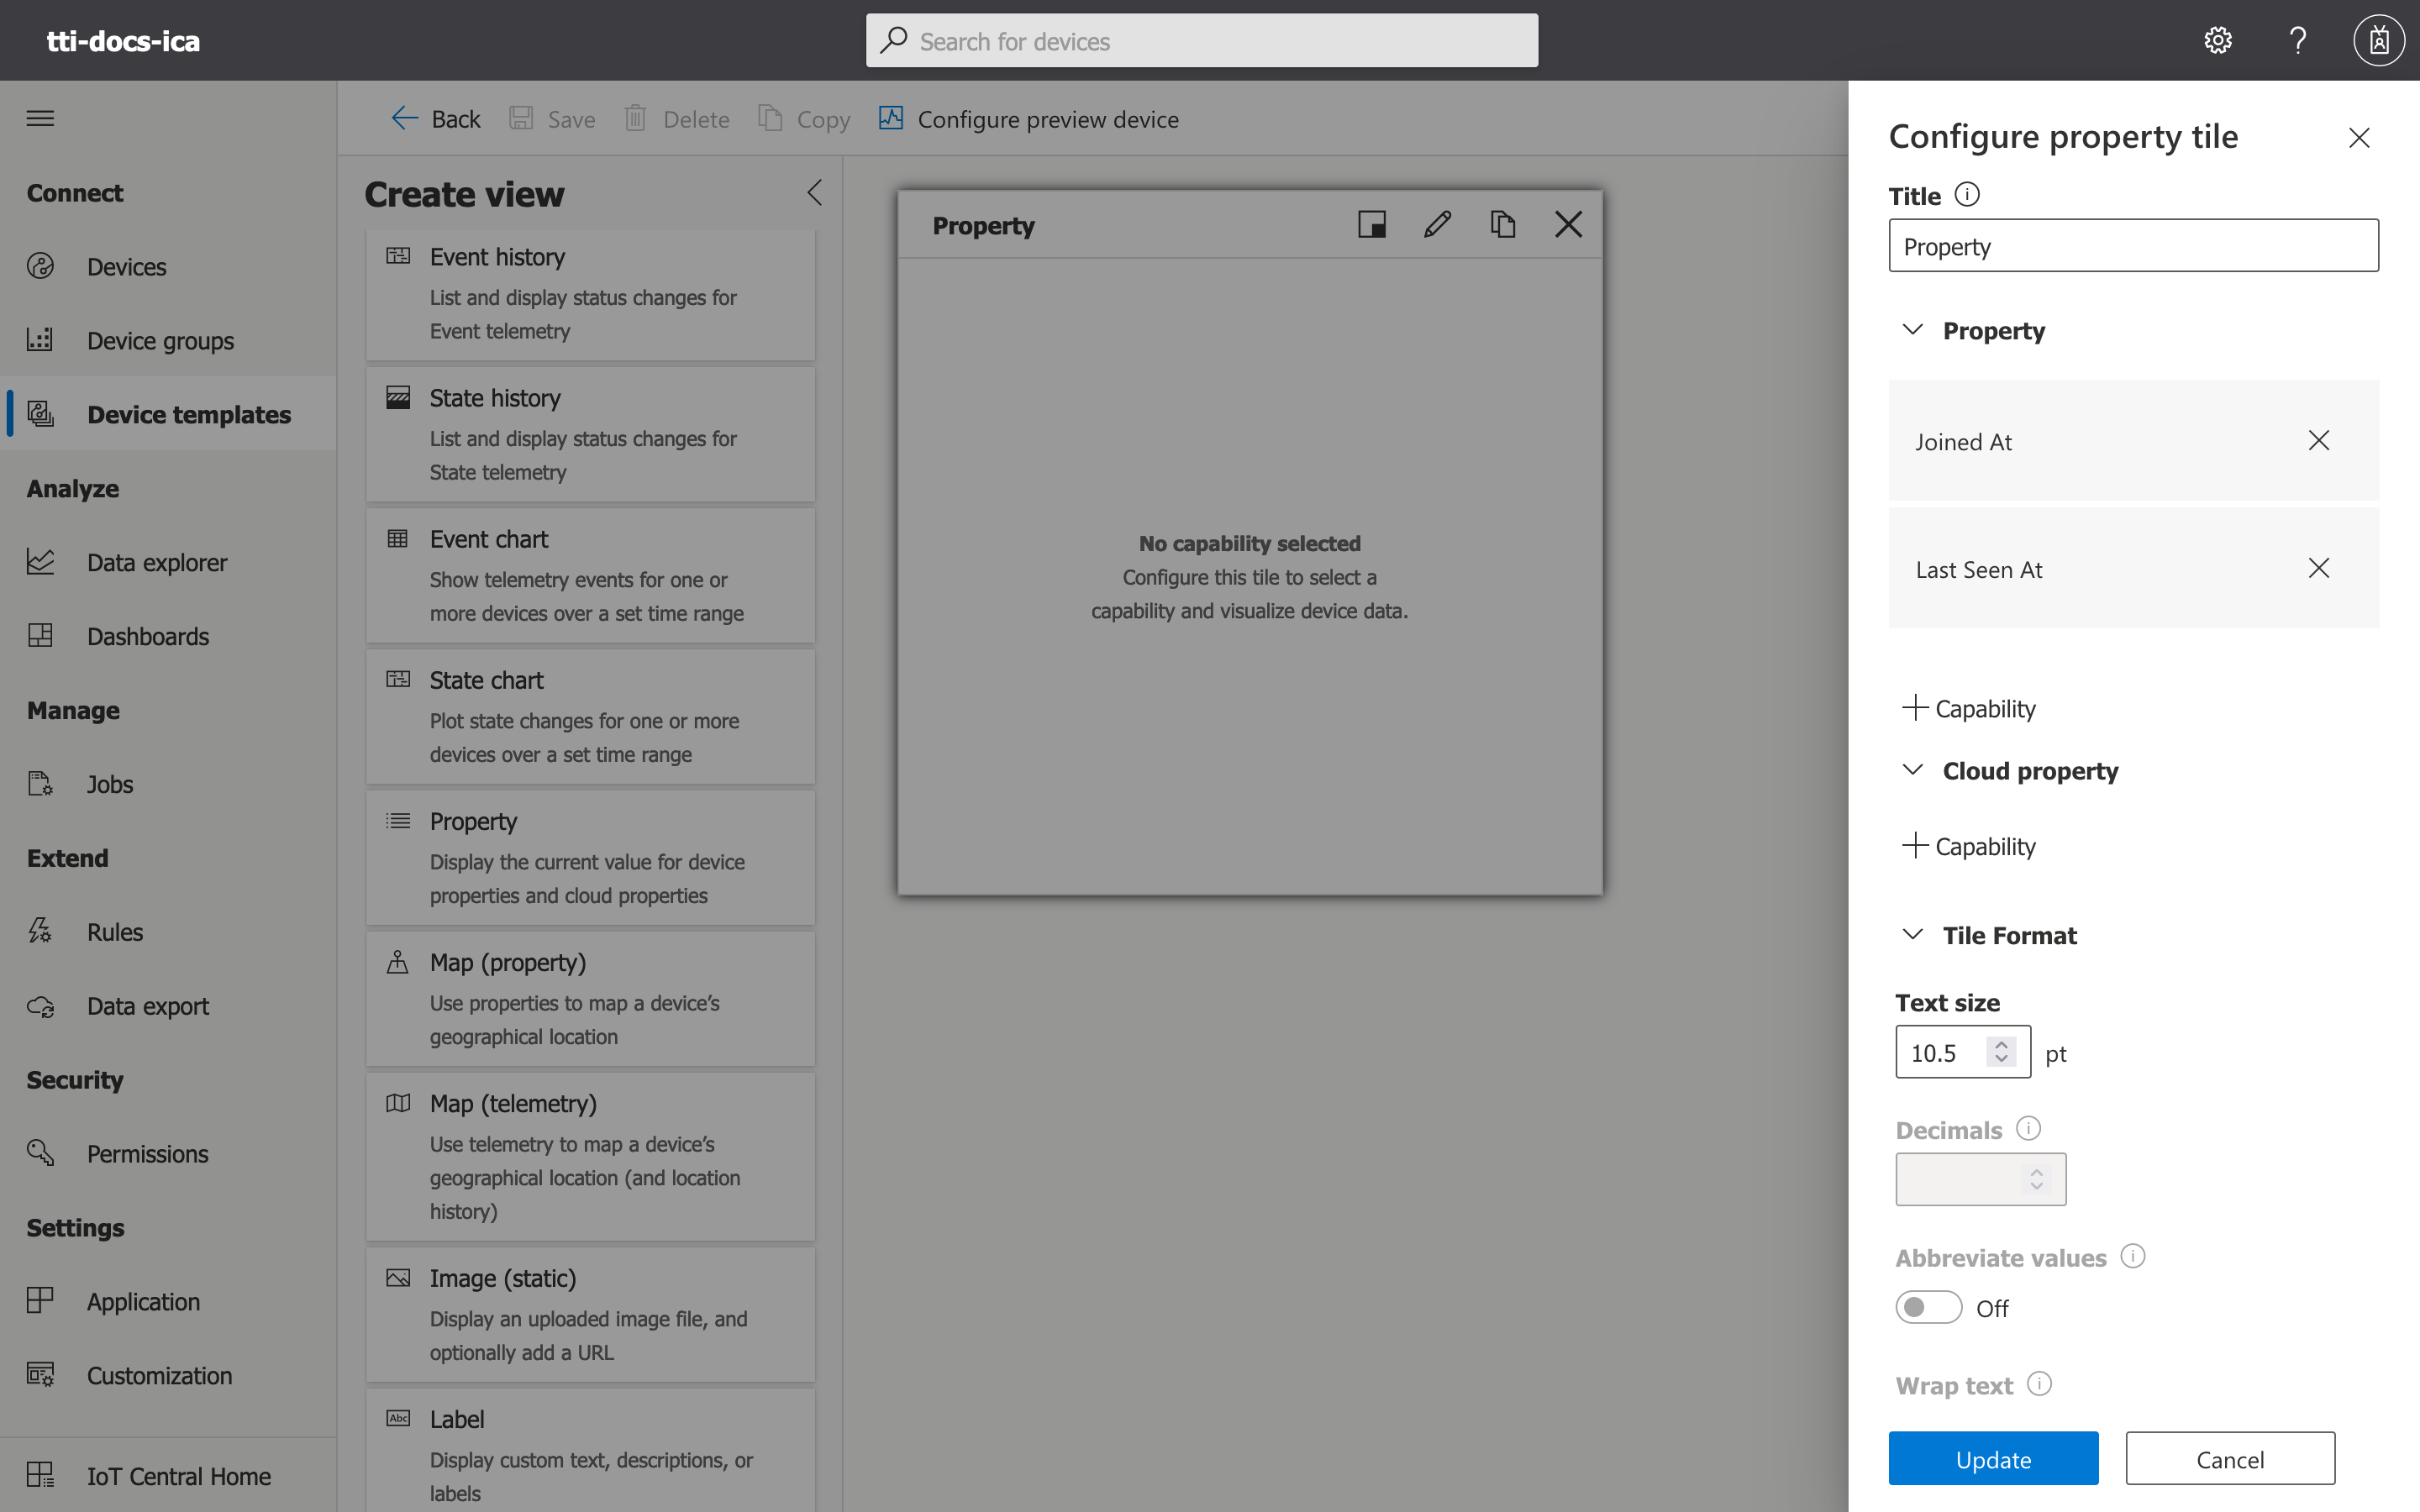
Click on the crayon button (Edit) in the newly addded tile. The configuration dialogue will open. Click on +Capability and then select the two properties we have modeled so far, then click on Update in order to save the updated tile.
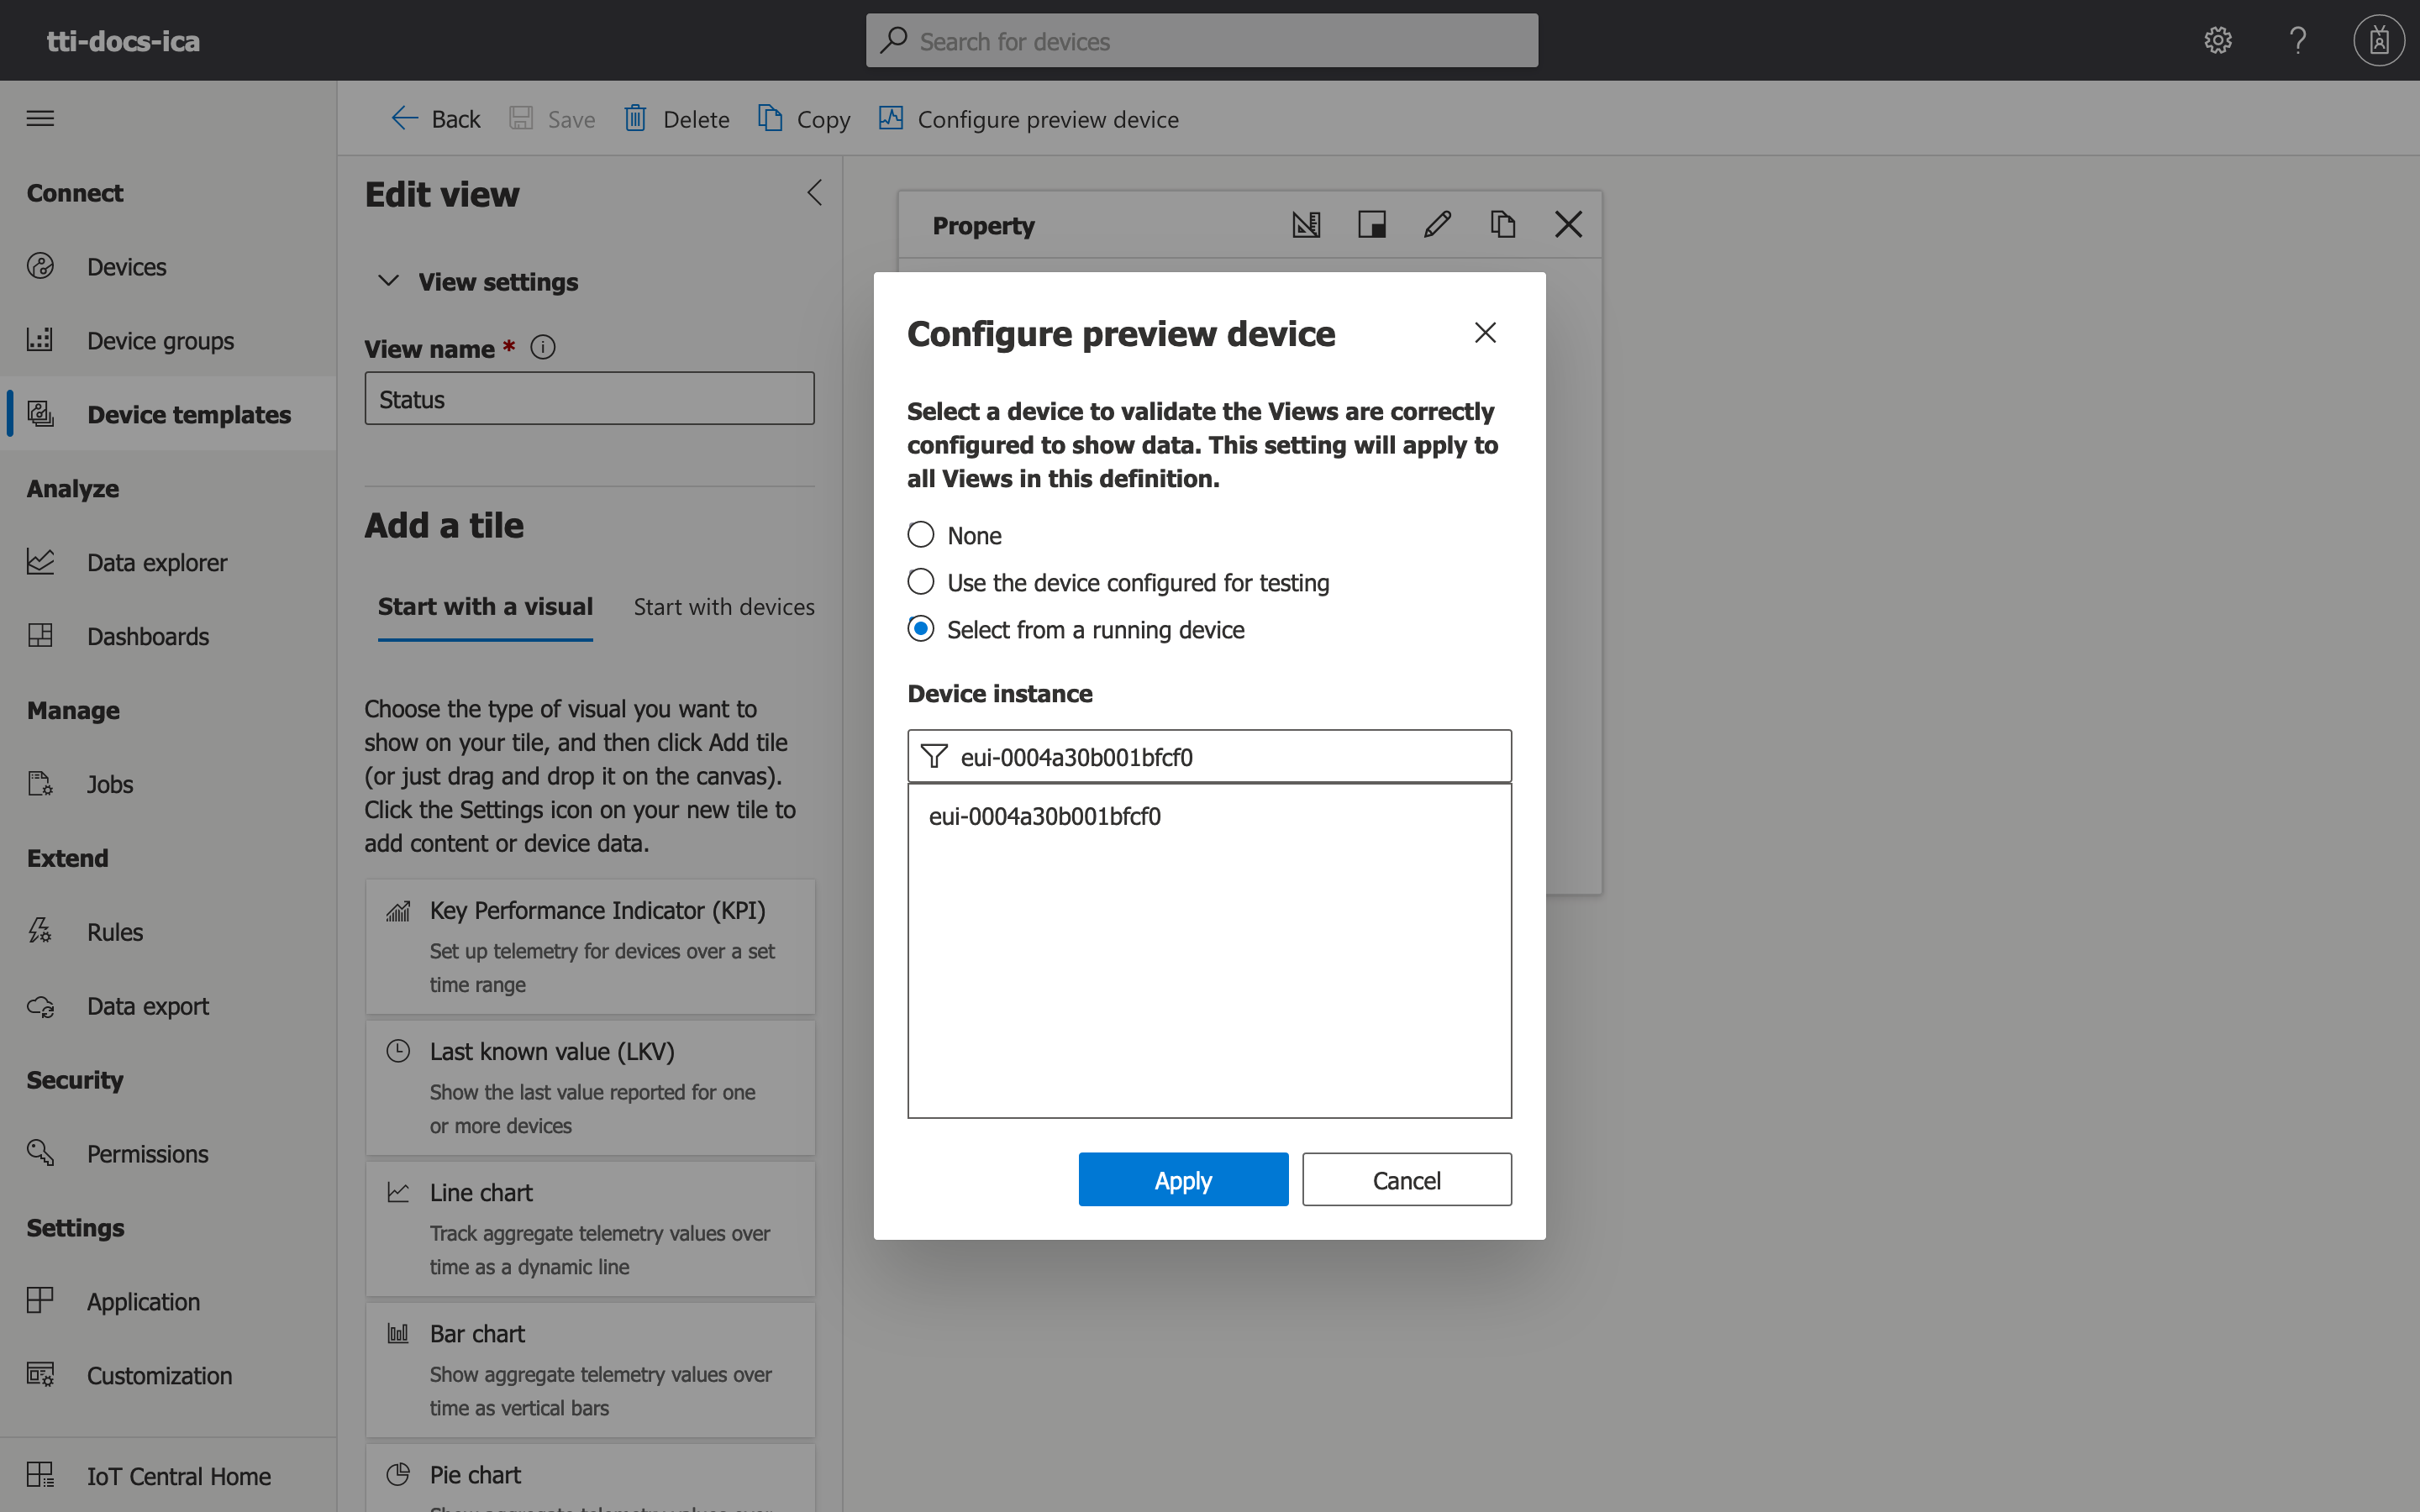
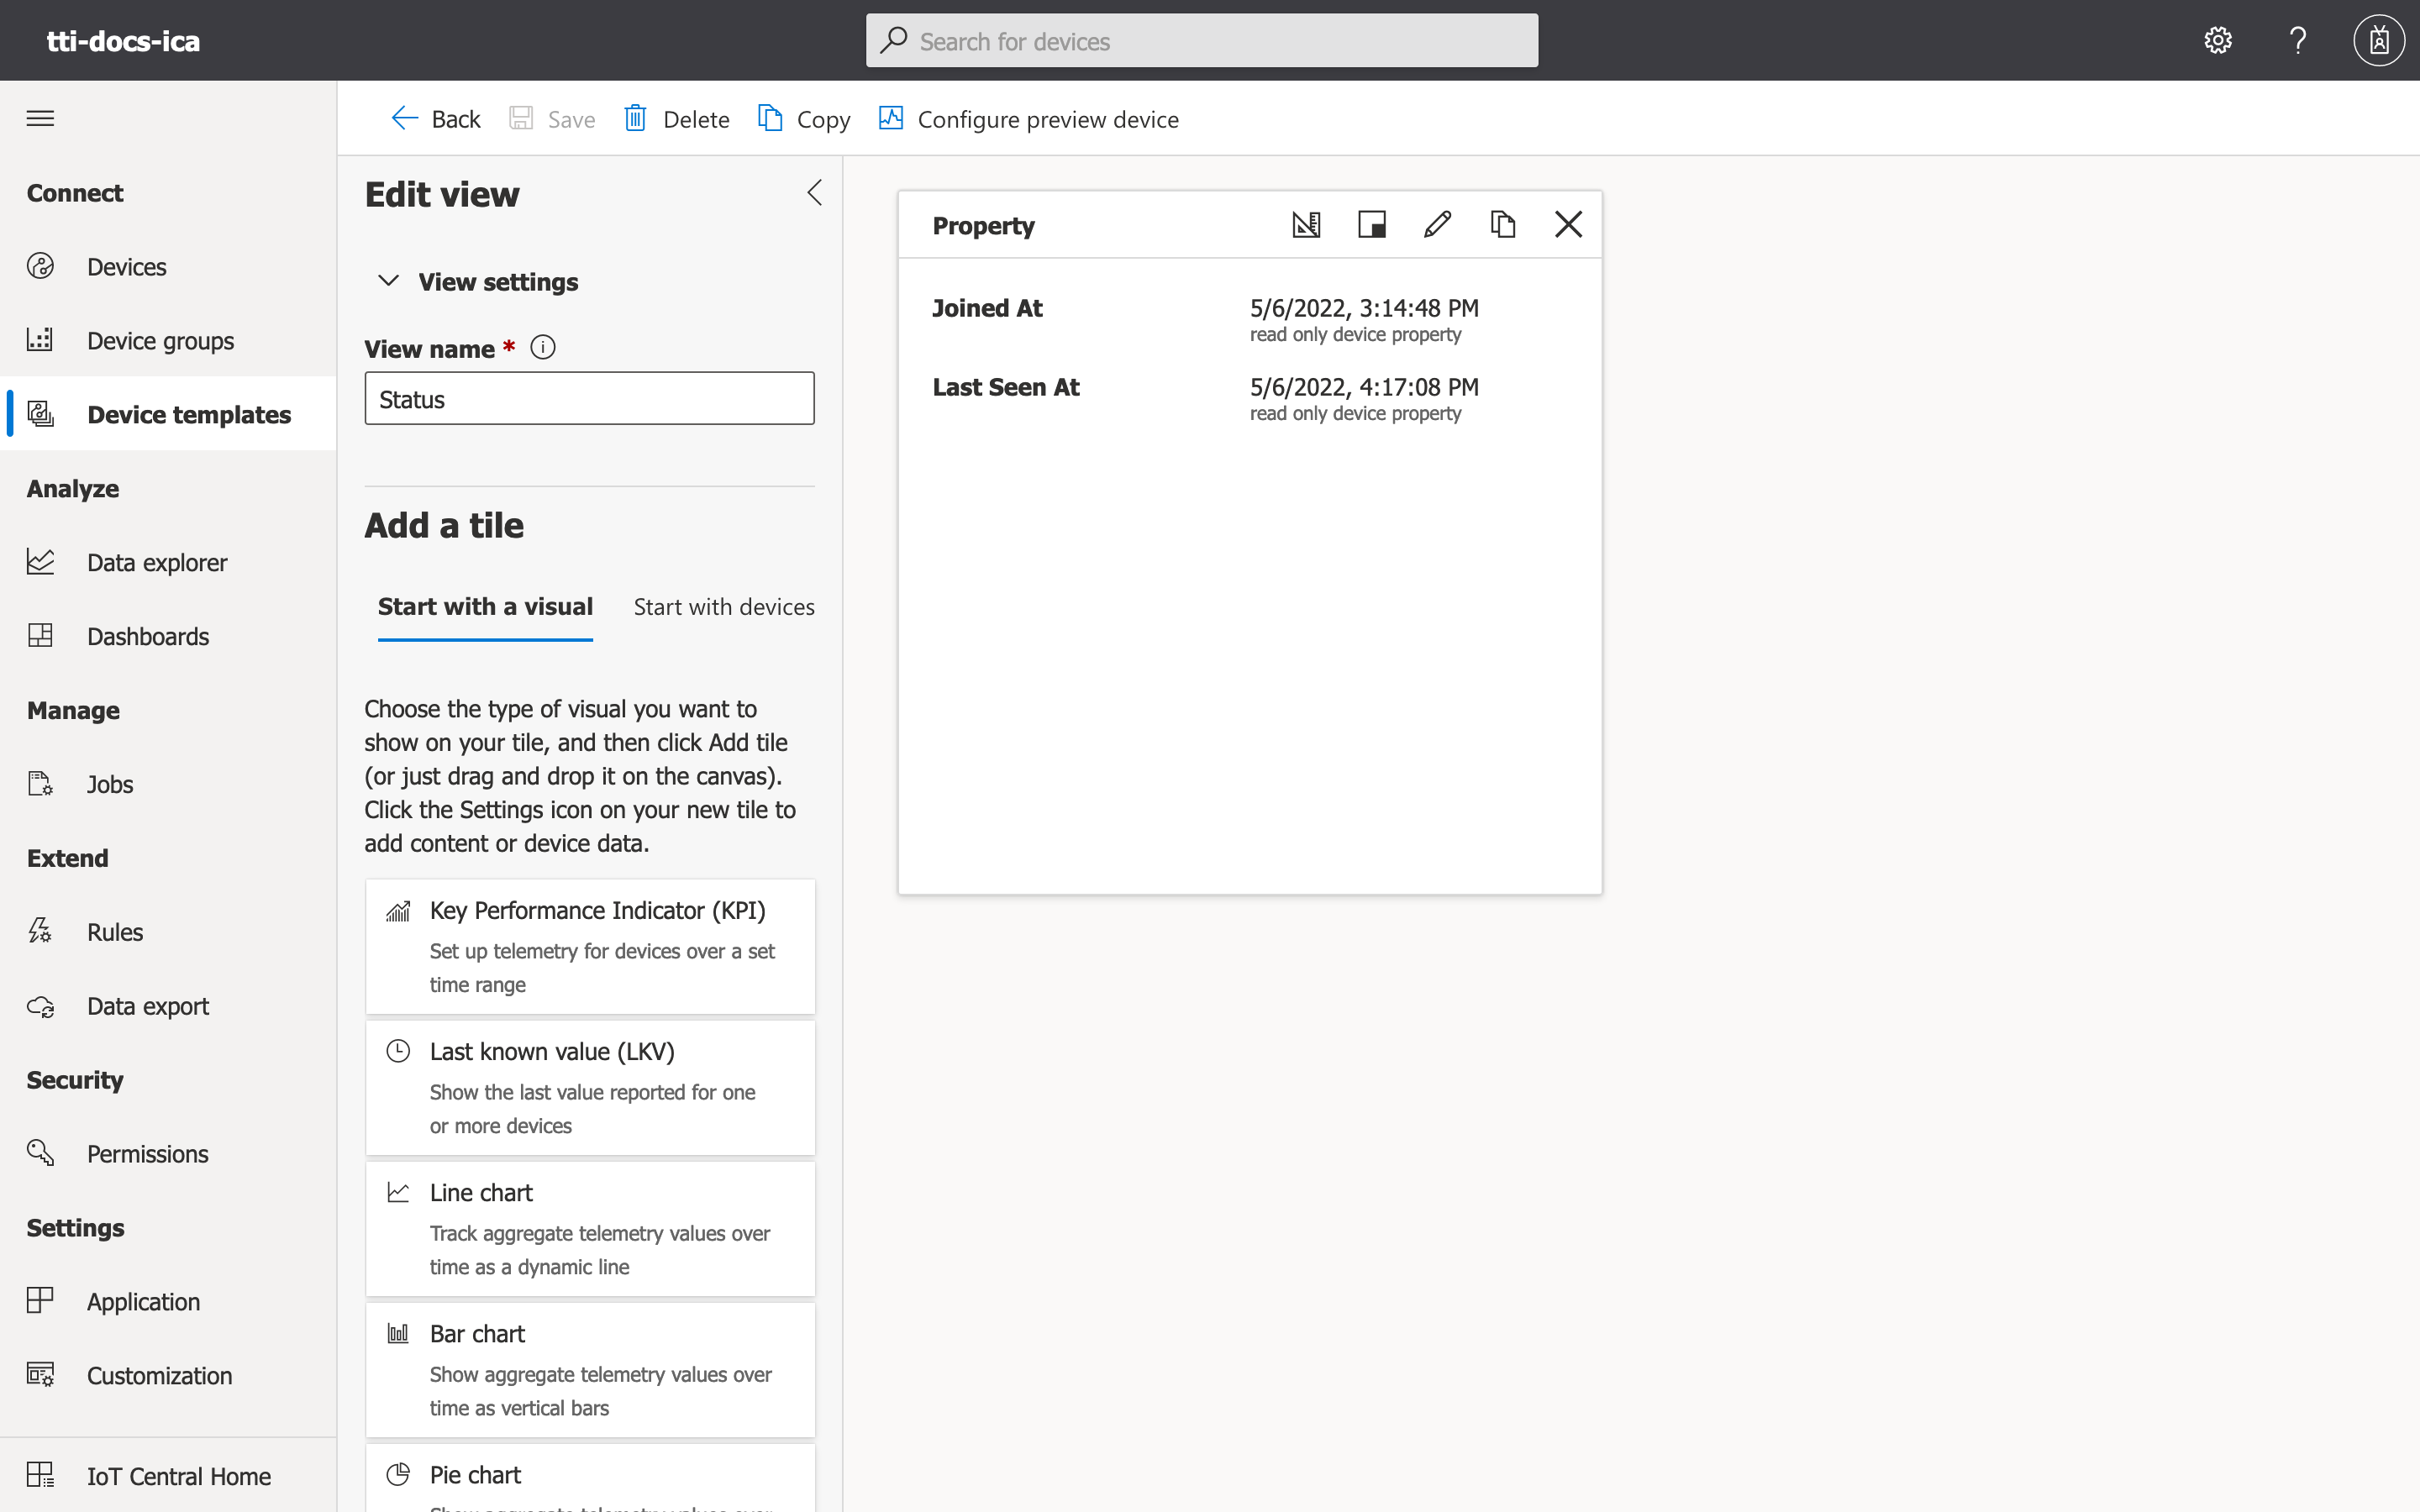
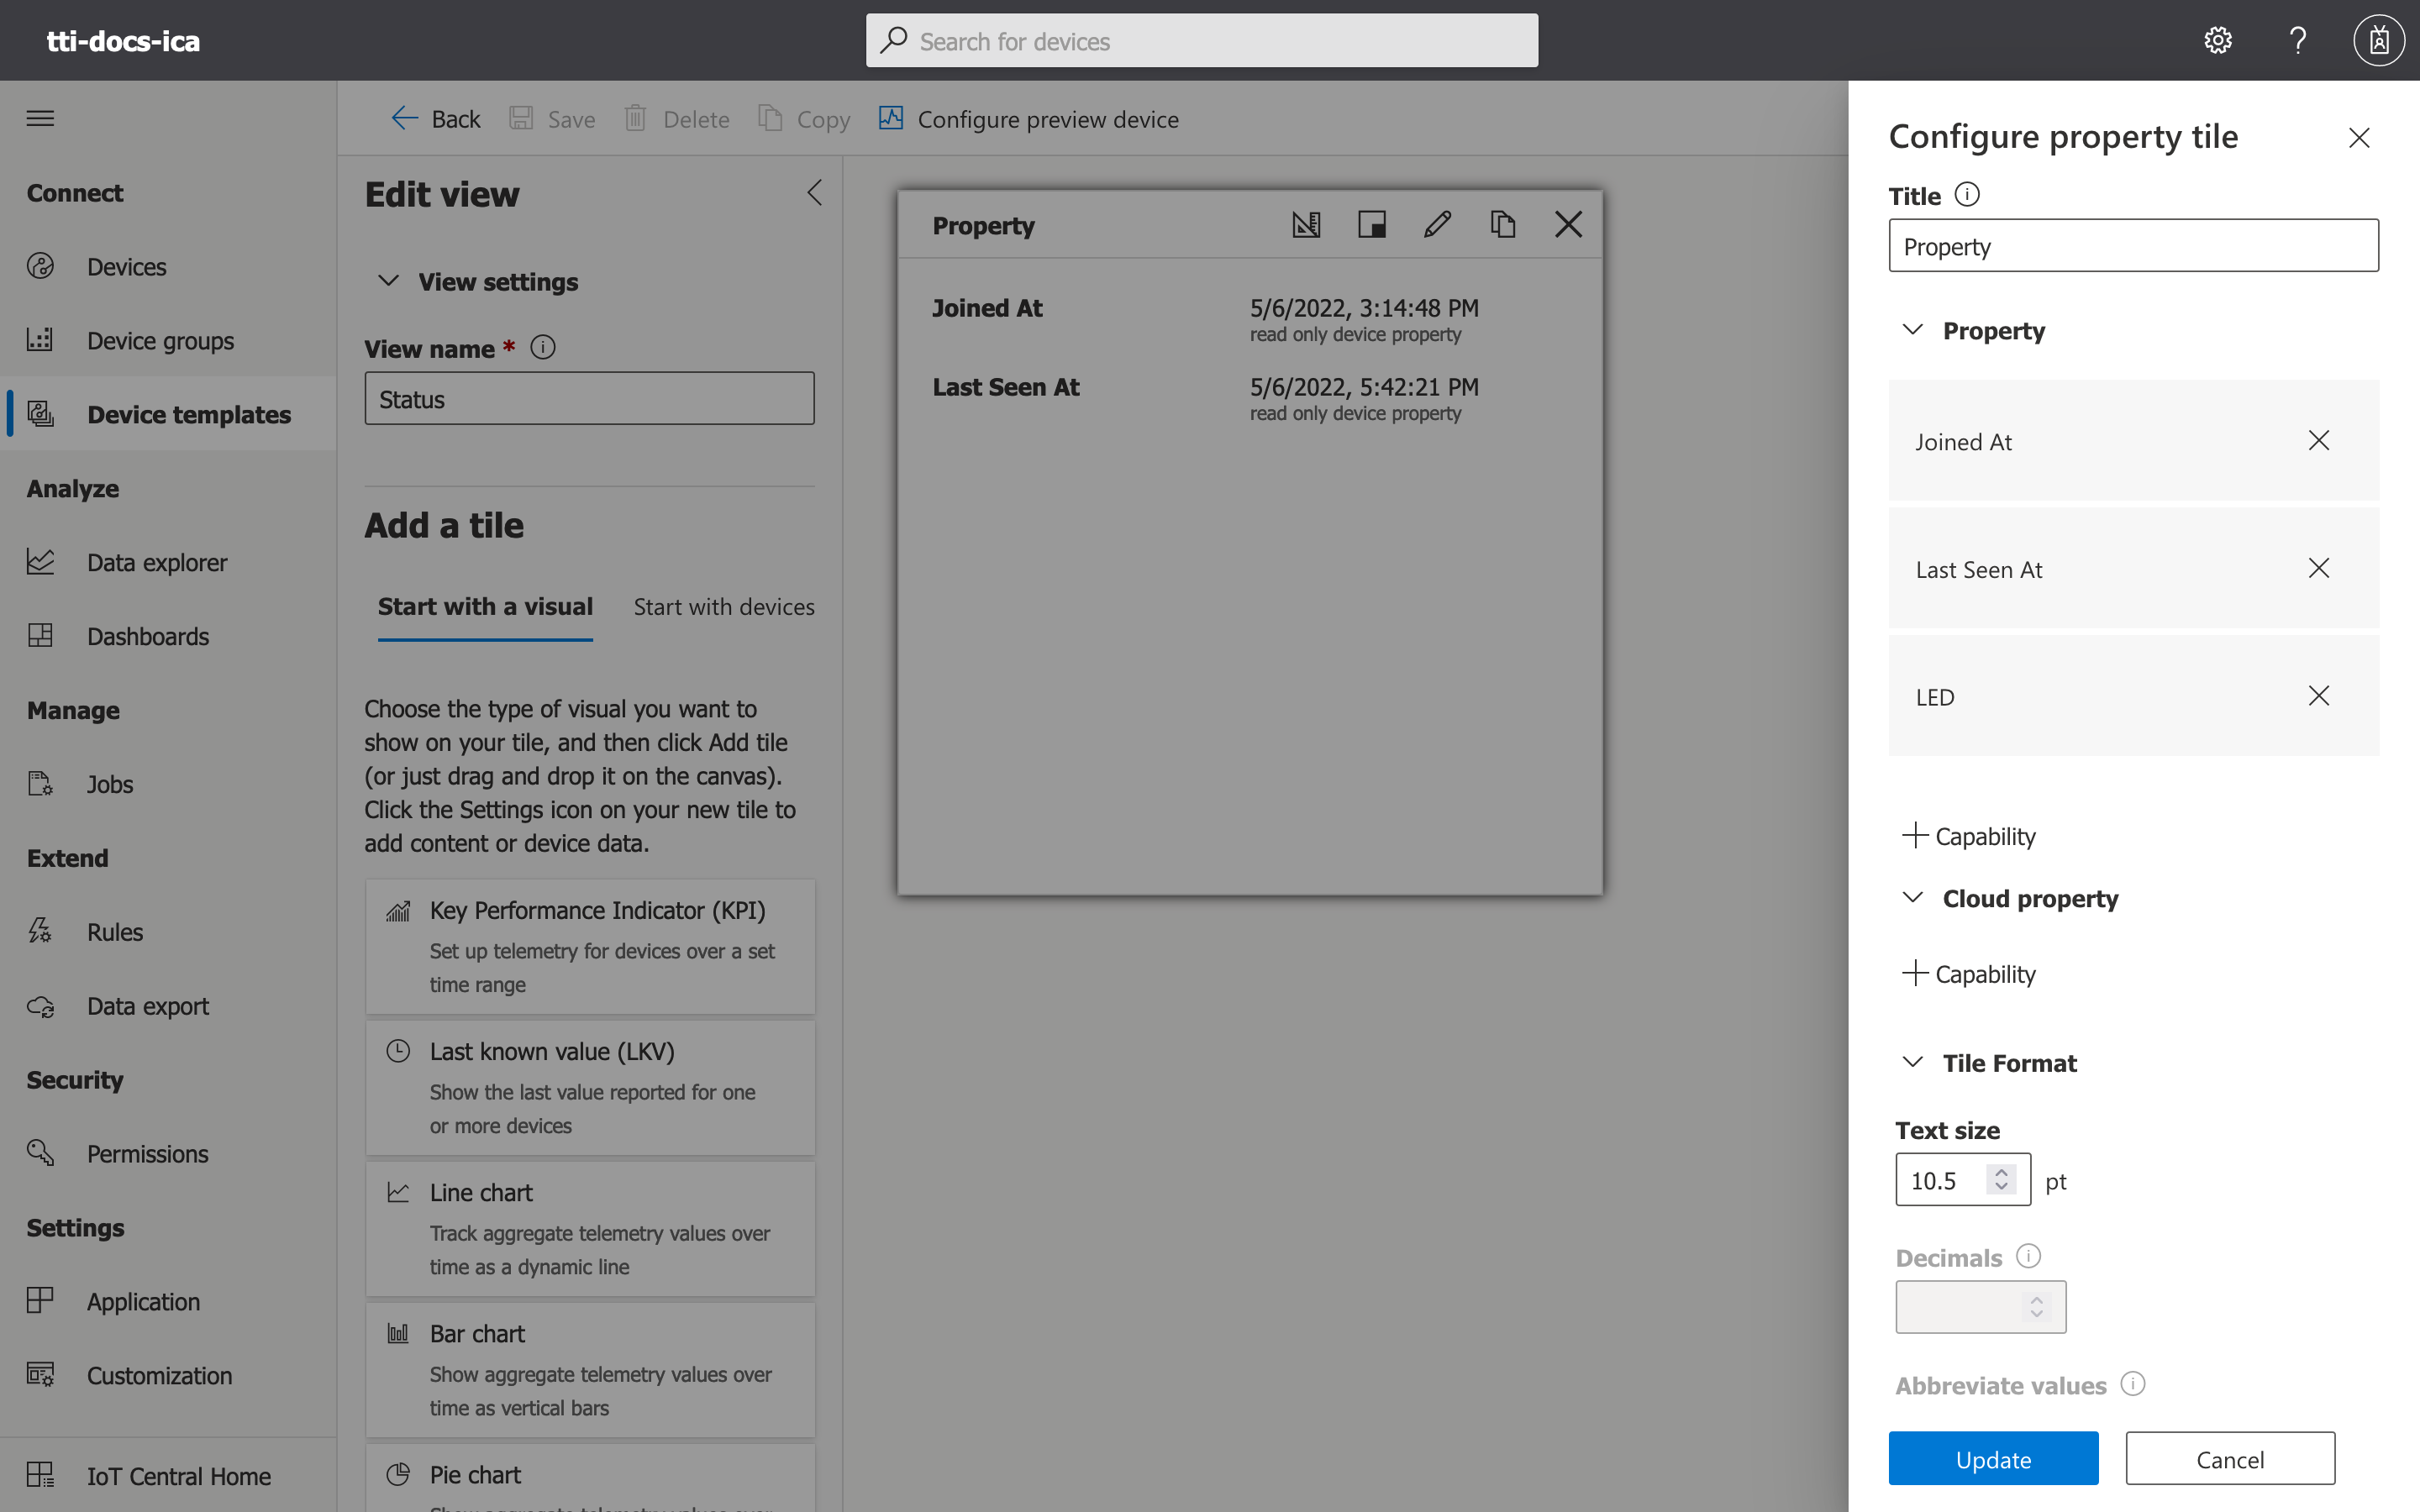
Click on Save in order to save the view. You can now click on Configure preview device, then select Select from a running device. Select your end device and click Apply.
You can now see the view with values populated from your preview device.
You may now click on Back. This will bring you back to the main device template overview page. Click on Publish, then click on Publish again in order to publish the updated model.
You may now open the end device view once again, and the Status view you have added will now be visible.
Modeling Non-primitive Schemas
As part of our previous example, we have modeled two primitive properties. Specifically, the data types (schema) were primitive types - timestamps. Yet the decodedPayload property is an object. As such, we need to model the data type of the decodedPayload object using a separate schema.
The decodedPayload property, which is tied to the output of the uplink payload decoder in The Things Stack has a singular field called ledState, which may take two possible values: on and off.
We start with the following property definition:
{
  "@id": "dtmi:ttnlwstack:decodedPayload;1",
  "@type": "Property",
  "displayName": {
    "en": "Decoded Payload"
  },
  "name": "decodedPayload",
  "schema": {
    "@id": "dtmi:ttnlwstack:decodedPayload:schema;1",
    "@type": "Object",
    "fields": [],
    "writable": true
  },
  "writable": true
}
You can observe that the schema of the property is now an object in itself, with the type marked as Object. Another important thing is that we have marked both the property, and the object inside of it, as writeable. This field allows us to consider the decodedPayload as a reported and desired property.
Desired properties represent the state in which we would like the end device to be in, while reported properties capture the state in which the device is right now. By having the decodedPayload and its contents as a desired property, we can schedule changes to the end device state.
The quickstart firmware makes The Things Uno report its current (LED) state as part of the uplink decoded payload, while the downlink payload formatter allows us to change the (LED) state. Another useful property to be observed here is that the payloads are symmetric - we use the same object format to both report the current state (reported properties), and to change the state itself (desired properties).
Moving on, let us look at the (partial) definition of the ledState field:
{
  "@id": "dtmi:ttnlwstack:decodedPayload:schema:ledState;1",
  "displayName": {
    "en": "LED"
  },
  "name": "ledState",
  "schema": {
    "@id": "dtmi:ttnlwstack:decodedPayload:schema:ledState:schema;1",
    "@type": "Enum",
    "enumValues": [],
    "valueSchema": "string"
  }
}
As we can see, the ledState can be modeled as an Enum. We now have to provide the two possible options, on and off as enumValues.
[
  {
    "@id": "dtmi:ttnlwstack:decodedPayload:schema:ledState:schema:off;1",
    "displayName": {
      "en": "Off"
    },
    "enumValue": "off",
    "name": "off"
  },
  {
    "@id": "dtmi:ttnlwstack:decodedPayload:schema:ledState:schema:on;1",
    "displayName": {
      "en": "On"
    },
    "enumValue": "on",
    "name": "on"
  }
]
We can now put everything together and thus obtain the following updated model:
{
  "@id": "dtmi:ttnlwstack:brand:the_things_products:model:the_things_uno:hwversion:hw1_0:fwversion:fwquickstart:band:EU_863_870;1",
  "@type": "Interface",
  "contents": [
    {
      "@id": "dtmi:ttnlwstack:decodedPayload;1",
      "@type": "Property",
      "displayName": {
        "en": "Decoded Payload"
      },
      "name": "decodedPayload",
      "schema": {
        "@id": "dtmi:ttnlwstack:decodedPayload:schema;1",
        "@type": "Object",
        "fields": [
          {
            "@id": "dtmi:ttnlwstack:decodedPayload:schema:ledState;1",
            "displayName": {
              "en": "LED"
            },
            "name": "ledState",
            "schema": {
              "@id": "dtmi:ttnlwstack:decodedPayload:schema:ledState:schema;1",
              "@type": "Enum",
              "enumValues": [
                {
                  "@id": "dtmi:ttnlwstack:decodedPayload:schema:ledState:schema:off;1",
                  "displayName": {
                    "en": "Off"
                  },
                  "enumValue": "off",
                  "name": "off"
                },
                {
                  "@id": "dtmi:ttnlwstack:decodedPayload:schema:ledState:schema:on;1",
                  "displayName": {
                    "en": "On"
                  },
                  "enumValue": "on",
                  "name": "on"
                }
              ],
              "valueSchema": "string"
            }
          }
        ],
        "writable": true
      },
      "writable": true
    },
    {
      "@id": "dtmi:ttnlwstack:joinedAt;1",
      "@type": "Property",
      "displayName": {
        "en": "Joined At"
      },
      "name": "joinedAt",
      "schema": "dateTime"
    },
    {
      "@id": "dtmi:ttnlwstack:lastSeenAt;1",
      "@type": "Property",
      "displayName": {
        "en": "Last Seen At"
      },
      "name": "lastSeenAt",
      "schema": "dateTime"
    }
  ],
  "displayName": {
    "en": "The Things Uno"
  },
  "@context": ["dtmi:iotcentral:context;2", "dtmi:dtdl:context;2"]
}
We can now update the DTDL model with our new model. Navigate to Device templates → The Things Uno then click on the Edit DTDL. Input the updated model and click on Save. You will now see the decodedPayload field.
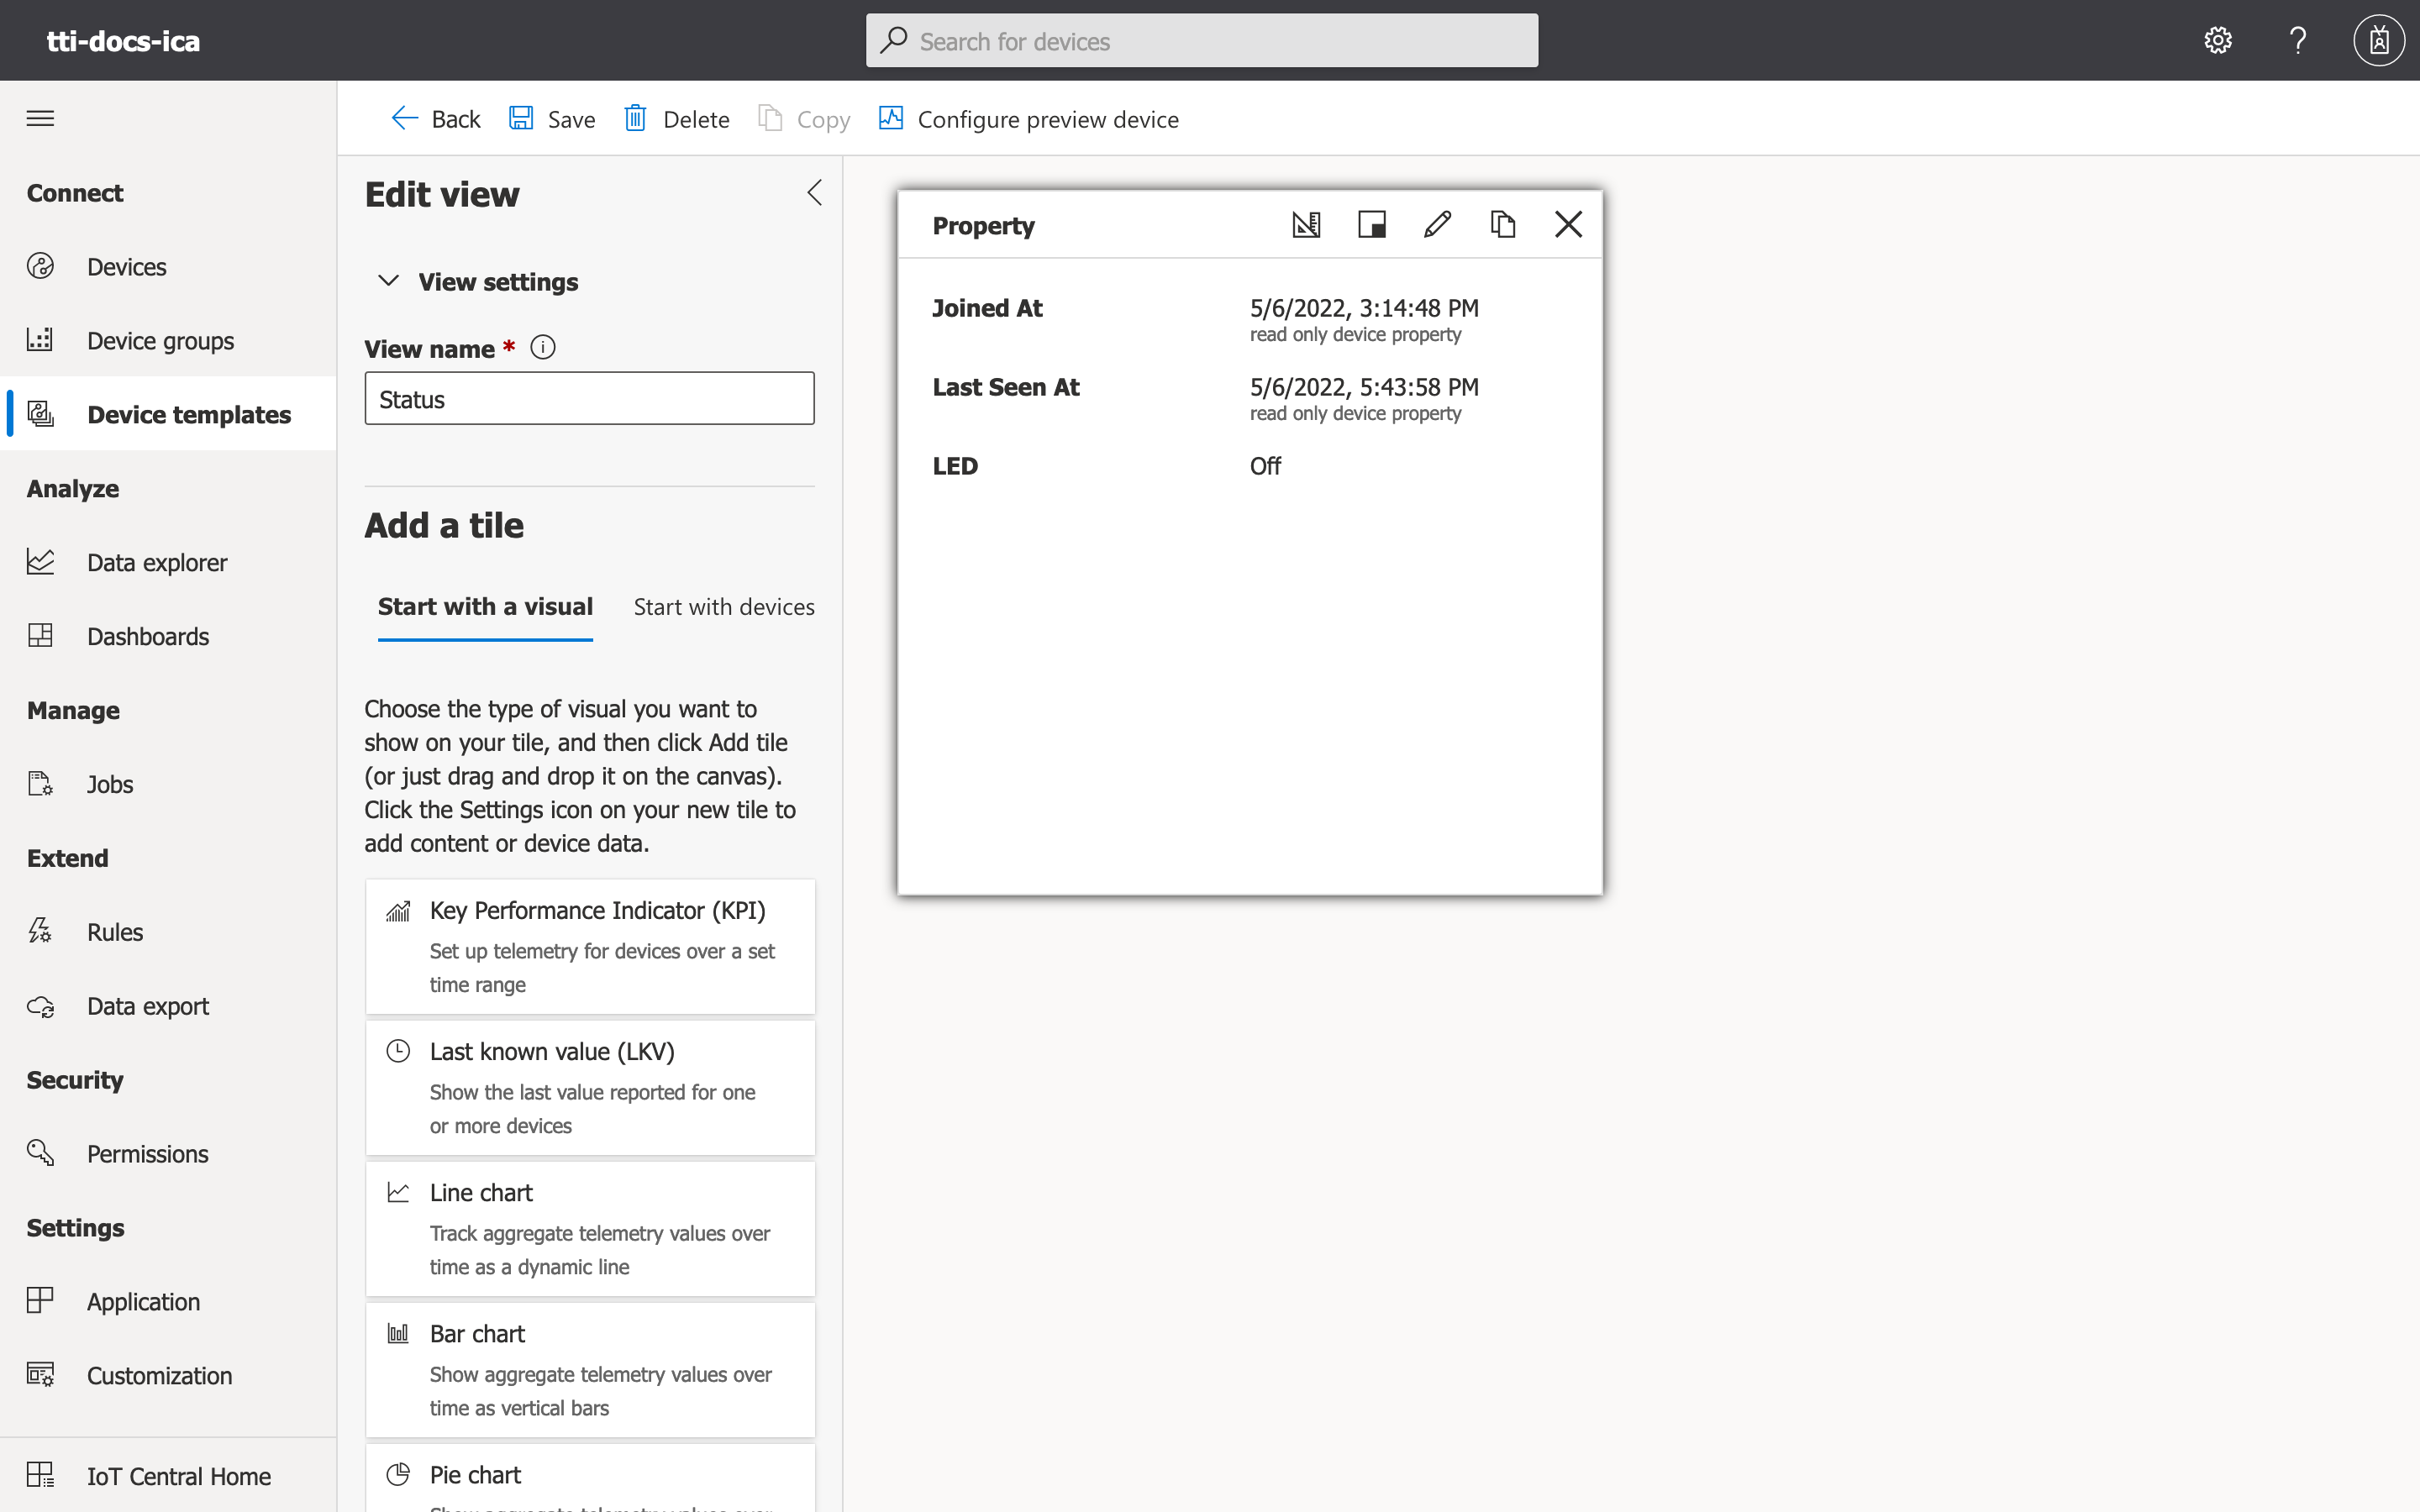
We would like to visualize this property as part of our earlier view. Click on the Status view on the left hand side menu, then click on the pencil button on the tile. Click on the + Capability button and select the LED property.
You may now click on Update in order to update the tile. The property will now be visible.
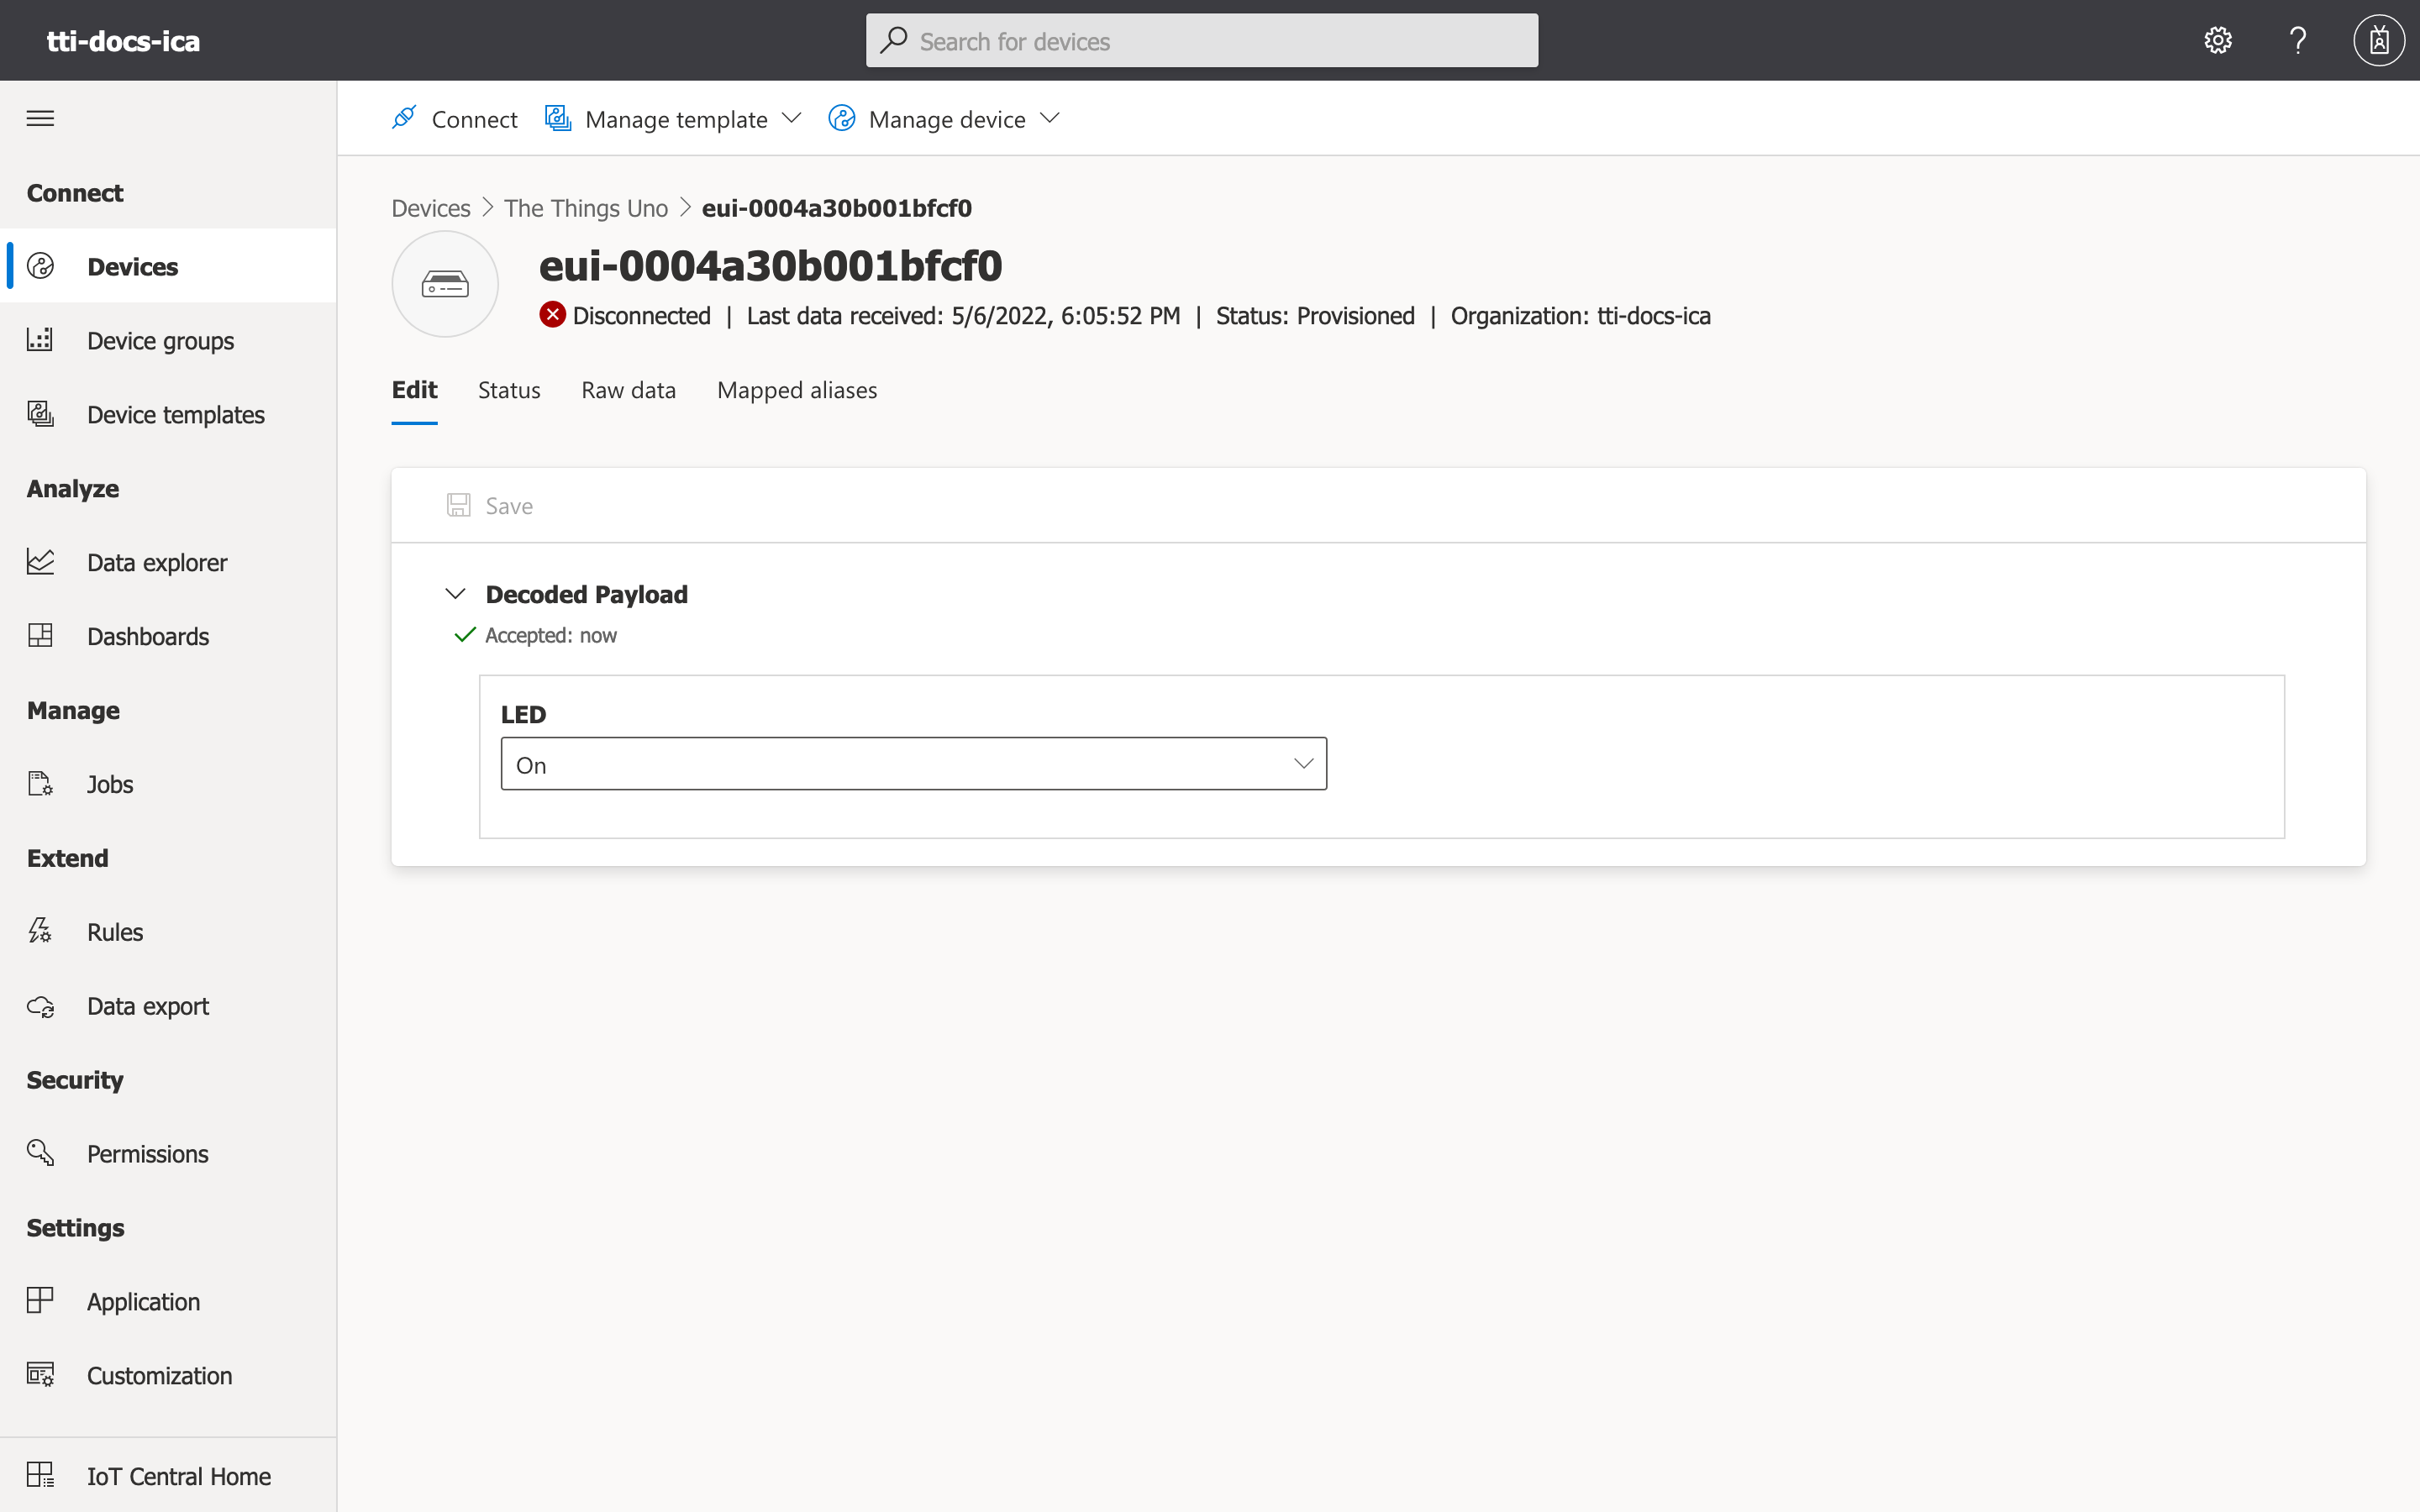
Click on Save, then click on Back. Let us now add a form which would allow us to edit the LED state. Click on Views on the left hand side menu, then click on Editing device and cloud data.
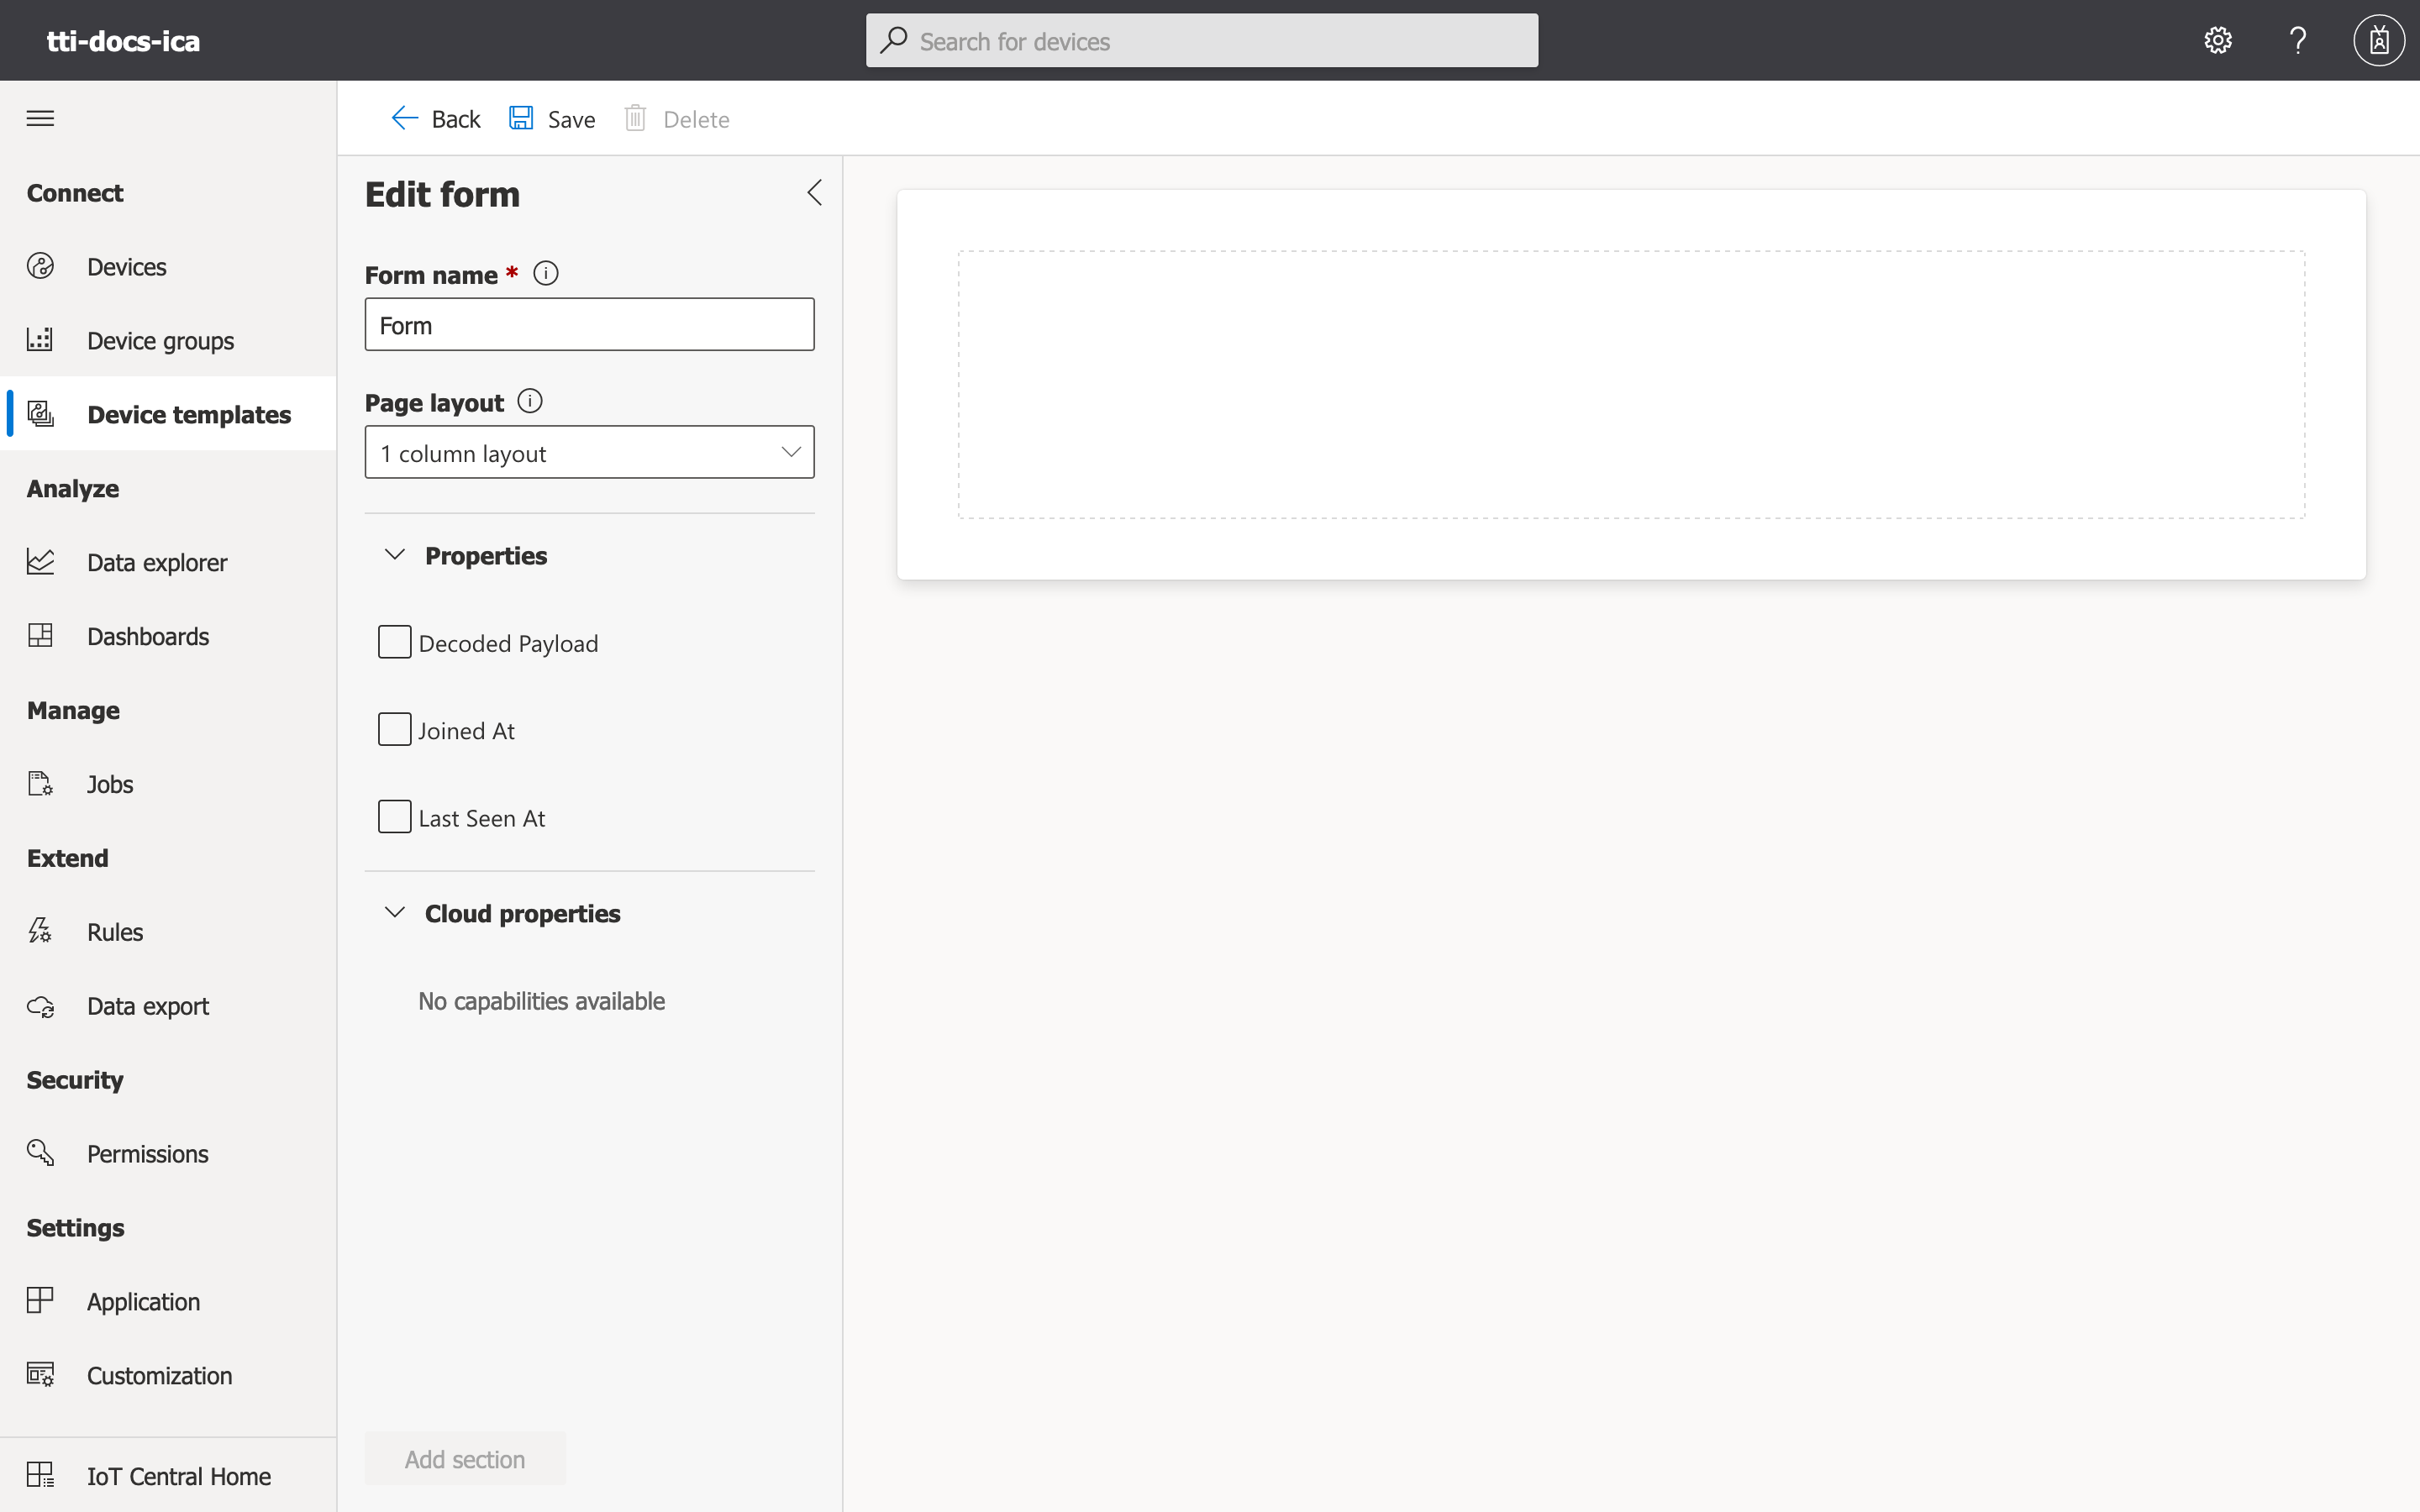
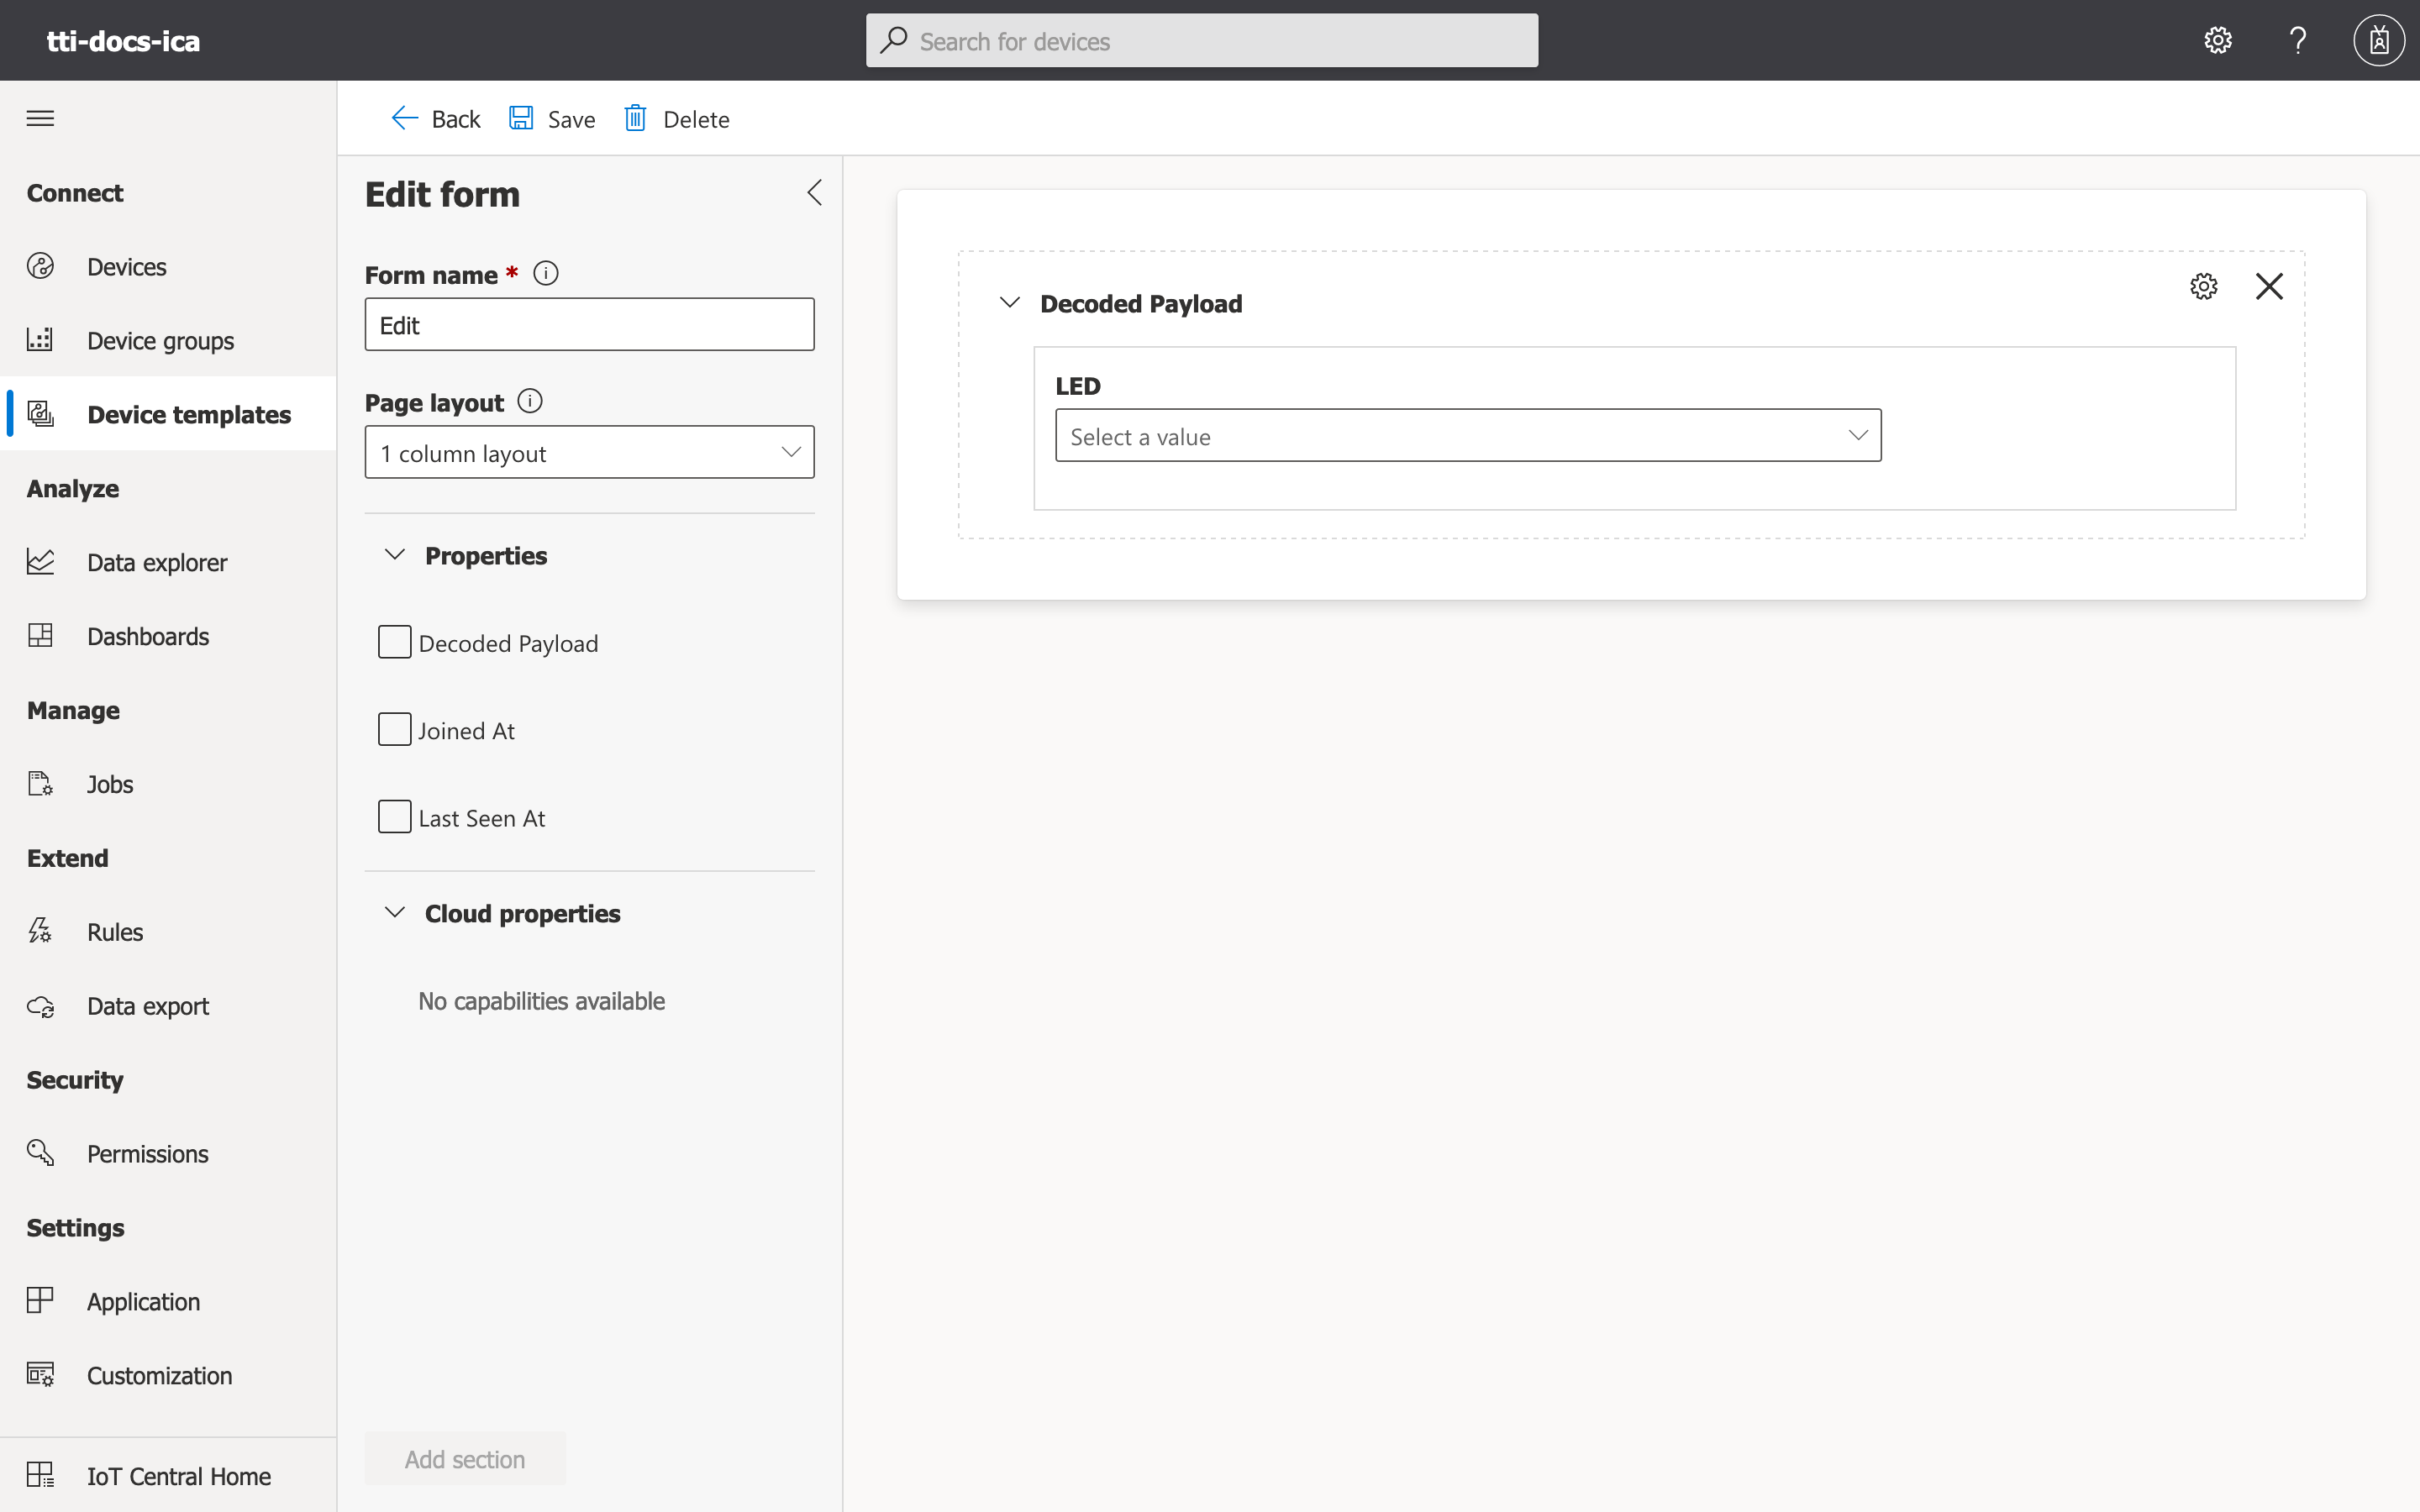
You may now give a name, such as Edit, to your form under the Form name. Drag-and-drop the Decoded Payload property on the canvas found on the right hand side. Click on Save in order to save your form.
Click on Back in the top side menu. You may now publish the updated model by click on Publish on the top level menu, then clicking on the Publish button in the newly open dialogue. You can now see the updated view, and form, in your device view.

We can now change the desired state of the end device by updating the LED status from off to on. We can select the On option from the LED dropdown, then click on Save. This will generate a downlink in The Things Stack.
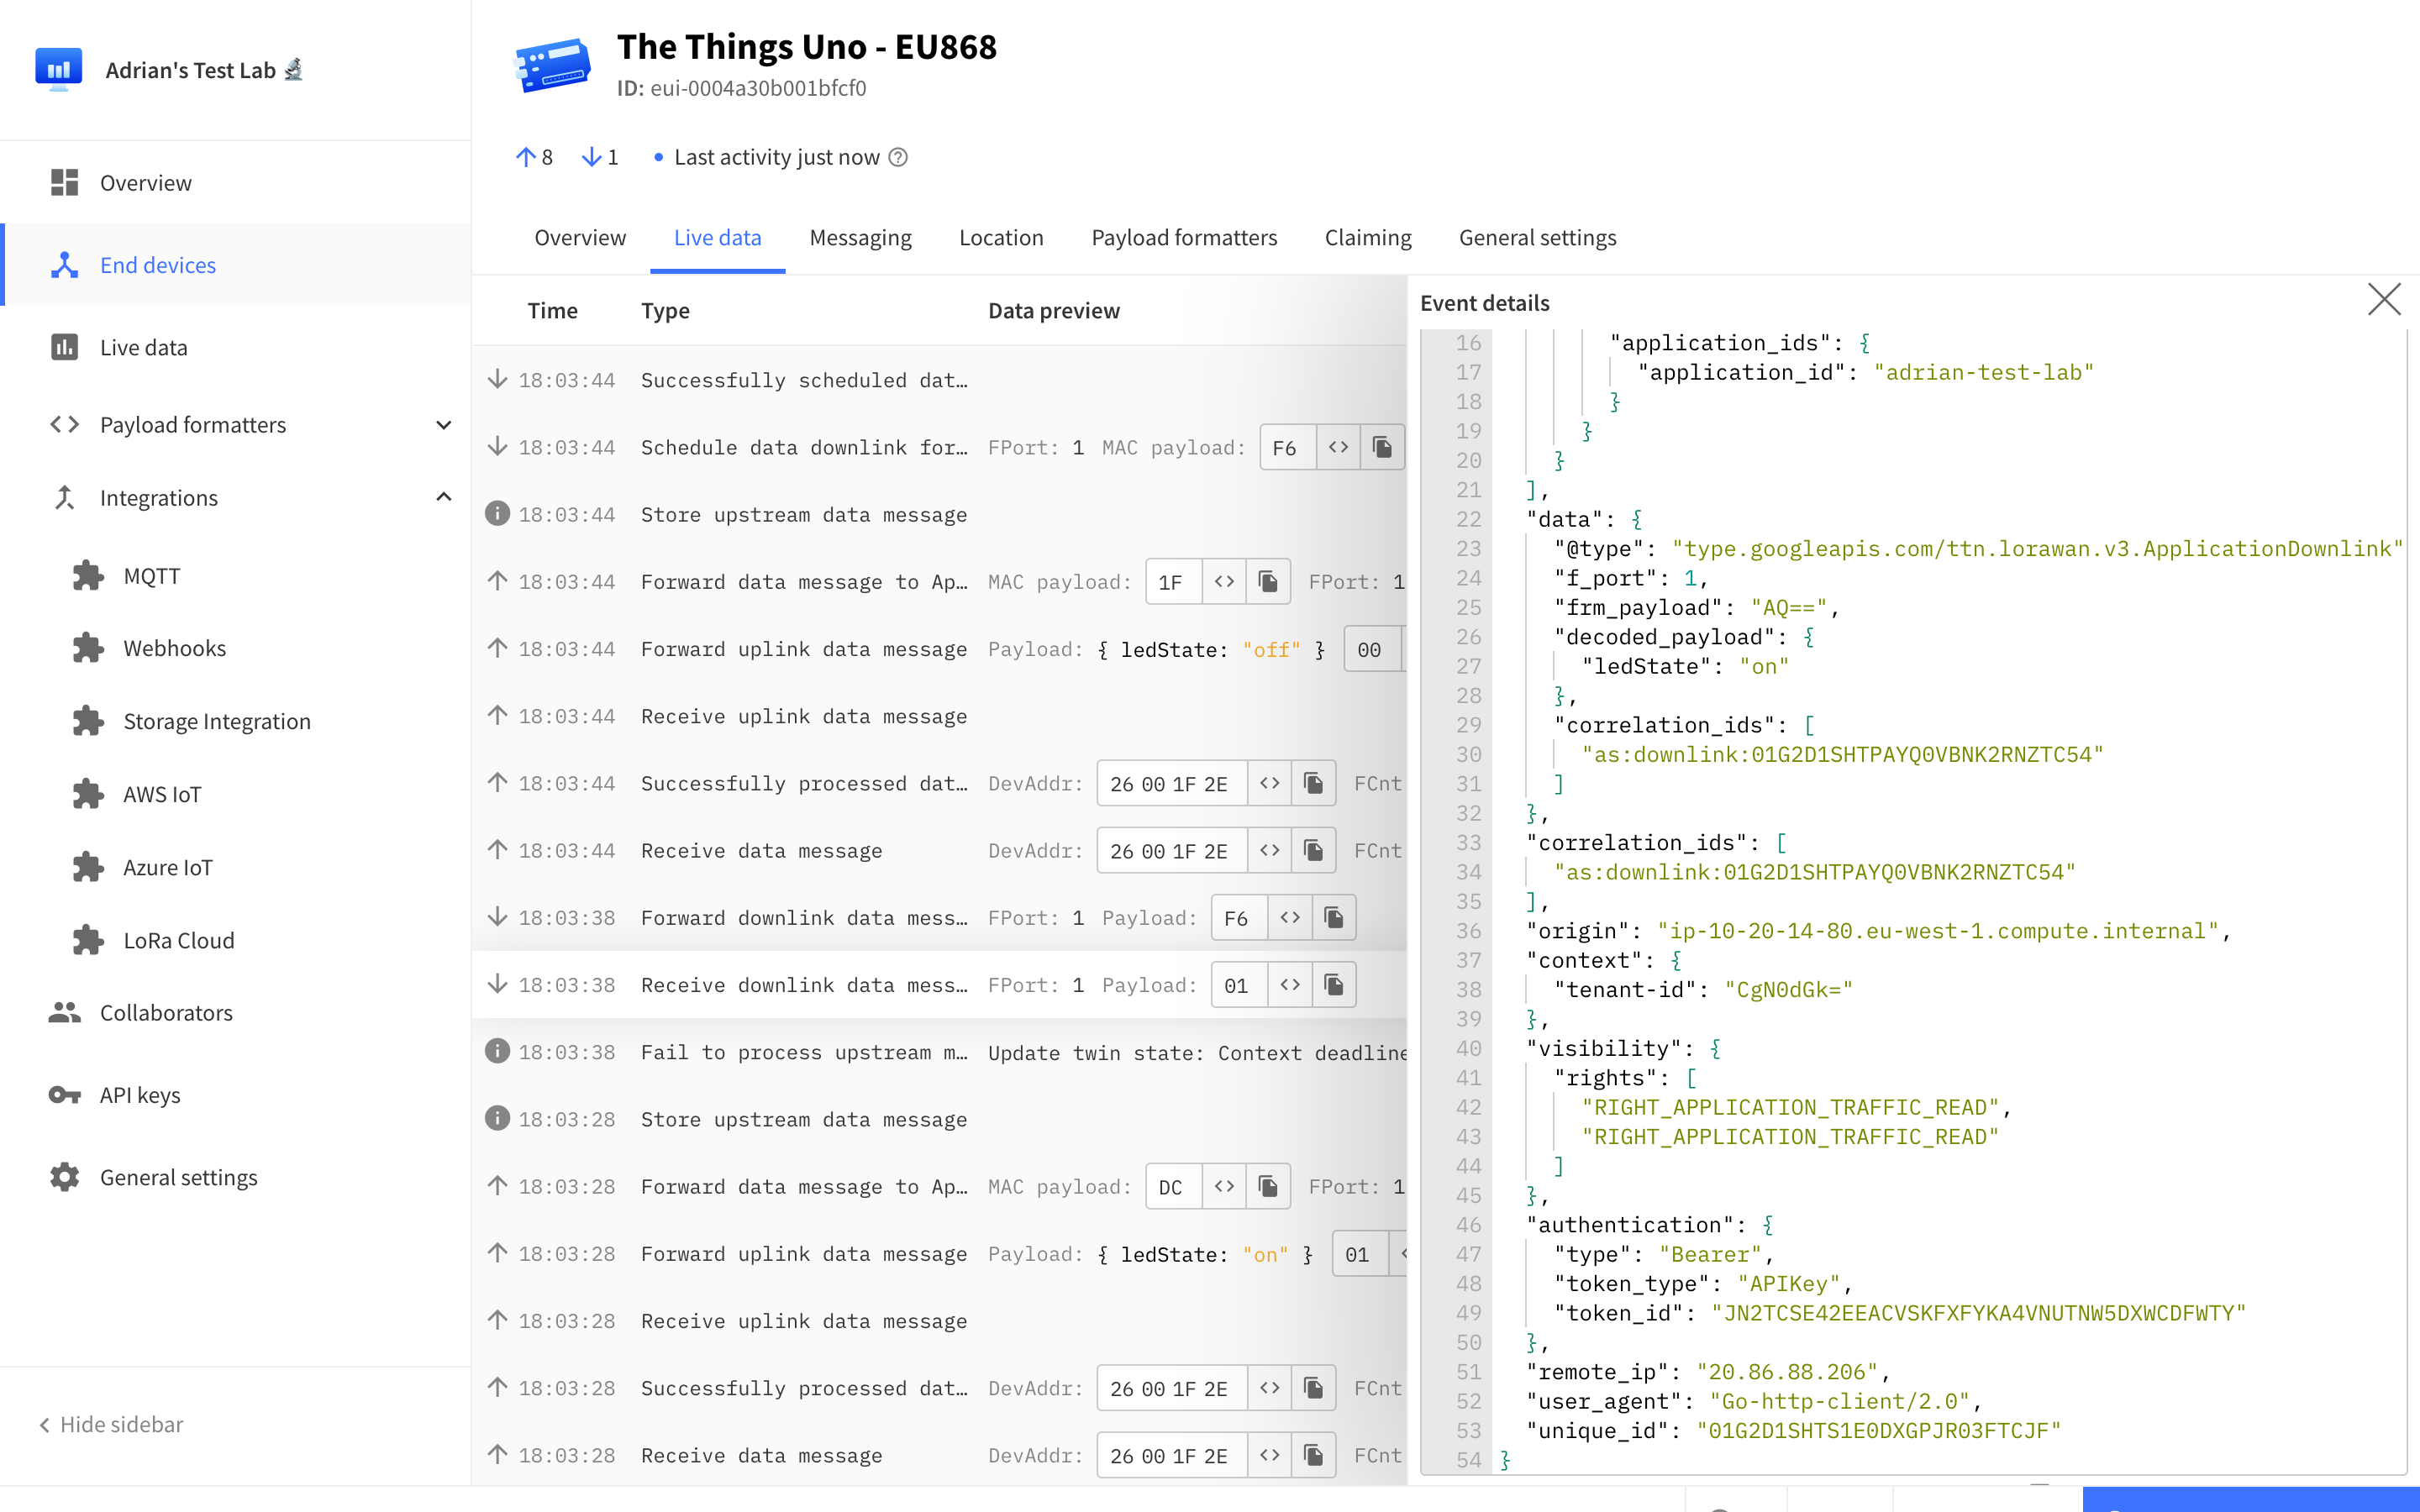
On the next uplink, which will still report that the LED state is off, the downlink will be transmitted to the end device. On the subsequent uplink, the end device will report the LED state as on, and the form will report the property as accepted.