ThingsBoard is an open-source IoT platform for data collection, processing, visualization, and device management. It supports cloud and on-premises deployments, and it combines scalability, fault-tolerance and performances to nullify the chances of getting your IoT data lost.
The integration between The Things Stack and ThingsBoard is an example of an MQTT integration. ThingsBoard embeds an MQTT Broker, which is configured with the ThingsBoard Integrations functionality to subscribe or publish to The Things Stack MQTT Server.
Prerequisites
- Access to ThingsBoard Professional Edition deployment. You can sign up for a trial account on ThingsBoard PE Cloud server.
Warning:
Only ThingsBoard PE supports the Platform Integrations feature that is needed for this integration.Configure The Things Stack
Before creating an integration setup on ThingsBoard, you need to prepare the uplink payload formatter on The Things Stack.
Define a Javascript payload formatter and take the following code as an example of the formatter parameter:
function decodeUplink(input) {
  return {
    data: {
      temperature: input.bytes[0],
    },
  };
}
The payload formatter shown above extracts the first byte of your payload and sets it as a temperature value, but data object’s contents can vary depending on the telemetry type your device is sending.
Also, note your credentials available under MQTT submenu of the Integrations menu on the left, because you will need them for further steps.
Setup ThingsBoard
Log in to your ThingsBoard account.
Defining Data Converters
Before creating an integration, you need to define uplink and downlink data converters. To do so, first navigate to Data converters on the left hand menu.
Click the + icon in the upper right and then select Create new converter to create a new uplink converter.
Give a Name to your uplink converter, select Uplink as a Type and paste the following code in the decoder function field:
var data = decodeToJson(payload);
var deviceName = data.end_device_ids.device_id;
var deviceType = data.end_device_ids.application_ids.application_id;

var result = {
  deviceName: deviceName,
  deviceType: deviceType,
  telemetry: {
    temperature: data.uplink_message.decoded_payload.temperature,
  },
};

function decodeToString(payload) {
  return String.fromCharCode.apply(String, payload);
}

function decodeToJson(payload) {
  var str = decodeToString(payload);
  var data = JSON.parse(str);
  return data;
}

return result;
You can test the decoder by clicking the Test decoder function and submitting an uplink message from The Things Stack manually.
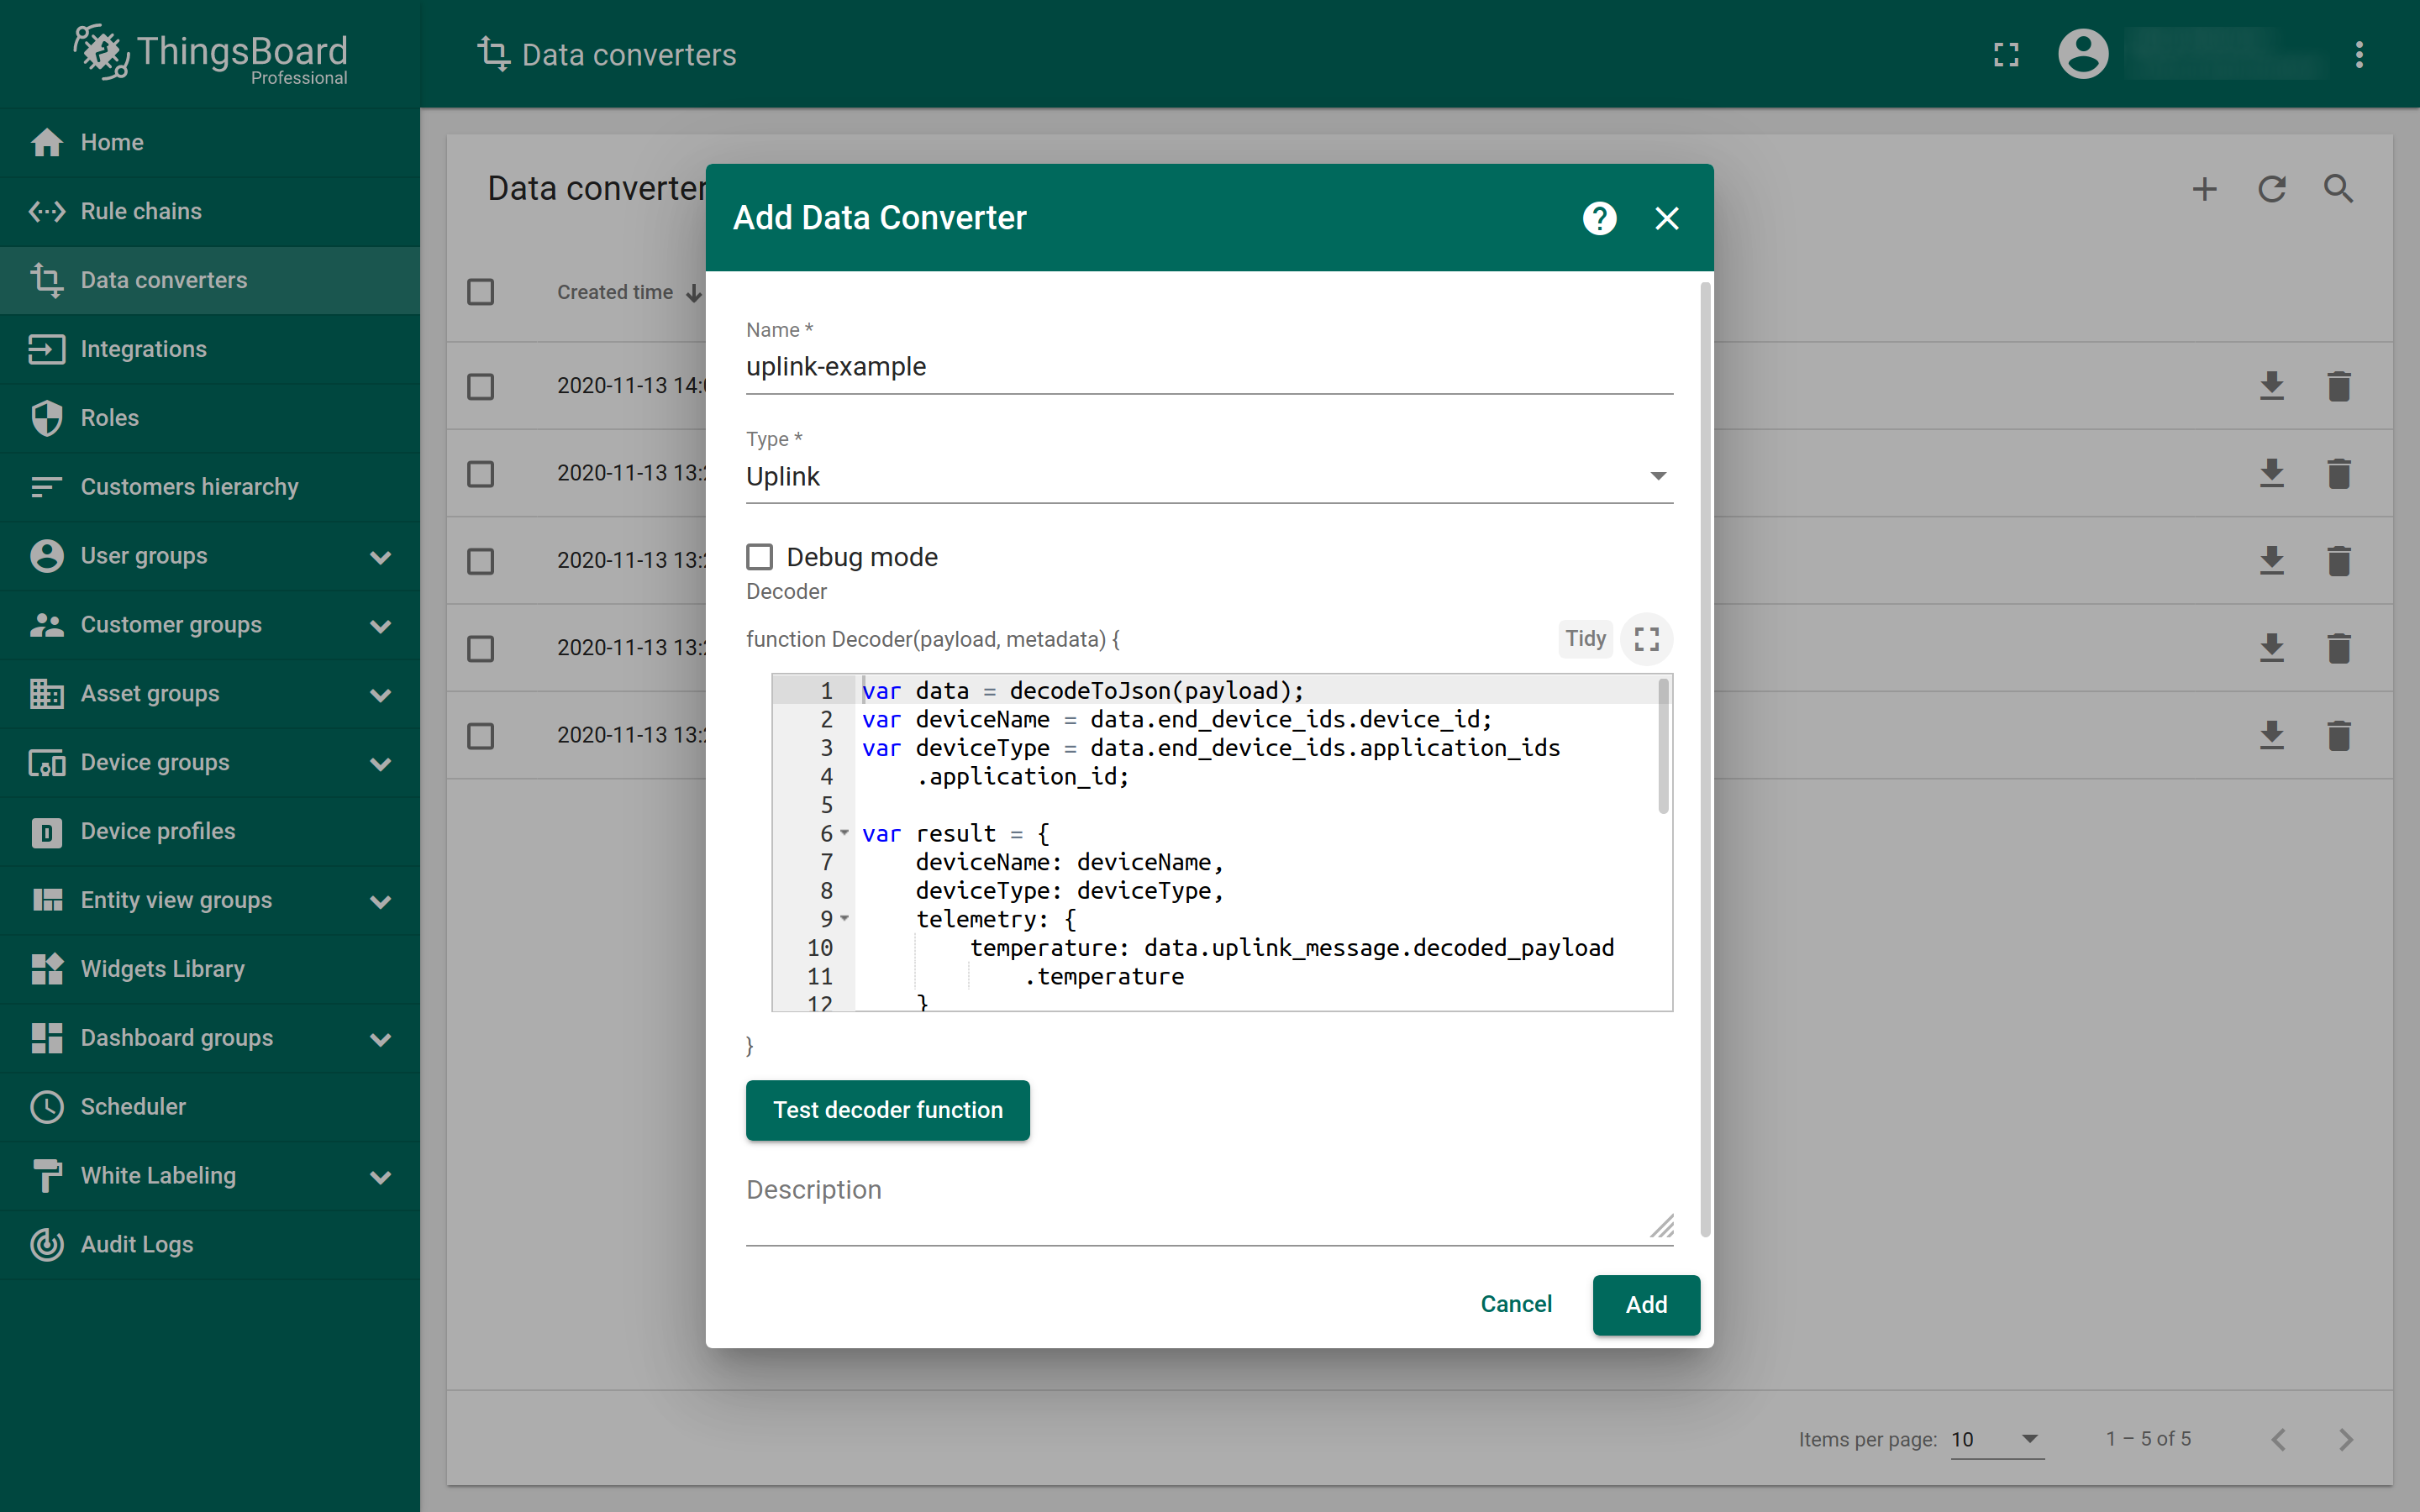
Finish by selecting Add.
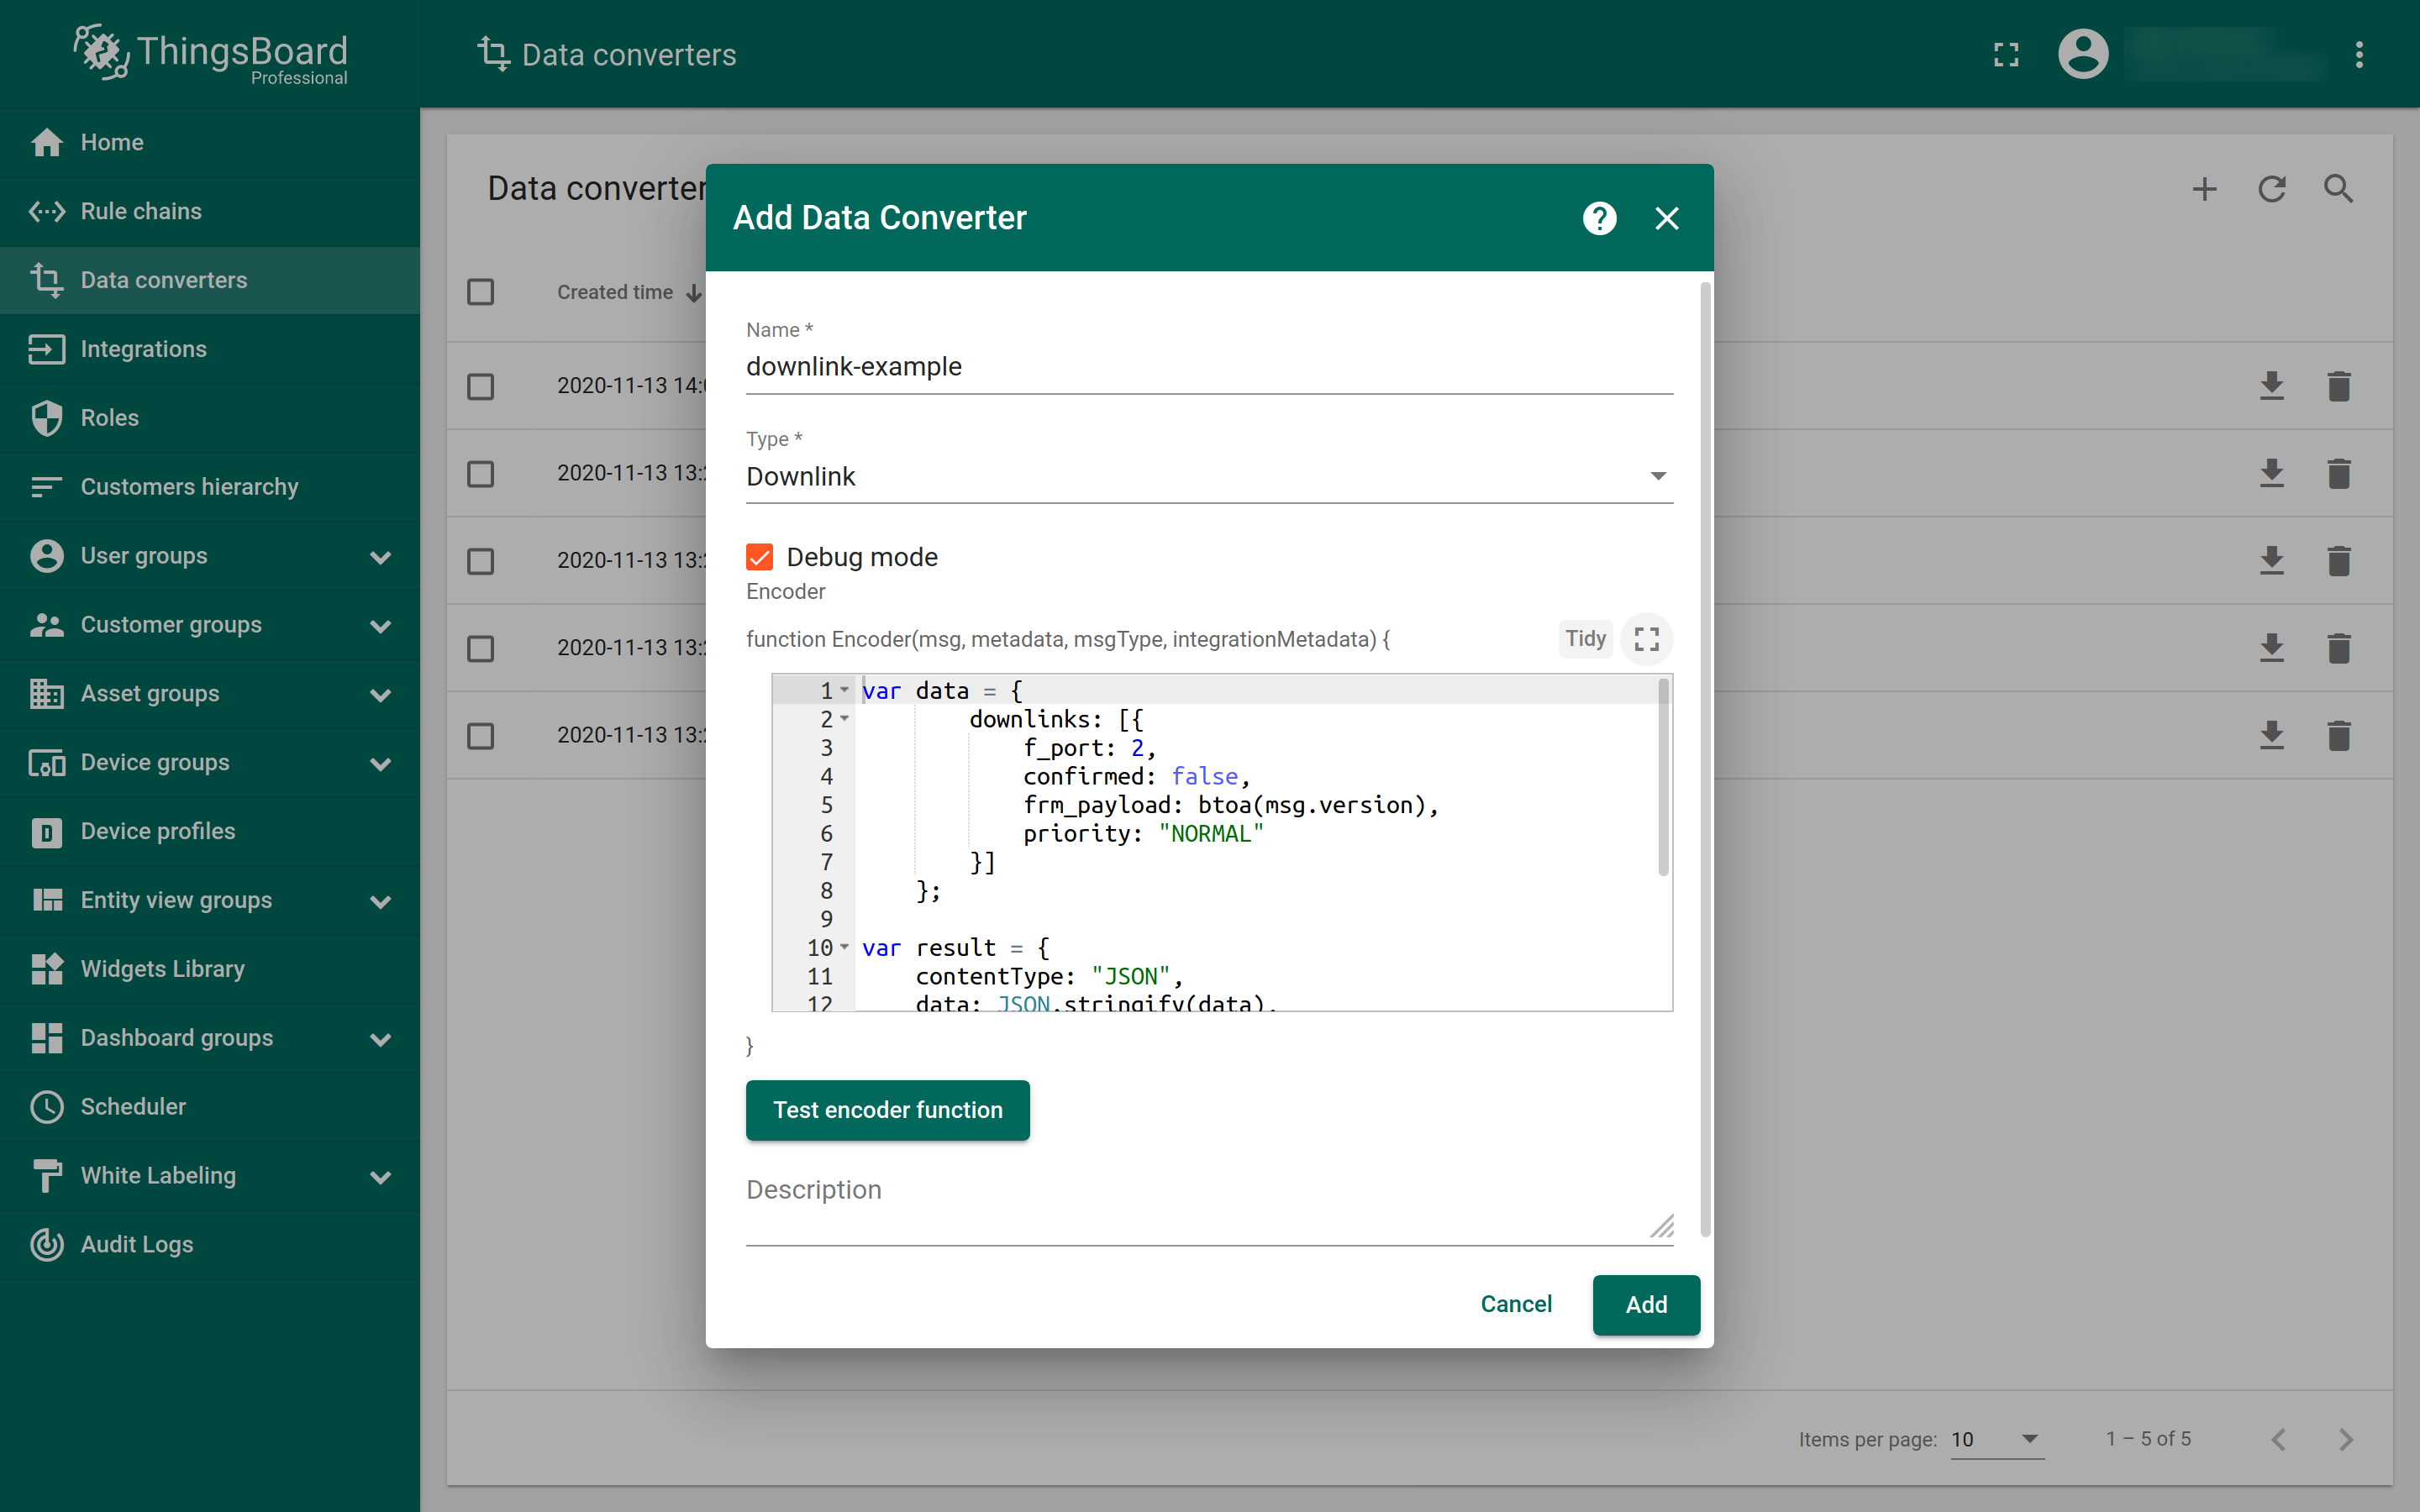
Follow the same procedure to create a converter with Downlink as a Type and a following encoder function:
var data = {
  downlinks: [
    {
      f_port: 2,
      confirmed: false,
      frm_payload: btoa(msg.version),
      priority: "NORMAL",
    },
  ],
};

var result = {
  contentType: "JSON",
  data: JSON.stringify(data),
  metadata: {
    devId: "device_id", //enter your device's ID here
  },
};
return result;
Replace the device_id in the downlink converter function with the End device ID value from The Things Stack.
Creating MQTT Integration
When you have defined data converters, navigate to the Integrations section on the left hand menu. Add a new integration by clicking the + button in the upper right corner.
Give a name to your integration by filling in the Name field. For Type, choose The Things Stack.
Make sure the Enabled and Allow create devices or assets checkboxes are left ticked.
For Uplink data converter and Downlink data converter choose the uplink and downlink converters you created in the previous step.
Depending on your The Things Stack deployment, choose Host type.
If you want to use TLS, enter 8883 for Port. Otherwise, enter 1883 and disable the Enable SSL button.
Use the credentials of your The Things Stack MQTT Server as Username and Password.
You can check the connection with your host via port you specified using credentials you provided by pressing the Check connection button. If it fails, make sure you fix it.

Click the Add button on the bottom to finish creating the integration.
A new device with your end device’s ID will be created automatically. You can find it if you navigate to Device groups → All and search the end devices list. Select your device and switch to the Latest telemetry tab to see the telemetry data your device is sending, and use it to explore the further ThingsBoard features.
Scheduling Downlinks
Besides listening to uplink messages, you can also schedule downlink messages to be sent to your end device from ThingsBoard.
This example shows the steps to create a setup that schedules a downlink message when the device attributes change. This requires modifying the Root Rule Chain. For more details, visit the Getting Started with Rule Engine section of the official ThingsBoard documentation page.
First, navigate to Rule chains on the left hand menu.
Open the Root Rule Chain by clicking the Open rule chain icon next to it.
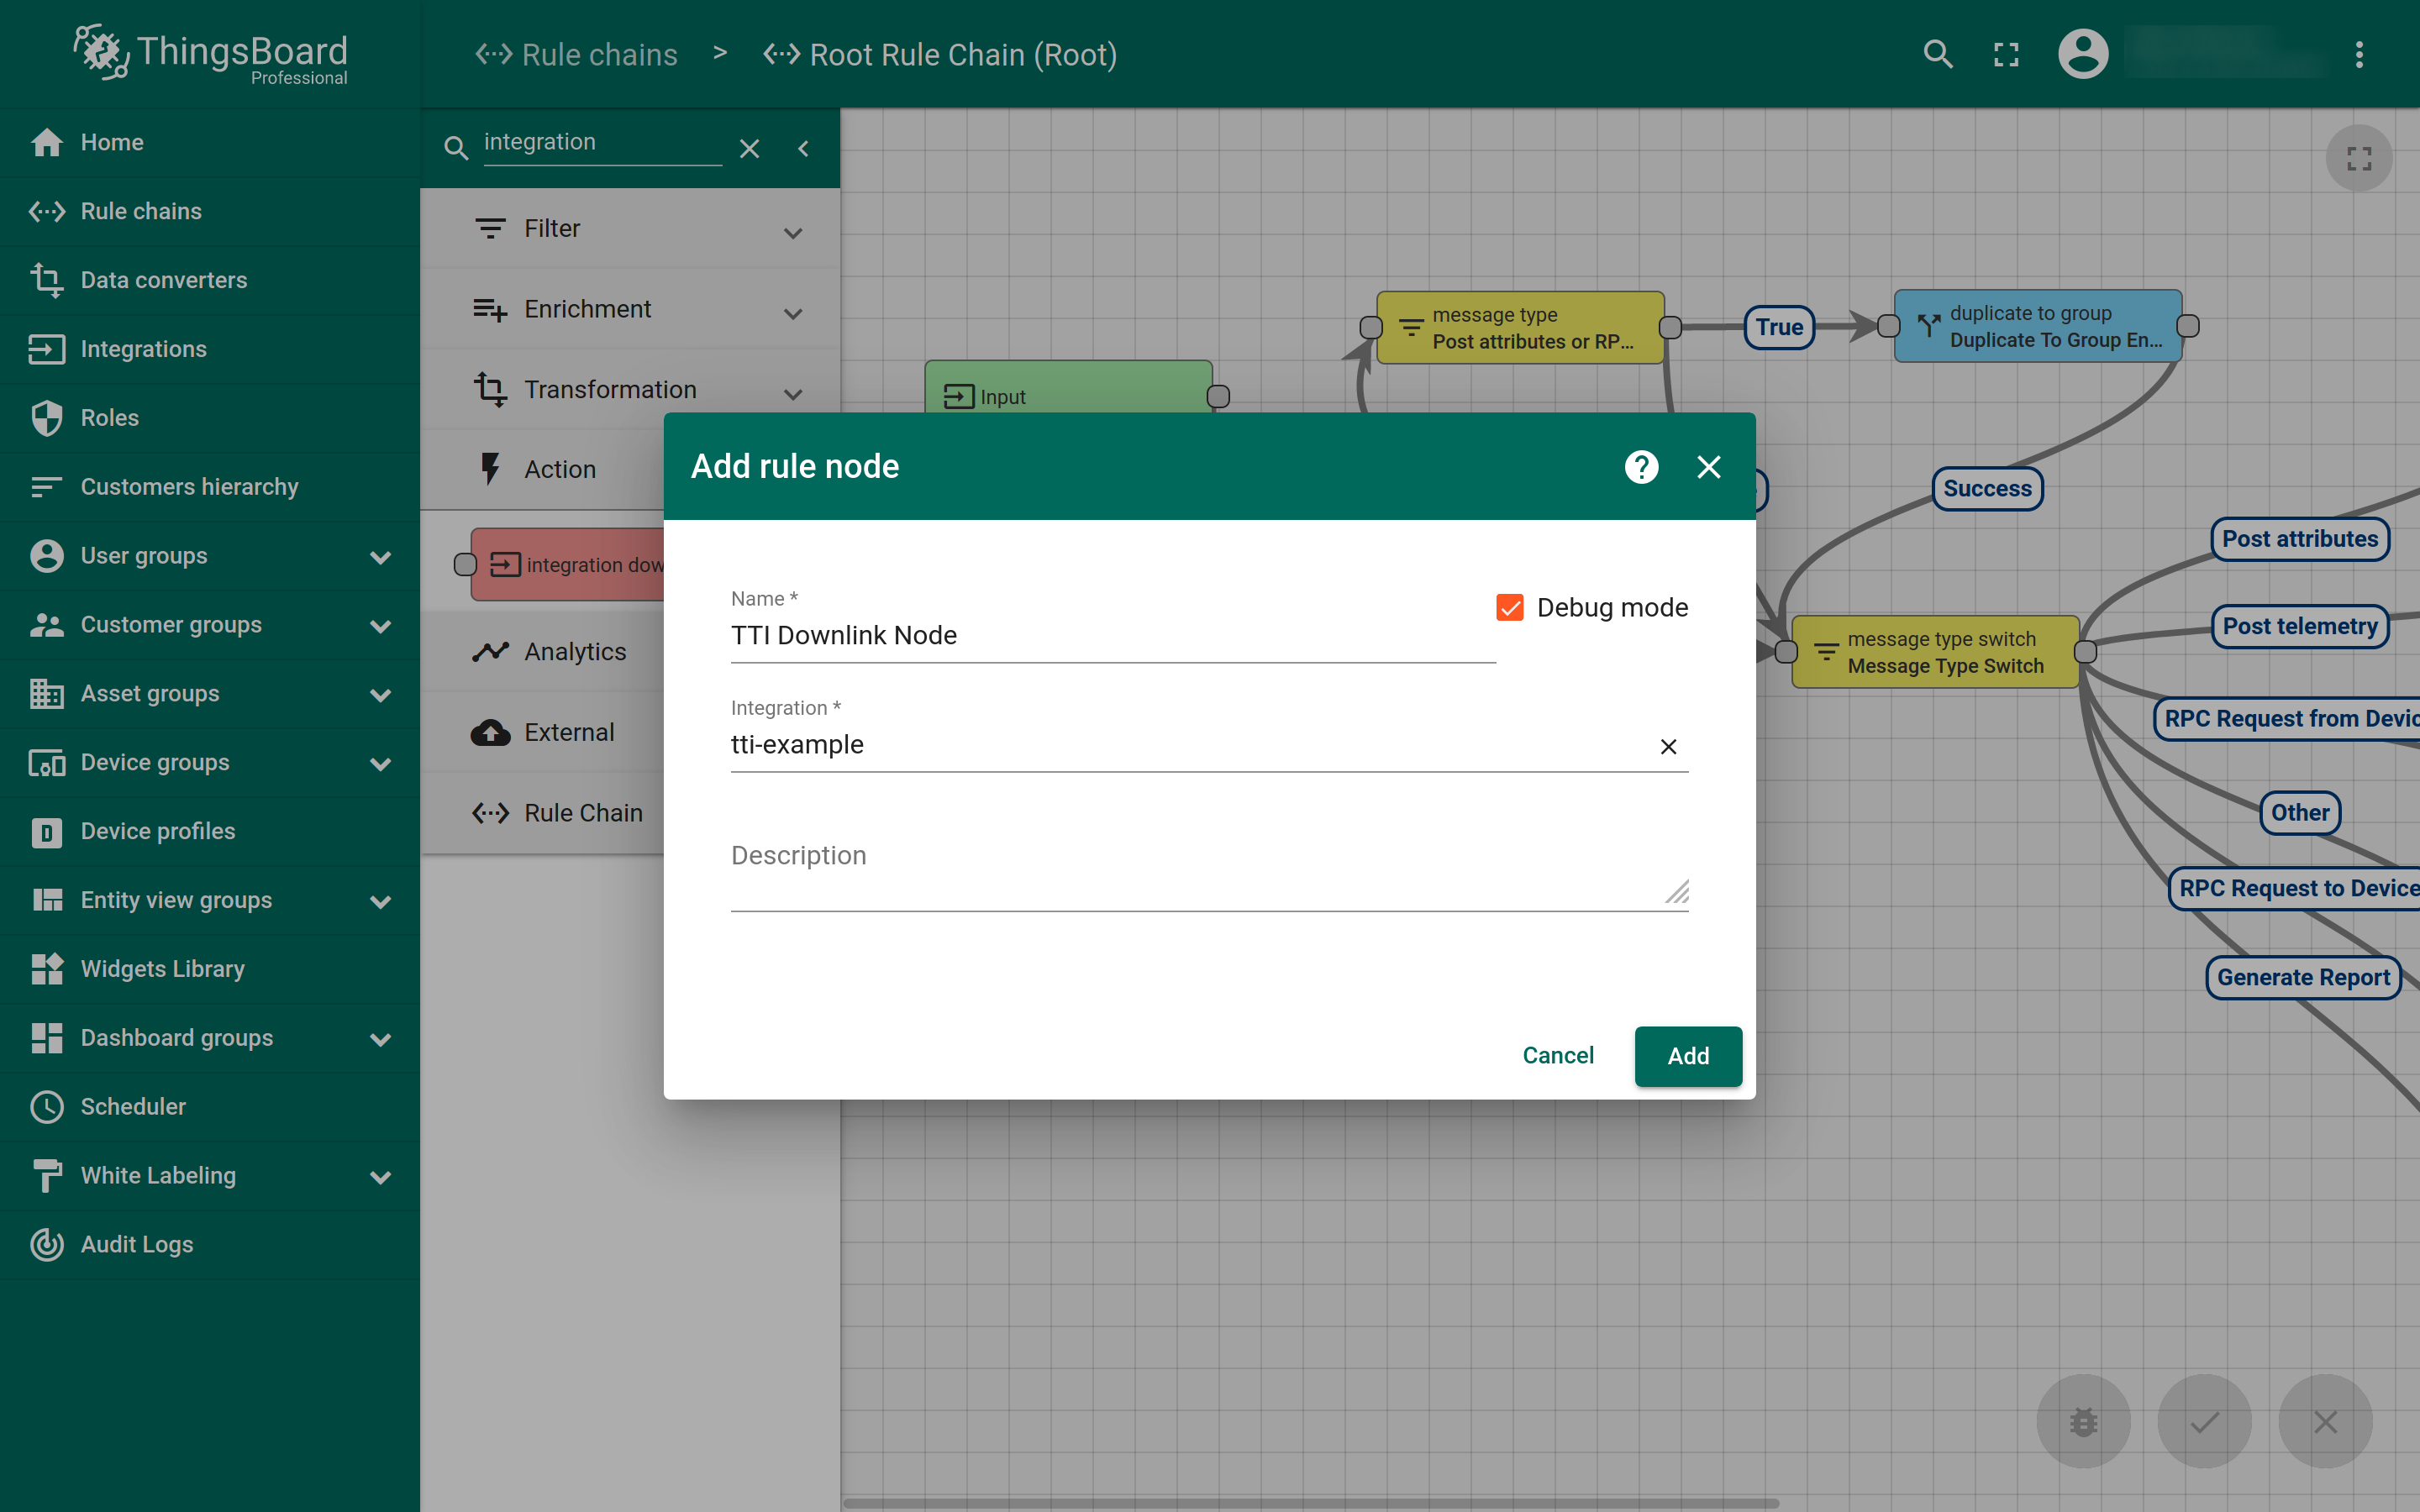
In the nodes library on the left, find integration downlink node and place it on the dashboard. Give a Name to this node, choose the integration you created previously as Integration and click Add to finish.
Connect the output port of the Message Type Switch node with the input port of the integration downlink node you just created, and choose Attributes Updated link label.
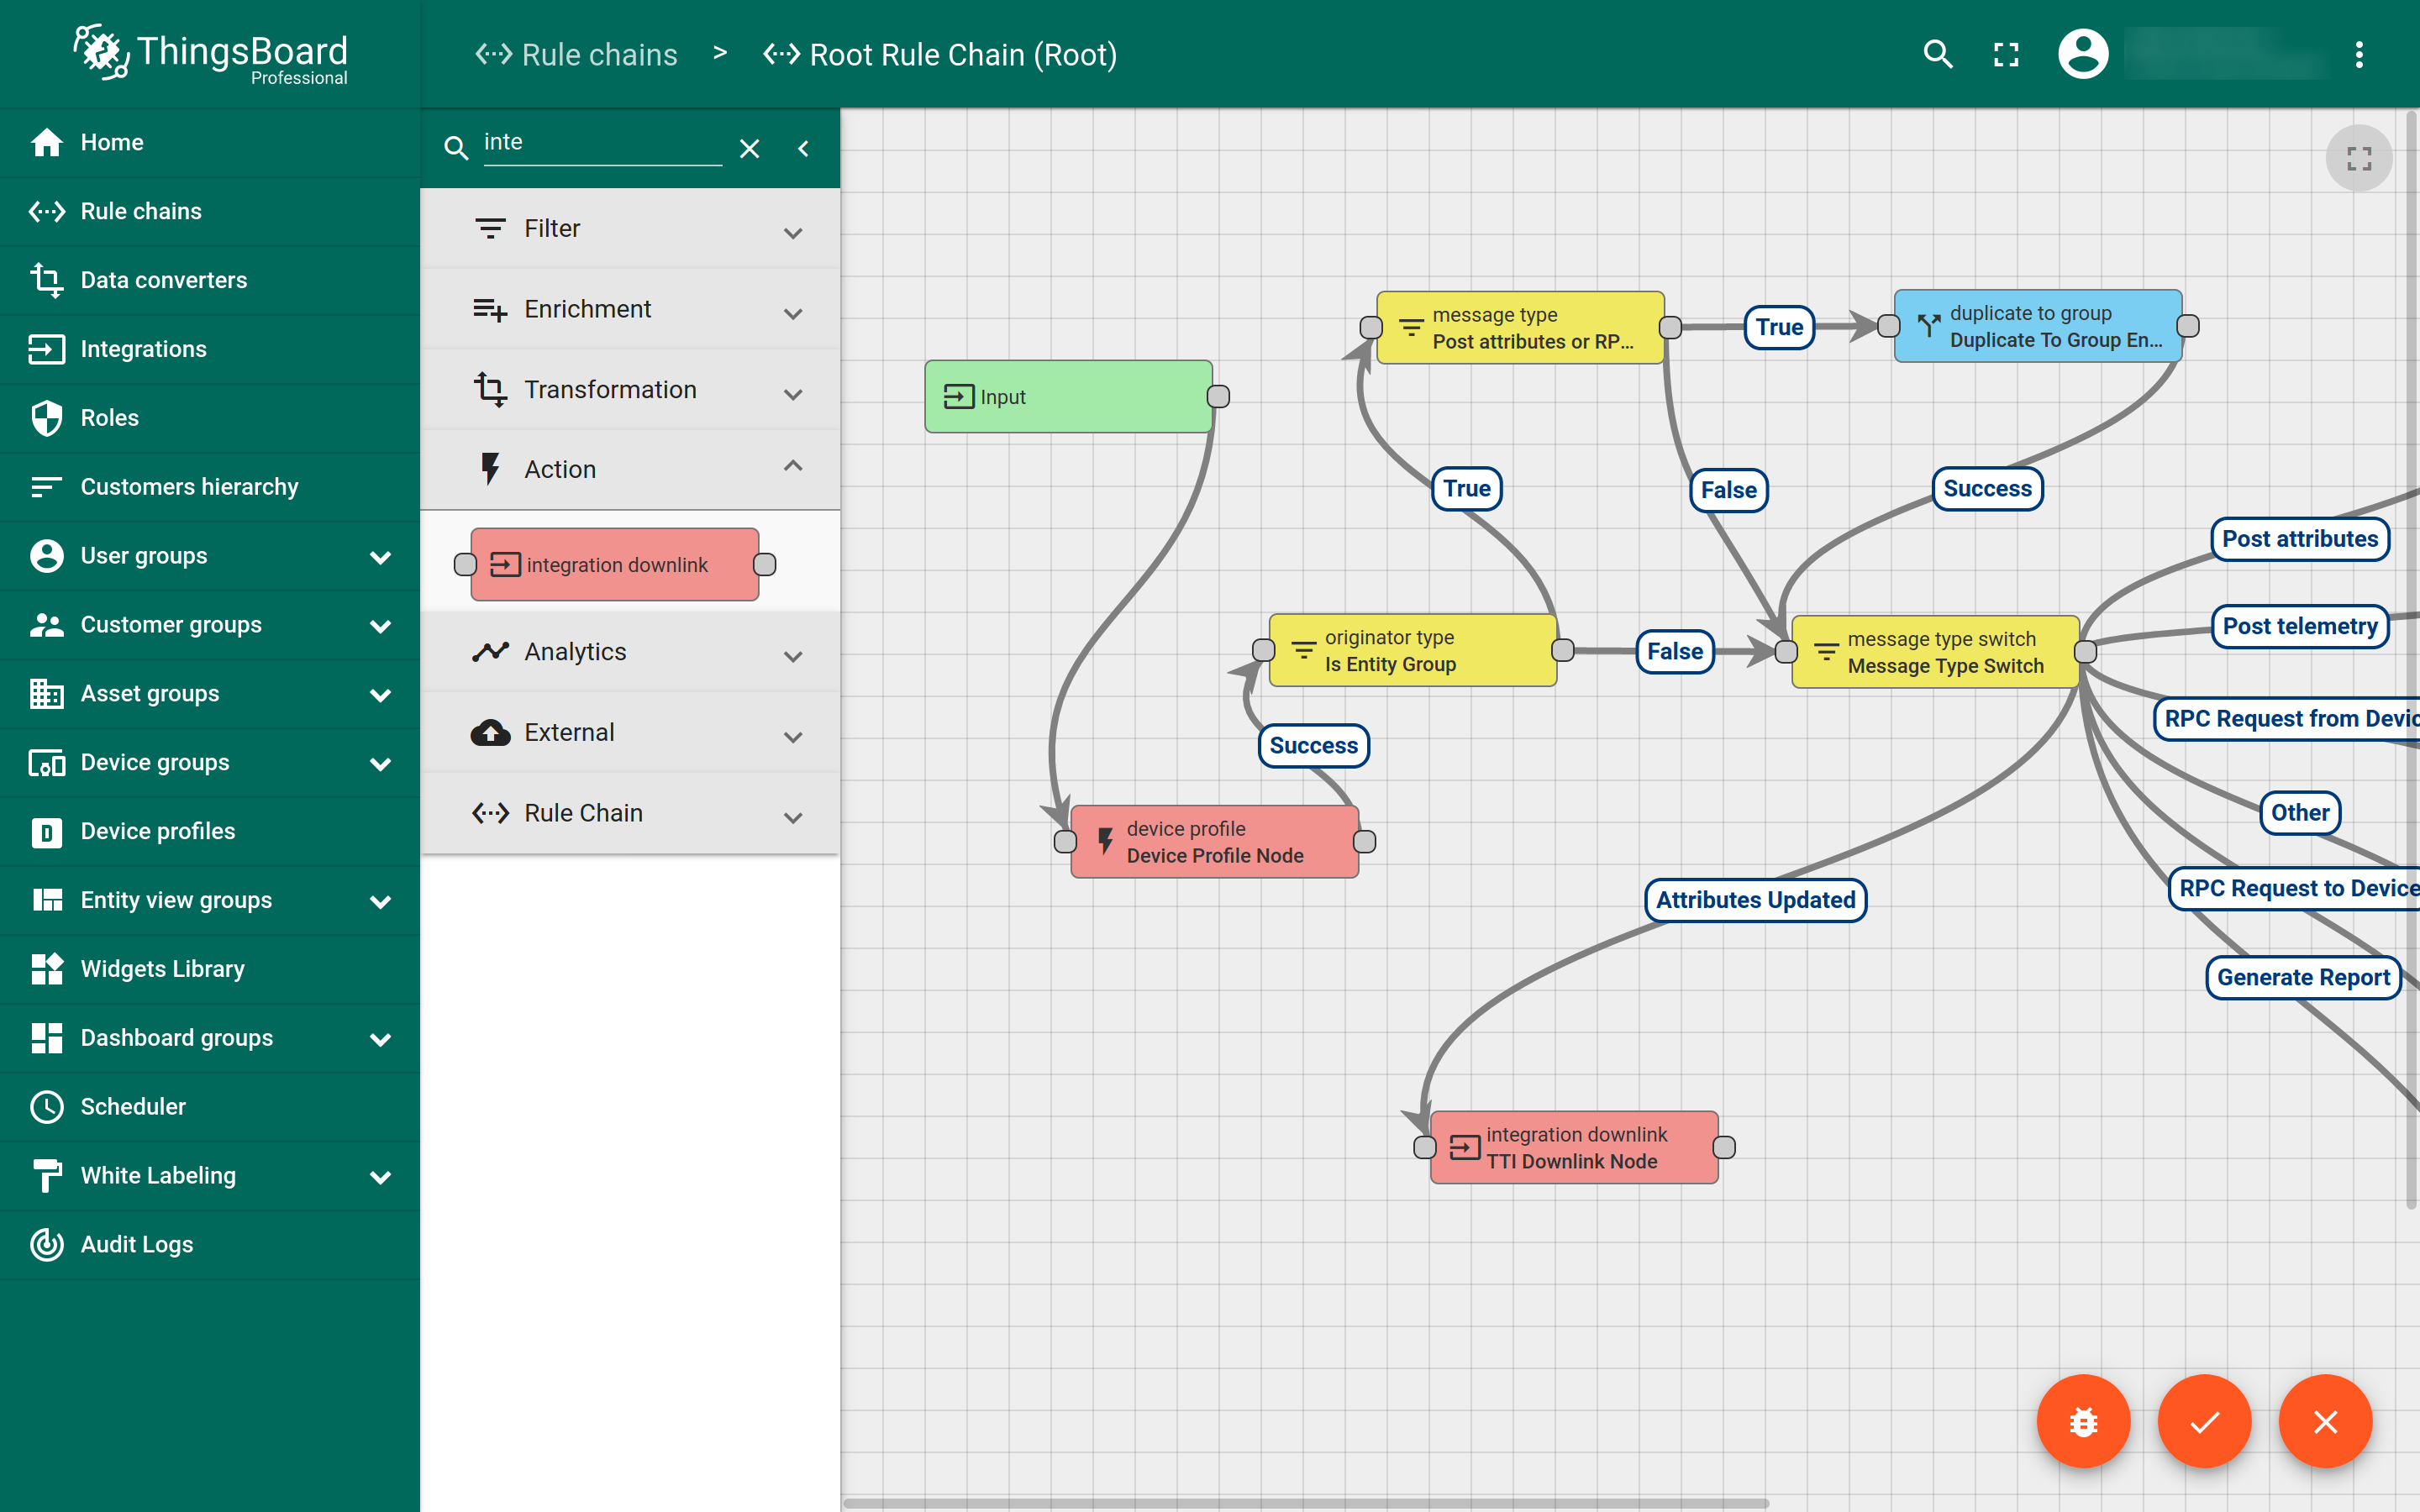
Click Apply changes in the bottom right corner.
Go back to your device’s settings by navigating to Device groups → All and selecting your device.
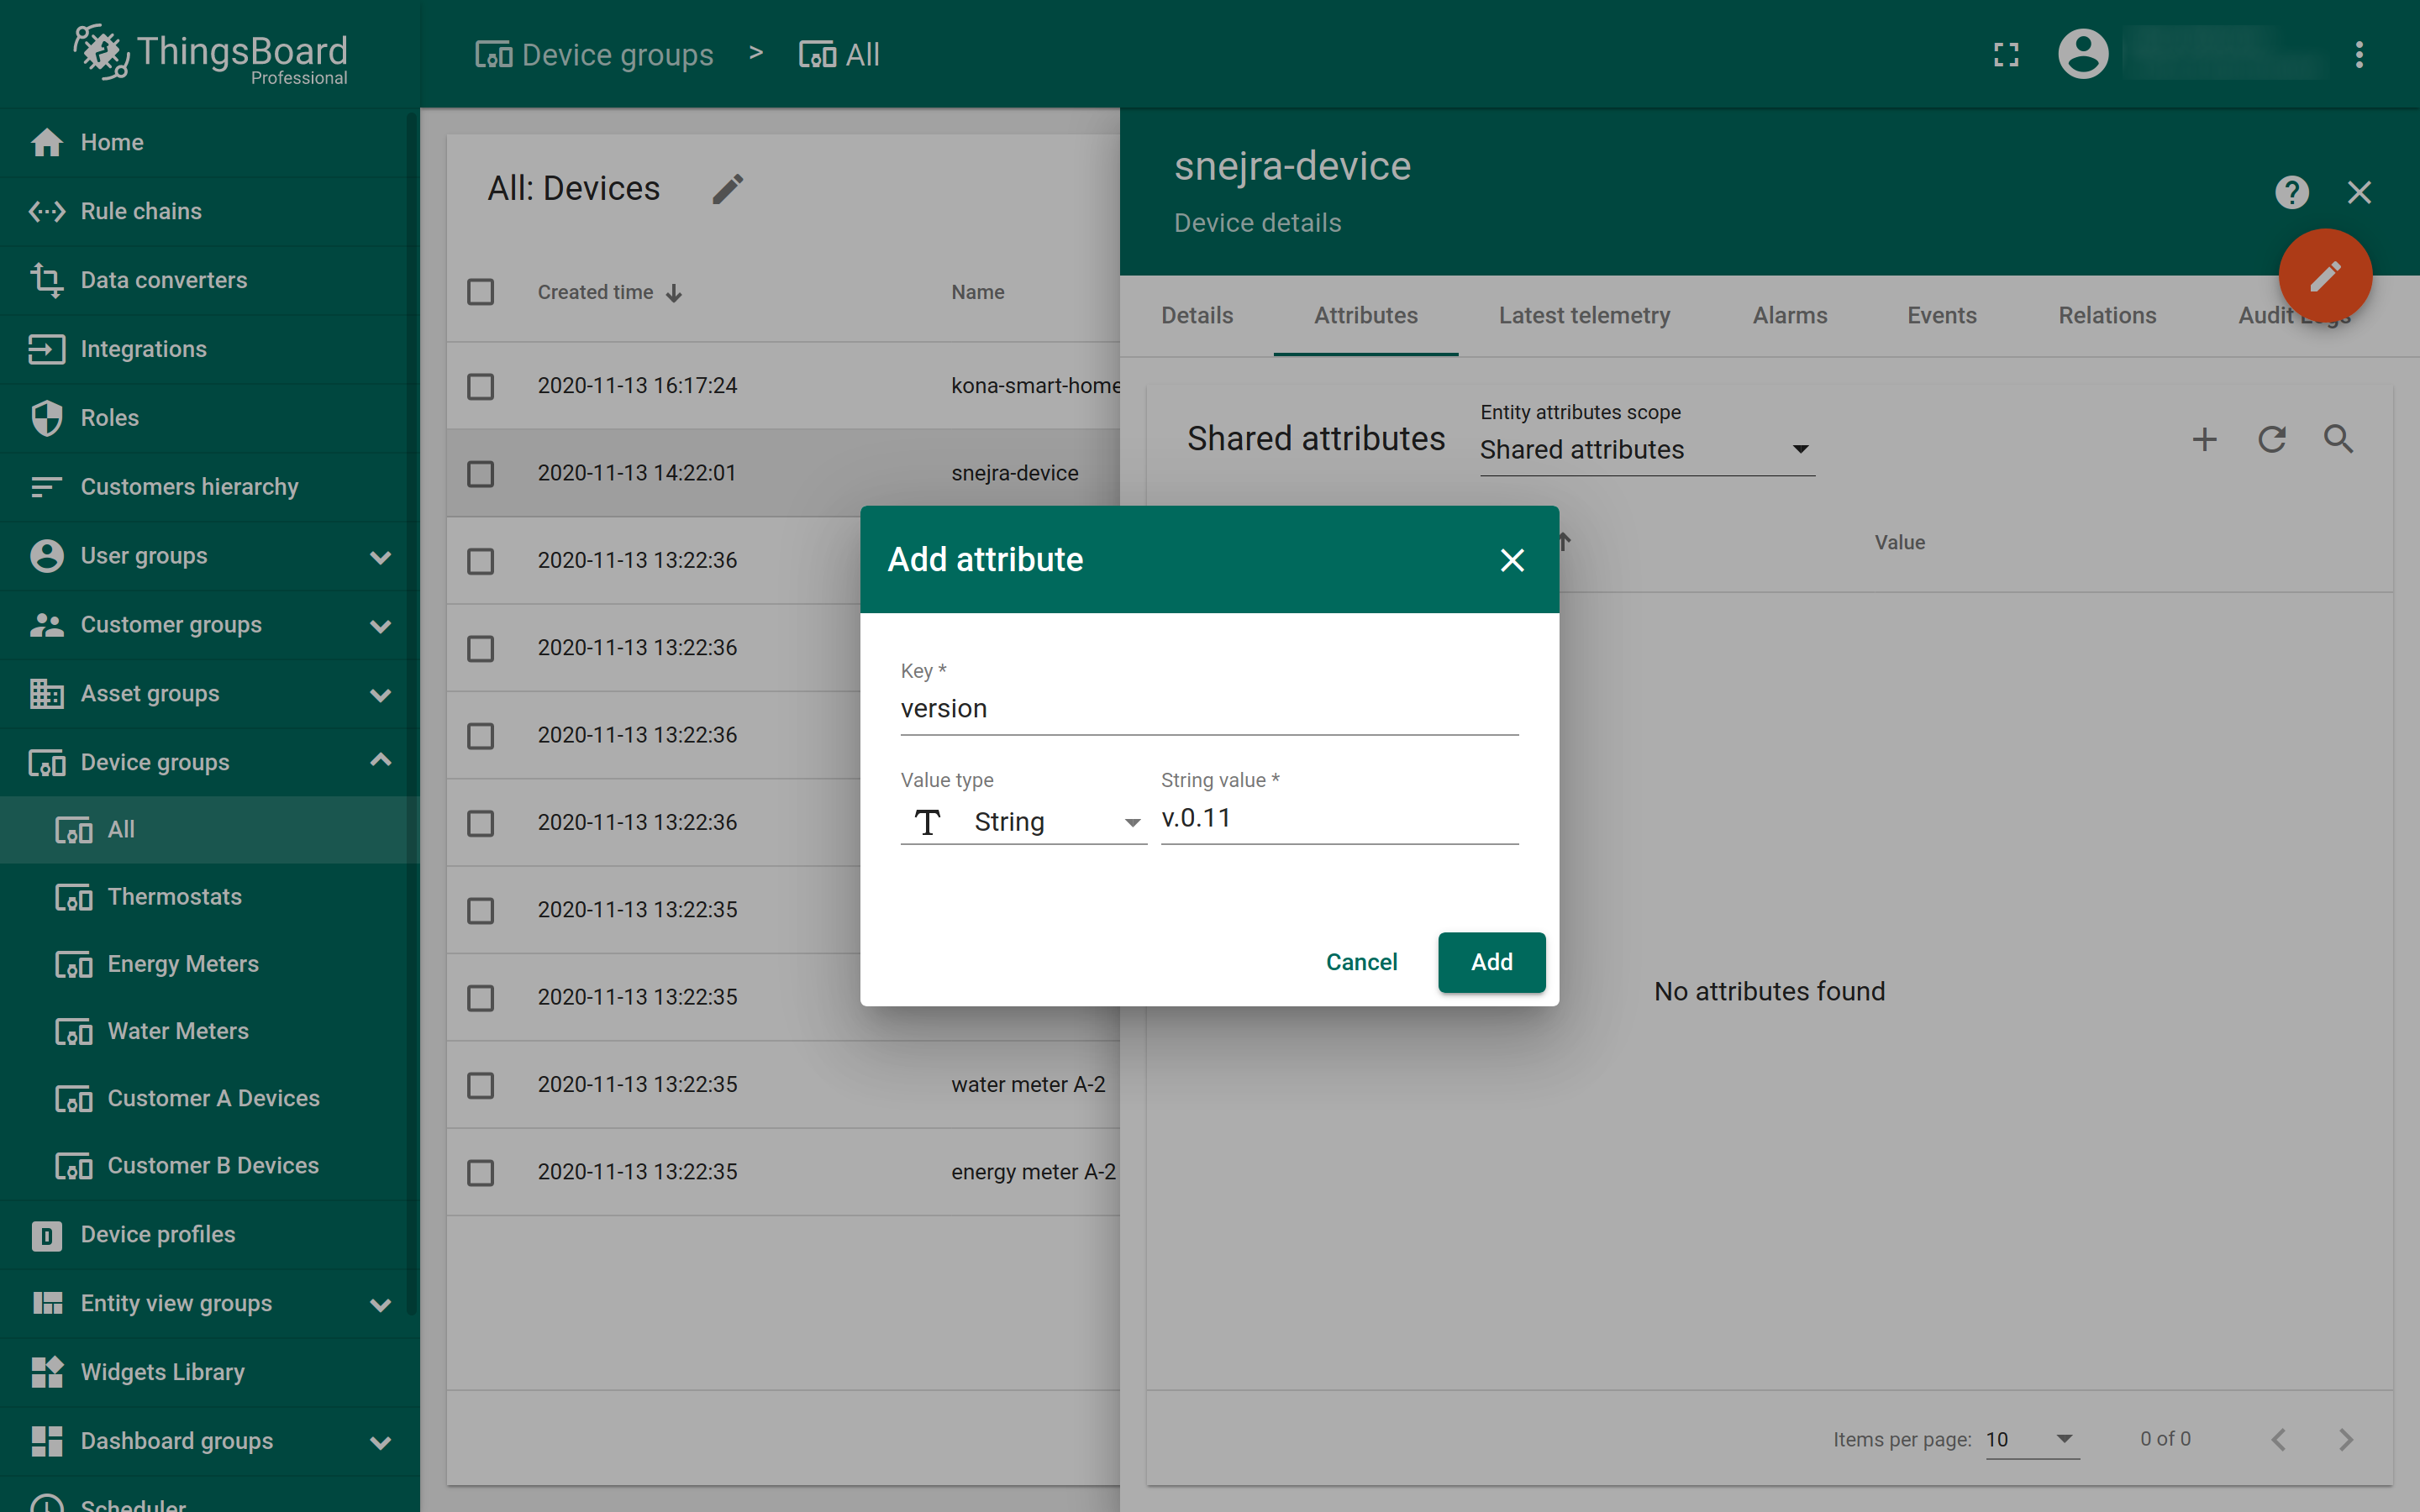
Switch to the Attributes tab, choose Shared attributes in the Entity attributes scope list, then click the + in the upper right corner to add a new shared attribute.
Enter version in the Key field and v.0.11 in the String value field. Click Add to finish.
By updating the Value of the shared attribute, you are scheduling a downlink message to be sent to your end device. To validate this, go to The Things Stack and find downlink message appearing in the Live data tab of your end device. The frm_payload attribute inside the data object of this message will contain Base64 encoded value of the shared attribute. For example, the frm_payload will be di4wLjEx for the shared attribute value v.0.11.