The LtAP LTE kit is a compact weatherproof wireless access point with a built-in cellular modem that supports 4G (LTE) connectivity.
Connect to the LtAP’s built-in high power 2.4 GHz 802.11B/G/N wireless and access the LTE network from your phone or any other wireless device. The LtAP LTE kit also has one Gigabit Ethernet LAN port for wired devices.
For more info, see Mikrotik’s official product page.
Features:
- 2.4 GHz AP in a rugged case
- LTE installed in miniPCIe slot
- Second miniPCIe slot for expansions
- Three Mini SIM slots
- Gigabit Ethernet port
- Built-in GPS
- Many powering options (DC jack, POE-in, automotive)
- Serial port and full size USB for other devices
- Perfect for cars or outdoor mobile applications
Warning:
Currently, this gateway does not support changing frequency channels.Prerequisites
- User account on The Things Stack with rights to create Gateways.
- MikroTik LtAP kit connected via Ethernet, LTE or LTE-M.
- A web browser (see section Configuration via Browser), or the MikroTik Mobile App installed on a smartphone.
Registration
Create a gateway by following the instructions for Adding Gateways. The EUI of the gateway can be found on the back panel of the gateway under the field GW ID, or under the Gateway ID in the LoRa tab of the MikroTik web GUI.
Configuration via Browser
The MikroTik Routerboard exposes a WiFi Access Point (AP) with SSID MikroTik-xxxxxx, where xxxxxx are the last 6 digits of the device’s MAC Address.
Use your PC, tablet or smartphone to connect to this AP. You will not need a password to connect to this AP.
Open a browser to http://192.168.88.1/webfig/#Interfaces.
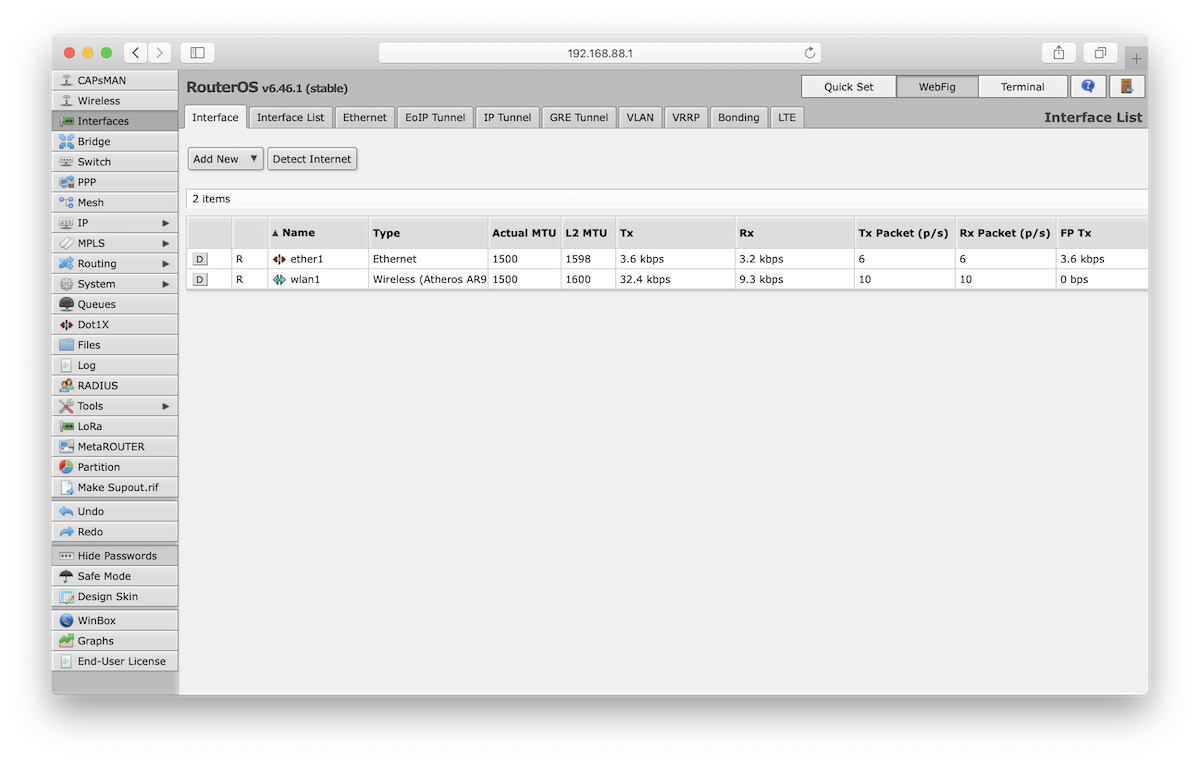
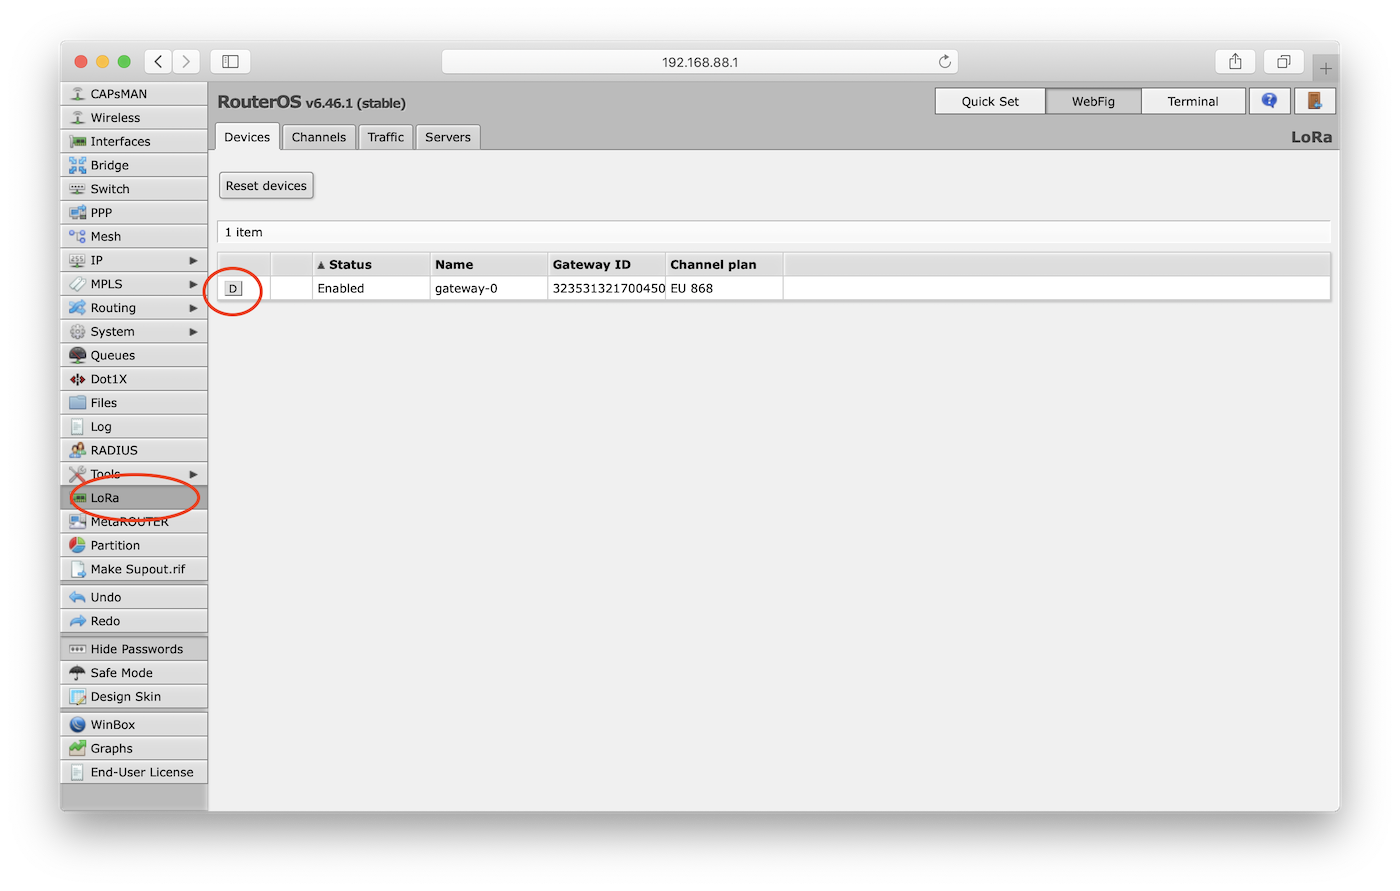
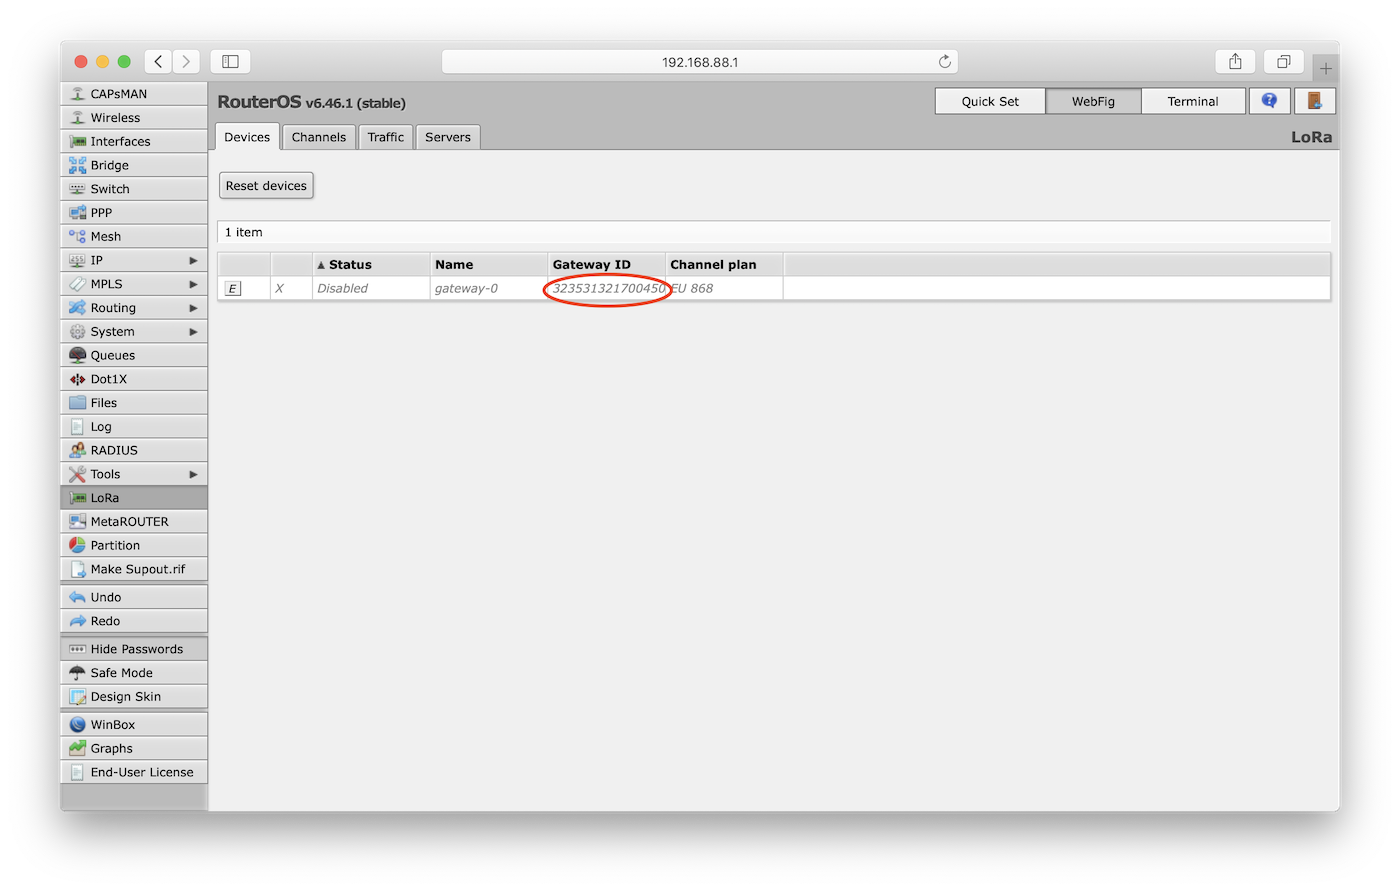
Select LoRa on the left hand menu. The status of the gateway should be Disabled - if needed, press the D button to disable it.
If you do not see any devices listed in the Devices tab of the LoRa menu, you will need to enable the LoRa interface first. To do so, click the Terminal button in the upper right corner and enter the command:
system routerboard usb set type=mini-PCIe
The Gateway ID you see here is the Gateway EUI you need to register the gateway in The Things Stack.
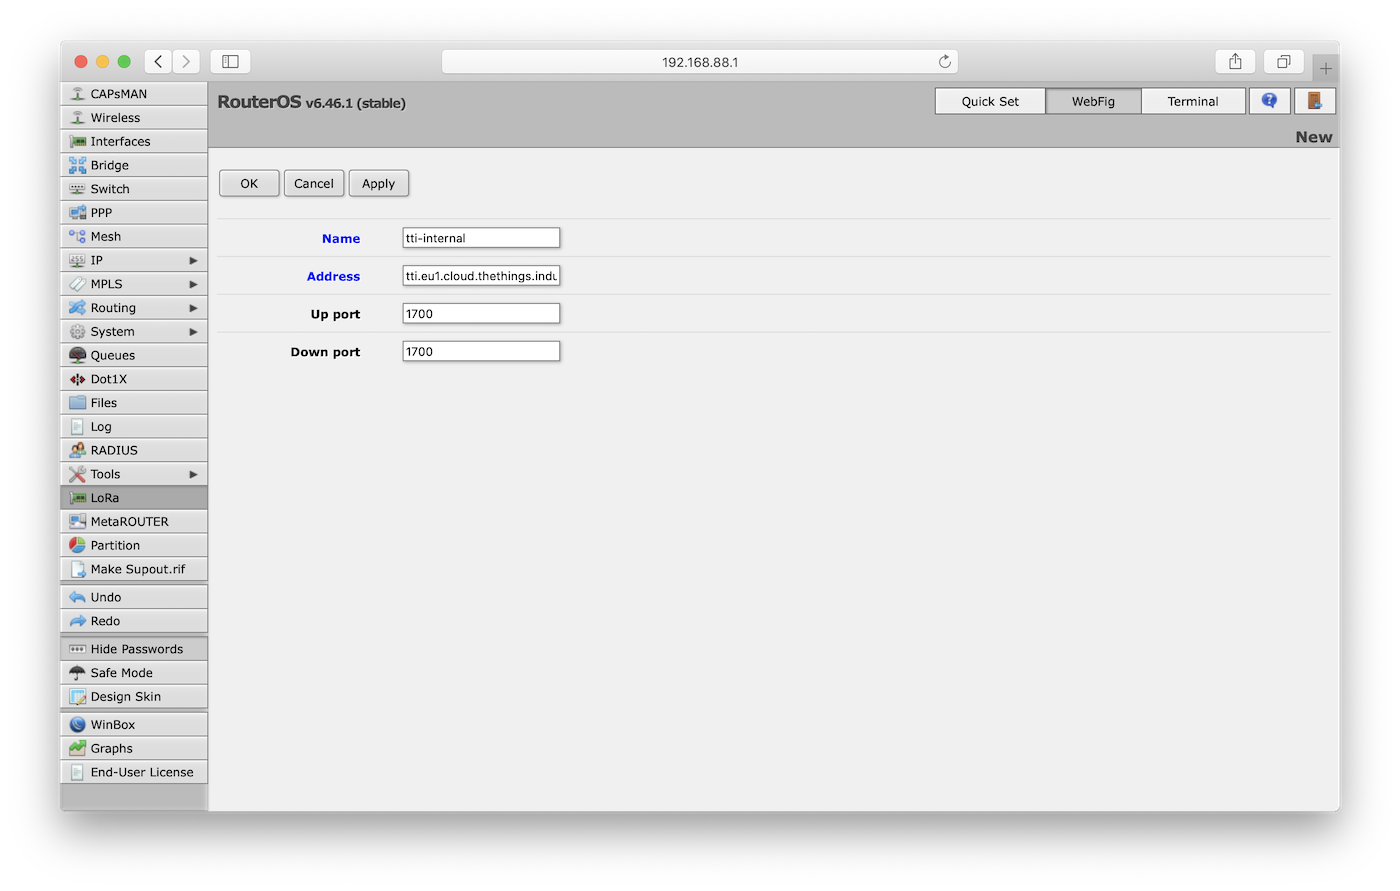
From the top menu, select the Servers Tab and press the Add New button.
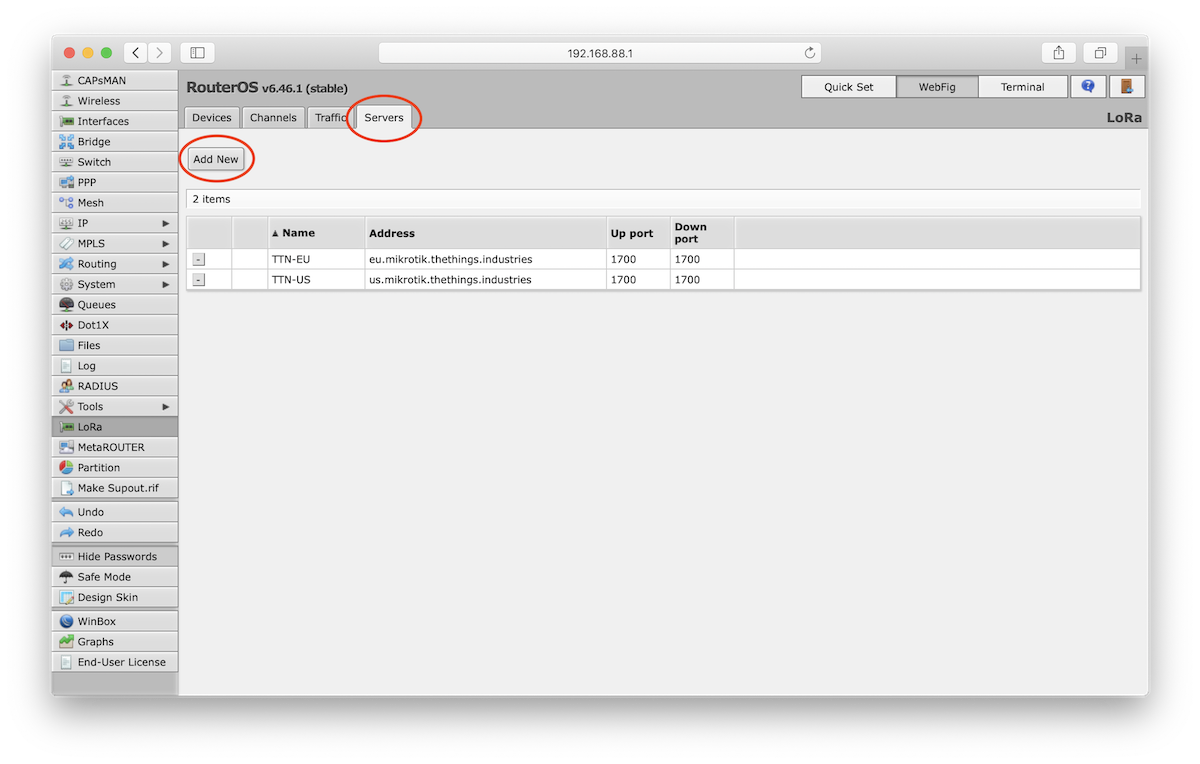
Edit the server parameters.
- Name: A distinct name
- Address: Address of your The Things Stack deployment. See Server Addresses.
- Up port: UDP upstream port of the Gateway Server, typically
1700. - Down port: UDP downstream port of the Gateway Server, typically
1700.
Press OK to save the parameters.
From the top menu, select the Devices tab. Click the Gateway ID to configure it.
In the device settings, click the Network Servers drop-down menu to view available servers. Choose the server you just created.
Select Public for the Network and click OK to save these parameters.
Press the E button to enable the gateway device (it is enabled when E becomes D) and the device status will update.
If your configuration was successful, your gateway will connect to The Things Stack after a couple of seconds.