Arduino MKR 1310
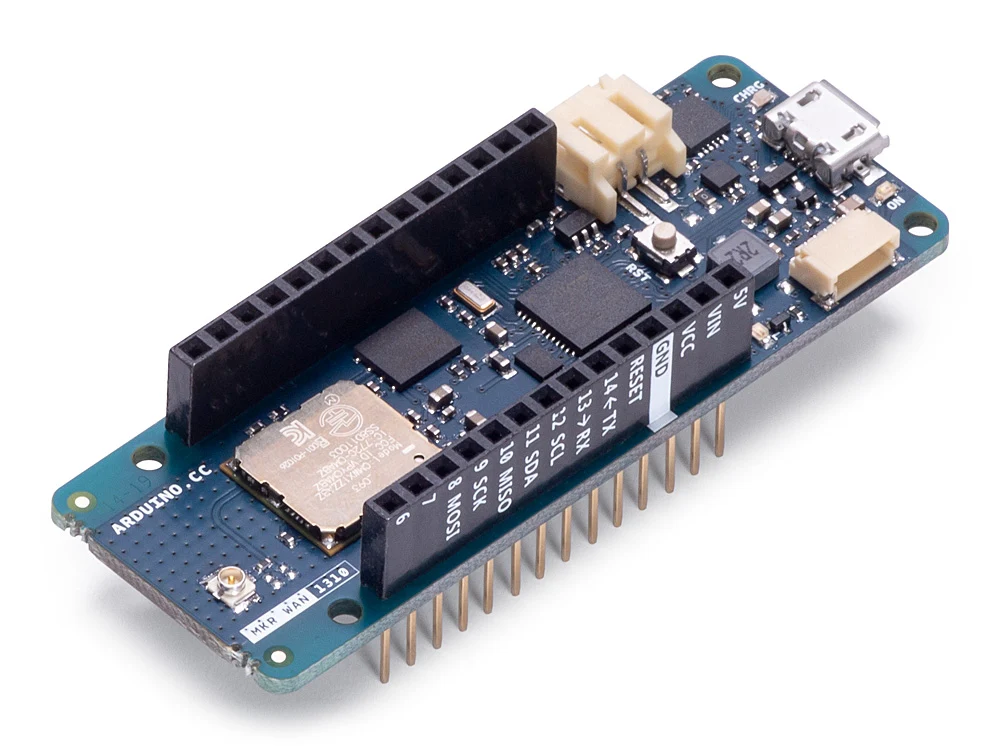
This section will help you get started with using The Arduino MKR WAN 1310 on The Things Stack.
The Arduino MKR WAN 1310 is a board that combines the power of an ATMEL SAMD21 microcontroller and the communication capabilities of the Murata LoRa® module. It is designed to integrate the core’s low power-consumption and high performance with the ease-of-use of Arduino’s environment, making this board a practical and cost effective solution for makers seeking to add LoRa® connectivity to their projects, with minimal previous experience in networking.
The Arduino MKR WAN 1310 is programmed using the Arduino Software (IDE).
Setting up Arduino IDE
The Arduino IDE allows you to write code using the Arduino programming language (C/C++), compile (verify), and upload it to The Arduino MKR WAN 1310. It supports Windows, Mac OS, Linux, and Chrome OS.
Download the latest release of the Arduino Software (IDE), install it on your operating system and run it.
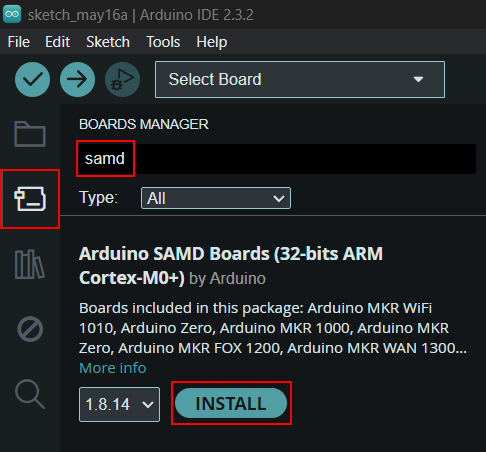
Before we get to programming you need to install a few additional things. First is the drivers for the board. This can be done by clicking the second icon in the left-hand menu or navigating to Tools > Board > Board Manager…. Here you need to look for the Arduino SAMD boards (32-bits ARM® Cortex®-M0+) package and install it.
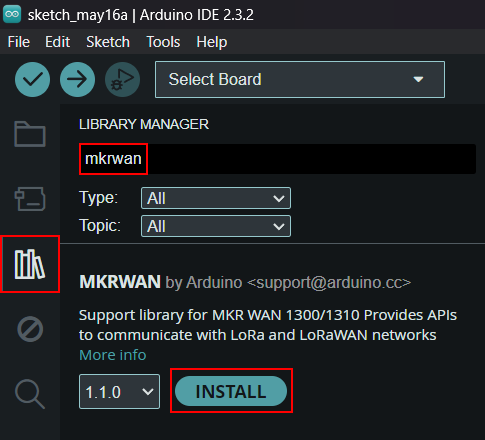
Then you need to install the library for the board. Click on the third icon in the left-hand menu or navigate to Tools > Manage libraries... In here search for MKRWAN and install it.
Note:
You might have noticed there is also a library named MKRWAN_v2 from Arduino. We used the MKRWAN library for this tutorial, but both libraries work. As the two libraries rely on two separate firmware, it is important that your device has the correct firmware installed. Updating it is done by running the File > Examples > MKRWAN / MKRWAN_v2 > MKRWANFWUpdate_standalone example from the corresponding library.Once you have downloaded the library, you will need to upload an example code from the MKRWAN library, called FirstConfiguration. You can find this in File > Examples > MKRWAN > FirstConfiguration.
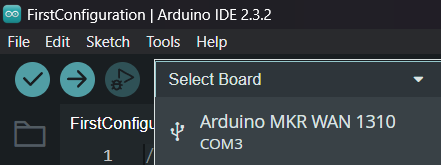
Then plug the Arduino into your computer. In the IDE, click on Select Board at the top, and select your Arduino MKR WAN 1310.
Note:
If your board does not show up in the dropdown, try a different cable. The cable might not be able to transfer data.Once that is done you can upload the file to the board (Using the -> button). Once the code is uploaded successfully, open the Serial Monitor. You can open it by clicking the icon in the top-right corner.

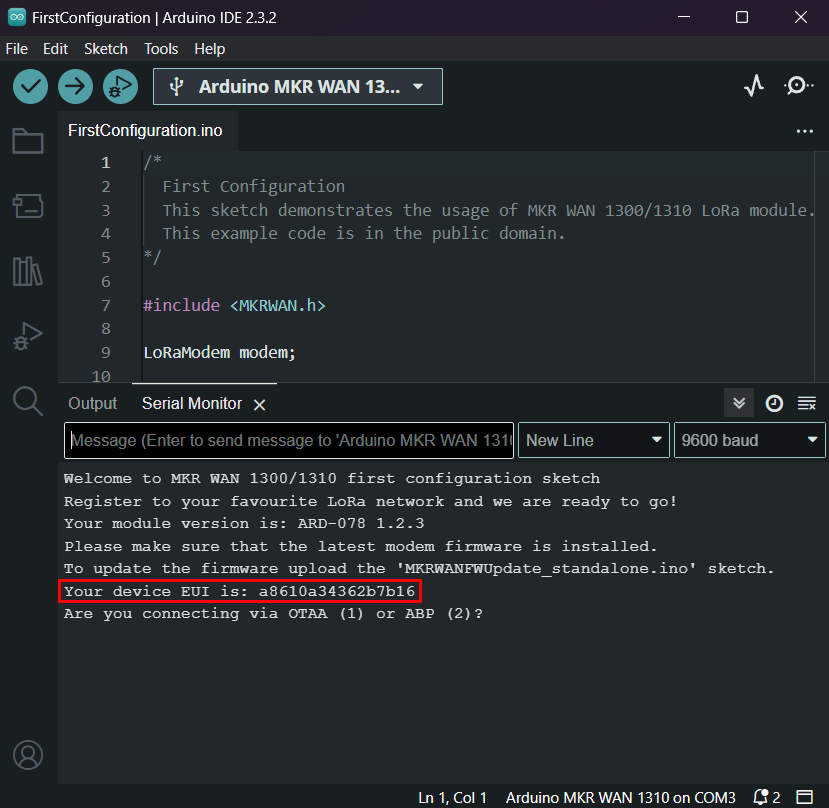
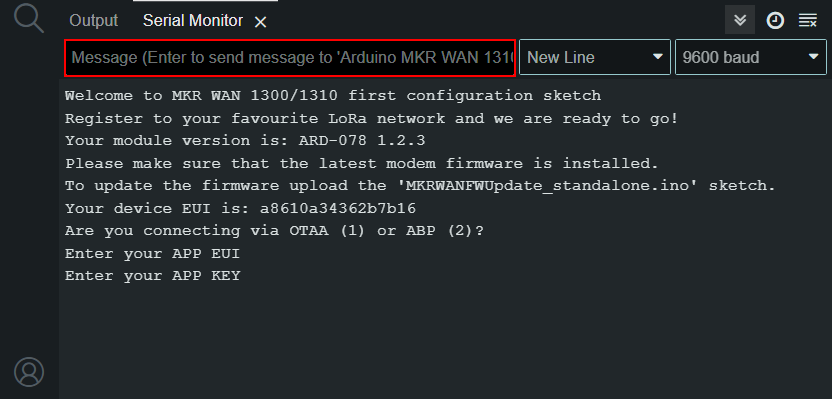
Here you will find the unique Device EUI as displayed in the picture below:
Note:
If nothing appears in the serial monitor, press the reset button on the MKR WAN 1310.Now copy the Device EUI and save it, as it will be used for connecting to The Things Stack.
Registering on The Things Stack
Move to The Things Stack Console, create an application and click register device. Check Adding Devices for more info.
Here enter the following details:
- End device brand:
Arduino SA - Model:
MKR WAN 1310 - Hardware Ver.:
1.0 - Firmware Ver.: Check in the Arduino IDE Serial Monitor ↓
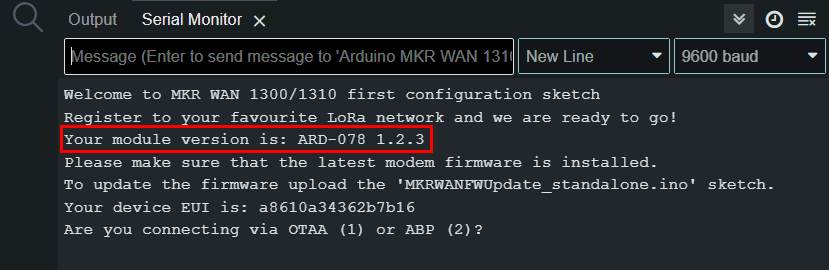
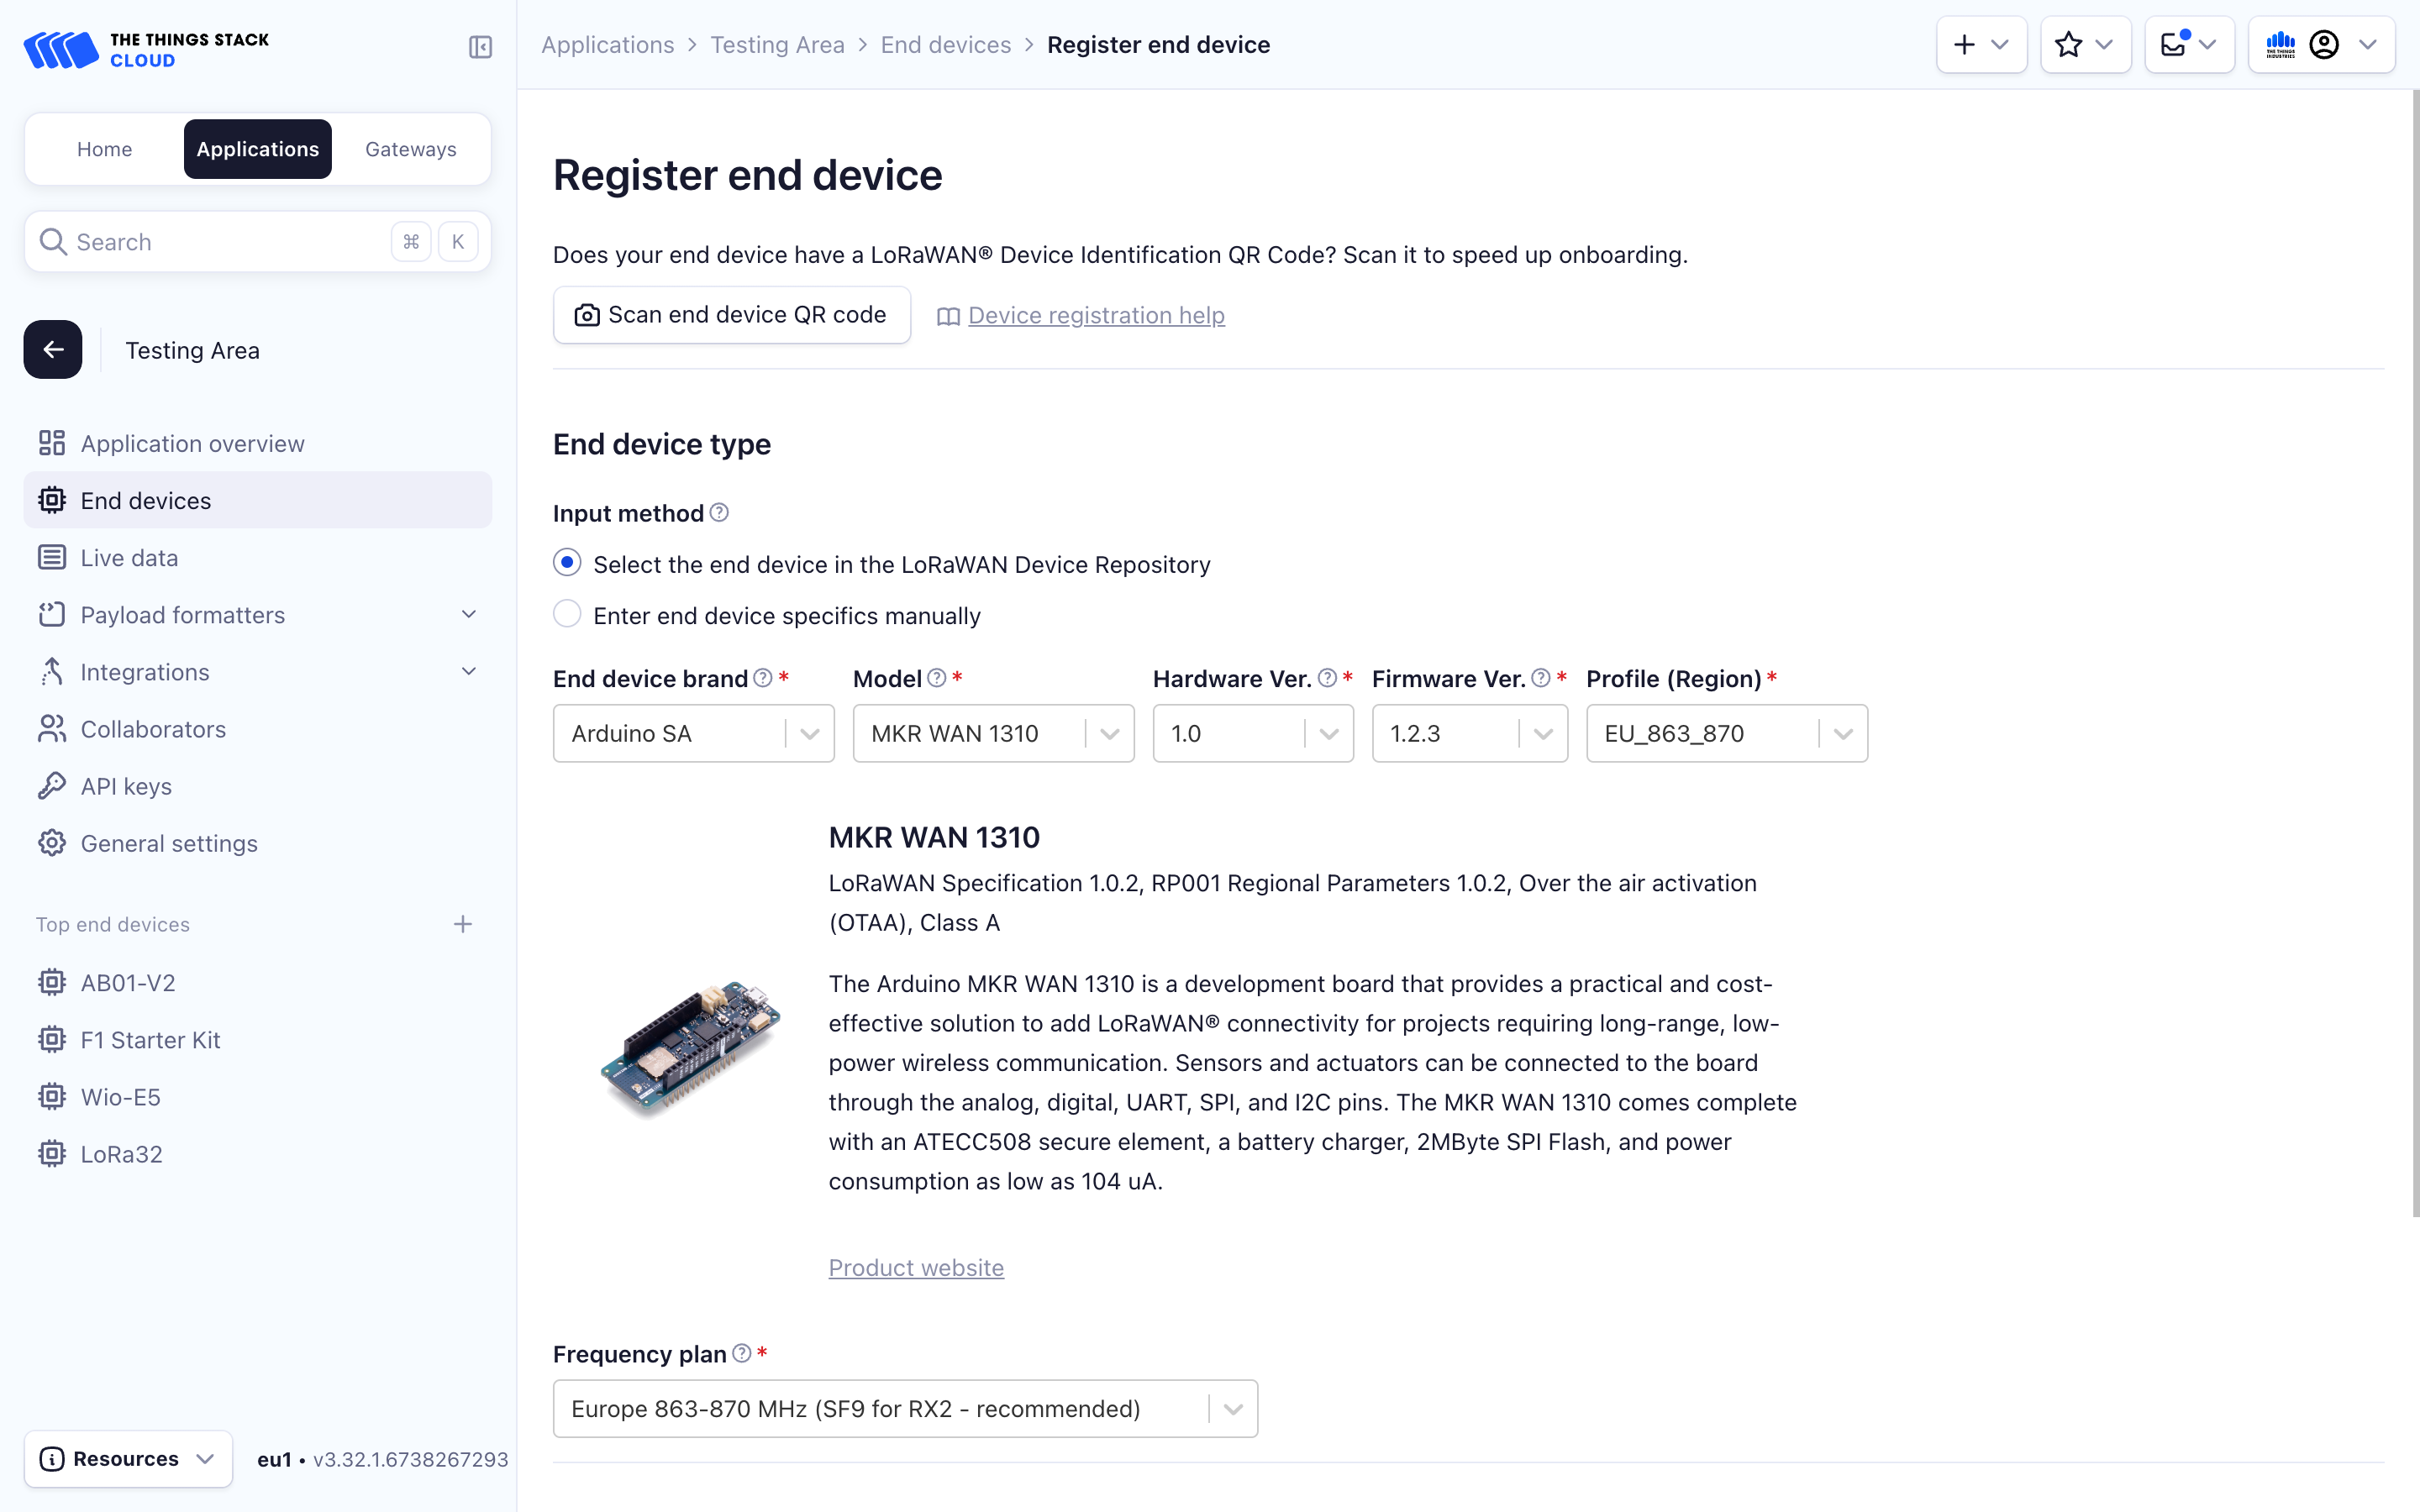
For the Provisioning information, enter the following details:
- JoinEUI:
0000000000000000 - DevEUI: The Device EUI value that was previously copied from Arduino IDE Serial Monitor
- AppKey: Generate by clicking the Generate button
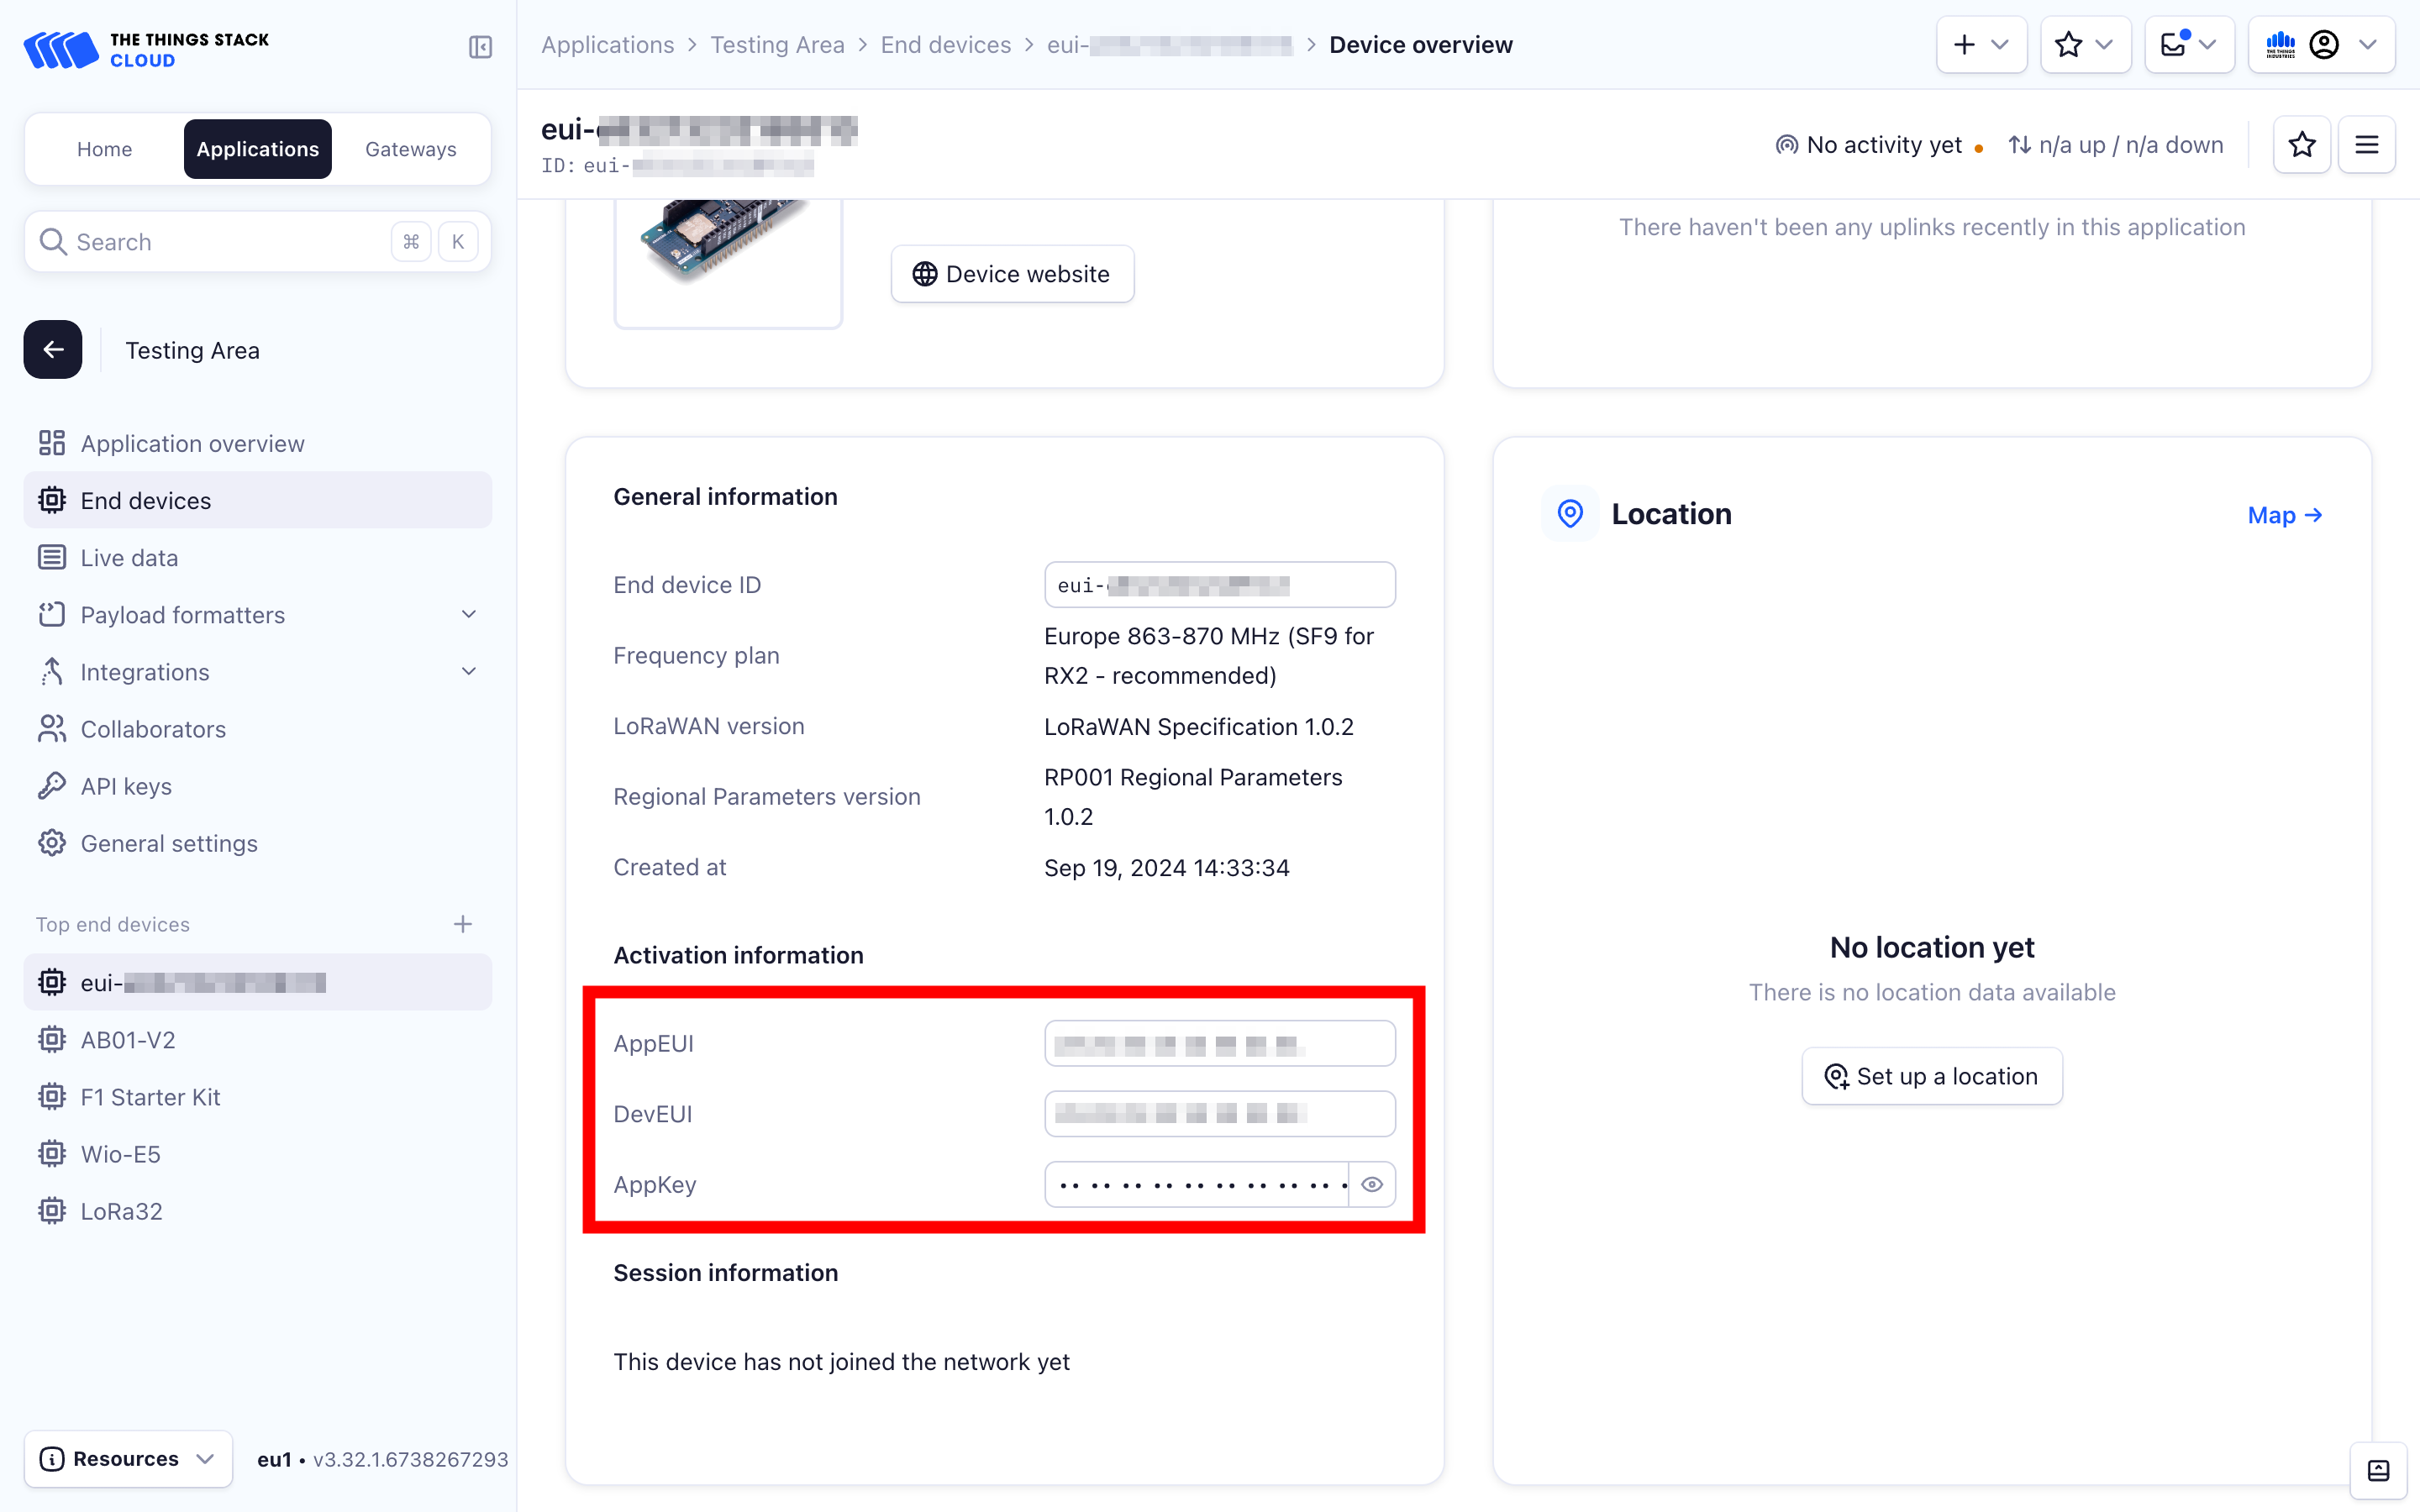
In the device overview you can now see three parameters in the Activation information section: AppEUI, DevEUI and AppKey. You are going to need these values for the next steps.
Connecting board to The Things Stack
Now let’s go back to the FirstConfiguration sketch again. To be safe, reset your board and open the Arduino IDE Serial Monitor again. Once the program starts, it will start asking questions in the Serial Monitor. The first one is if you are using OTAA or ABP. We are going to use OTAA, so you can enter a 1 in the message field and hit enter. For why we are using OTAA, check ABP vs OTAA.
Then it will ask you for your APP EUI and APP KEY. Enter values for these parameters from the Activation information fields inside The Things Stack Console device overview. Once you have entered them, the device will try to connect to The Things Stack.
Now go to The Things Stack Console Live data tab and you should see messages arriving, which should mean the device is connecting.
As the device payload comes to The Things Stack in a HEX format, you will need to decode it using a payload formatter. To do this, in your application on The Things Stack, navigate to Payload formatters.

Select the Custom Javascript formatter from the Formatter type dropdown.
Enter the following code in the Formatter code field:
function Decoder(bytes, port) {
  var result = "";
  for (var i = 0; i < bytes.length; i++) {
    result += String.fromCharCode(parseInt(bytes[i]));
  }
  return { payload: result };
}
That was it! Now you can check out our example project or start creating your own.