SG Wireless F1 Starter Kit
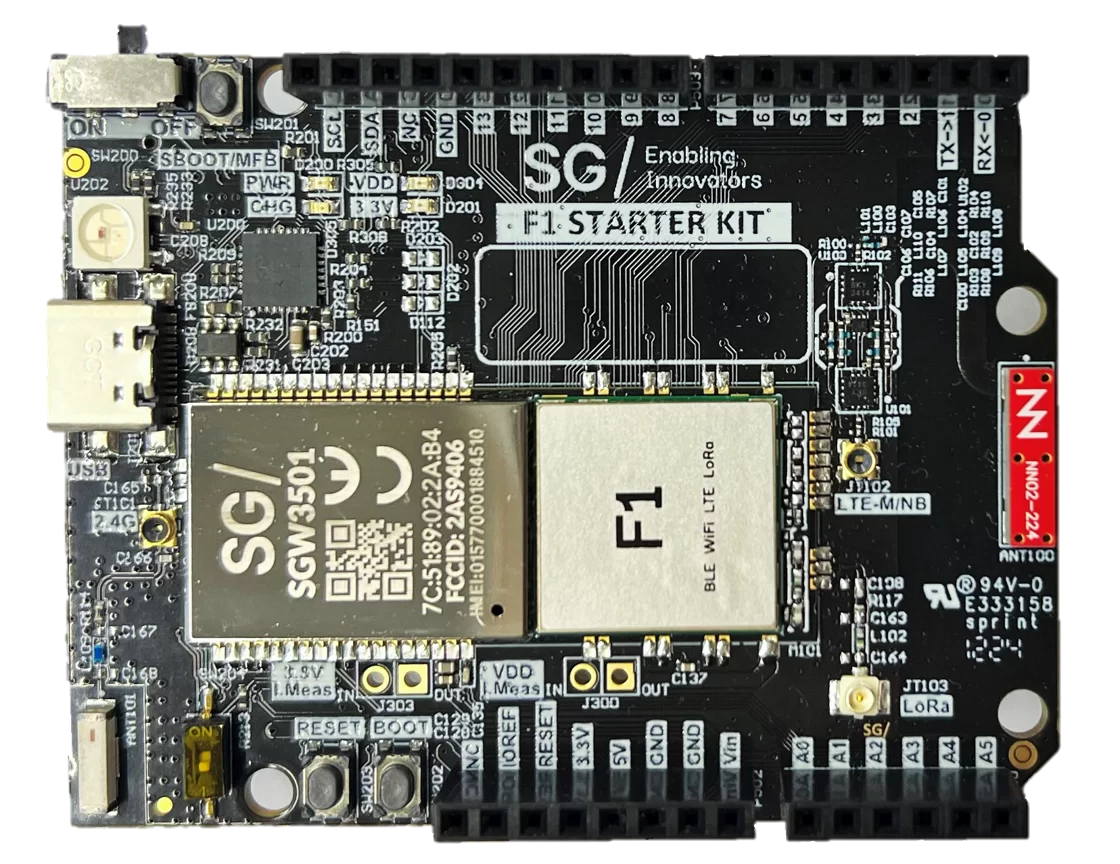
The SG Wireless F1 Starter Kit is an Arduino form factor board based on the F1 Smart Module, which features Wi-Fi, Bluetooth LE, LTE and LoRaWAN connectivity. It boasts a nano-SIM holder, micro-SD card holder and a li-po battery connector.
In order to program the F1 Starter Kit, we must use Microsoft Visual Studio Code and the CtrlR plugin.
You will need the latest version of Visual Studio Code to proceed, which can be downloaded and installed here.
Setting up CtrlR Plugin
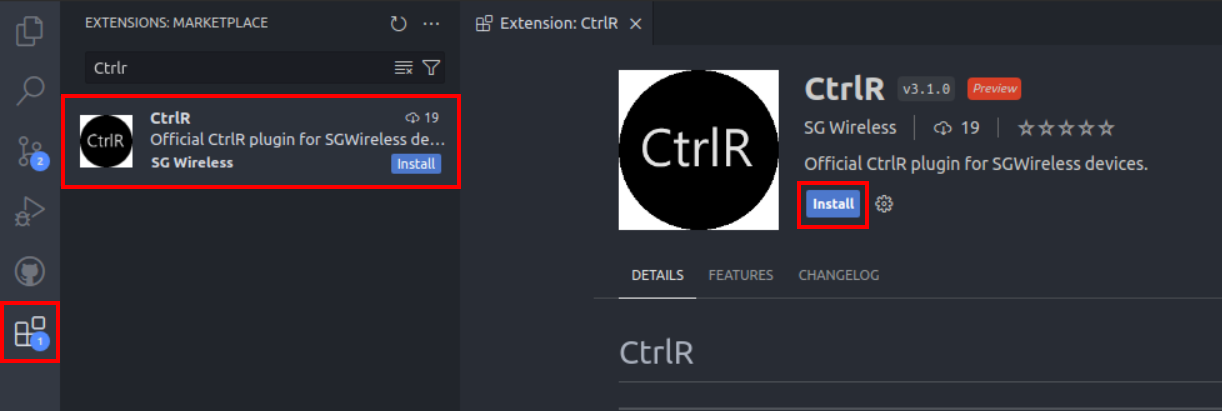
Open Visual Studio Code and navigate to Extensions. Search for ctrlr and click Install.
Connect your F1 Starter Kit to your PC and turn it on (SW200 switch from OFF to ON).
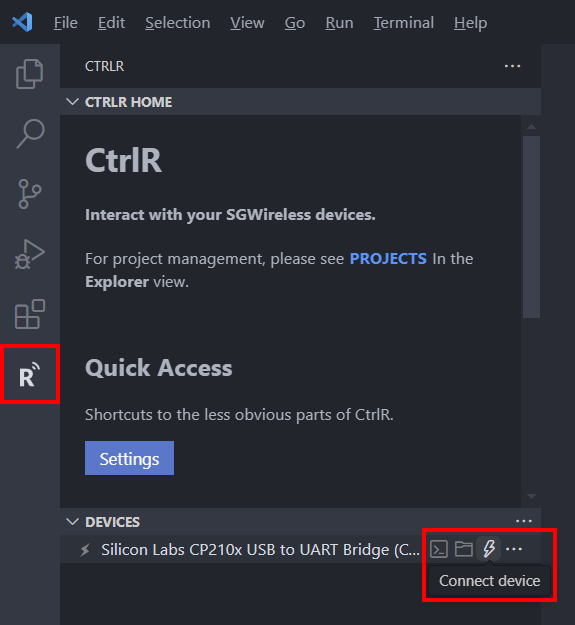
Head over to the CtrlR tab and click on the Connect device button (lightning bolt) for the device.
Note:
If your PC doesn’t have the driver installed, an unknown device will be shown in your PC’s Device Manager. Download and install the Virtual COM Port driver, and the device should show up in your Device Manager.Then when it’s connected, click the File explorer button.
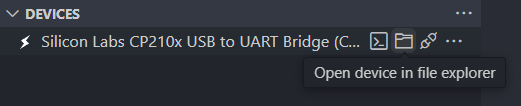
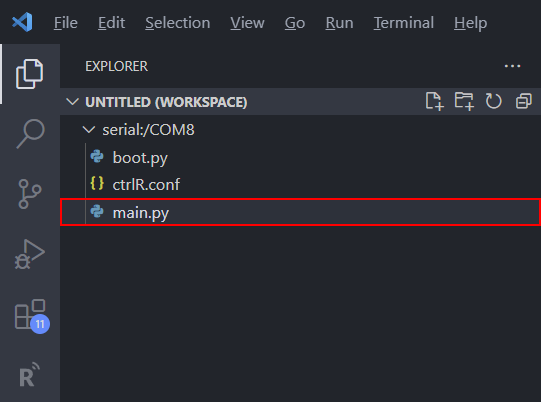
When the Explorer opens, open the folder structure of the device and open main.py.
In the main.py file, replace the code with the following one:
import logs
import lora
import ubinascii
import time

logs.filter_subsystem('lora', False)

lora.mode(lora._mode.WAN)

# configure the stack on region EU-868 with Class A
lora.wan_params(region=lora._region.REGION_EU868, lwclass=lora._class.CLASS_A)

lora.commission(
    type    = lora._commission.OTAA,
    version = lora._version.VERSION_1_1_X,
    DevEUI  = ubinascii.unhexlify('0000000000000000'),
    JoinEUI = ubinascii.unhexlify('0000000000000000'),
    AppKey  = ubinascii.unhexlify('00000000000000000000000000000000'),
    NwkKey  = ubinascii.unhexlify('00000000000000000000000000000000')
    )

lora.join()

while lora.is_joined() == False:
    print("wait joining ...")
    time.sleep(2)
    pass
print("-- JOINED --")
lora.stats()

lora.port_open(1)

def get_event_str(event):
    if event == lora._event.EVENT_TX_CONFIRM:
        return 'EVENT_TX_CONFIRM'
    elif event == lora._event.EVENT_TX_DONE:
        return 'EVENT_TX_DONE'
    elif event == lora._event.EVENT_TX_TIMEOUT:
        return 'EVENT_TX_TIMEOUT'
    elif event == lora._event.EVENT_TX_FAILED:
        return 'EVENT_TX_FAILED'
    elif event == lora._event.EVENT_TX_CONFIRM:
        return 'EVENT_TX_CONFIRM'
    elif event == lora._event.EVENT_RX_DONE:
        return 'EVENT_RX_DONE'
    elif event == lora._event.EVENT_RX_TIMEOUT:
        return 'EVENT_RX_TIMEOUT'
    elif event == lora._event.EVENT_RX_FAIL:
        return 'EVENT_RX_FAIL'
    else:
        return 'UNKNOWN'

def port_any_cb(event, evt_data):
    print('lora event [ {} ] --> data: {}'
        .format(get_event_str(event), evt_data))

lora.callback(handler=port_any_cb)

lora.duty_set(10000)
lora.enable_rx_listening()
lora.duty_start()

# schedule sending some test messages
i = 1000
while i < 1010:
    lora.send('1000', port=1, confirm=True, id = i)
    i = i + 1
Now we have our code in place, but we need credentials for connecting it to The Things Stack.
Onboarding to The Things Stack
The device has to be onboarded manually.
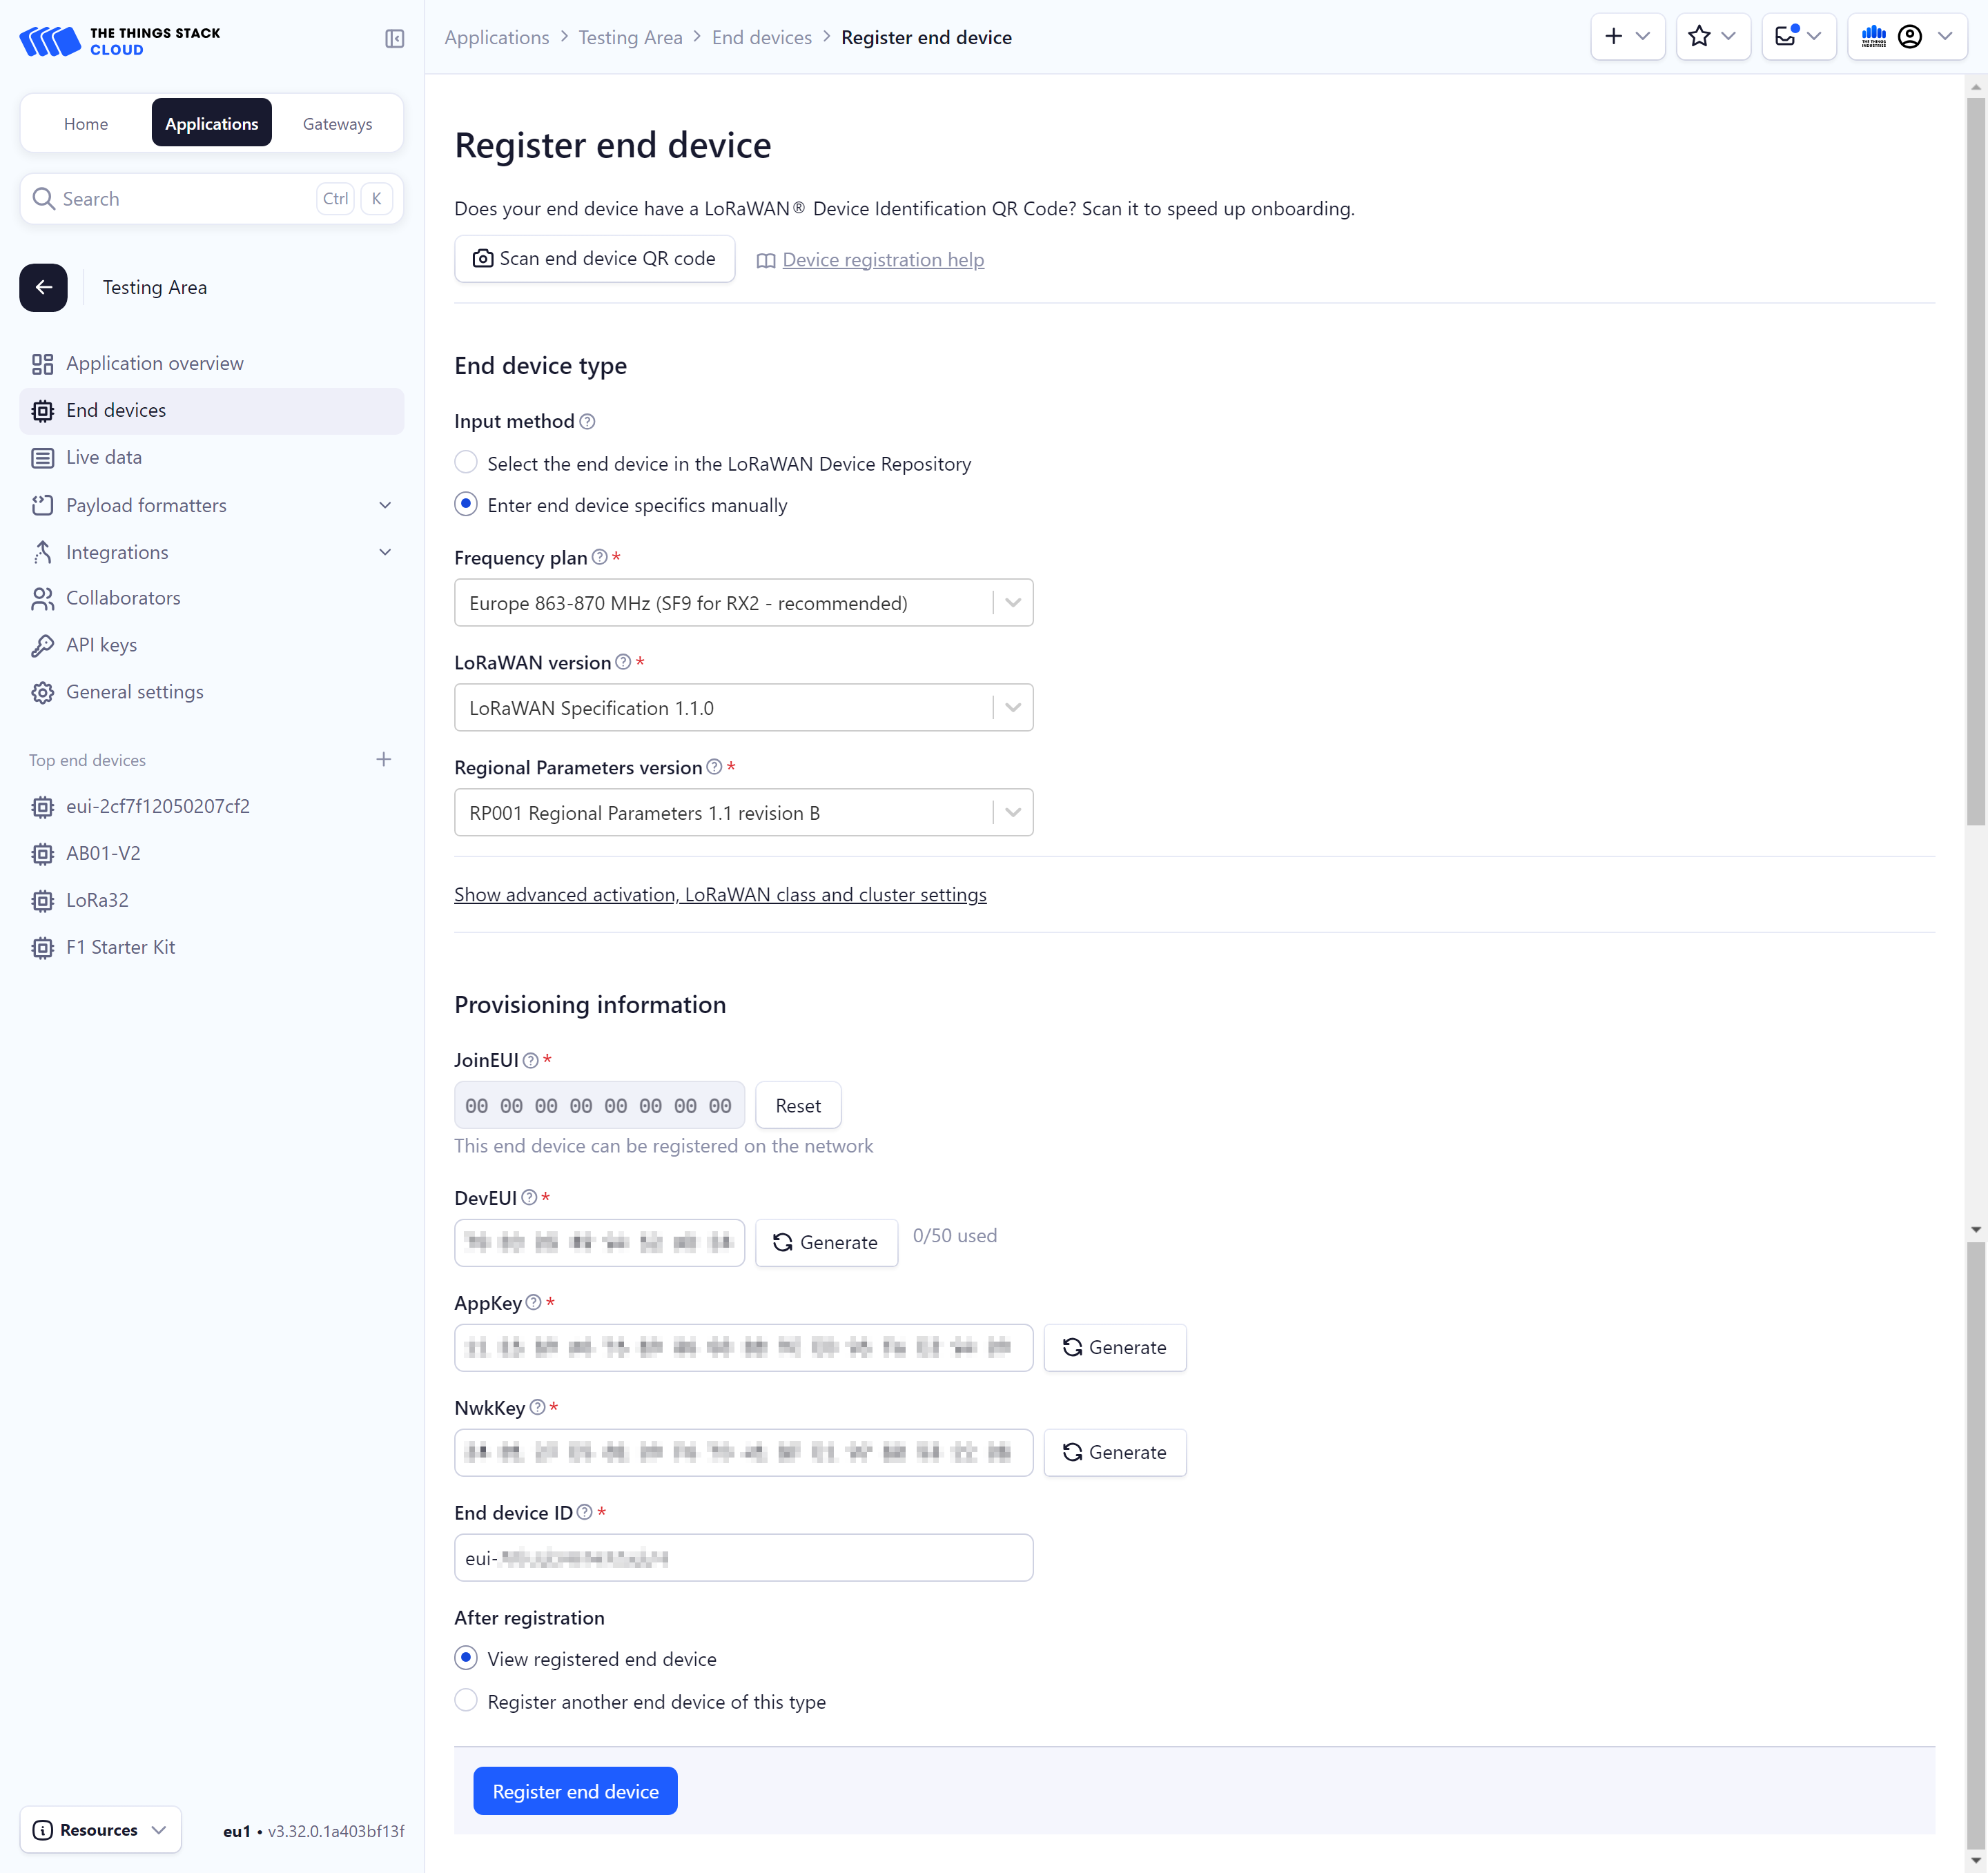
To onboard manually, in the End device type section, under Input Method, select the Enter end device specifics manually option. The Manually adding devices and Over the Air Activation (OTAA) guides explain this procedure in detail. Following details are specific to the F1:
- LoRaWAN version: LoRaWAN Specification 1.1.0
- Regional parameters version: RP001 Regional Parameters 1.1 revision B
For the Provisioning information, enter the following details:
- JoinEUI:
0000000000000000 - DevEUI, AppKey and NwkKey: Generate by clicking the Generate button.
After configuring your device, select the Register end device button.
Updating code
Go back to the code and locate this portion:
lora.commission(
    type    = lora._commission.OTAA,
    version = lora._version.VERSION_1_1_X,
    DevEUI  = ubinascii.unhexlify('0000000000000000'),
    JoinEUI = ubinascii.unhexlify('0000000000000000'),
    AppKey  = ubinascii.unhexlify('00000000000000000000000000000000'),
    NwkKey  = ubinascii.unhexlify('00000000000000000000000000000000')
    )
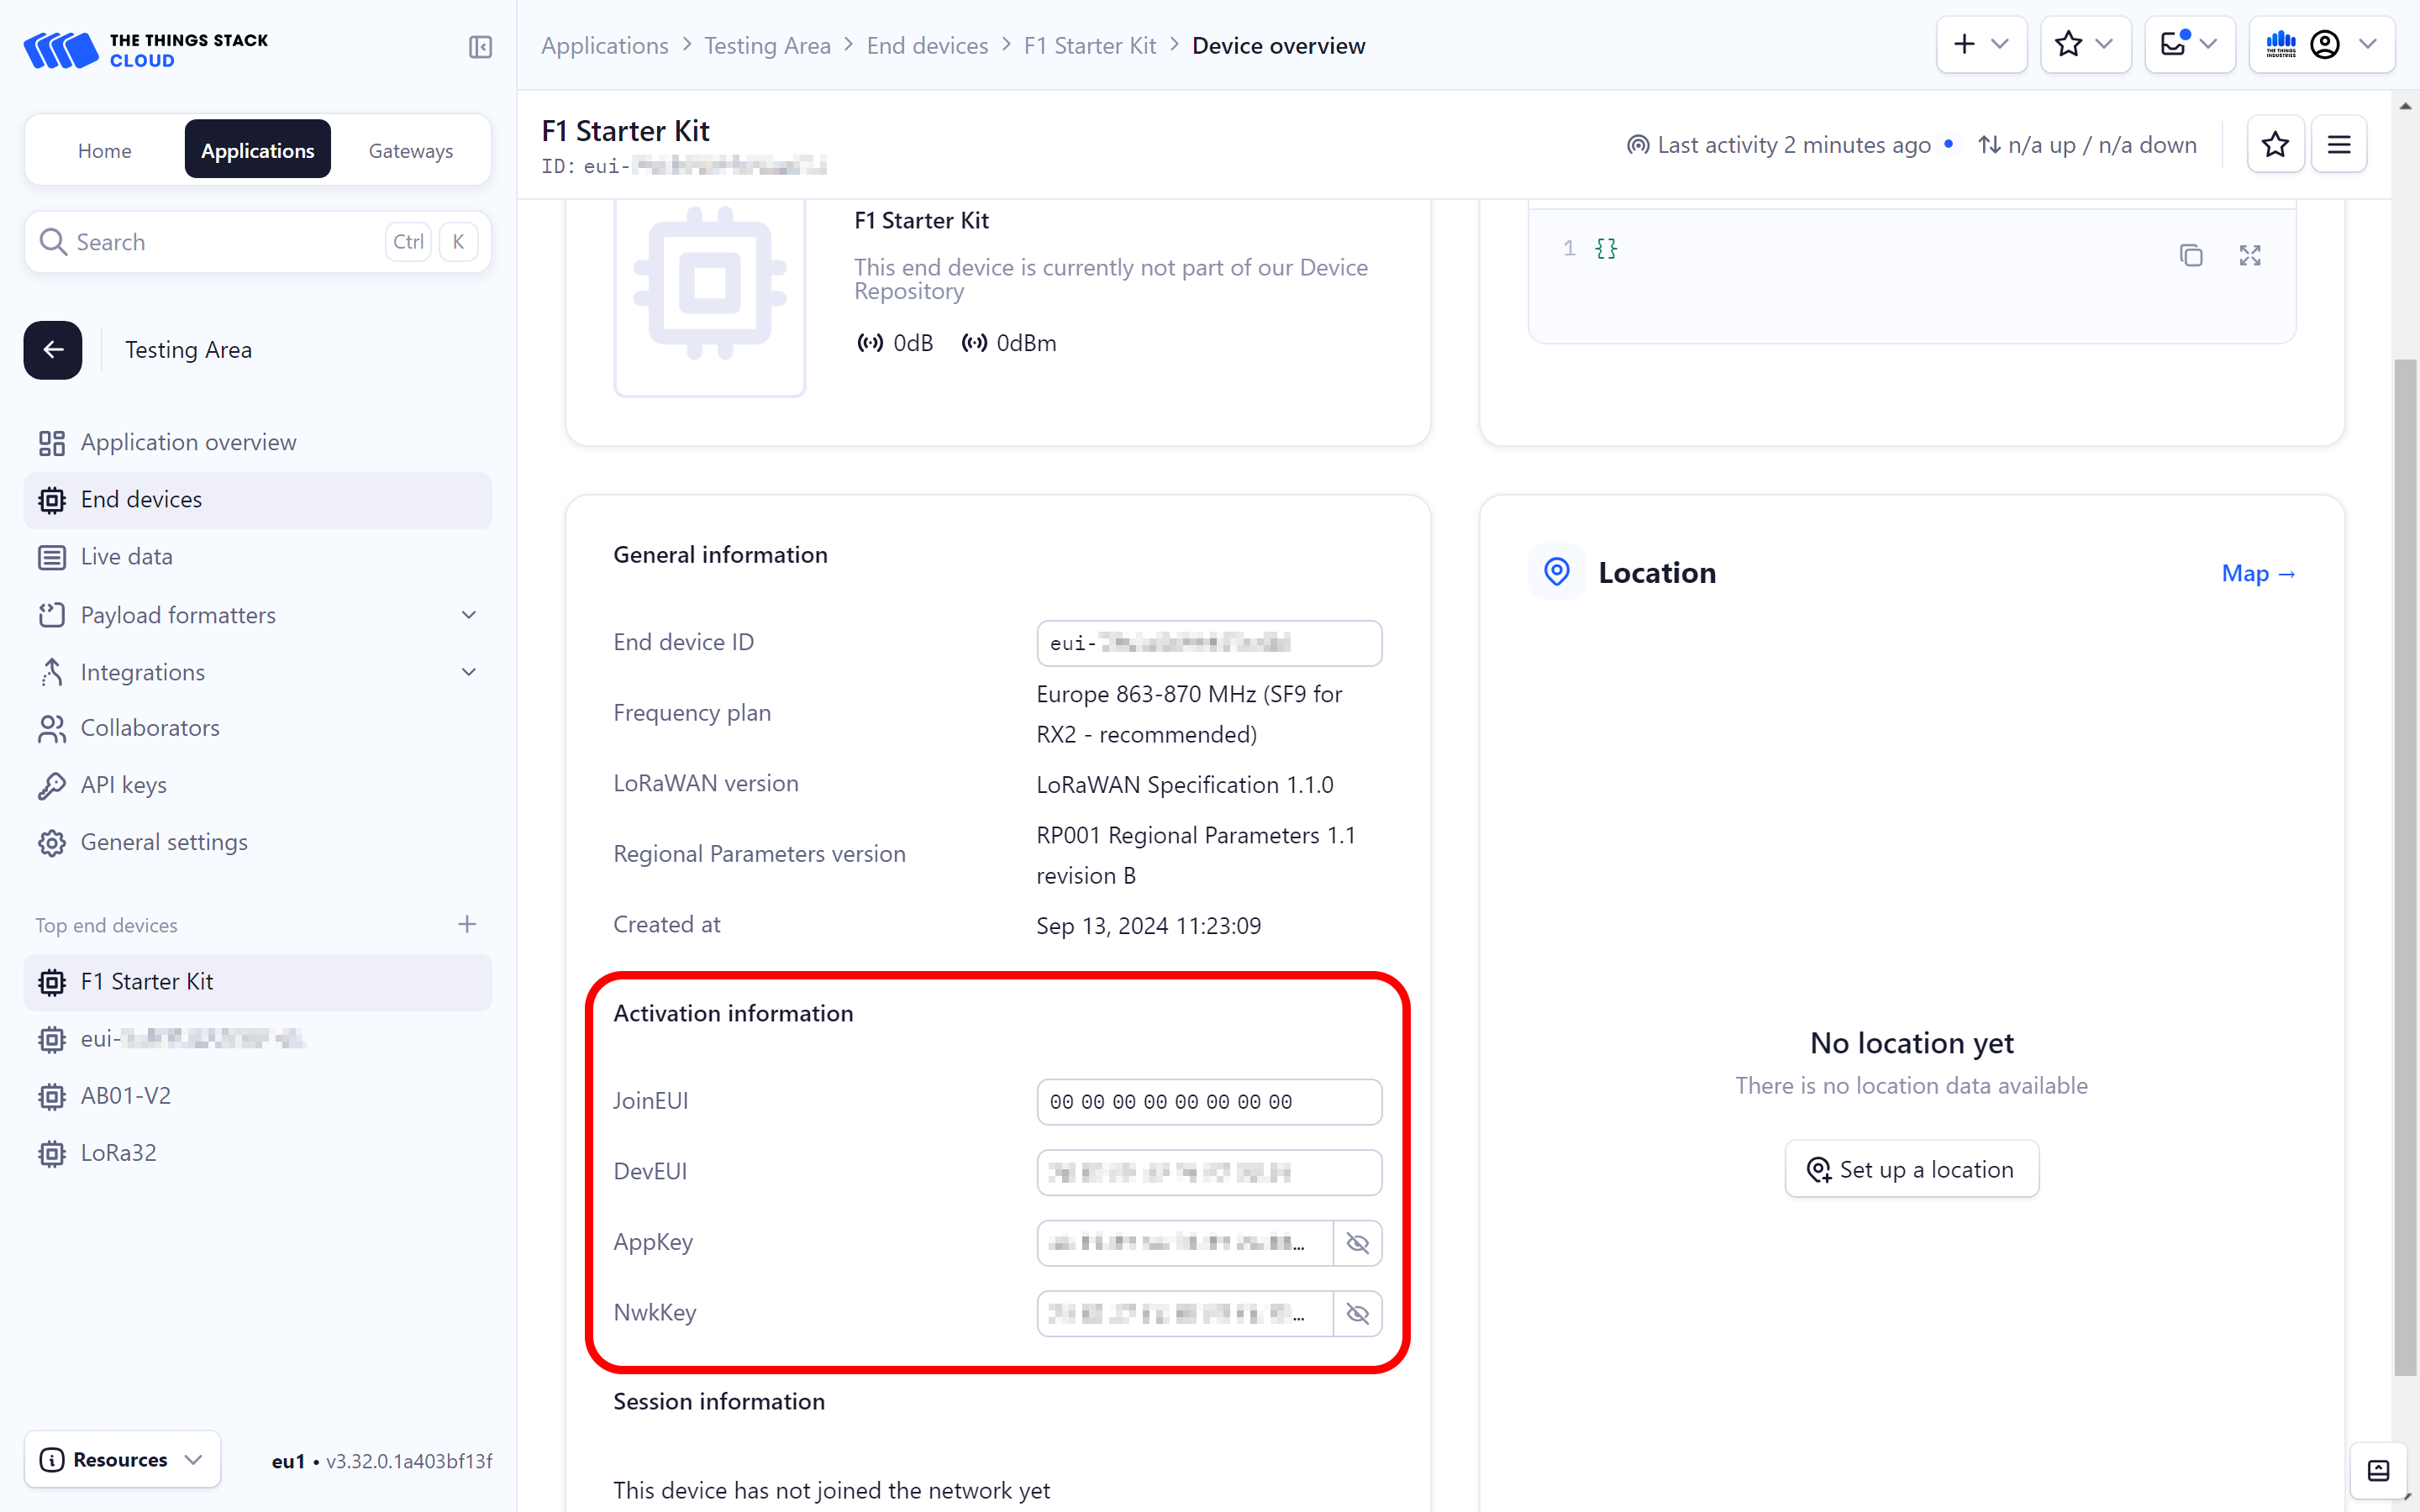
In The Things Stack, copy the DevEUI and replace the 0000000000000000 with the devEUI you copied.
Repeat this for the AppKey and NwkKey too.
Save the main.py file, right click the file, then CtrlR -> Upload to Device.
There should be activity showing up in the console. Now that you know how to connect the device to The Things Stack, you can create or add your application to the device! For more information check the SG Wireless Docs.