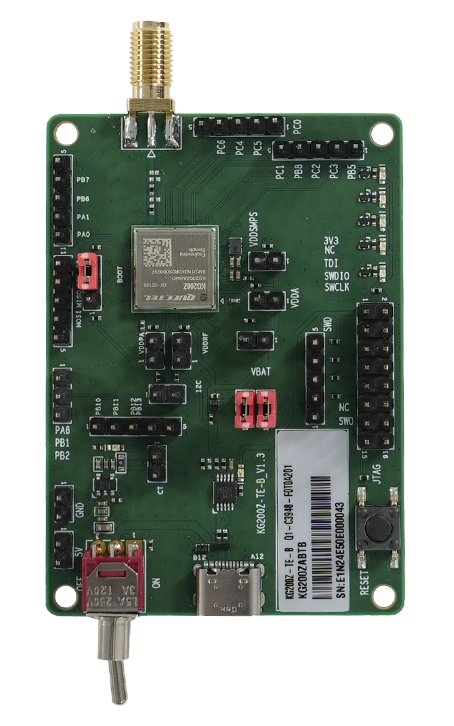
The Quectel KG200ZABTB is a high-performance LoRa module launched by Quectel, which provides ultra-low power consumption and long-range wireless transmission applications.
The module integrates an ARM Cortex-M4 core with the modulations of LoRa, (G)FSK, (G)MSK and BPSK, supporting LoRaWAN standard protocol, as well as 470–510MHz and 862–928MHz LoRa frequency bands. Additionally, it incorporates AES hardware encryption for enhanced security.
In this guide, we focus on connecting the evaluation board (EVK) to The Things Stack. This board can be used for programming the KG200Z module.
Provisioning Information
To get the provisioning information of the EVK we need to connect to the board via serial. The steps for connecting to it via serial depends on what OS you are using, MacOS/Linux or Windows.
MacOS / Linux
On MacOS and Linux, you can use the handy built-in screen command.
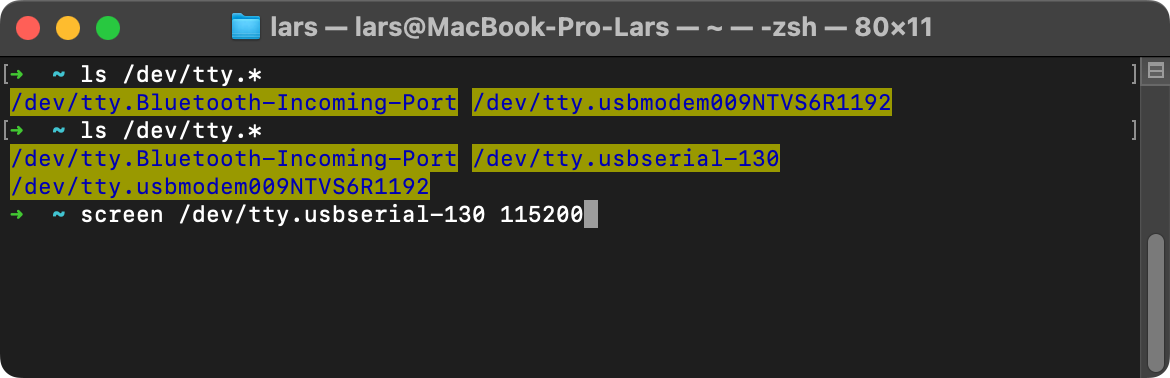
First step is to find out the board address.
Before plugging in the board, open up a terminal and type ls /dev/tty.*. You should see a couple of addresses show up.
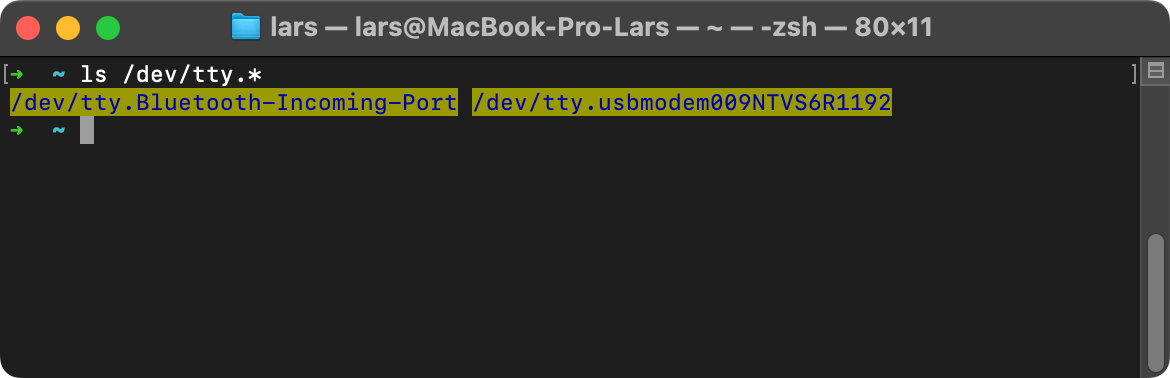
Then plug in the EVK and turn it on. When you try the command again you should see a new address show up.
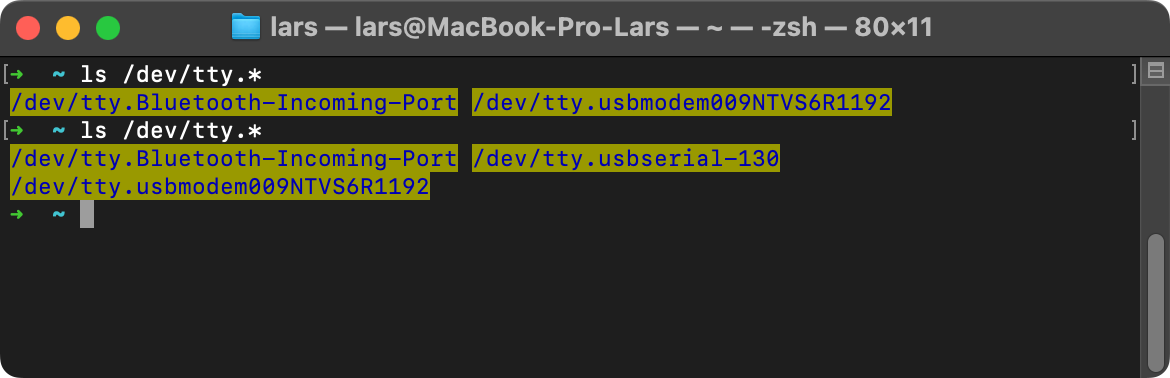
Now use the newly discovered board address to connect to the board using the screen <DEVICE-ADDRESS> 115200 command.
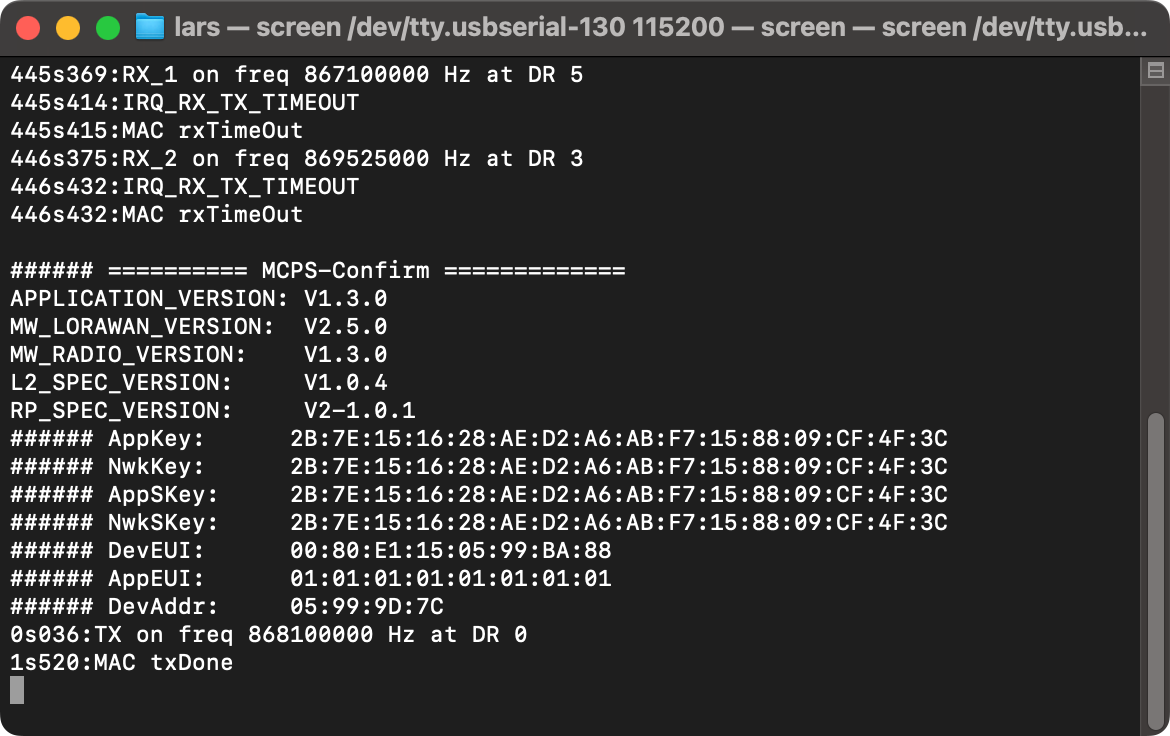
Once you do that, you should see some text show up in your terminal. Now press the reset button on the EVK to have the device show its provisioning information. Select and copy the AppKey, DevEUI and AppEUI and store them somewhere.
Using these values we can now proceed with onboarding the device to The Things Stack.
Windows
To connect to the EVK using Windows, a third party tool that can interface with the EVK needs to be installed first. Make sure your board isn’t yet connected to your computer.
For this tutorial we use SimpleCom, but any UART serial tool should do the trick. Download the ZIP file, unzip it and run SimpleCom.exe.
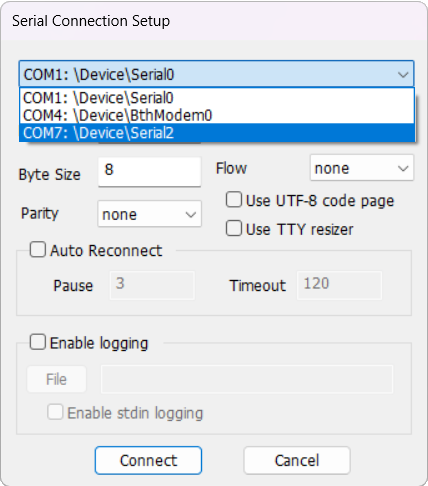
When you run the tool, you will see the following screen. If you select the COM dropdown, you will probably see a couple of COM ports.
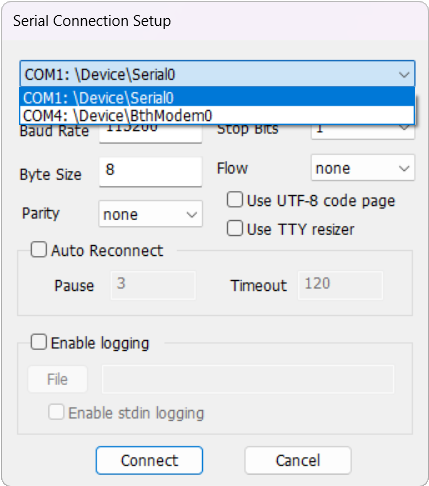
Now close the program (using the Cancel button), then plug in the EVK and turn it on. Run the program again, and when you select the dropdown again you should see a new COM port show up. Select that one and make sure the Baud Rate is set at 115200.
Once that is done, hit Connect and you should see some text show up in the terminal. Now press the reset button on the EVK to have the device show its provisioning information. Select and copy the AppKey, DevEUI and AppEUI and store them somewhere.
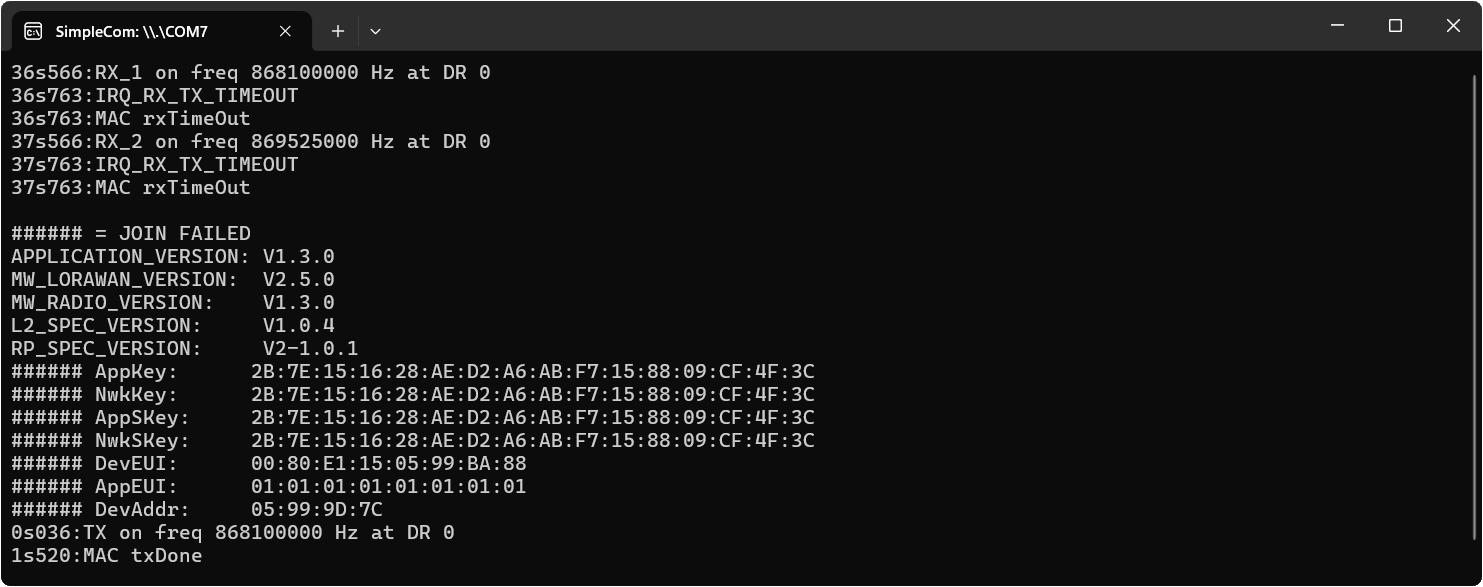
Using these values we can now proceed with onboarding the device to The Things Stack.
Note:
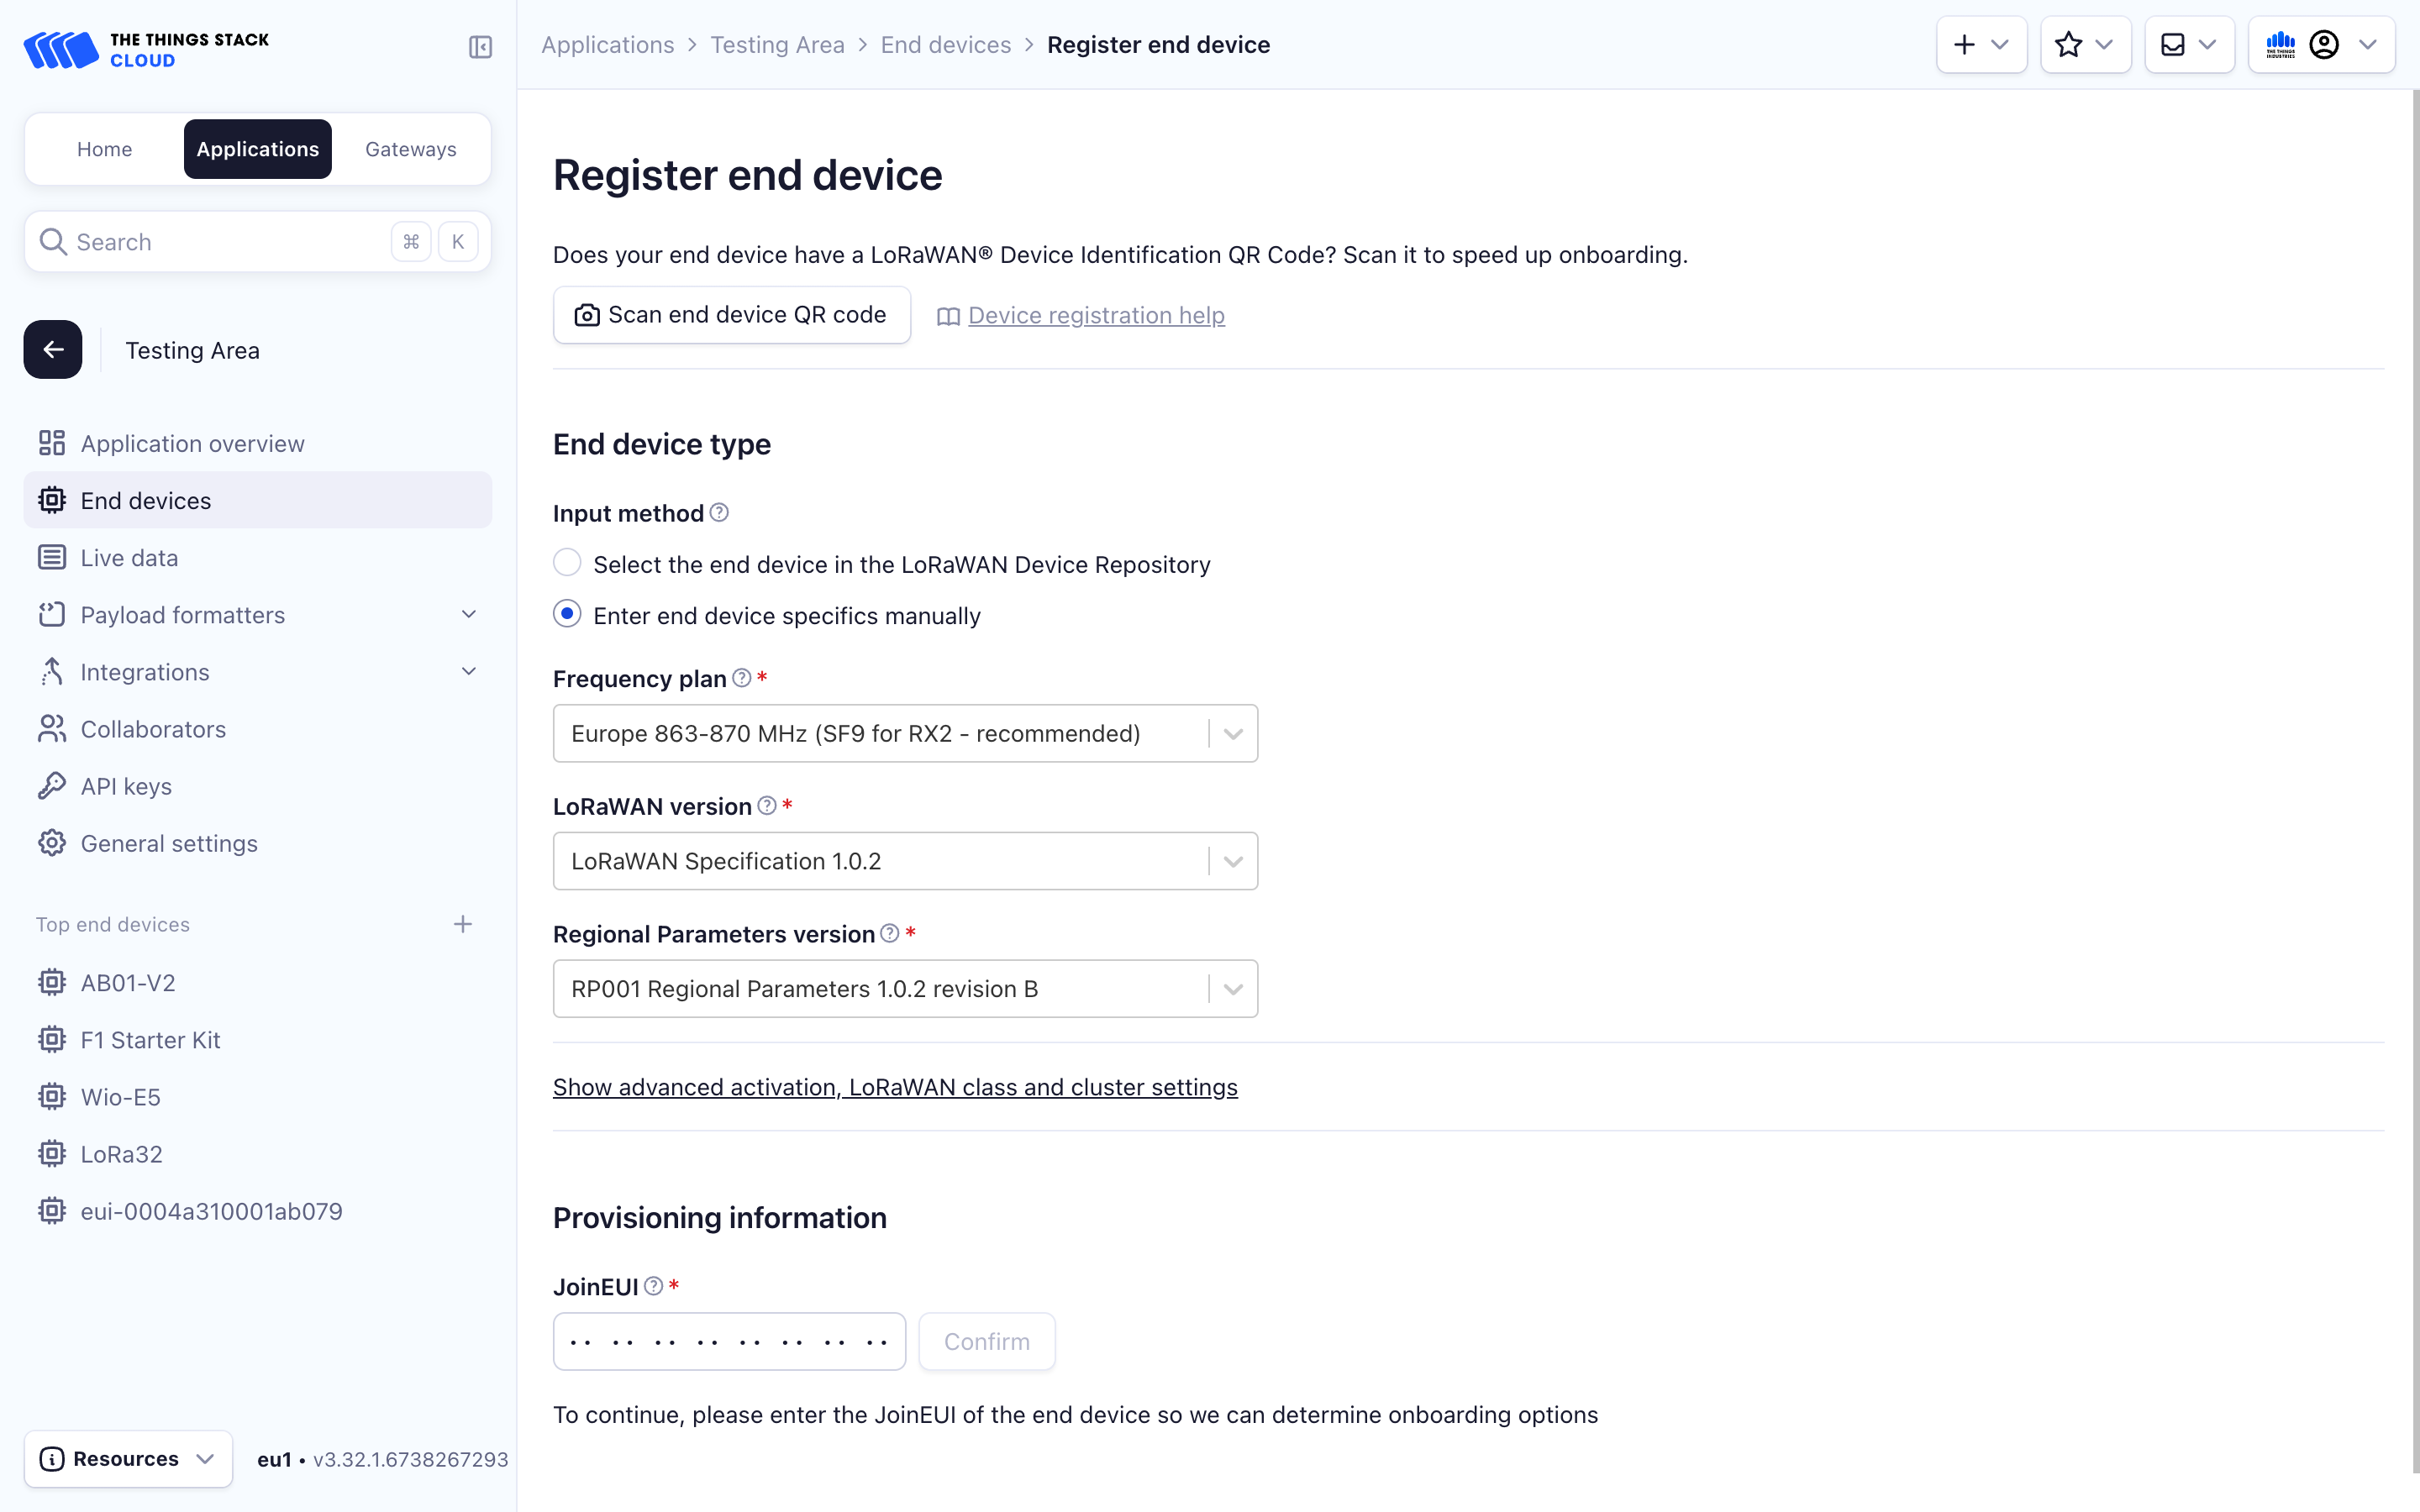
Quectel KG200ZABTB cannot be onboarded to The Things Stack using QR code.Onboarding to The Things Stack
The Quectel KG200ZABTB has to be onboarded manually.
To do this, in the End device type section, under Input Method, select Enter end device specifics manually option. The Manually adding devices and Over the Air Activation (OTAA) guides explain this procedure in detail. Following details are Quectel KG200ZABTB-specific:
- LoRaWAN version: LoRaWAN Specification 1.0.2
- Regional parameters version: RP001 Regional Parameters 1.0.2 revision B
Then fill in the Provisioning information, which were found in the first steps.
After configuring your device, select the Register end device button.