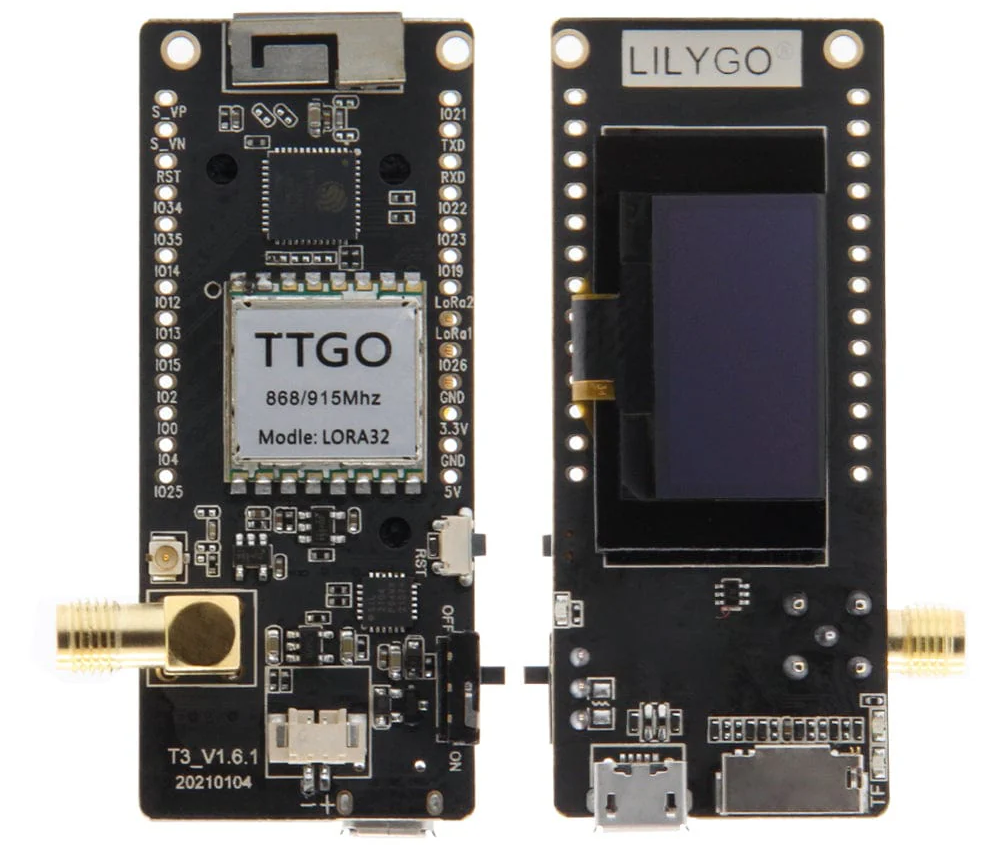
The LILYGO LoRa32 V2.1_1.6 is a development board with an ESP32 and a Semtech SX1276 transceiver. It features an OLED screen, Micro SD card slot and a JST GH for connecting a Li-Po battery.
In order to program the board we need to make use of of the RadioLib library. This is a universal Arduino library created for radio modules (such as LoRa).
We will set up the Arduino IDE first, after which we will use an example code to connect it to The Things Stack.
Installing libraries
Download the latest release of the Arduino Software (IDE), install it on your operating system and run it.
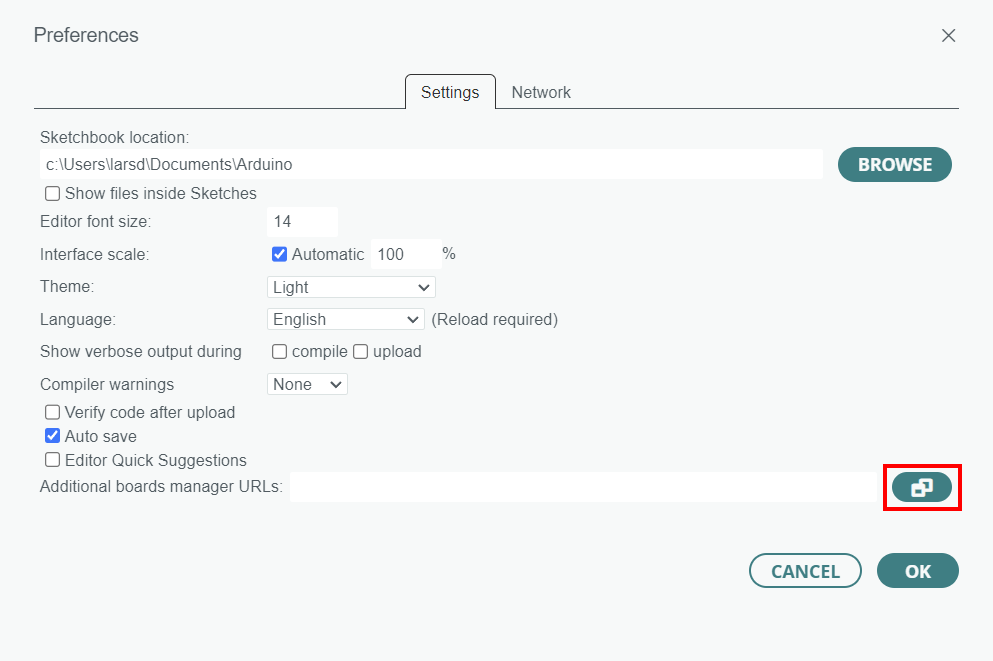
Open Arduino IDE, and click File -> Preferences -> Settings and click the button next to Additional Boards Manager URLs.
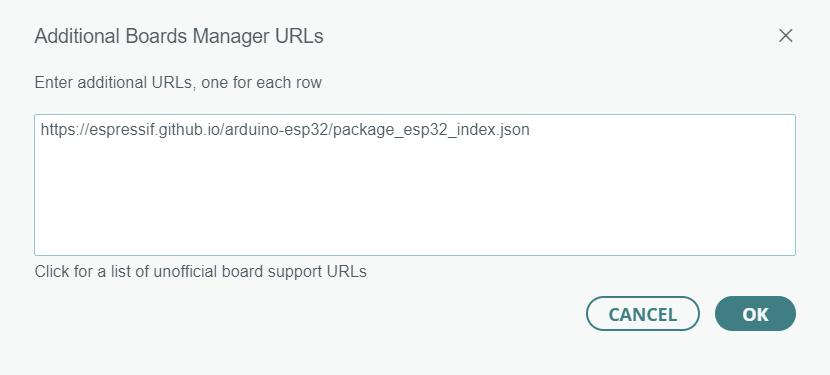
In a new line, enter: https://espressif.github.io/arduino-esp32/package_esp32_index.json and click OK.
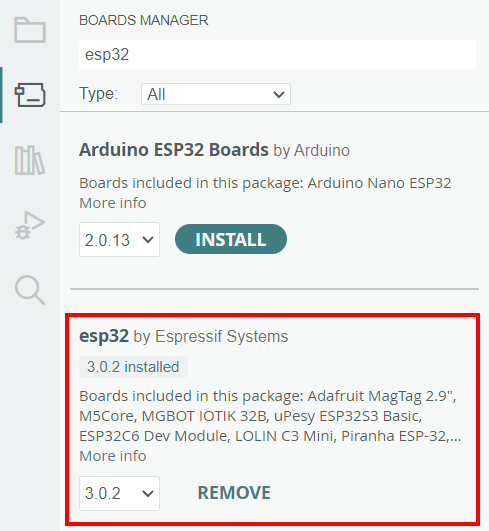
Click the second icon in the left-hand menu or select Tools -> Board: -> Boards Manager…, then search esp32 in the search field, select the latest releases and click install.
Then go to the third icon in the left-hand menu or select Sketch -> Include Library -> Manage Libraries…, then search radiolib in the search field, select the latest releases and click install.

Connecting the Device
Connect the board to your computer with a micro usb cable.
Click the Select Board drop down (or go to the tools menu) and select the right COM port and board:
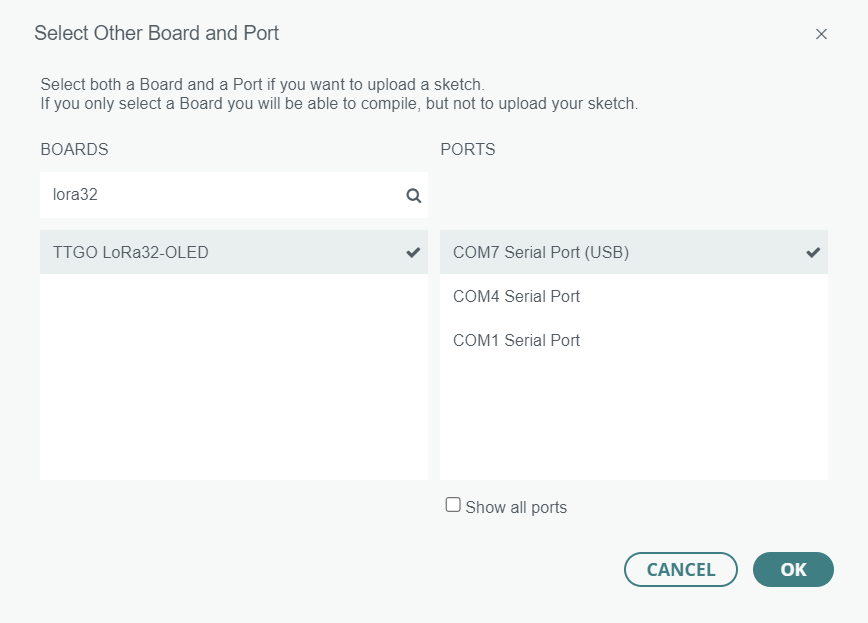
Then, in the tools menu, make sure to select the correct Board Revision (TTGO LoRa32 V2.1 (1.6.1) in our case. You can check on the board itself for which version you have) and the Upload Speed (115200 is recommended).
Open the example sketch by going to File -> Examples -> RadioLib -> LoRaWAN -> LoRaWAN_Starter
Now we need the credentials to onboard it to The Things Stack.
Onboarding to The Things Stack
The device has to be onboarded manually.
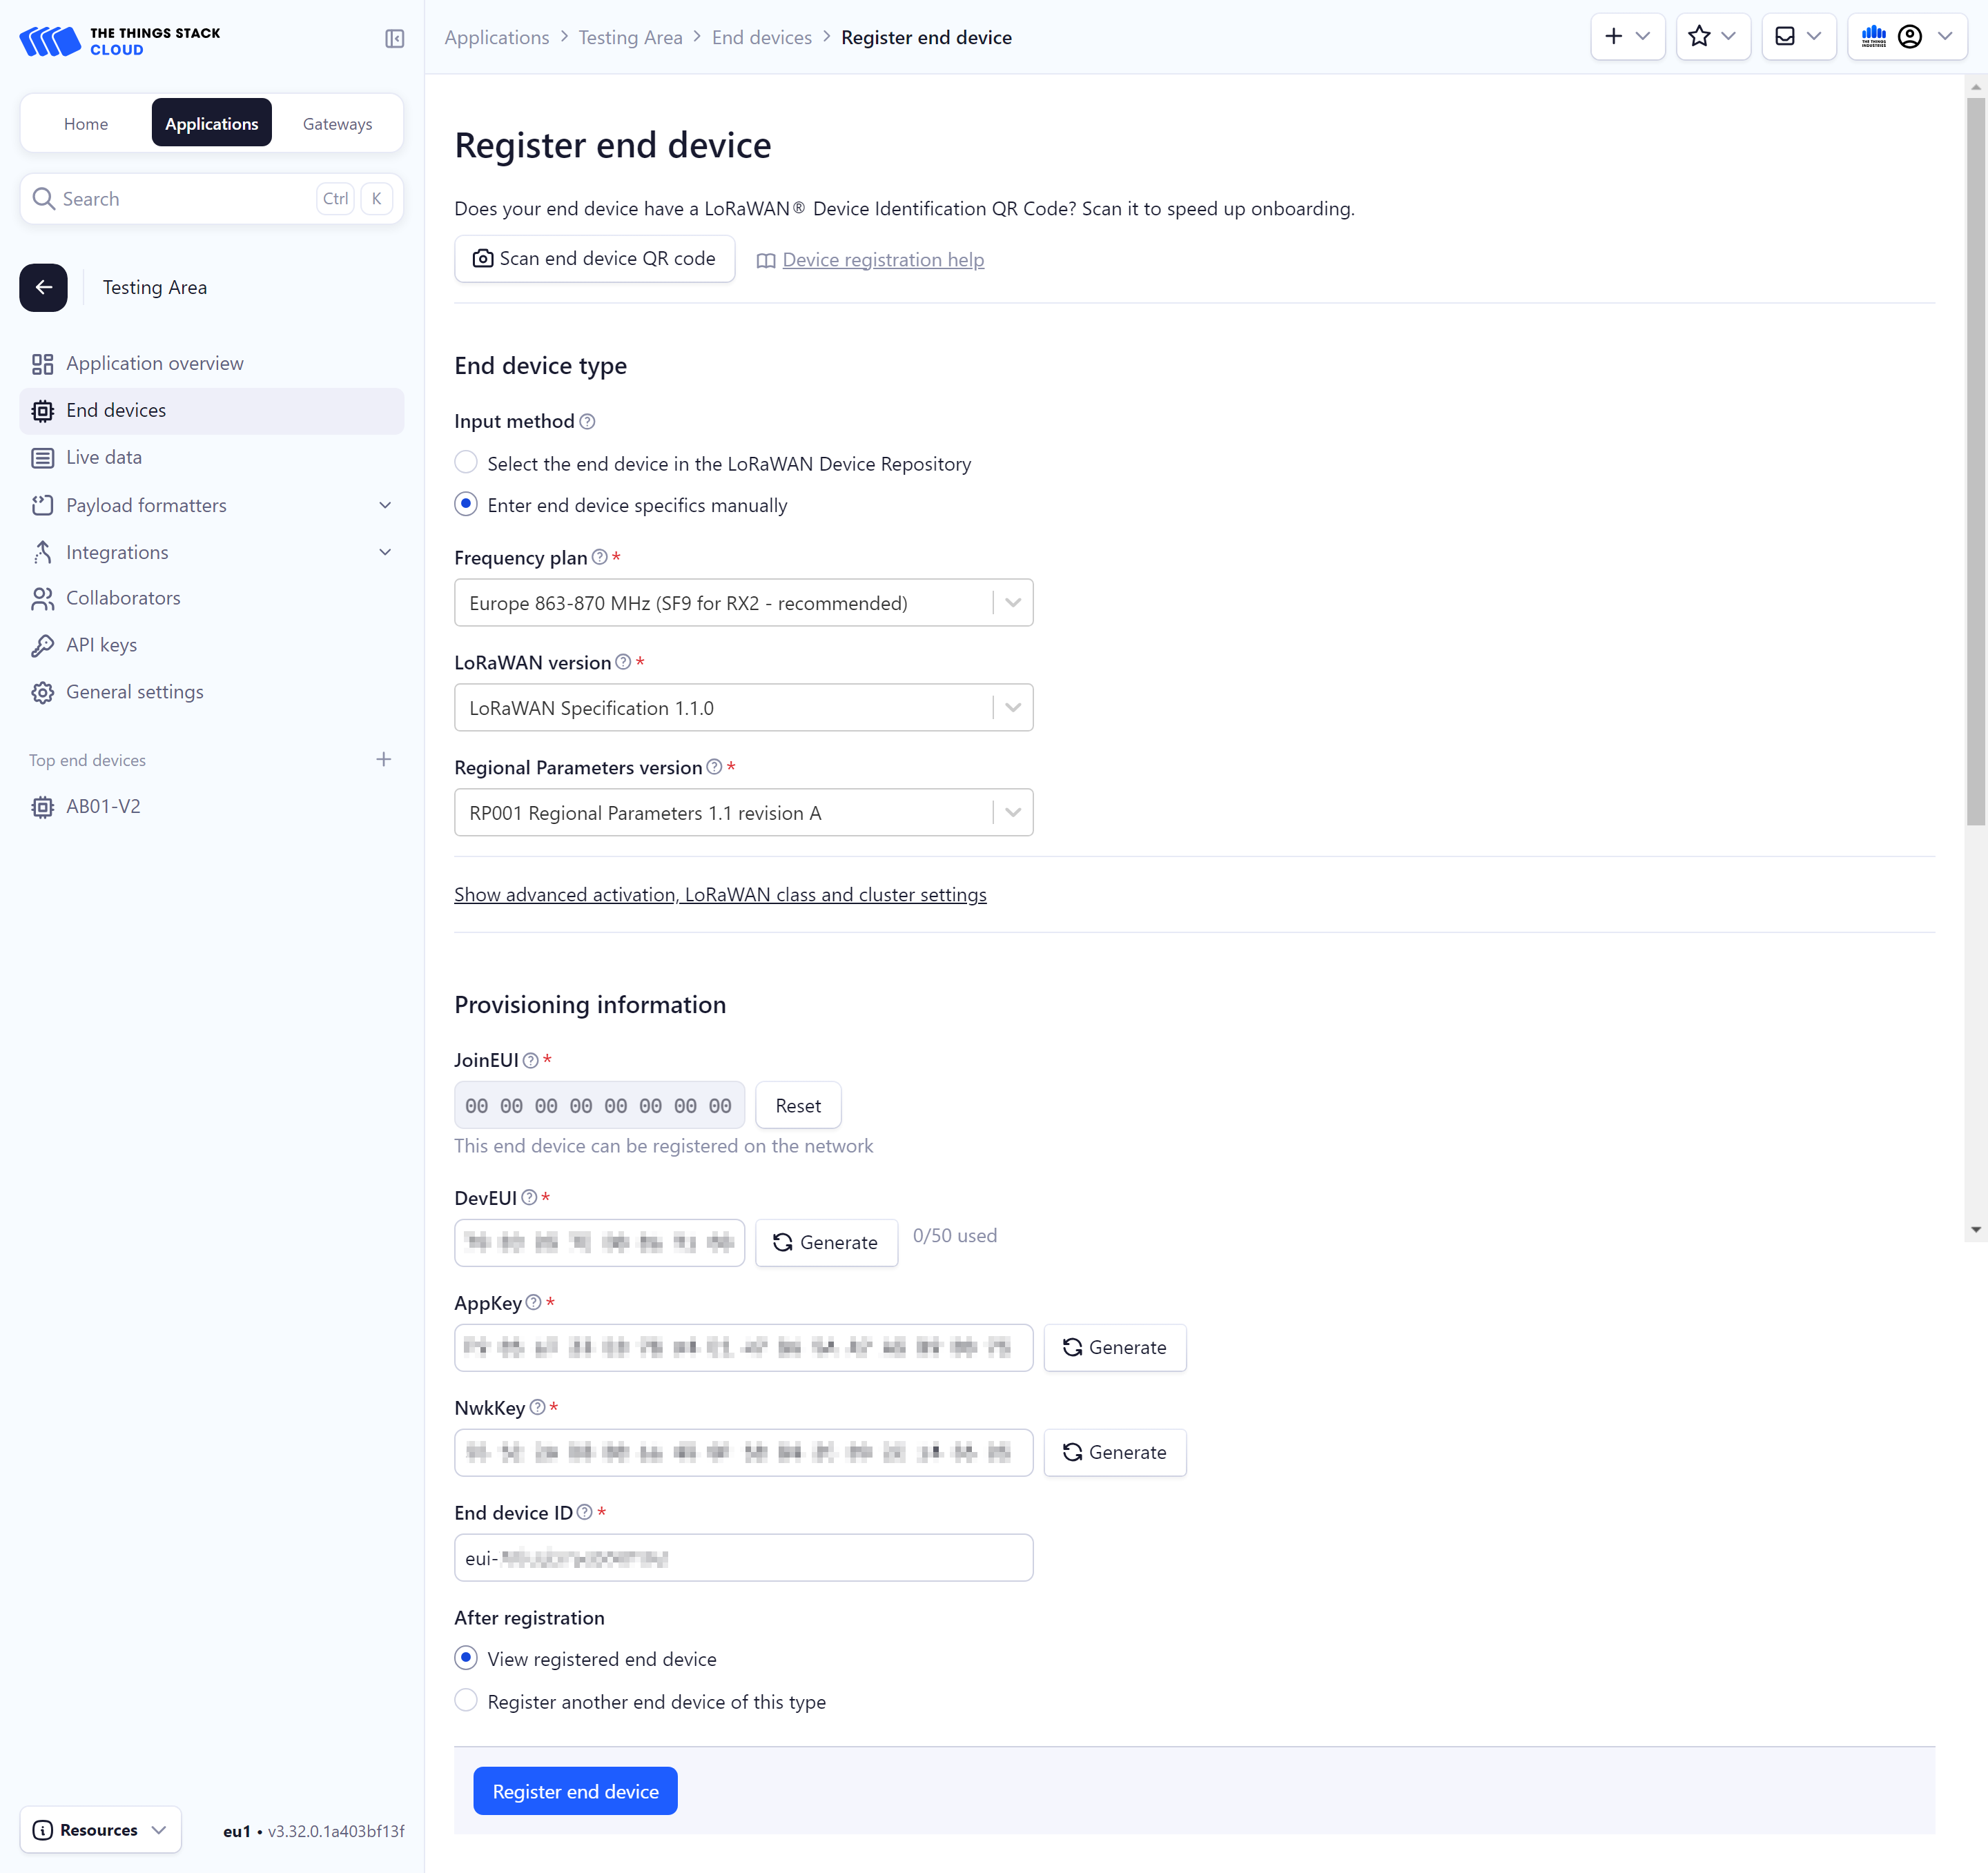
To onboard manually, in the End device type section, under Input Method, select the Enter end device specifics manually option. The Manually adding devices and Over the Air Activation (OTAA) guides explain this procedure in detail. Following details are specific to the LoRa32:
- LoRaWAN version: LoRaWAN Specification 1.1.0
- Regional parameters version: RP001 Regional Parameters 1.1 revision A
For the Provisioning information, enter the following details:
- JoinEUI:
0000000000000000 - DevEUI, AppKey & NwkKey: Generate by clicking the Generate button.
After configuring your device, select the Register end device button.
Configuring the code
Our device is registered with The Things Stack, but it still needs the correct info in order to connect.
Go back to your Arduino IDE, and go to the config.h file. There you should see the following:
// the Device EUI & two keys can be generated on the TTN console
#ifndef RADIOLIB_LORAWAN_DEV_EUI   // Replace with your Device EUI
#define RADIOLIB_LORAWAN_DEV_EUI   0x---------------
#endif
#ifndef RADIOLIB_LORAWAN_APP_KEY   // Replace with your App Key
#define RADIOLIB_LORAWAN_APP_KEY   0x--, 0x--, 0x--, 0x--, 0x--, 0x--, 0x--, 0x--, 0x--, 0x--, 0x--, 0x--, 0x--, 0x--, 0x--, 0x--
#endif
#ifndef RADIOLIB_LORAWAN_NWK_KEY   // Put your Nwk Key here
#define RADIOLIB_LORAWAN_NWK_KEY   0x--, 0x--, 0x--, 0x--, 0x--, 0x--, 0x--, 0x--, 0x--, 0x--, 0x--, 0x--, 0x--, 0x--, 0x--, 0x--
#endif
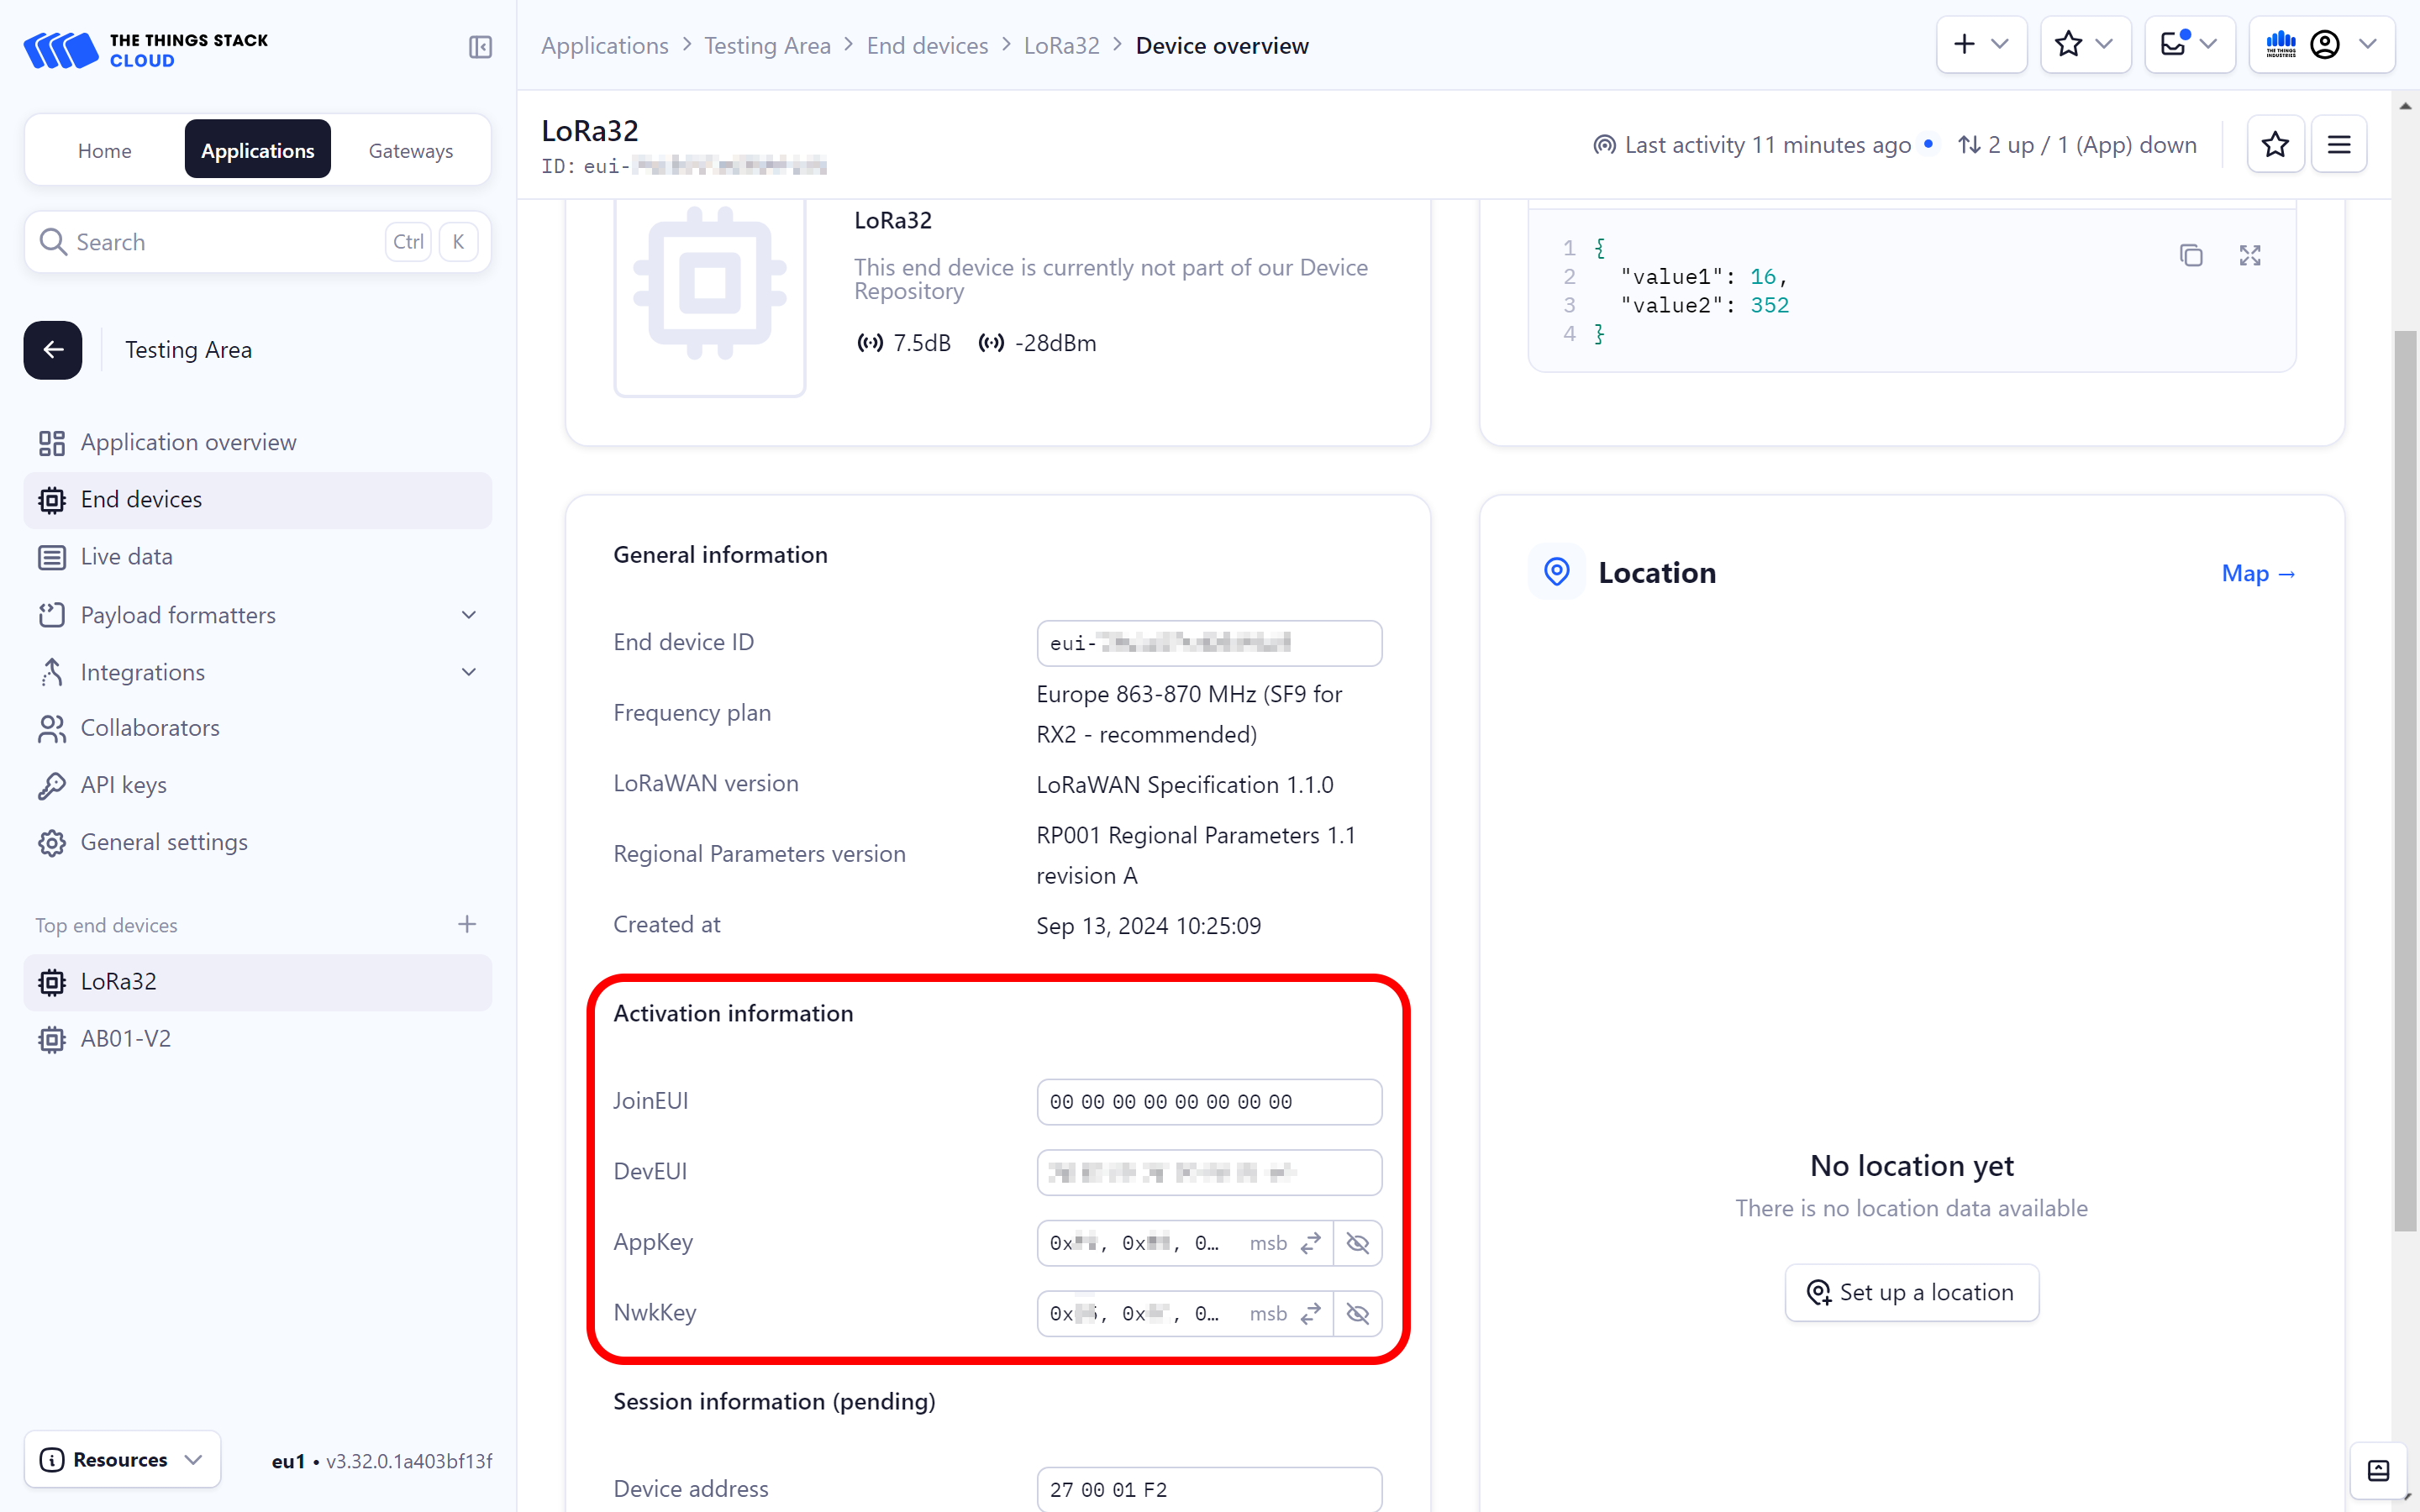
In The Things Stack, copy the DevEUI and replace the 0x--------------- with the devEUI you copied.
For the AppKey and NwkKey, click the eye icon and then selecting the </> icon. Then copy the AppKey by clicking the Copy to clipboard button and replace the string in the config file. Repeat this for the NwkKey.
A few lines down you will see regional settings. Make sure these match your region:
// regional choices: EU868, US915, AU915, AS923, IN865, KR920, CN780, CN500
const LoRaWANBand_t Region = EU868;
const uint8_t subBand = 0;  // For US915, change this to 2, otherwise leave on 0
Now upload the code to your device using the -> button in the top-left.
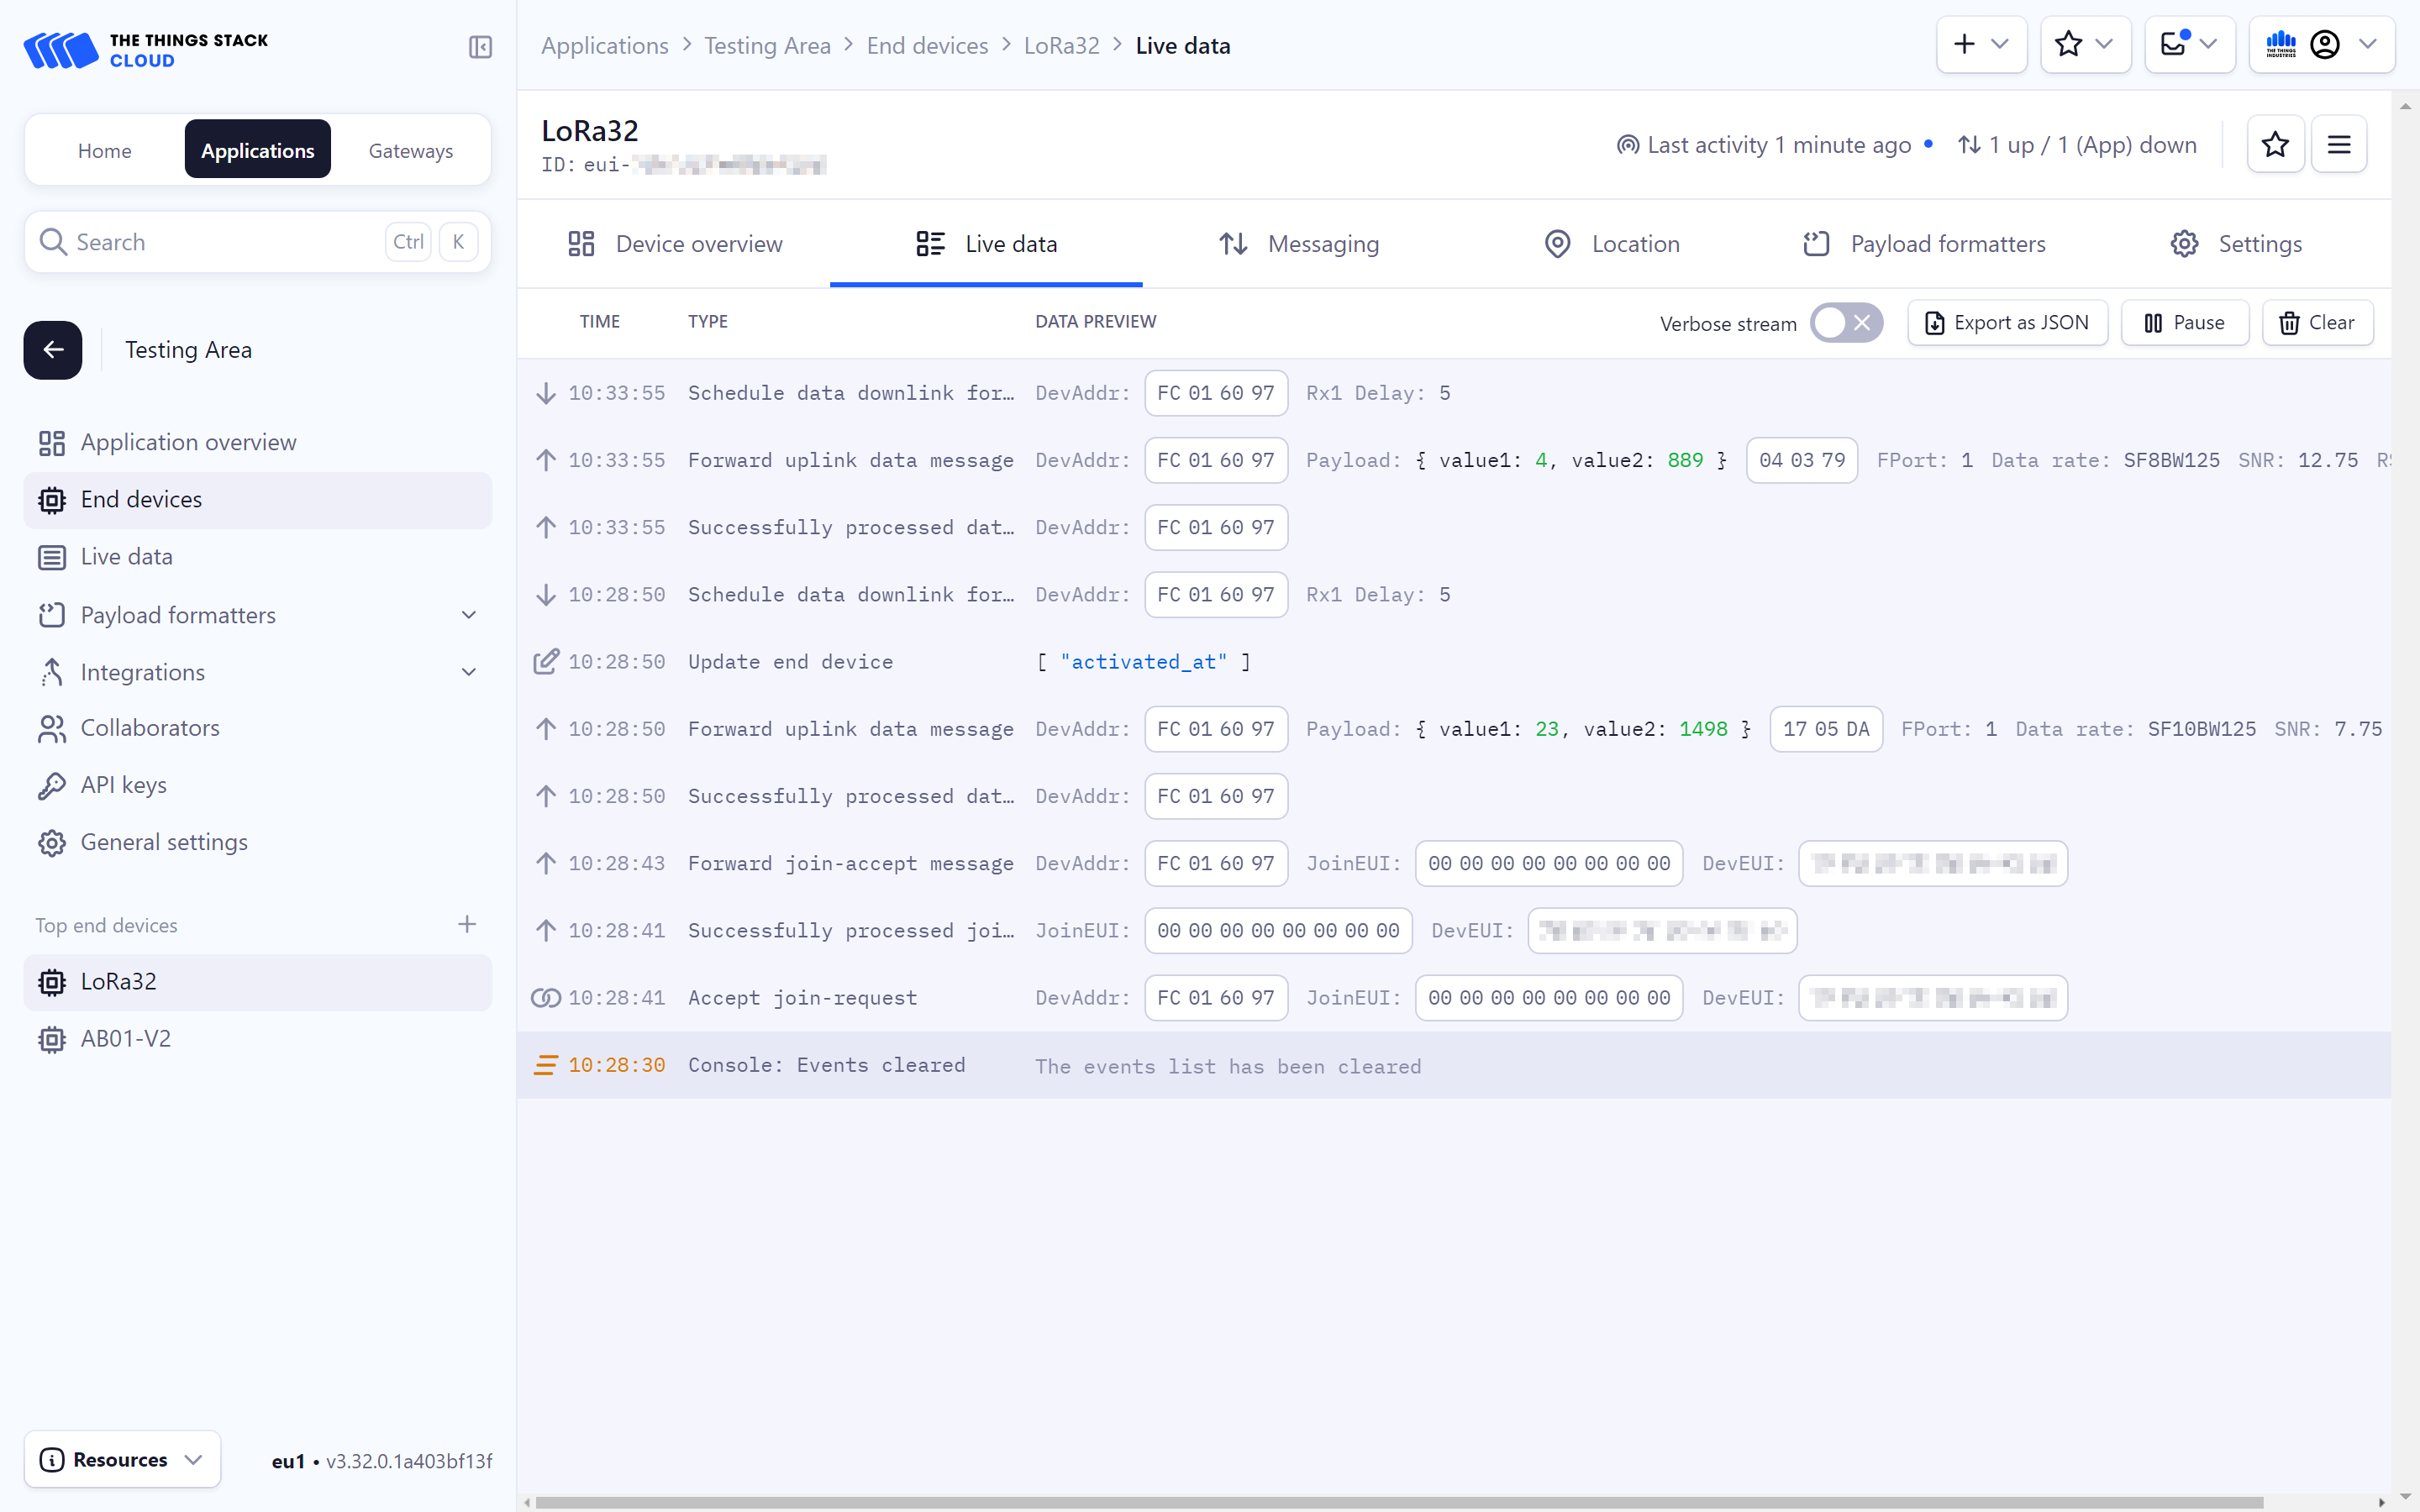
Monitoring Live Data
As the device payload comes to The Things Stack in a HEX format, you will need to decode it using a payload formatter. To do this, in your application on The Things Stack, navigate to Payload formatters.
Select the Custom Javascript formatter from the Formatter type dropdown.
Enter the following code in the Formatter code field:
function decodeUplink(input) {
  var value1 = input.bytes[0];
  var value2 = (input.bytes[1] << 8) | input.bytes[2];

  return {
    data: {
      value1: value1,
      value2: value2,
    },
  };
}
Click Save changes at the bottom of the page and go back to the Live Data tab to view all messages exchanged between the end device and The Things Stack.