Skip to content
The Things Stack documentation home
Getting Started Concepts Cloud Enterprise Integrations API Hardware
Getting Started Concepts
Cloud Enterprise
Integrations API Hardware
Get The Things Stack

    Recent searches

      Popular pages

      • Getting Started
      • Adding Gateways
      • Adding Devices
      • Payload Formatters
      • Webhooks
      • Authentication

      No results for “”.

      • Check the spelling, or try fewer or more general words.
      • Ask the community on The Things Network Forum
      • Contact support
      ↑↓ to navigate ↵ to open Esc to close

      Concepts

      • Overview
      • Architecture
      • Features
        • Console
        • Command-line Interface
        • Multi-tenancy
        • Gaining insights using Events
        • LoRaWAN
        • Single Sign-On
          • Amazon Cognito
          • Google OpenID Connect
          • Microsoft Entra
        • Alerting
        • Network Operations Center
      • Networking
      • Migrate to The Things Stack
      • Packet Broker
      • Server Addresses
      • Advanced Topics
      • Troubleshooting
      • The Things Stack Sandbox

      Amazon Cognito

      Updated 8 November 2026 Edit on GitHub
      Copy page
      • View as MarkdownThis page as plain text
      • Open in ChatGPTAsk questions about this page
      • Open in ClaudeAsk questions about this page

      This section contains instructions to configure Amazon Cognito to work with The Things Stack.

      Configuring OpenID Connect with Amazon Cognito will allow single sign-on from any account within a Cognito user pool.

      Create a User Pool

      From the Amazon Cognito Management Page, choose Manage User Pools.
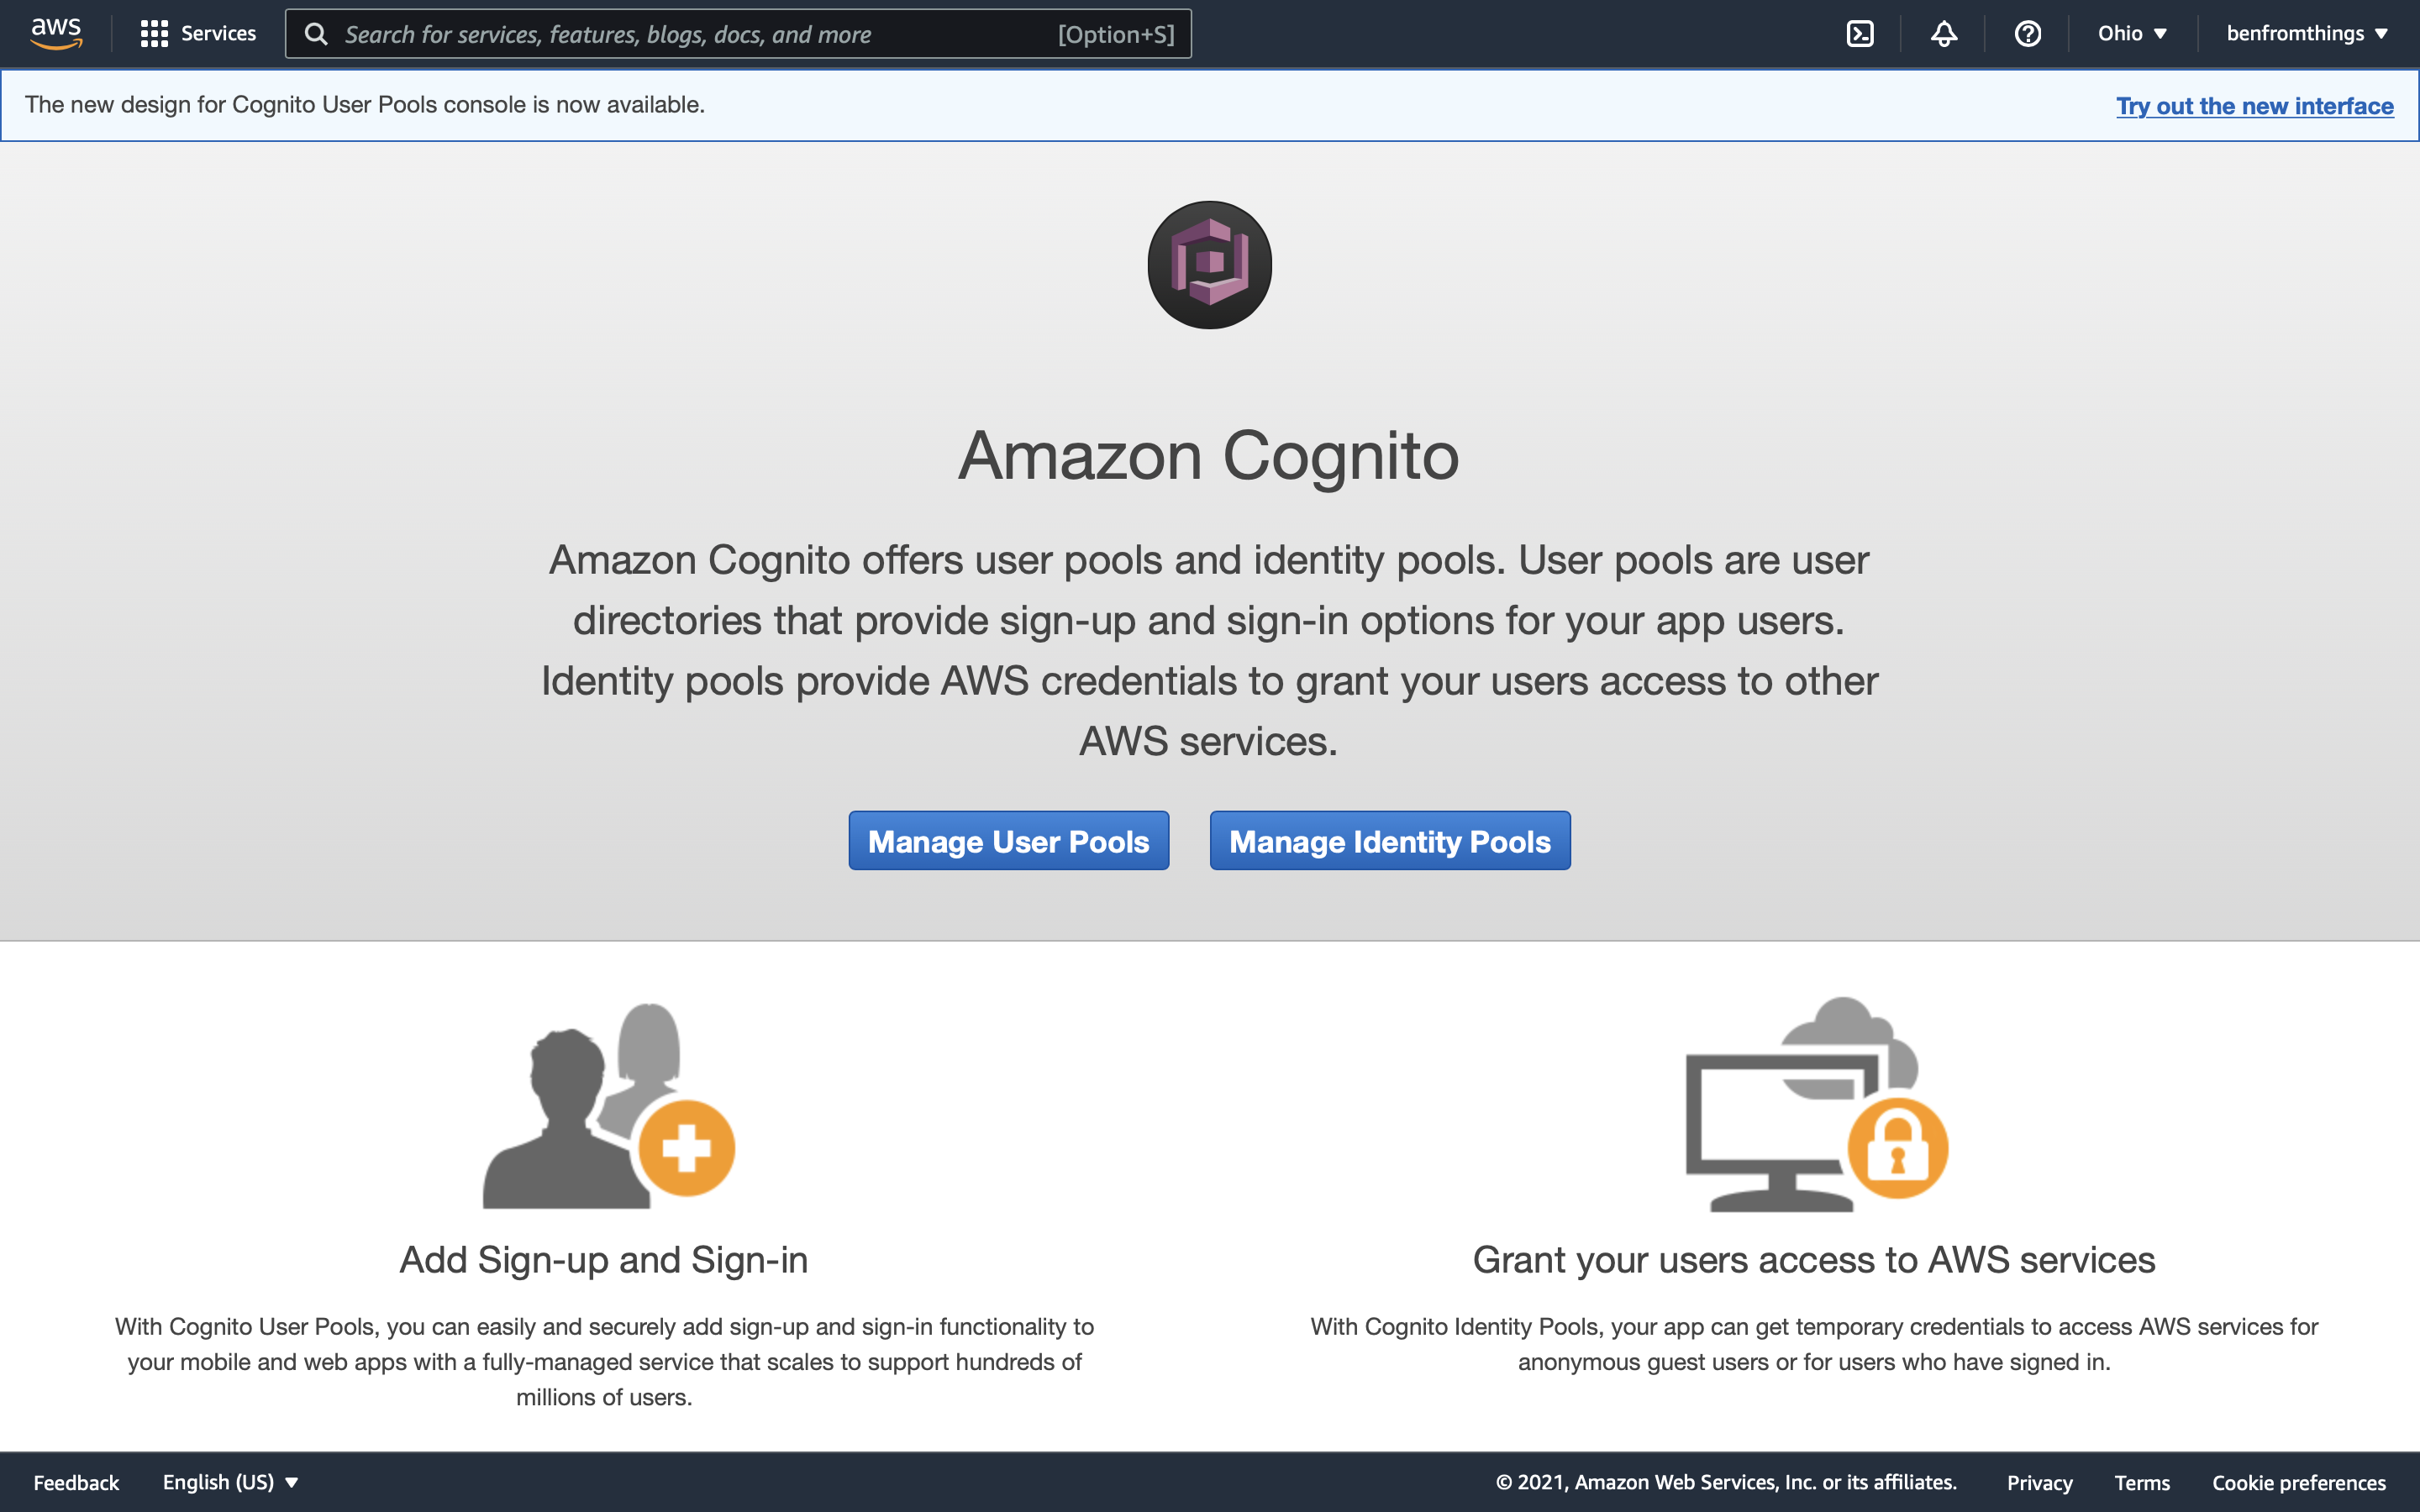
      Amazon Cognito start page with the Manage User Pools button

      Click Create a user pool in the top right.
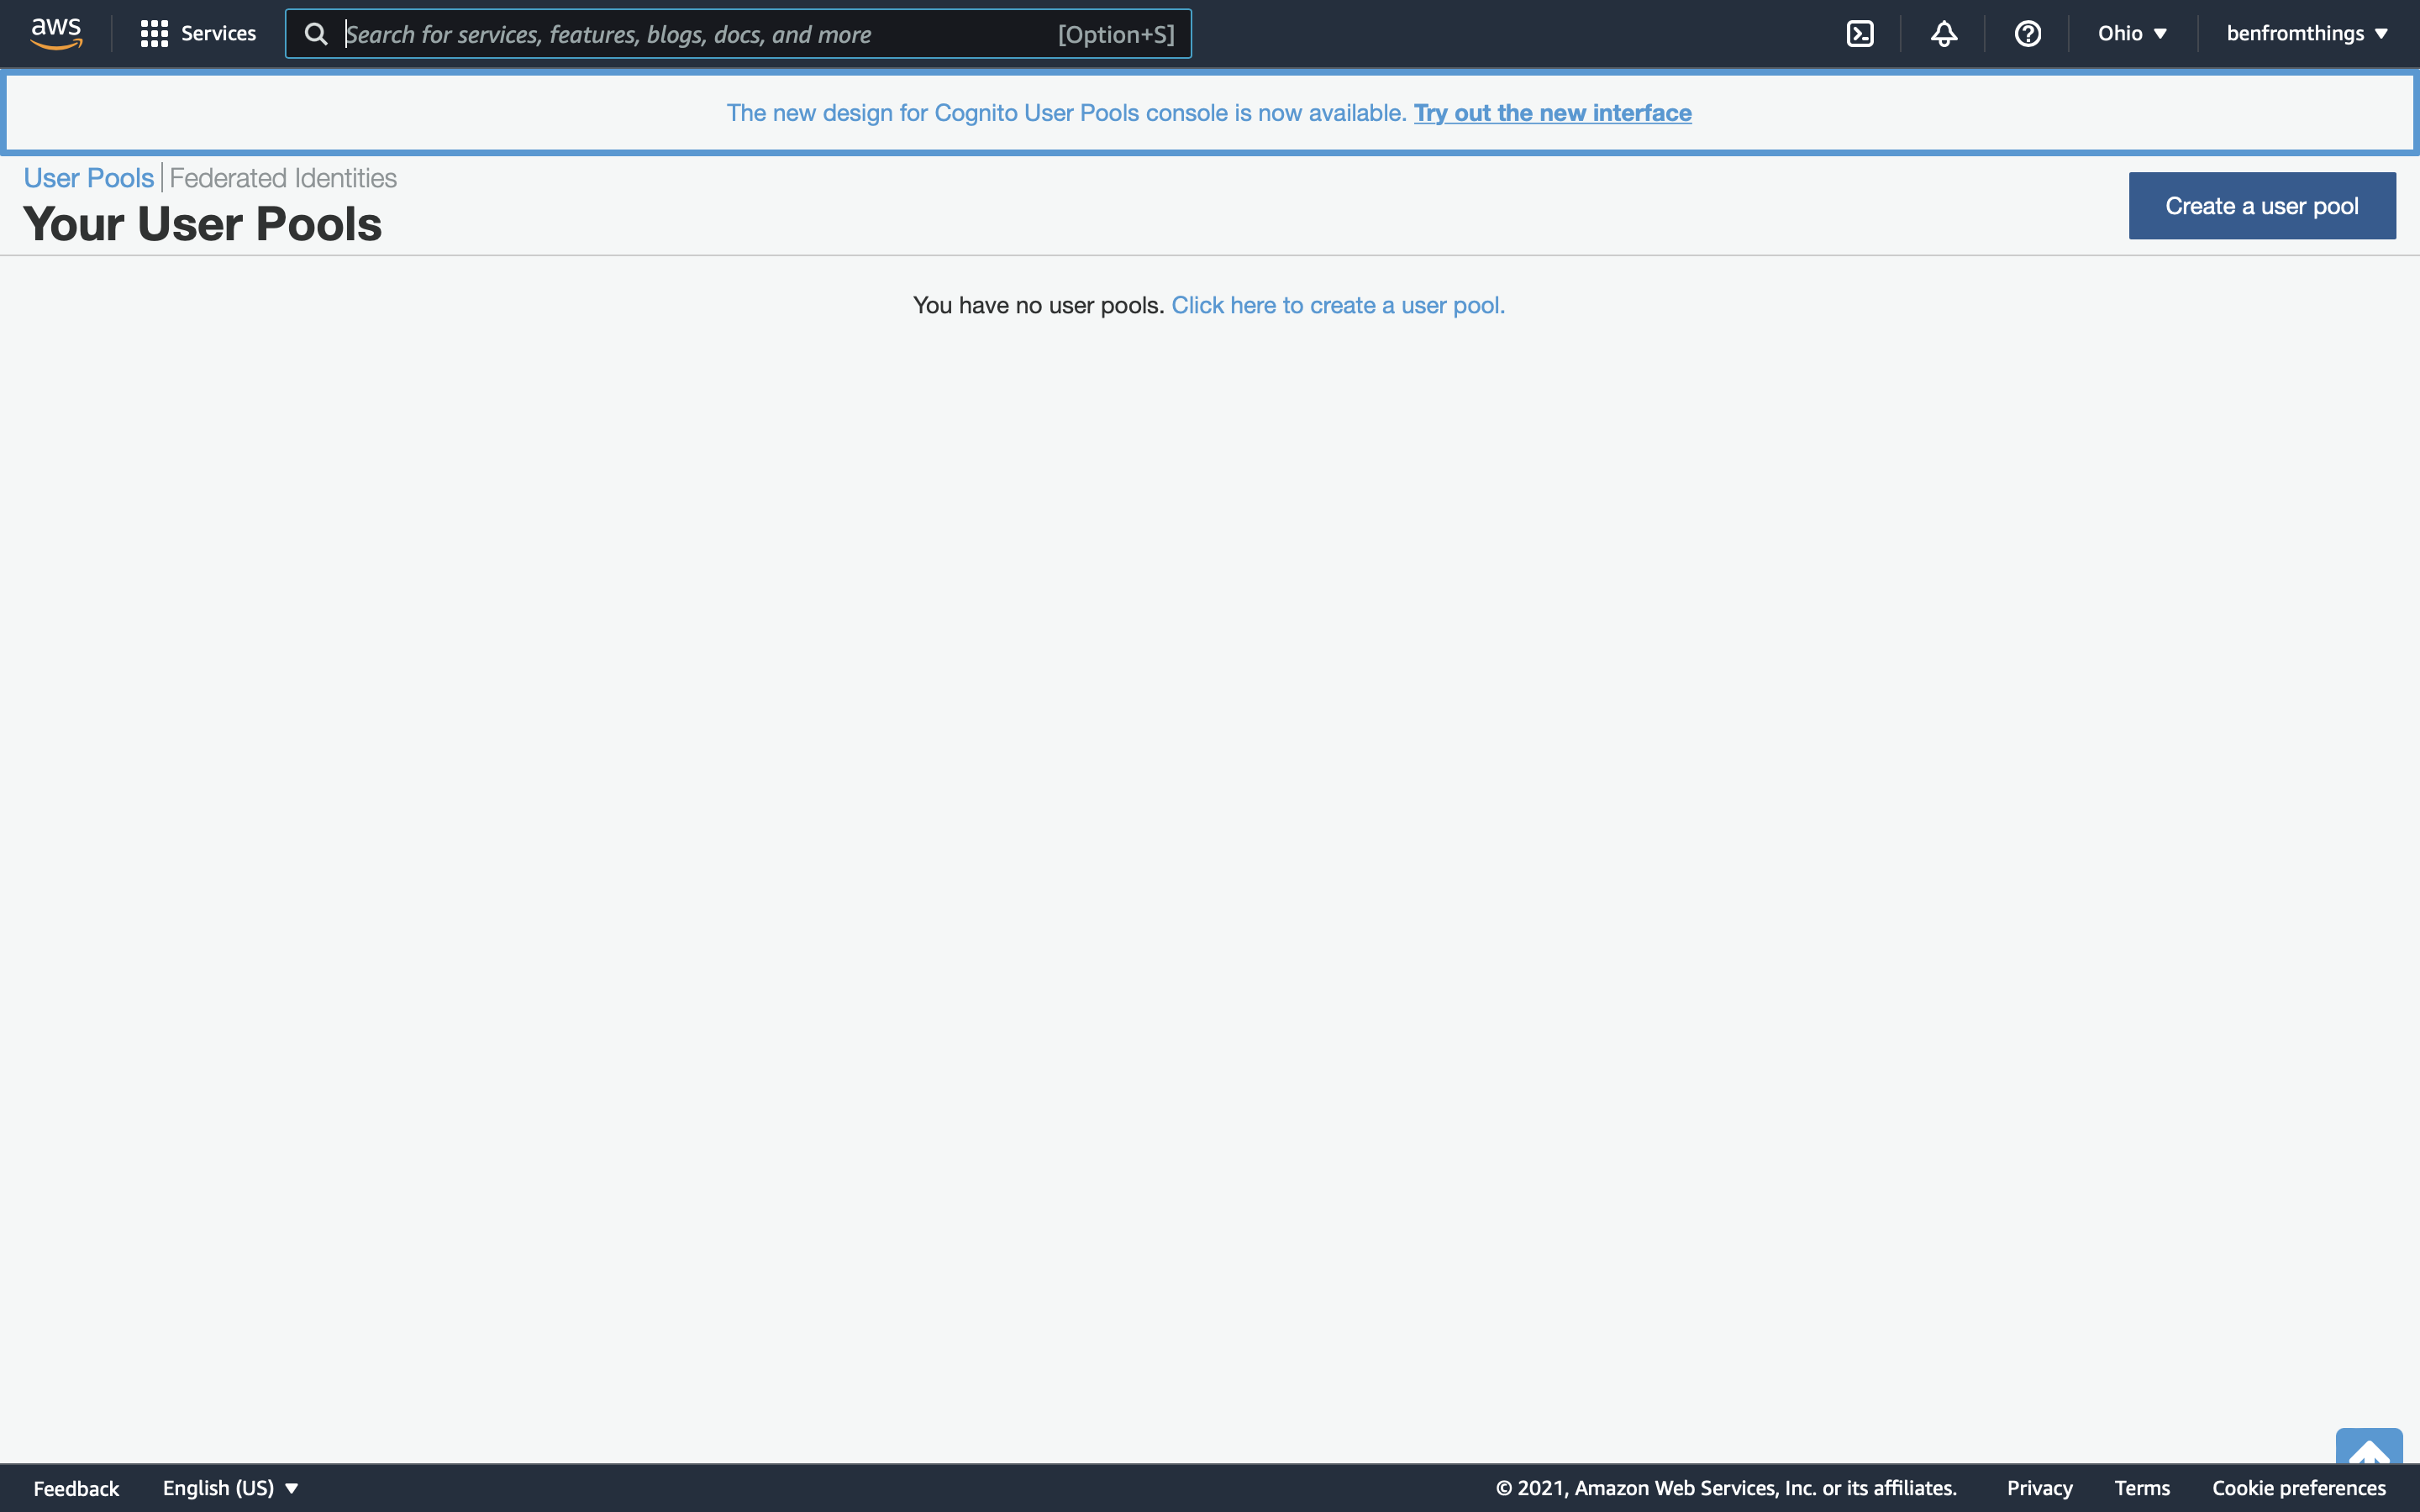
      Amazon Cognito Your User Pools page with the Create a user pool button

      Give the user pool a name of your choosing. You will not need this later, you may pick any name.

      Click Review defaults.
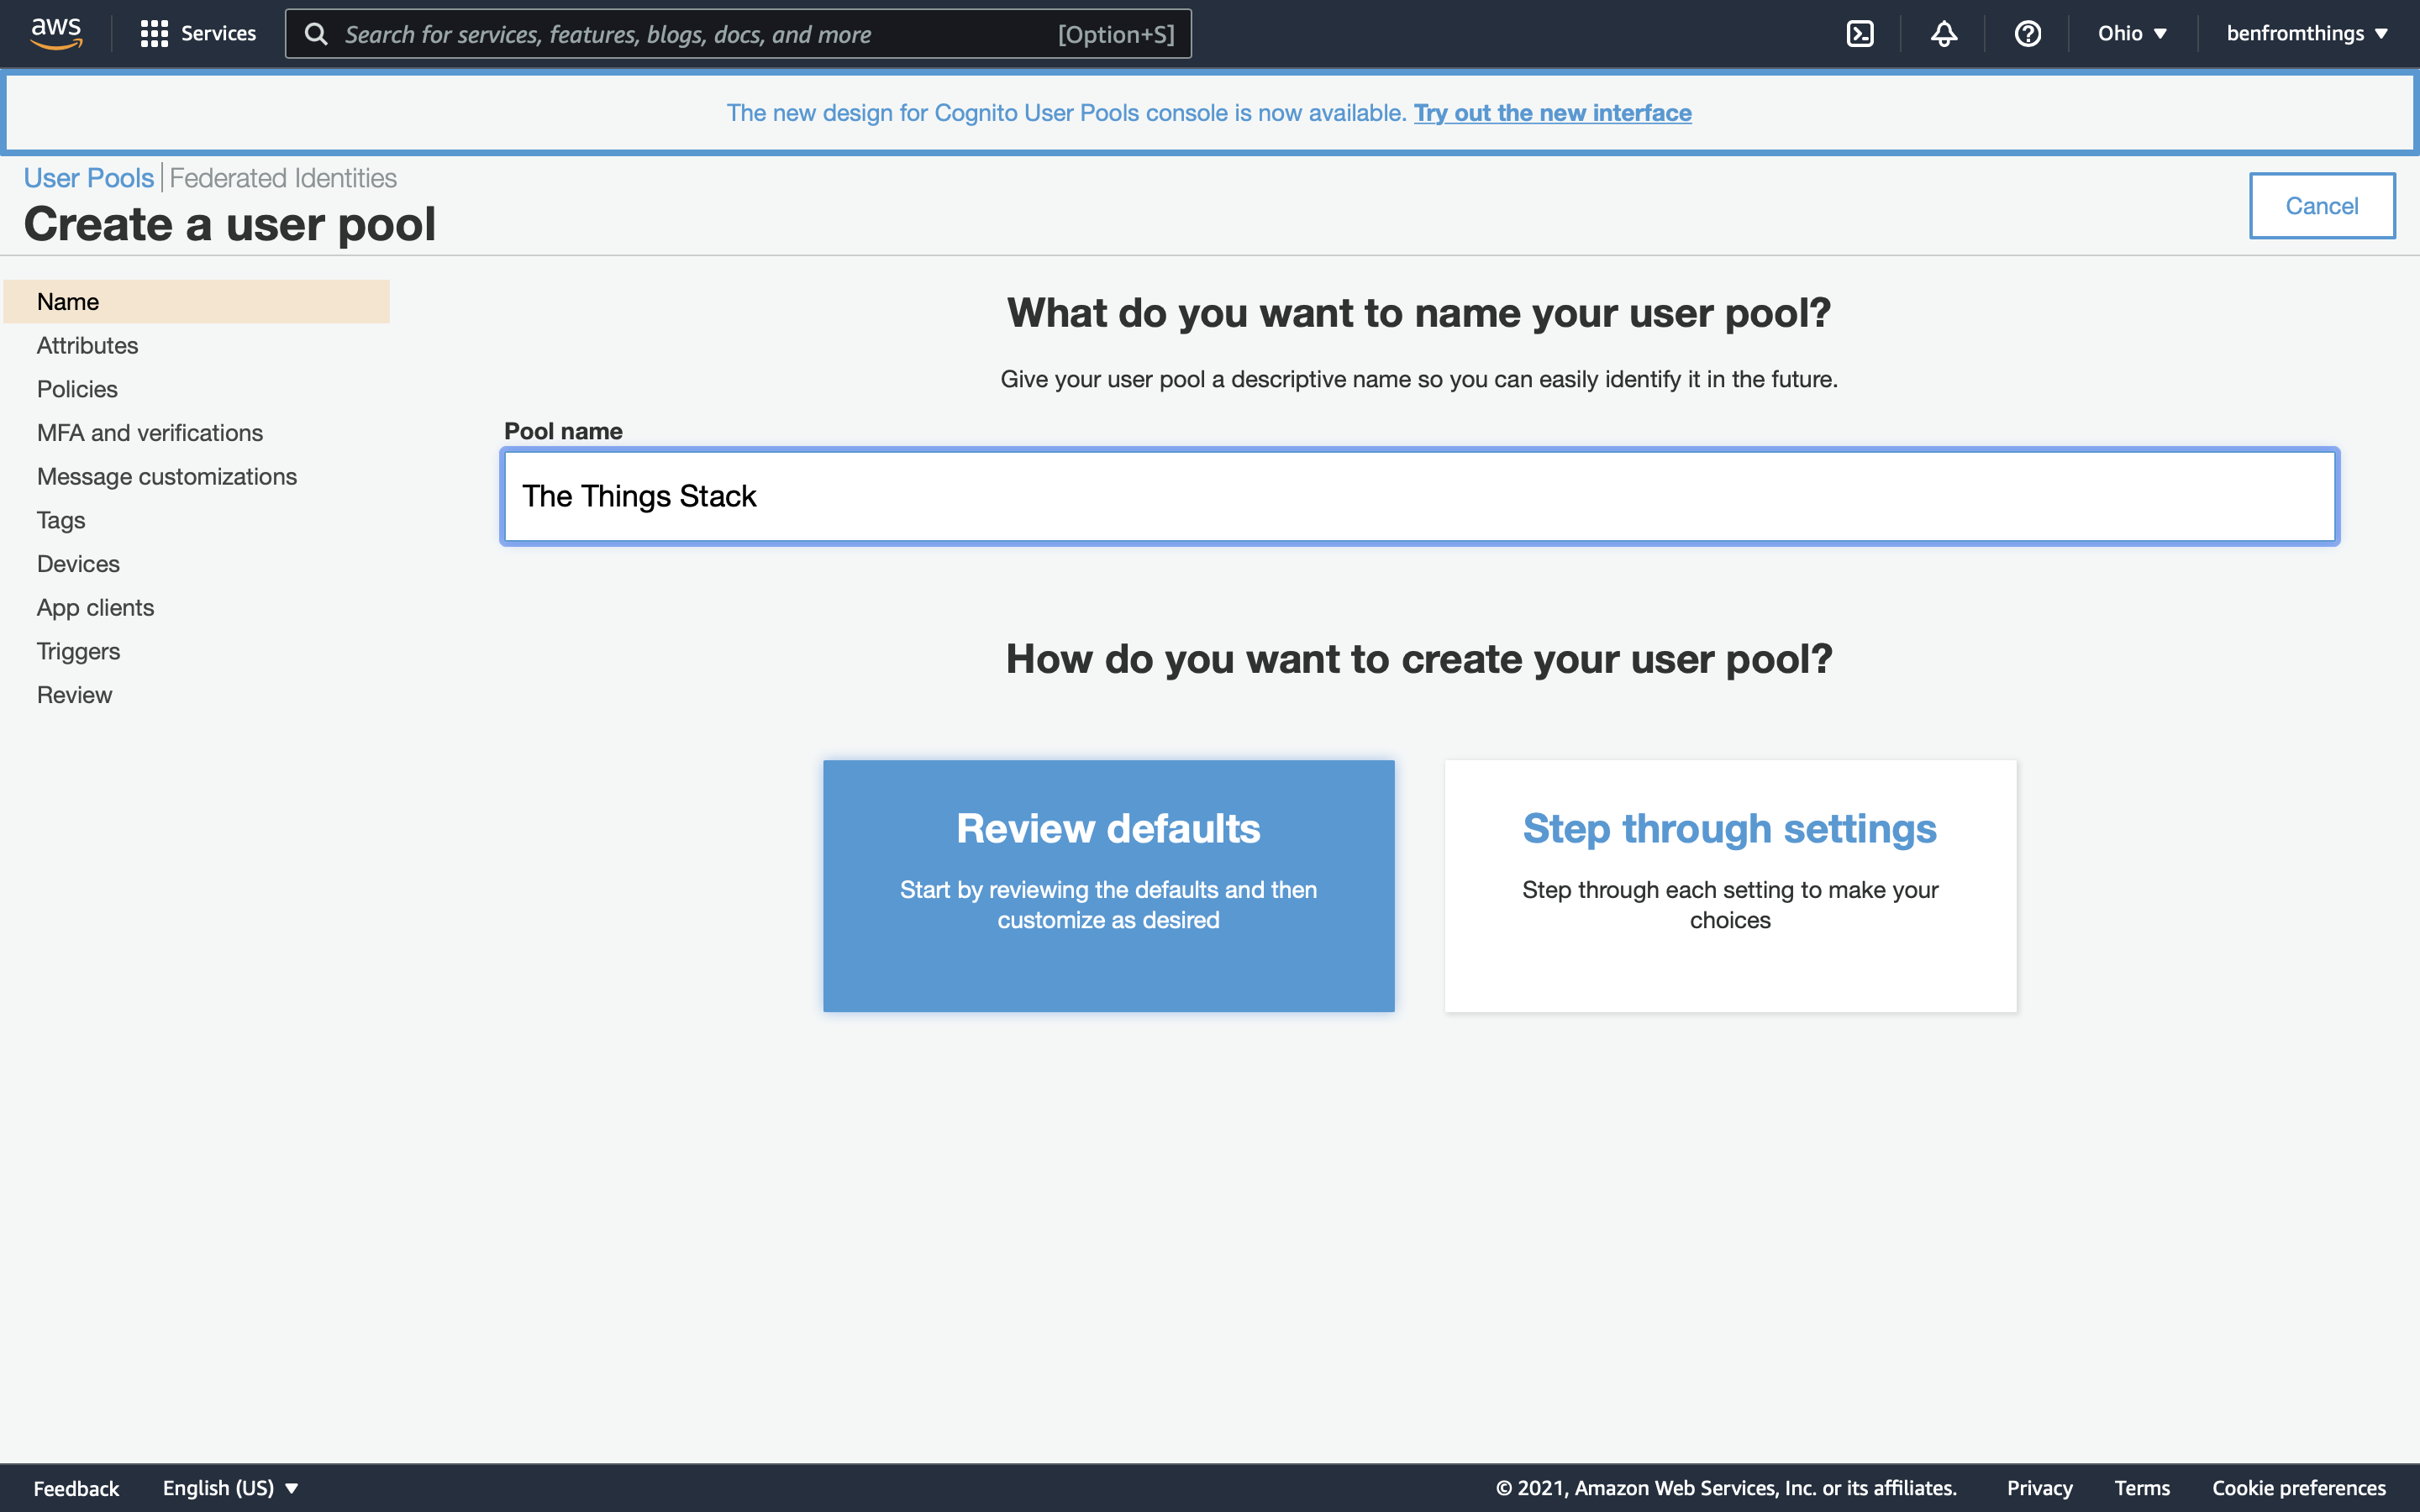
      Create a user pool in Amazon Cognito: the pool name set to The Things Stack

      Leave all default settings, but click Add app client.
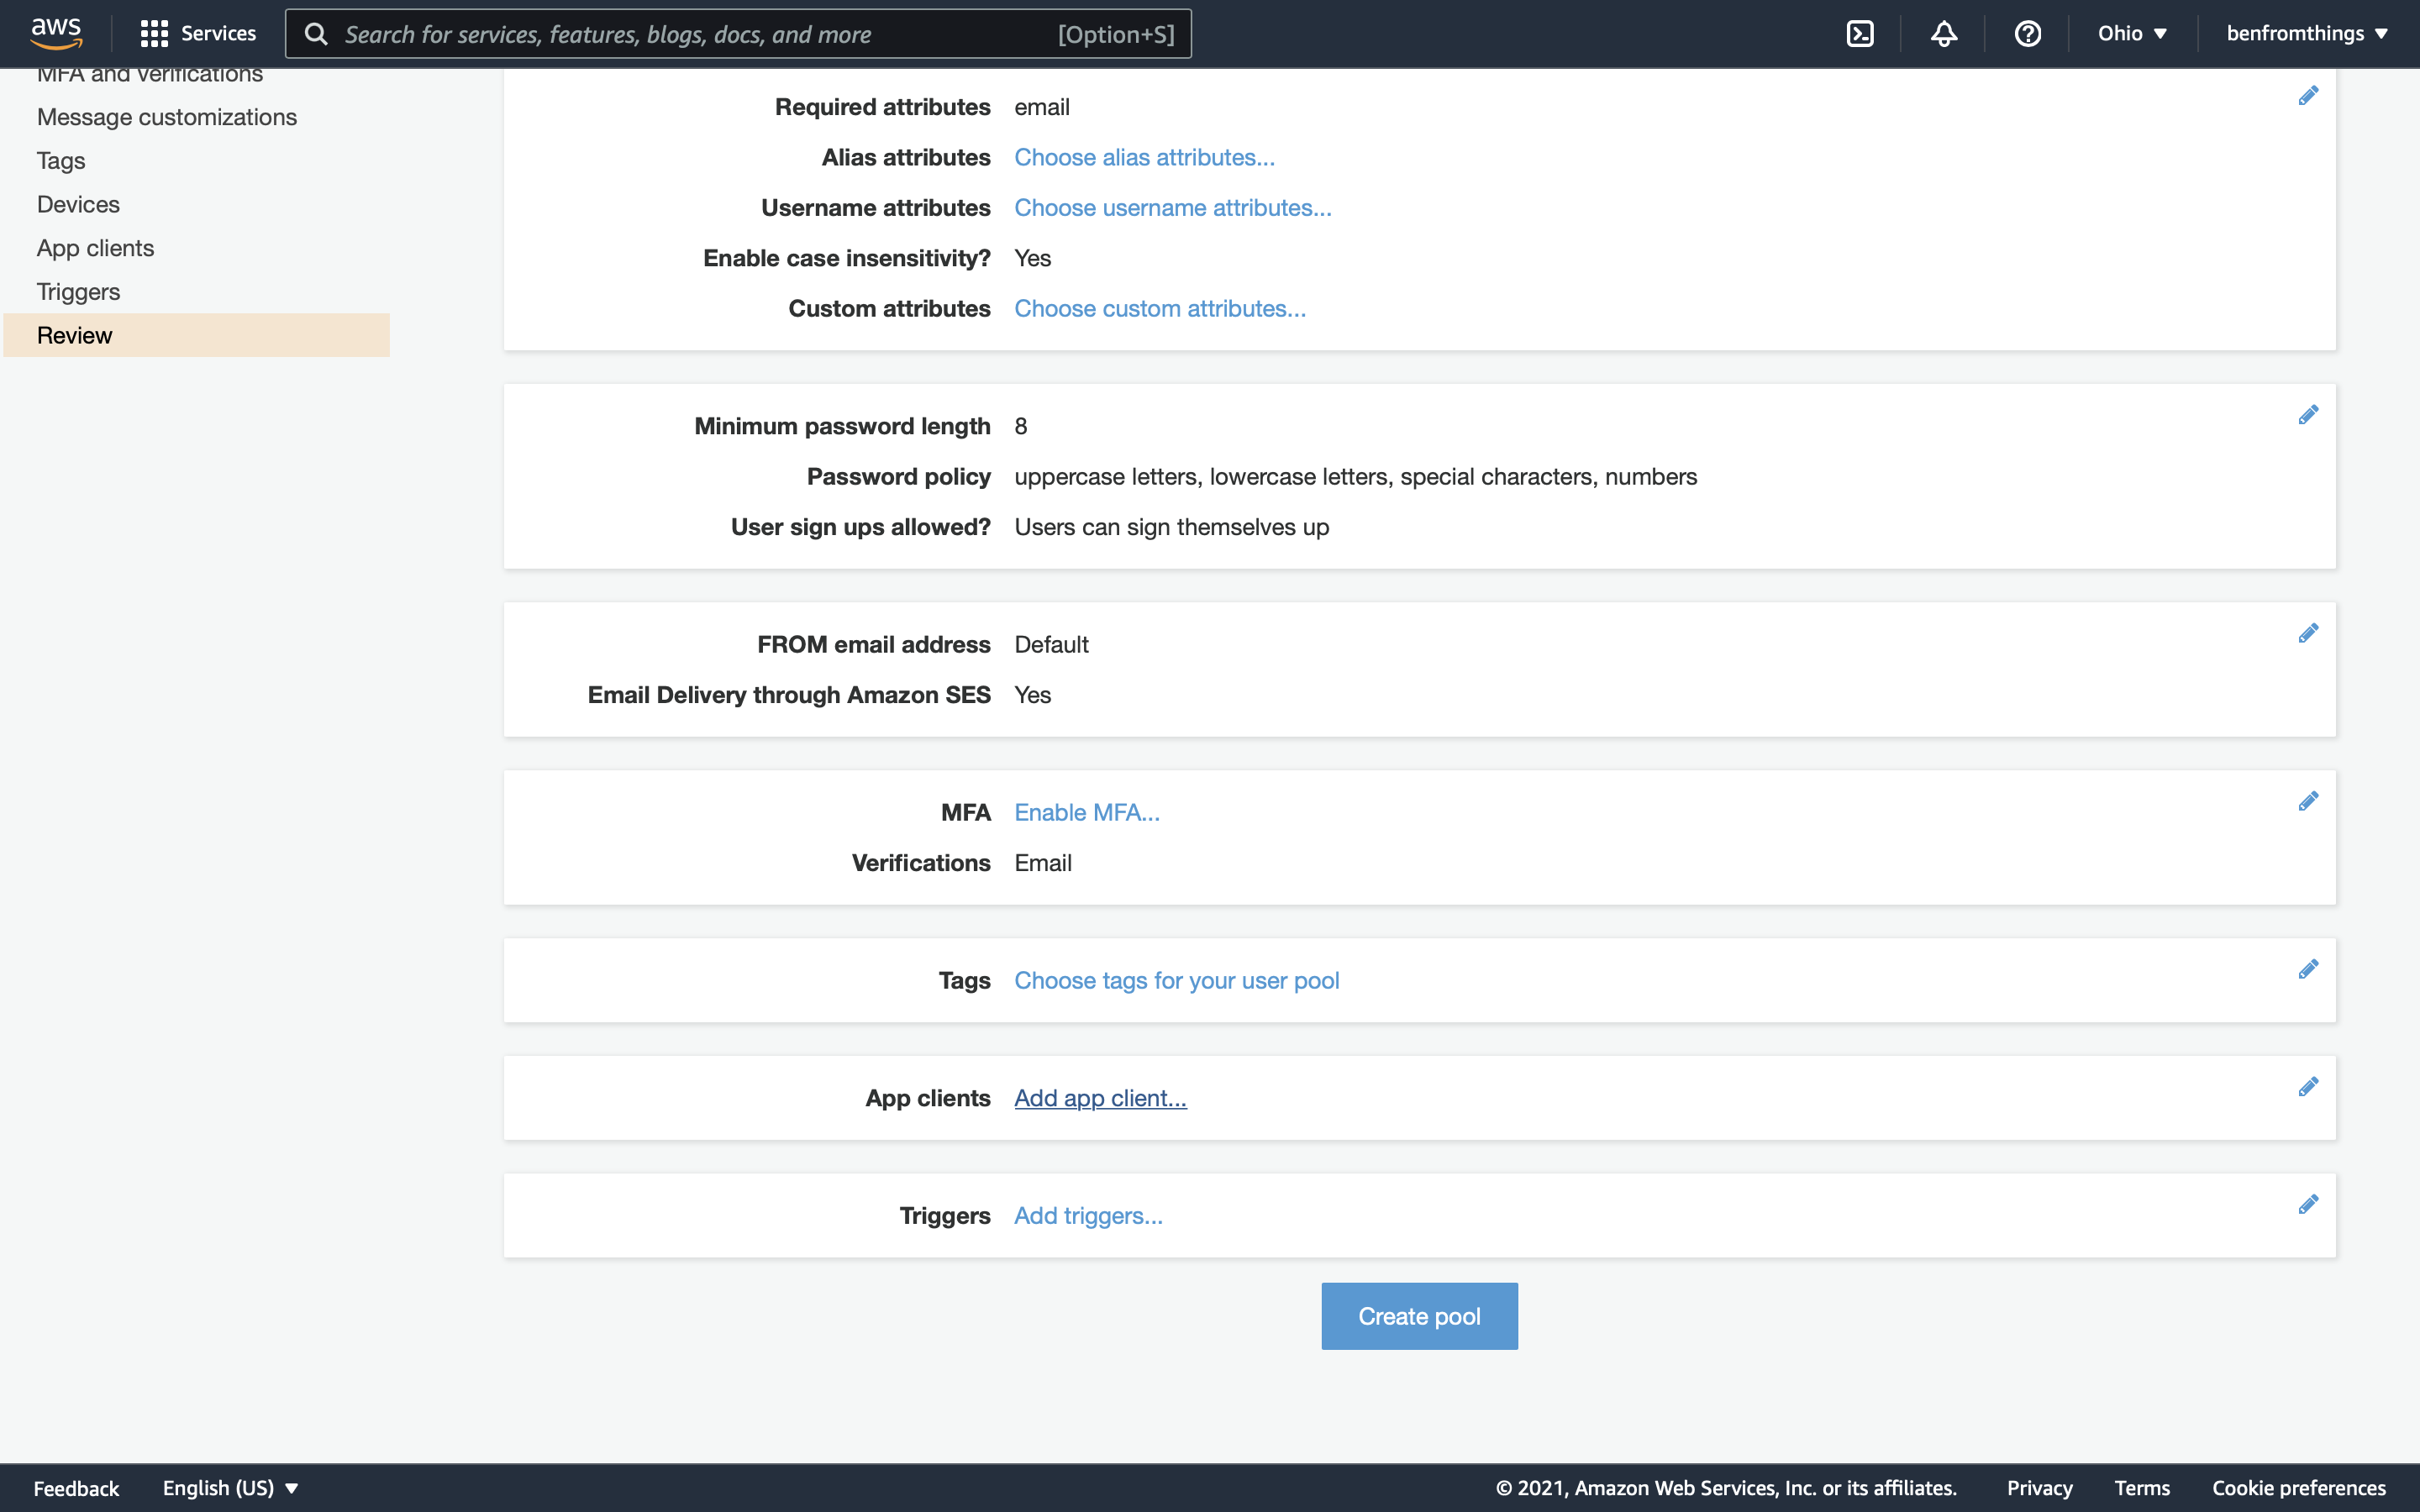
      Amazon Cognito user pool review page with the Add app client link

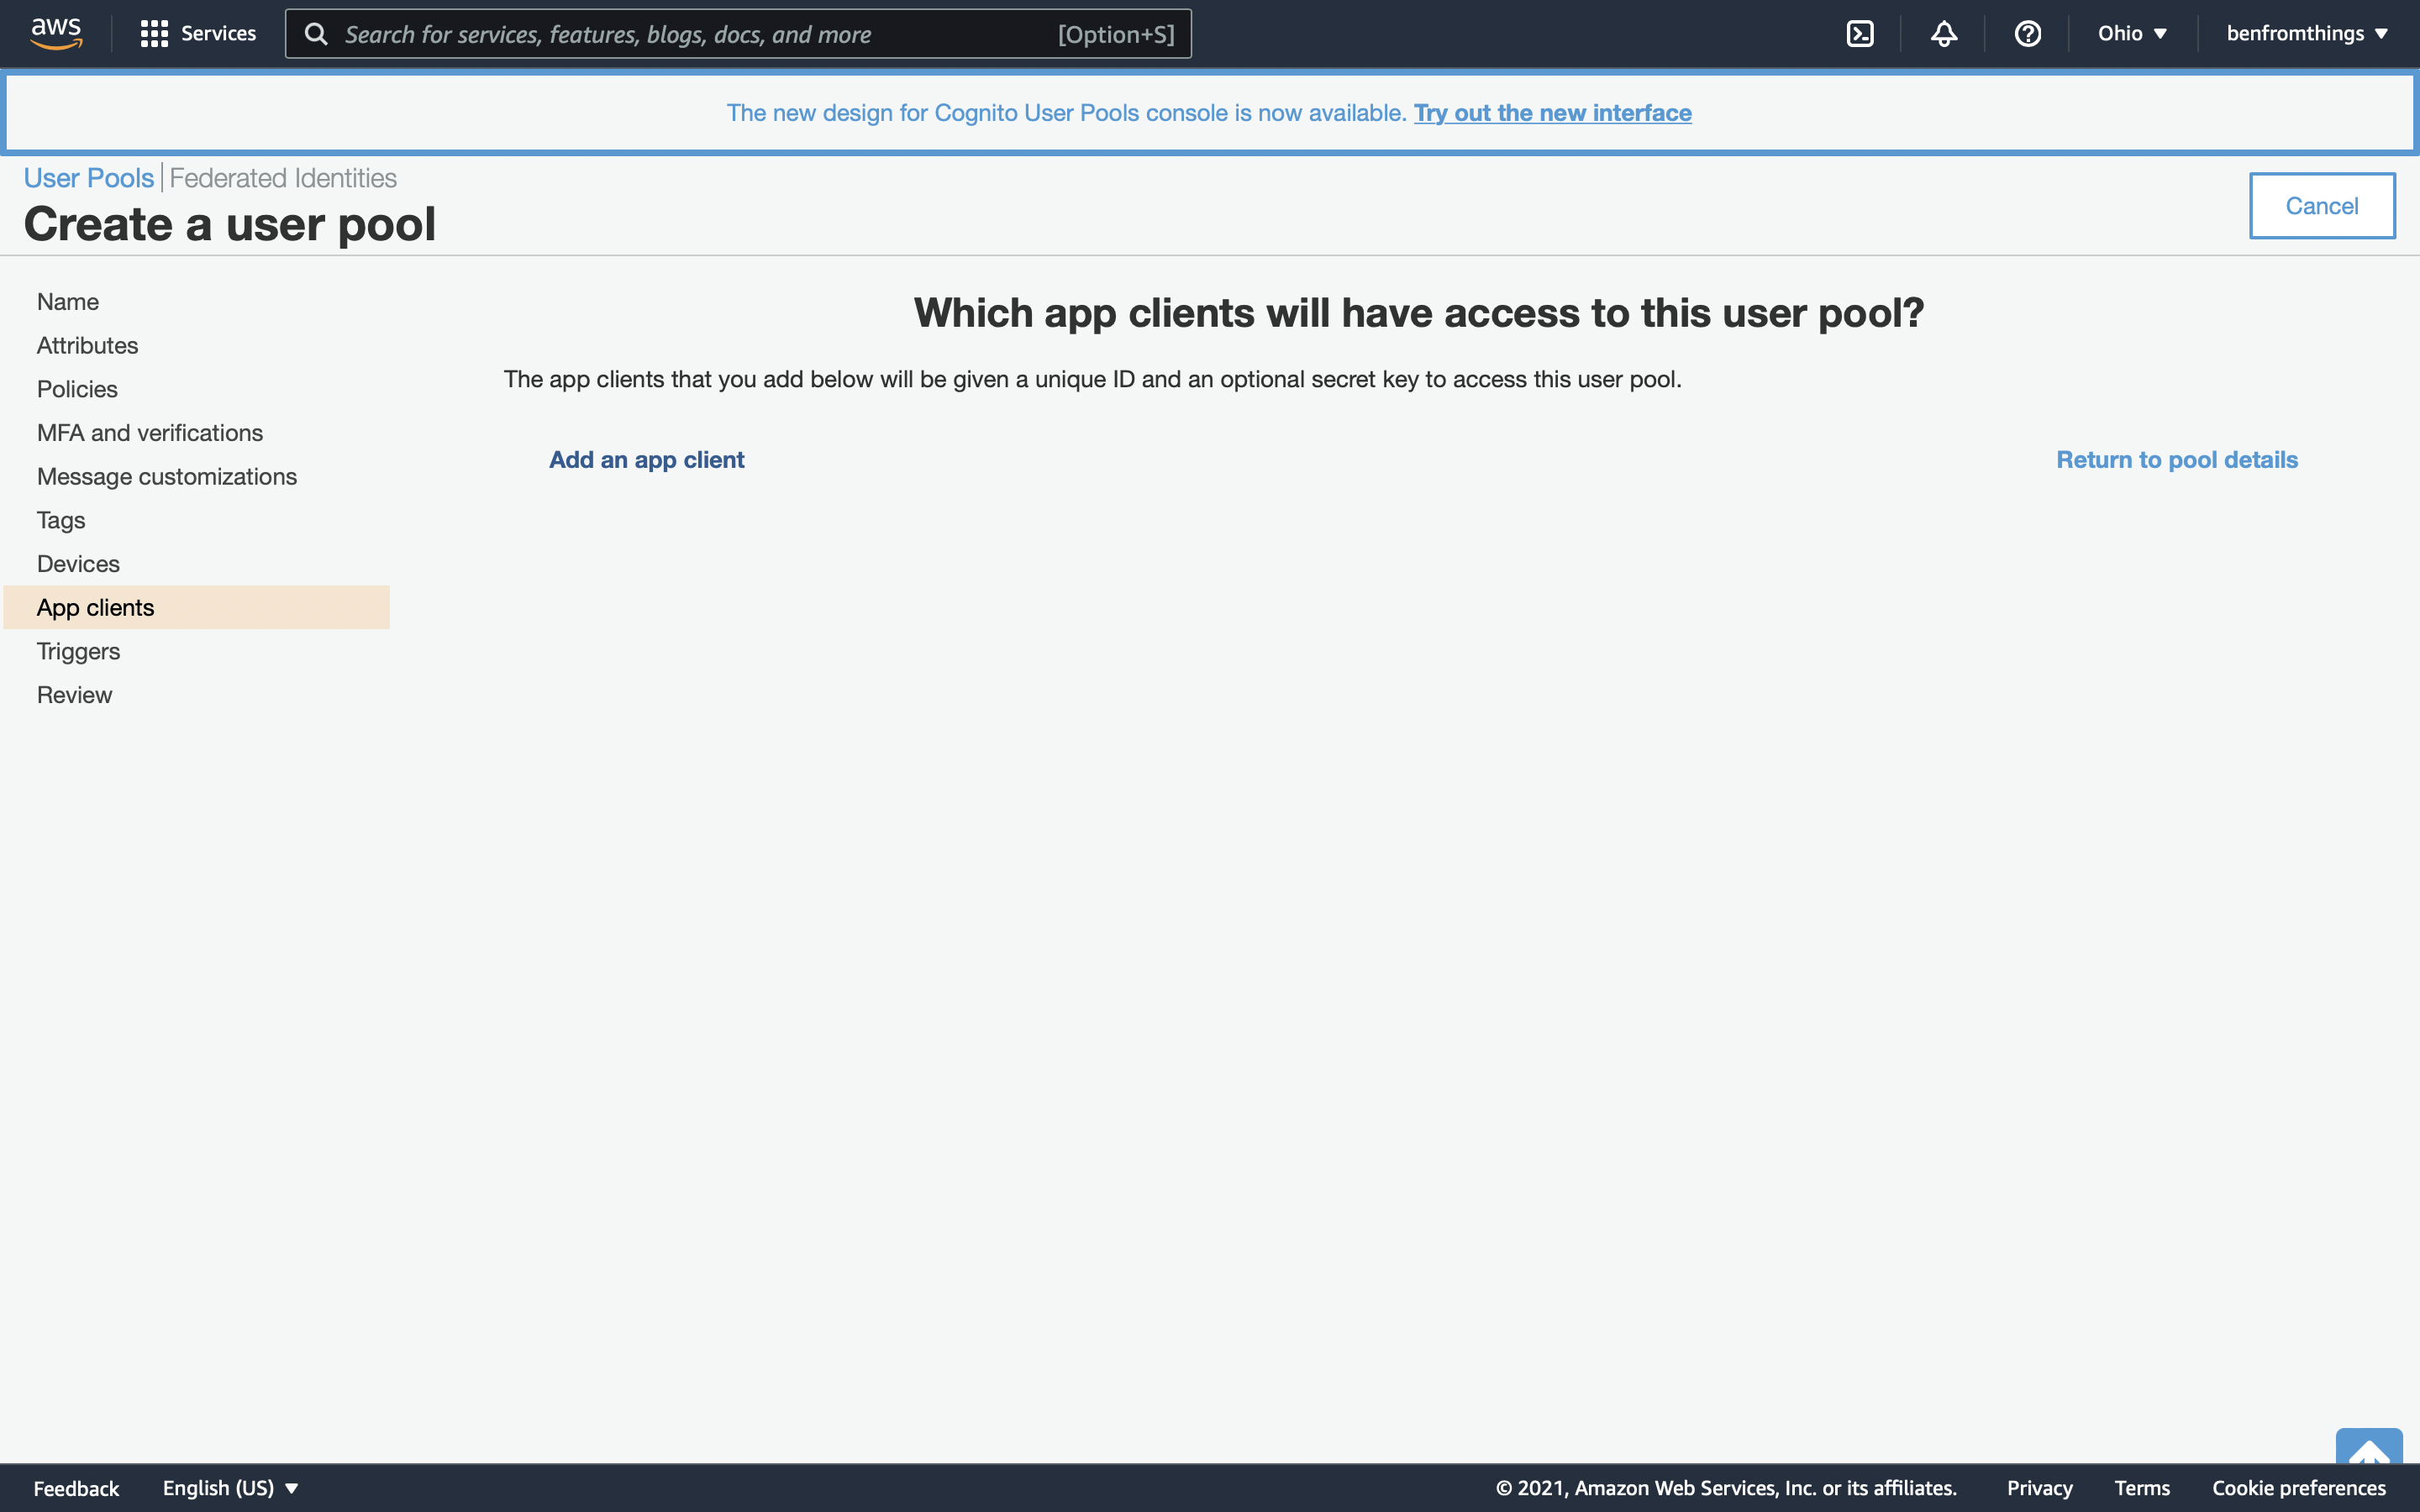
      Click Add an app client.

      Amazon Cognito app clients page with the Add an app client link

      Give the App Client a name and leave all settings default. Click Create app client.
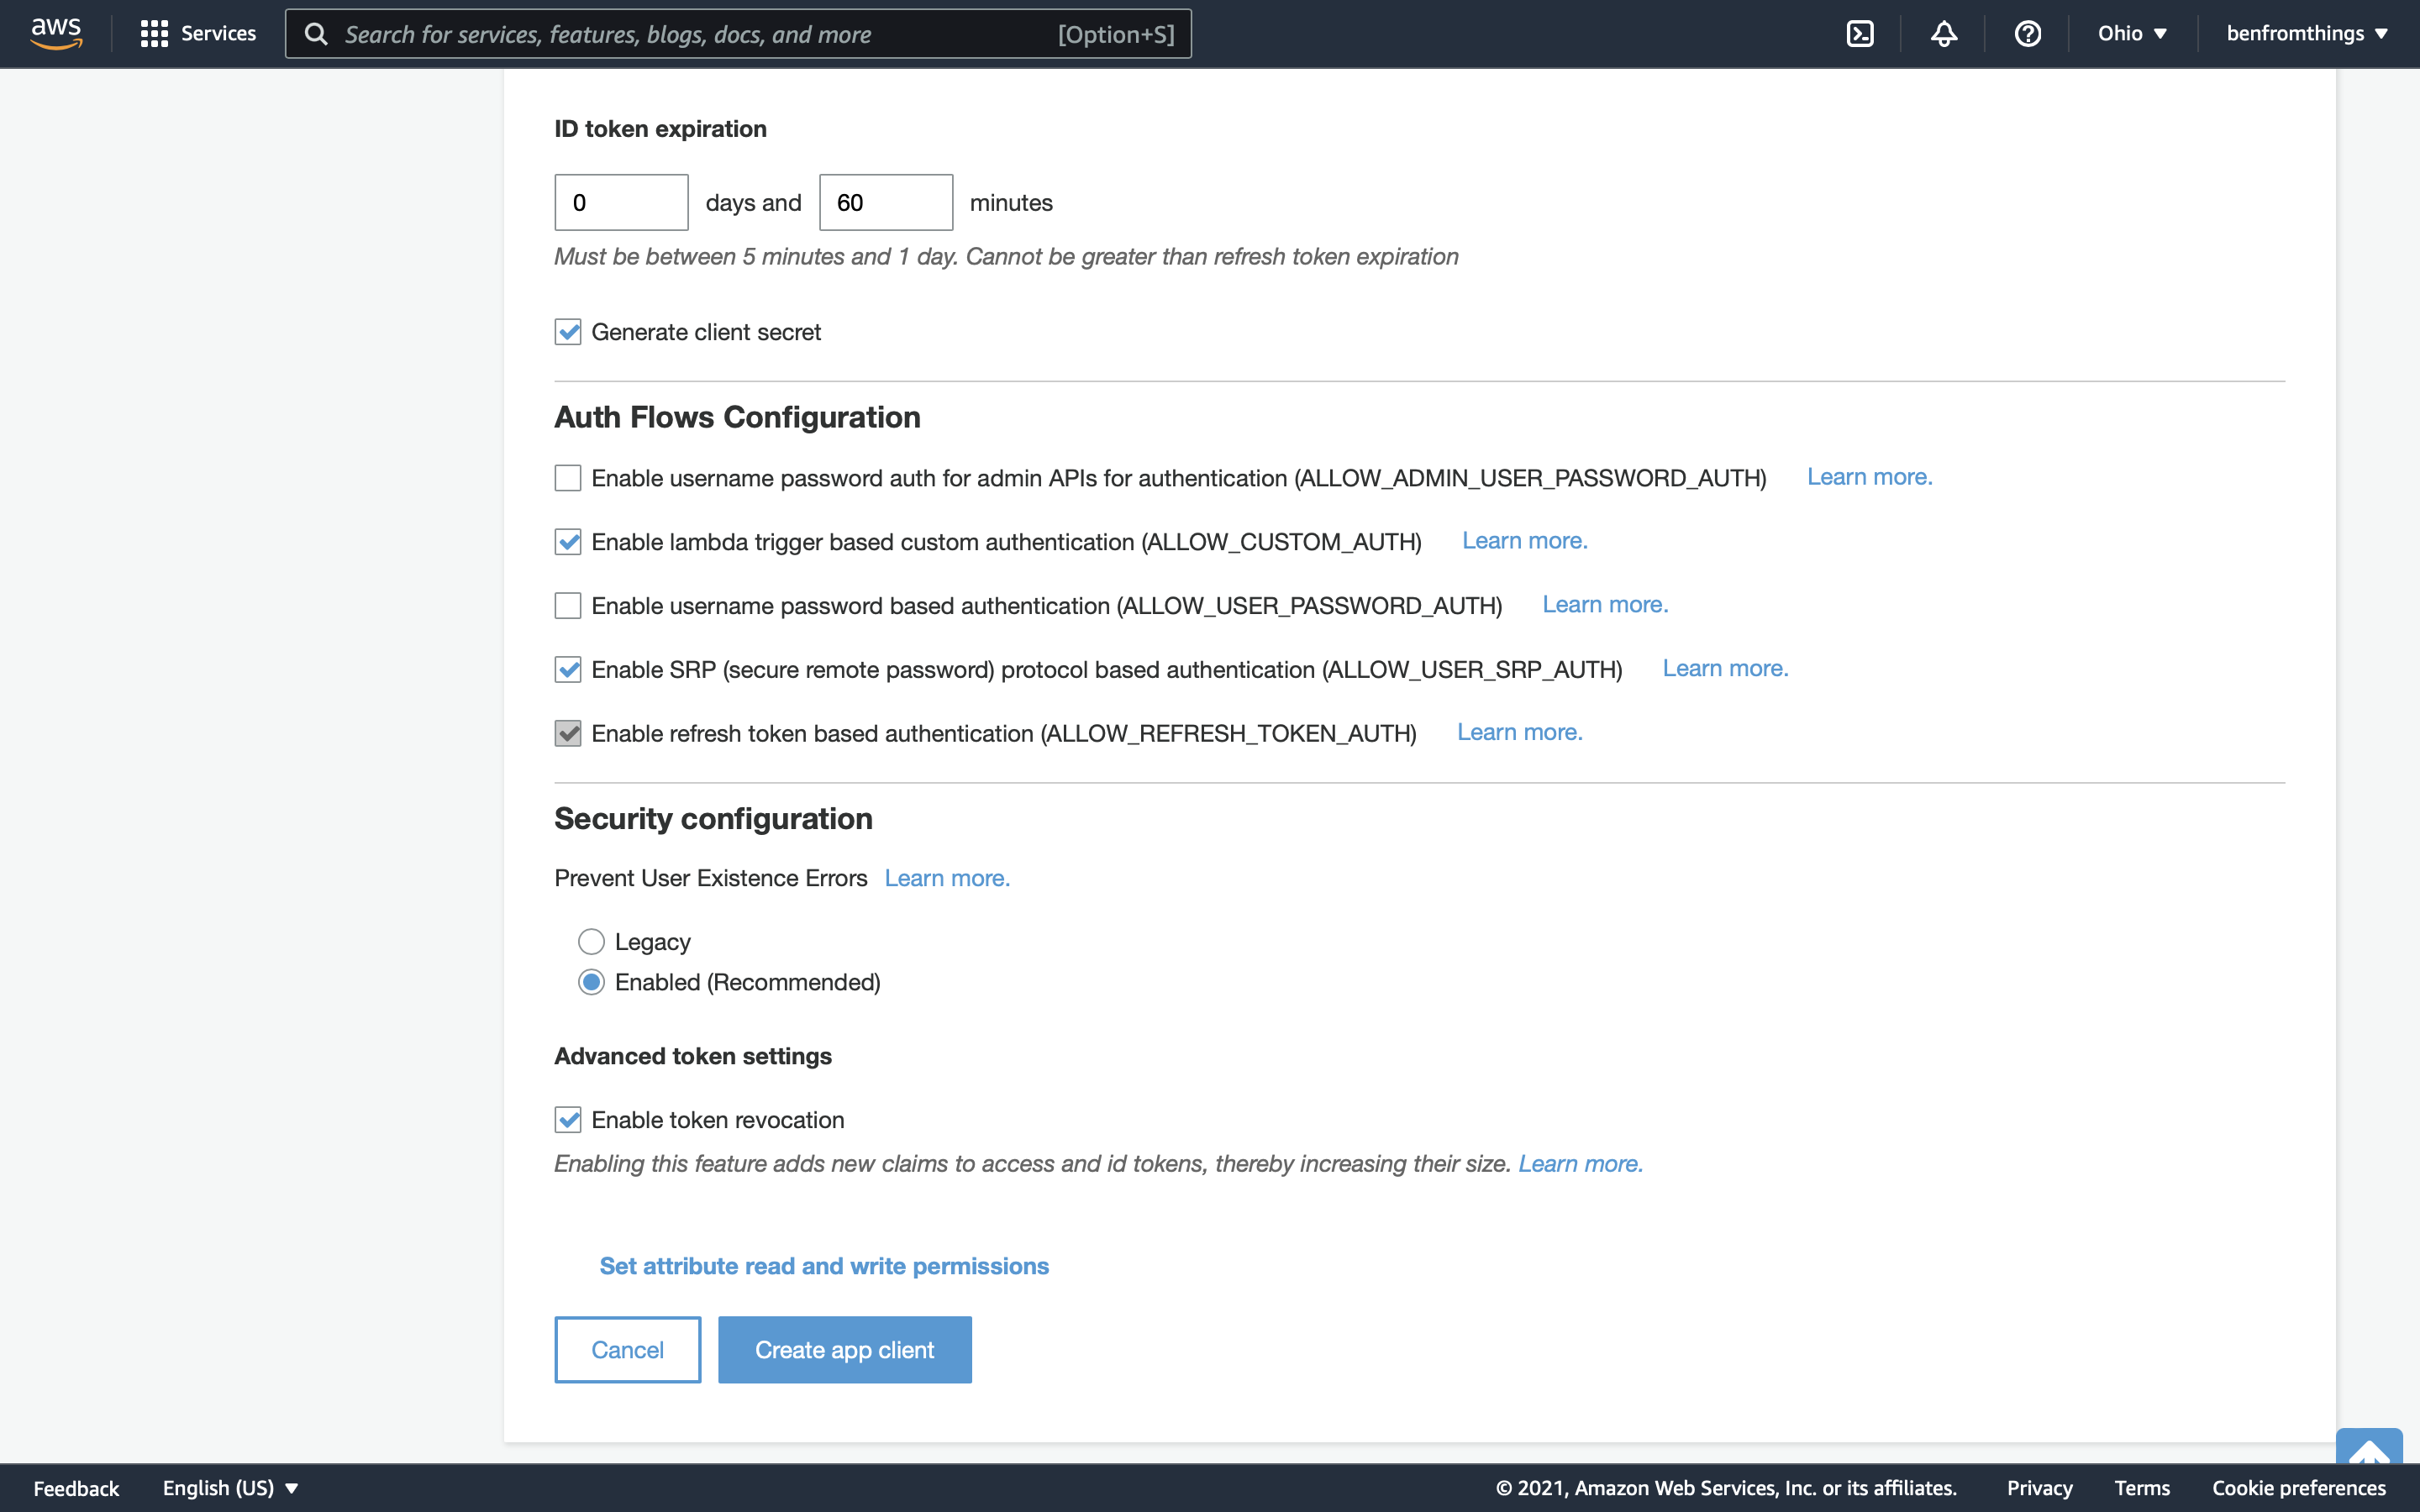
      Amazon Cognito app client settings: token expiration, Generate client secret and auth flows configuration

      You will be taken back to the App Clients screen, where you should see the App Client you just added. Click Return to pool details.
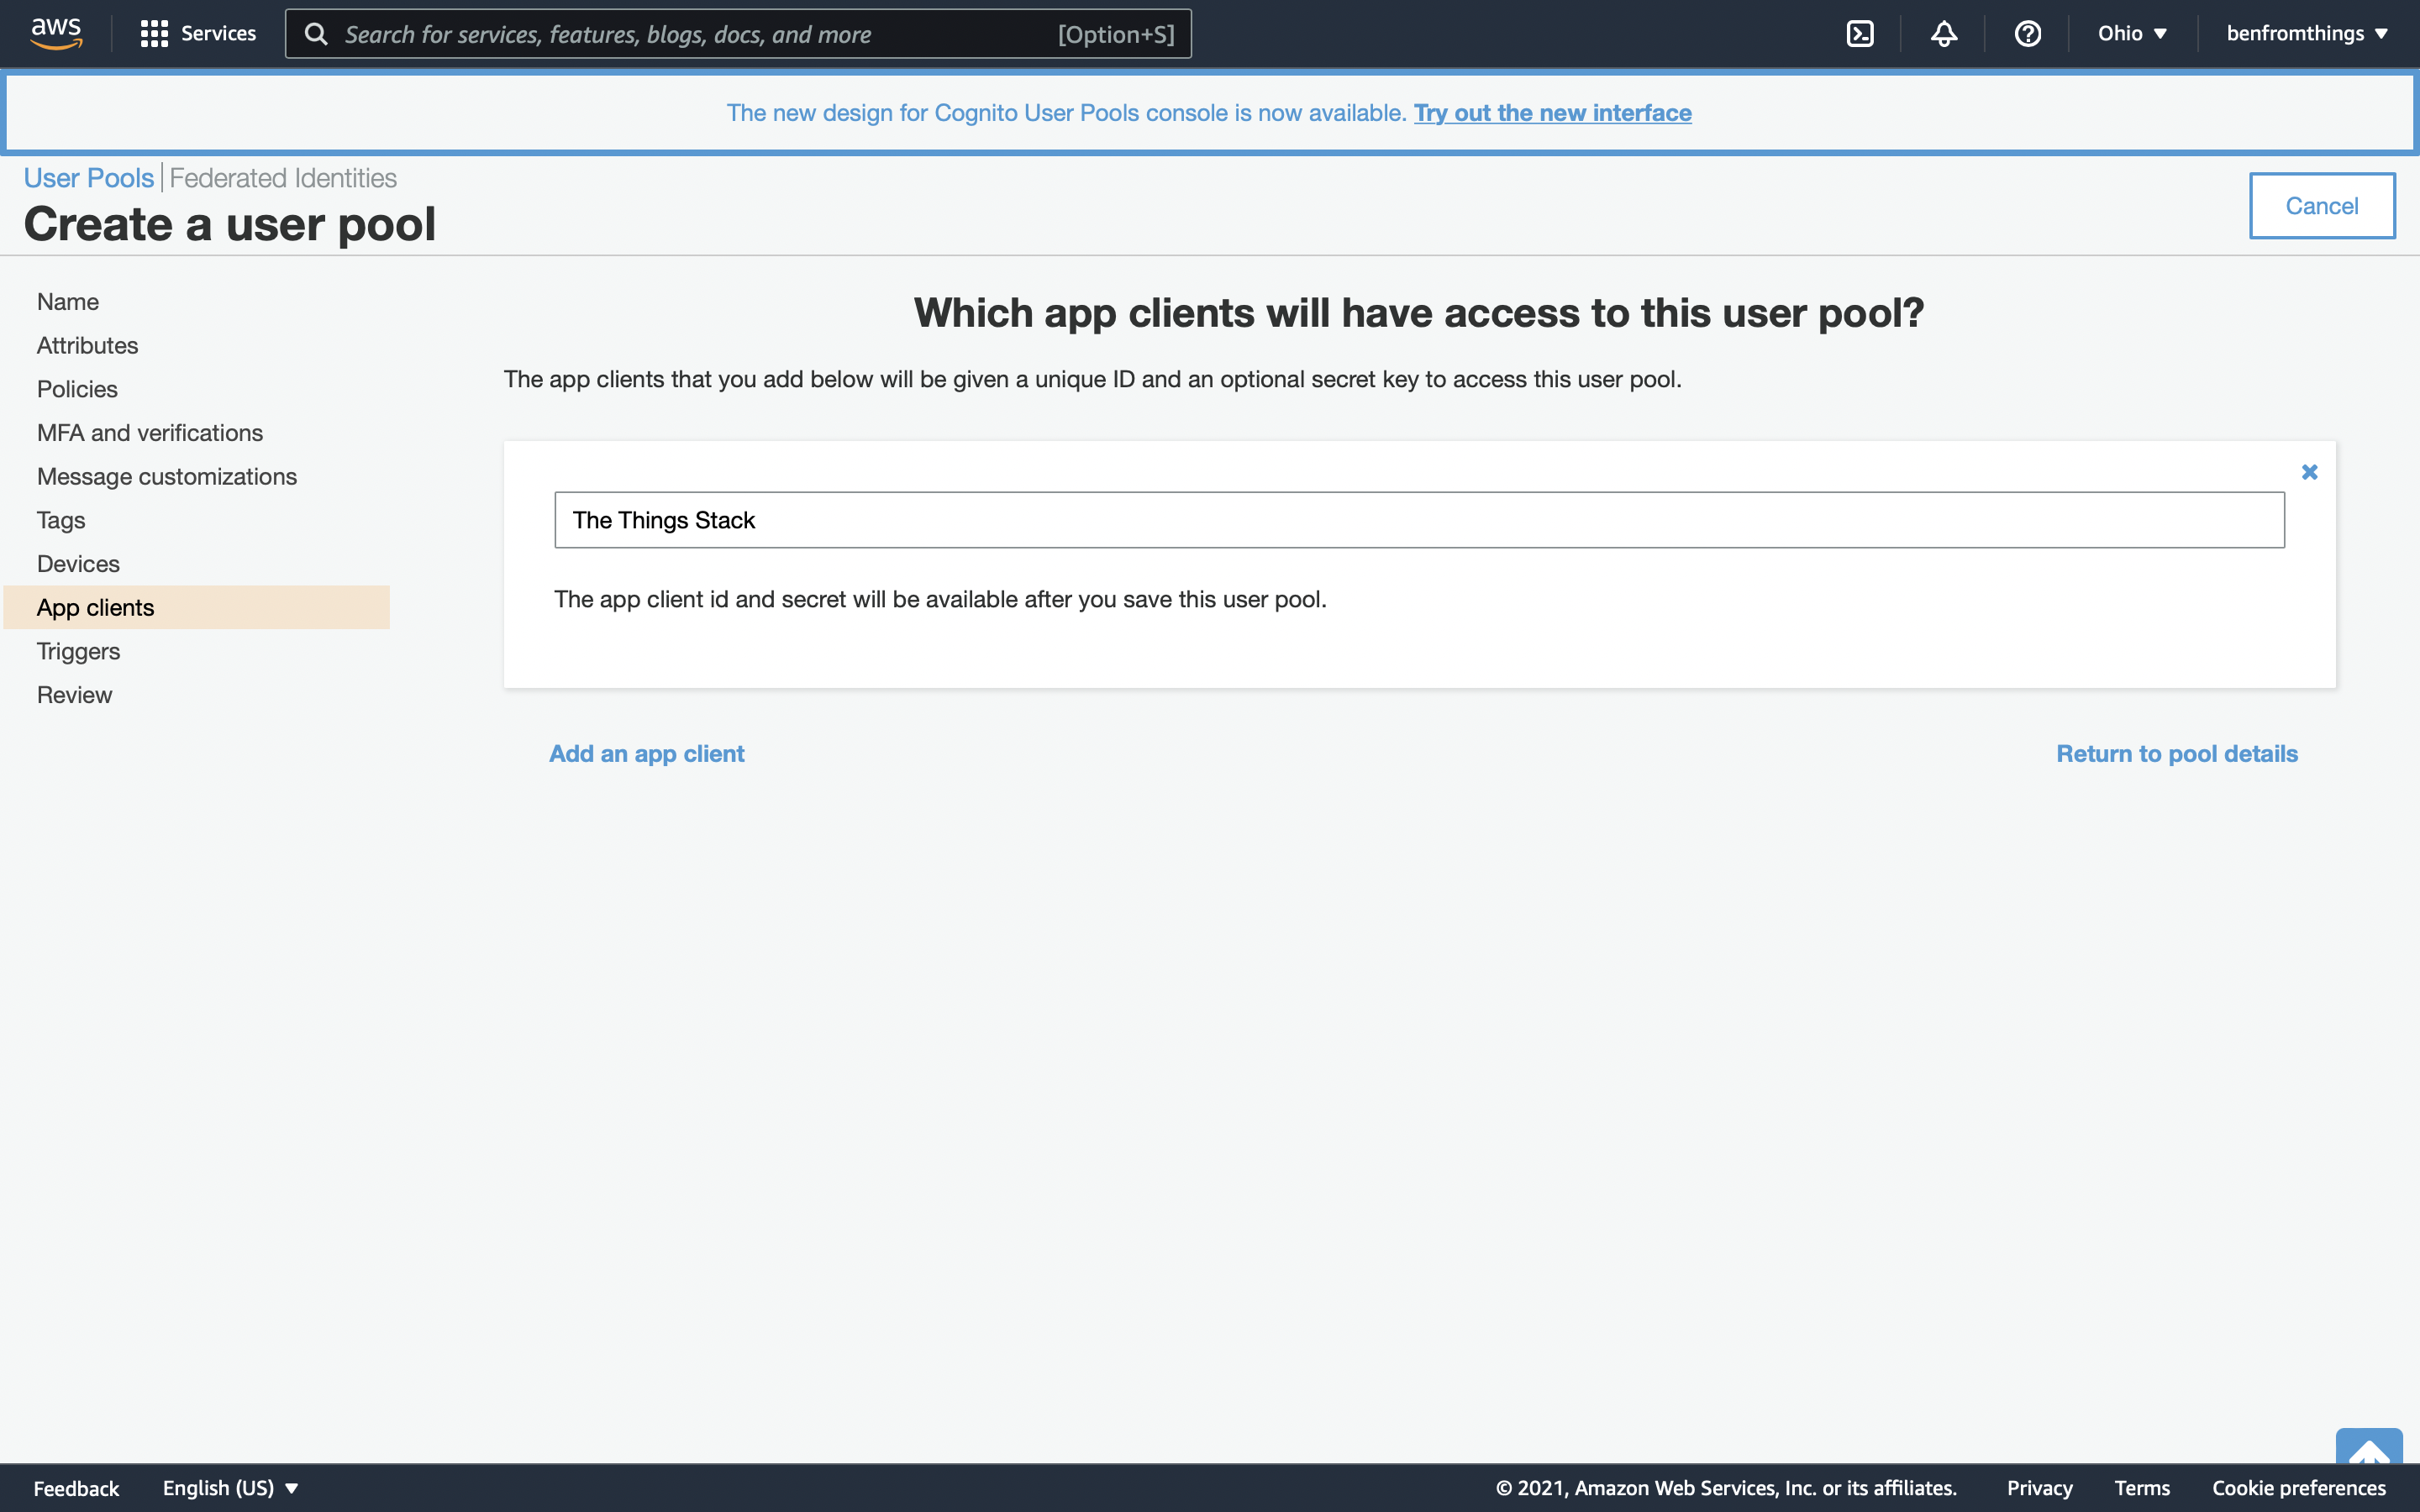
      Amazon Cognito App Clients page listing the newly added app client

      Verify that the App Client you added is listed in the pool. Click Create pool.
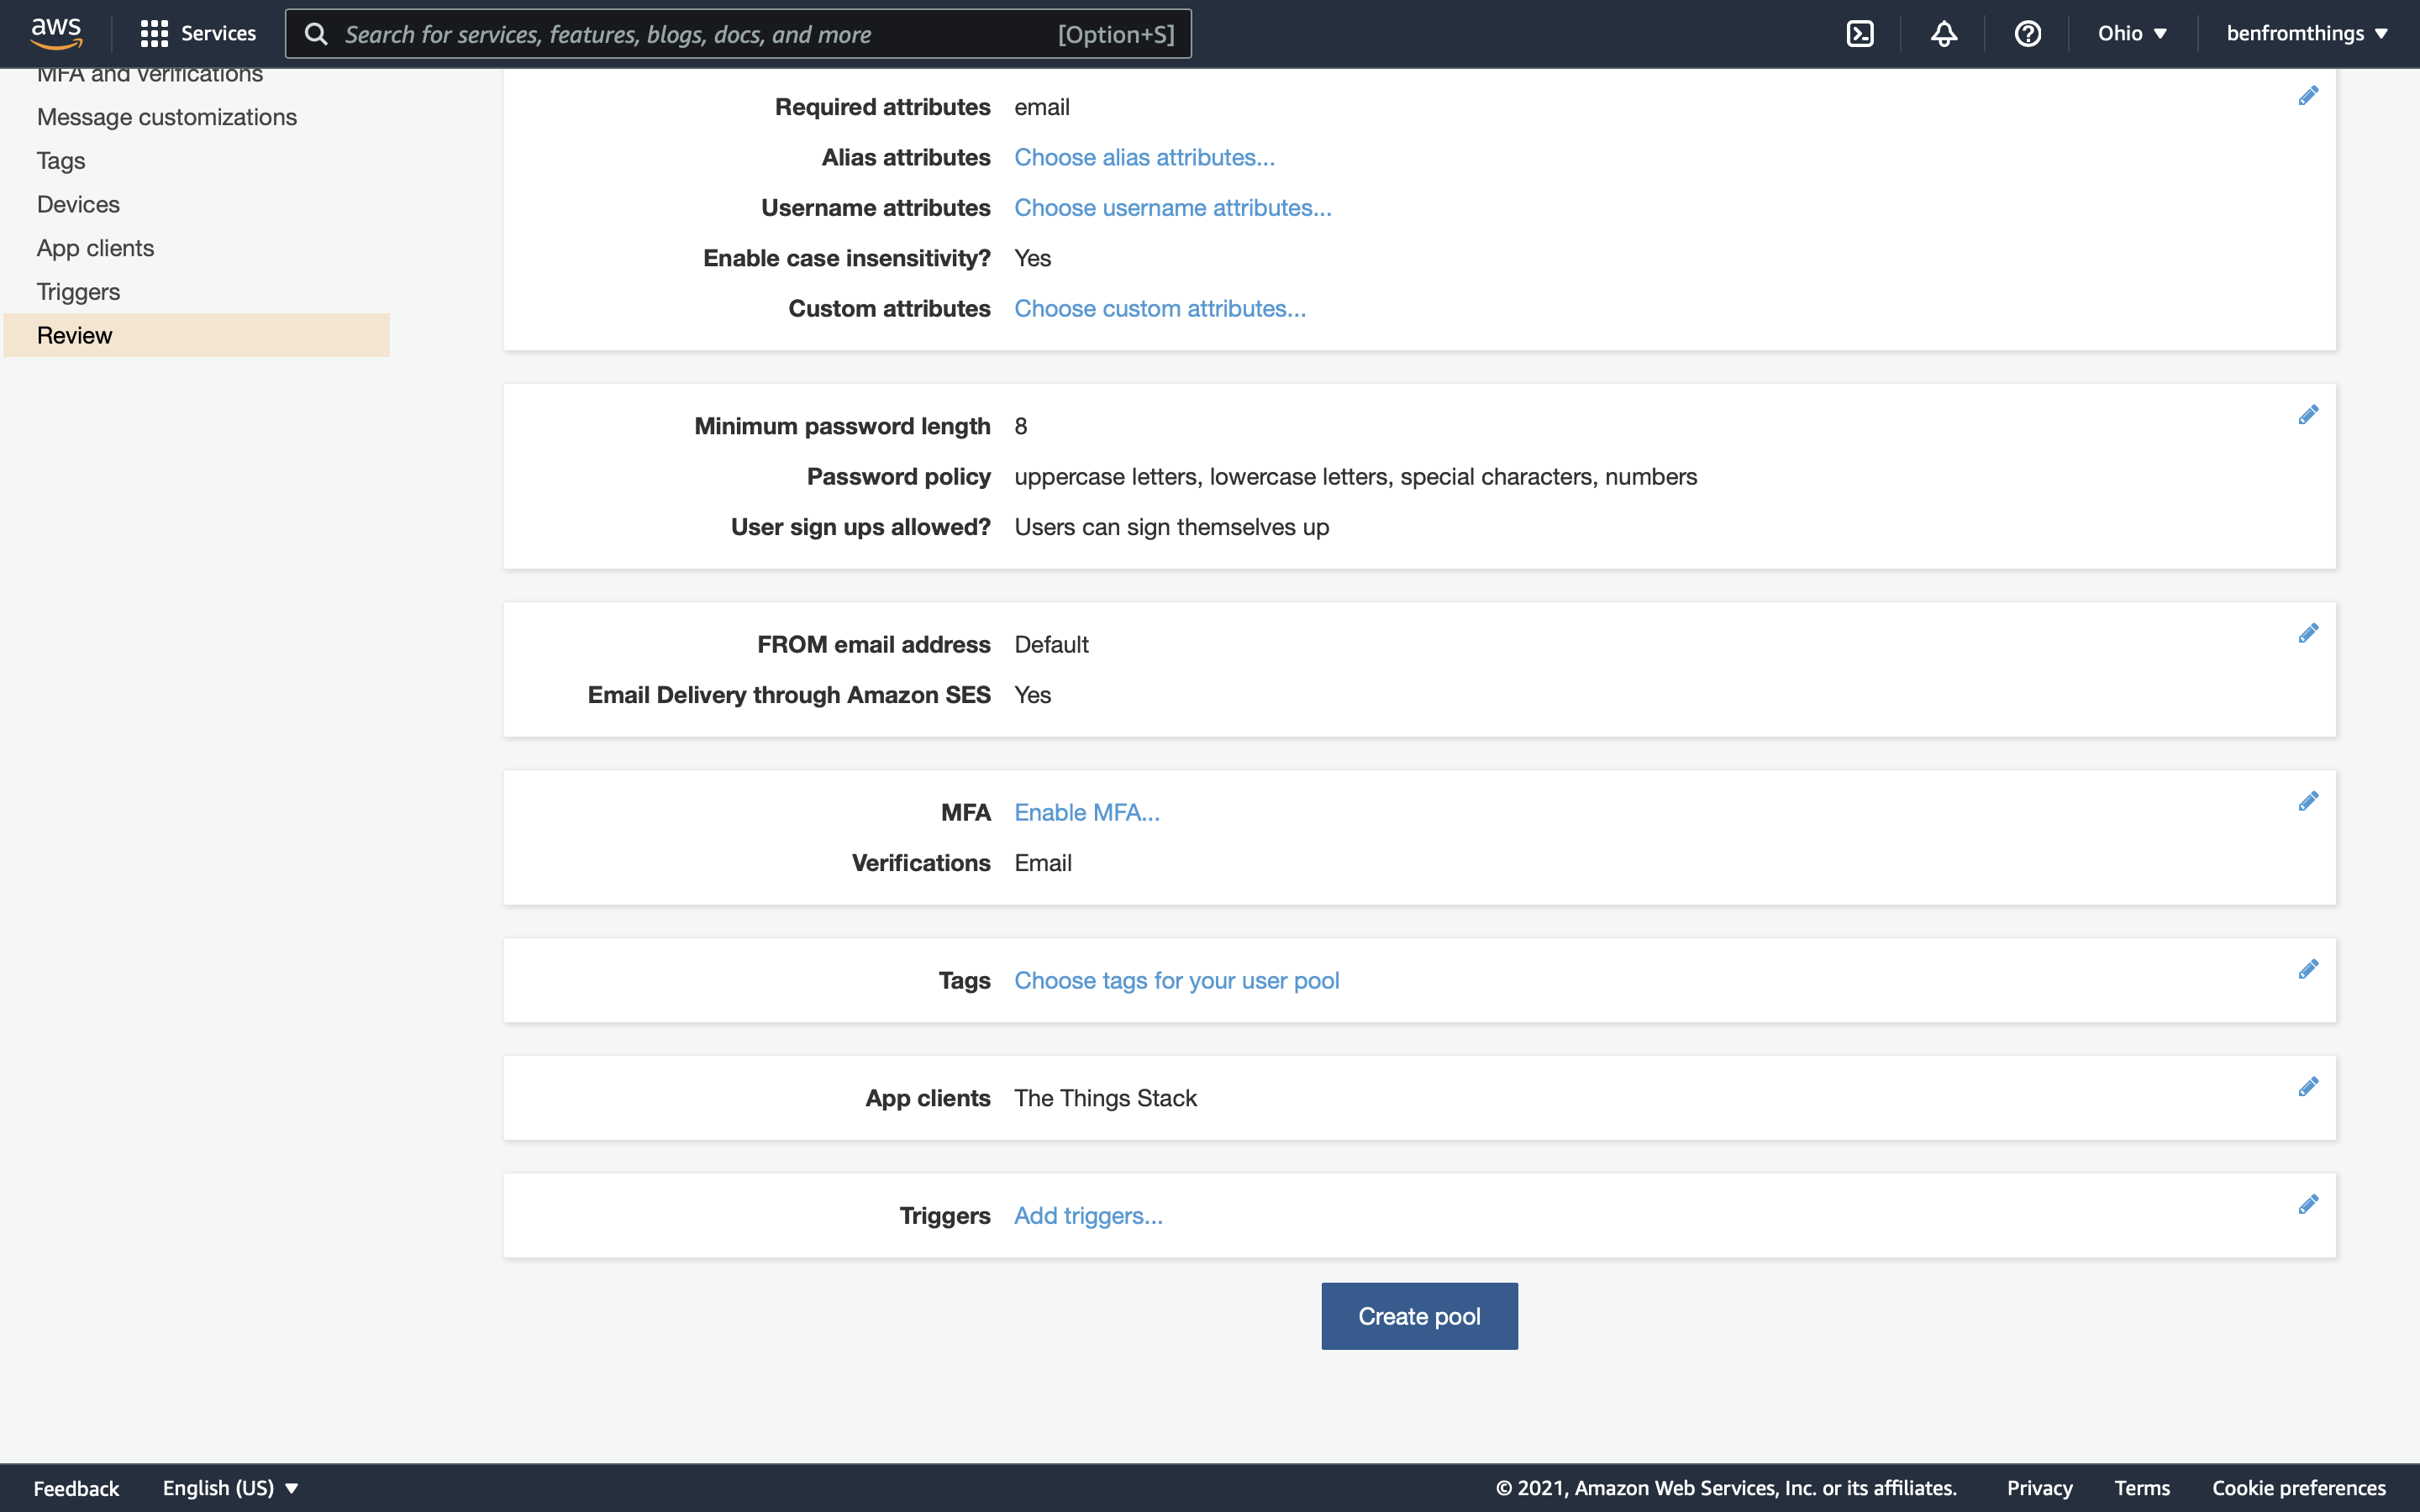
      Amazon Cognito user pool review page with the Create pool button

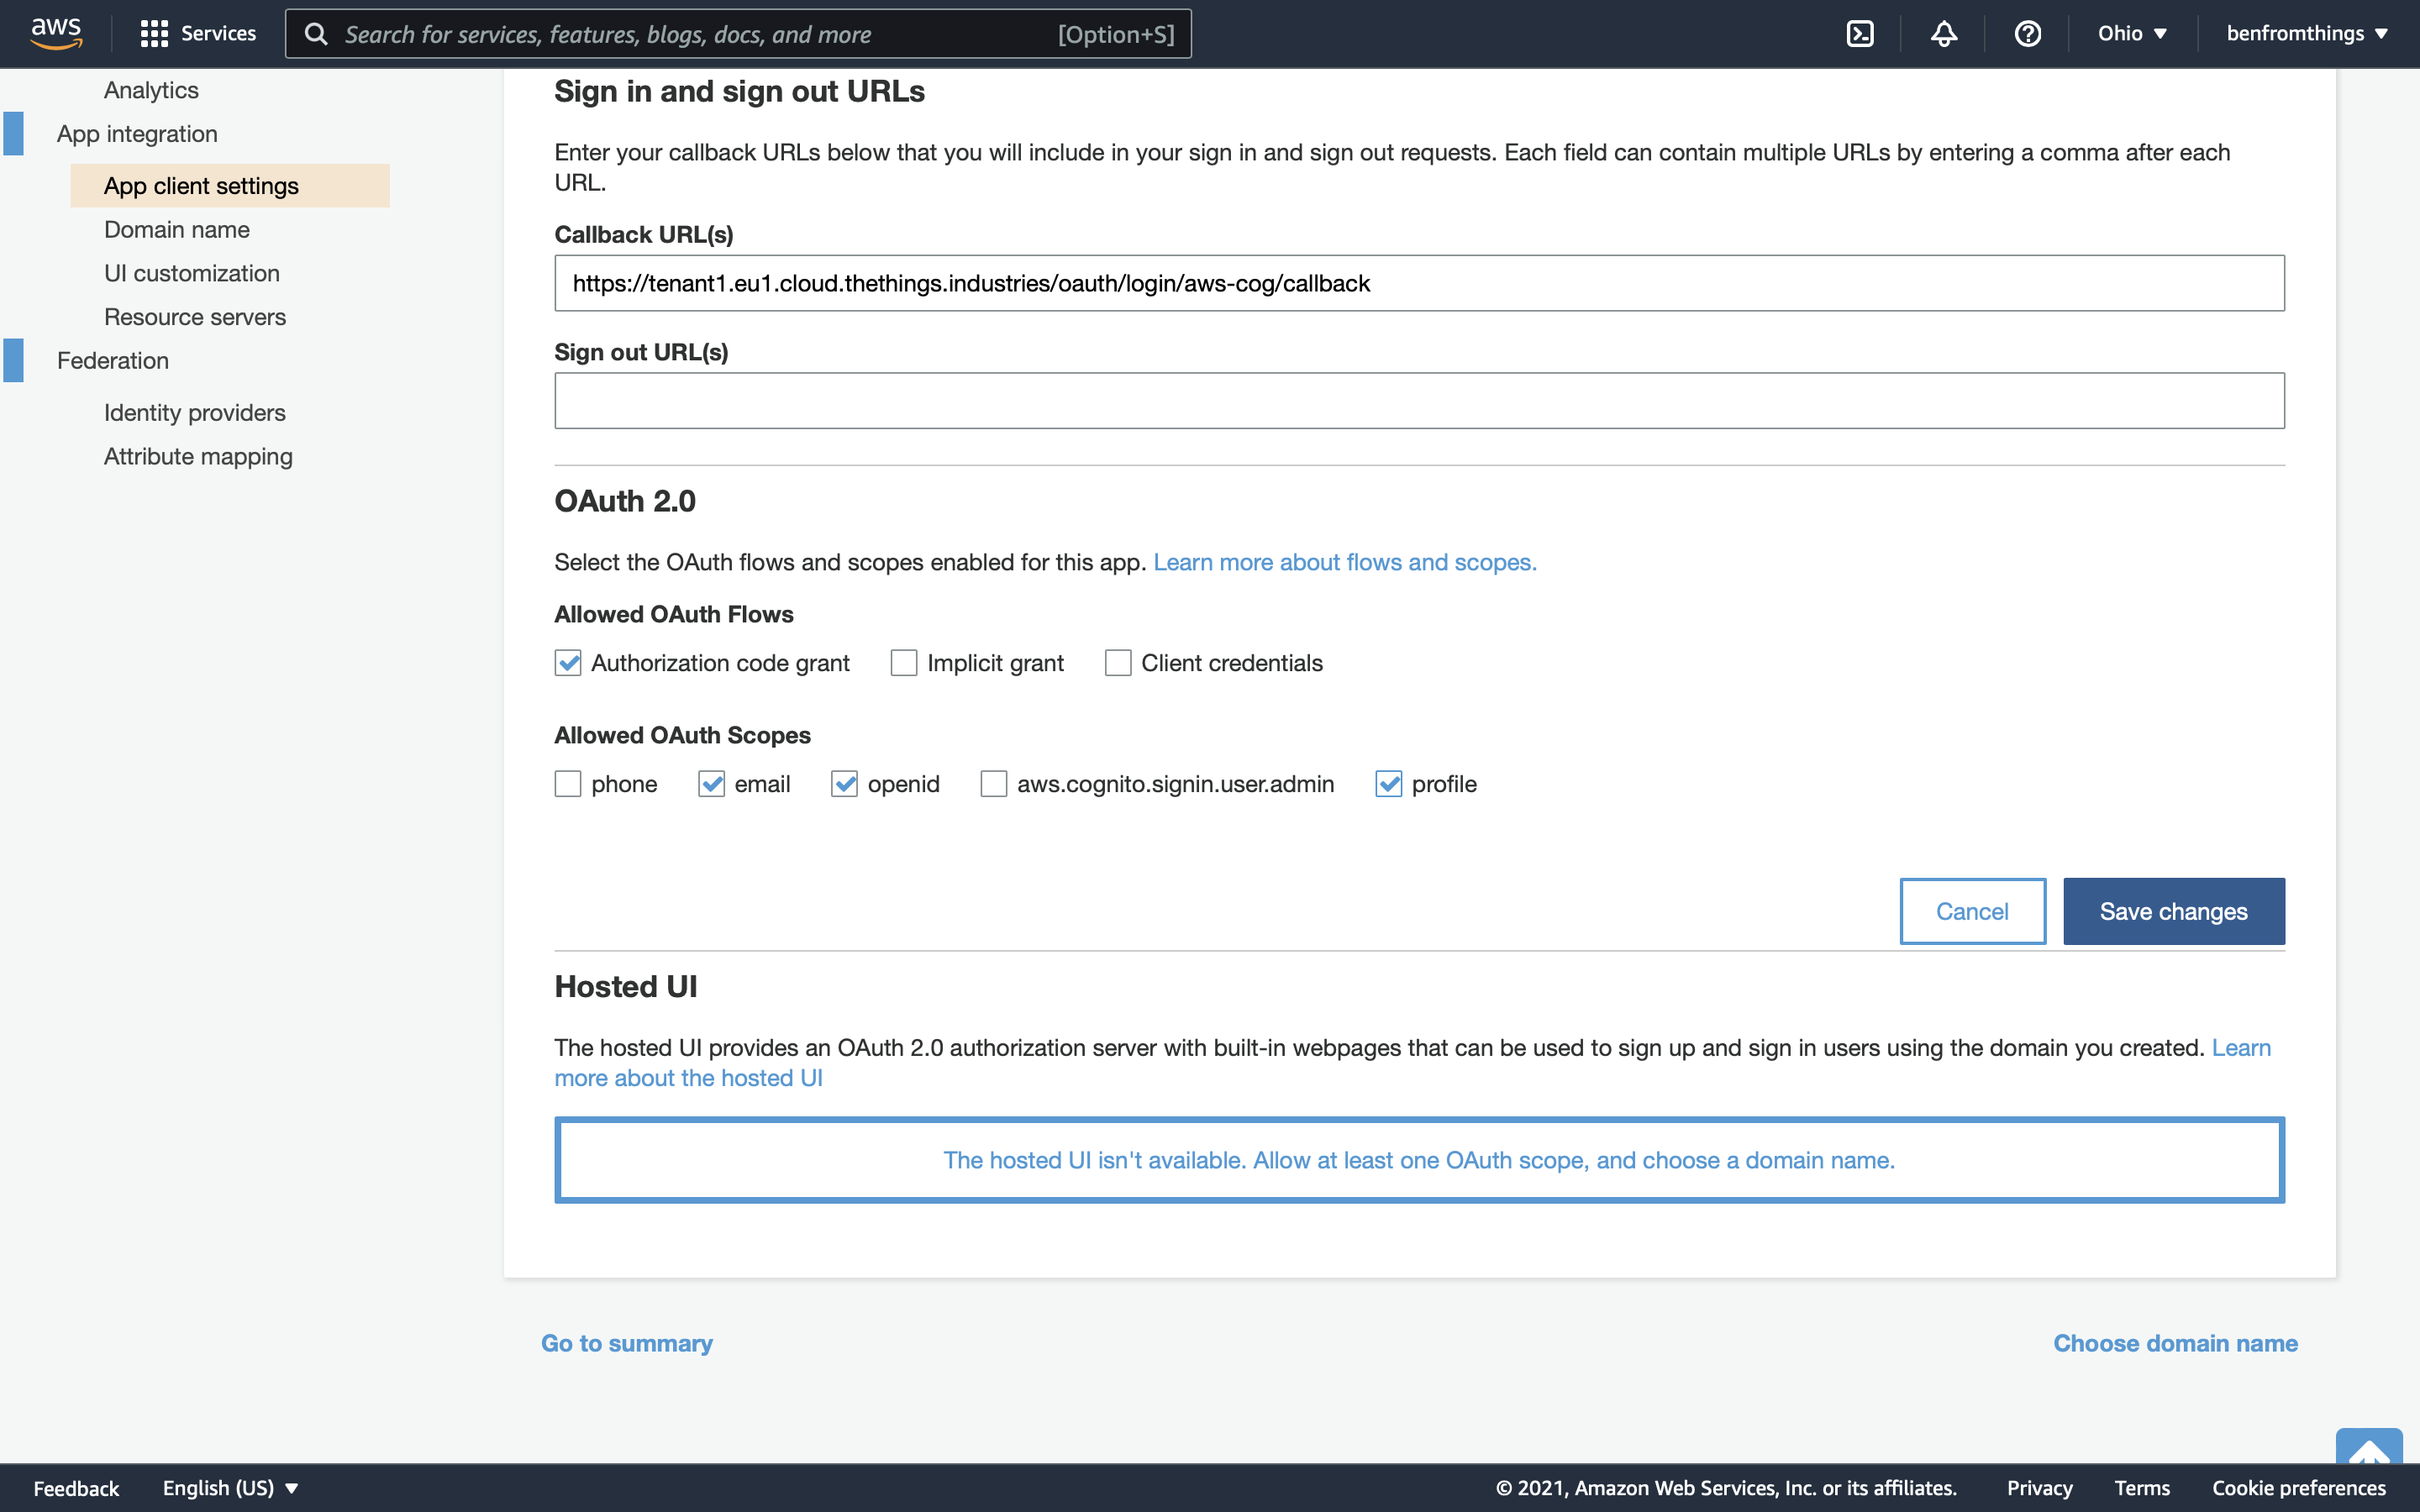
      In the left hand menu, choose App client settings.

      Ensure that Cognito User Pool is checked for Enabled Identity Providers.
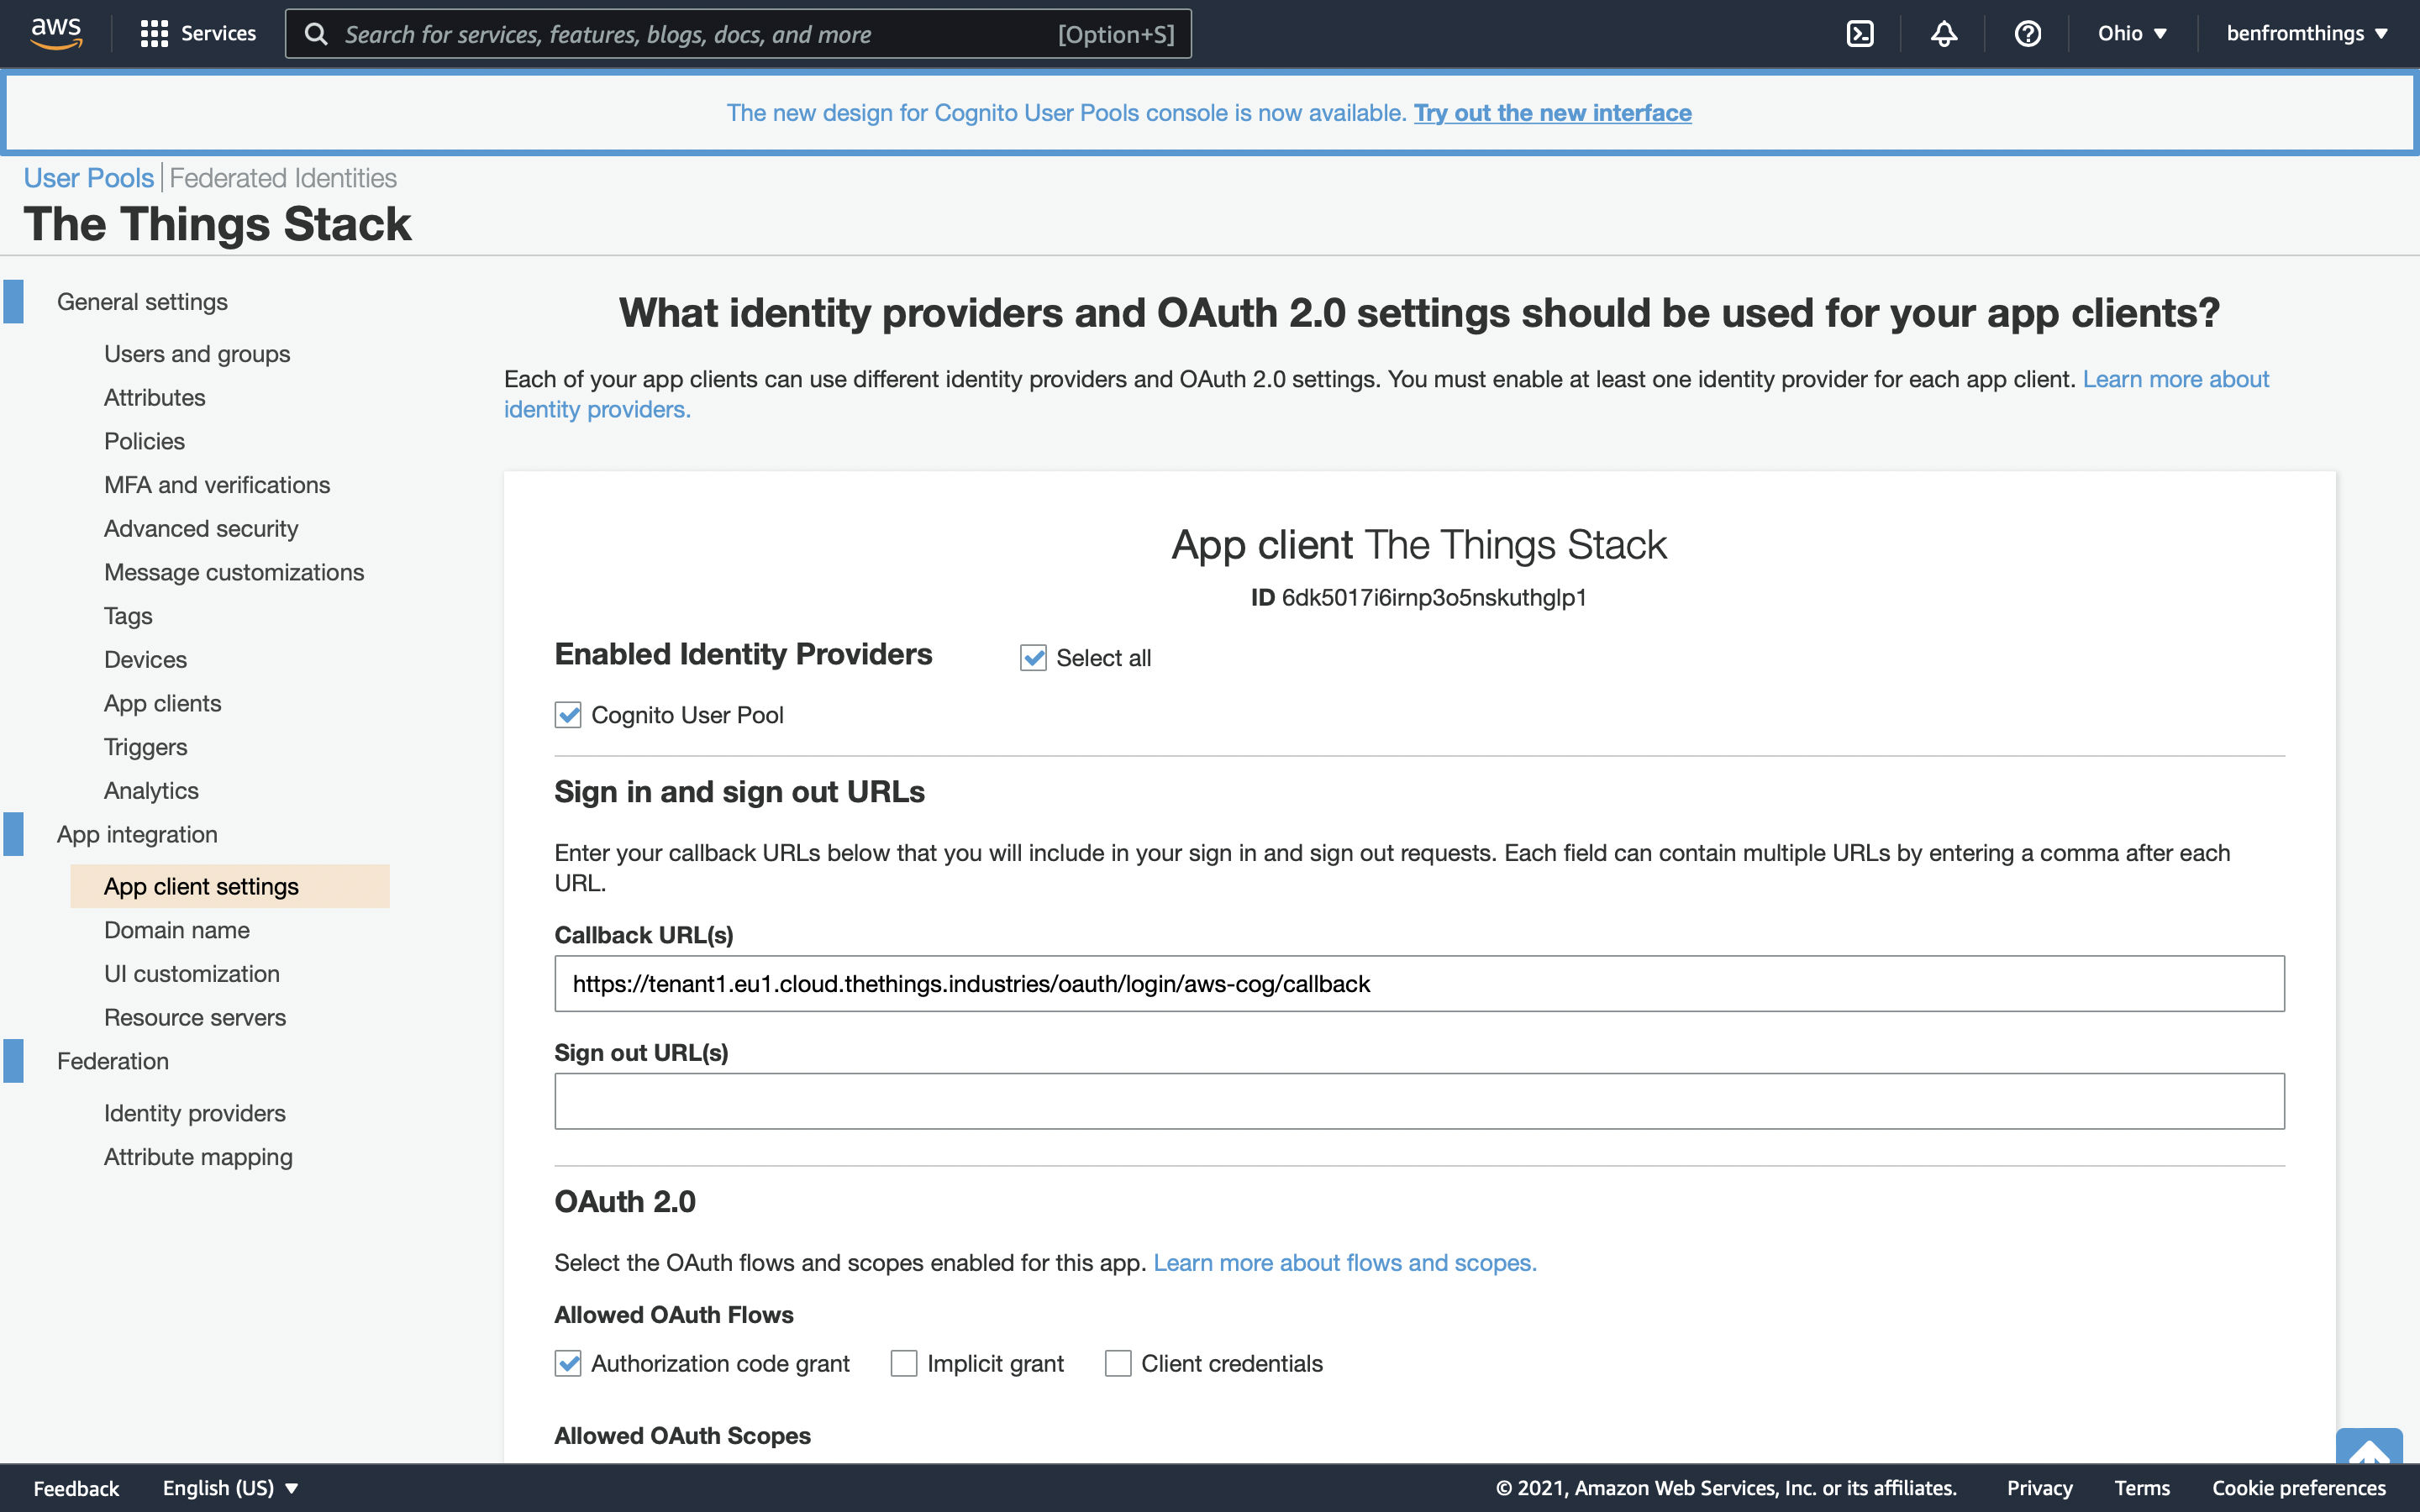
      Amazon Cognito app client settings with the identity providers, callback URL and allowed OAuth flows and scopes

      For the Callback URL, enter the OAuth Callback URL of your The Things Stack deployment. This is the Server Address followed by the OAuth endpoint, which includes an Authentication Provider ID of your choosing:

      /oauth/login/<authentication-provider-id>/callback
      

      You will actually create the Authentication Provider in The Things Stack using this Authentication Provider ID, so remember it.

      For example, with a tenant tenant1 in the eu1 cluster and an Authentication Provider ID of aws-cog, the OAuth Callback URL is:

      https://tenant1.eu1.cloud.thethings.industries/oauth/login/aws-cog/callback
      

      Additionally, ensure the following Allowed OAuth Scopes are checked:

      • email
      • openid
      • profile

      Finally, click Save changes.

      Amazon Cognito app client settings with the callback URL for The Things Stack and the allowed OAuth flows and scopes

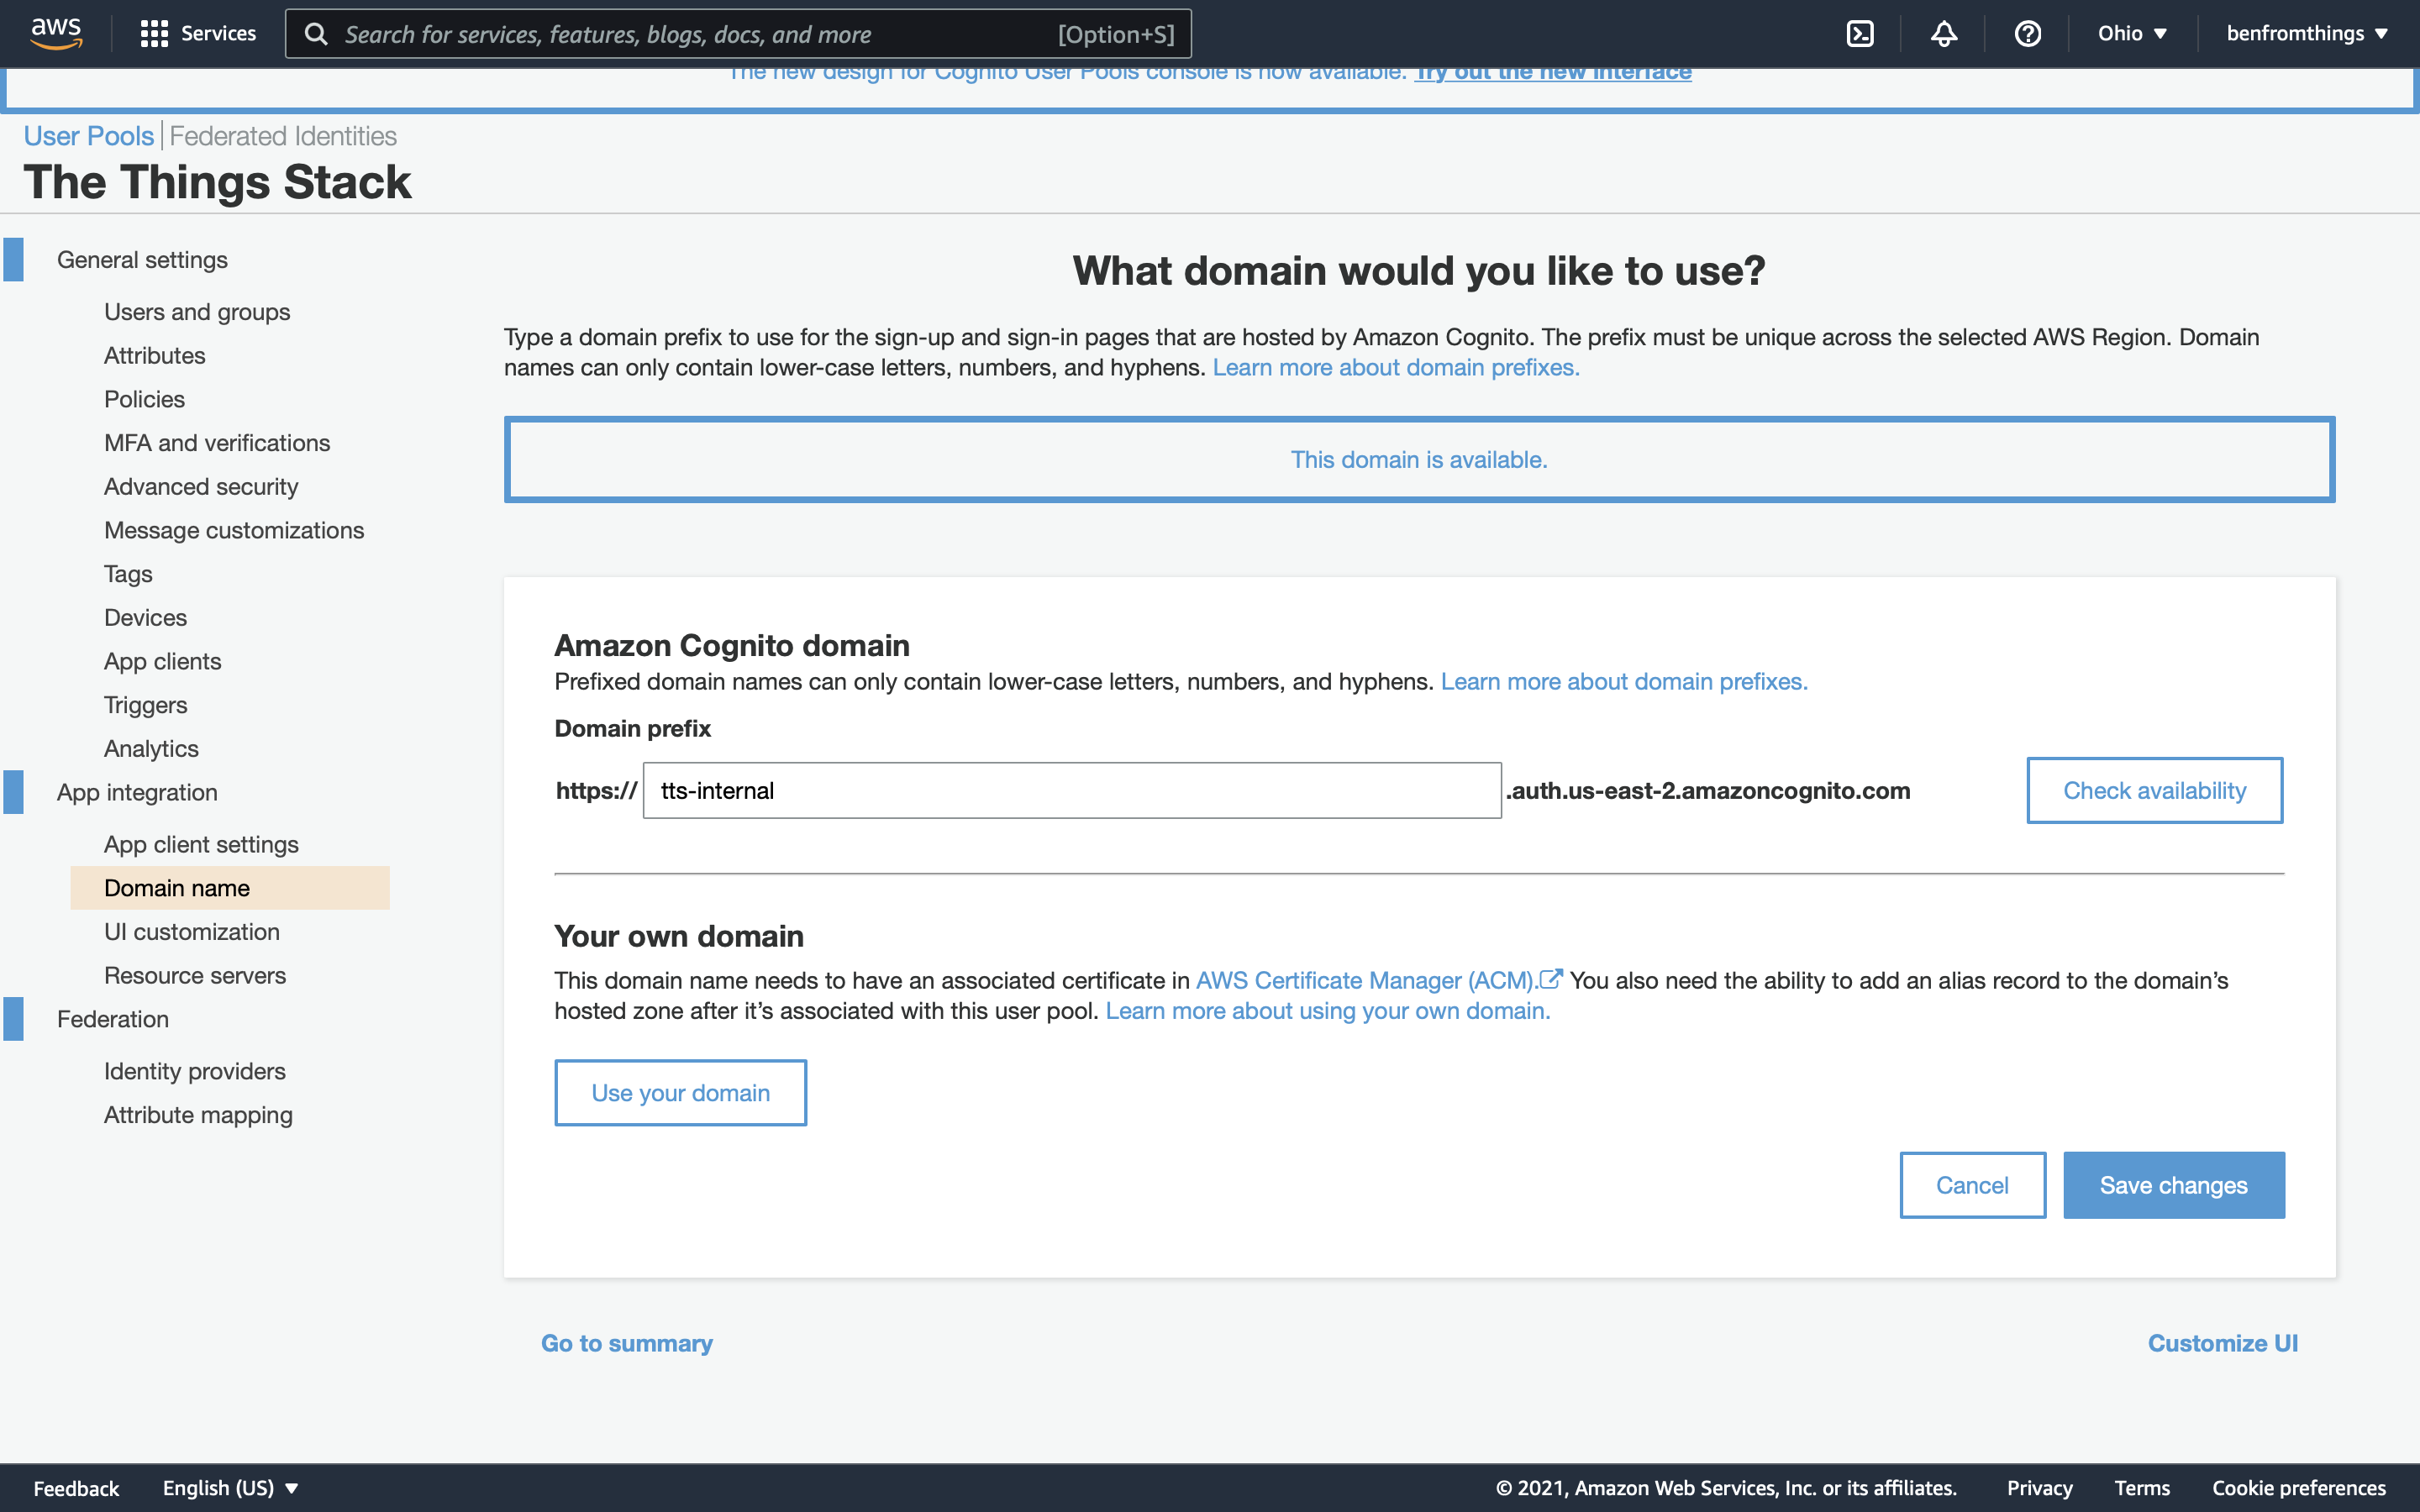
      Choose Domain name from the left hand menu.

      Choose a domain name. You will not need to remember it, but login will fail if no domain is configured.

      Warning:

      Failing to configure a domain name will cause login to fail.

      Click Save changes.

      Amazon Cognito domain name settings with a domain prefix entered

      Finally, go to App clients and choose your App Client to view your Client ID and Client Secret.
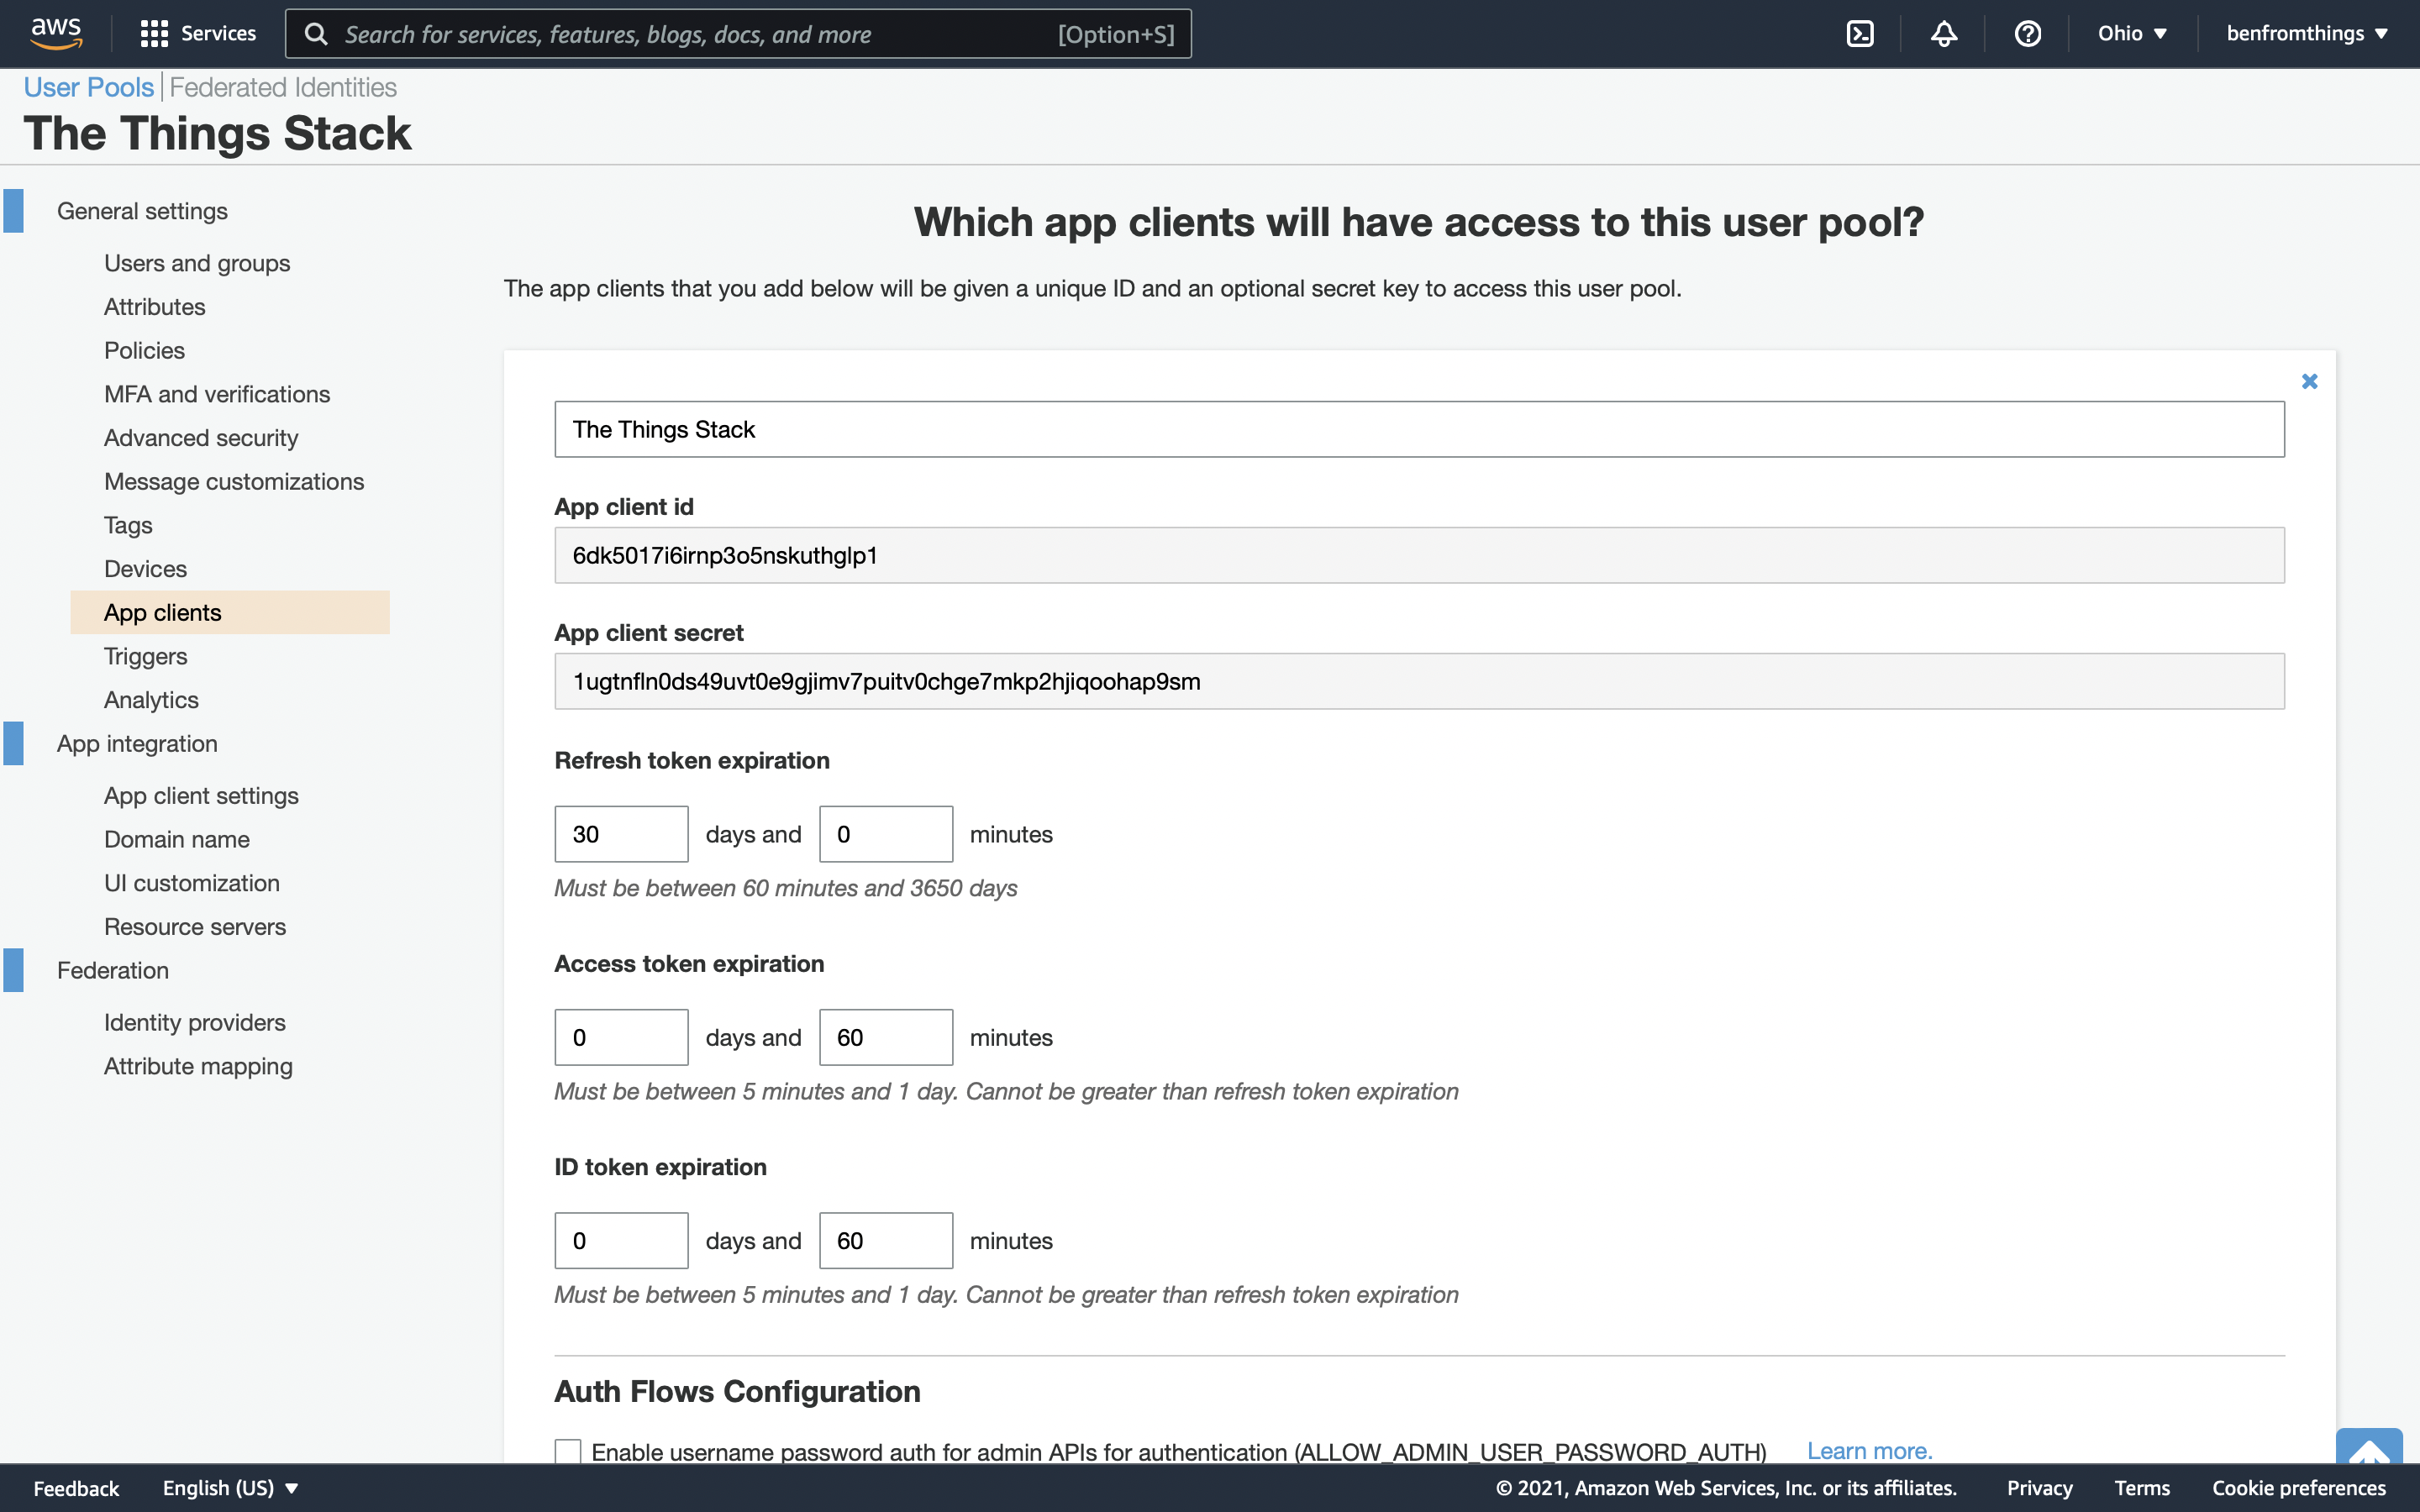
      Amazon Cognito app client details showing the app client ID and app client secret

      Proceed to Configure The Things Stack for SSO using the following information:

      • Client ID: Provided by Cognito
      • Client Secret: Provided by Cognito
      • Authentication Provider ID: Of your choosing (see above)
      • OpenID Discovery Address: https://cognito-idp.{REGION_ID}.amazonaws.com/{POOL_ID}. That should look like https://cognito-idp.eu-west-2.amazonaws.com/eu-west-2_KcLwCelr7. Your Pool ID is visible in General settings.

      Troubleshooting Amazon Cognito

      If you receive an error when logging in with Cognito, check the following:

      • Did you configure a Domain Name in Cognito?
      • Did you enable email, profile, and openid scopes?
      • Did you ensure Cognito User Pool is checked for Enabled Identity Providers?
      ← Single Sign-On Google OpenID Connect →

      On this page

      • Create a User Pool
      • Troubleshooting Amazon Cognito

      Sections

      Getting Started

      Concepts

      Cloud

      Enterprise

      Integrations

      API

      Hardware

      Sitemap

      View our Sitemap

      Contributing

      GitHub

      About Us

      The Things Industries

      Privacy Policy

      Cookie settings

      Cookie Settings

      We use cookies to enhance your experience, analyze site traffic and deliver personalized content. Read our Privacy Policy.

      Cookie categories