This section contains instructions for installing the command-line interface.
There are two versions of The Things Stack CLI: ttn-lw-cliand tti-lw-cli. For most users, ttn-lw-cli is sufficient, as it supports all commands to manage The Things Stack. tti-lw-cli has additional commands for tenant management and OpenID Connect but is otherwise identical.
We recommend Cloud, The Things Stack Sandbox, and Open Source users to install ttn-lw-cli, and Enterprise users to install tti-lw-cli.
Installing using a package manager (recommended)
The Things Stack CLI can be installed using a package manager on macOS and Linux, and we recommend this over manual installation of binaries. Installation using a package manager enables auto-completion and makes it easy to upgrade or remove the CLI. Unfortunately, there is no package manager support in Windows, so Windows users must use binaries.
Read this section to find out how to install The Things Stack CLI on your operating system with commonly used package managers.
macOS
On macOS, Homebrew is the recommended package manager. See the official Homebrew documentation for installation instructions.
Once Homebrew is installed on your system, you can install The Things Stack CLI using the following command in your terminal:
brew install TheThingsNetwork/lorawan-stack/ttn-lw-cli
To upgrade the CLI if it is already installed, use:
brew upgrade TheThingsNetwork/lorawan-stack/ttn-lw-cli
Once installation is complete, you can run the CLI using ttn-lw-cli in your terminal.
Once Homebrew is installed on your system, you can install The Things Stack CLI using the following command in your terminal:
brew install TheThingsIndustries/lorawan-stack/tti-lw-cli
To upgrade the CLI if it is already installed, use:
brew upgrade TheThingsIndustries/lorawan-stack/tti-lw-cli
Now you can run the CLI using tti-lw-cli in your terminal.
Linux
On Linux, snap is the recommended package manager. See the official snap documentation for installation instructions.
Once snap is installed on your system, you can install The Things Stack CLI using the following command in your terminal:
sudo snap install ttn-lw-stack
sudo snap alias ttn-lw-stack.ttn-lw-cli ttn-lw-cli
To upgrade the CLI if it is already installed, use:
sudo snap refresh ttn-lw-stack
Once installation is complete, you can run the CLI using ttn-lw-cli in your terminal.
Once snap is installed on your system, you can install The Things Stack CLI using the following command in your terminal:
sudo snap install tti-lw-stack
sudo snap alias tti-lw-stack.tti-lw-cli tti-lw-cli
To upgrade the CLI if it is already installed, use:
sudo snap refresh tti-lw-stack
Now you can run the CLI using tti-lw-cli in your terminal.
Windows
No package manager is available for Windows. Follow instructions in the Installing using pre-built binaries section below to download the pre-built binaries for Windows based on the processor architecture.
Note that Windows binaries must be run with a .exe extension on the end, so if an example uses ttn-lw-cli, that will be ttn-lw-cli.exe on Windows.
Installing using pre-built binaries
If your operating system does not support a package manager or you do not want to use one, you can still download pre-built binaries for your operating system and processor architecture.
The commands to determine your processor architecture depend on your operating system. On Linux and macOS you can use uname -m in your terminal, while on Windows you can use echo %PROCESSOR_ARCHITECTURE%.
Use the following form to select the correct binaries for your architecture.
See binaries for all releases
To see old versions of the CLI, or if the binary selector above does not work, find all releases of ttn-lw-cli here.
Scroll down and expand the Assets section to see the binaries. Search for archives starting with lorawan-stack-cli (usually on top), then search for the specific archive ending with your operating system and processor architecture label.
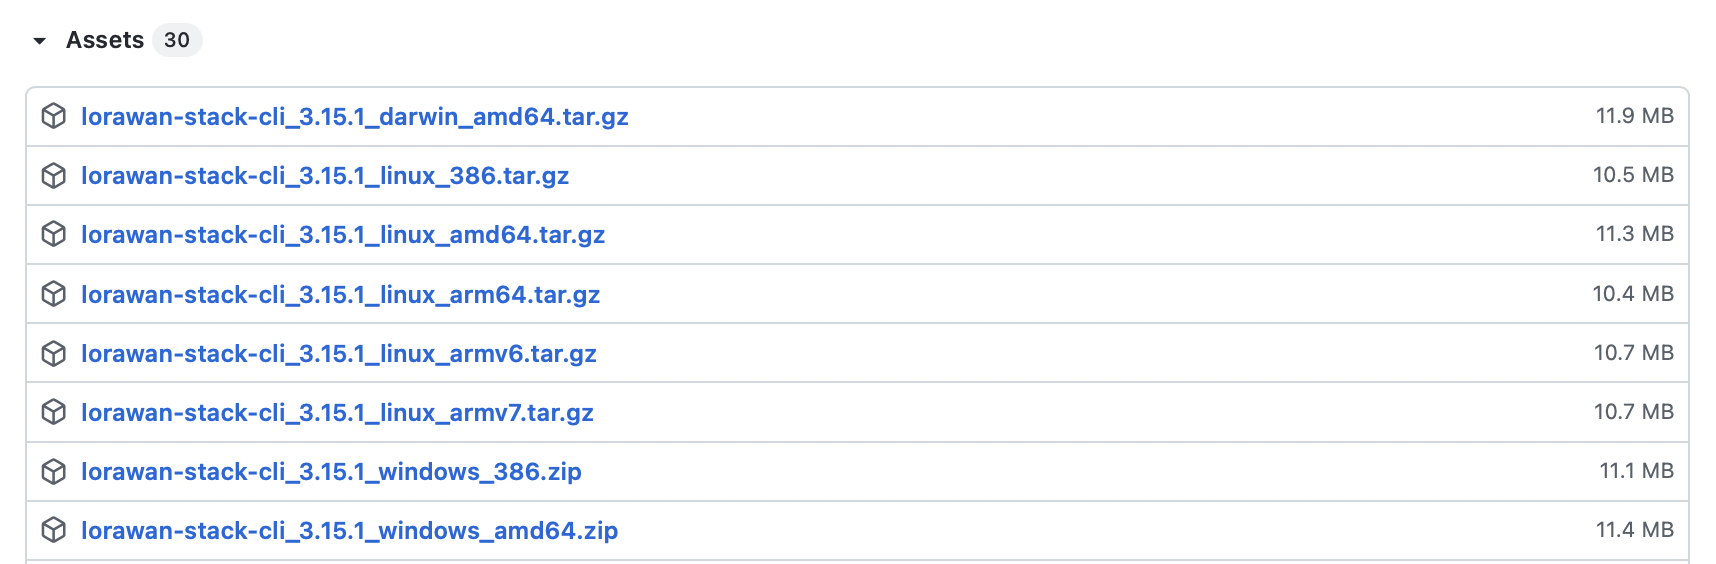
For example, if you are using a Linux operating system on a computer with an AMD64 processor, you need to download lorawan-stack-cli_x.x.x_linux_amd64.tar.gz.
Open the downloaded archive and extract it to the desired location. Enter the extracted directory.
You can now run the CLI from inside that directory, or add that directory to PATH to run the CLI from any location.
Auto-completion (optional)
After you have installed the CLI, you can also enable auto-completion. Auto-completion allows the shell to automatically fill in commands after you type the first few letters. It is completely optional but can save you time entering commands.
Supported shells are bash, zsh, fish and powershell.
Note:
When installing The Things Stack CLI withbrew and snap package managers, auto-completion is enabled automatically.
macOS and Linux
Use ttn-lw-cli complete to generate an auto-completion script for the ttn-lw-cli command while specifying the shell you are using:
ttn-lw-cli complete --shell bash --executable ttn-lw-cli > ttn-lw-cli-autocomplete
Now you need to source the generated file to enable auto-completion:
. ./ttn-lw-cli-autocomplete
Alternatively, put in a default directory so that it gets loaded automatically (this directory depends on your operating system and your shell).
For example, for bash, this directory is typically /etc/bash_completion.d/:
sudo cp ./ttn-lw-cli-autocomplete /etc/bash_completion.d/
Windows
Generating and sourcing an auto-completion PowerShell script on Windows is slightly different. In addition to ttn-lw-cli being replaced with ttn-lw-cli.exe, ttn-lw-cli-autocomplete needs to be replaced with ttn-lw-cli-autocomplete.ps1 as follows:
ttn-lw-cli.exe complete --shell powershell --executable ttn-lw-cli.exe > ttn-lw-cli-autocomplete.ps1

. ./ttn-lw-cli-autocomplete.ps1
Configuring the CLI
Once you have installed the CLI, you need to configure it to connect to your The Things Stack deployment. Proceed to Configuring the CLI.