LNS establishes a data connection between a LoRa Basics™ Station and The Things Stack. This page contains information about connecting your gateway to The Things Stack using the LoRaWAN® Network Server (LNS) protocol.
These are general instructions for all LoRa Basics™ Station gateways. For specific instructions for connecting your gateway via LNS, look in the Gateways section.
Note:
The LNS protocol is required for sending and receiving LoRaWAN® data with LoRa Basics™ Station, while the CUPS protocol is not. However, configuring CUPS will automatically retrieve LNS credentials and configure LNS on your gateway, so there is no need to configure both.Requirements
- User account on The Things Stack with rights to create gateways.
- A gateway which support LoRa Basics™ Station.
Create a Gateway
To connect a gateway using the LNS protocol, you must first add the gateway in The Things Stack. This can be done either in the console, or via the command line. See instructions for Adding Gateways.
Create an API Key
LNS requires an API Key with the following rights:
- Link as Gateway to a Gateway Server for traffic exchange, i.e. write uplink and read downlink
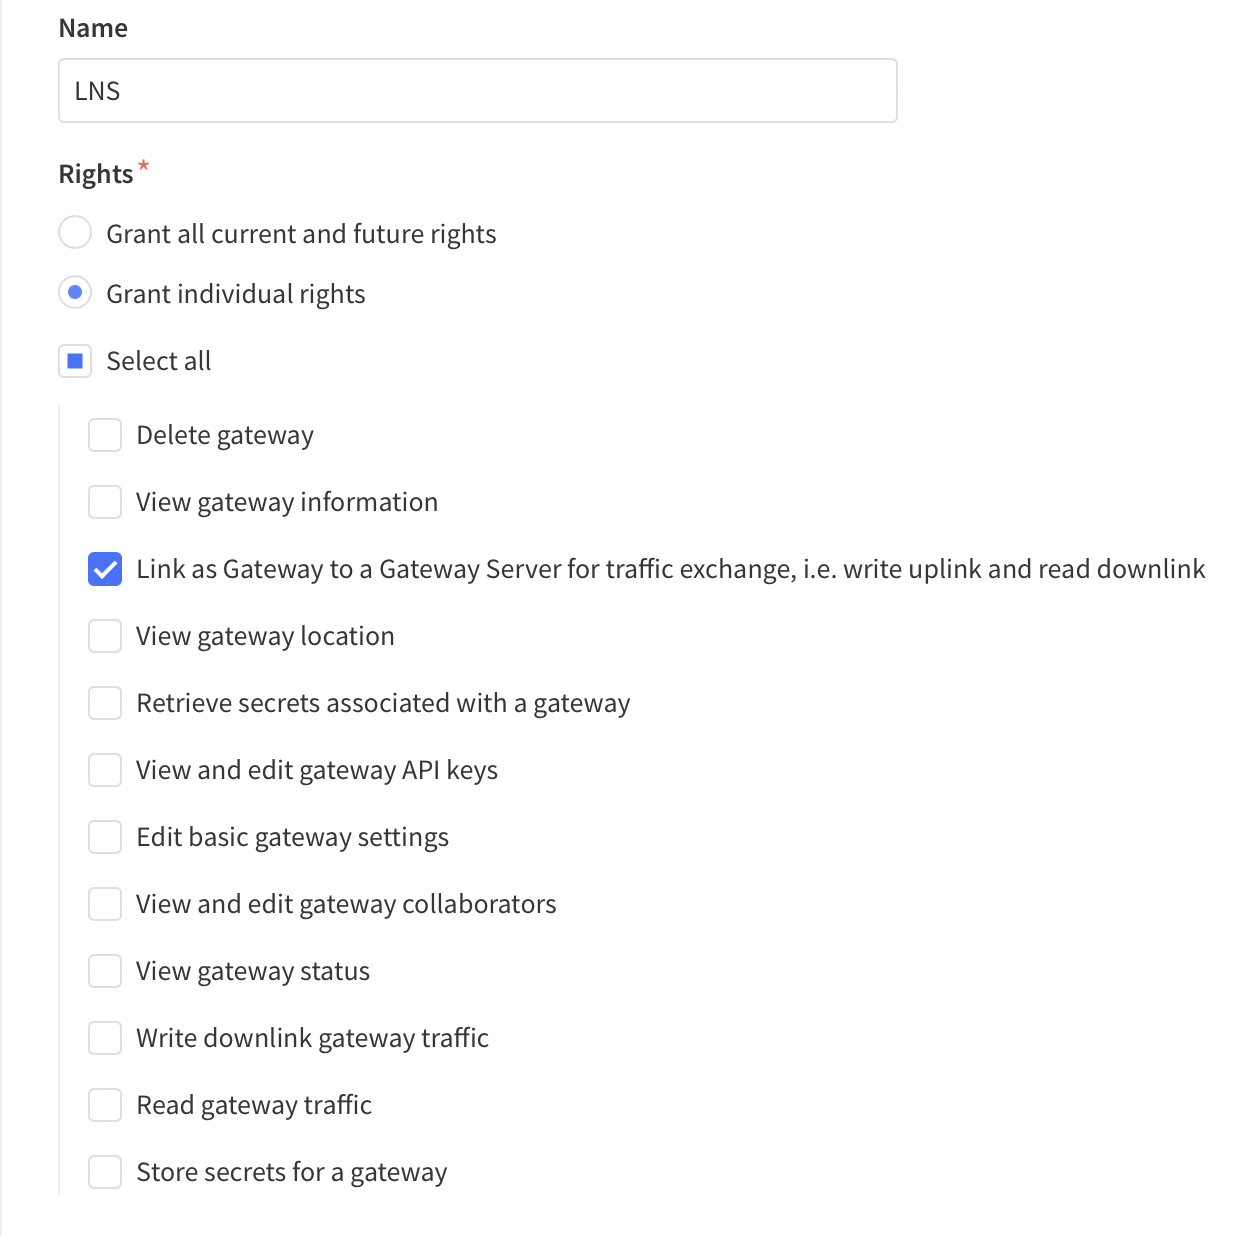
To create this API key for your gateway, follow instructions for Creating a Gateway API key .
Configure Gateway
All LoRa Basics™ Station gateways support the following configuration options. Consult your gateway documentation for more information about configuring your specific gateway.
LNS Server Address
The server address is the network endpoint of The Things Stack LNS. It is a combination of the protocol (wss), the server address, and the port.
Enter the following in your gateway as the LNS Server Address: wss://<server-address>:8887.
The <server-address> is the address of your The Things Stack deployment. See Server Addresses for more info.
LNS Server Certificate / LNS Trust
This is the CA certificate which secures your domain. A .pem file containing common certificates is available in the Root Certificates Reference.
Upload the .pem file in your gateway as the LNS Server Certificate, i.e. LNS Trust.
LNS Key File
This is a file which The Things Stack uses to verify the identity of your gateway.
Instructions below show how to create a file called lns.key, replacing "your-lns-api-key" with the LNS API key you created above.
On Linux or macOS use the following commands:
LNS_KEY="your-lns-api-key"
echo "Authorization: Bearer $LNS_KEY" | perl -p -e 's/\r\n|\n|\r/\r\n/g'  > lns.key
On Windows, you can use Command Prompt:
set LNS_KEY=your-lns-api-key
echo Authorization: Bearer %LNS_KEY% > lns.key
or PowerShell:
$env:LNS_KEY='your-lns-api-key'
write-output "Authorization: Bearer $env:LNS_KEY" | set-content lns.key
The commands above create a file called lns.key, terminated with a Carriage Return Line Feed (0x0D0A) character. Upload this file in your gateway as the LNS key.