This guide shows you how to activate your Starter Kit’s LoRaWAN® gateway and end device.
1. The Things Indoor Gateway Pro
First, set up the gateway. It receives messages from the end device and forwards them to The Things Stack, and the other way around. Once the gateway is online, you can activate your end device to start sending and receiving data.
We’ll use the built-in 4G LTE SIM in The Things Indoor Gateway Pro to connect to The Things Stack. You can switch to WiFi or Ethernet later if needed.
If you prefer a visual guide to connecting The Things Indoor Gateway Pro you can use the video below.
Show video
There are only two steps to connecting The Things Indoor Gateway Pro to The Things Stack.
Step 1: Register in The Things Stack
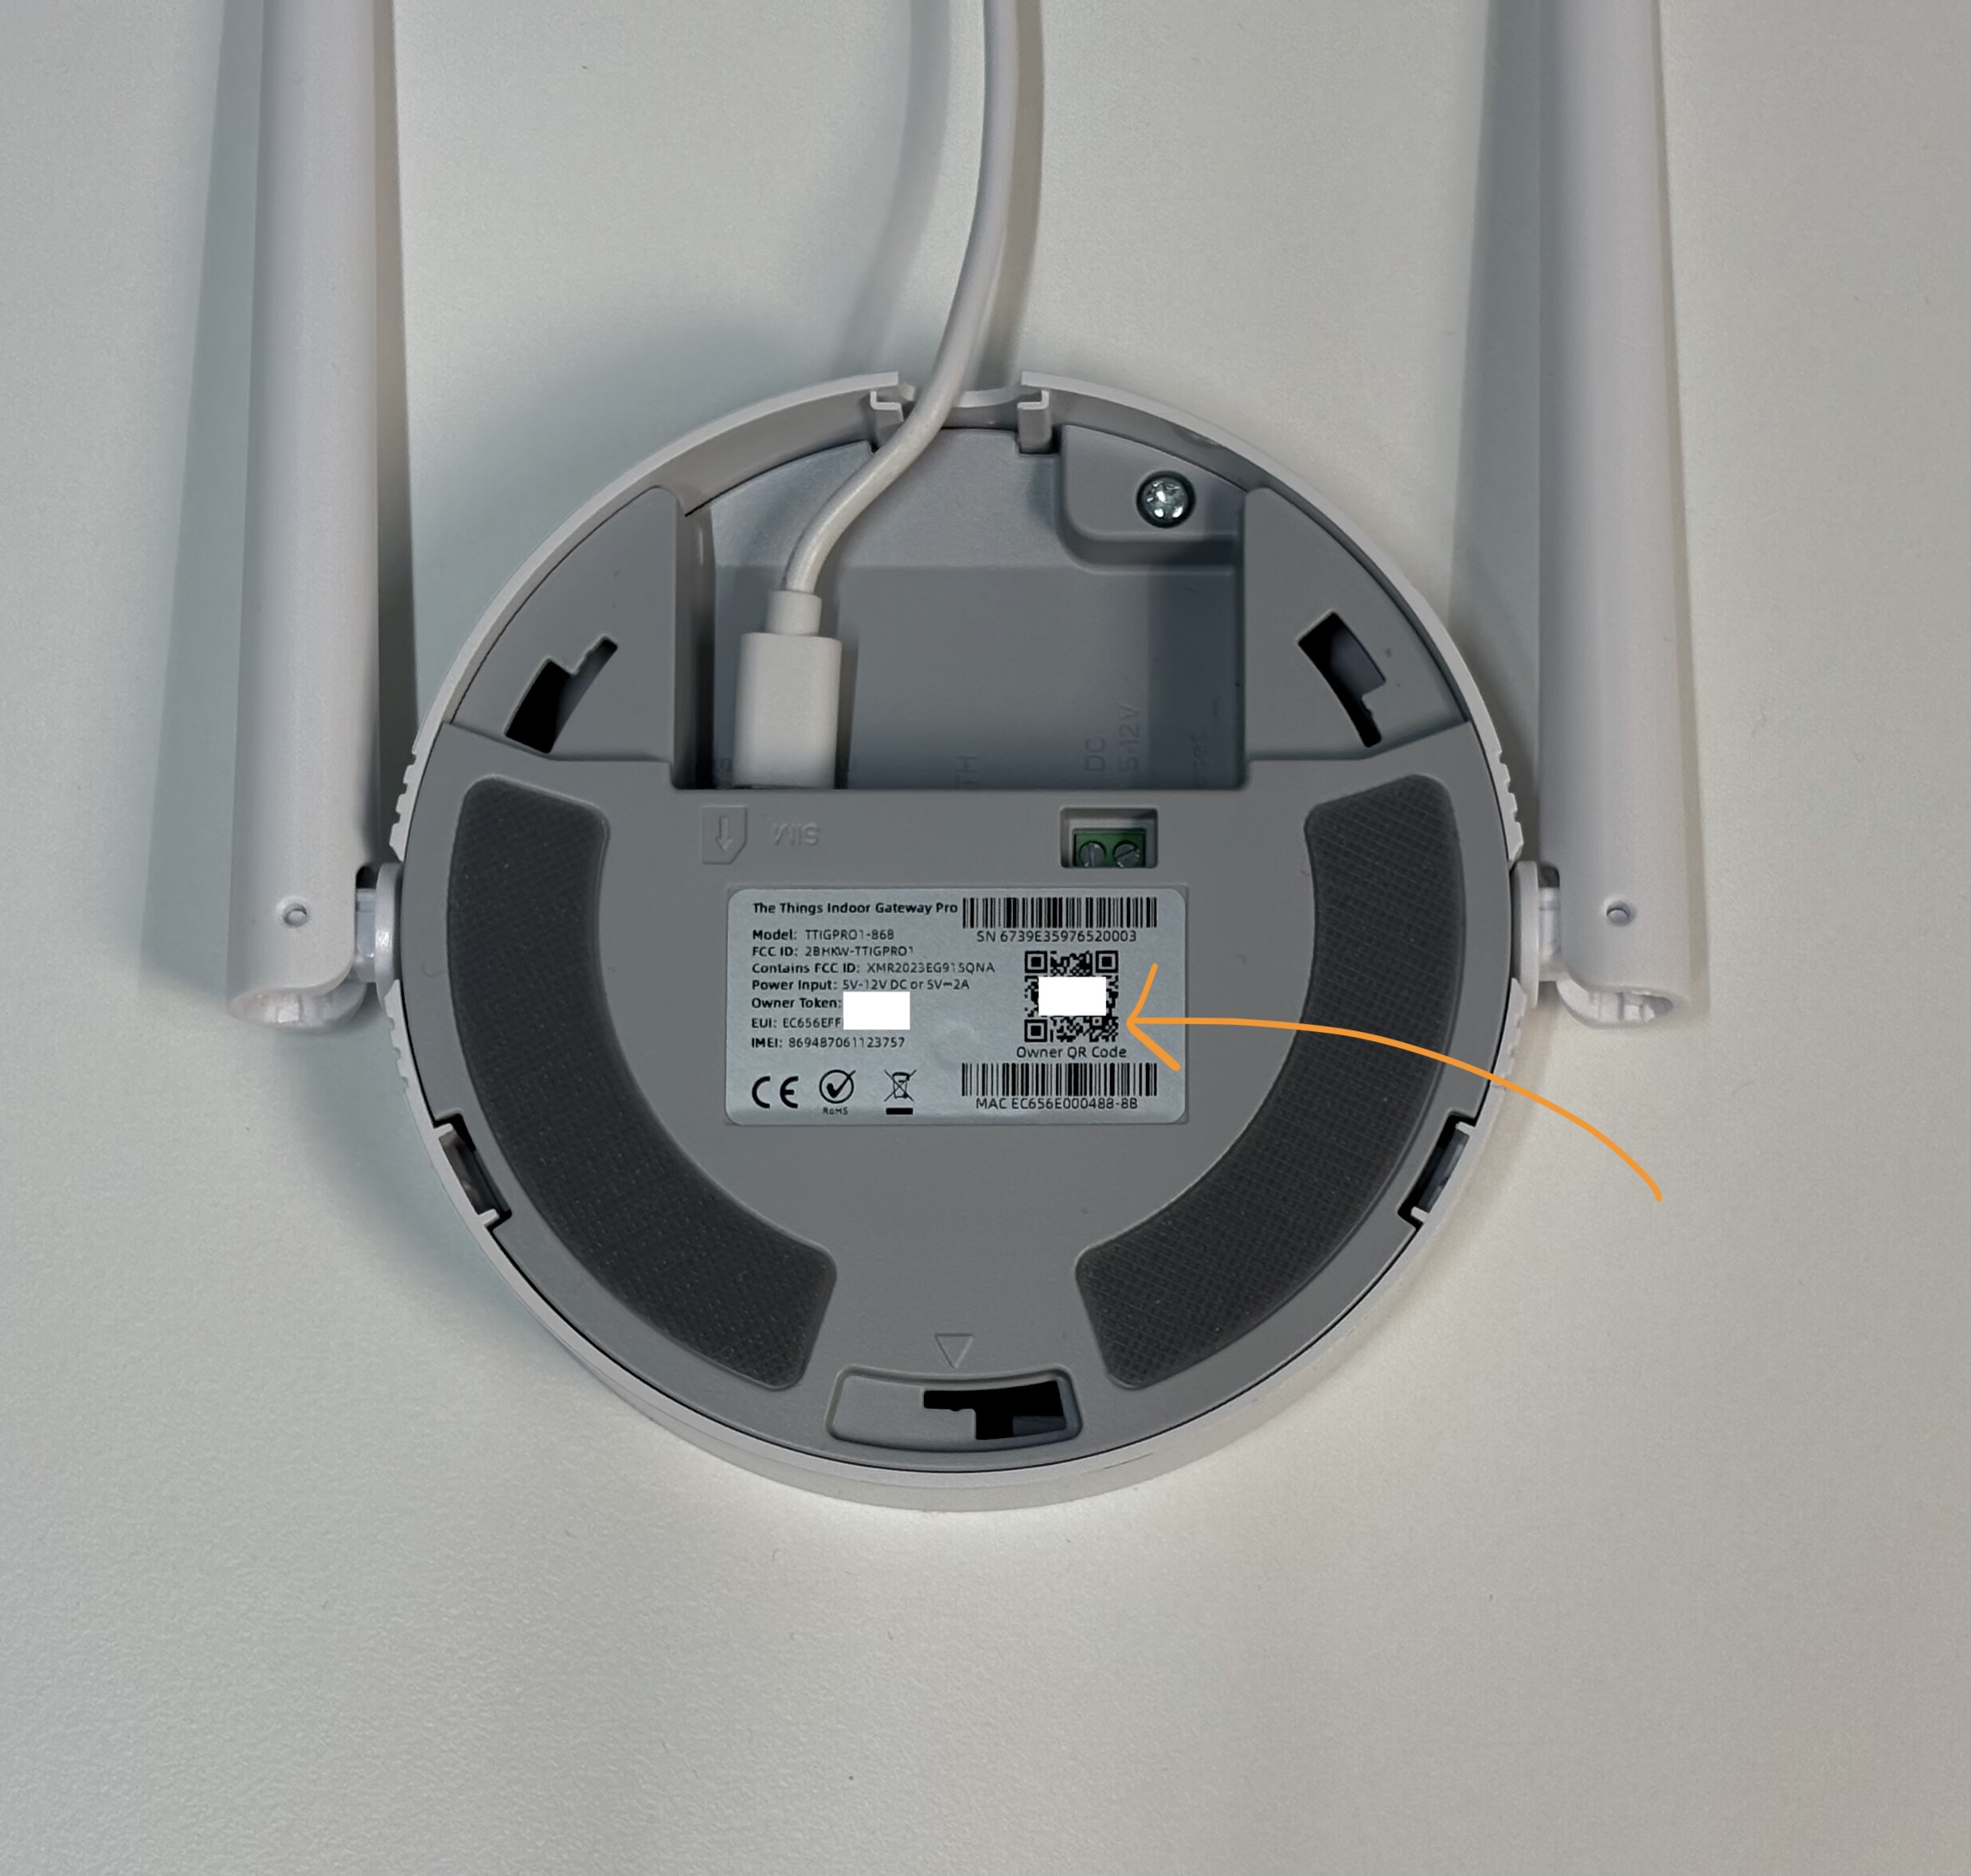
- Open the back panel of the gateway. This can be done by clicking the slot provided on the back side of the gateway counter clockwise. If you’re unsure, check out how to do this on Youtube
Here, you will find a QR Code and some information about the gateway.
- In The Things Stack Console, go to Gateways.
- Click Register Gateway.
- Click Scan gateway QR code and scan the QR code back of the gateway. A few things to note
- You can use any camera connected to your machine, even the built-in one.
- Make sure to center the QR Code in the camera’s view port.
- In some older browsers/operating systems, the camera may not be able to detect the QR code.
- In this case, instead of pressing Scan gateway QR code, manually enter the Gateway EUI field, which is printed on the back of the gateway (looks like
EC656EFFFEXXXXXX). - The Things Stack automatically detects this gateway and asks you to enter an Owner Token. This is printed on the back panel of the gateway below the Power Input field.
- In this case, instead of pressing Scan gateway QR code, manually enter the Gateway EUI field, which is printed on the back of the gateway (looks like
-
Enter a Gateway ID, which is a unique identifier used by The Things Stack
-
Select the Frequency plan to use.The frequency plan configures certain radio parameters for the gateway. If you’re unsure of this at this point, select
- For Europe and UK, choose
Europe 863-870 MHz (SF9 for RX2 - recommended) - For North America (US, EU, Mexico) choose
United States 902-928 MHz, FSB 2 (used by TTN) - You can always change the value later.
- Click Claim gateway.
Step 2: Connect a power supply cable
Connect the USB-C cable to the power supply slot.
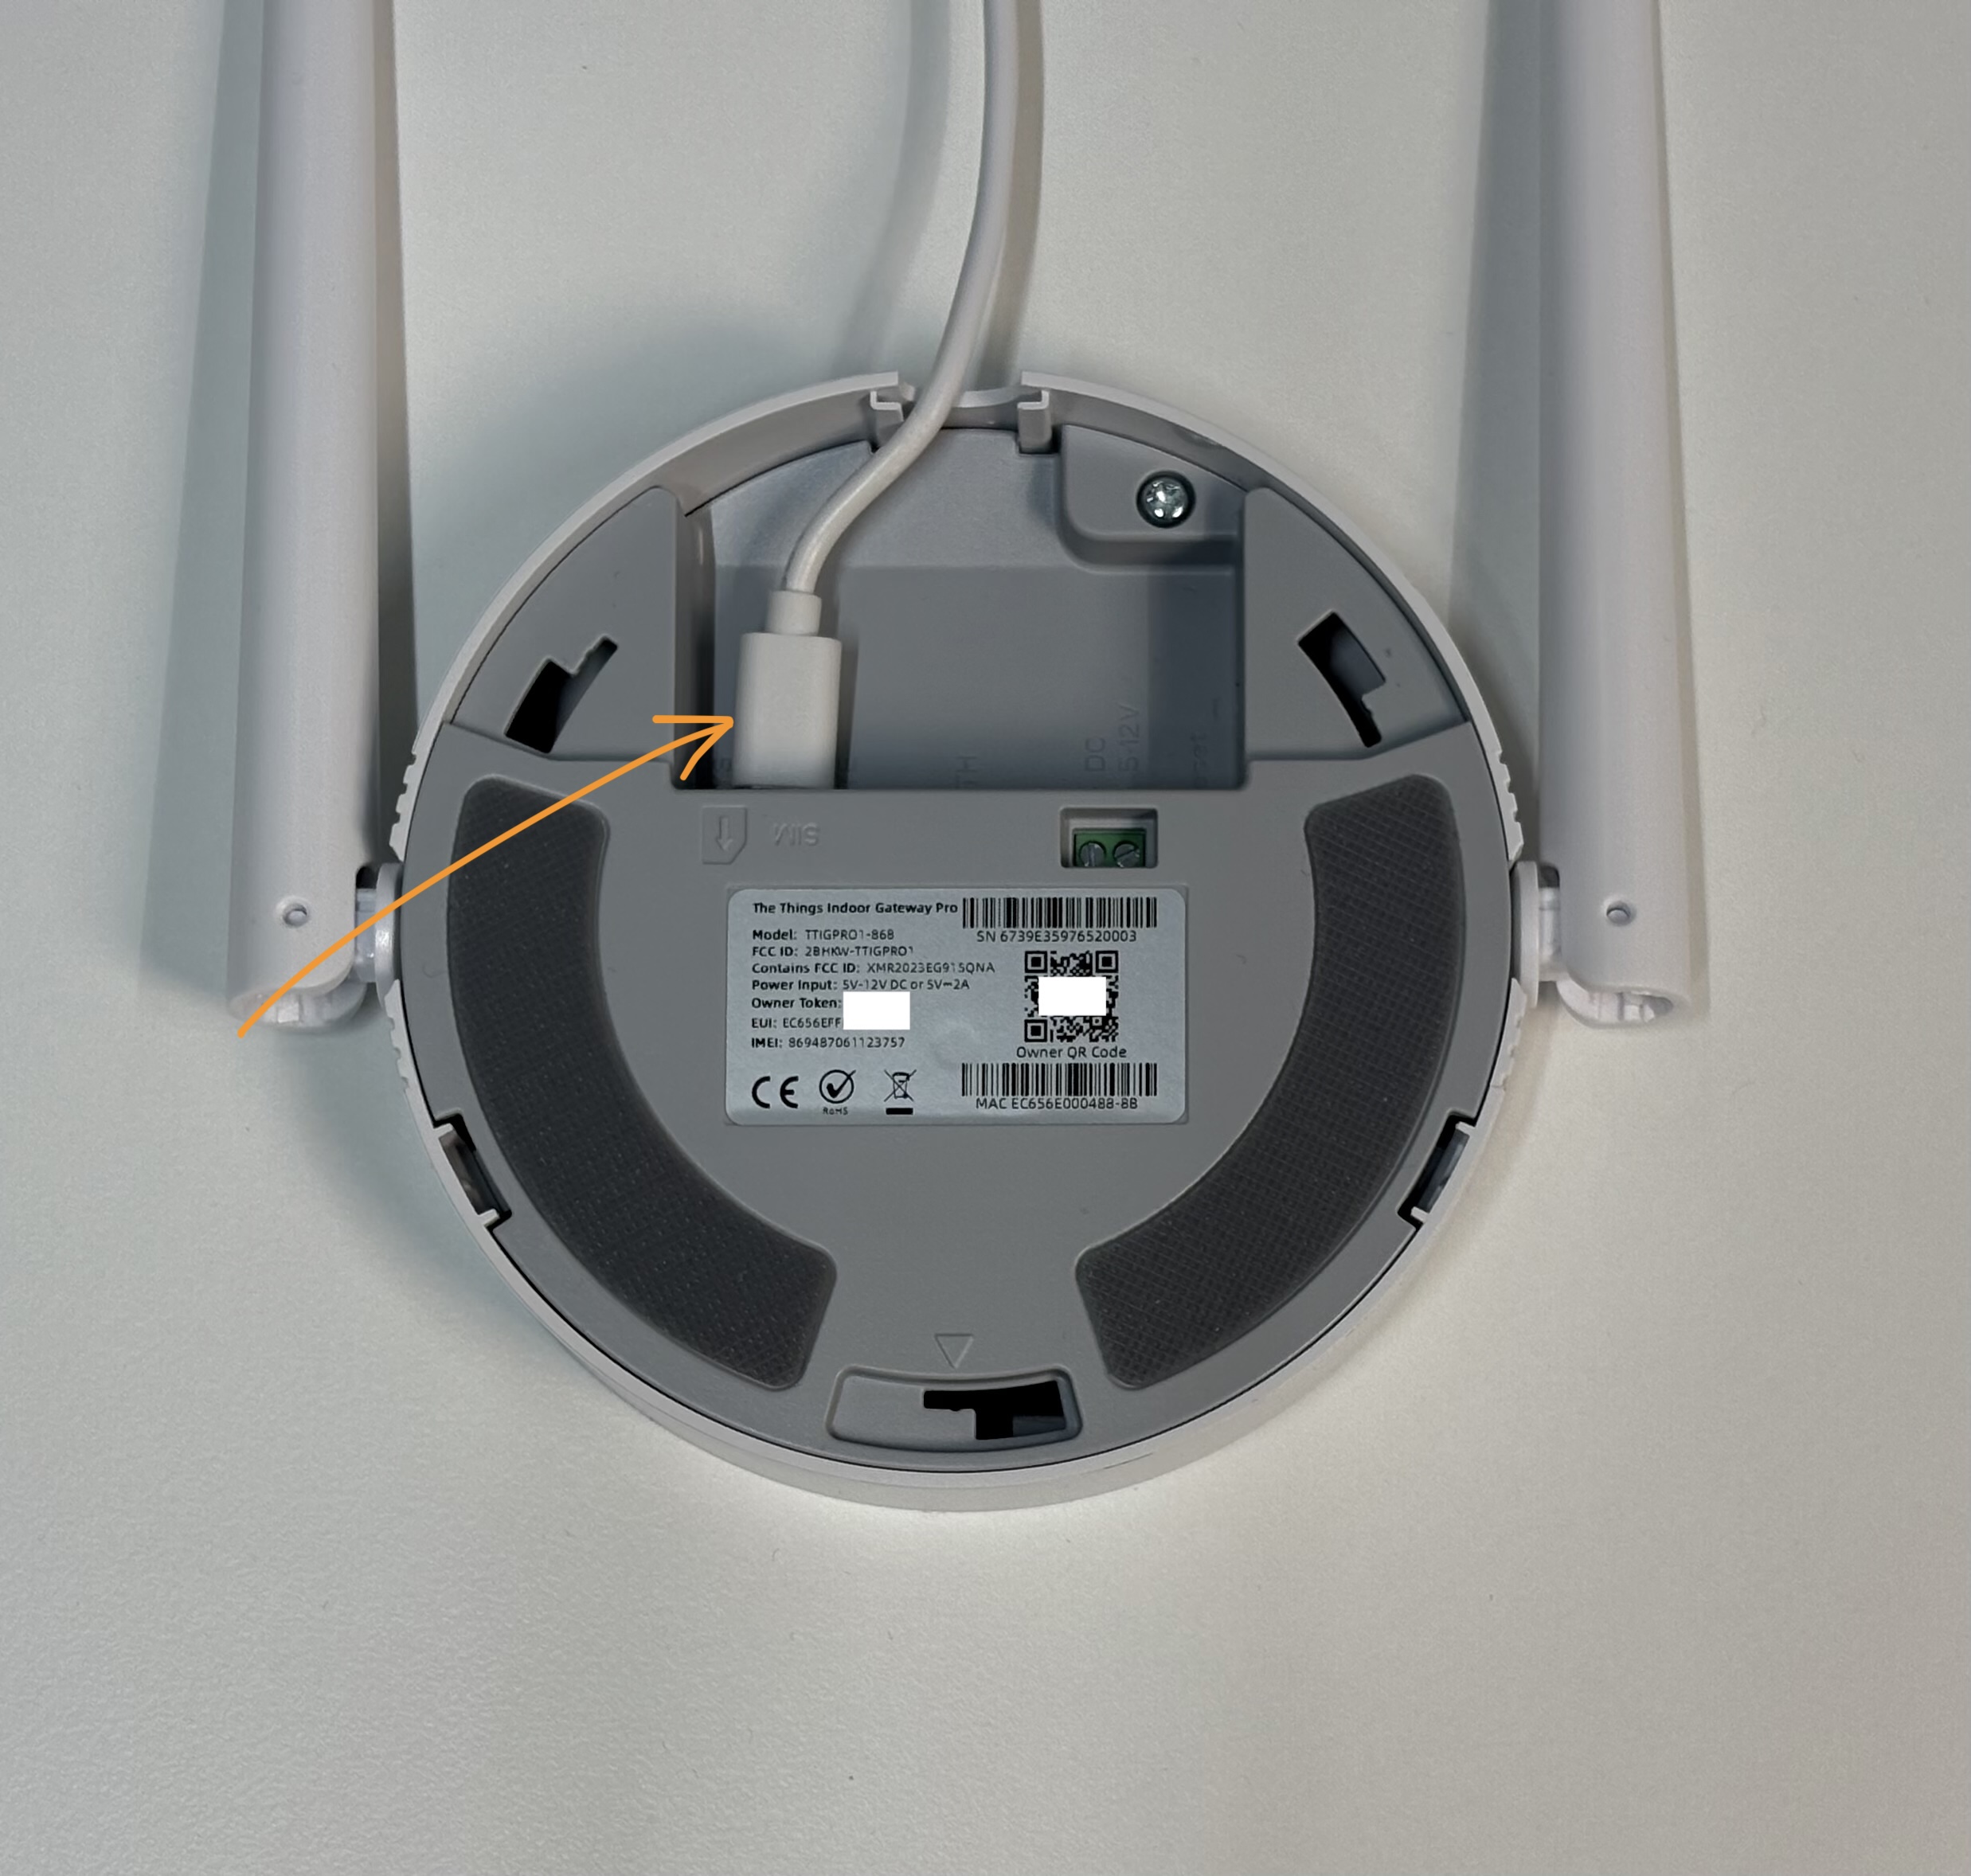
Warning:
Only use the power adapter that comes with The Things Indoor Gateway Pro.It may take several minutes to activate the SIM card and attach to a mobile network.
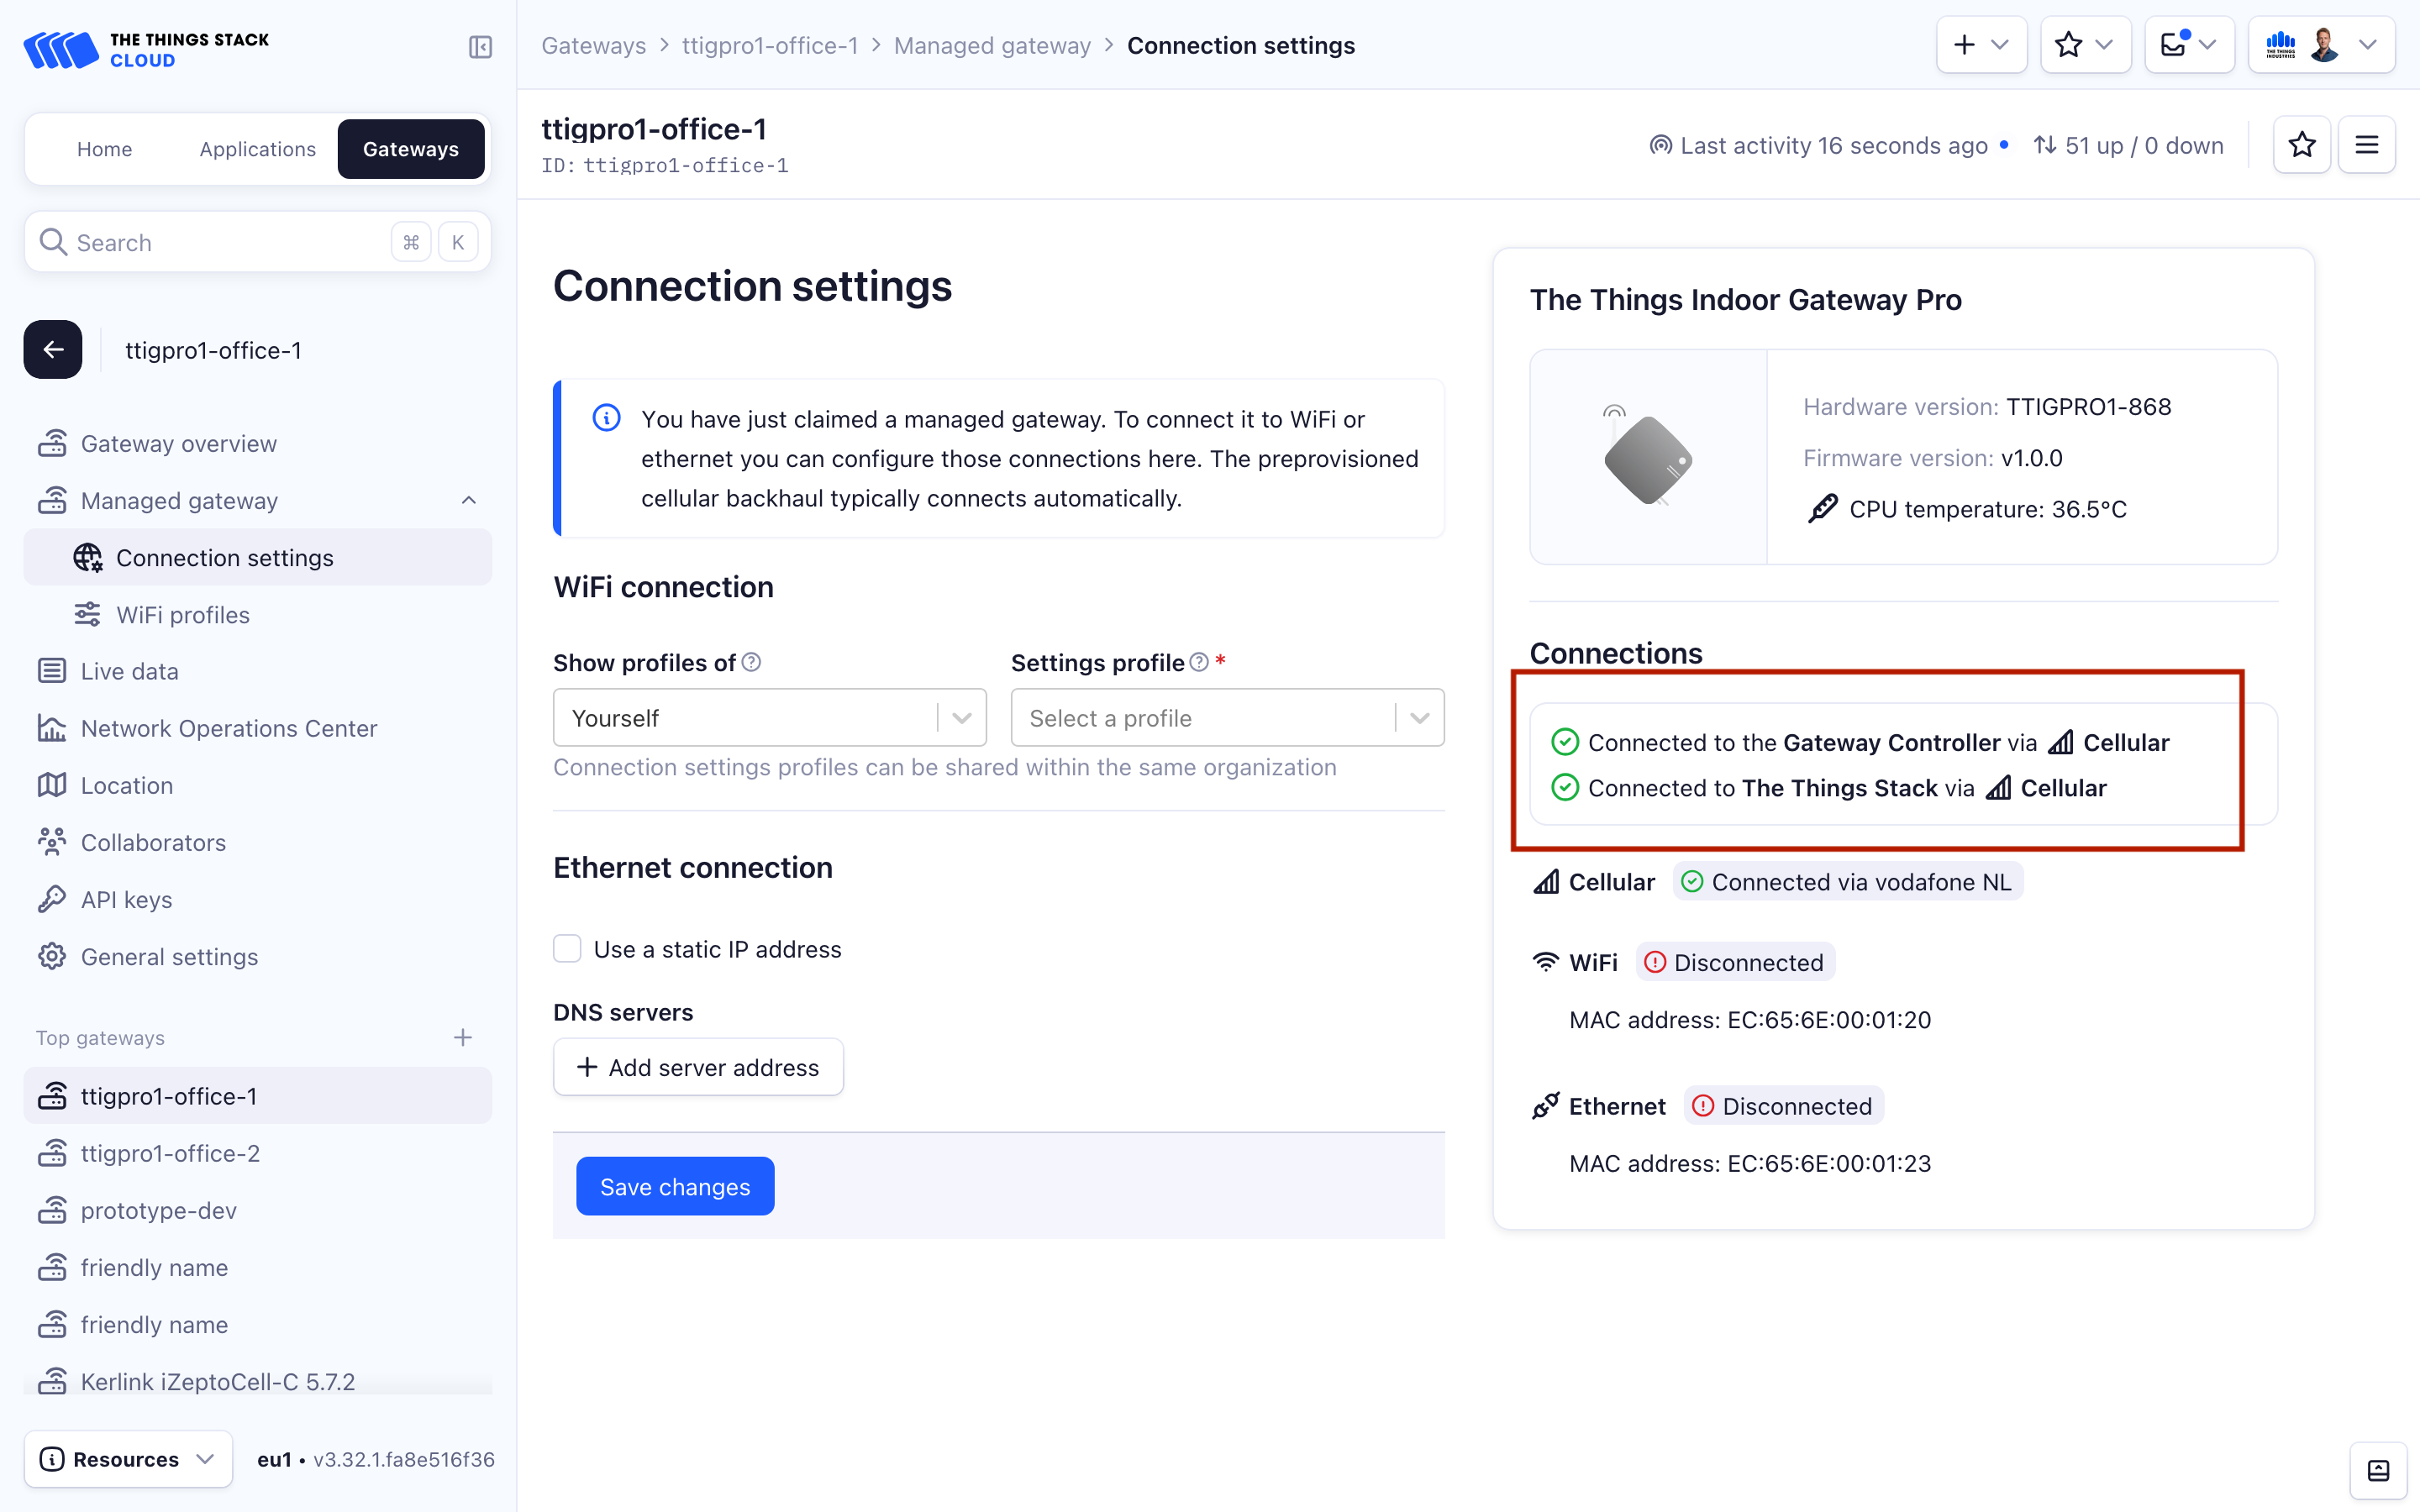
After a few minutes, The Things Indoor Gateway Pro should be connected to The Things Stack. You can see this in the Connections section on the right hand side of the Connection Settings page.
If you would like to learn more about The Things Indoor Gateway Pro or setup WiFi or Ethernet connectivity, you can check the dedicated The Things Indoor Gateway Pro page.
Let’s now register and activate the end device to send and receive data.
2. mClimate Multipurpose Button
Step 1: Register in The Things Stack
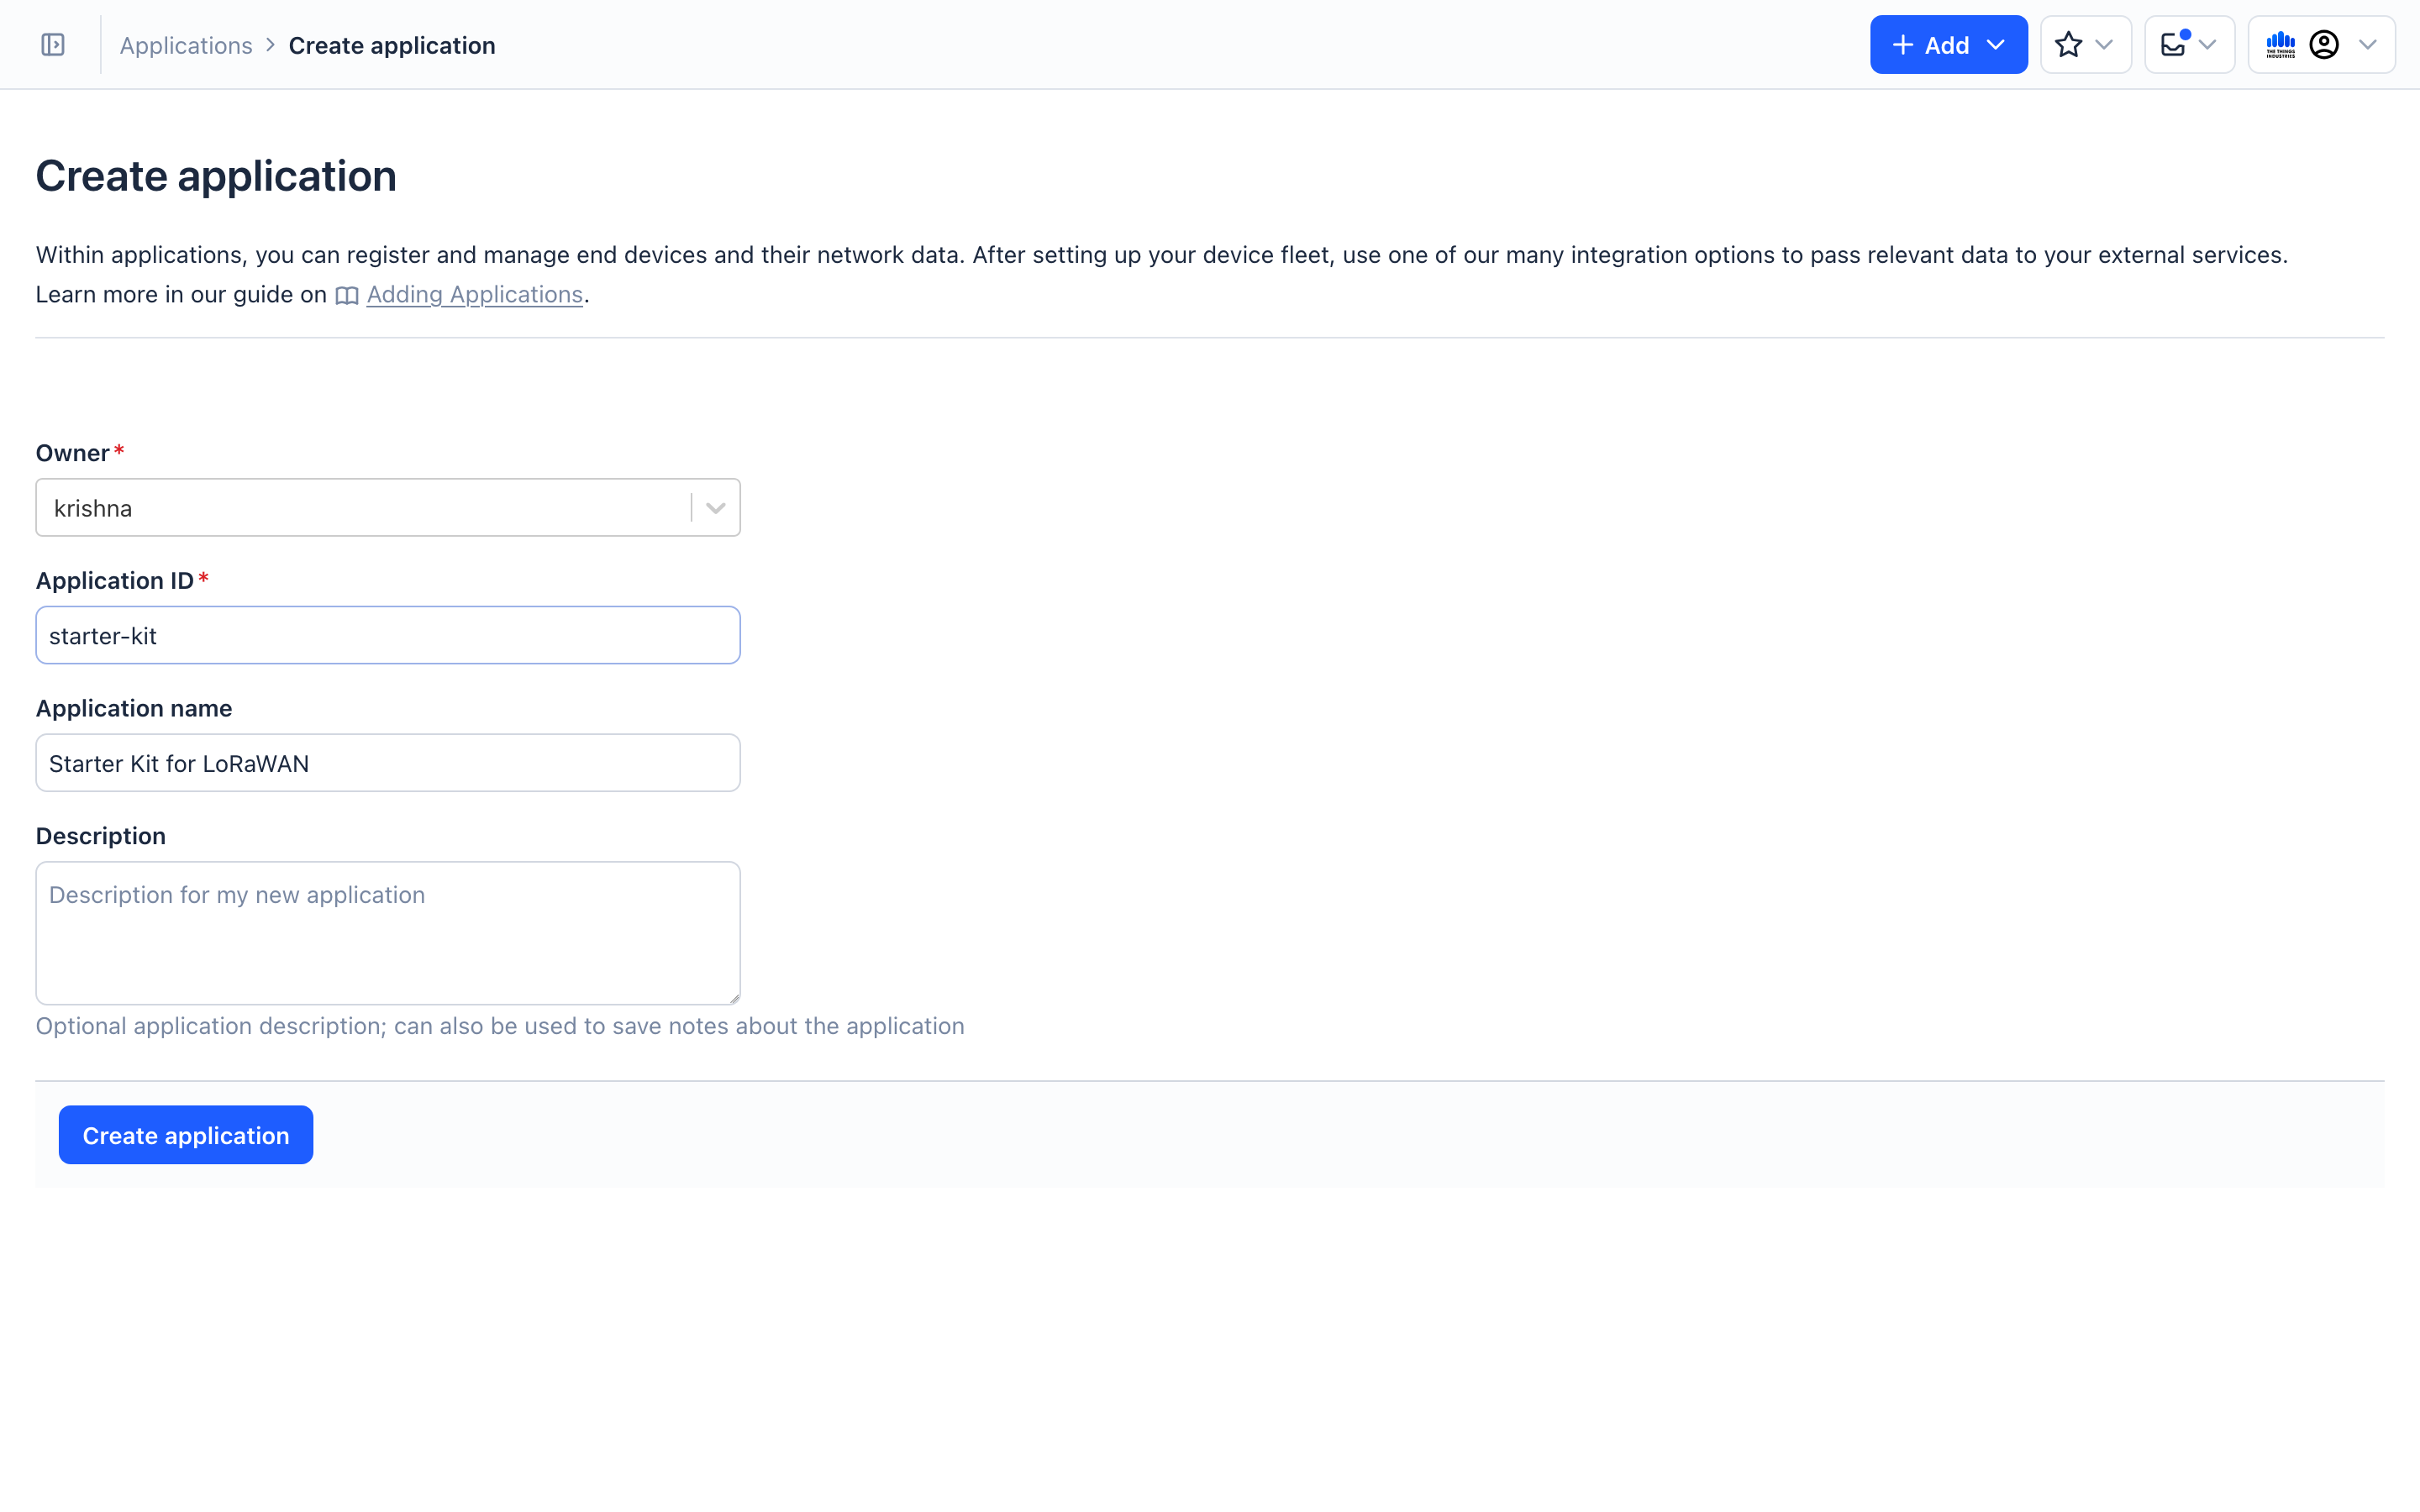
- First create an application in The Things Stack. An application is a collection of end devices.
-
Now within the application, select Register end device.
-
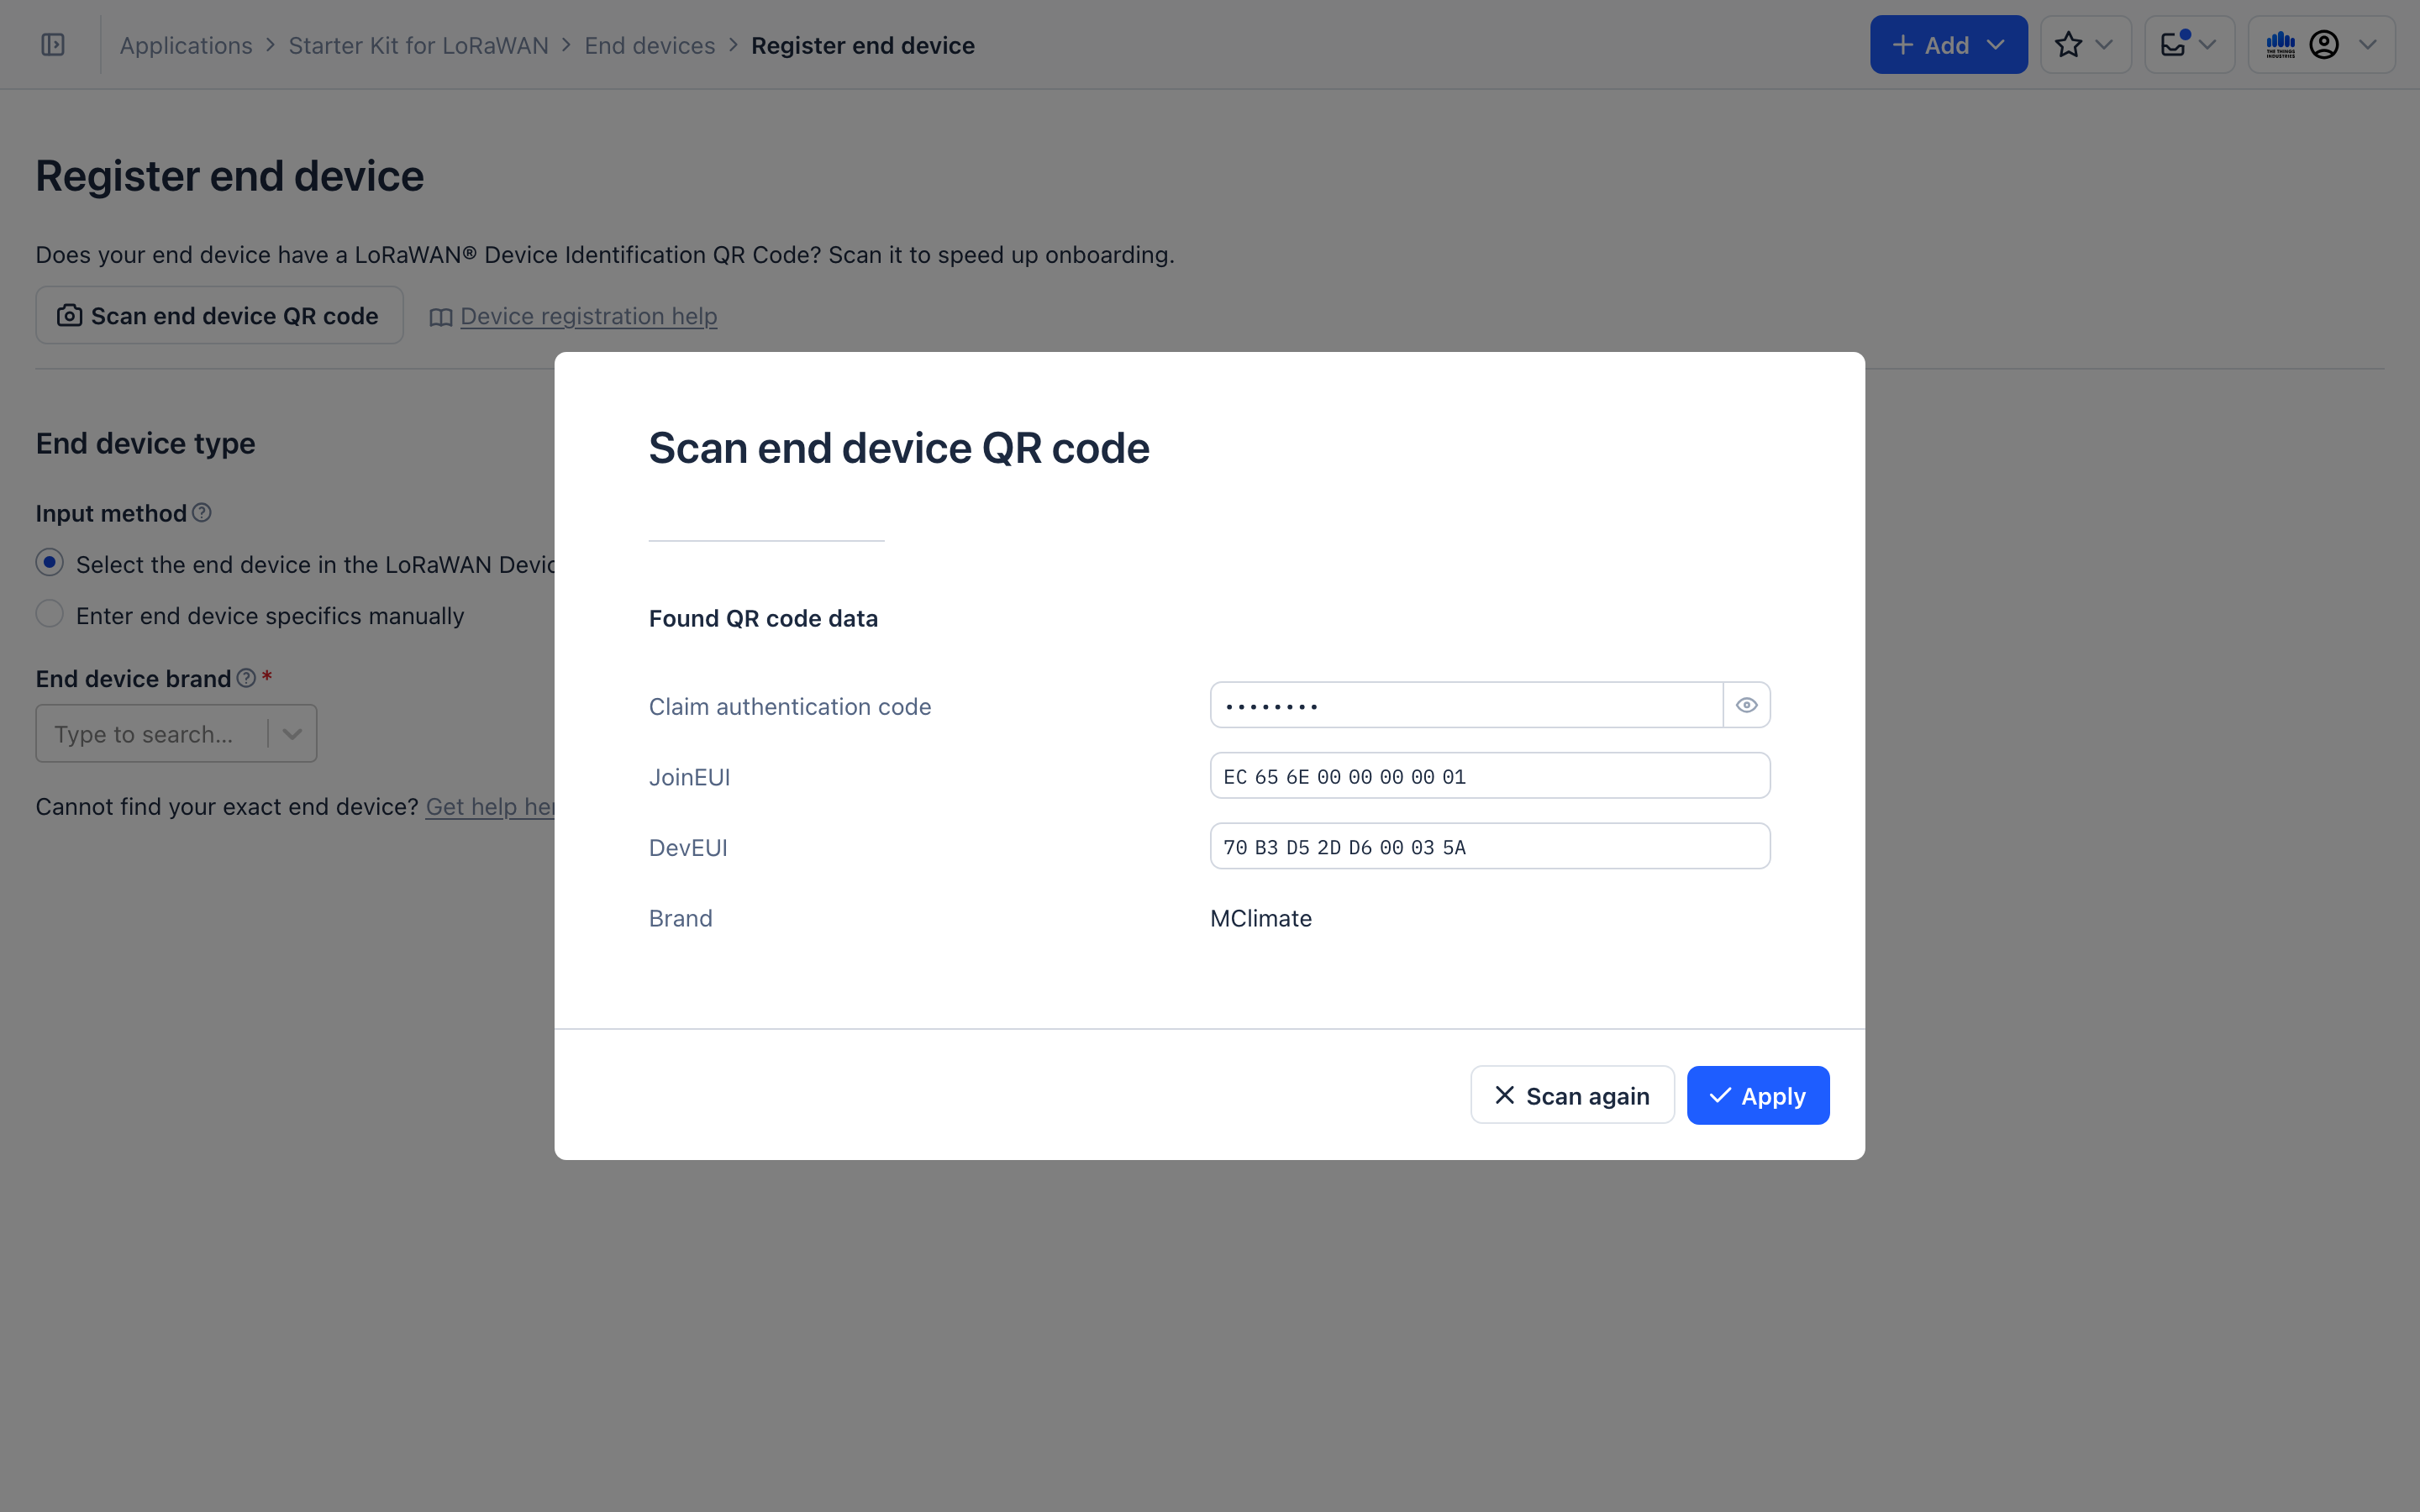
Select Scan end device QR code.
-
Use the QR code that’s part of a separate piece of paper included in the box. This will prefill important information required to claim the end device.
-
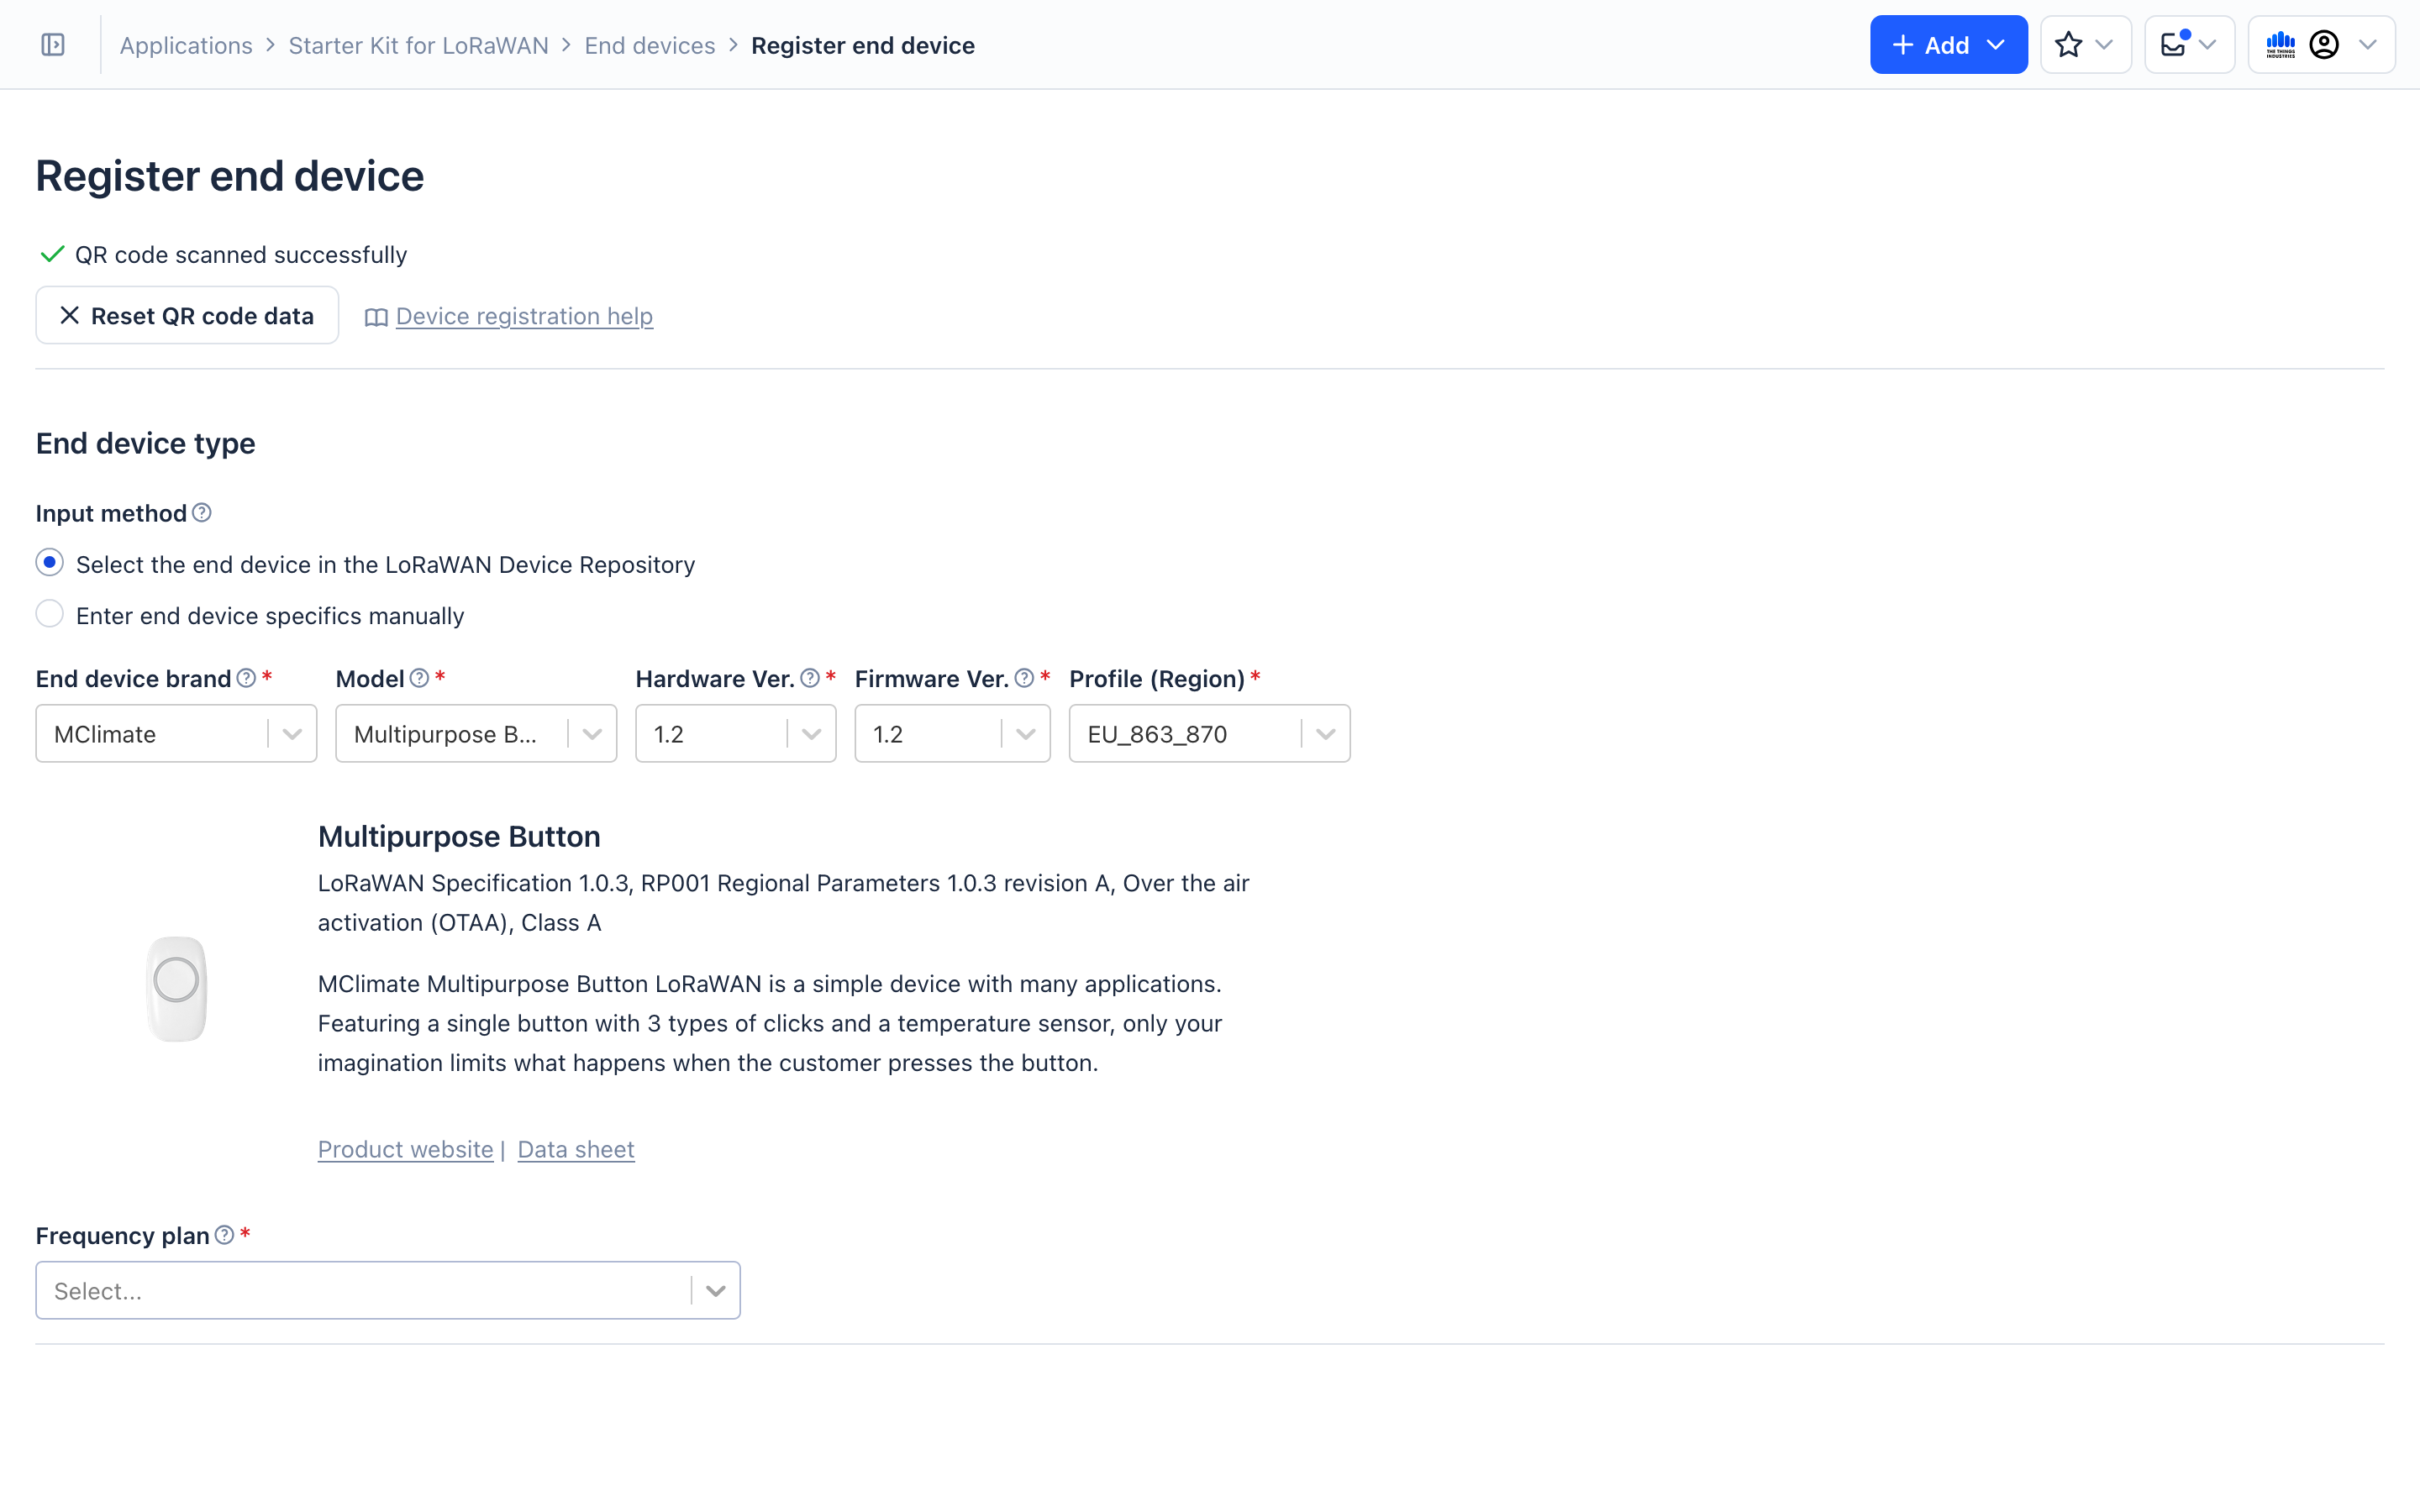
From the model dropdown, select Multipurpose button. The rest of the information about the end device is automatically fetched and prefilled.
-
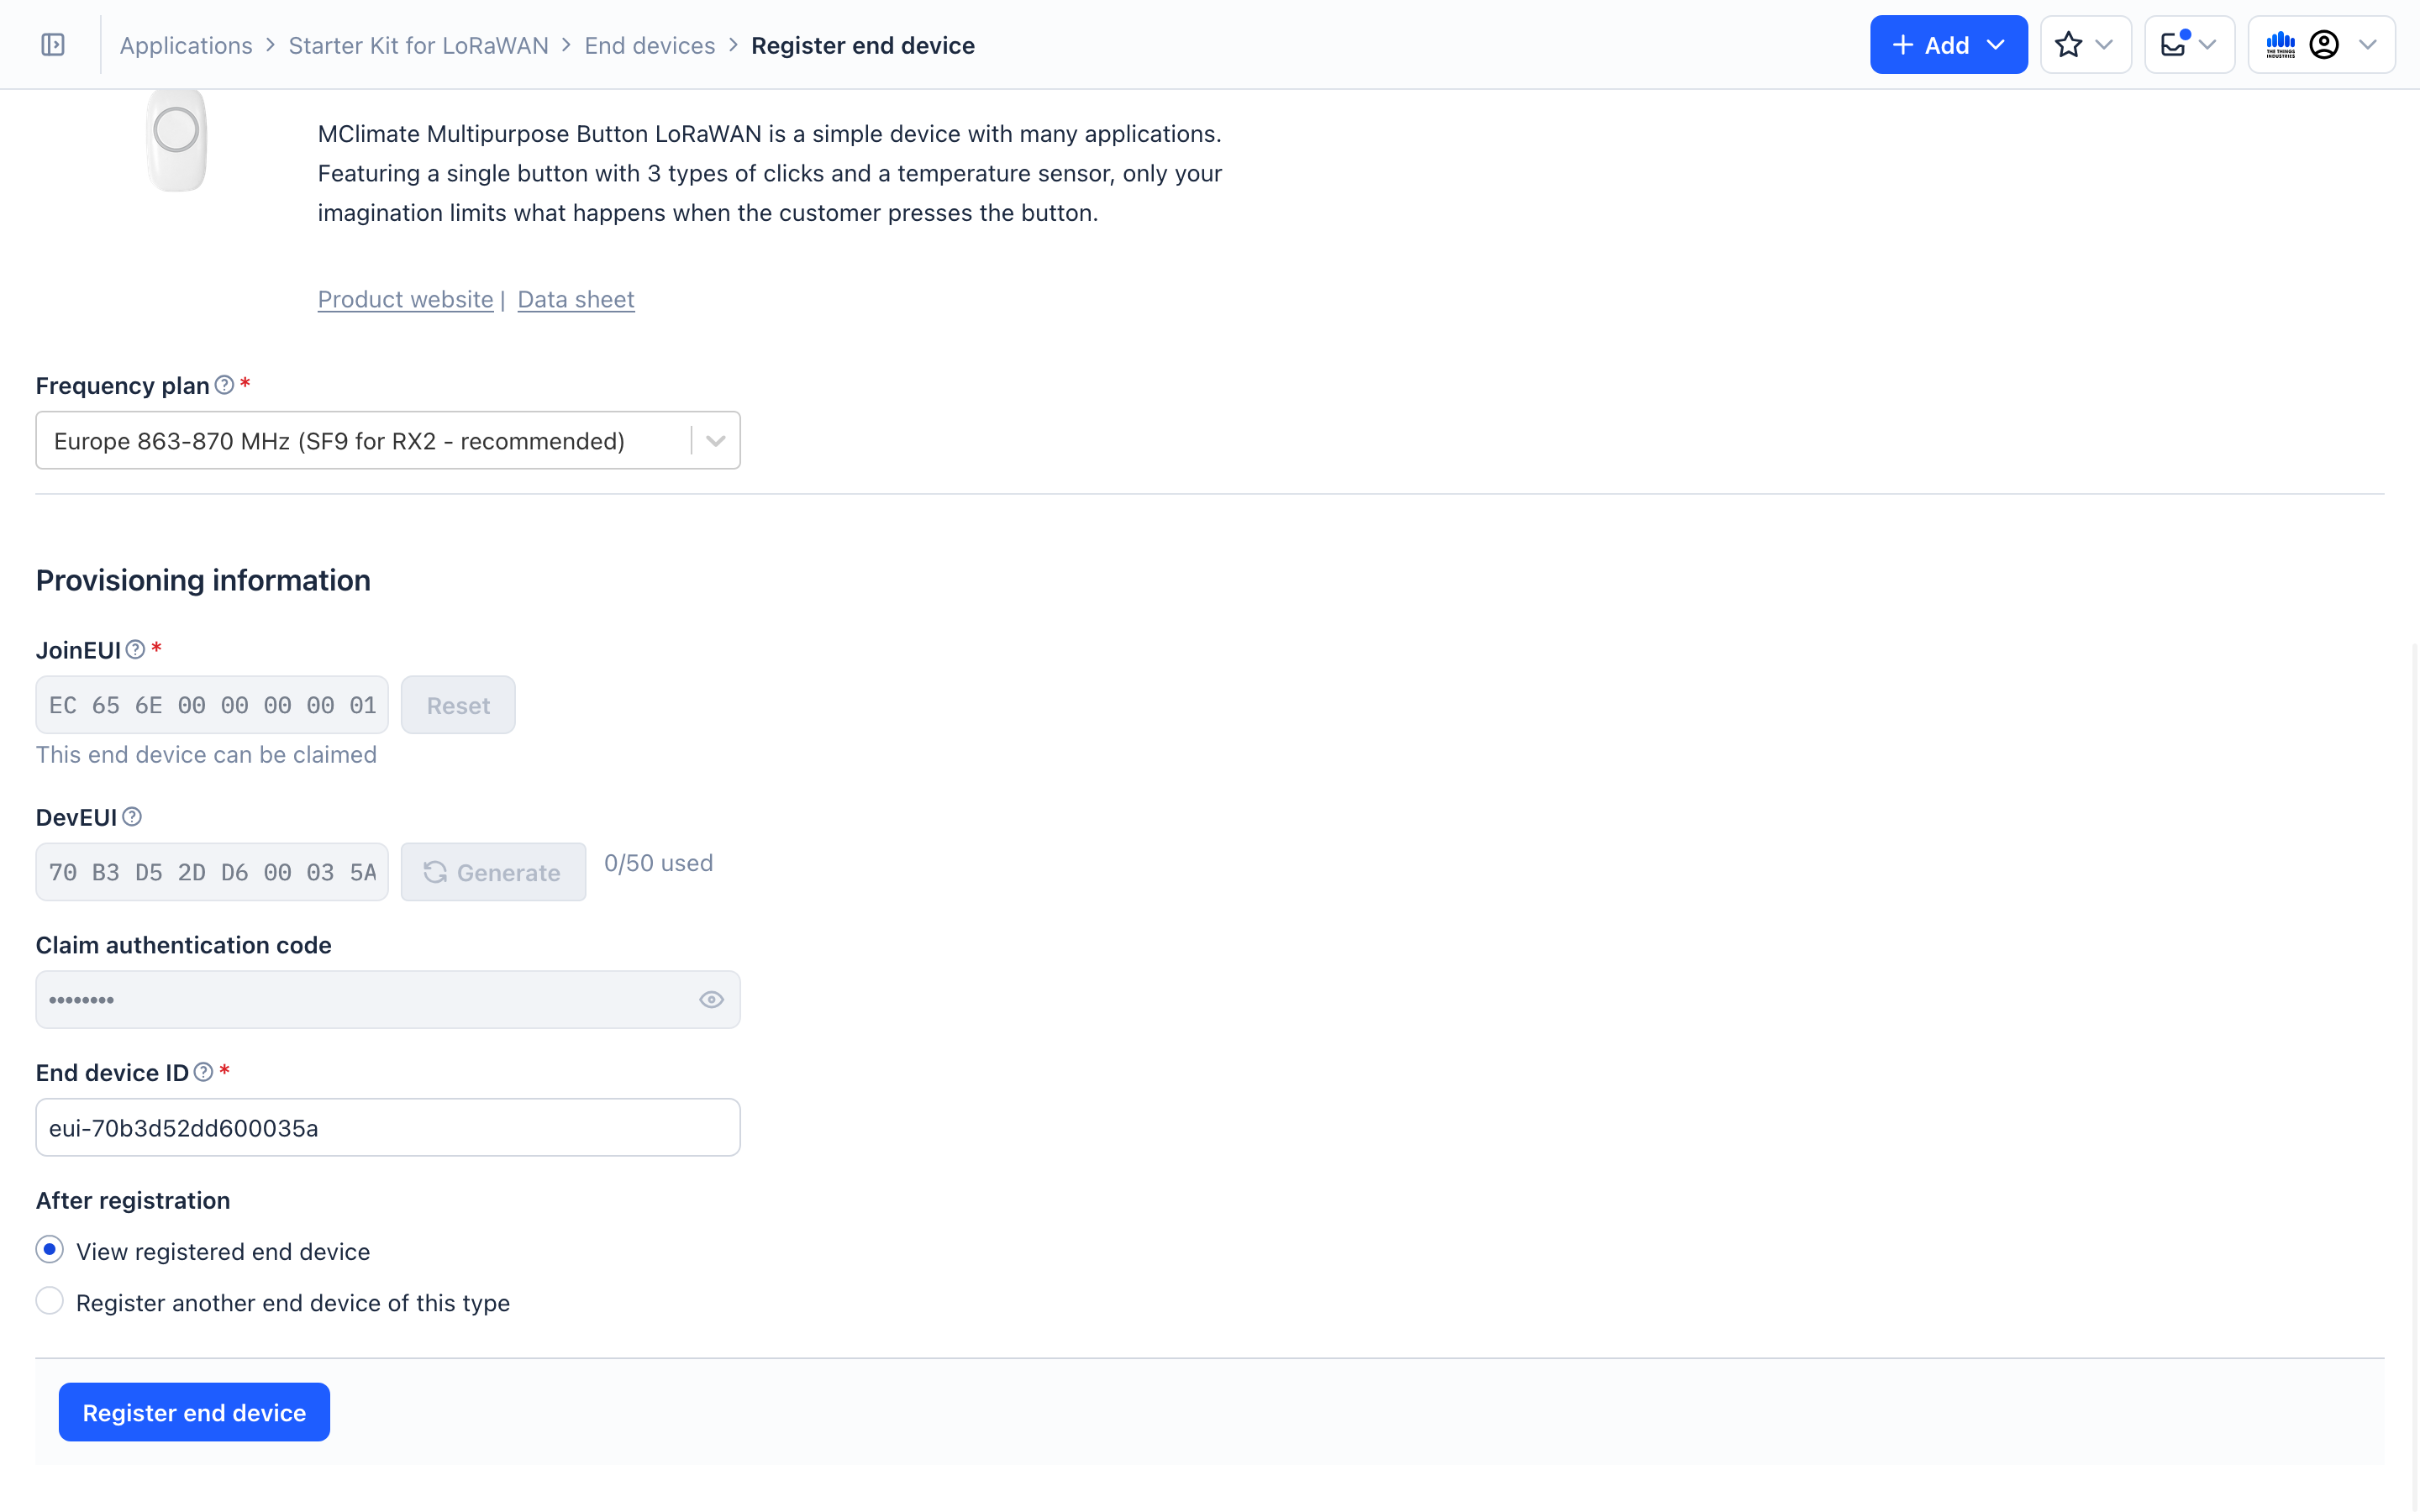
For the Frequency plan, select the exact same value that you selected for the The Things Indoor Gateway Pro.
-
The rest of the information is already setup for you. You can at this point choose to customize the End Device ID field or leave the pre-generated value.
-
Click the Register end device button. You device should now be successfully registered.
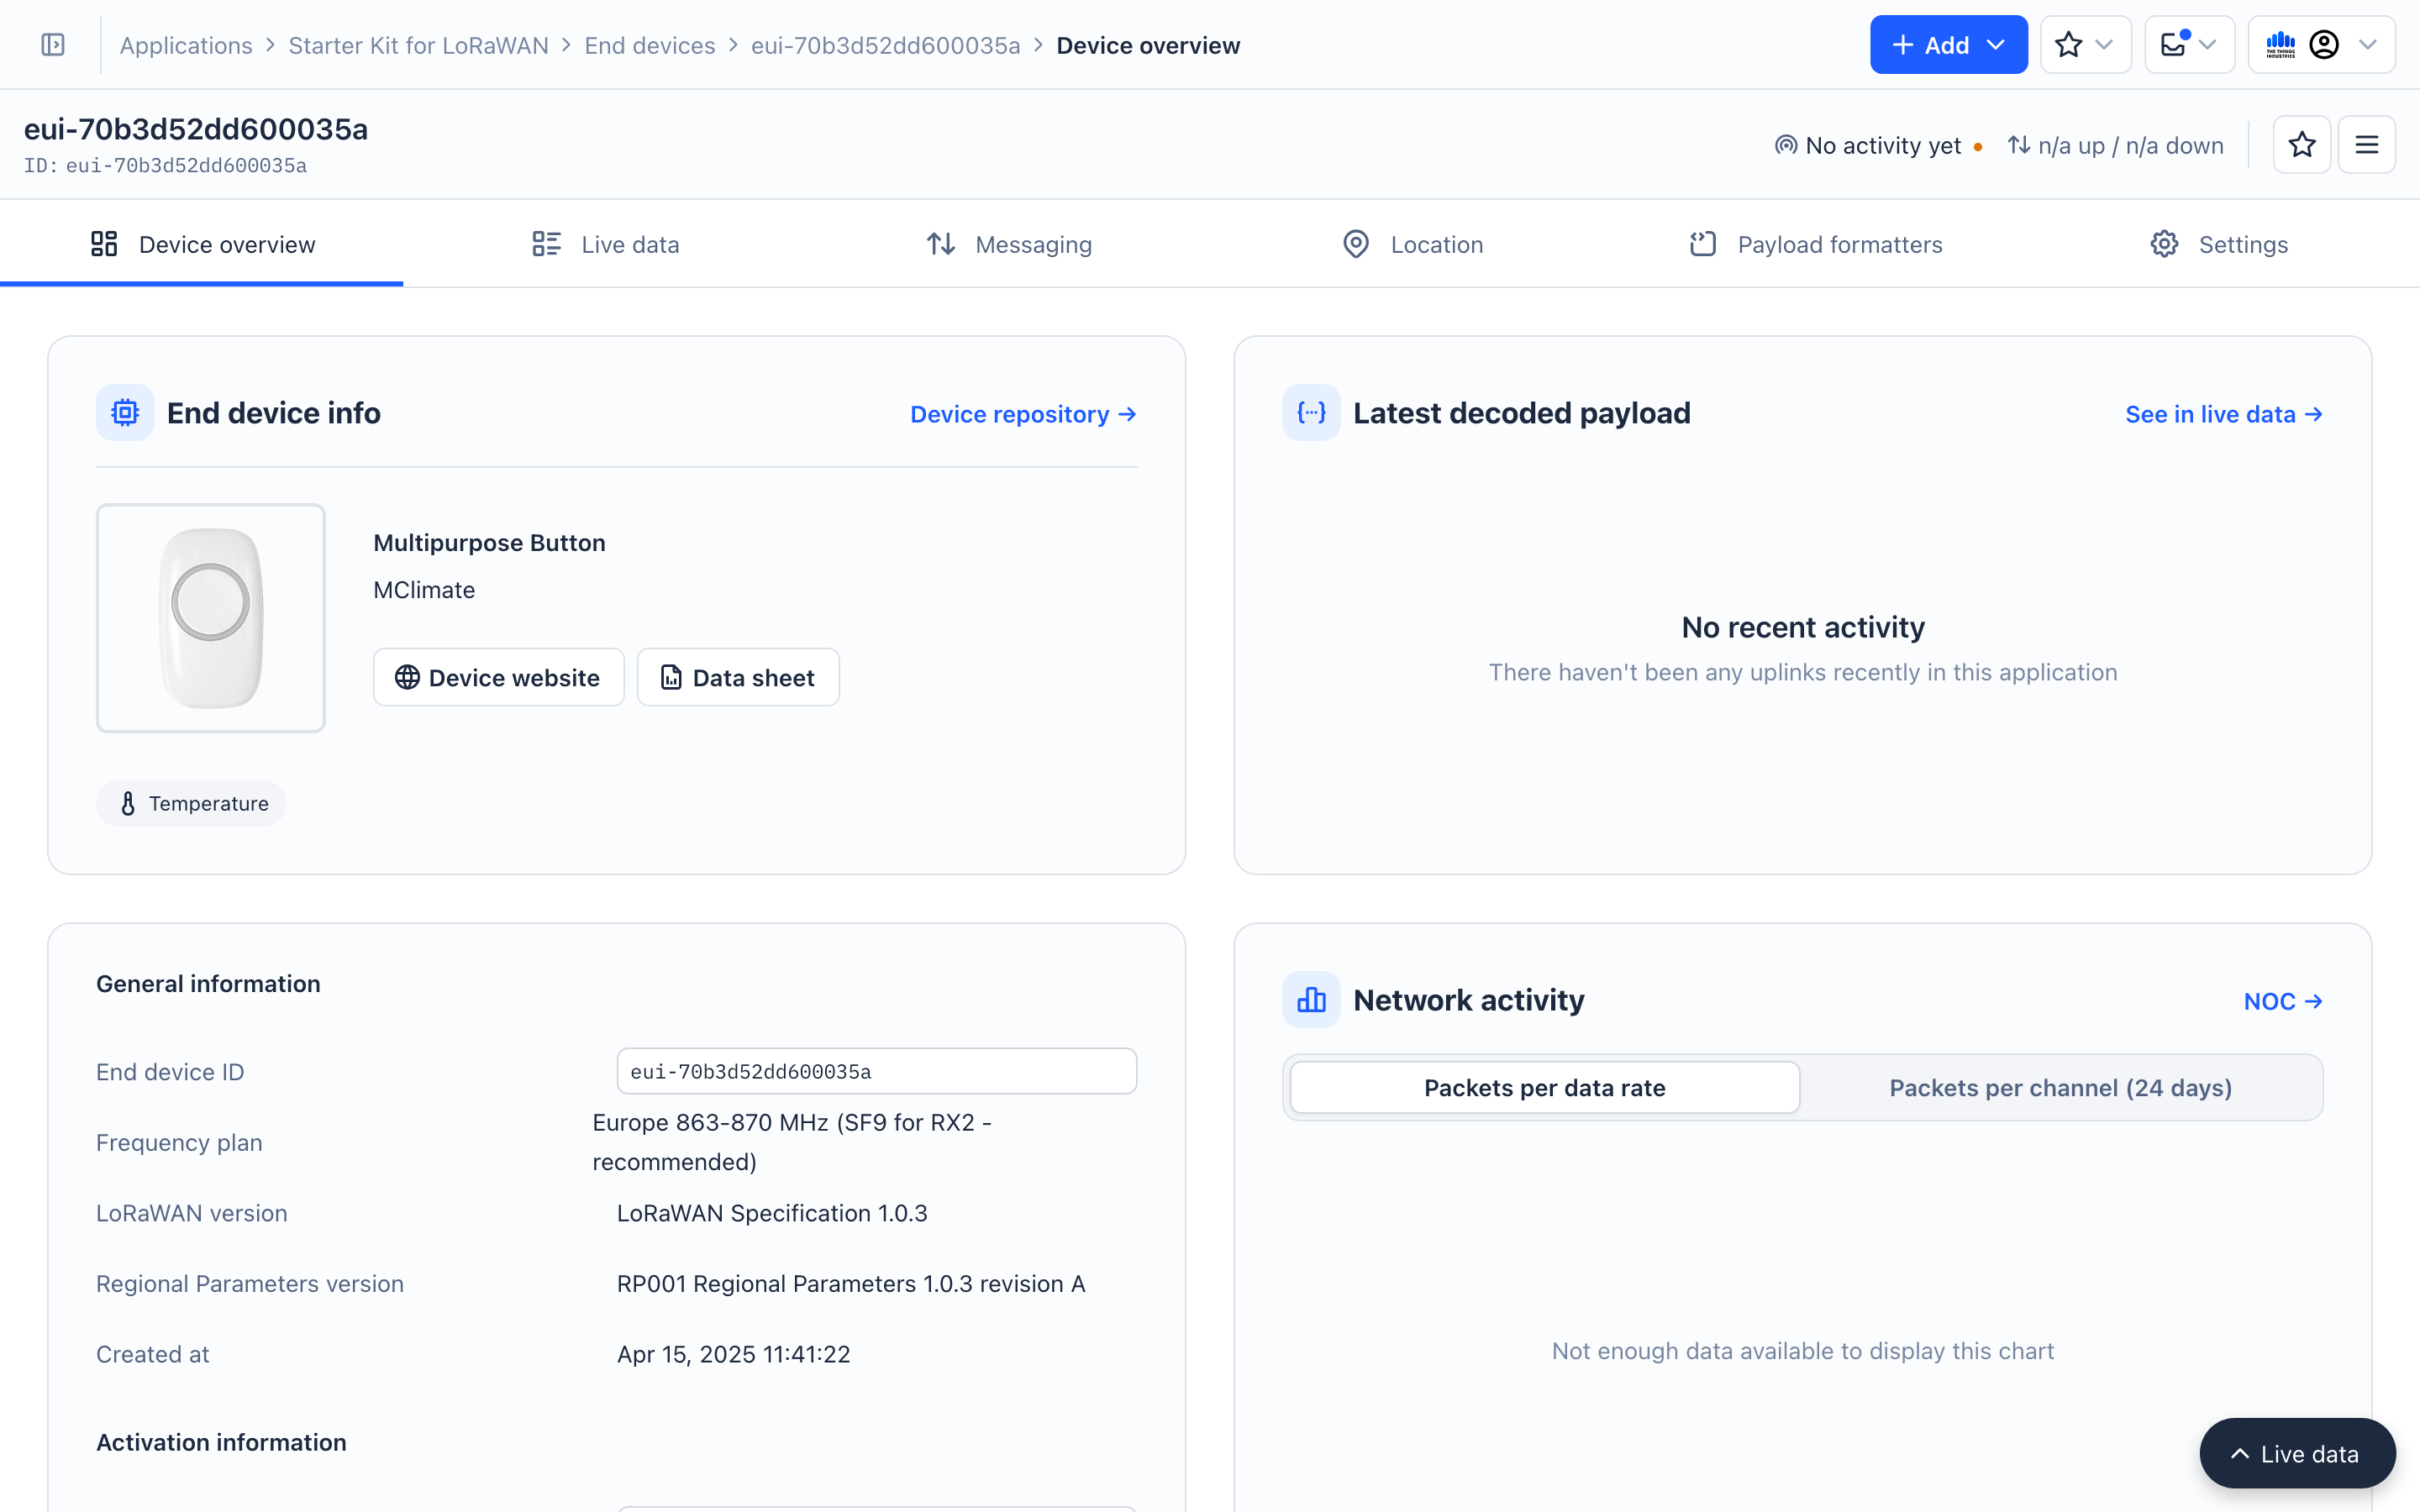
You will now be redirected to the end device.
Step 2: Activate
- Open the Live Data tab of the end device.
- Make sure that The Things Indoor Gateway Pro is connected to The Things Stack and is 1-2 meters away from the end device.
- Pull the plastic strip at the back of the gateway. This allows the battery to touch the contact point and the device now starts a join request.
- A join request is a special uplink message used by the end device to “join” a network (The Things Stack in this case).
- If the device is registered properly, The Things Stack returns a join accept message, with a few configuration parameters to the end device.
The device is now successfully configured and sends the first data message. Since a LoRaWAN message consists of bytes, The Things Stack decodes these bytes into human readable information, which is seen in the payload field on the live data page. The following is an example.
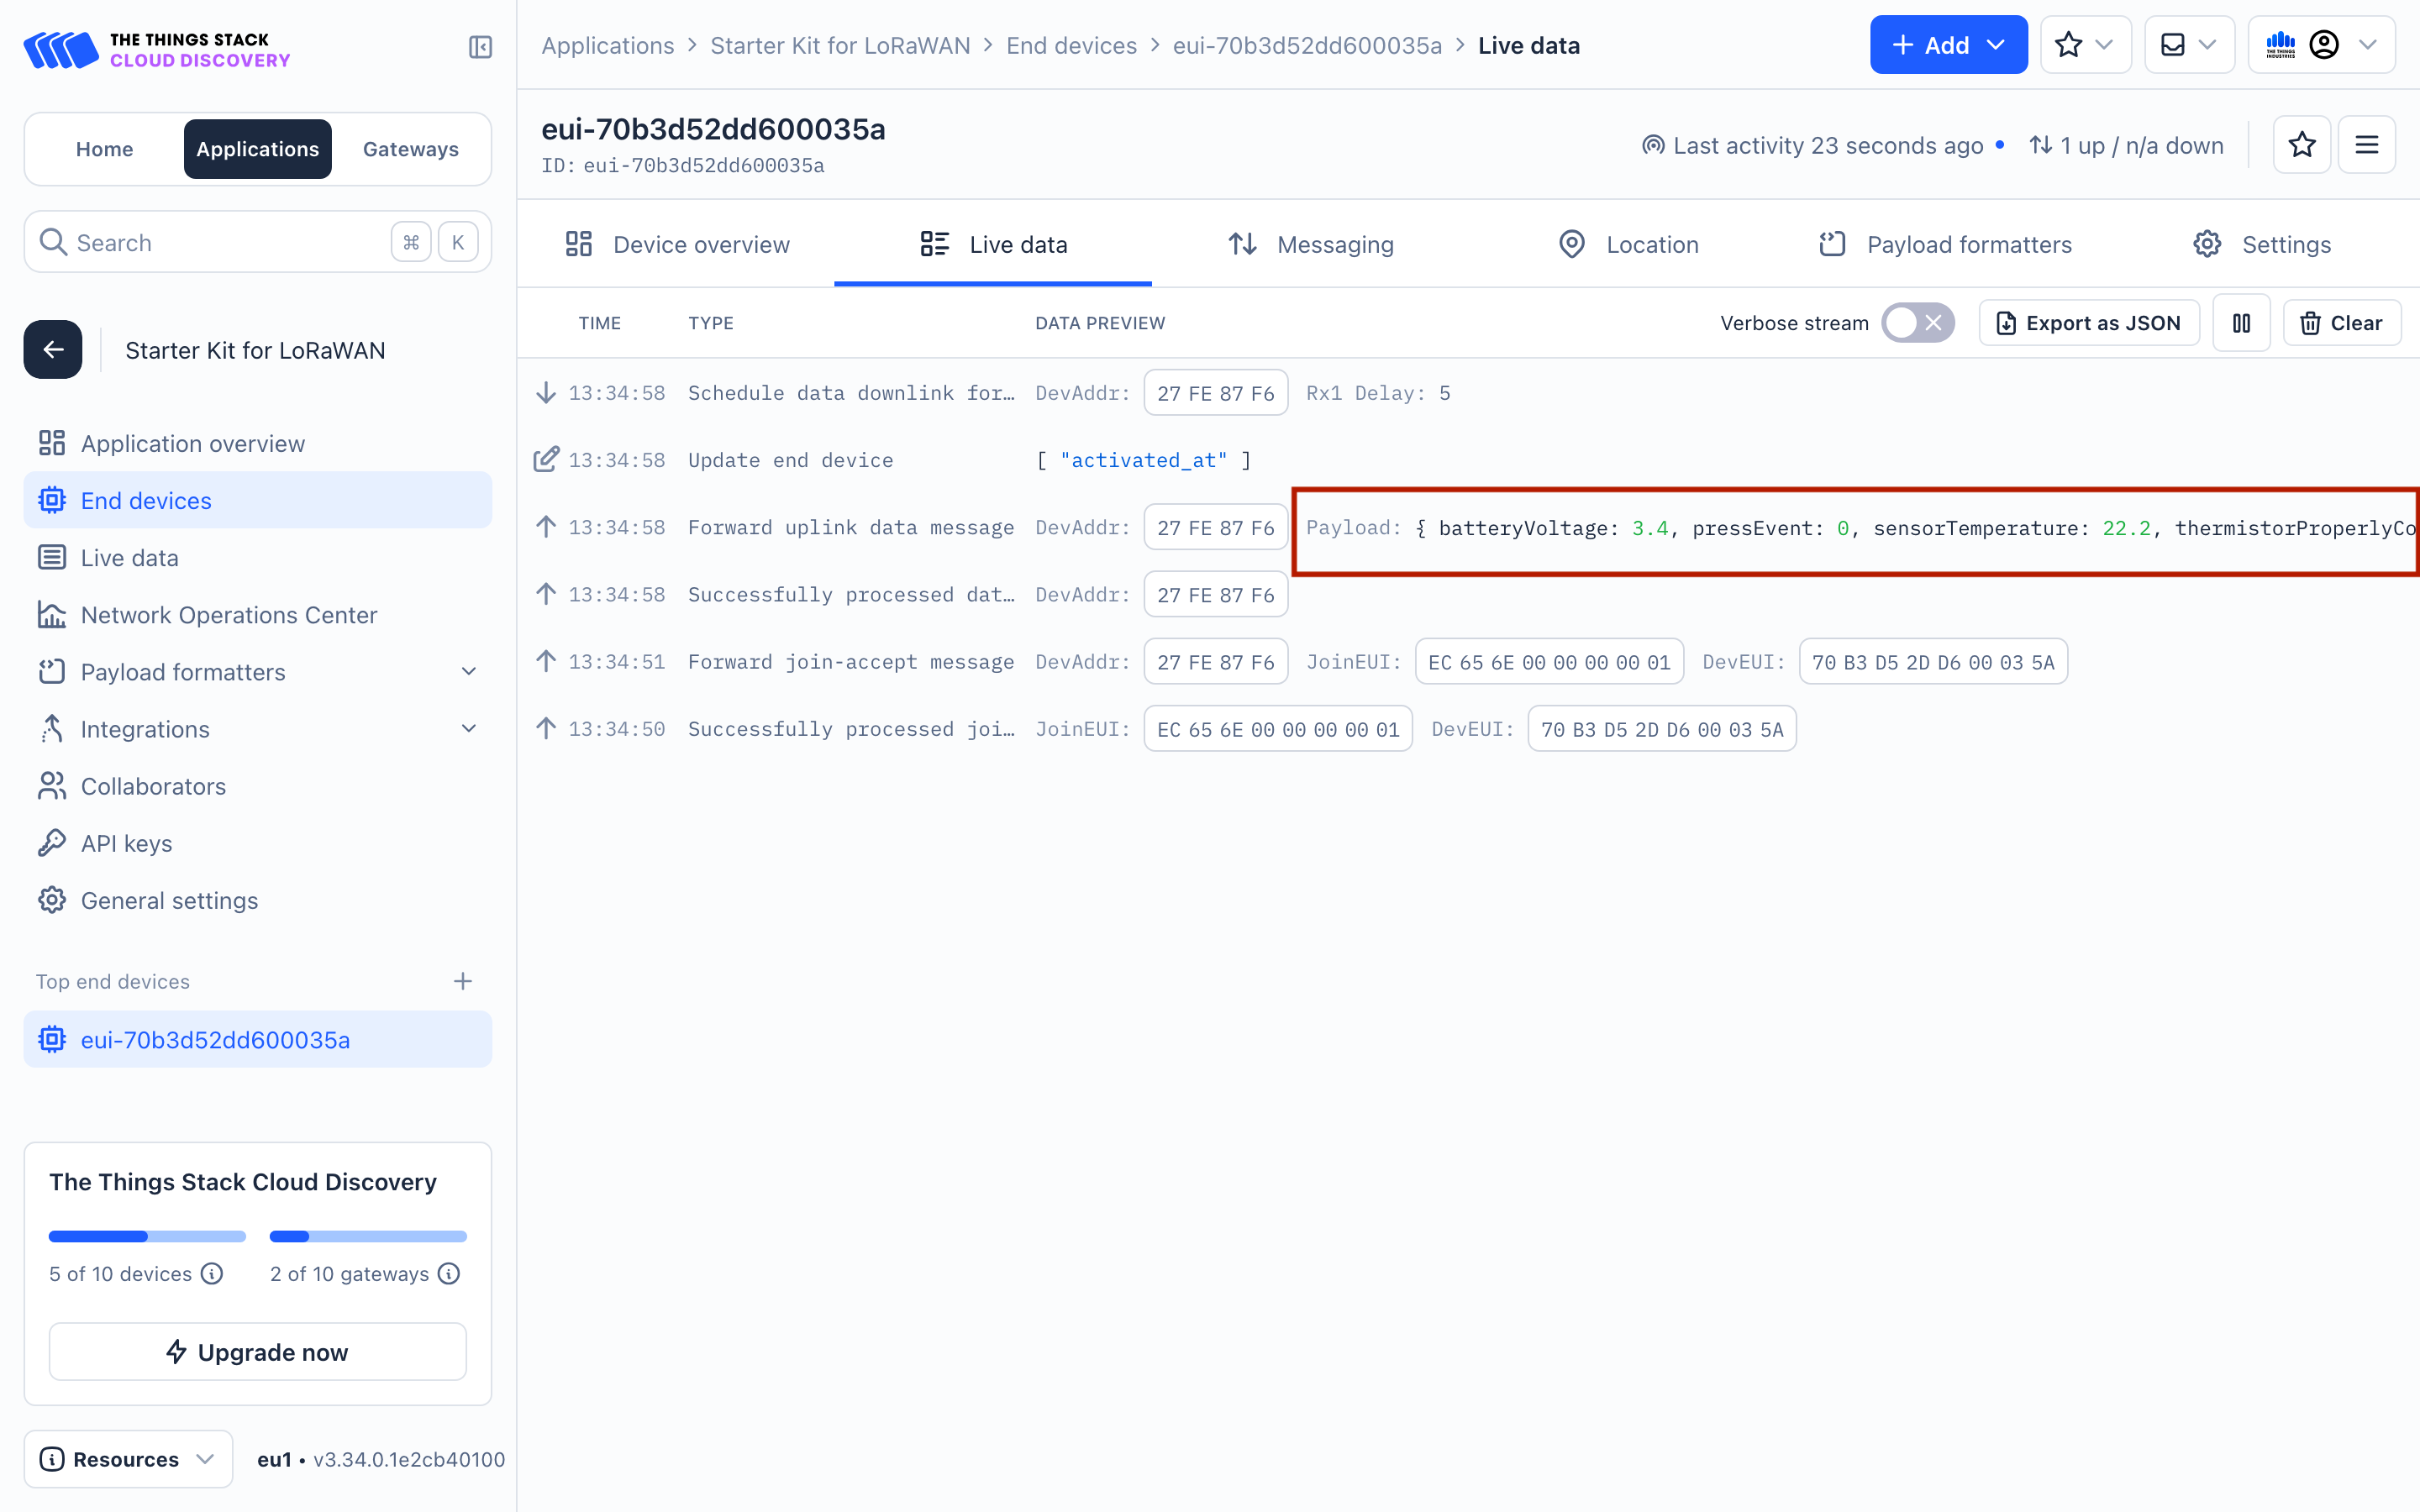
The following are sample values.
{
  "batteryVoltage": 3.4,
  "pressEvent": 0,
  "sensorTemperature": 22.2,
  "singlePressEventCounter": 0,
  "thermistorProperlyConnected": true
}
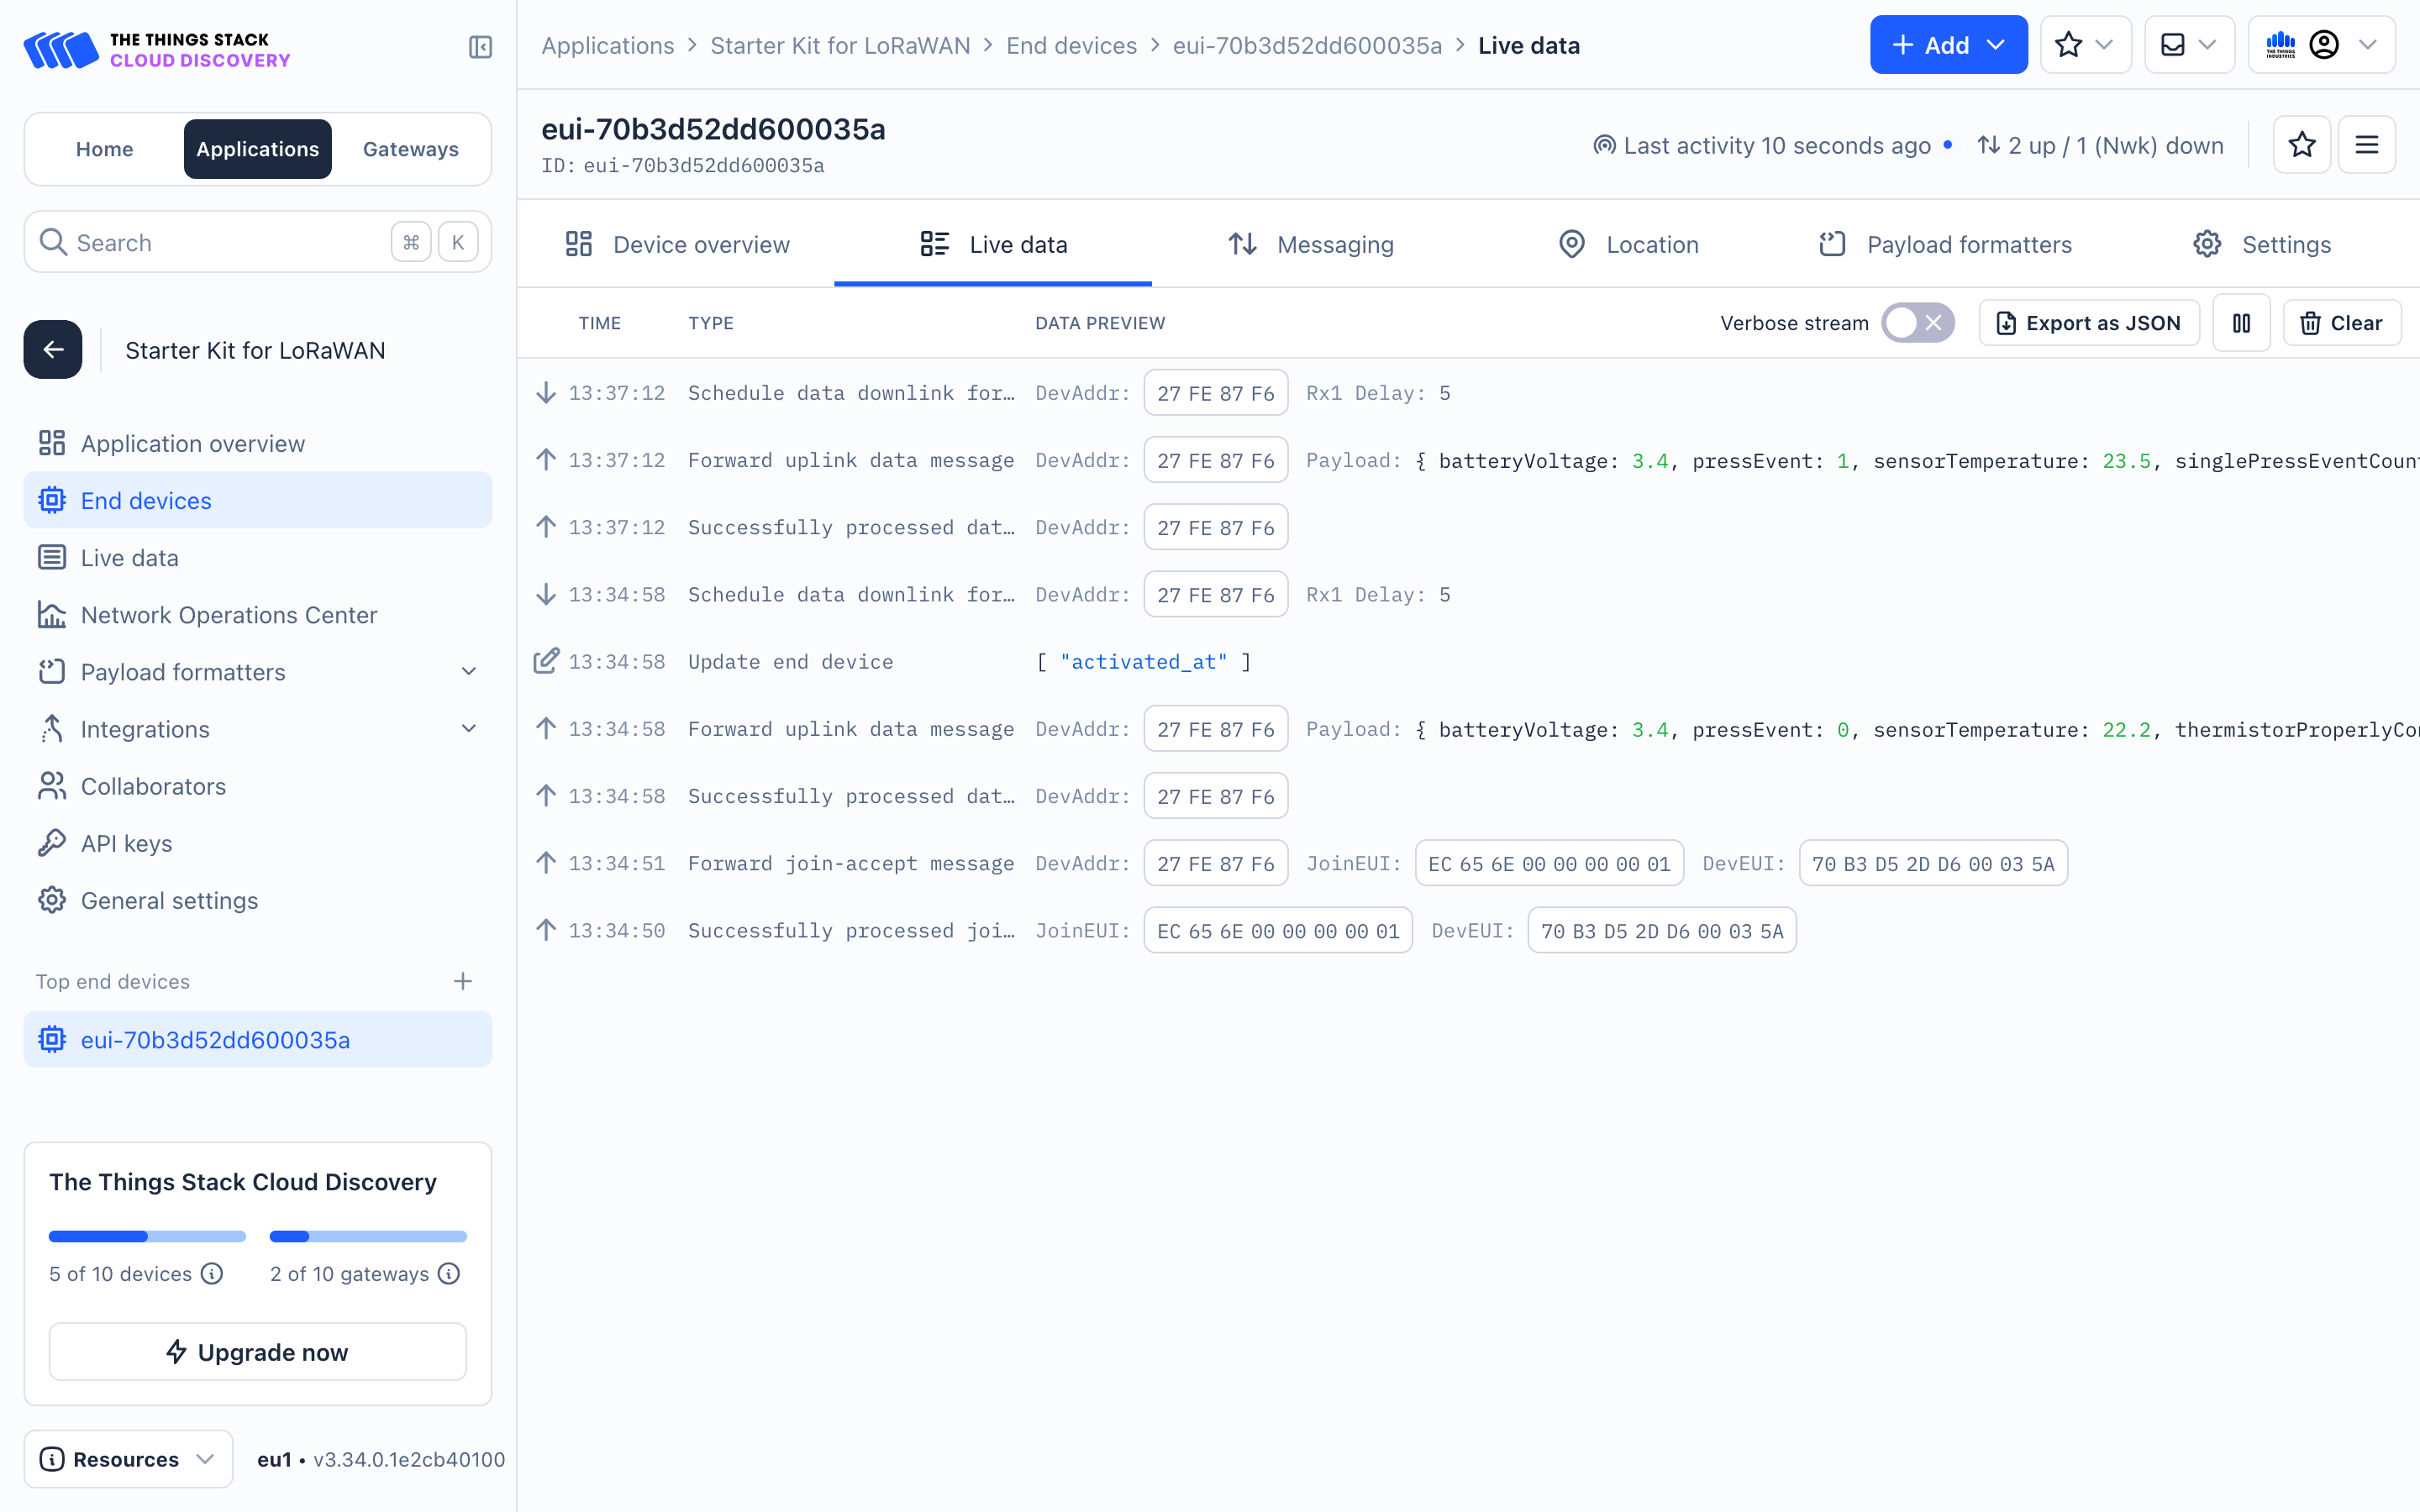
- Now you can press the button and you will see it’s surrounding LED blink green, which is a signal that an uplink was sent to the The Things Stack. If you now check the live data tab, you’ll see the newest data message at the top.
If you have any issues in this process, don’t worry and check out the troubleshooting guide
Now that you’ve successfully setup the LoRaWAN gateway and end device, let’s go ahead and collect and visualize this data.