This section contains instructions for managing users.
Managing Users in the Console
User management can be found in the user dropdown in the top right corner of the Console.

Listing Users
The list of users is shown immediately after going to User management in the user dropdown.
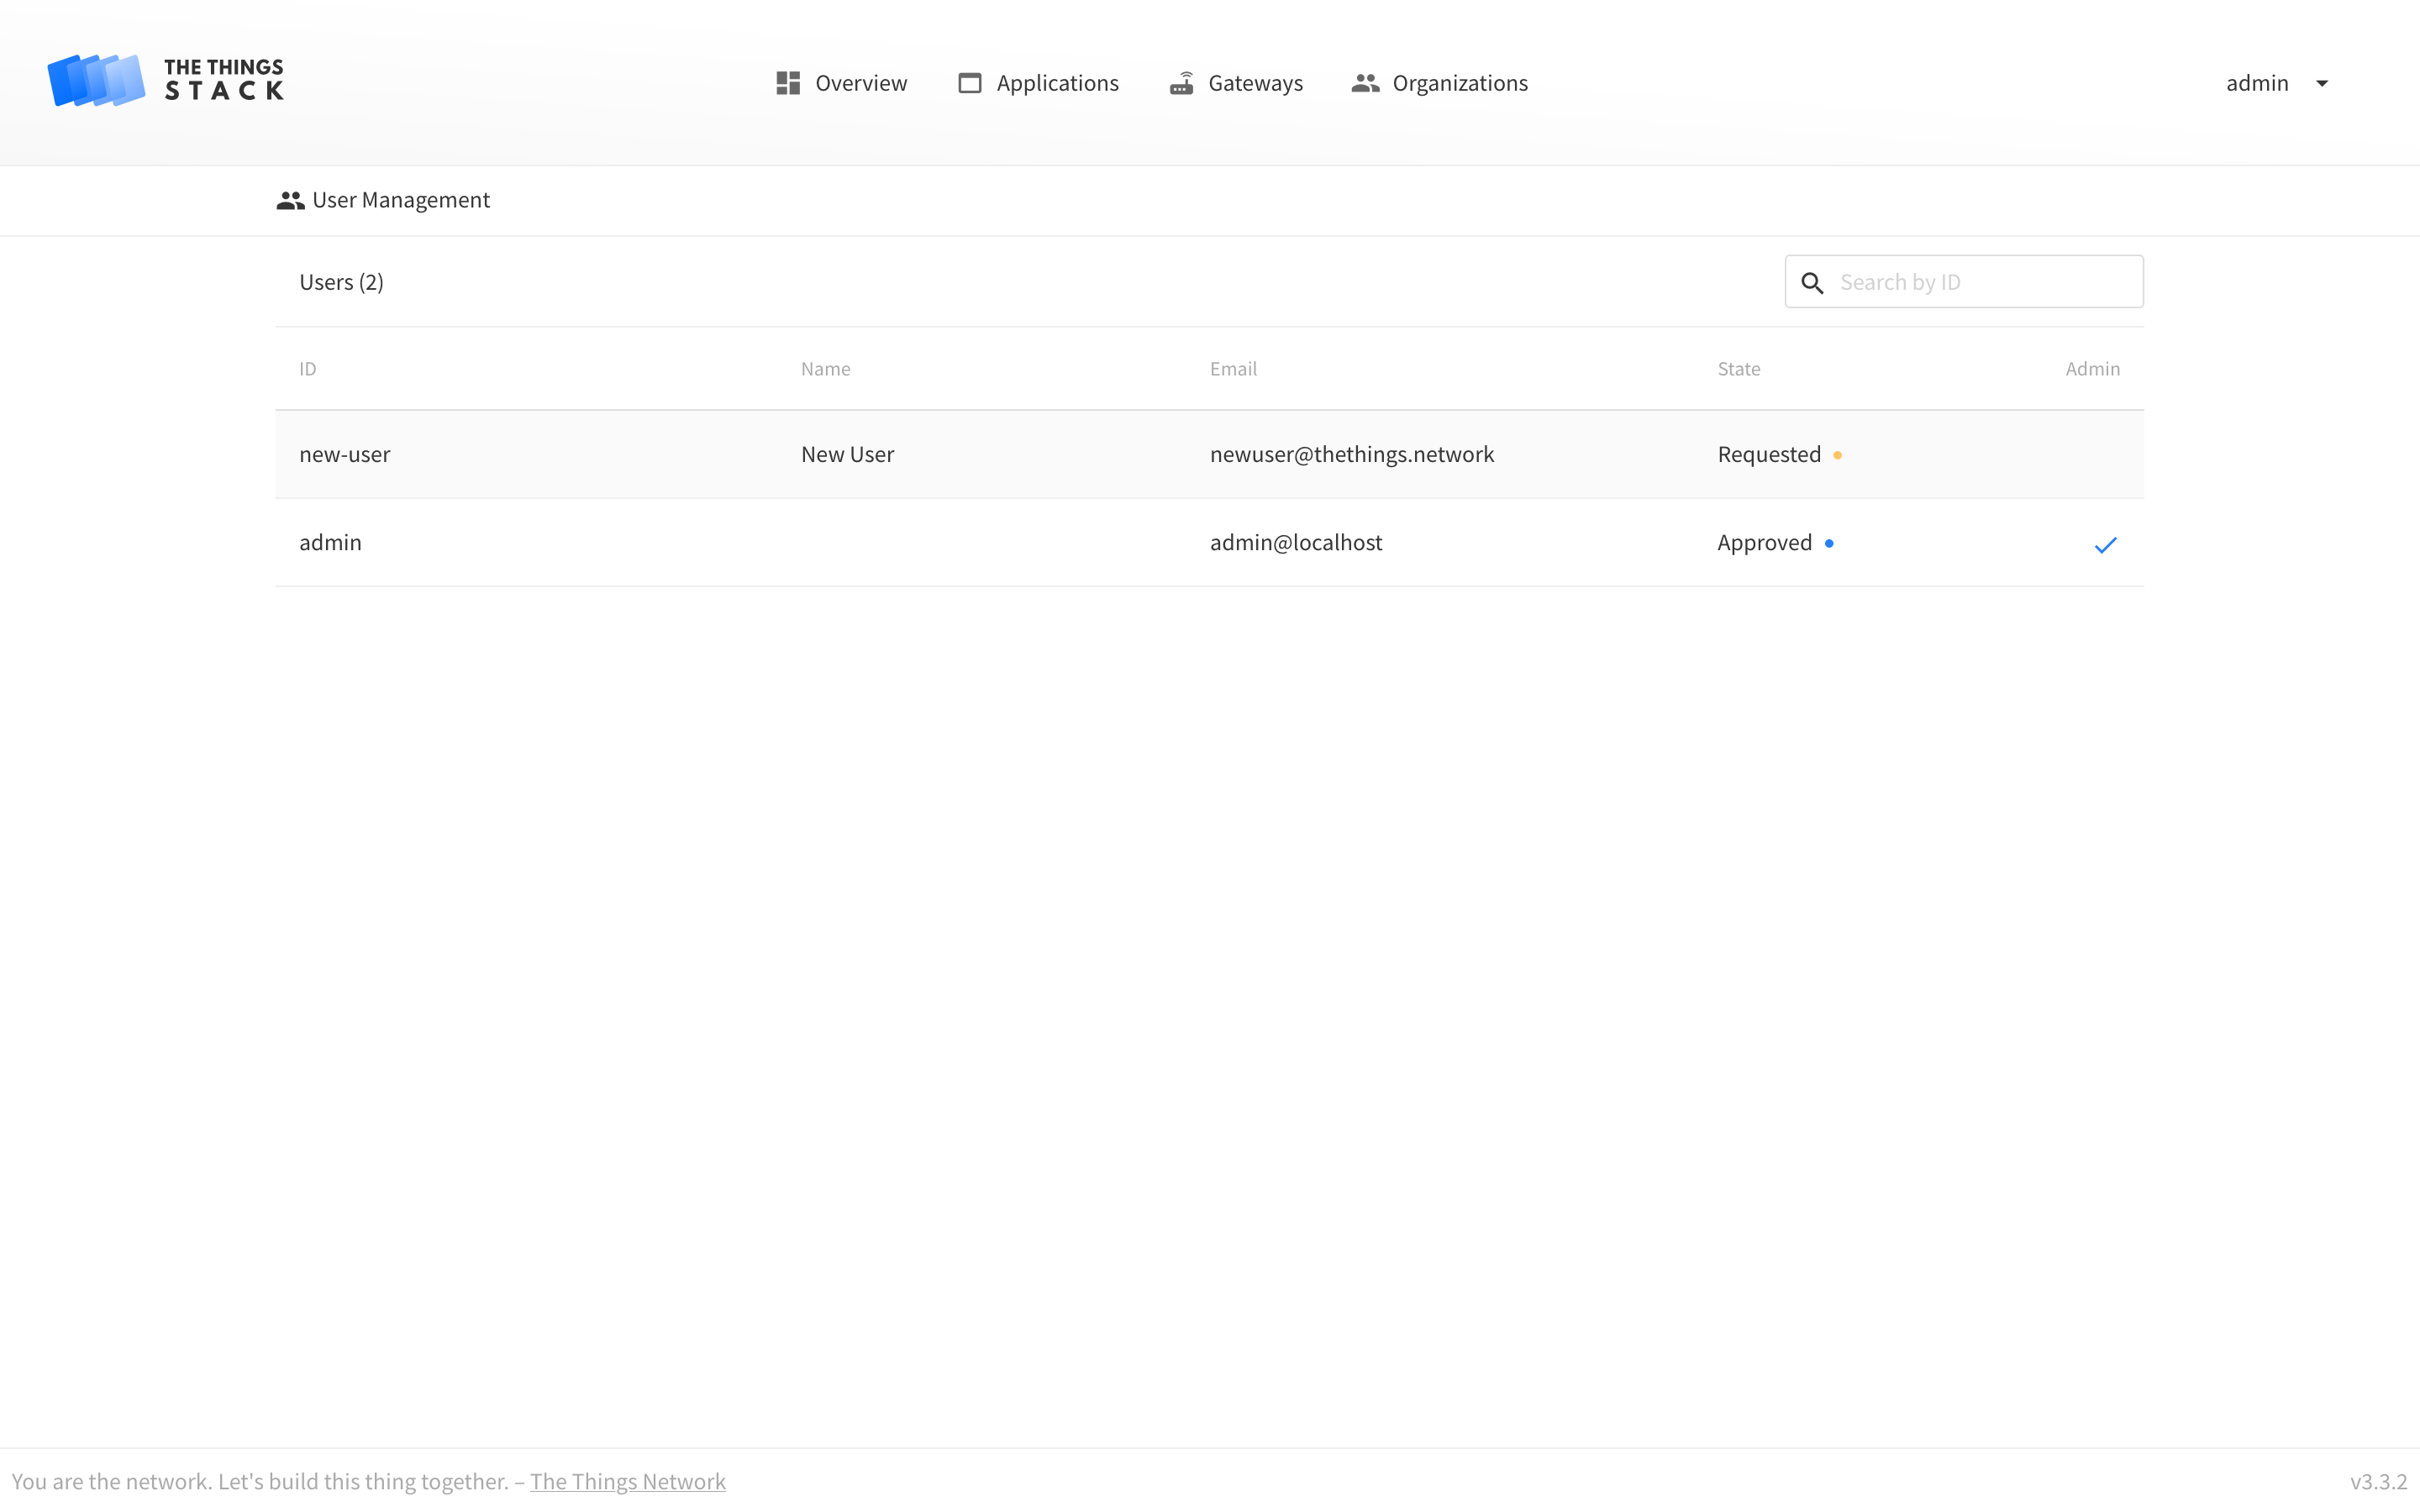
Searching for Users
You can search for users by ID using the search field above the list of users. It is currently not possible to search for users by other fields than the user ID using the Console, but you can do this with the CLI.
Creating Users
See the following video from The Things Industries youtube channel for instructions to create a user in the console.
Show video
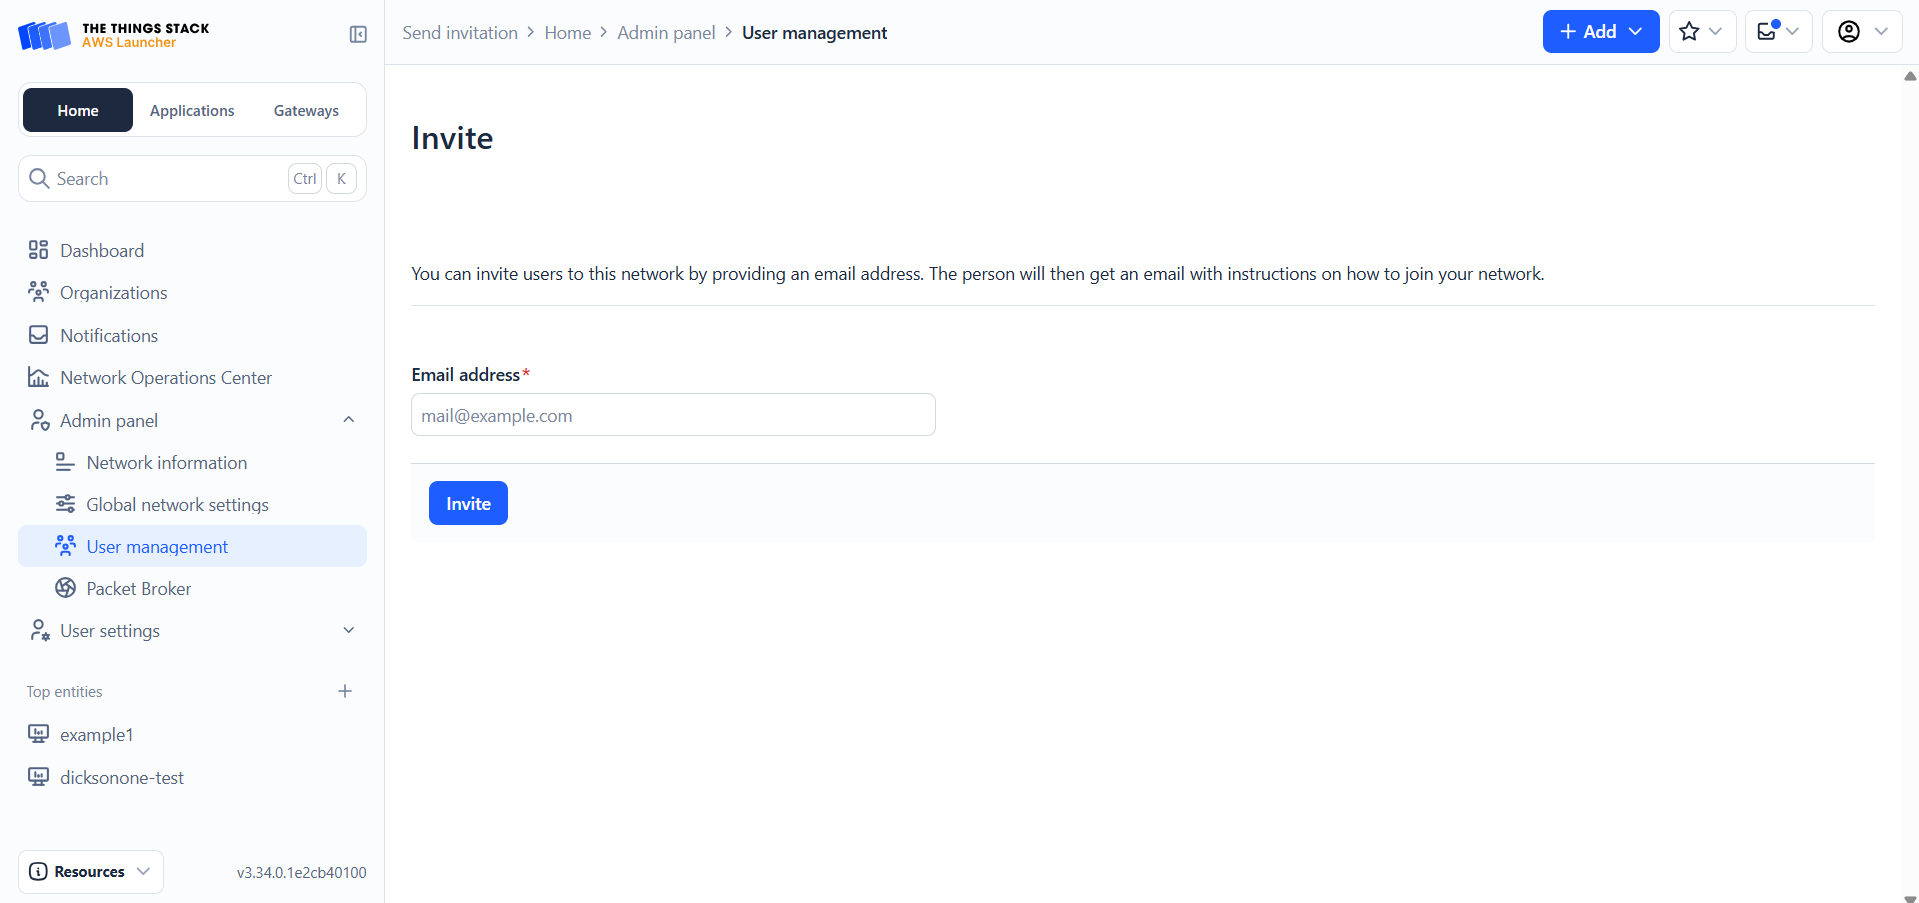
Inviting Users
New in v3.20.1
Invitations can be created allowing users to join The Things Stack. To do so, navigate to the User Management tab under the Admin Panel in the left-hand menu.
Once there, switch to the User Invitations tab and click the Invite User button. Enter the email address of the user you wish to invite, and click Invite to send the invitation.
Updating Users
In order to update a user, select that user from the list. You’ll now see the edit view.
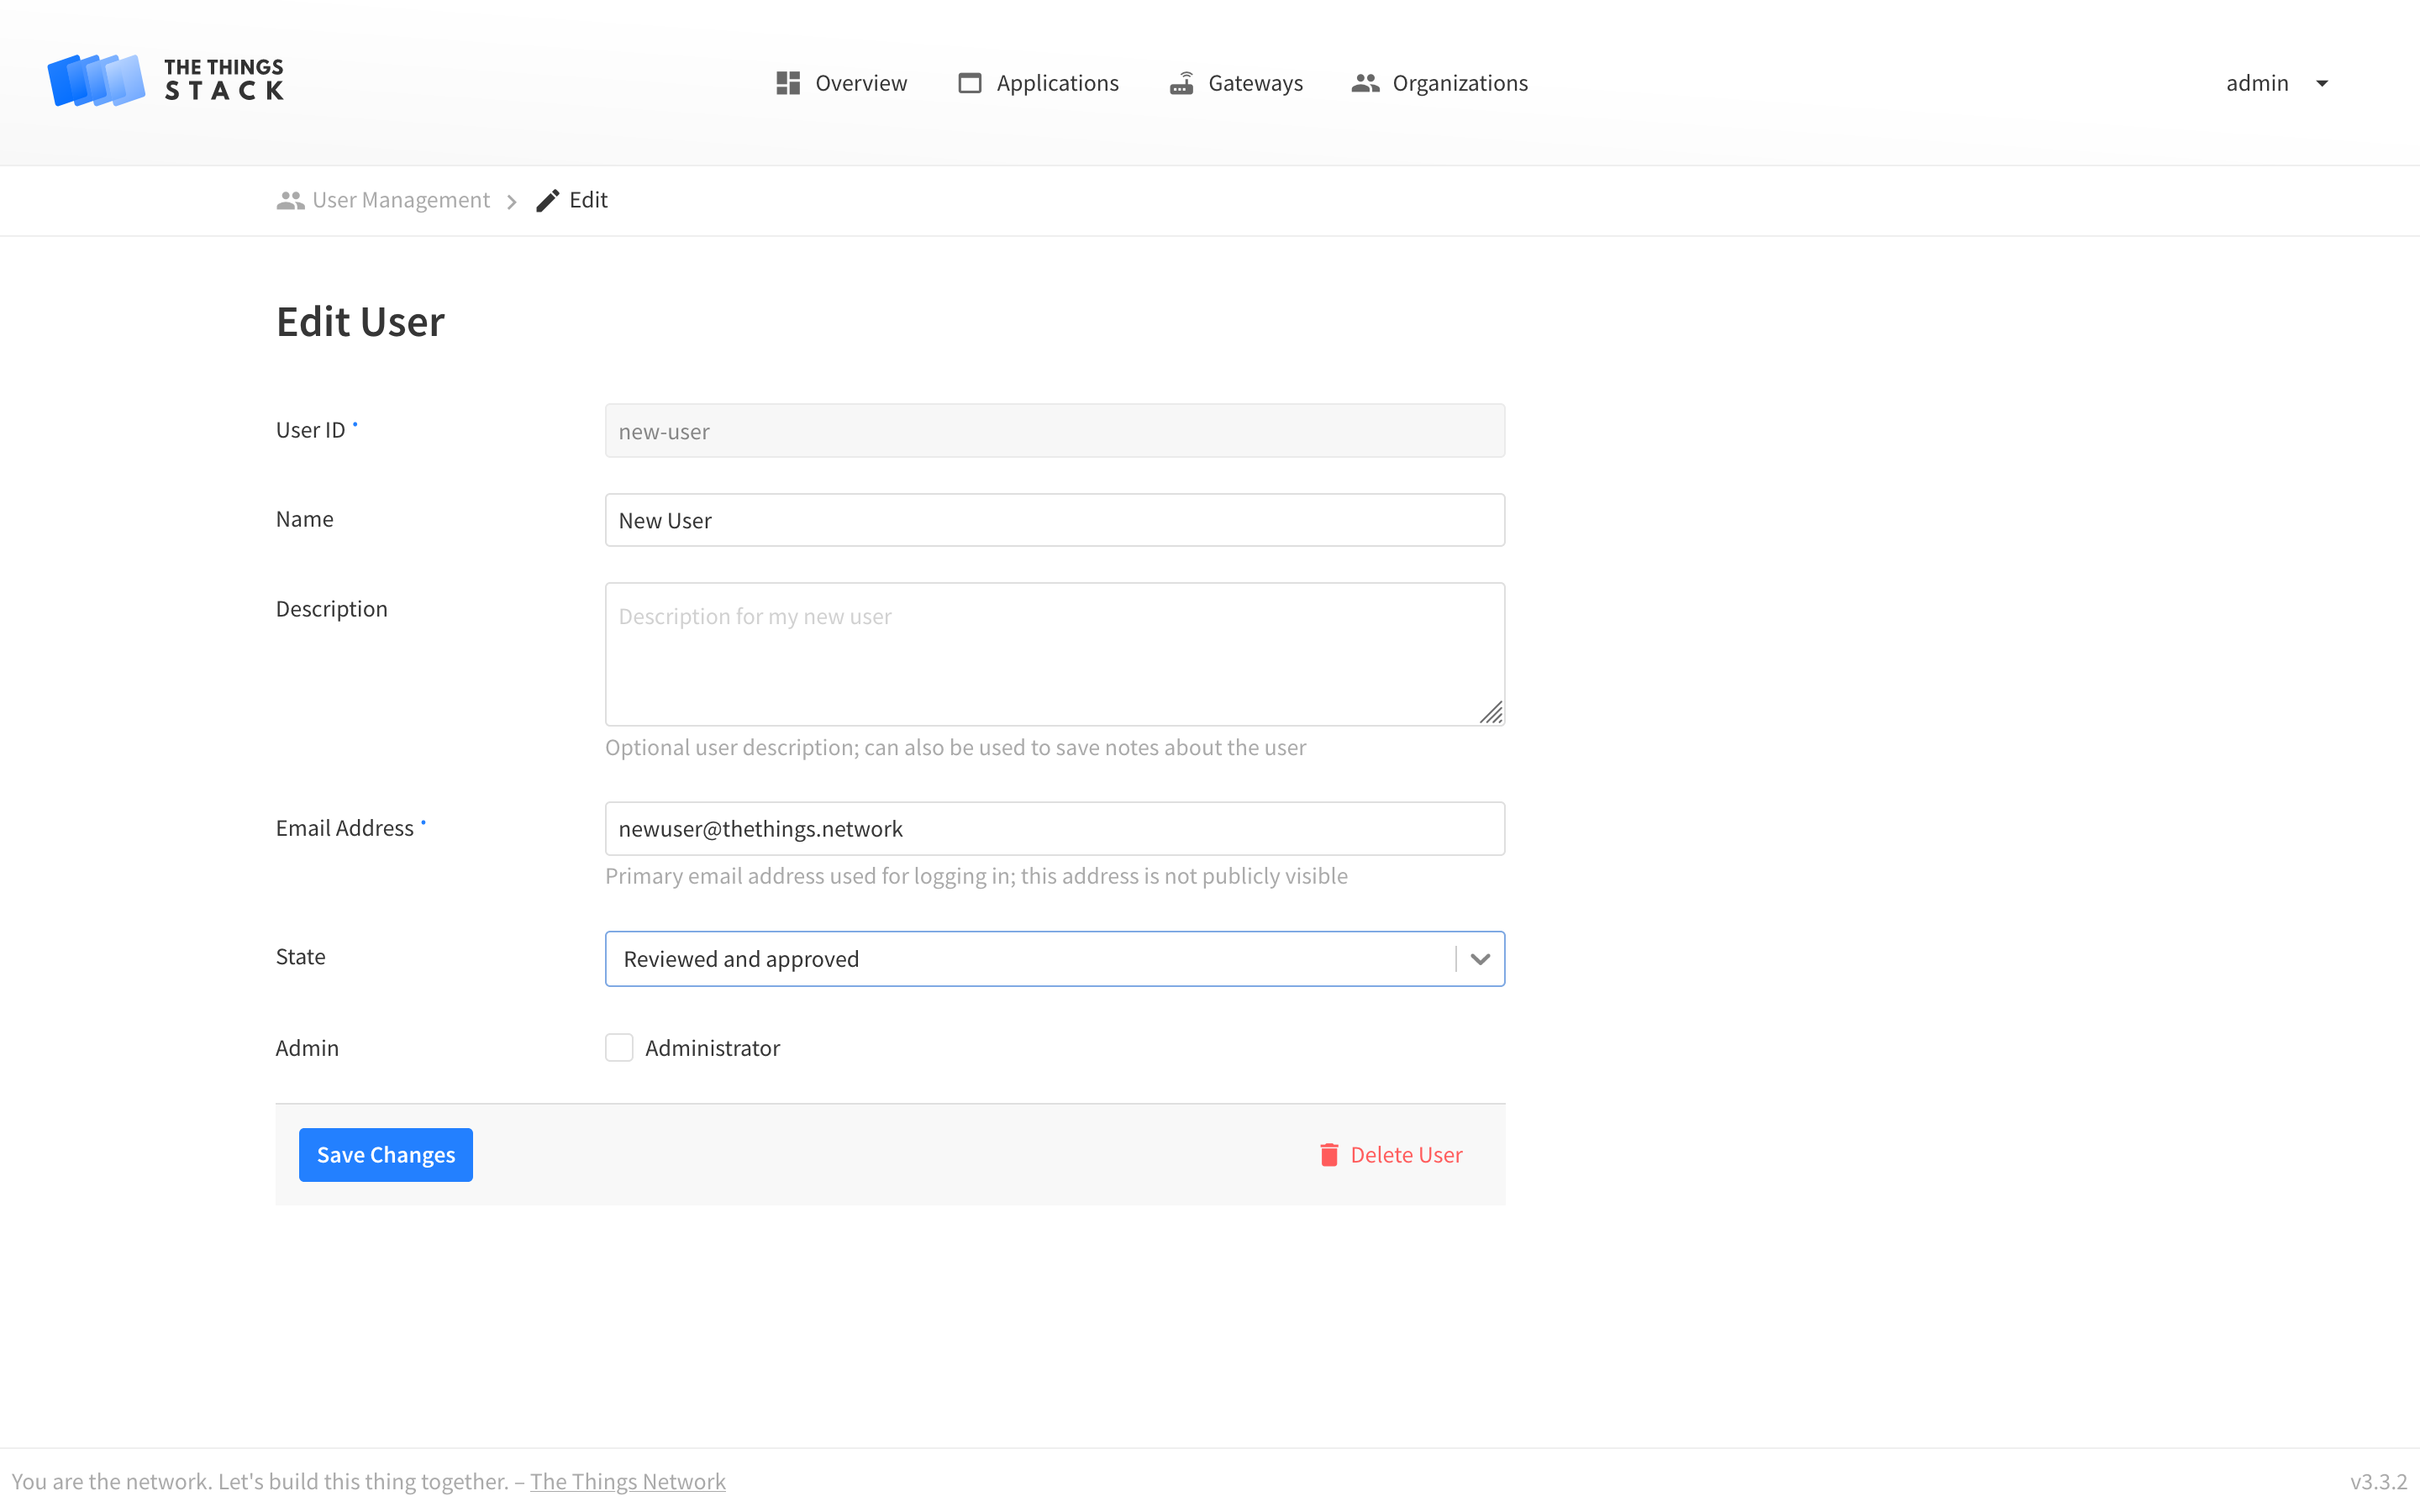
After making the changes to the user, click Save changes to update the user.
Deleting Users
In the bottom of the edit view, you can click Delete user to delete the user.
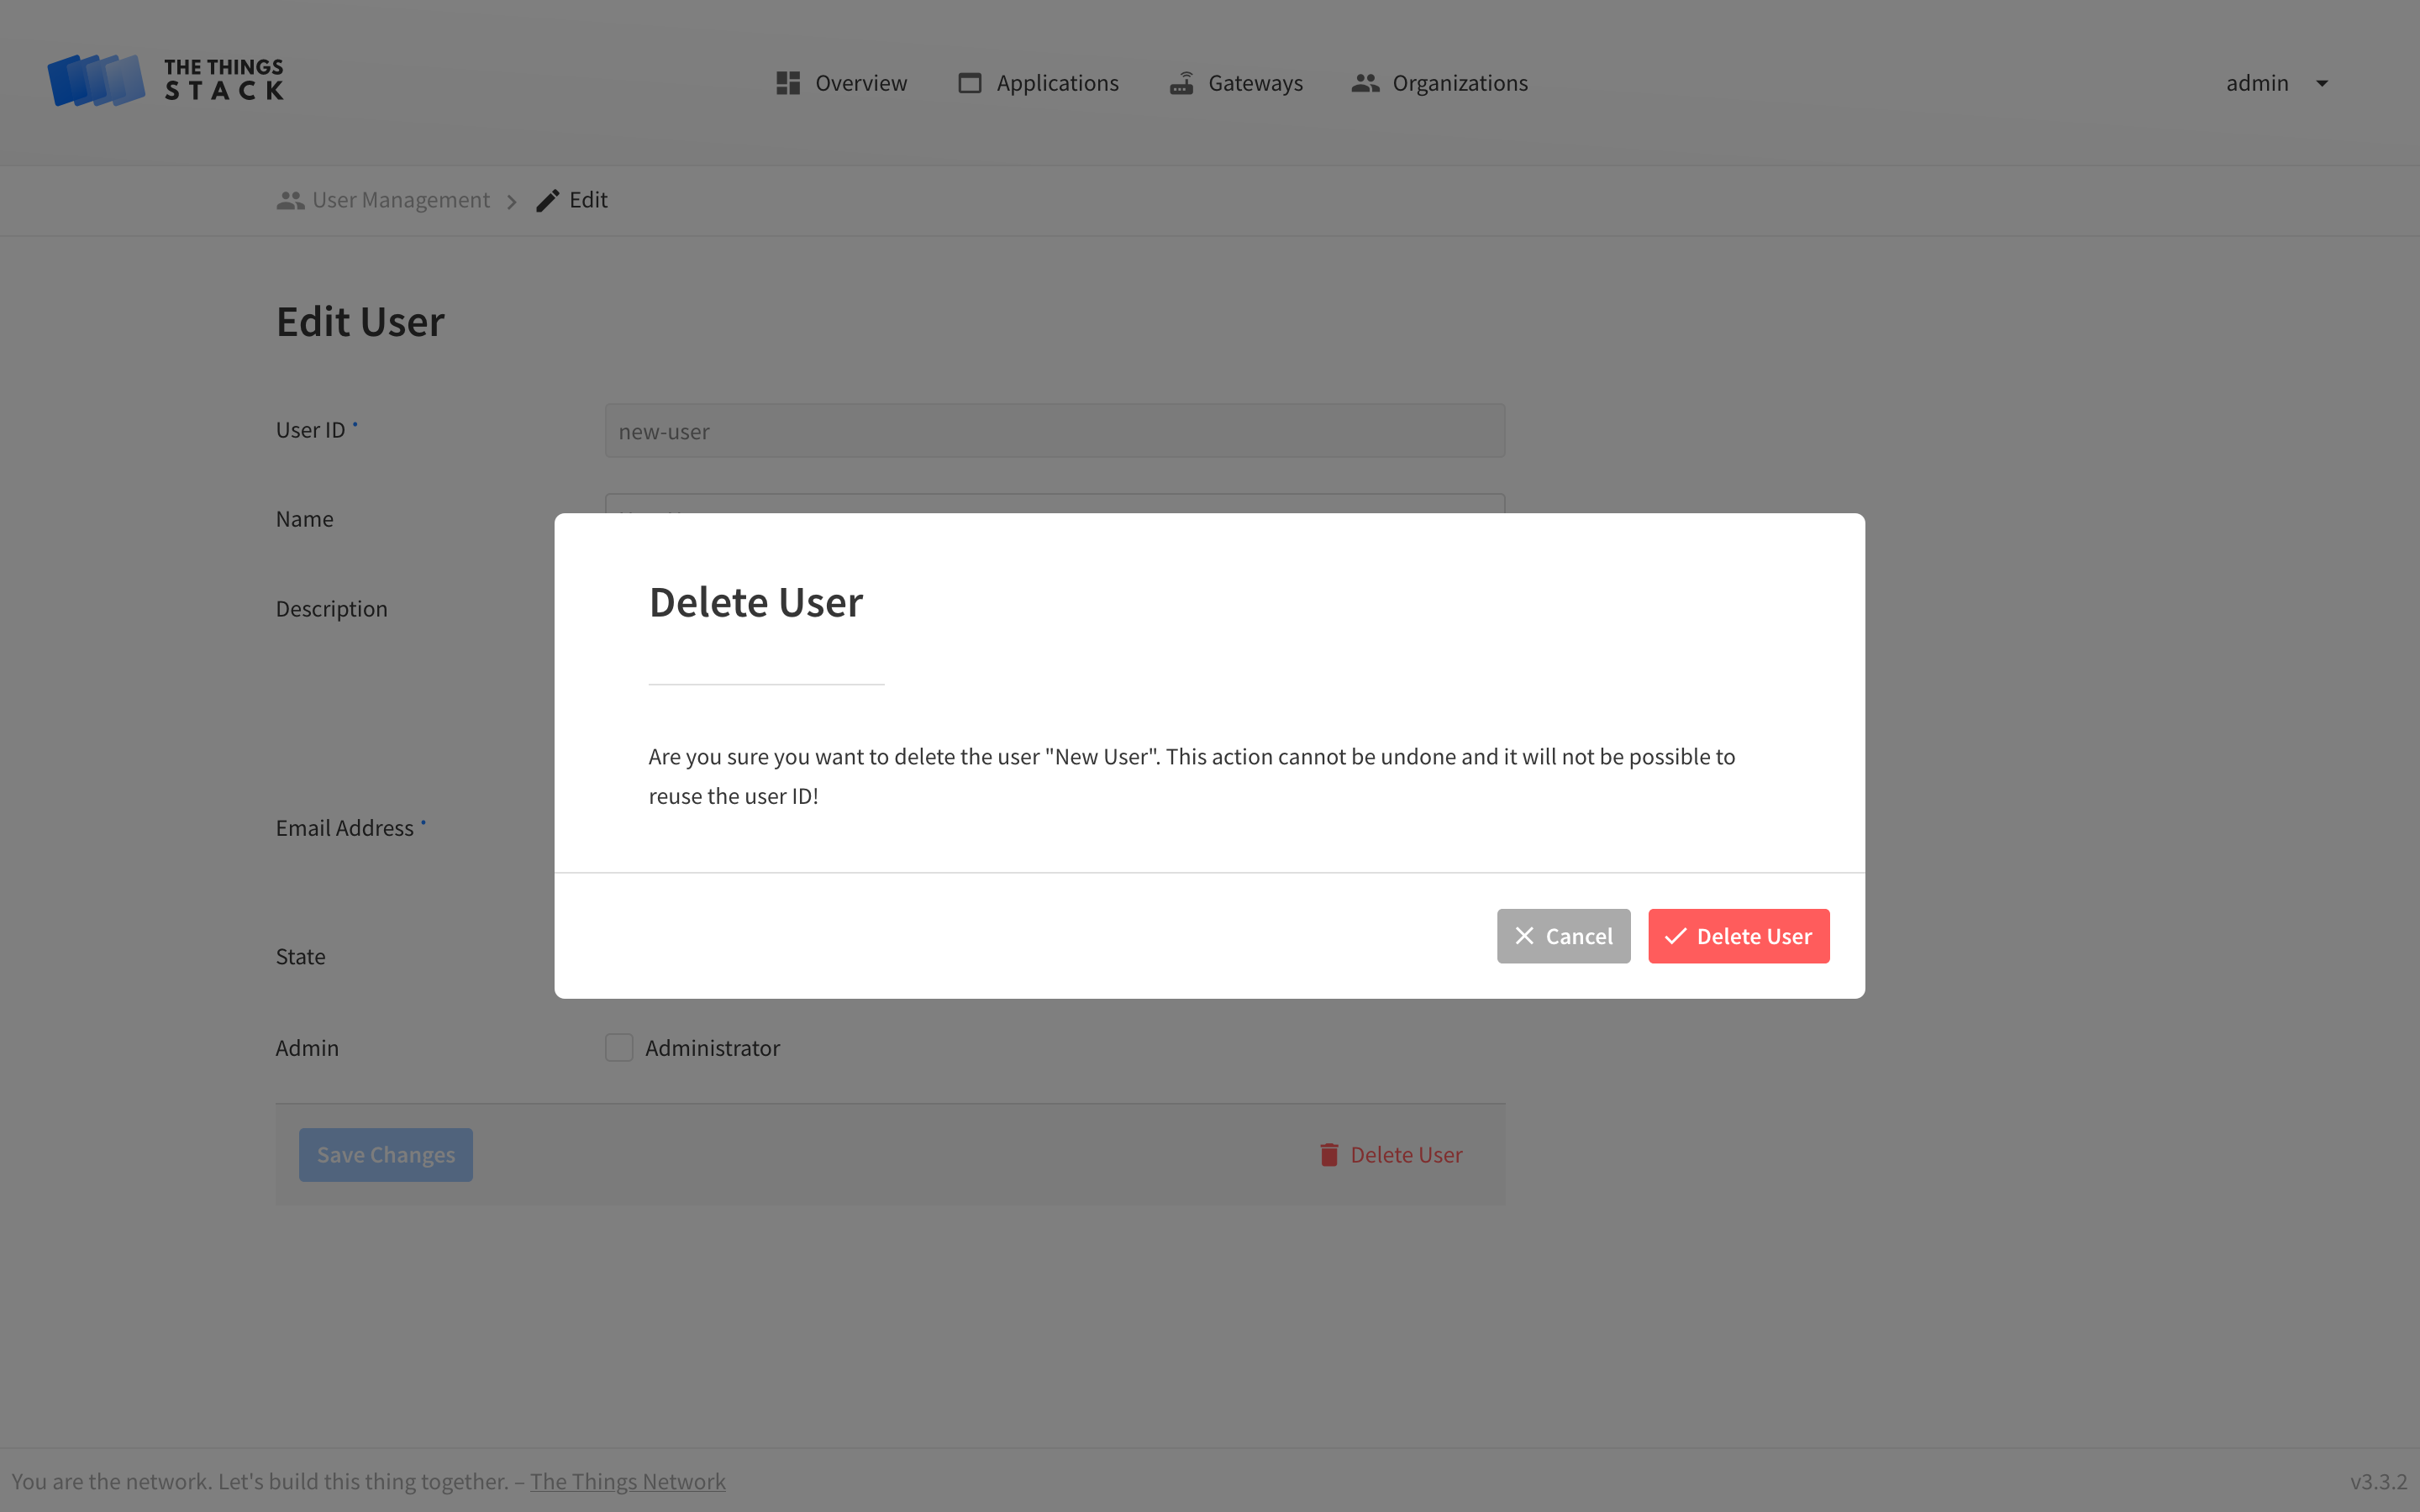
Warning:
When deleting users, their user IDs stay reserved in the system, it is not possible to create a new user with the same user ID. In most cases you’ll probably want to update a user to set its state to suspended instead.
However, if the user ID has been purged by an admin, you’ll be able to reuse it.
Managing Users using the CLI
We define some user parameters that will be used below:
NAME="My Colleague"
EMAIL="colleague@thethings.network"
Make sure to modify these according to your setup.
Creating Users
Network Administrators can create user accounts as follows:
ttn-lw-cli users create colleague \
  --name $NAME \
  --primary-email-address $EMAIL
You will be prompted to enter the password:
Please enter password:***************
Please confirm password:***************
Output
{
  "ids": {
    "user_id": "colleague"
  },
  "created_at": "2019-12-19T10:54:53.677Z",
  "updated_at": "2019-12-19T10:54:53.677Z",
  "name": "My Colleague",
  "contact_info": [
    {
      "contact_method": "CONTACT_METHOD_EMAIL",
      "value": "colleague@thethings.network"
    }
  ],
  "primary_email_address": "colleague@thethings.network",
  "password_updated_at": "2019-12-19T10:54:53.674Z",
  "state": "STATE_APPROVED"
}
Inviting Users
You can create invitations for users to join the network with the users invitations create command:
ttn-lw-cli users invitations create $EMAIL
After you do this, you will be able to list the invitations you’ve sent:
% ttn-lw-cli users invitations list
Output
[
  {
    "email": "colleague@thethings.network",
    "token": "MW7INQWYOE46GLP3AEFQEHR5XIKRYPSRAXFF3CUCLIQPPQ3BNBLQ",
    "expires_at": "2019-12-26T11:41:29.485Z",
    "created_at": "2019-12-19T11:41:29.486Z",
    "updated_at": "2019-12-19T11:41:29.486Z"
  }
]
You will also be able to delete an invitation if you want to revoke it:
ttn-lw-cli users invitations delete $EMAIL
Listing Users
To list users with the CLI, use the users list command. Make sure to specify the fields you’re interested in.
ttn-lw-cli users list --name --state --admin
Output
[
  {
    "ids": {
      "user_id": "new-user"
    },
    "created_at": "2019-12-19T09:10:31.426Z",
    "updated_at": "2019-12-19T09:10:40.527Z",
    "name": "New User"
  },
  {
    "ids": {
      "user_id": "admin"
    },
    "created_at": "2019-12-18T14:54:12.723Z",
    "updated_at": "2019-12-18T14:54:12.723Z",
    "state": "STATE_APPROVED",
    "admin": true
  }
]
Use the pagination flags --limit and --page when there are many users.
Searching for Users
To search for users with the CLI, use the users search command. Make sure to specify the fields you’re interested in. We’ll search for users with IDs that contain “new”:
ttn-lw-cli users search --id-contains new --name
Output
[
  {
    "ids": {
      "user_id": "new-user"
    },
    "created_at": "2019-12-19T09:10:31.426Z",
    "updated_at": "2019-12-19T09:10:40.527Z",
    "name": "New User"
  }
]
Use the pagination flags --limit and --page when there are many users.
Updating Users
To update users with the CLI, use the users update command. The following command updates the state of user new-user to “approved” and makes them admin of the network:
ttn-lw-cli users update new-user --state APPROVED --admin true
Output
{
  "ids": {
    "user_id": "new-user"
  },
  "created_at": "2019-12-19T09:10:31.426Z",
  "updated_at": "2019-12-19T11:44:39.609Z",
  "state": "STATE_APPROVED",
  "admin": true
}
Deleting Users
To delete a user, use the users delete command.
Warning:
When deleting users, their user IDs stay reserved in the system, it is not possible to create a new user with the same user ID. In most cases you’ll probably want to update a user to set its state tosuspended instead.