This Section covers your options for collecting and visualizing LoRaWAN data from your mClimate Multipurpose button.
The Live Data view in The Things Stack Console gives you a real-time look at messages from your end device. This view is very useful to get a quick look at the contents of the message and also for debugging. However, if you want to truly visualize data, you can process the data and visualize it in a dashboard.
At this point, this guide offers two mutually exclusive options to further collect/visualize this data.
- Create a dashboard using an external IoT platform.
- (Advanced) Retrieve data on your local machine using ngrok.
The Things Stack does not support building dashboards as they are very specific to the use case and are meant to be very customizable.
Instead, there are many IoT platforms out there on the market which provide various dashboard options. For this example, we are going to use one such platform called Datacake.
Datacake
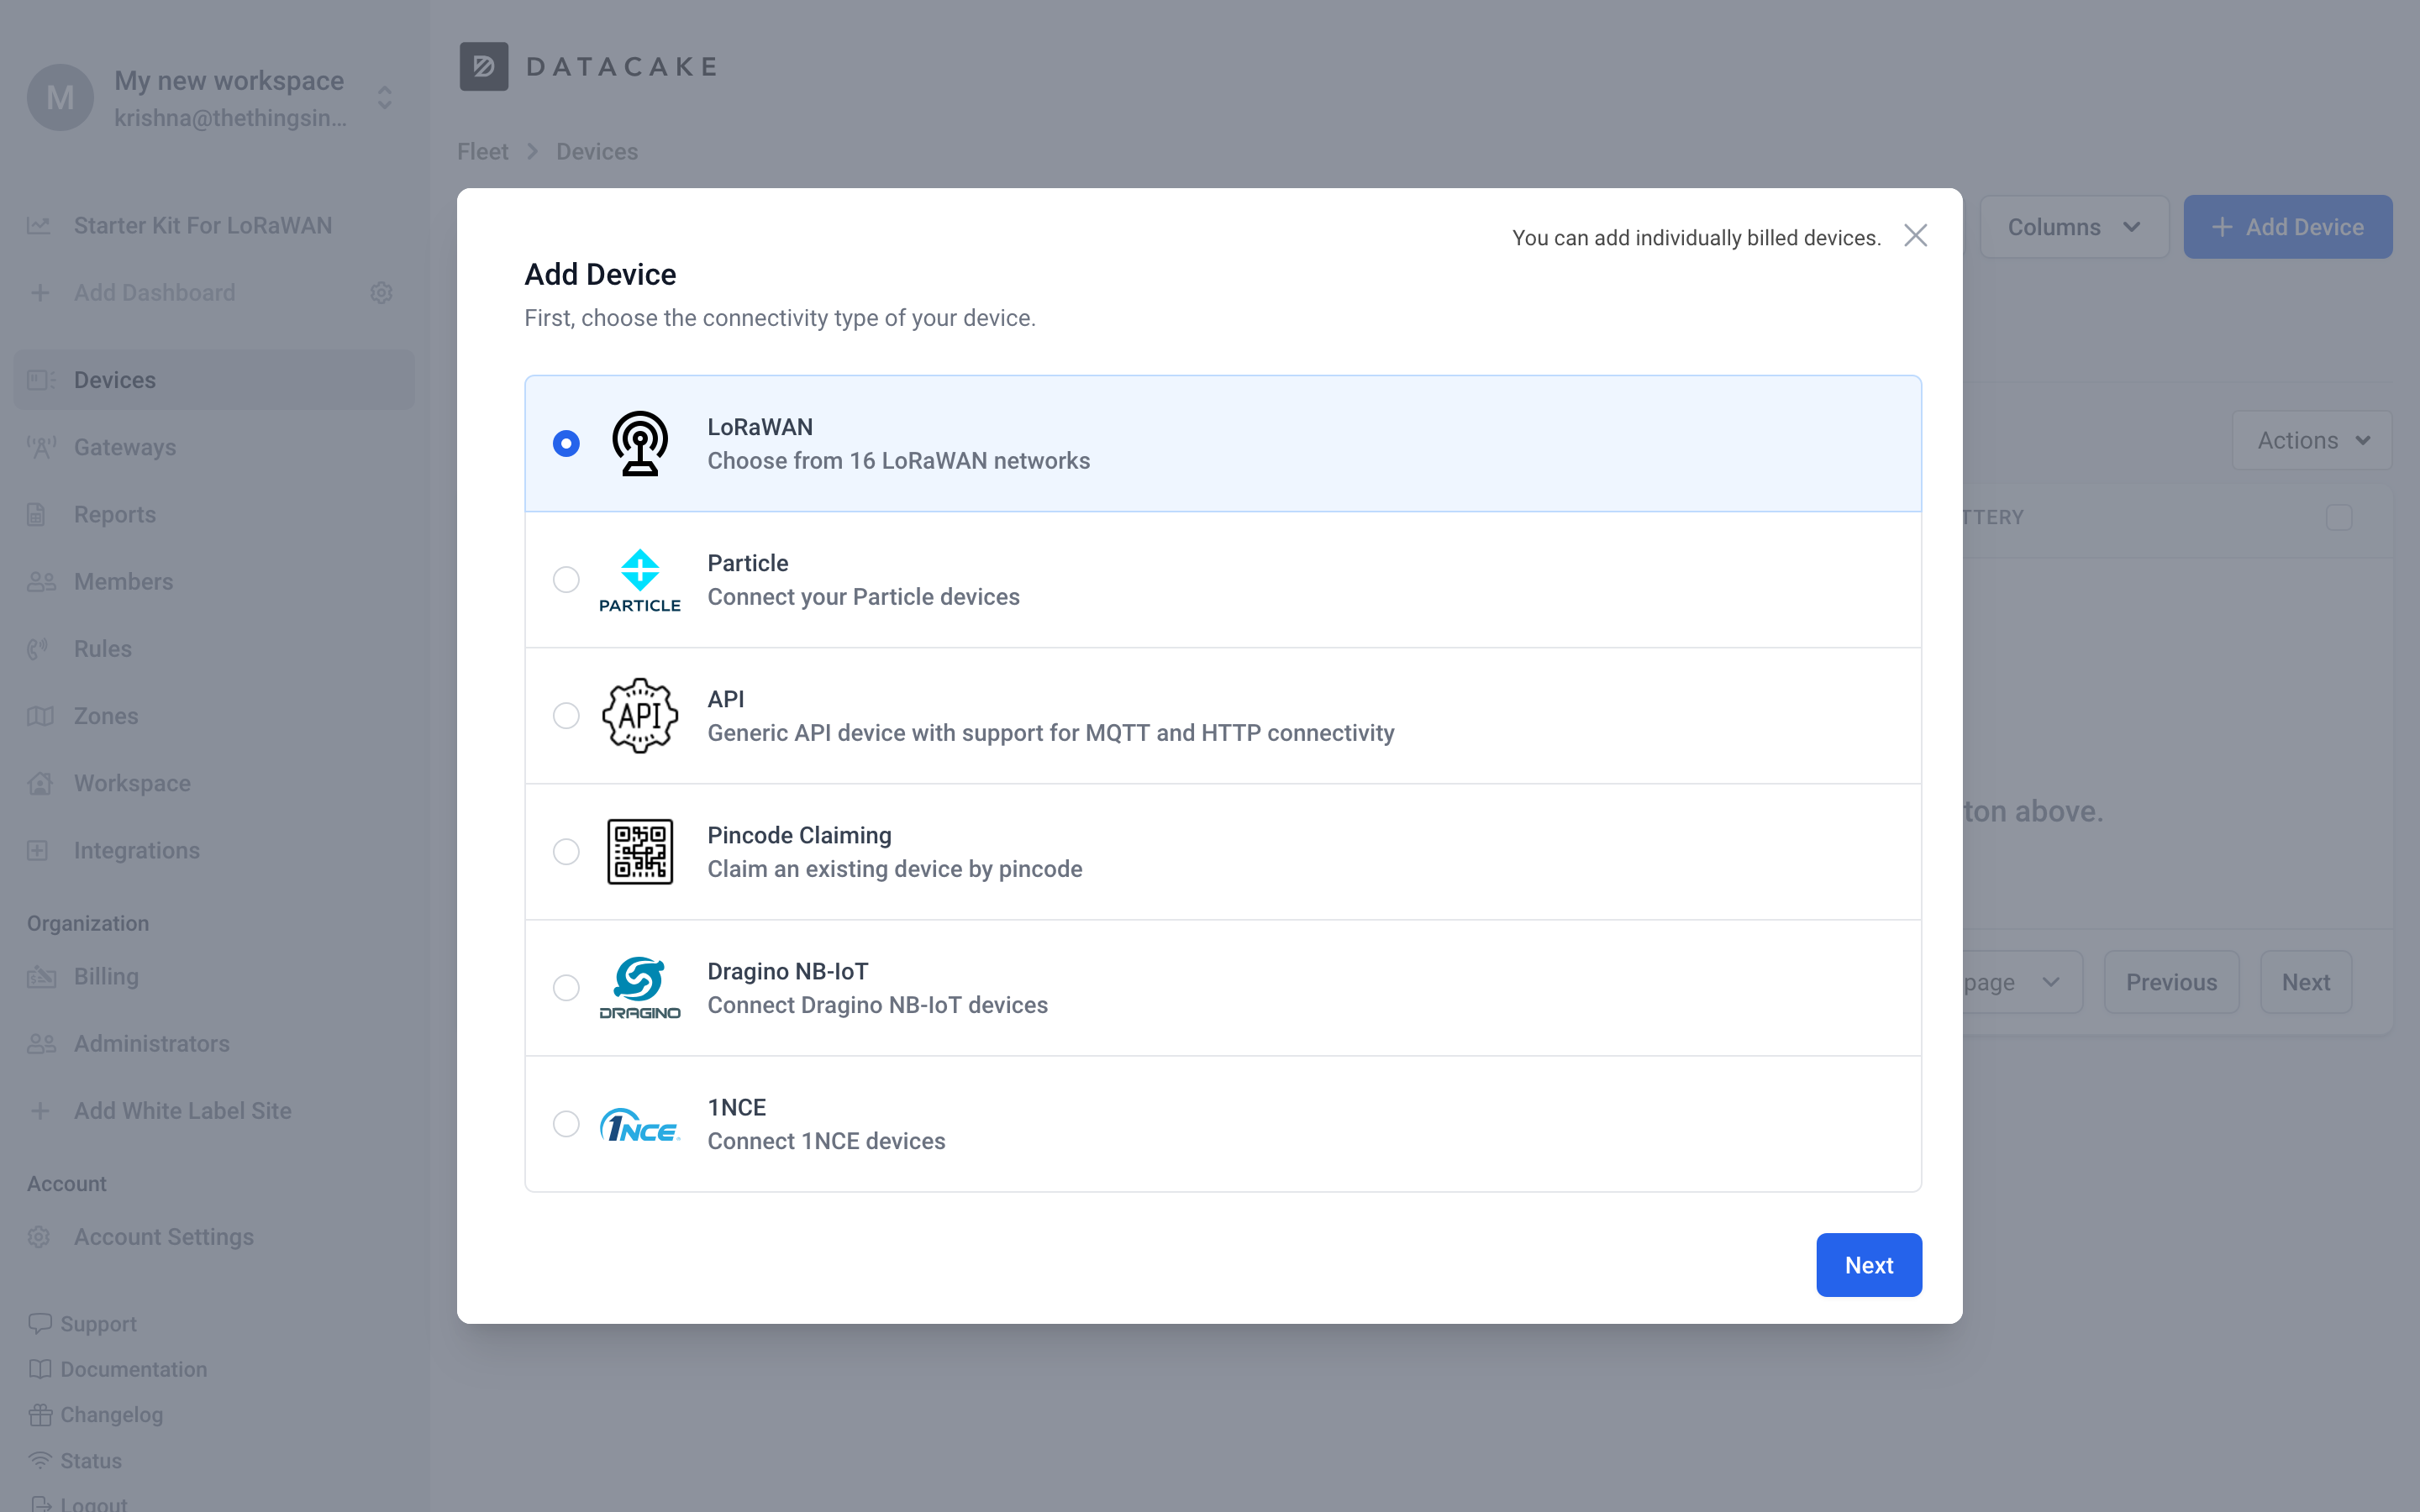
- Create an account on the Datacake platform and login.
- Select Add Device and choose the LoRaWAN option.
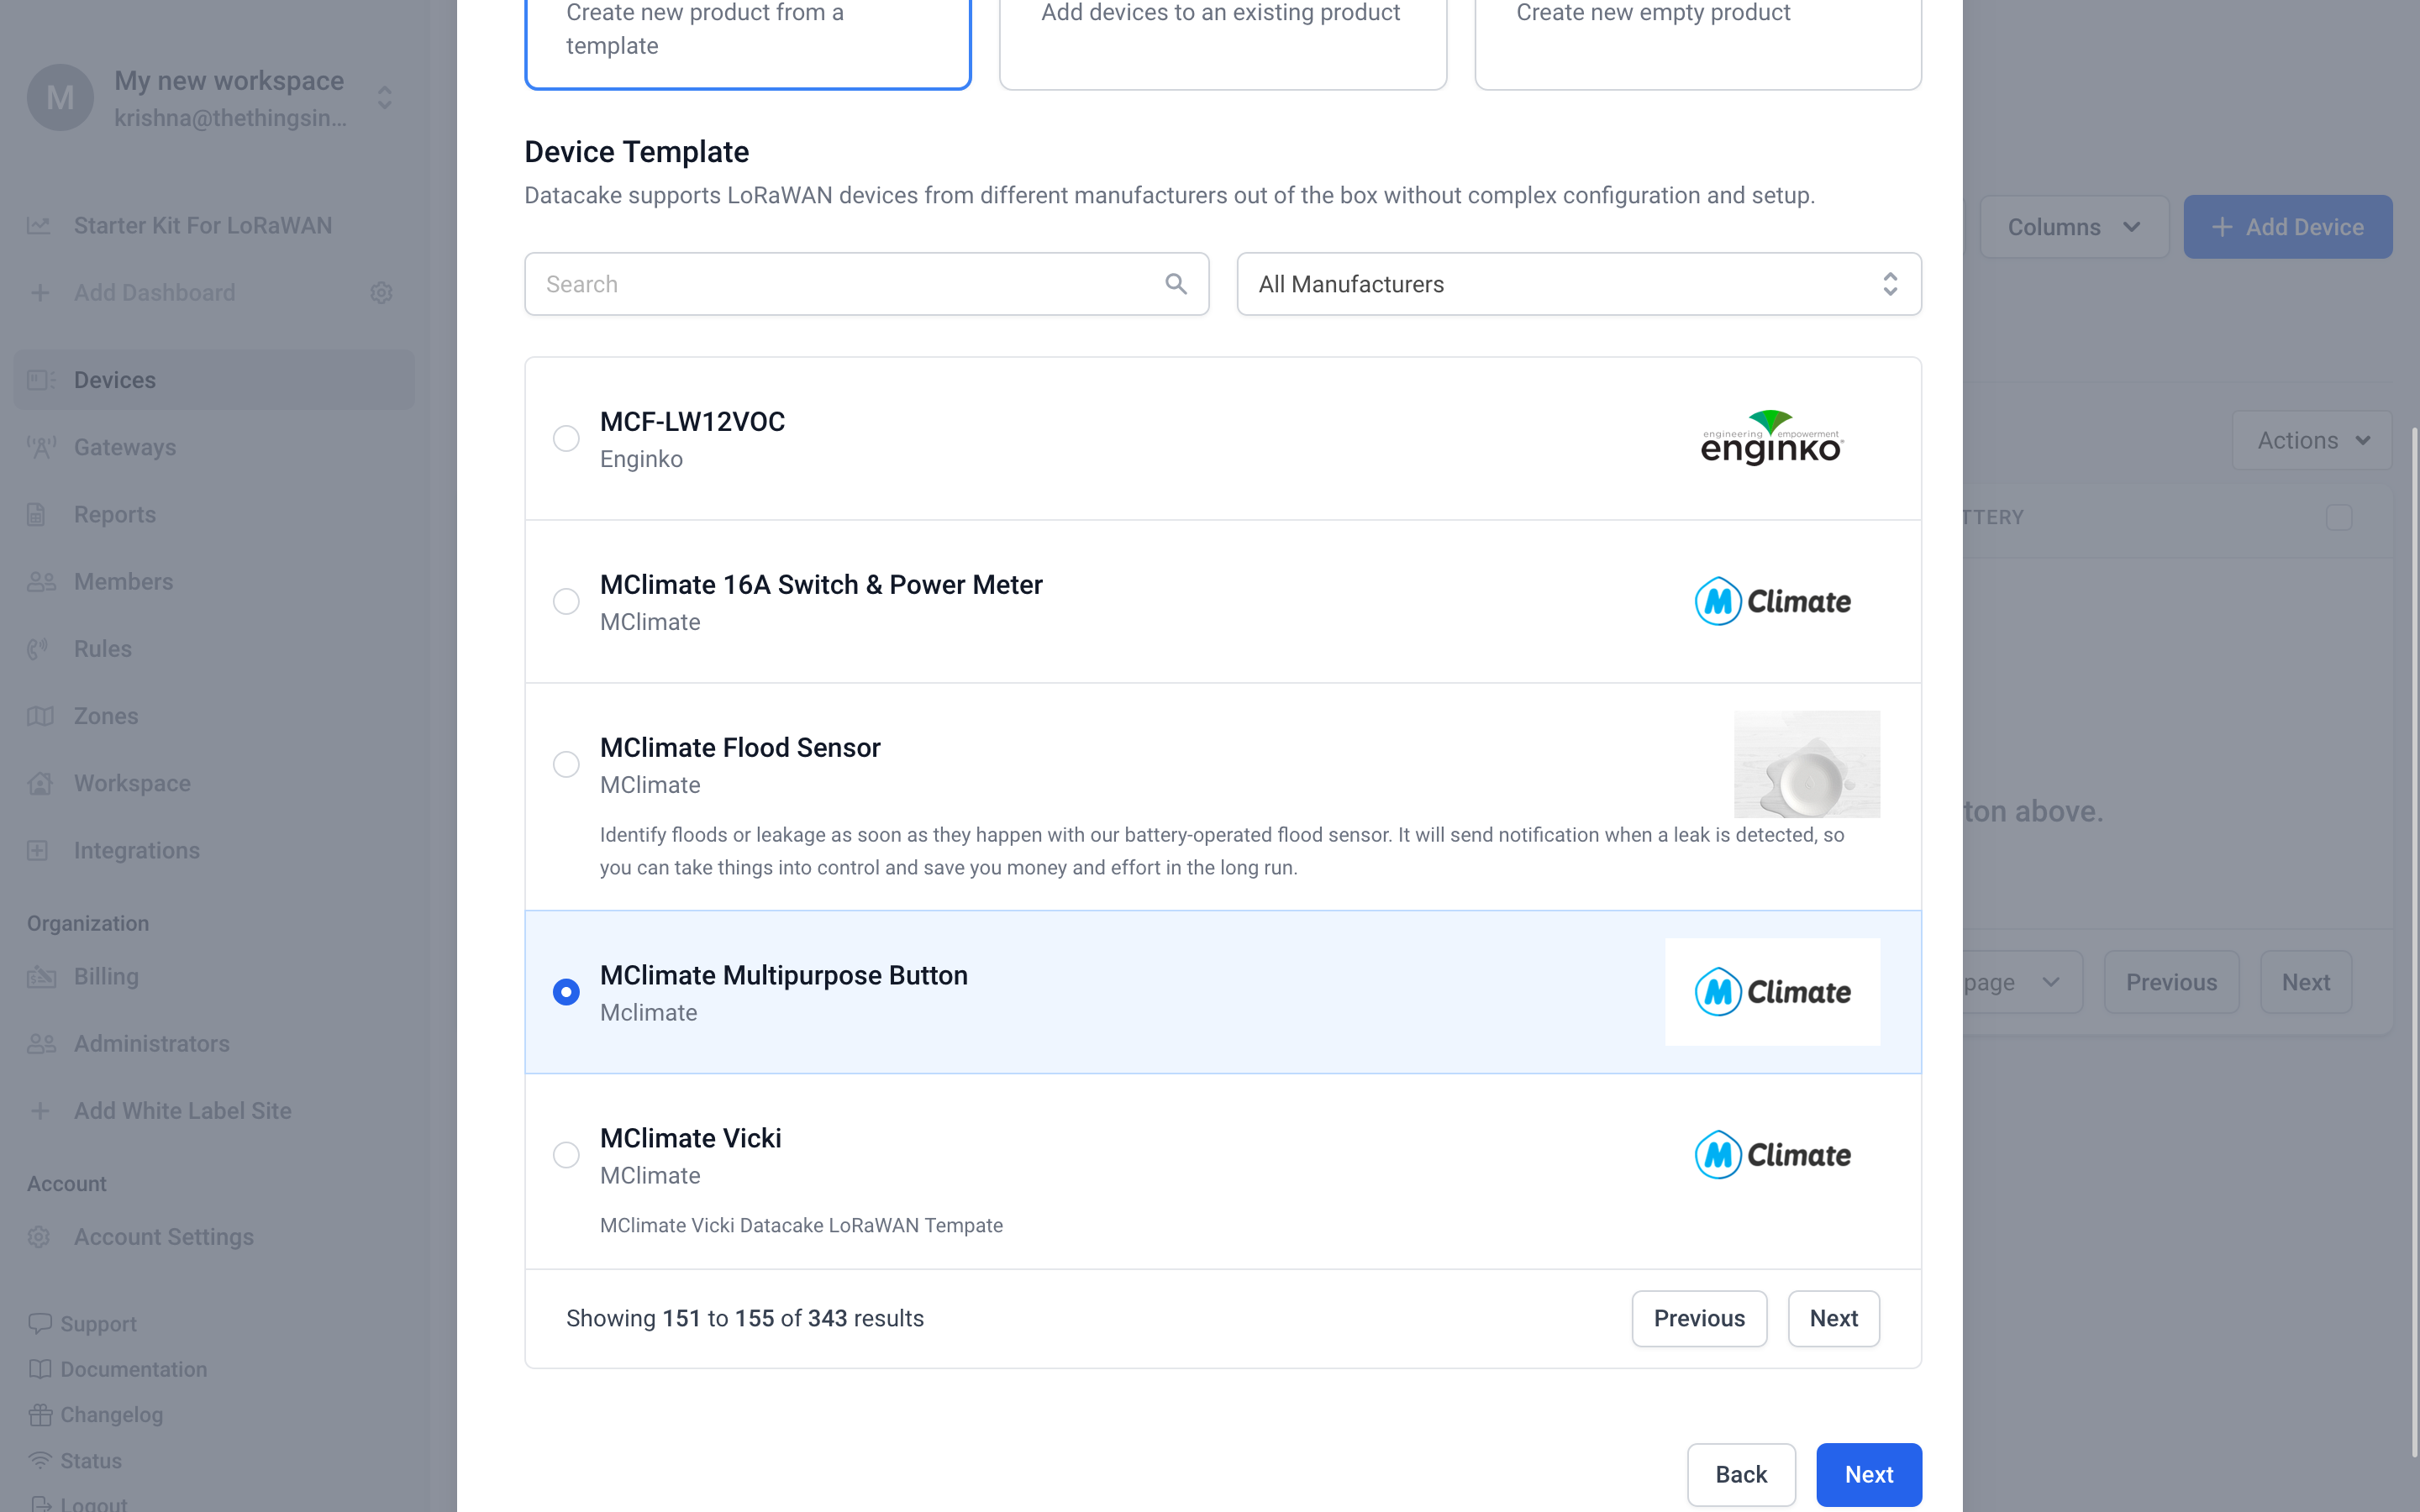
- In the search bar after Device Template, search for
mClimate Multipurpose Button. Select Next.
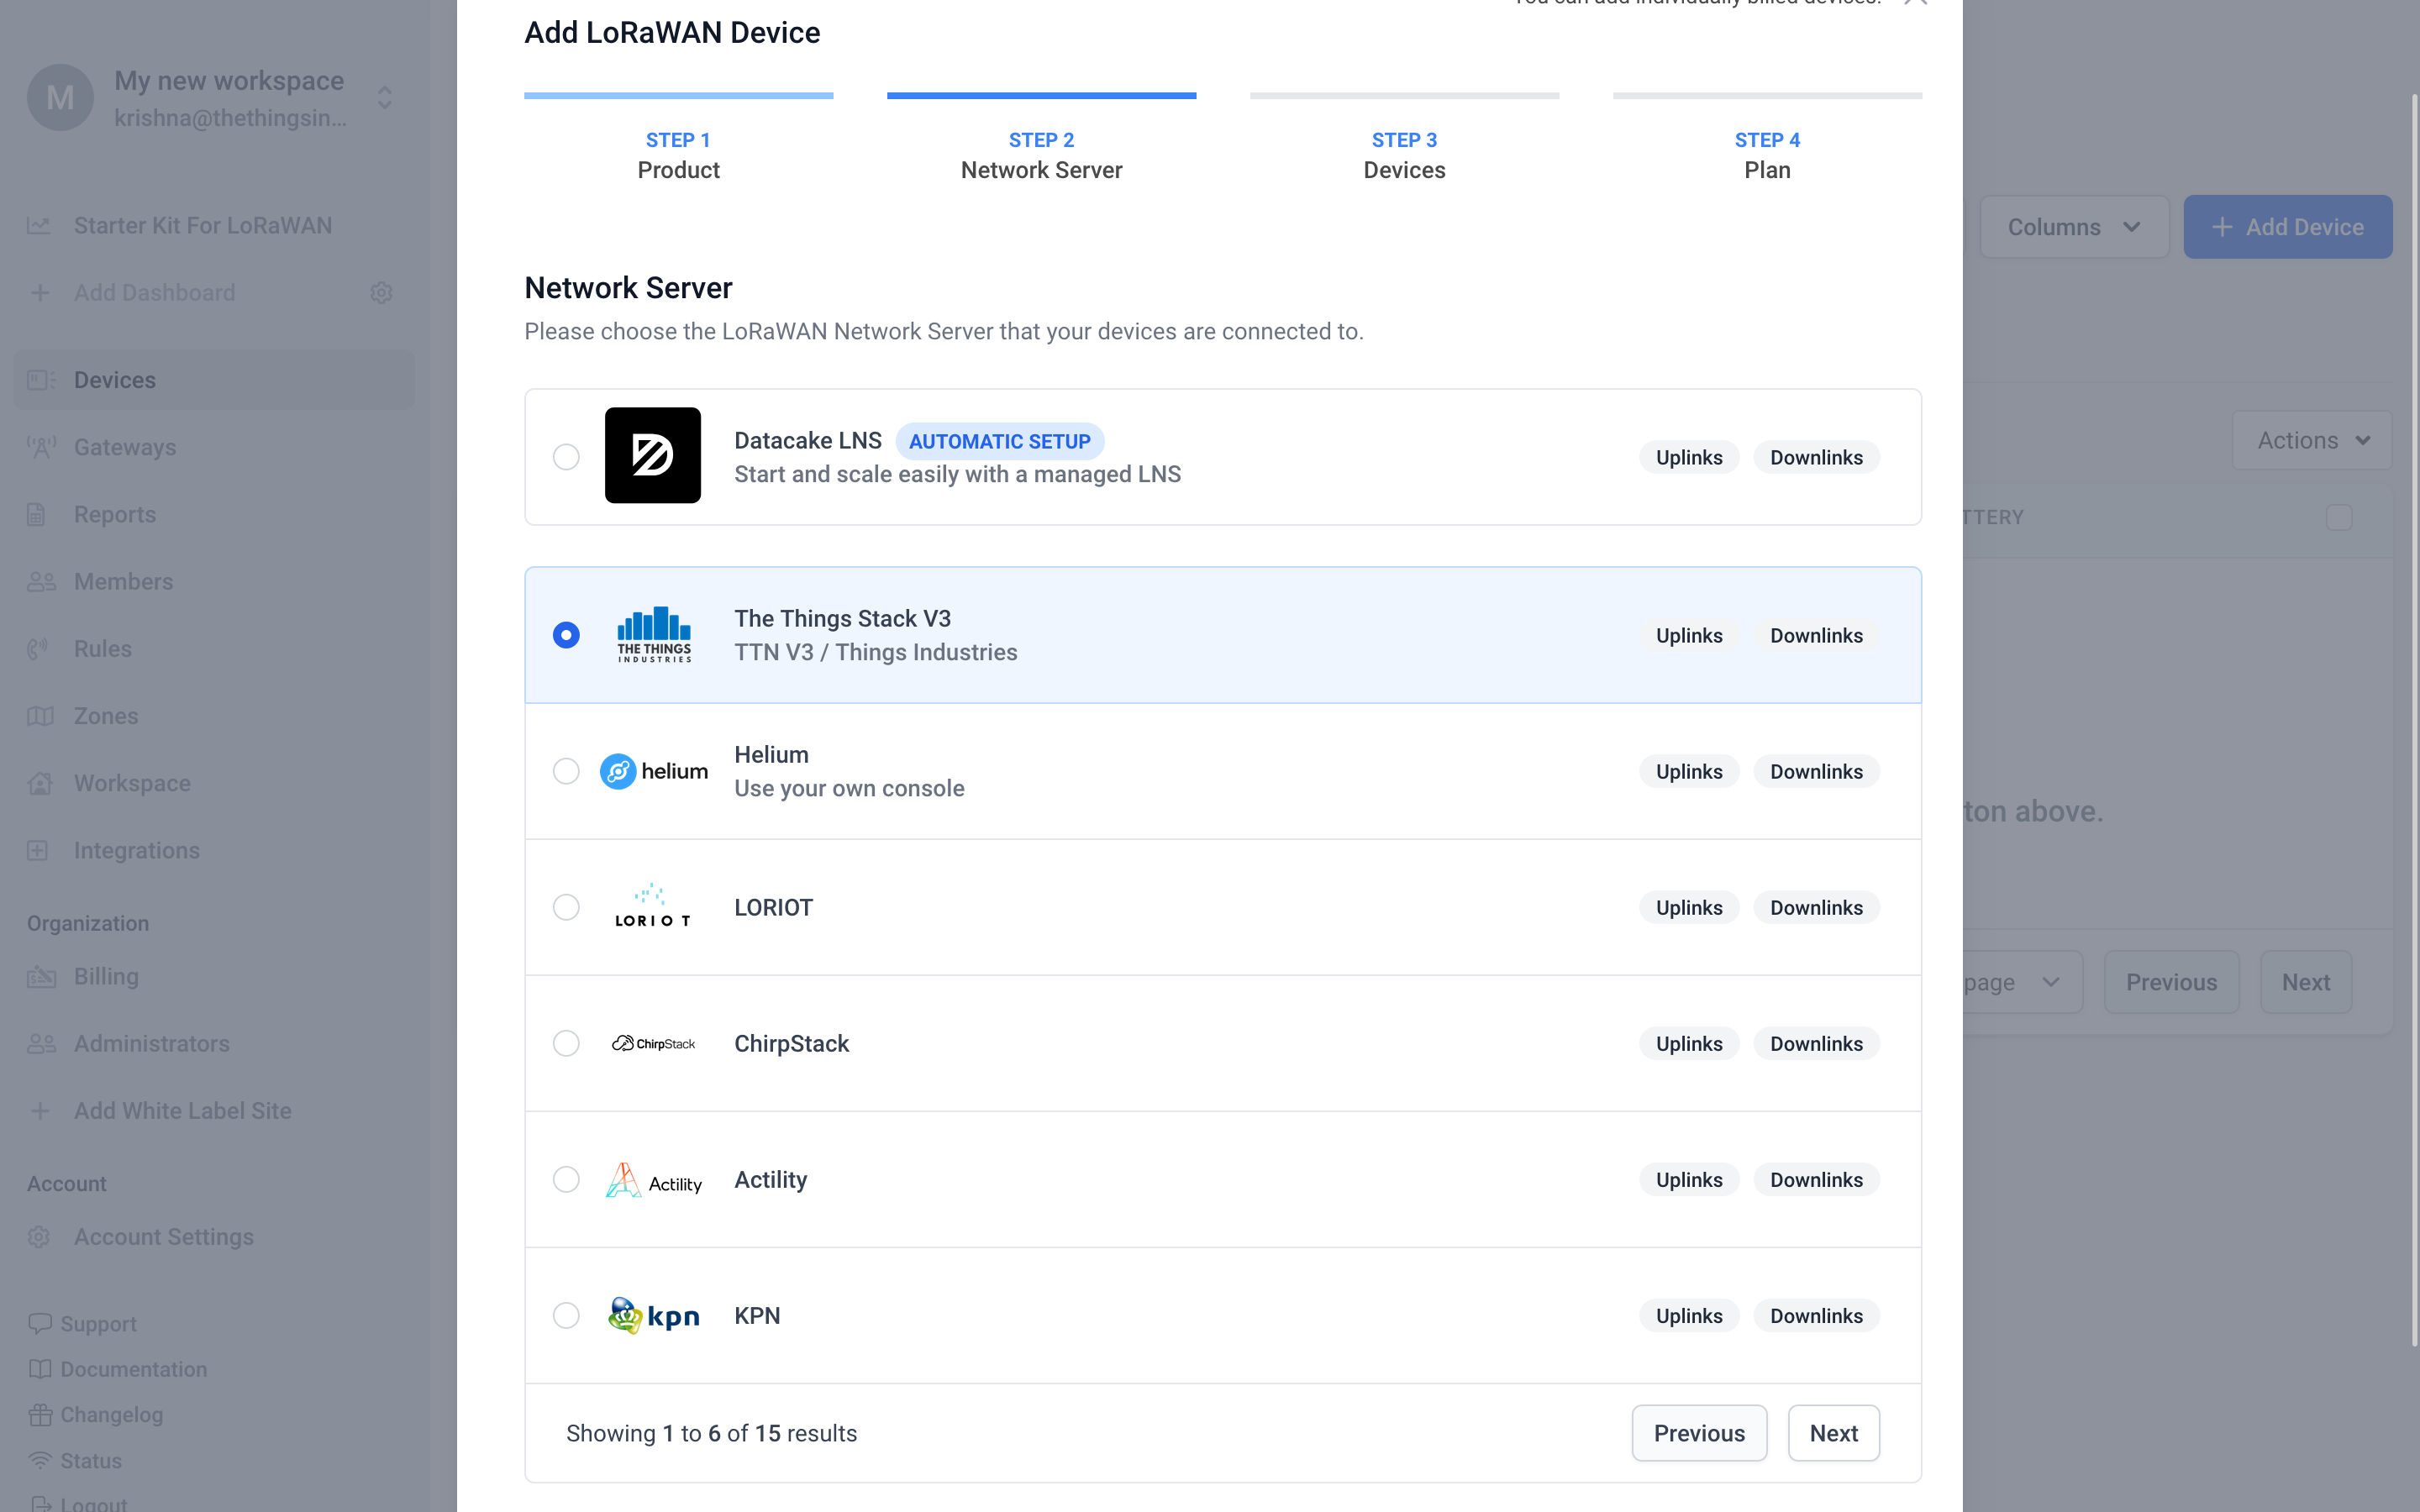
- In the Network Server tab select,
The Things Stack v3and click Next.
- In the Add Devices section, choose Manual and enter the Device EUI of the end device. You can find this Applications ->
Your Application-> End Devices page The Things Stack console

-
Choose the free plan to proceed.
-
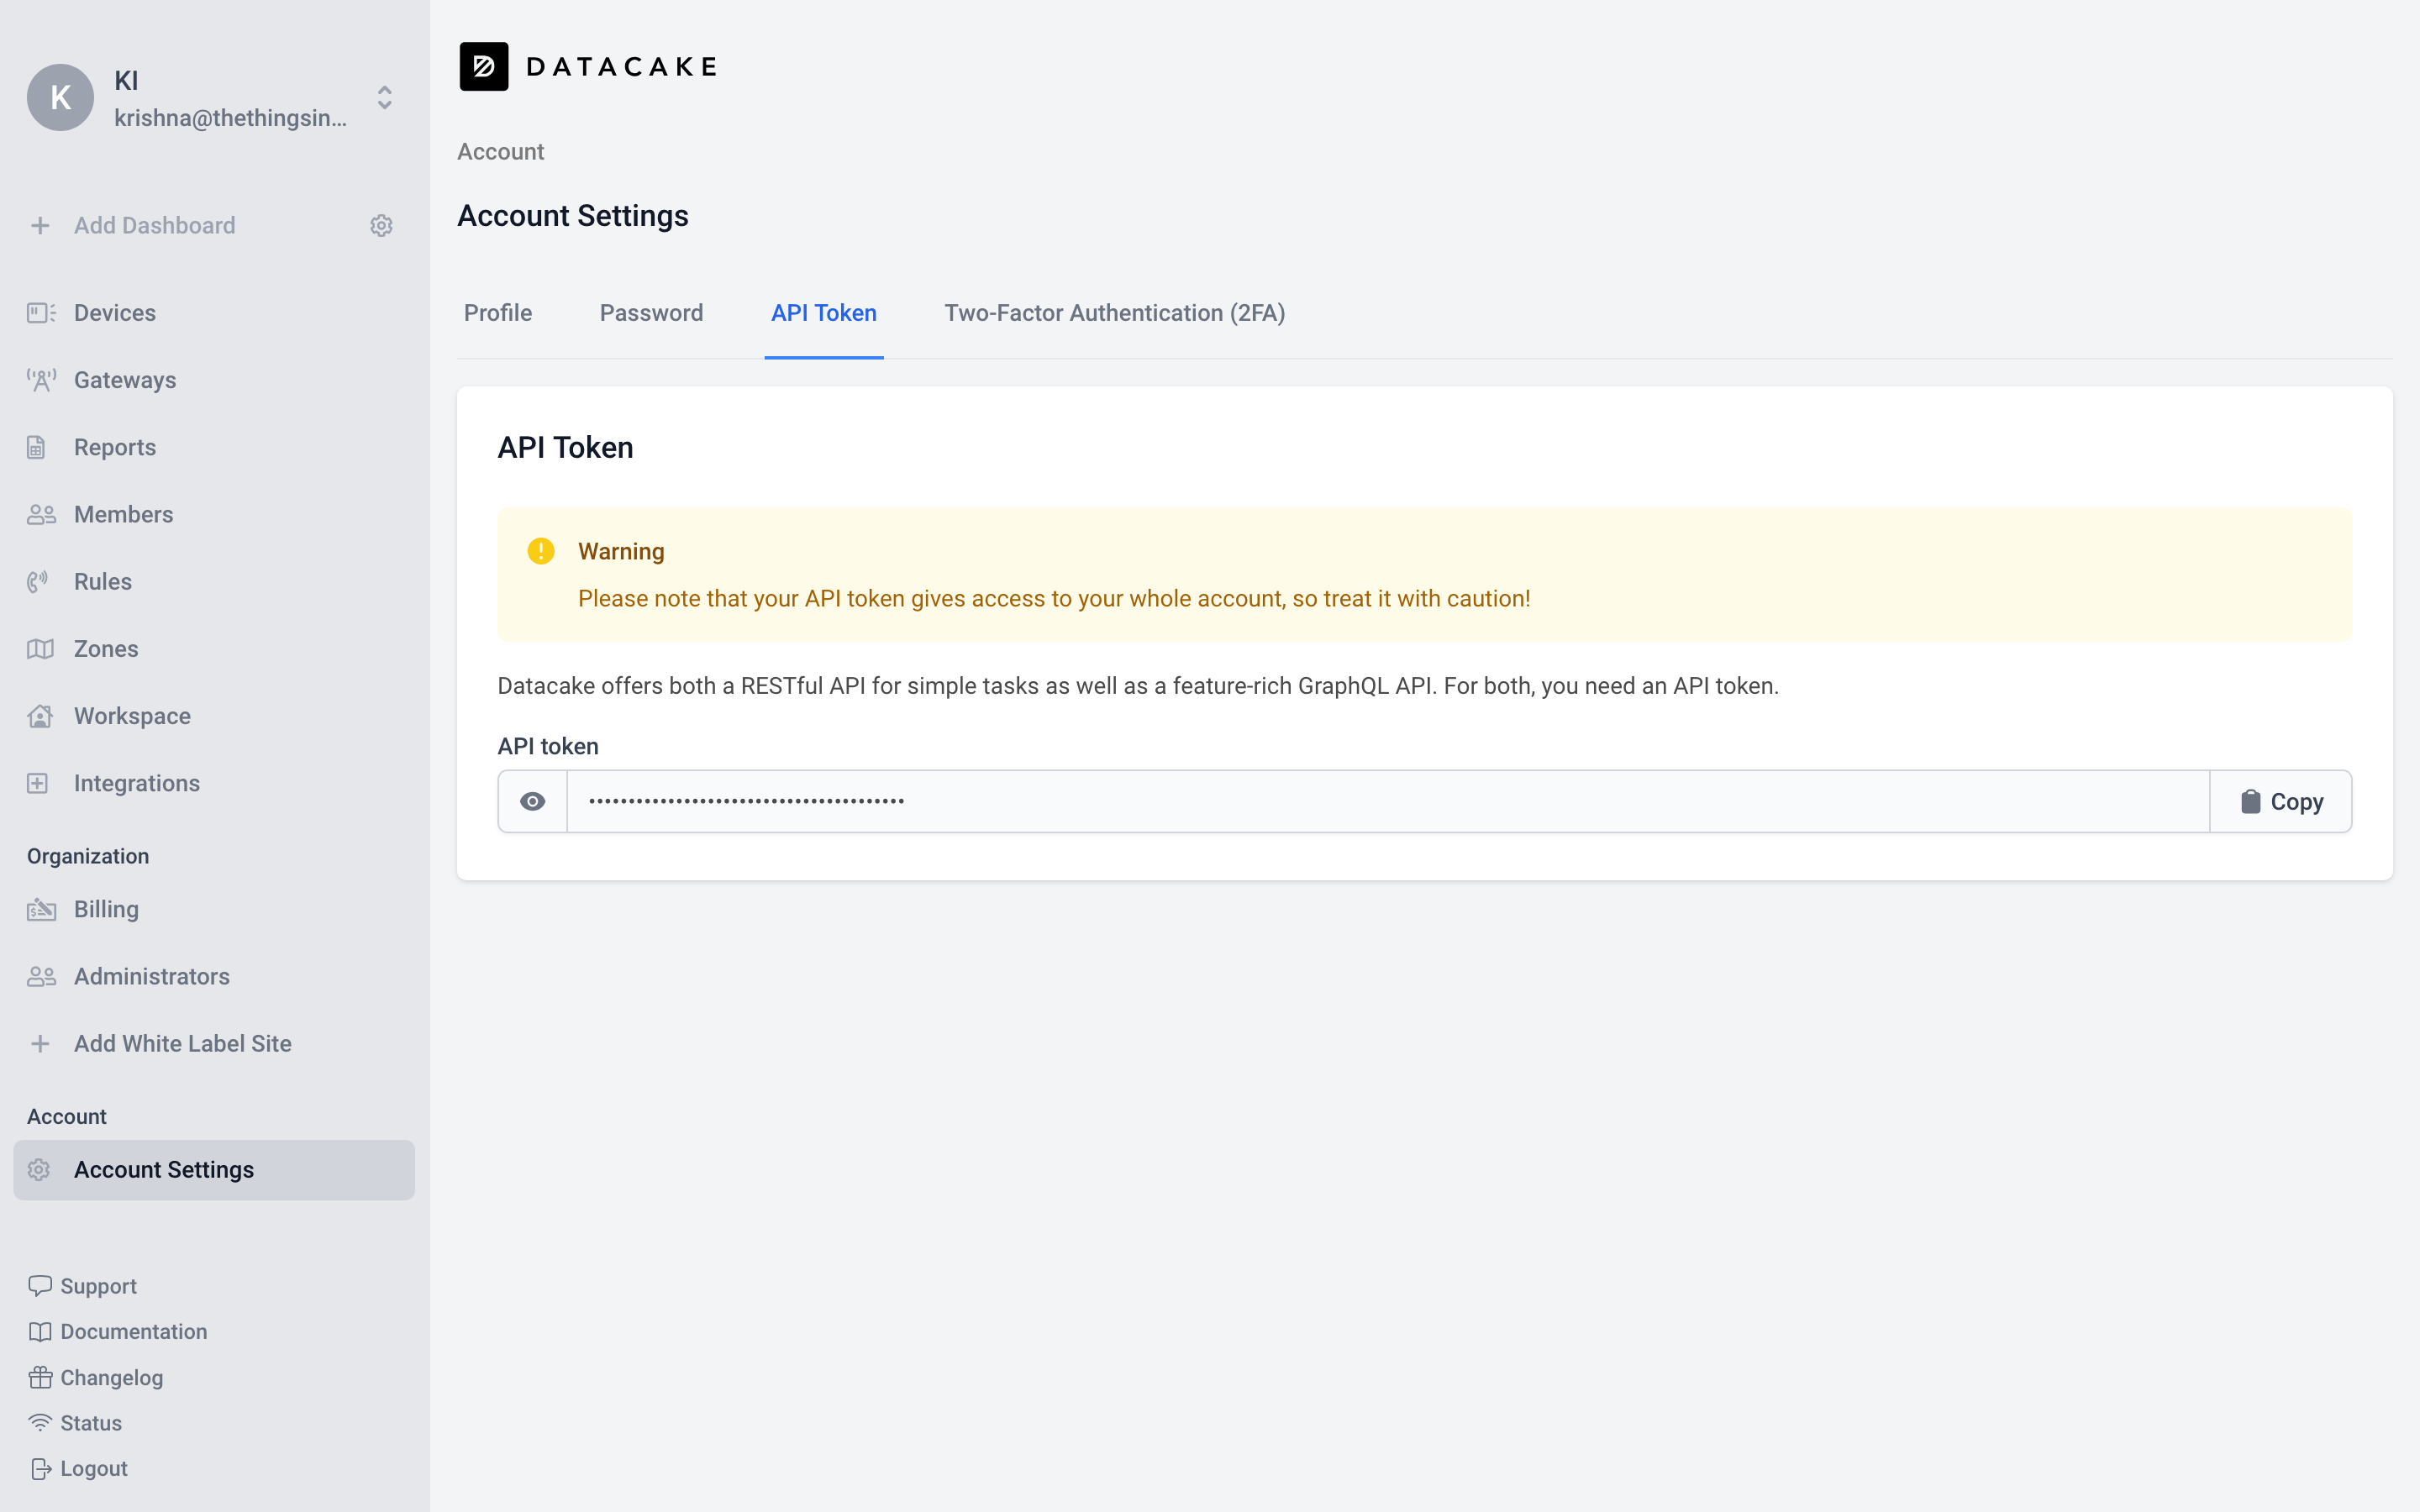
Get an API token
- Head to Account Settings from the navigation panel on the left.
- Select the API Token tab.
- Copy the token
The Things Stack
Now head back to The Things Stack console and go to your application.
-
Click on the Webhooks option from the side panel.
-
Click Add webhook. Choose Datacake.
-
Enter the webhook details
- Wehbook ID: An identifier for your Webhook. This cannot be changed later.
- Token: API Key from Datacake.
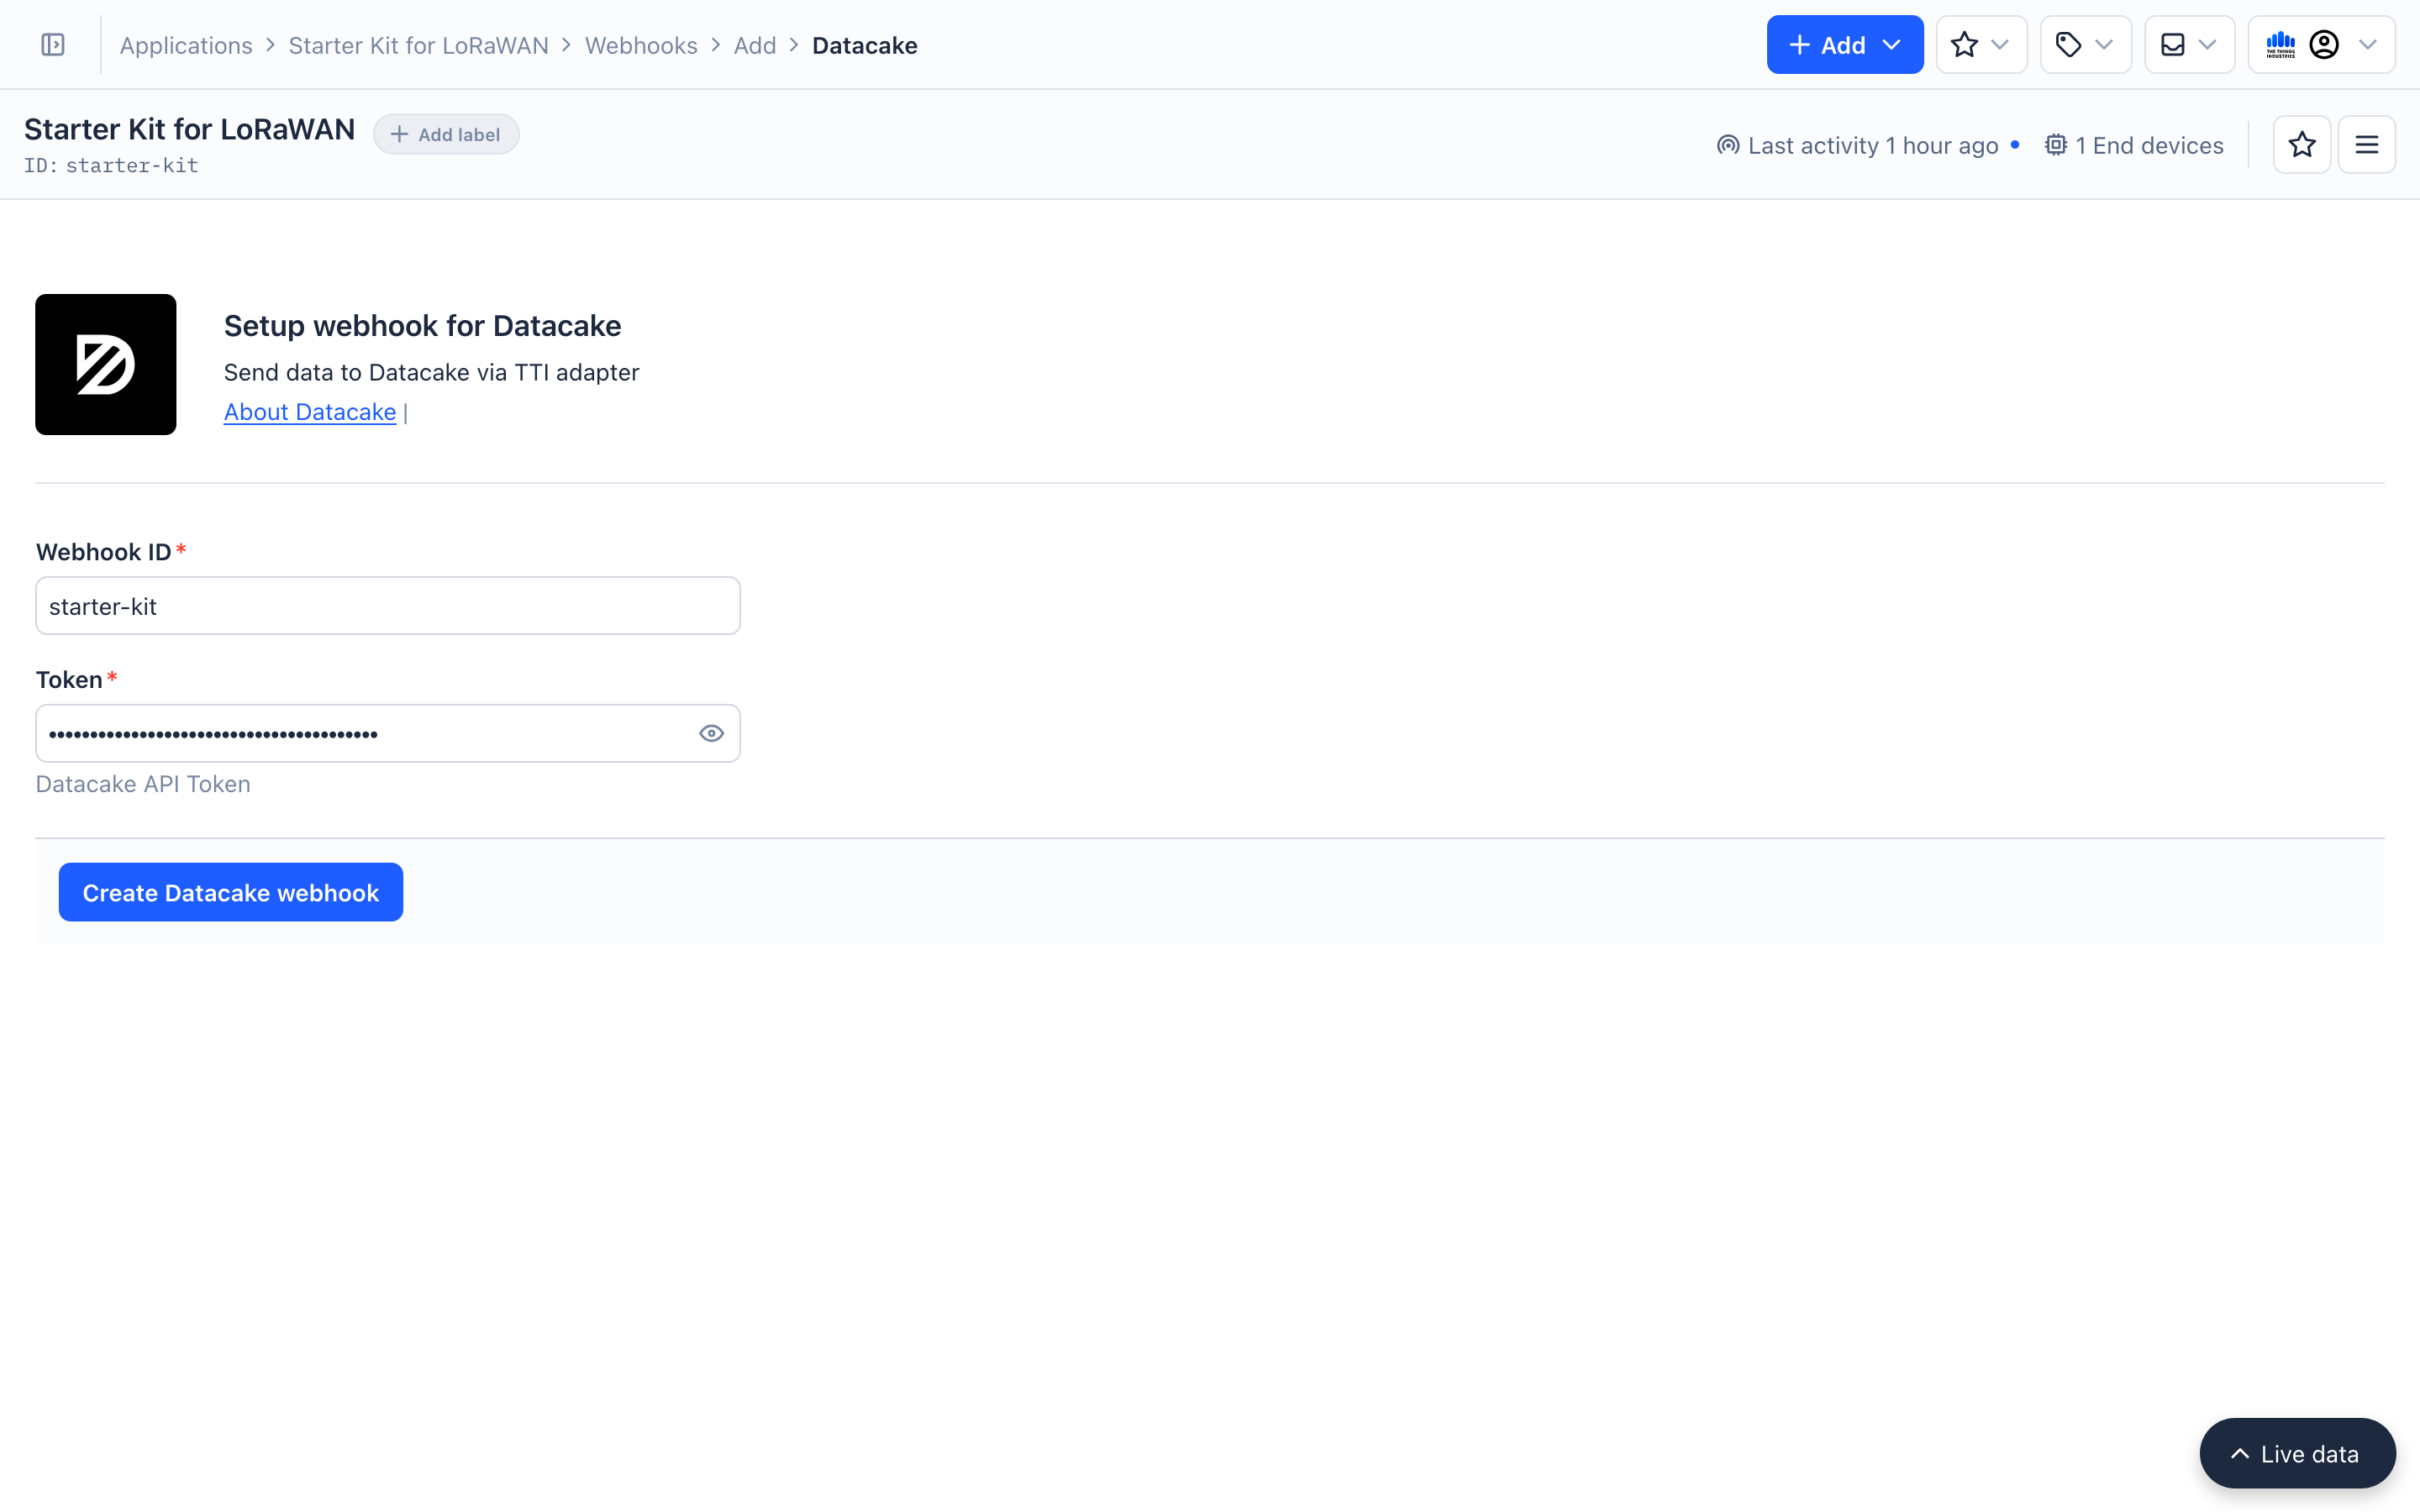
-
Select Create Datacake webhook
-
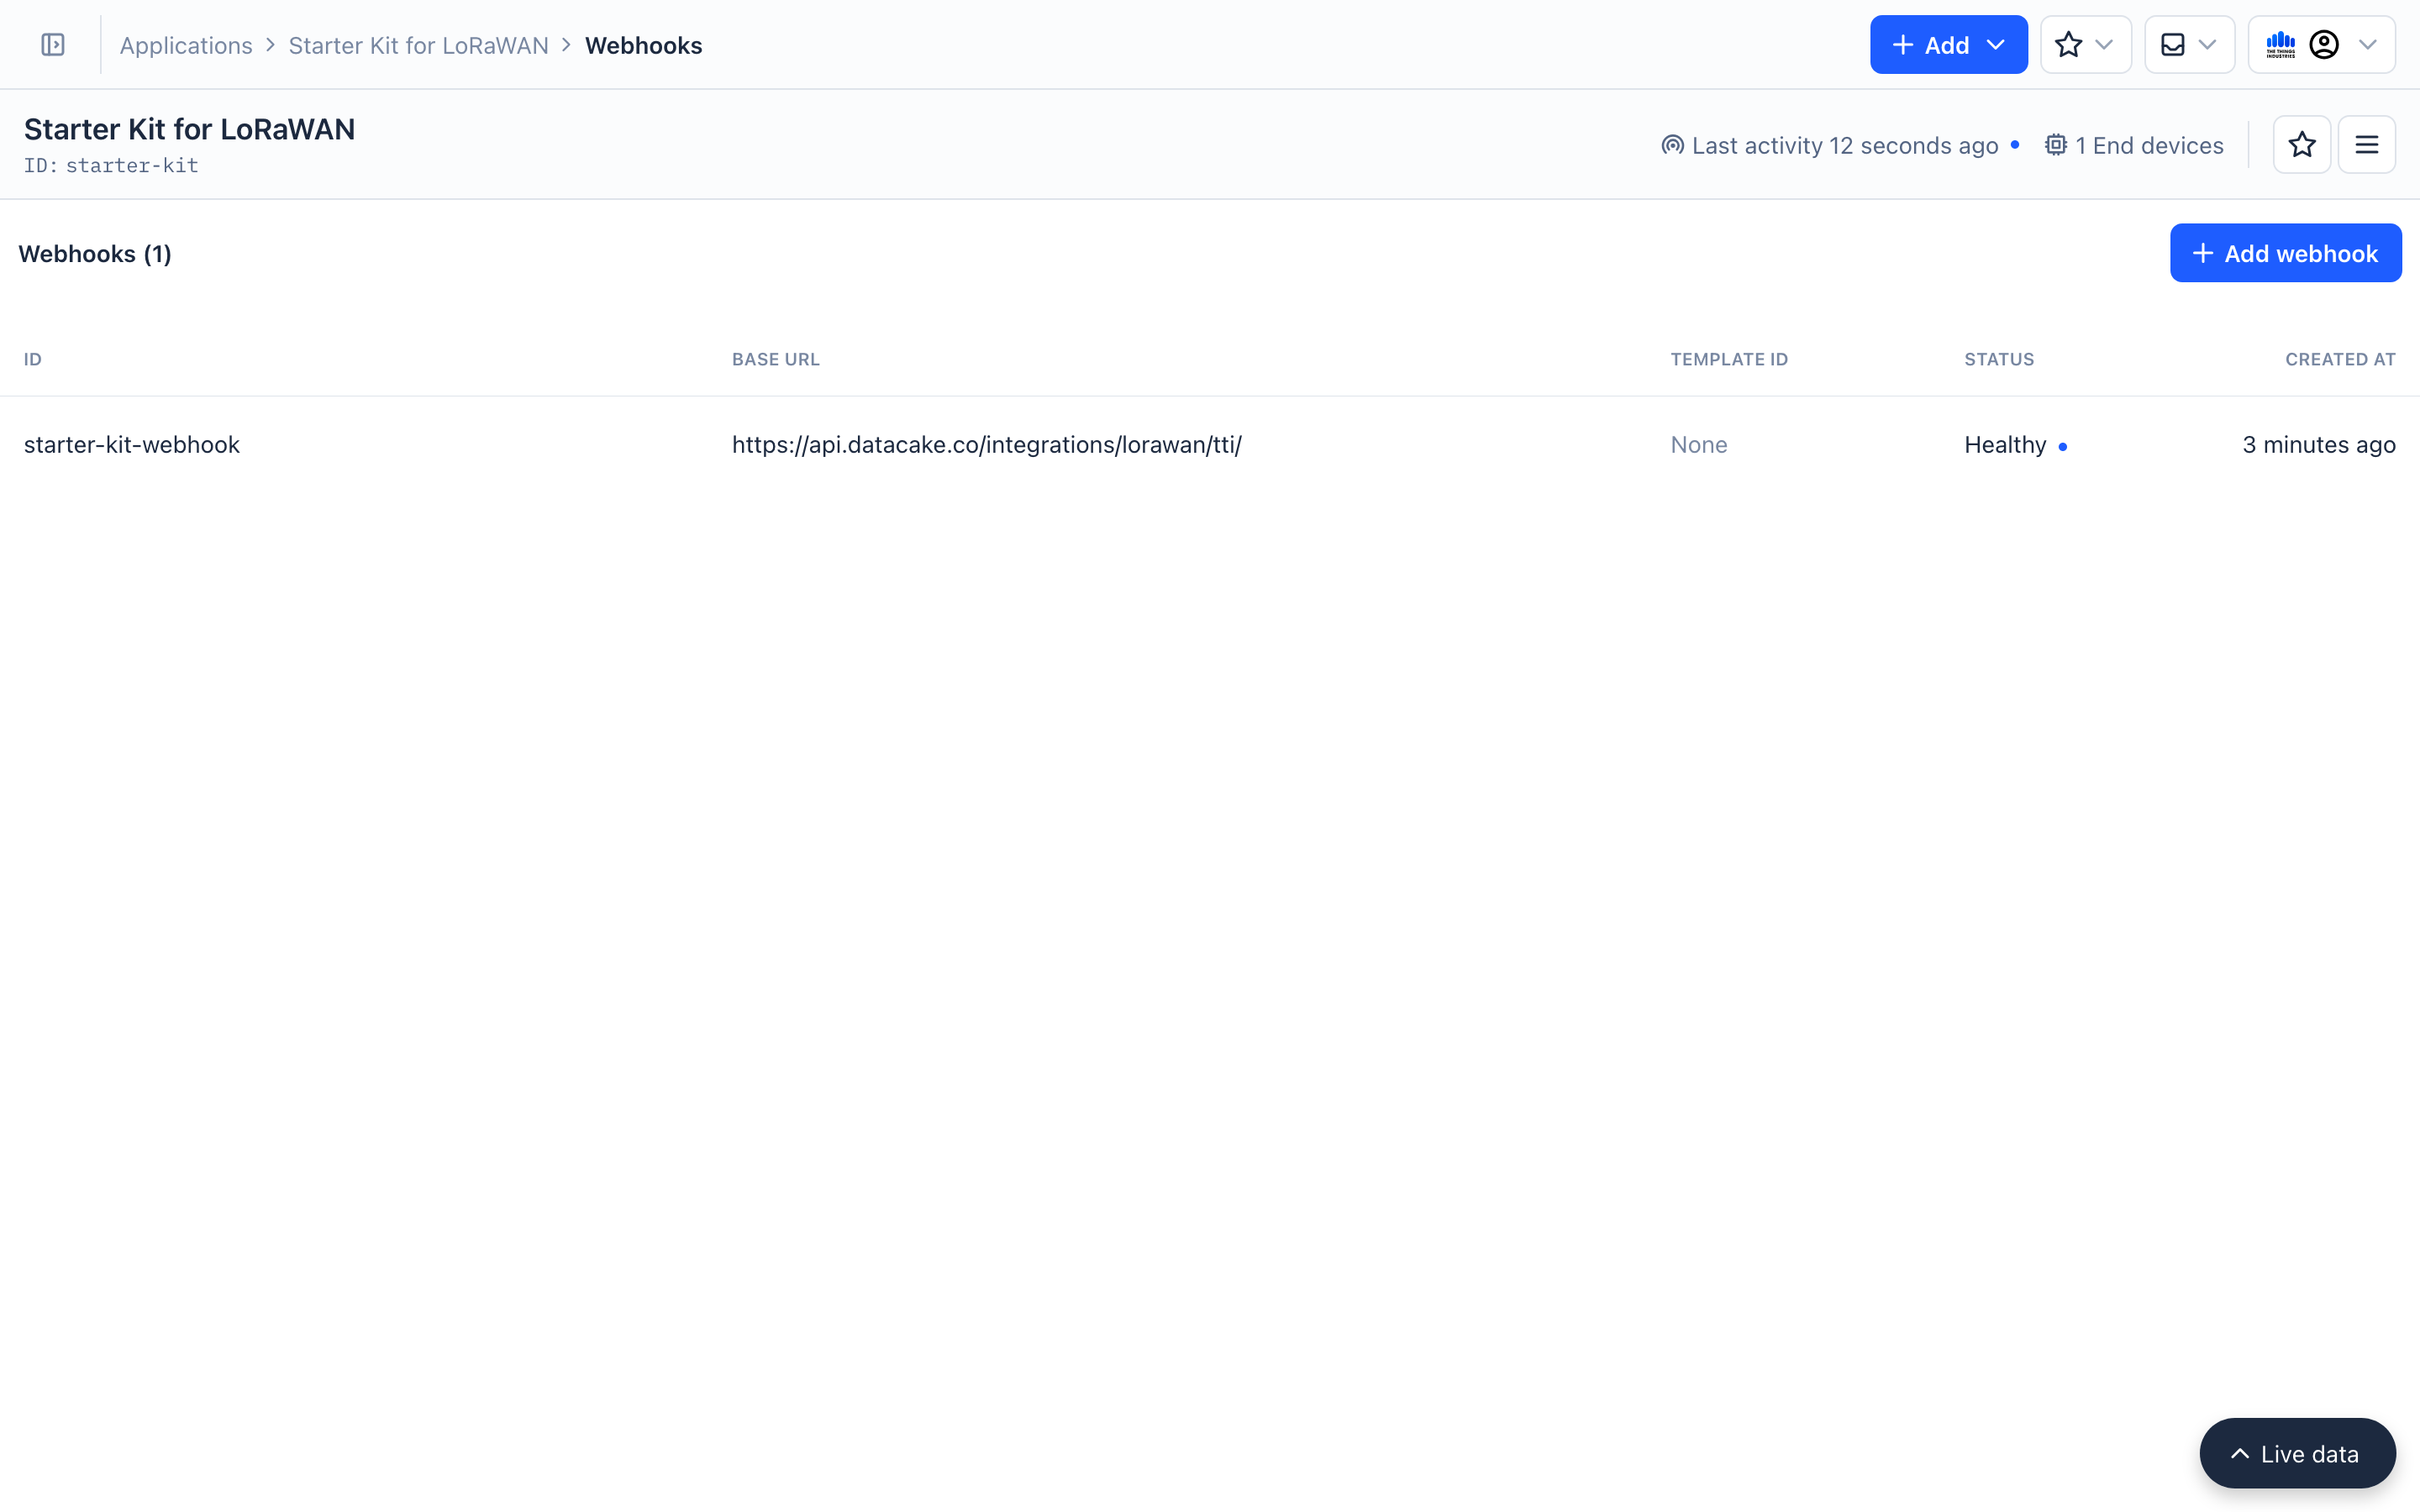
The newly created webhook will have the
pendingstatus.

- Click the button on your end device. The uplink message should now be successfully transmitted to the The Things Stack and it will be sent to Datacake. If you now refresh the webhooks page, the webhook will be marked as
healthy.
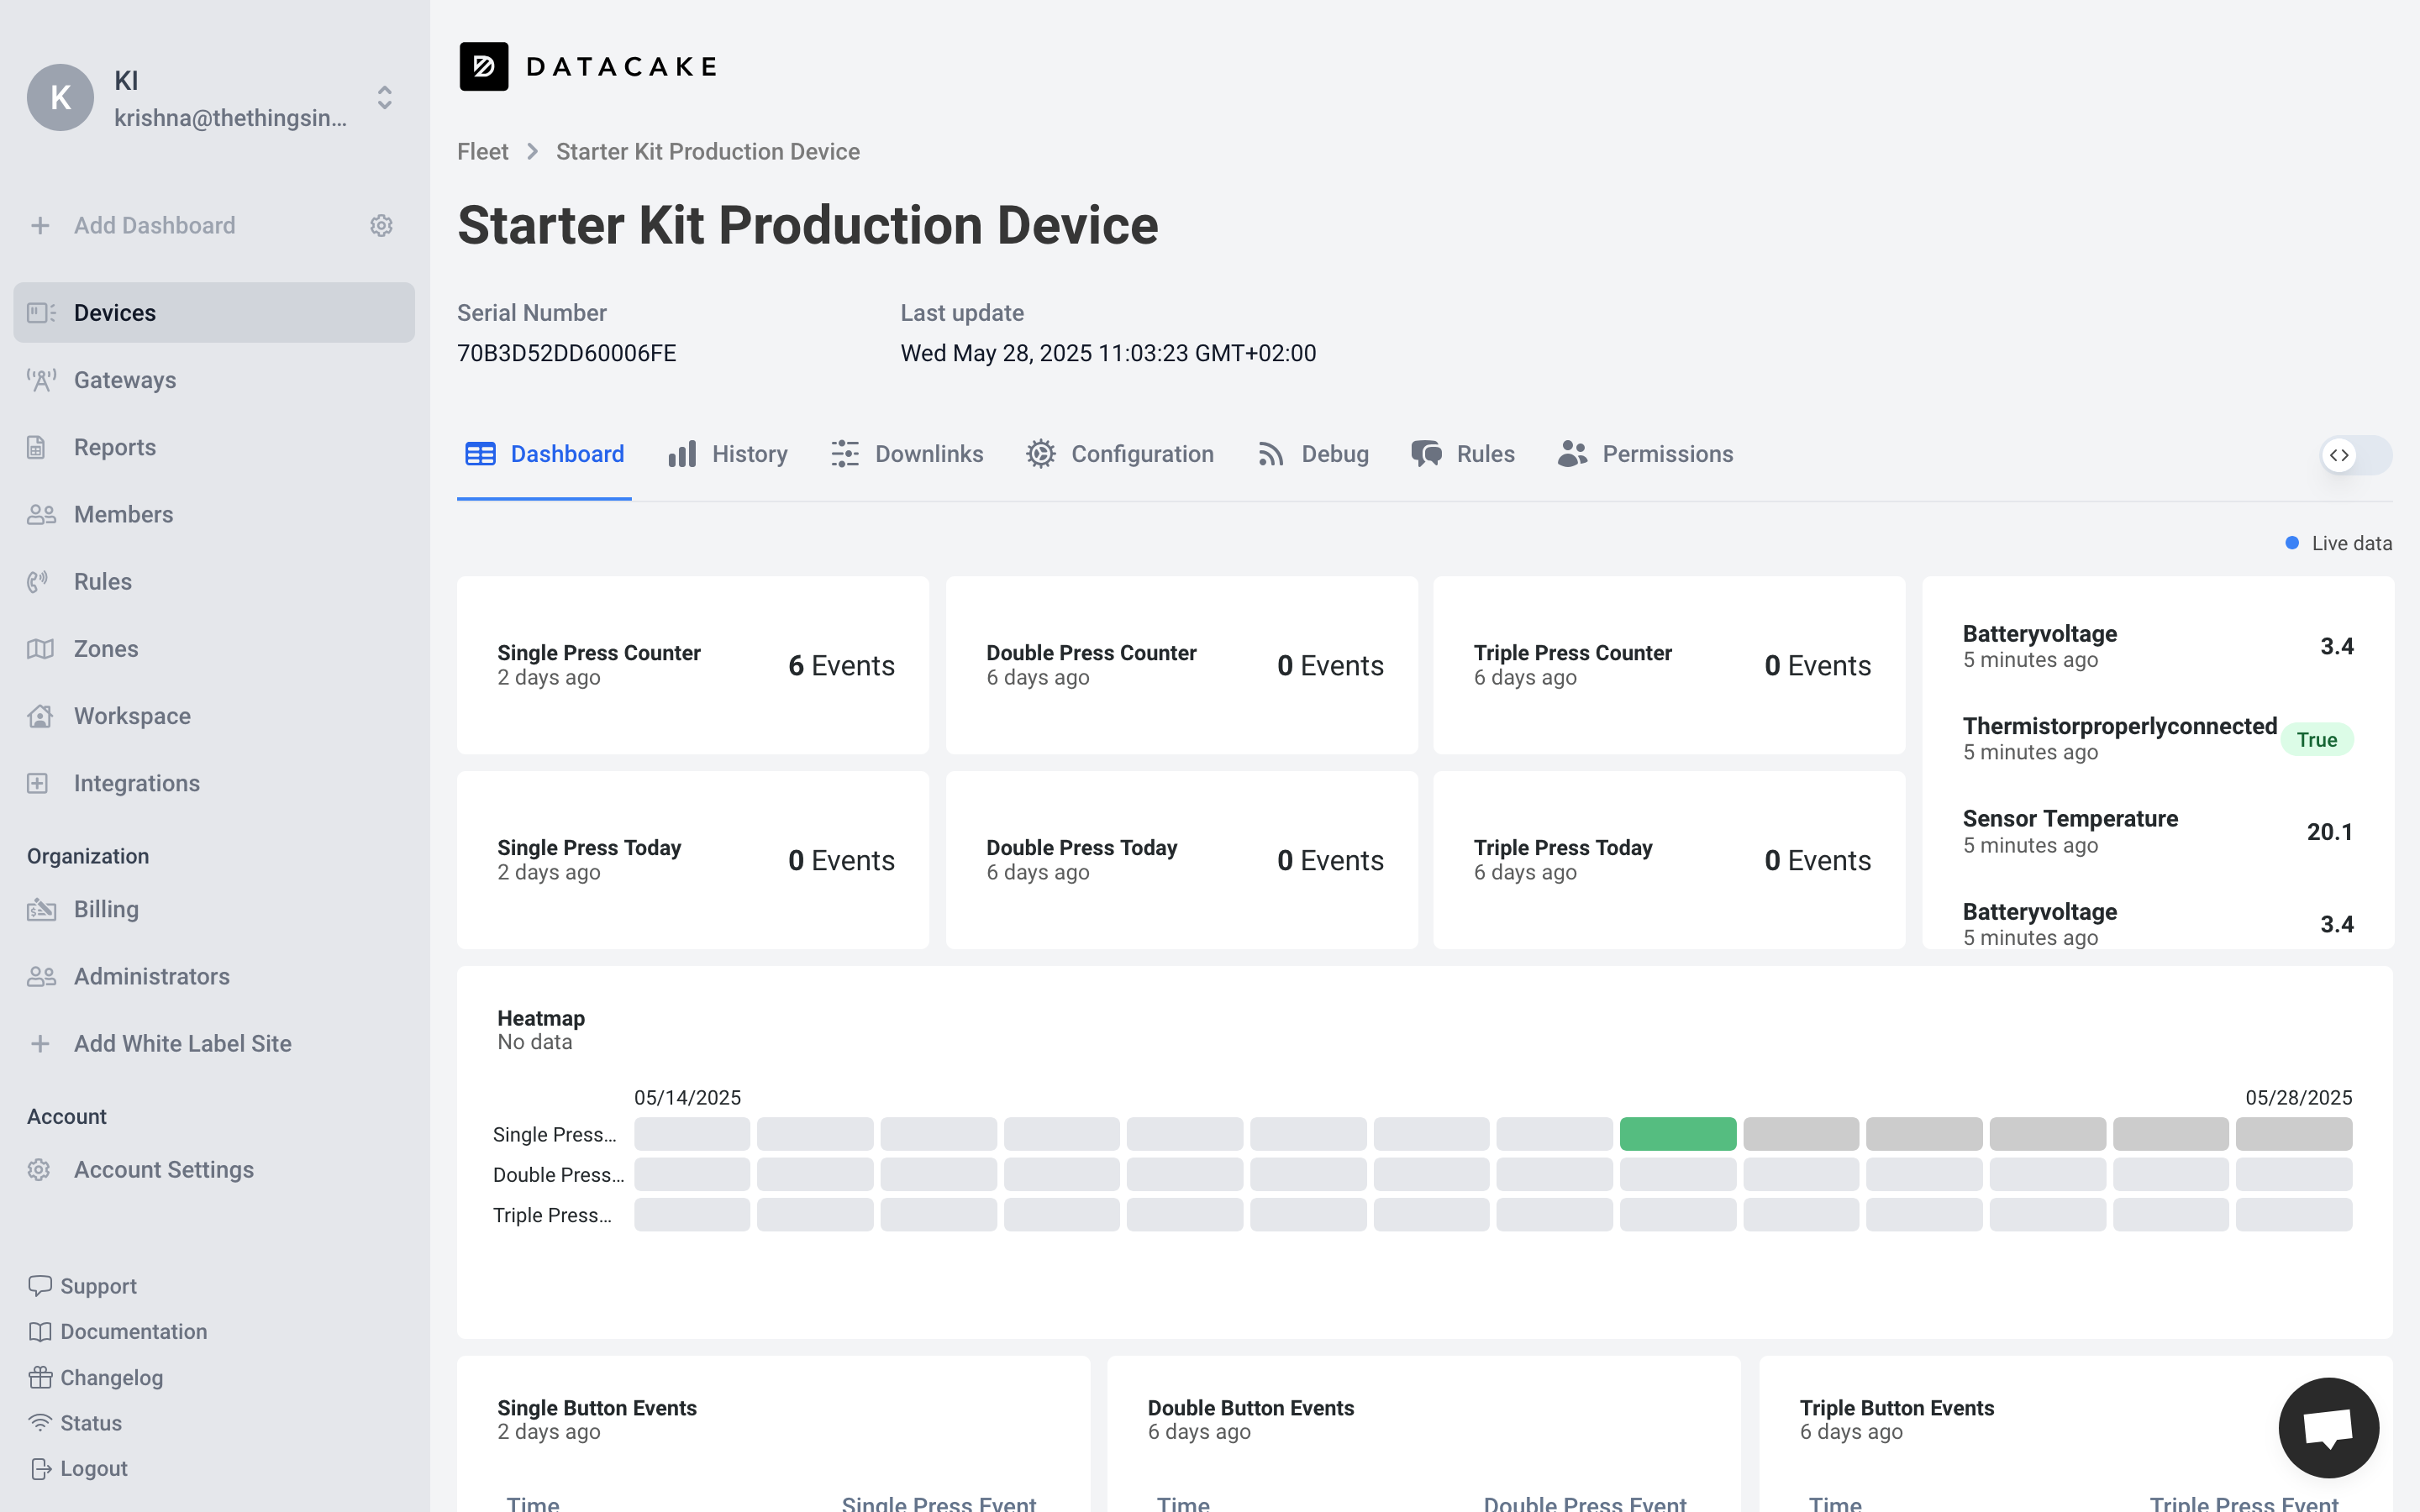
- Once you send a few uplinks, the Datacake dashboard for the device will get filled with that data.
In this guide, we will use ngrok and some Python code to pipe the data to our local terminal. This guide is meant for users who are already comfortable with using a terminal.
Prerequisites
- ngrok free tier account.
- ngrok agent command line tool
- Python
- Pip package manager.
Build a Simple HTTP Server Using Python
Setup
- Create Project Structure
First, create a new directory for your project and set up the required files:
mkdir python-http-server
cd python-http-server
touch server.py requirements.txt .env
- Install Dependencies
Add the following to your requirements.txt file:
flask==2.3.3
python-dotenv==1.0.0
Then install the dependencies:
pip install -r requirements.txt
- Generate a random authentication token. One option is to use
openssl.
$ openssl rand -hex 16
33f9bf794b0aed47bb04f0a1832159db
- Configure Environment Variables
Create a .env file with the following configuration.
The following example sets the server port to 3000 and provides an authentication token. Adapt it for your case.
export SERVER_PORT=3000
export AUTH_TOKEN=<token from above>
Server Implementation
- Import Libraries and Setup
Create the server.py file and add the necessary imports:
import os
import json
import logging
from functools import wraps
from flask import Flask, request, jsonify
from dotenv import load_dotenv
These imports provide:
- Access to environment variables and file system
- JSON handling capabilities
- Logging functionality
- Decorator utilities
- Flask web framework components
- Environment variable loading from .env files
- Initialize Environment and Logging
Add the following code to set up logging and load environment variables:
# Load environment variables from .env file
load_dotenv()

# Configure basic logging
logging.basicConfig(
    level=logging.INFO,
    format='%(levelname)s : %(message)s'
)
logger = logging.getLogger(__name__)

# Read configuration from environment variables
PORT = int(os.environ.get("SERVER_PORT", 3000))
AUTH_TOKEN = os.environ.get("AUTH_TOKEN")

# Validate required environment variables
if not AUTH_TOKEN:
    logger.error("ERROR: AUTH_TOKEN environment variable is required")
    exit(1)
This section:
- Loads variables from the
.envfile - Sets up logging with INFO level
- Retrieves environment variables with fallback values
- Validates that required authentication token exists
- Create the Flask Application
Initialize the Flask application:
app = Flask(__name__)
- Implement Authentication. Since we are exposing the server to the internet, this adds some basic security.
Add a decorator function to handle token-based authentication:
def require_bearer_token(f):
    """Decorator to validate bearer token from Authorization header"""
    @wraps(f)
    def decorated(*args, **kwargs):
        auth_header = request.headers.get('Authorization')

        # Check if Authorization header exists and has correct format
        if not auth_header or not auth_header.startswith('Bearer '):
            return jsonify({"error": "Unauthorized. Bearer token required"}), 401

        # Extract and validate token
        token = auth_header.split(' ')[1]
        if token != AUTH_TOKEN:
            return jsonify({"error": "Forbidden. Invalid token"}), 403

        return f(*args, **kwargs)
    return decorated
This decorator:
- Checks if the Authorization header is present and properly formatted
- Extracts the token from the header
- Compares the token against the expected value
- Returns appropriate error responses for invalid tokens
- Implement JSON Validation since The Things Stack sends JSON webhooks.
Add a helper function to validate JSON requests:
def validate_json():
    """Validate that the request has the correct content type header and a valid JSON body"""
    if not request.is_json:
        return jsonify({"error": "Unsupported Media Type. Expected application/json"}), 415

    try:
        # This will raise an exception if the body is not valid JSON
        request.get_json()
        return None
    except Exception:
        return jsonify({"error": "Bad Request. Invalid JSON format"}), 400
This function:
- Checks if the Content-Type header indicates JSON
- Validates that the body contains properly formatted JSON
- Returns appropriate error responses for invalid requests
- Define the root endpoint. This is where
ngrokwill forward the webhook.
Create the routes for handling HTTP requests:
@app.route('/', methods=['POST'])
@require_bearer_token
def handle_post():
    # Validate JSON content type and format
    error_response = validate_json()
    if error_response:
        return error_response

    # Get and print the JSON data
    json_data = request.get_json()
    logger.info("Received device data")
    logger.info(json.dumps(json_data, indent=2))

    # Return success response
    return jsonify({
        "message": "data received successfully",
    }), 200
This route:
- Accepts only POST requests to the root URL
- Requires valid authentication via the decorator
- Validates the request contains proper JSON
- Logs the received data
- Returns a success message
- Define Error Handling for Other Methods
Add a catch-all route for unsupported HTTP methods:
@app.route('/', methods=['GET', 'PUT', 'DELETE', 'PATCH'])
def method_not_allowed():
    return jsonify({"error": "Method Not Allowed"}), 405
This explicitly returns a 405 error for all HTTP methods except POST.
- Start the Server
Finally, add the code to run the server:
if __name__ == "__main__":
    # Log server startup information
    token_preview = AUTH_TOKEN[:3] + "..." + AUTH_TOKEN[-3:]
    logger.info(f"Server running at http://localhost:{PORT}/")
    logger.info(f"Using auth token: {token_preview}")

    # Start the server
    app.run(host='localhost', port=PORT)
This server now runs on http://localhost:<PORT>
Expose the Server using ngrok
- On the ngrok dashboard, scroll down to the Deploy your app online and claim a free Static Domain. This is the end point that The Things Stack will send the webhooks to.
- On your local machine, configure the auth token for ngrok agent. This token will be available on the
ngrokdashboard.
$ ngrok config add-authtoken <token>
- Start the
ngrokagent and set it to forward traffic to the local HTTP Server.
$ ngrok http --url=<your-static-domain> <PORT>
Testing
Send an HTTP POST request to your static domain to check if the request gets forwarded to your local webserver.
curl -H "Authorization: Bearer <AUTH_TOKEN>" -H "Content-Type: application/json" https://<your-static-domain>  -d '{"test":"value"}'
{"message":"data received successfully"}
This request should be successful and the local server should log the JSON.
 * Running on http://localhost:3000
INFO : Press CTRL+C to quit
INFO : Received device data
INFO : {
  "test": "value"
}
Configure a Webhook on The Things Stack
- In the The Things Stack Console, click on your application and navigate to the webhooks section.
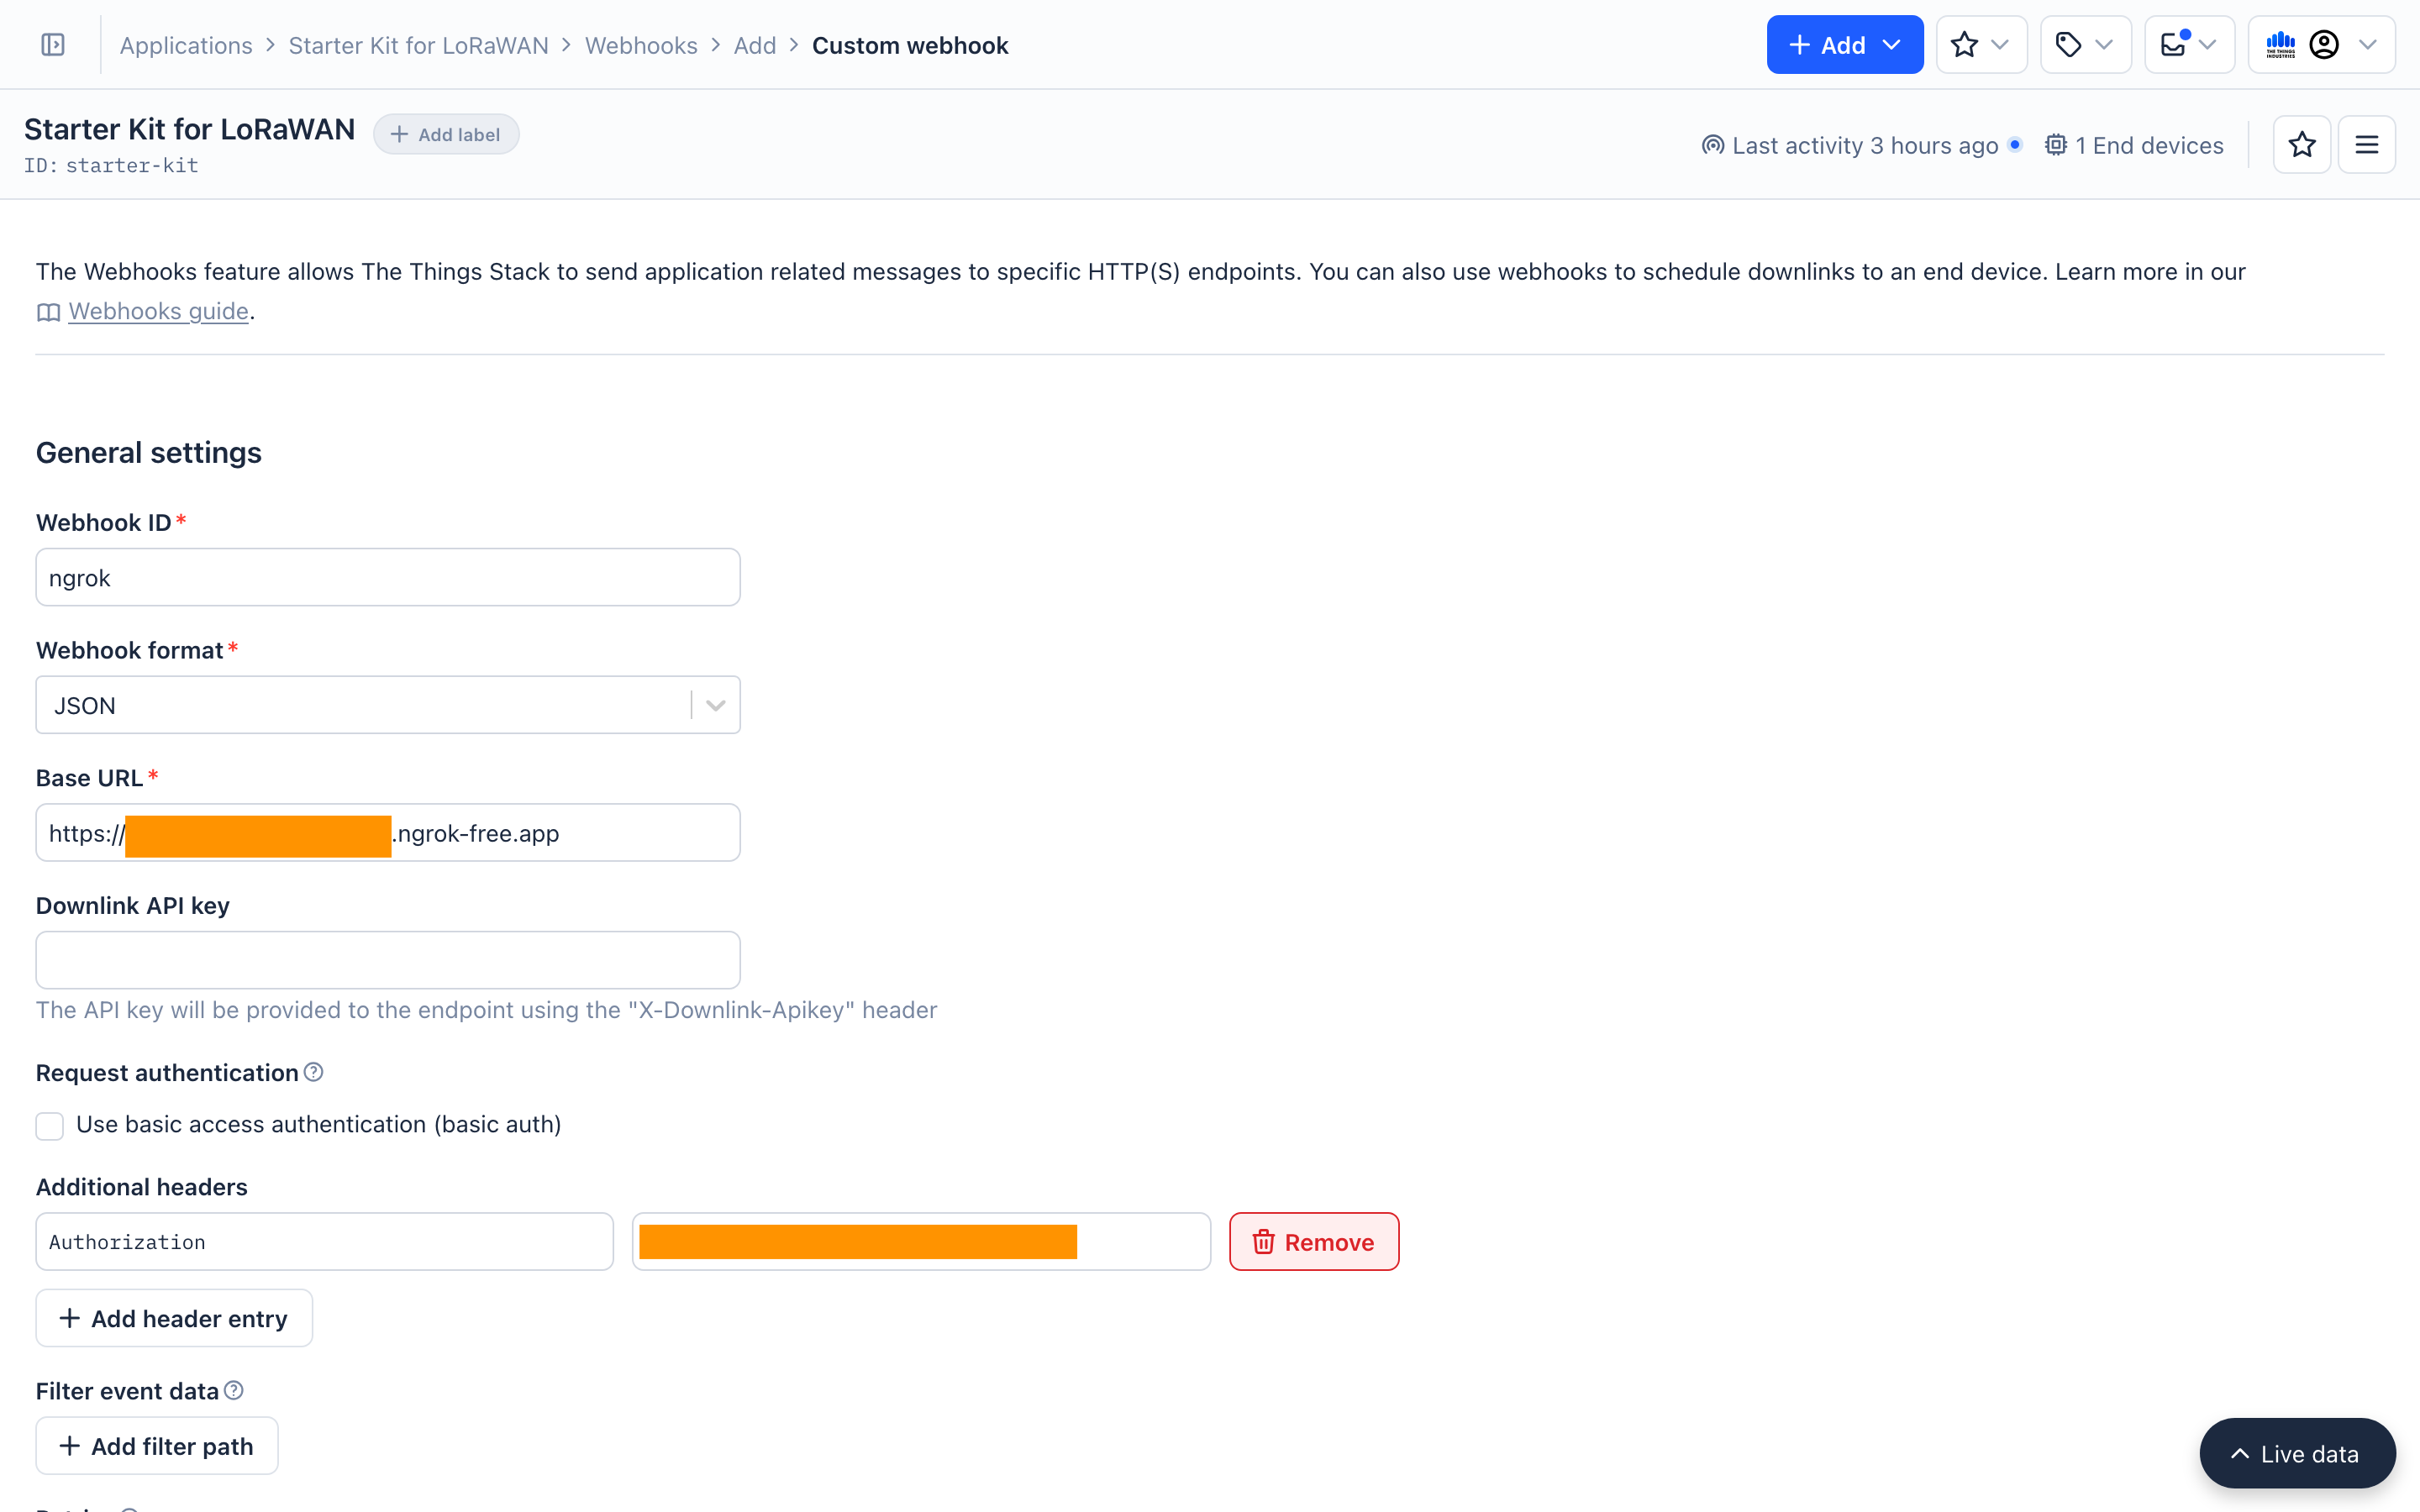
- Select Add Webhook and select
Custom webhook. - Enter the webhook details.
- Wehbook ID: An identifier for your Webhook (ex:
my-server-ngrok). This cannot be changed later. - Webhook format: Keep this as
JSON. - Base URL: Enter your static domain URL from
ngrok.
- Select Add header entry in the additional header section.
- Key:
Authorization - Value:
Bearer <your-auth-token>
-
In Enabled event types select
Uplink messageandJoin request. You can also select all message types. -
Click Add webhook.
Sending Uplinks
If all the previous steps were successful, you now have a local HTTP server to which The Things Stack will forward uplink data via Webhooks. To test this, press the button on your end device. The HTTP Server will log this uplink JSON. An example is shown below.
INFO : Received device data
INFO : {
  "end_device_ids": {
    "device_id": "eui-70b3d52dd600035a",
    "application_ids": {
      "application_id": "starter-kit"
    },
    "dev_eui": "70B3D52DD600035A",
    "join_eui": "EC656E0000000001",
    "dev_addr": "27FE87F6"
  },
  "correlation_ids": [
    "gs:uplink:01JRZ767CVCHBZW1Y8YG9PZ3TS"
  ],
  "received_at": "2025-04-16T11:54:13.995136483Z",
  "uplink_message": {
    "session_key_id": "aAixKtmNZUKQXd4GqpHDsw==",
    "f_port": 2,
    "f_cnt": 14,
    "frm_payload": "sQAAEAHlANcB",
    "decoded_payload": {
      "batteryVoltage": 3.4,
      "pressEvent": 1,
      "sensorTemperature": 21.5,
      "singlePressEventCounter": 16,
      "thermistorProperlyConnected": true
    },
    "rx_metadata": [
      {
        "gateway_ids": {
          "gateway_id": "ttig-52ec",
          "eui": "58A0CBFFFE8052EC"
        },
        "time": "2025-04-16T11:54:13.697237014Z",
        "timestamp": 1276394164,
        "rssi": -31,
        "channel_rssi": -31,
        "snr": 9.5,
        "uplink_token": "ChcKFQoJdHRpZy01MmVjEghYoMv//oBS7BC09dDgBBoMCOW0/r8GEO6mnPcCIKCelfiSJQ==",
        "received_at": "2025-04-16T11:54:13.758247461Z"
      }
    ],
    "settings": {
      "data_rate": {
        "lora": {
          "bandwidth": 125000,
          "spreading_factor": 7,
          "coding_rate": "4/5"
        }
      },
      "frequency": "867700000",
      "timestamp": 1276394164,
      "time": "2025-04-16T11:54:13.697237014Z"
    },
    "received_at": "2025-04-16T11:54:13.787593298Z",
    "confirmed": true,
    "consumed_airtime": "0.061696s",
    "version_ids": {
      "brand_id": "mclimate",
      "model_id": "mc-button",
      "hardware_version": "1.2",
      "firmware_version": "1.2",
      "band_id": "EU_863_870"
    },
    "network_ids": {
      "net_id": "000013",
      "ns_id": "EC656E000010181D",
      "tenant_id": "docs-test-account",
      "cluster_id": "eu1",
      "cluster_address": "eu1.cloud.thethings.industries",
      "tenant_address": "docs-test-account.eu1.cloud.thethings.industries"
    },
    "last_battery_percentage": {
      "f_cnt": 14,
      "value": 90.118576,
      "received_at": "2025-04-16T11:54:13.787593298Z"
    }
  }
}
Now that we have experimented with different methods of collecting uplinks, let’s use The Things Stack to send downlink messages to the end device.