# MQTT Server
> The Things Stack exposes an MQTT server to work with streaming events. This section explains how to connect an MQTT client and subscribe to uplinks or publish …
Source: https://www.thethingsindustries.com/docs/integrations/other-integrations/mqtt/
The Things Stack exposes an MQTT server to work with streaming events. This section explains how to connect an MQTT client and subscribe to uplinks or publish downlinks.
> **Note:** The Things Stack supports the [MQTT Standard Version 3.1.1](http://docs.oasis-open.org/mqtt/mqtt/v3.1.1/os/mqtt-v3.1.1-os.pdf) and QoS 0 only.
## Note on Using the Tenant ID
For all The Things Stack deployments except the Open Source, application IDs and other endpoints include the tenant ID. For the integration with The Things Stack MQTT Server on these deployments this means two things:
- The **Username** used for connecting will be of format `{application id}@{tenant id}` (see the section below)
- The MQTT topics will contain `{application id}@{tenant id}` (see [MQTT Clients](https://www.thethingsindustries.com/docs/integrations/other-integrations/mqtt/#mqtt-clients) section)
For example, for an application `app1` added on The Things Network, you would use `app1@ttn`, because `ttn` is a tenant ID for The Things Network.
For The Things Stack Open Source deployment these endpoints do not include the tenant ID. Hence, instead of `{application id}@{tenant id}`, you would be using only `{application id}` for **Username** and in topics.
## Creating an API Key
In order to use the MQTT server you need to create a new API key to authenticate. The Console provides the required connection information and can be used to create an API key for authentication. In your application select the **MQTT** submenu from the **Integrations** side menu.
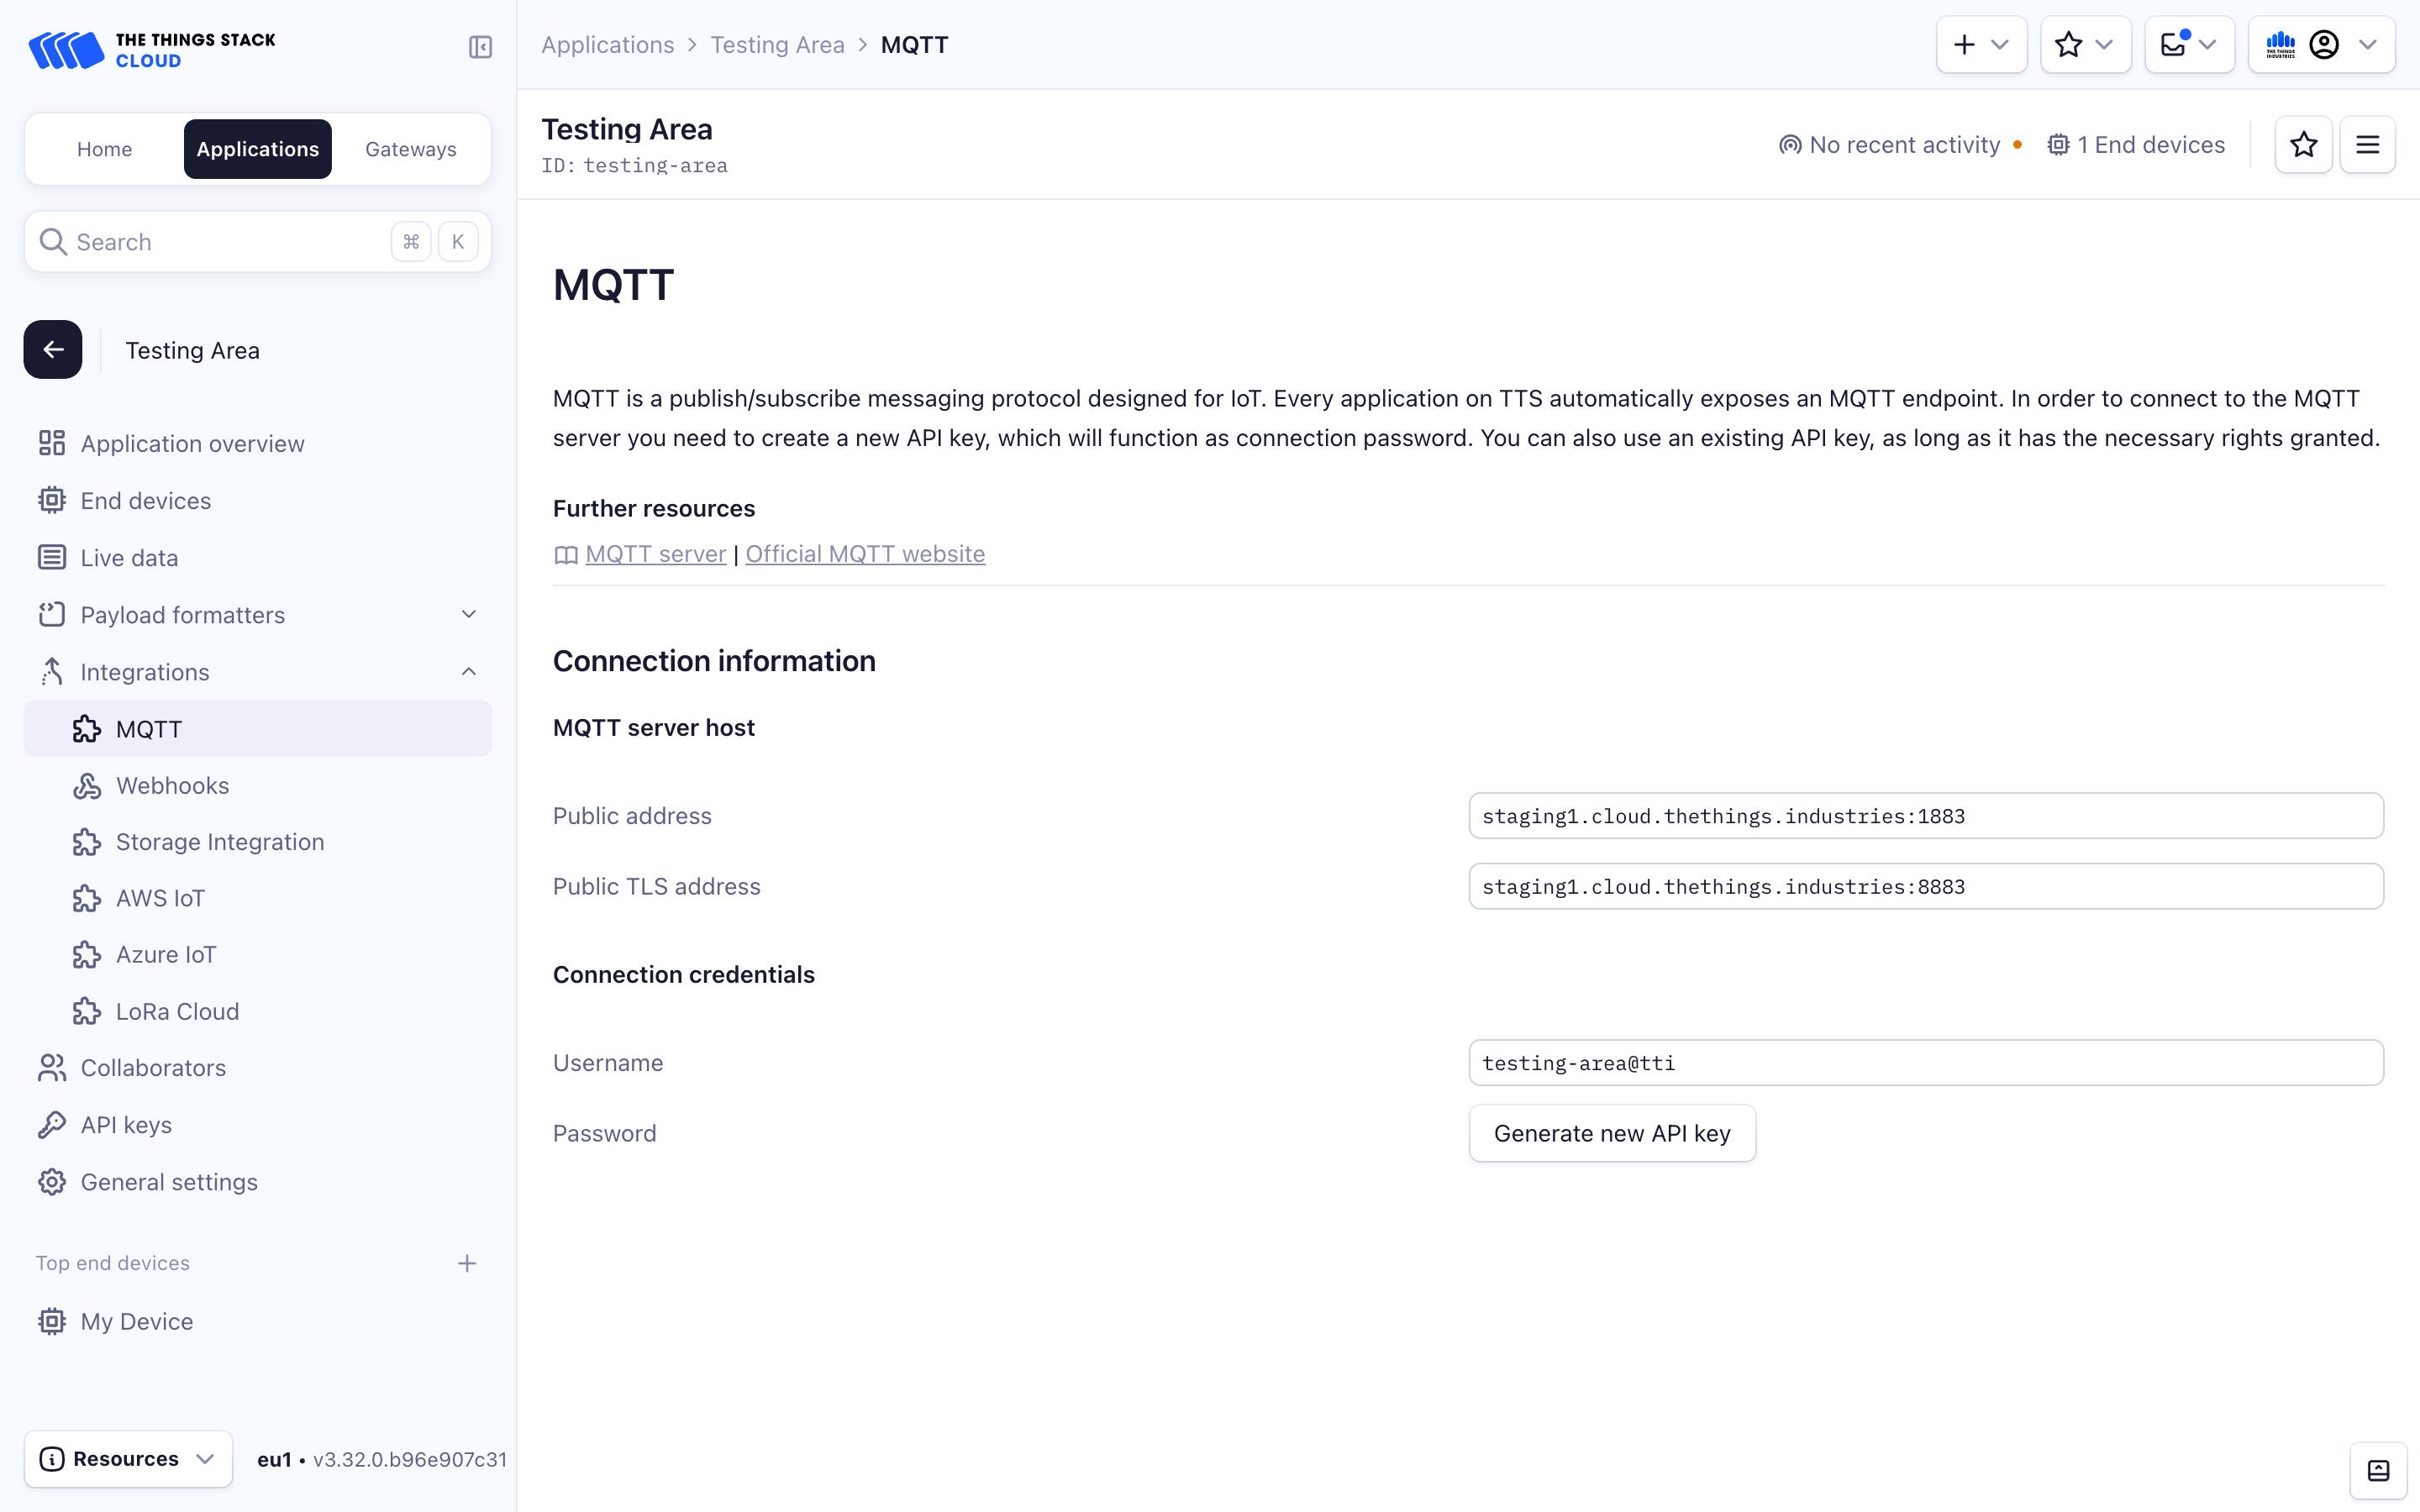
You can now click on the **Generate new API key** button in order to generate an API key which can be used to send and receive traffic from MQTT server.
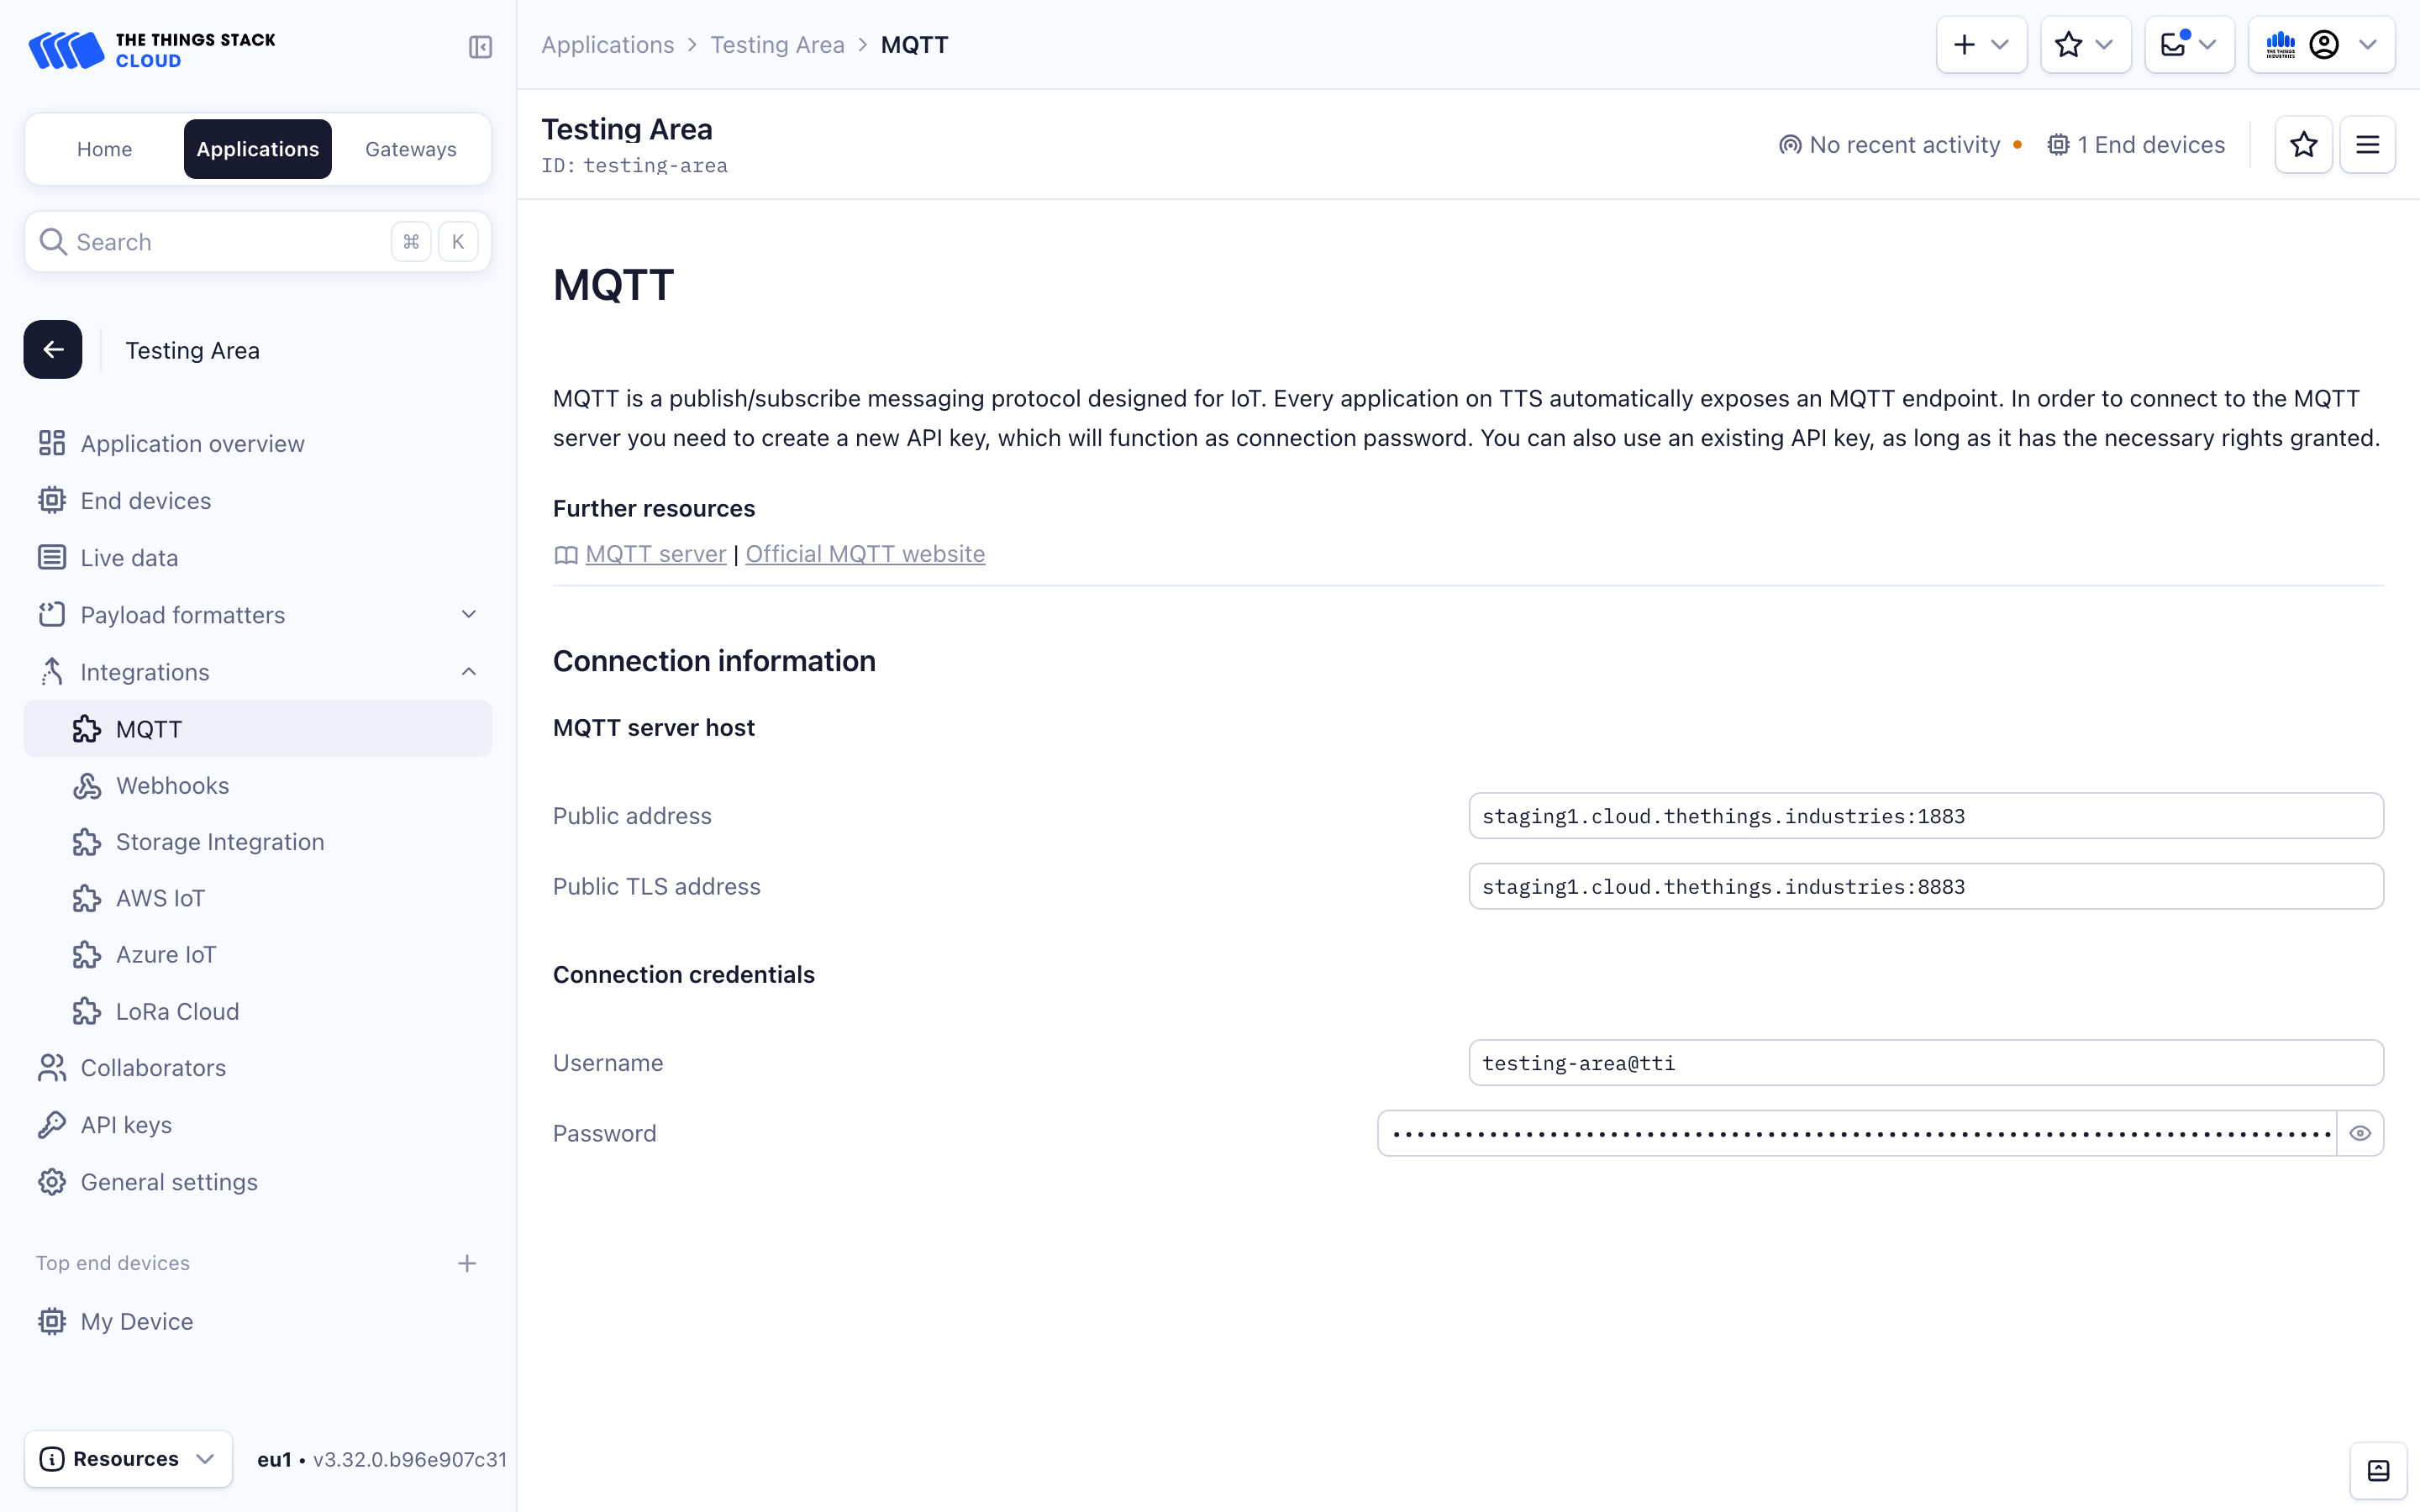
> **Note:** Make sure to copy your API key now, since it will no longer be visible after leaving the page for security reasons.
>
> If API key does not exist or has been removed, you will probably see the `as.mqtt.connect.fail` event with the `api key with id {api_key_id} not found` error in application Live events.
Keep in mind that this example shows the MQTT Server information for The Things Stack Open Source. If you are using a different deployment, make sure your read a [Note on Using the tenant ID](https://www.thethingsindustries.com/docs/integrations/other-integrations/mqtt/#note-on-using-the-tenant-id).
The information shown on the image above is enough for you to be able to connect to The Things Stack MQTT Server using an arbitrary MQTT client. Keep reading to find out how.
## MQTT Clients
There are many available MQTT clients you can use to connect to The Things Stack MQTT Server. See [Integrations with MQTT Clients](https://www.thethingsindustries.com/docs/integrations/other-integrations/mqtt/mqtt-clients/) section for detailed instructions on how the integrate with the most popular ones.
In this section, we focus on the available topics that the MQTT Server is exposing and provide short examples of their usage. In general, some topics are used for subscribing to upstream traffic, while others are used for publishing downlink traffic.
In the examples below, we use the `mosquitto_pub` and `mosquitto_sub` clients.
## Subscribing to Upstream Traffic
The Application Server publishes uplink traffic on the following topics:
- `v3/{application id}@{tenant id}/devices/{device id}/join`
- `v3/{application id}@{tenant id}/devices/{device id}/up`
- `v3/{application id}@{tenant id}/devices/{device id}/down/queued`
- `v3/{application id}@{tenant id}/devices/{device id}/down/sent`
- `v3/{application id}@{tenant id}/devices/{device id}/down/ack`
- `v3/{application id}@{tenant id}/devices/{device id}/down/nack`
- `v3/{application id}@{tenant id}/devices/{device id}/down/failed`
- `v3/{application id}@{tenant id}/devices/{device id}/service/data`
- `v3/{application id}@{tenant id}/devices/{device id}/location/solved`
Remember that the format of these topics for The Things Stack Open Source would contain `{application id}` instead of `{application id}@{tenant id}`.
While you could subscribe to all of these topics separately, for the simplicity of this tutorial we use `#` to subscribe to all topics, i.e. to receive all uplink traffic.
Subscribing to all topics with the `mosquitto_sub` client can be done with:
```bash
# Tip: when using `mosquitto_sub`, pass the `-d` flag to see the topics messages get published on.
# For example:
mosquitto_sub -h thethings.example.com -t "#" -u "app1@tenant1" -P "NNSXS.VEEBURF3KR77ZR.." -d
```
### Example
This example is suitable for The Things Stack deployments other than Open Source. If you are using The Things Stack Open source, make sure your read a [Note on Using the tenant ID](https://www.thethingsindustries.com/docs/integrations/other-integrations/mqtt/#note-on-using-the-tenant-id).
When a device `dev1` (in application `app1` in tenant `tenant1`) joins the network, the `join` message is published on the topic `v3/app1@tenant1/devices/dev1/join`. With your MQTT client subscribed to that topic (or all topics), you can catch that `join` message.
Show join accept message example
```json
{
"end_device_ids": {
"device_id": "dev1",
"application_ids": {
"application_id": "app1"
},
"dev_eui": "4200000000000000",
"join_eui": "4200000000000000",
"dev_addr": "01DA1F15"
},
"correlation_ids": [
"gs:conn:01D2CSNX7FJVKQPCVG612QF1TX",
"gs:uplink:01D2CT834K2YD17ZWZ6357HC0Z",
"ns:uplink:01D2CT834KNYD7BT2NHK5R1WVA",
"rpc:/ttn.lorawan.v3.GsNs/HandleUplink:01D2CT834KJ4AVSD1SJ637NAV6",
"as:up:01D2CT83AXQFQYQ35SR74CTWKH"
],
"join_accept": {
"session_key_id": "AWiZpAyXrAfEkUNkBljRoA=="
}
}
```
Show uplink message example
```json
{
"end_device_ids": {
"device_id": "dev1",
"application_ids": {
"application_id": "app1"
},
"dev_eui": "4200000000000000",
"join_eui": "4200000000000000",
"dev_addr": "01DA1F15"
},
"correlation_ids": [
"gs:conn:01D2CSNX7FJVKQPCVG612QF1TX",
"gs:uplink:01D2CV8HF62ME0D7MZWE38HHH8",
"ns:uplink:01D2CV8HF6FYJHKZ45YY1DB3MR",
"rpc:/ttn.lorawan.v3.GsNs/HandleUplink:01D2CV8HF6XR7ZFVK768PDG3J4",
"as:up:01D2CV8HNGJ57G25BW0FCZNY07"
],
"uplink_message": {
"session_key_id": "AWiZpAyXrAfEkUNkBljRoA==",
"f_port": 15,
"frm_payload": "VGVtcGVyYXR1cmUgPSAwLjA=",
"rx_metadata": [
{
"gateway_ids": {
"gateway_id": "eui-0242020000247803",
"eui": "0242020000247803"
},
"time": "2019-01-29T13:02:34.981Z",
"timestamp": 1283325000,
"rssi": -35,
"snr": 5,
"uplink_token": "CiIKIAoUZXVpLTAyNDIwMjAwMDAyNDc4MDMSCAJCAgAAJHgDEMj49+ME"
}
],
"settings": {
"data_rate": {
"lora": {
"bandwidth": 125000,
"spreading_factor": 7
}
},
"coding_rate": "4/6",
"frequency": "868500000",
"gateway_channel_index": 2,
"device_channel_index": 2
}
}
}
```
Show downlink event message example
```json
{
"end_device_ids": {
"device_id": "dev1",
"application_ids": {
"application_id": "app1"
},
"dev_eui": "4200000000000000",
"join_eui": "4200000000000000",
"dev_addr": "00E6F42A"
},
"correlation_ids": ["my-correlation-id", "..."],
"downlink_ack": {
"session_key_id": "AWnj0318qrtJ7kbudd8Vmw==",
"f_port": 15,
"f_cnt": 11,
"frm_payload": "vu8=",
"confirmed": true,
"priority": "NORMAL",
"correlation_ids": ["my-correlation-id", "..."]
}
}
```